Gatsby以及静态应用的优势
Gatsby是一个基于react的静态站点生成器。
旨在解决两个问题:
首屏渲染加载时间长
客户端渲染SEO不友好
将React应用转化为静态HTML页面这两个问题就不存在了。
优势:
访问速度快
更利于SEO搜索引擎的内容抓取
部署简单,可以把生成后的内容部署在任何静态资源服务器即可运行
Gatsby的工作流程和框架特性
项目开发/构建/部署 三个步骤,我们这里主要谈论开发与构建相关的问题。
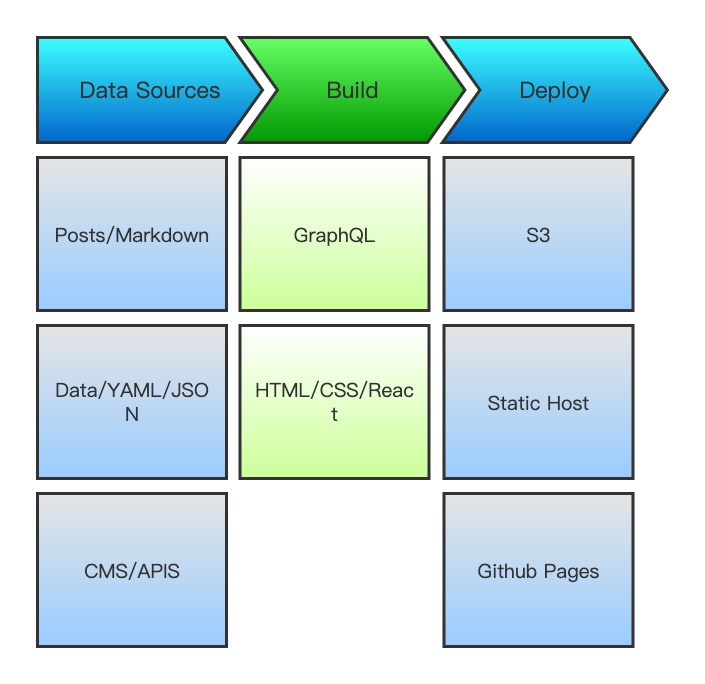
Gatsby总览
基于React 和 GraphQL,结合了Webpack, babel, react-router等前端领域中最先进的工具,开发人员体验好。
采用数据层和UI层分离而不失SEO的现代化前端开发模式,对SEO非常友好。
数据预读取,在浏览器空闲的时候预先读取链接对应的页面内容,是静态页面拥有SPA应用的用户体验,用户体验好。
数据来源多样化,Headless CMS/Markdown Files/REST API等。
功能插件化,Gatsby中提供了丰富且功能强大的各种类型的插件,用什么装什么。
创建Gatsby 项目
全局安装脚手架工具
npm i gatsby-cli -g
Gatsby 要求 Node.js版本在 18.0.0以上。
因为这个版本的nodejs 在我的电脑系统上运行有问题,所以我被迫选择了会退Gatsby的版本到[email protected] 版本。
Gatsby CLI version: 4.23.0
Nodejs v17.1.0
pnpm i [email protected]

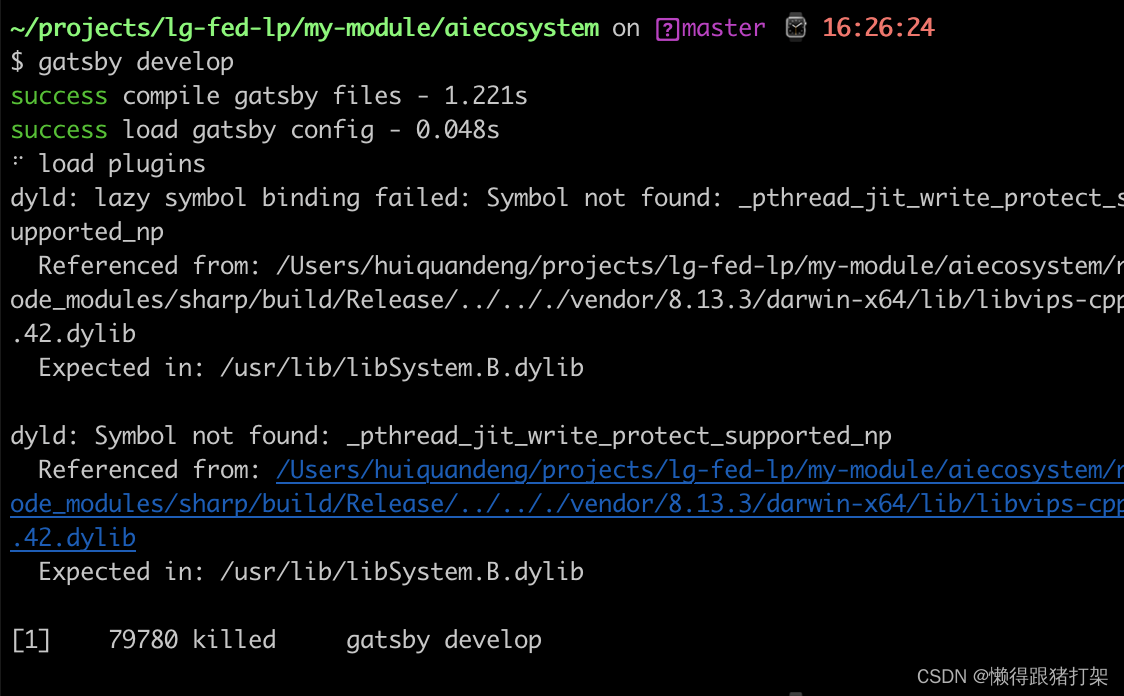
⚠️:目前最新的5.x 版本的要求nodejs 18+,安装运行会报以下错误:
dyld: lazy symbol binding failed: Symbol not found: _pthread_jit_write_protect_supported_np
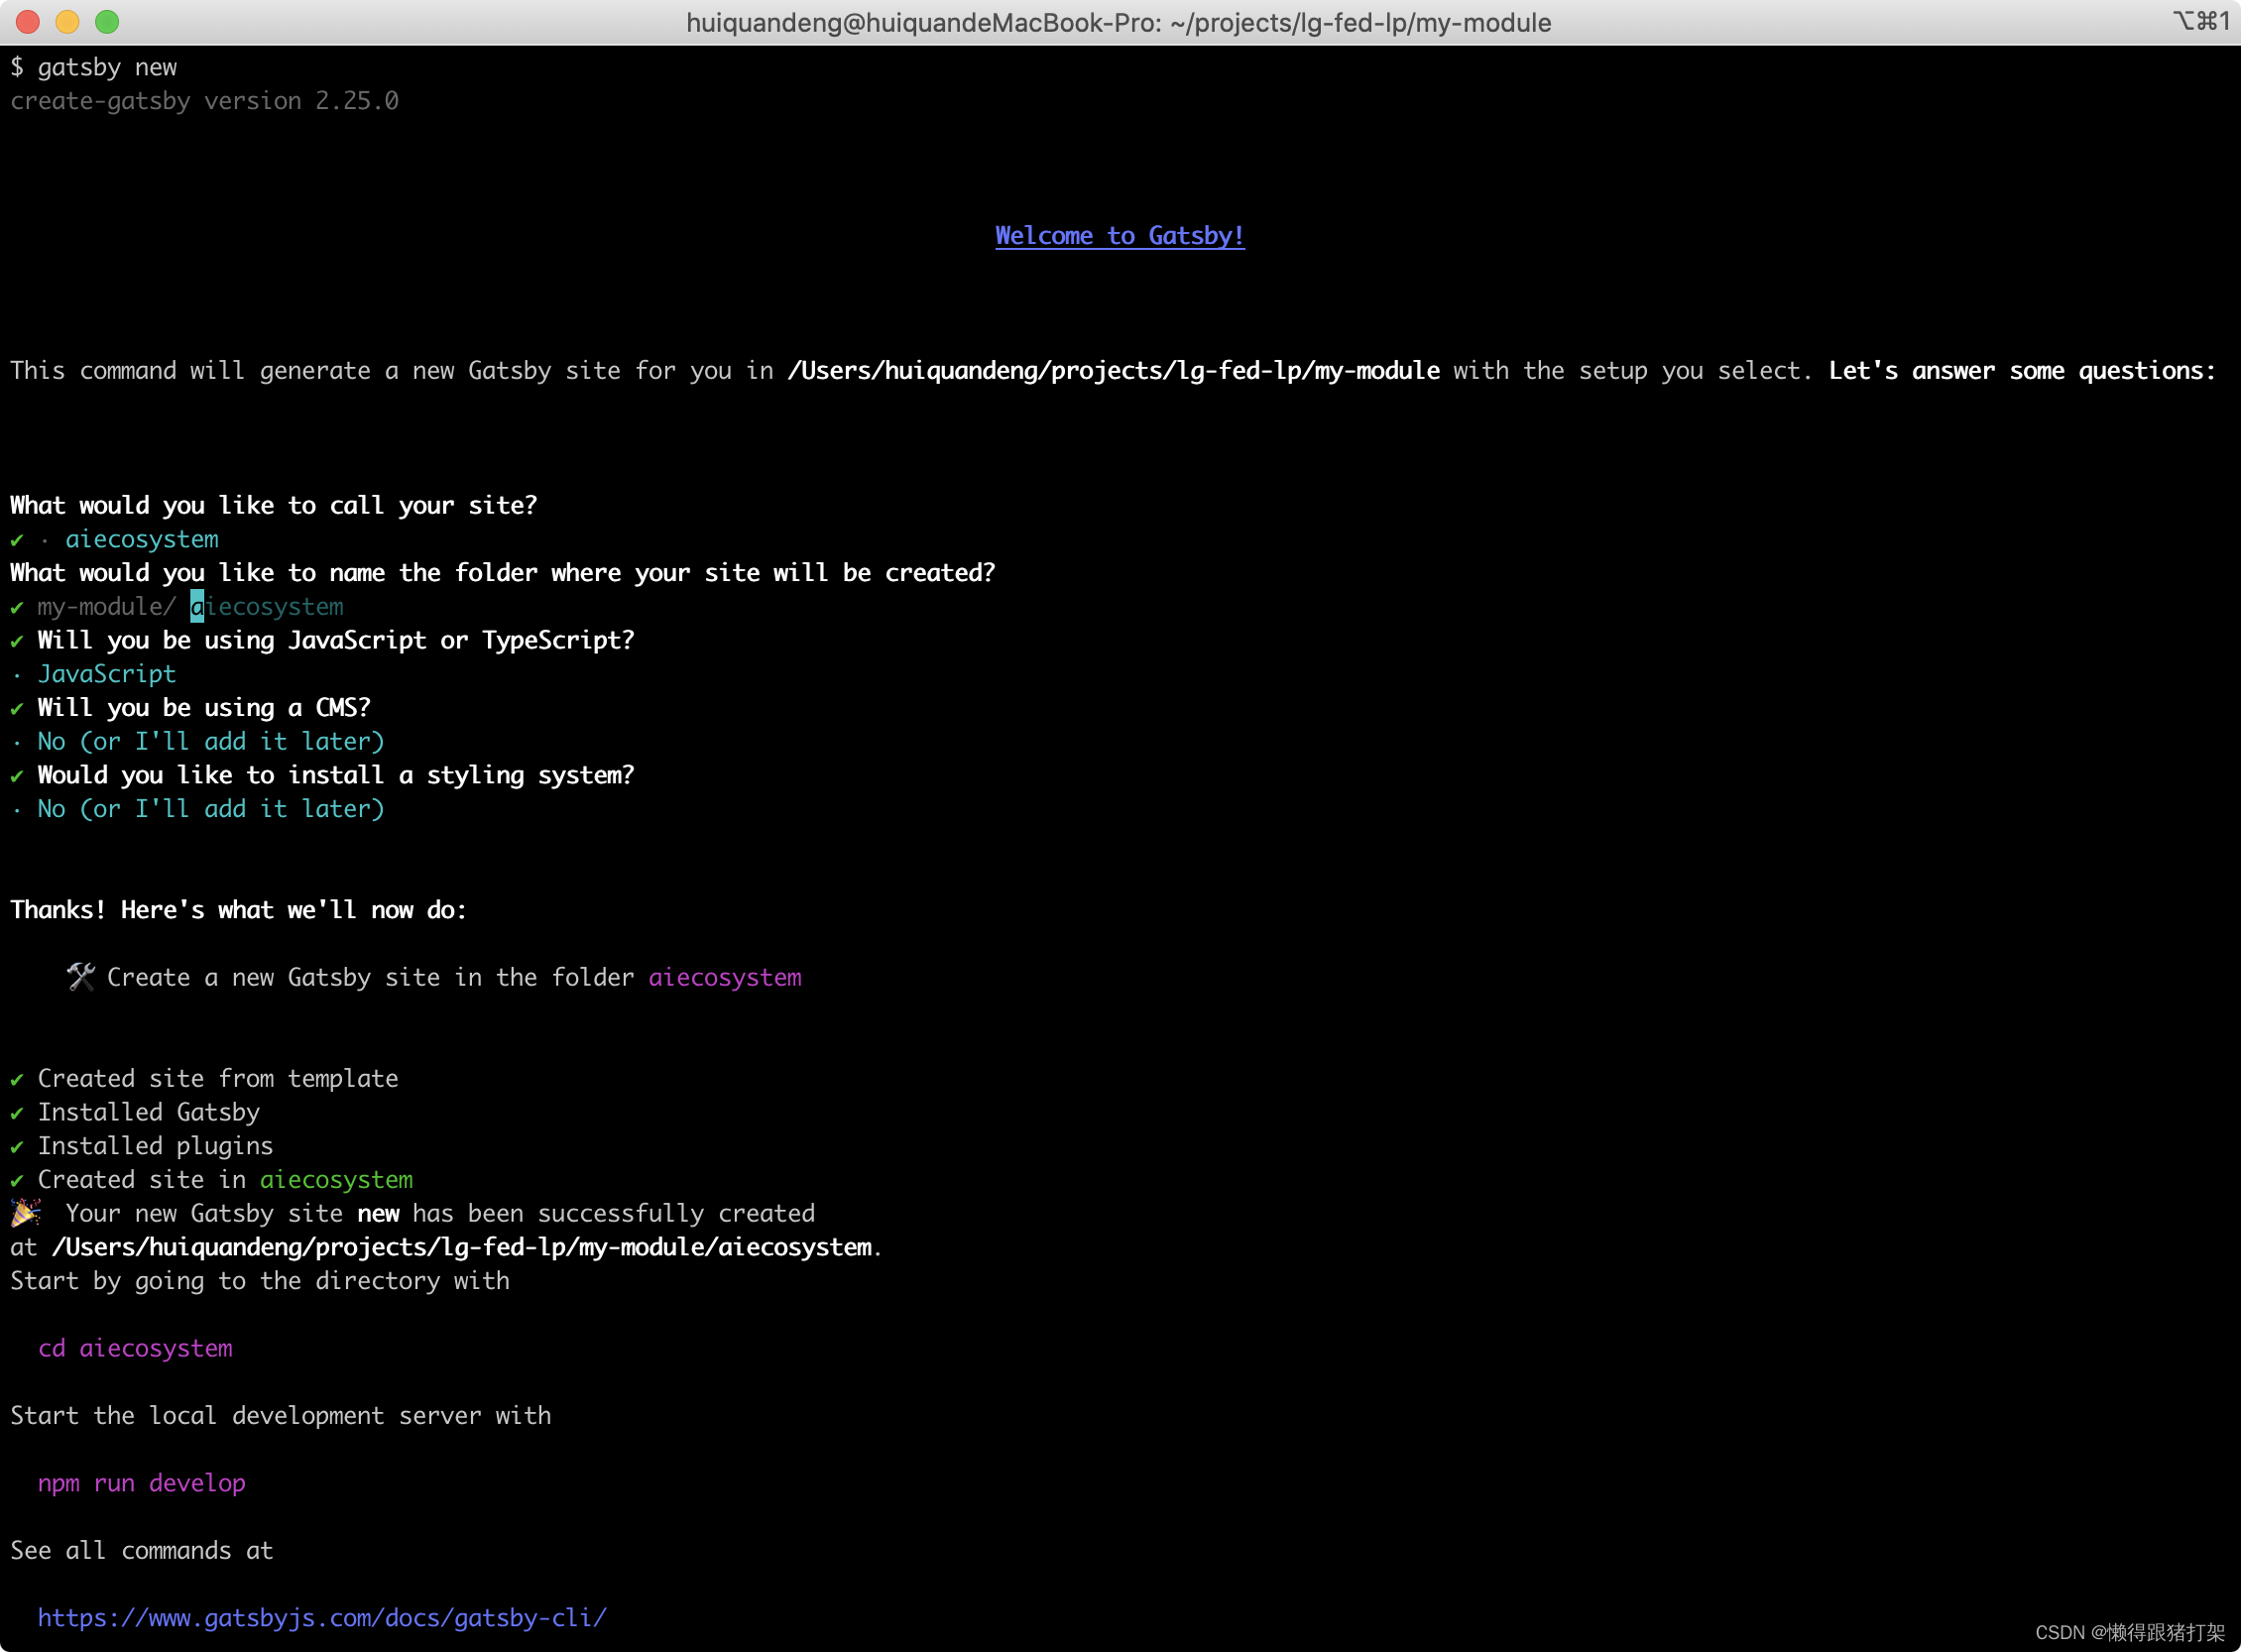
利用Gatsby CLI创建项目
gatsby new
进入新建项目的根目录下,运行项目:
npm run develop
or
gatsby develop
访问GraphQL: http://localhost:8000/___graphql
基于文件的路由系统
Gatsby内置基于文件的路由系统,页面组件被放置在src/pages文件夹中。
以模版配合编程的方式创建页面
例如商品详情页面,有多少商品就生成多少的商品详情展示页面。
在项目的根目录下创建一个名为: gatsby-node.js 的文件,名字是不可变的。
// 创建页面函数
function createPages ({ actions }) {
  const { createPage } = actions
  // 获取模版的绝对路径
  const template = require.resolve('./src/templates/person.js')

  // 获取模版所需要的数据
  const persons = [
    { slug: 'zhangsan', name: '张三', age: 20 },
    { slug: 'wangwu', name: '王武', age: 27 },
    { slug: 'lisi', name: '李四', age: 27 }
  ]
  // 根据模版和数据创建页面
  return persons.map(person =>
    createPage({
      // 模版绝对路径
      component: template,
      // 访问地址
      path: `/person/${person.slug}`,
      // 传递给模版的数据
      // 传递过去的数据可以在模版组件的props属性中获取到,属性为pageContext
      context: person
    })
  )
}

module.exports = {
  createPages
}
创建Person页面组件模版src/templates/person.js:
import React from 'react'

export default function Person (props) {
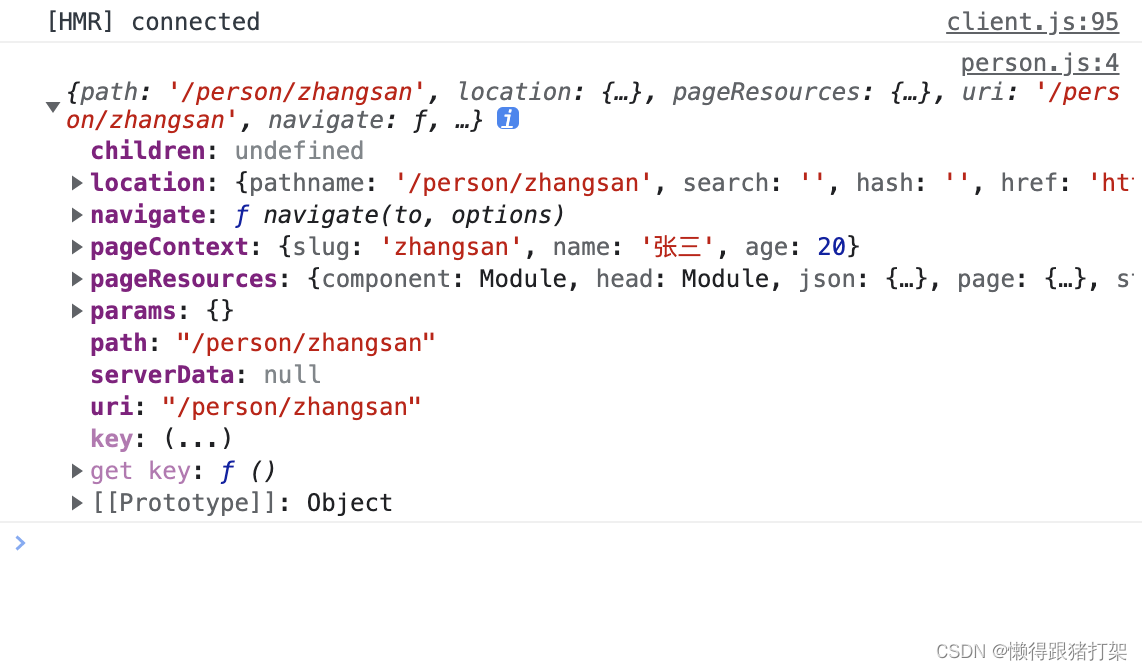
  console.log(props)
  const { pageContext: person } = props
  return (
    <div>
      <h2>
        {person.slug}:{person.name}:{person.age}
      </h2>
    </div>
  )
}

Link组件的使用
在Gatsby框架中页面的跳转 通过Link组件实现。
为了能在首页中显示我们上一步骤中生成的页面,修改pages/index.js文件,在里面添加Link组件指向那些页面:
const IndexPage = () => {
  return (<div>
      <Link to='/person/zhangsan'>张三</Link>
      <br />
      <Link to='/person/wangwu'>王武</Link>
    </div>)
}
GraphQL数据层
Gatsby框架提供了一个统一存储数据的地方,叫做数据层。
在应用构建时,Gatsby会从外部获取数据并将数据放数据层,组件可以直接从数据层查询数据。
数据层使用GraphQL构建,随项目构建提供给我们一个网页版调试工具:
http://localhost:8000/___graphql
从数据层中查询数据
页面组件使用graphql查询数据
在页面组件中导出查询命令,框架执行查询并将结果传递给组件的props对象,存储在props对象中的data属性中。
我们以在首页index.js中的Home组件中获取应用的网站metadata为例。
首先在gatsby-config.js中配置siteMetadata:
/**
 * @type {import('gatsby').GatsbyConfig}
 */
module.exports = {
  siteMetadata: {
    title: `aiecosystem`,
    siteUrl: `https://www.yourdomain.tld`,
  },
  plugins: [],
}
在index.js文件中通过graphql 方法来为页面查询数据:
import { graphql, Link } from 'gatsby'

const IndexPage = ({ data }) => {
  return (
    <div>
      <Link to='/person/zhangsan'>张三</Link>
      <br />
      <Link to='/person/wangwu'>王武</Link>
      <p>{JSON.stringify(data)}</p>
    </div>
  )
}

export default IndexPage

export const Head = () => <title>Home Page</title>
export const query = graphql`
  query MyQuery {
    site {
      siteMetadata {
        siteUrl
        title
      }
    }
  }
`
显示结果:

非页面组件中使用graphql查询数据
在页面组件中,想要查询数据层的数据的话,需要使用到useStaticQuery()这一钩子函数进行手动查询。
新建src/components/Header.js:
import React from 'react'
import { useStaticQuery, graphql } from 'gatsby'

export default function Header () {
  const data = useStaticQuery(graphql`
    query {
      site {
        siteMetadata {
          author
          siteUrl
          title
        }
      }
    }
  `)
  return (
    <div>
      <p>
        {data.site.siteMetadata.title}@{data.site.siteMetadata.author}
      </p>
      <p>{data.site.siteMetadata.siteUrl}</p>
    </div>
  )
}
新建 src/pages/list.js:
import React from 'react'
import Header from '../components/Header'

export default function List () {
  return (
    <div>
      <Header />
    </div>
  )
}
访问http://localhost:8000/list显示结果:

Gatsby插件
其内置了插件系统,插件是为应用添加功能最好的方式。
按功能可划分为三种插件类型:
数据源插件(gatsby-source-xxx)
负责从应用外部获取数据,将数据统一存放在Gatsby的数据层中
数据转换插件(gatsby-transformer-xxx)
负责转换特定类型的数据的格式,比如将Markdown 文件的内容转换为对象形式
功能插件(gatsby-plugin-xxx)
为应用提供功能,比如,通过插件让应用支持Less或者TypeScript。
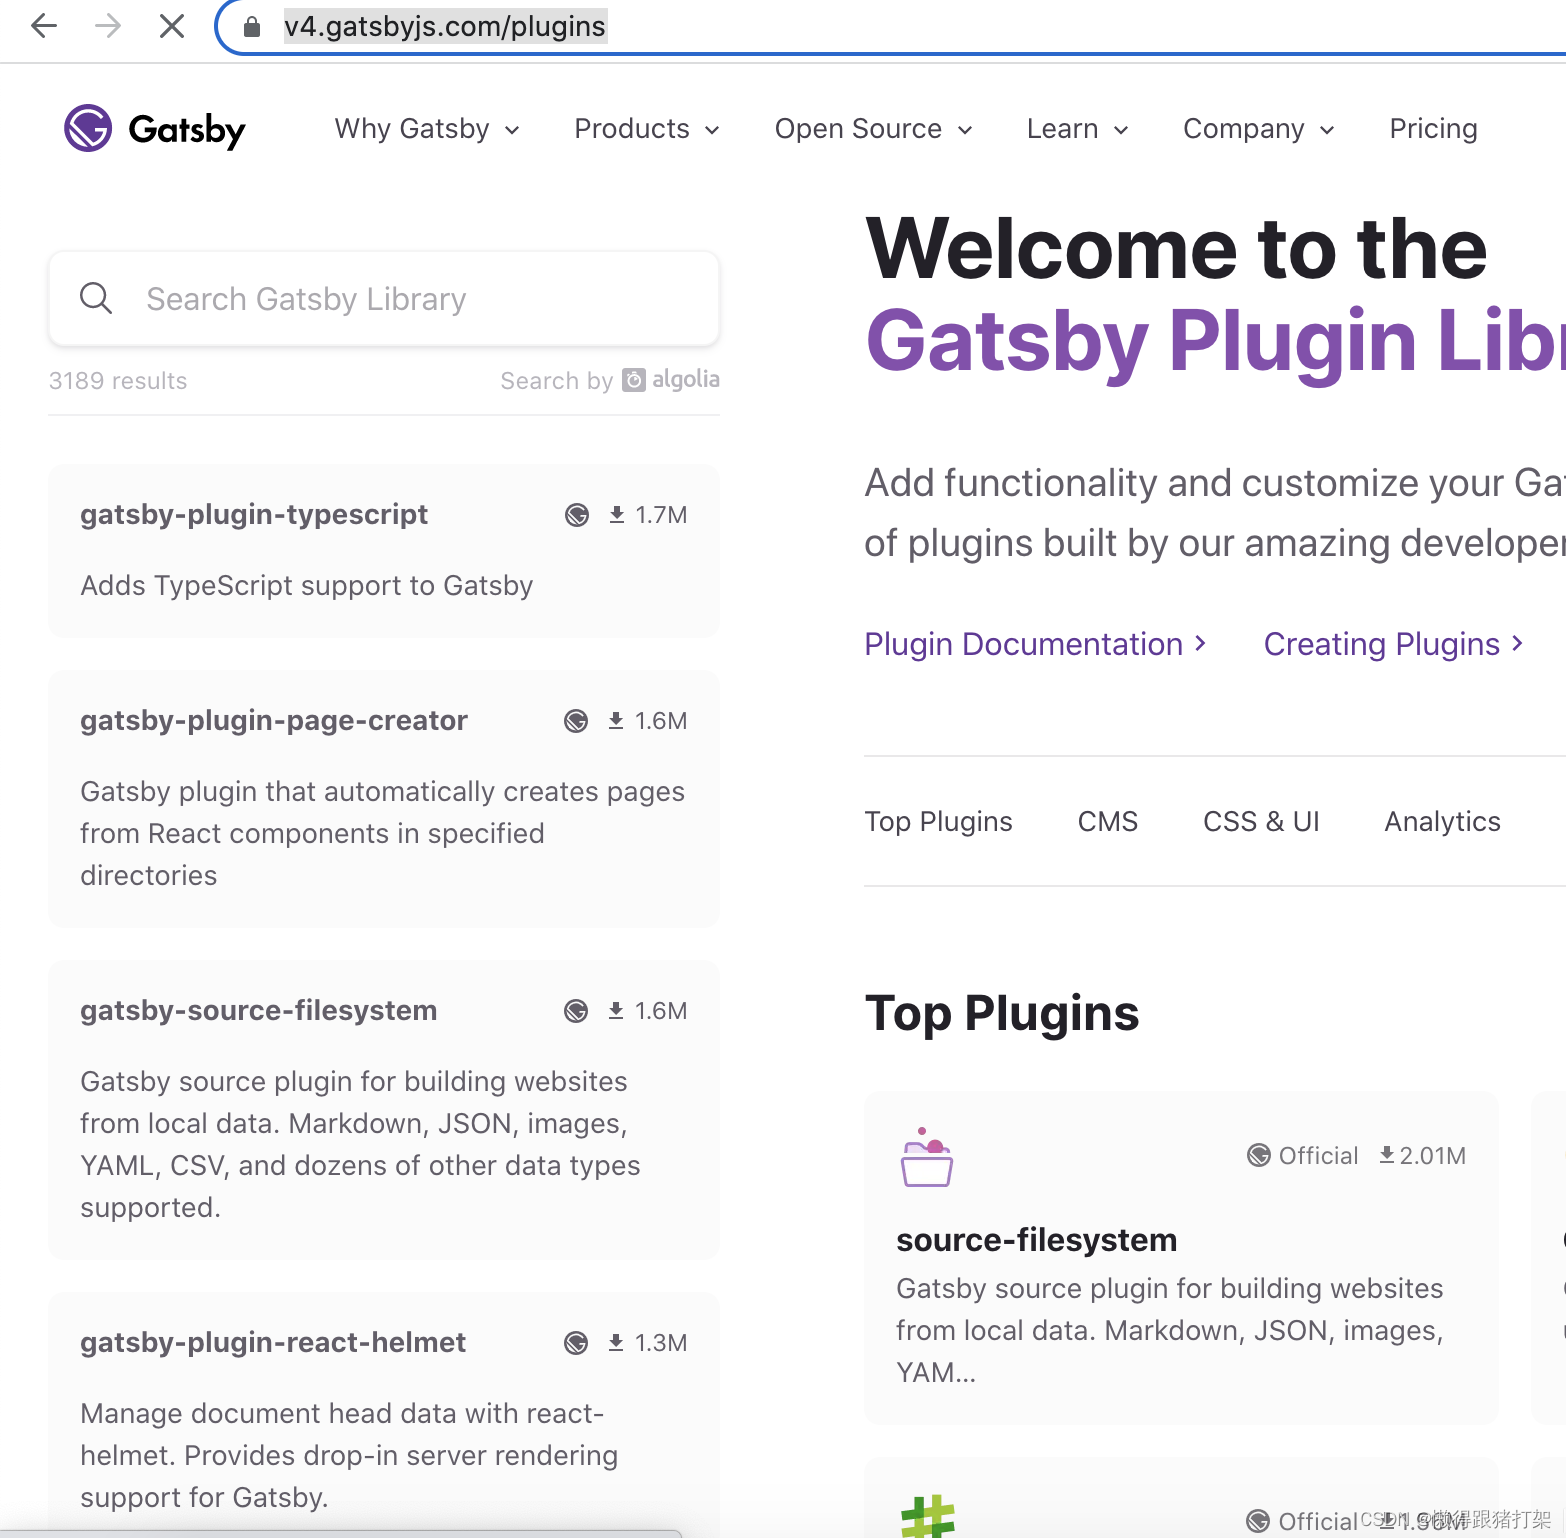
我们可以在https://v4.gatsbyjs.com/plugins这个地址可以找到大量的常用的插件。
将本地JSON文件数据添加到数据层中
要实现该功能,需要用到两个插件:
gatsby-source-filesystem:用于将本地文件中的json数据添加到数据层
gatsby-transformer-json:将原始的JSON字符串数据转换为JavaScript对象
首先我们来准备json数据,创建json目录,并添加products.json文件:
[
  {
    "id": 1,
    "name": "iPhone 12",
    "brand": "Apple",
    "price": 999,
    "description": "The latest iPhone model with 5G support and A14 Bionic chip.",
    "image": "/images/product-1.jpg",
    "category": "Electronics",
    "rating": 4.5
  },
  {
    "id": 2,
    "name": "Galaxy S21",
    "brand": "Samsung",
    "price": 899,
    "description": "The latest Samsung flagship phone with 5G support and Exynos 2100 chip.",
    "image": "/images/product-2.webp",
    "category": "Electronics",
    "rating": 4.7
  },
  {
    "id": 3,
    "name": "MacBook Pro",
    "brand": "Apple",
    "price": 1299,
    "description": "The latest MacBook Pro with M1 chip and Retina display.",
    "image": "/images/product-3.webp",
    "category": "Computers",
    "rating": 4.9
  },
  {
    "id": 4,
    "name": "AirPods Pro",
    "brand": "Apple",
    "price": 249,
    "description": "The latest AirPods with noise cancellation and wireless charging case.",
    "image": "/images/product-4.webp",
    "category": "Electronics",
    "rating": 4.8
  }
]
下面就需要为项目安装这些插件,并在gatsby-config.js 中进行配置:
安装:
npm install [email protected]
npm install [email protected]
/**
 * @type {import('gatsby').GatsbyConfig}
 */
module.exports = {
  siteMetadata: {
    author: 'denghuiquan',
    title: `aiecosystem`,
    siteUrl: `https://www.yourdomain.tld`
  },
  plugins: [
    `gatsby-transformer-json`,
    {
      resolve: `gatsby-source-filesystem`,
      options: {
        name: 'json',
        path: `${__dirname}/json/`
      }
    }
  ]
}
修改配置过后重启项目,查看结果:

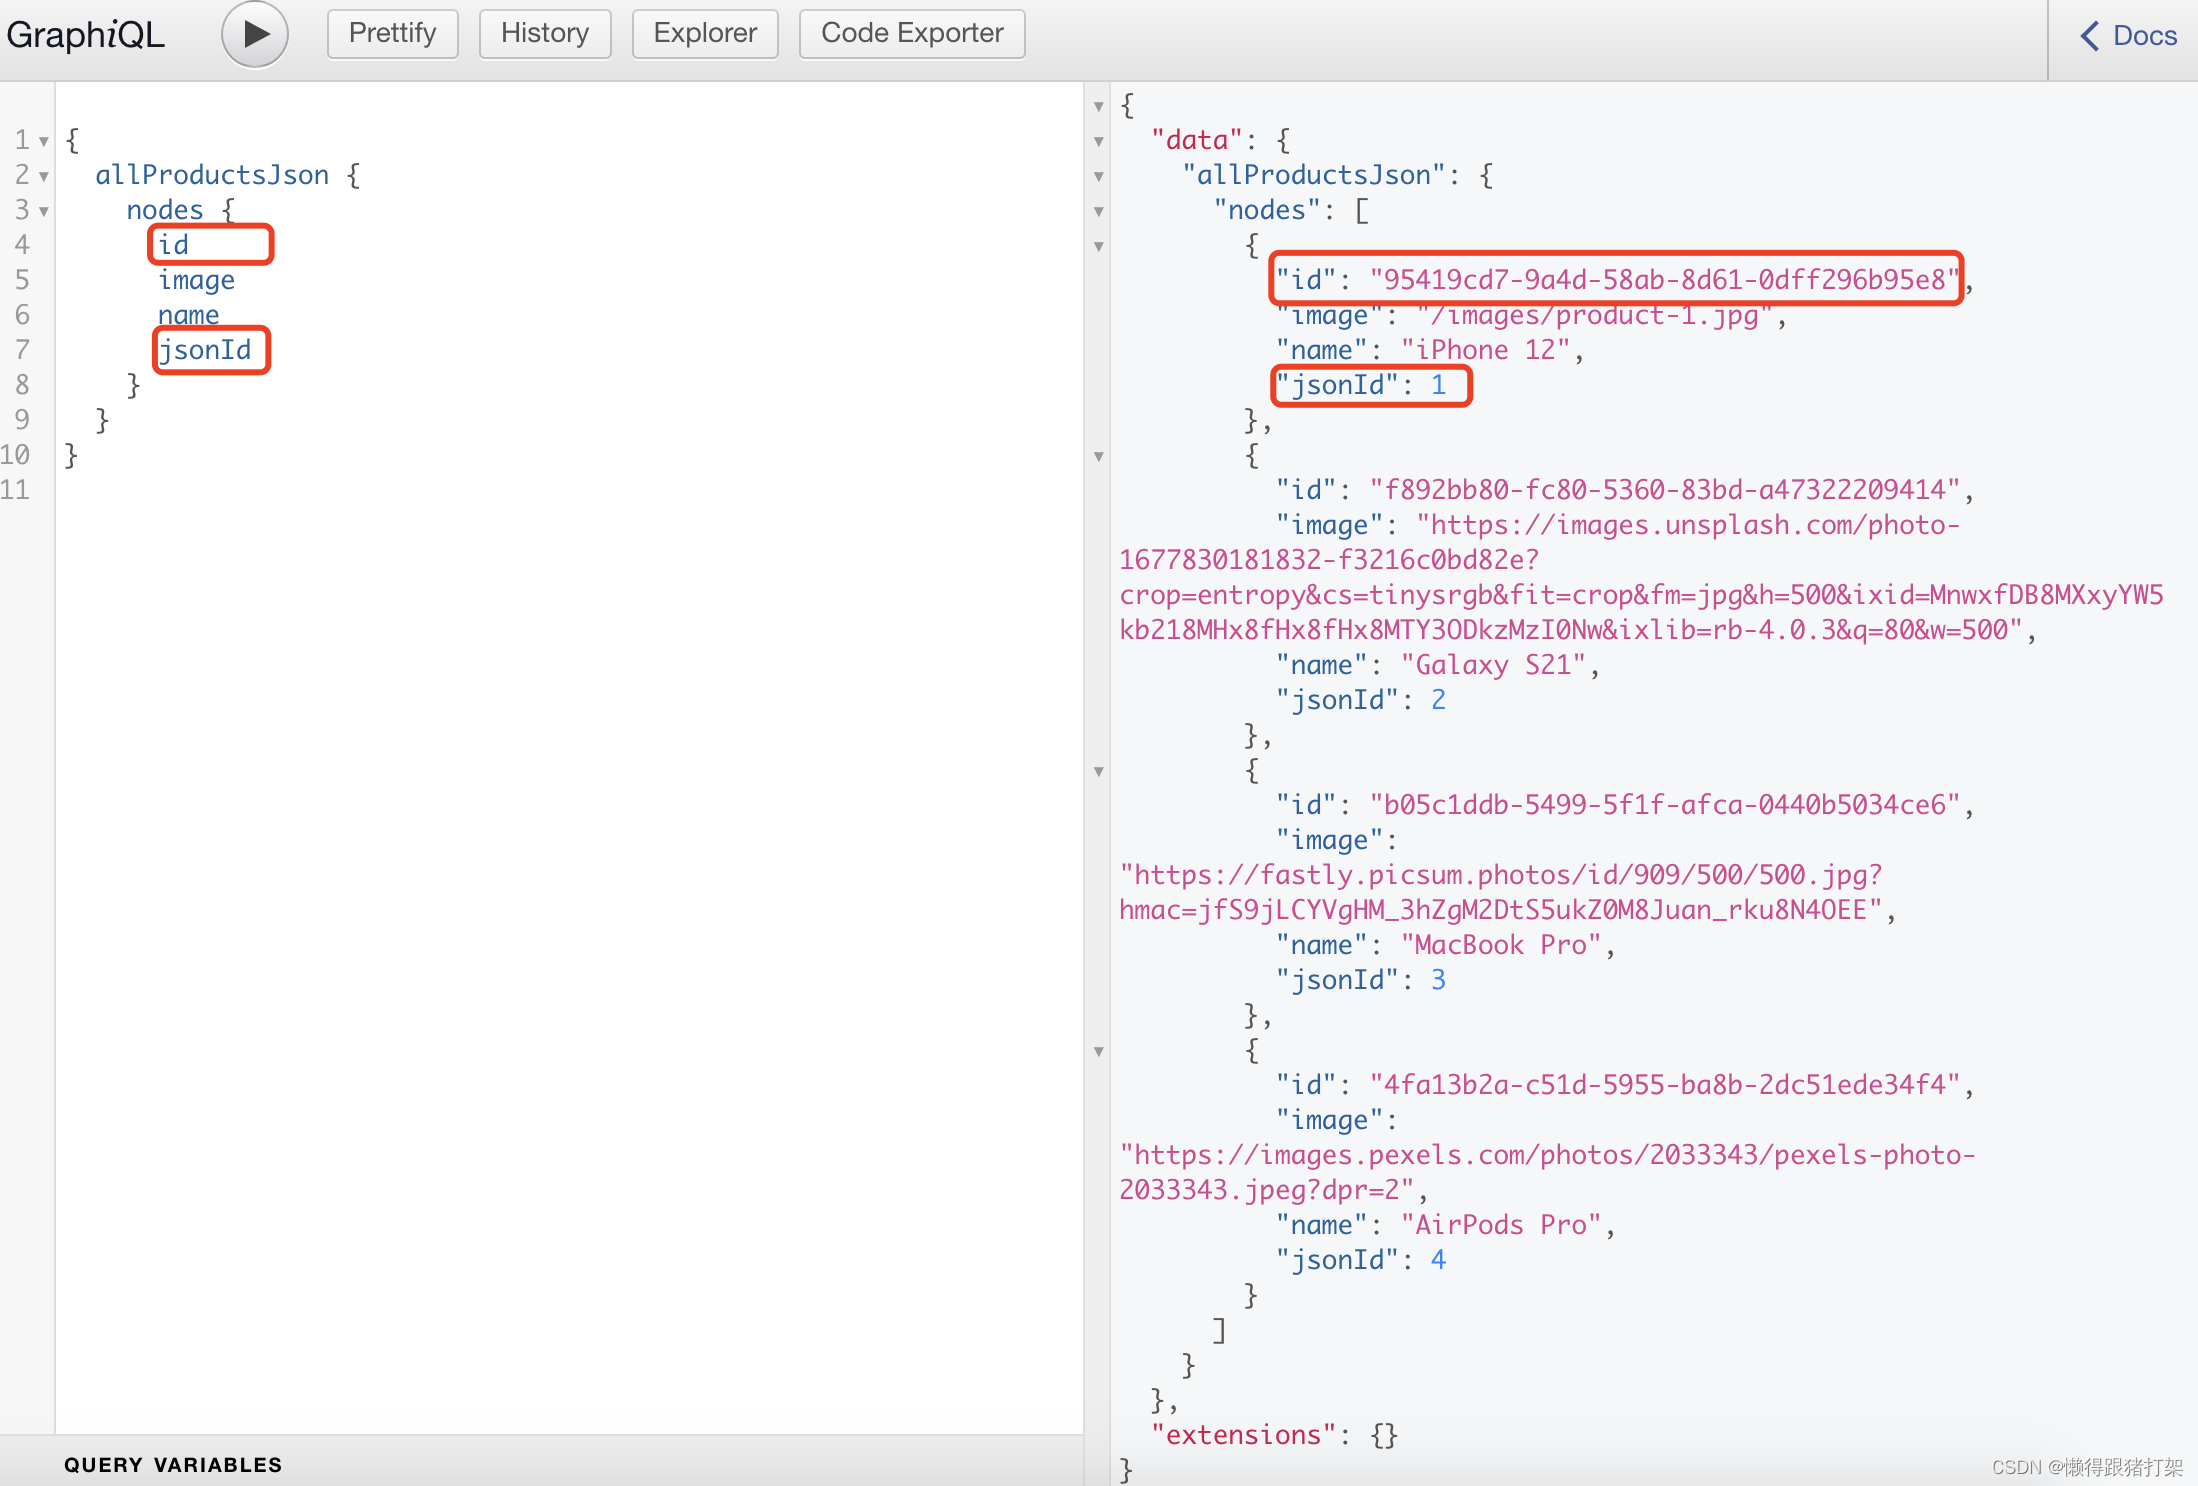
注意:id 和 jsonId
如果你的数据包含一个id键,转换器会自动将此键转换为jsonId,因为id是Gatsby的保留内部关键字。
图像优化
图像文件和数据文件不在源代码中的同一位置。
图像的路径是基于构建站点的绝对路径,而不是相对于数据的路径,难以分析出图片的位置
图像没有经过任何优化操作,如压缩体积和响应式图片,以及输出webp格式等
要实现图像优化需要用到:
gatsby-source-filesystem:用于将本地文件信息添加到数据层
gatsby-plugin-sharp:提供本地图片的处理功能,如调整图像尺寸、压缩图像体积等
gatsby-transformer-sharp:将plugin-sharp插件处理过后的图像信息添加到数据层
gatsby-image:React组件,优化图像显示,基于gatsby-transformer-sharp插件转换后的数据
生成多个具有不同宽度的图像版本,为图像设置srcset和 sizes 属性,根据设备视窗的宽度加载对于适合大小的图片。
使用模糊处理技术,将其中一个20px宽的小图像显示为占位符,直到实际图像加载完成为止。
安装插件:
npm install [email protected] [email protected] gatsby-image
将static中的images文件夹移动到json目录下,使得json数据及依赖的图像放置在相同位置中,并修改json中的图像引用地址,改绝对定位‘/’为相对定位 ‘./’。
[
  {
    "id": 1,
    "name": "iPhone 12",
    "brand": "Apple",
    "price": 999,
    "description": "The latest iPhone model with 5G support and A14 Bionic chip.",
    "image": "./images/product-1.jpg",
    "category": "Electronics",
    "rating": 4.5
  },
  {
    "id": 2,
    "name": "Galaxy S21",
    "brand": "Samsung",
    "price": 899,
    "description": "The latest Samsung flagship phone with 5G support and Exynos 2100 chip.",
    "image": "./images/product-2.webp",
    "category": "Electronics",
    "rating": 4.7
  },
  {
    "id": 3,
    "name": "MacBook Pro",
    "brand": "Apple",
    "price": 1299,
    "description": "The latest MacBook Pro with M1 chip and Retina display.",
    "image": "./images/product-3.webp",
    "category": "Computers",
    "rating": 4.9
  },
  {
    "id": 4,
    "name": "AirPods Pro",
    "brand": "Apple",
    "price": 249,
    "description": "The latest AirPods with noise cancellation and wireless charging case.",
    "image": "./images/product-4.webp",
    "category": "Electronics",
    "rating": 4.8
  }
]
在gatsby-config.js中添加图像优化的插件配置:
plugins: [
    `gatsby-transformer-json`,
    `gatsby-plugin-sharp`,
    `gatsby-transformer-sharp`,
    {
      resolve: `gatsby-source-filesystem`,
      options: {
        name: 'json',
        path: `${__dirname}/json/`
      }
    }
  ]
查询处理结果:

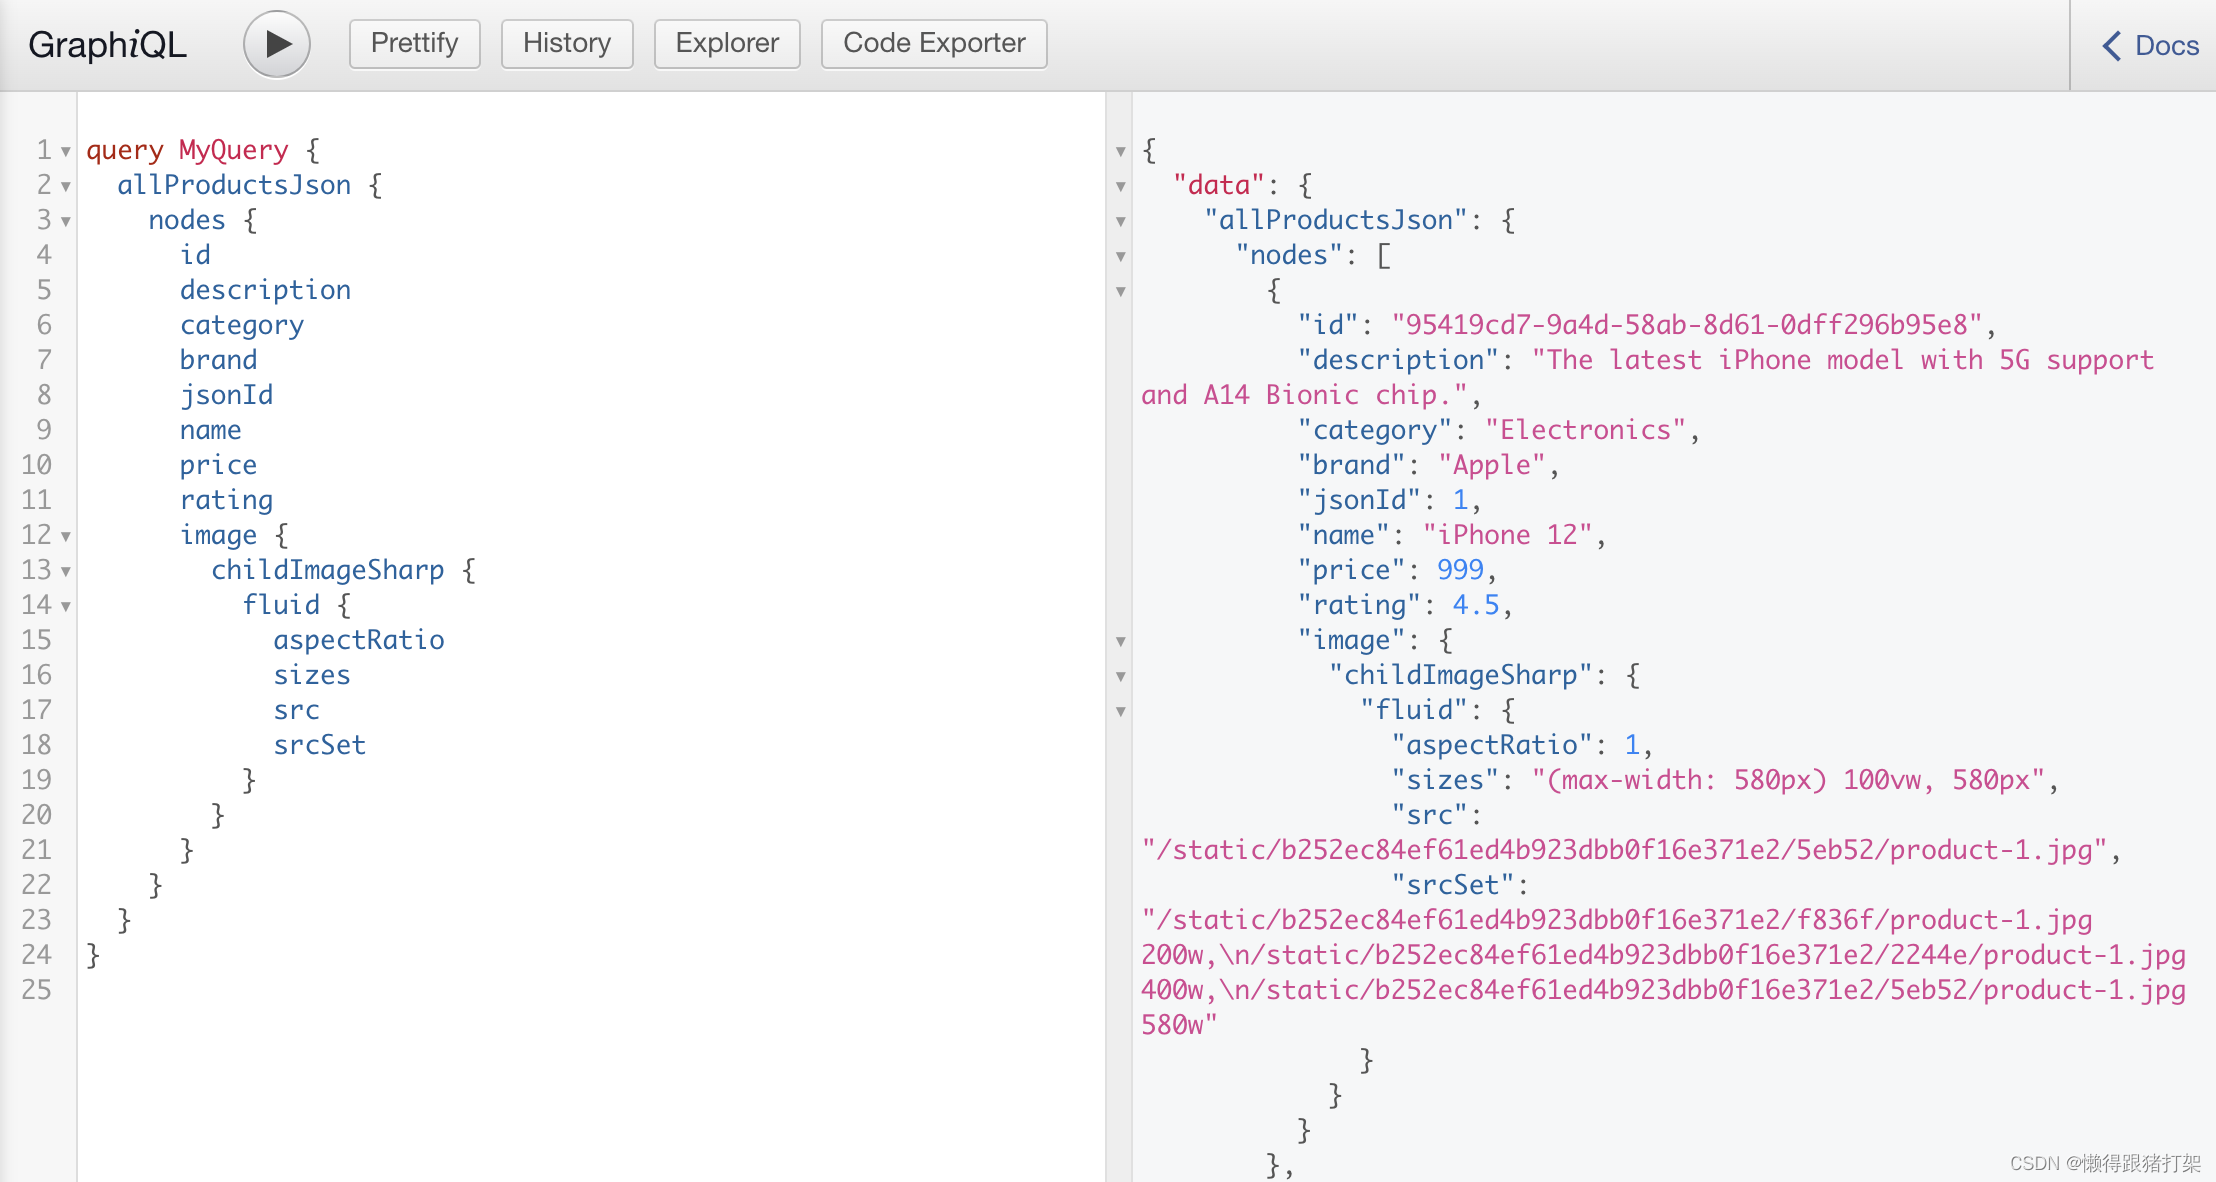
显示优化过后的图像信息
创建src/pages/product.js页面组件:
import { graphql } from 'gatsby'
import Img from 'gatsby-image'
import React from 'react'

export default function product ({ data }) {
  return data.allProductsJson.nodes.map(product => (
    <div key={product.jsonId}>
      <p>{`${product.brand} ${product.name}`}</p>
      <p>{product.category}</p>
      <p>{product.description}</p>
      <p>Price: ${product.price}</p>
      <p>Rating Score: {product.price}</p>
      <div>
        <Img fluid={product.image.childImageSharp.fluid} />
      </div>
    </div>
  ))
}

export const query = graphql`
  query {
    allProductsJson {
      nodes {
        id
        description
        category
        brand
        jsonId
        name
        price
        rating
        image {
          childImageSharp {
            fluid {
              aspectRatio
              sizes
              src
              srcSet
            }
          }
        }
      }
    }
  }
`
页面显示:
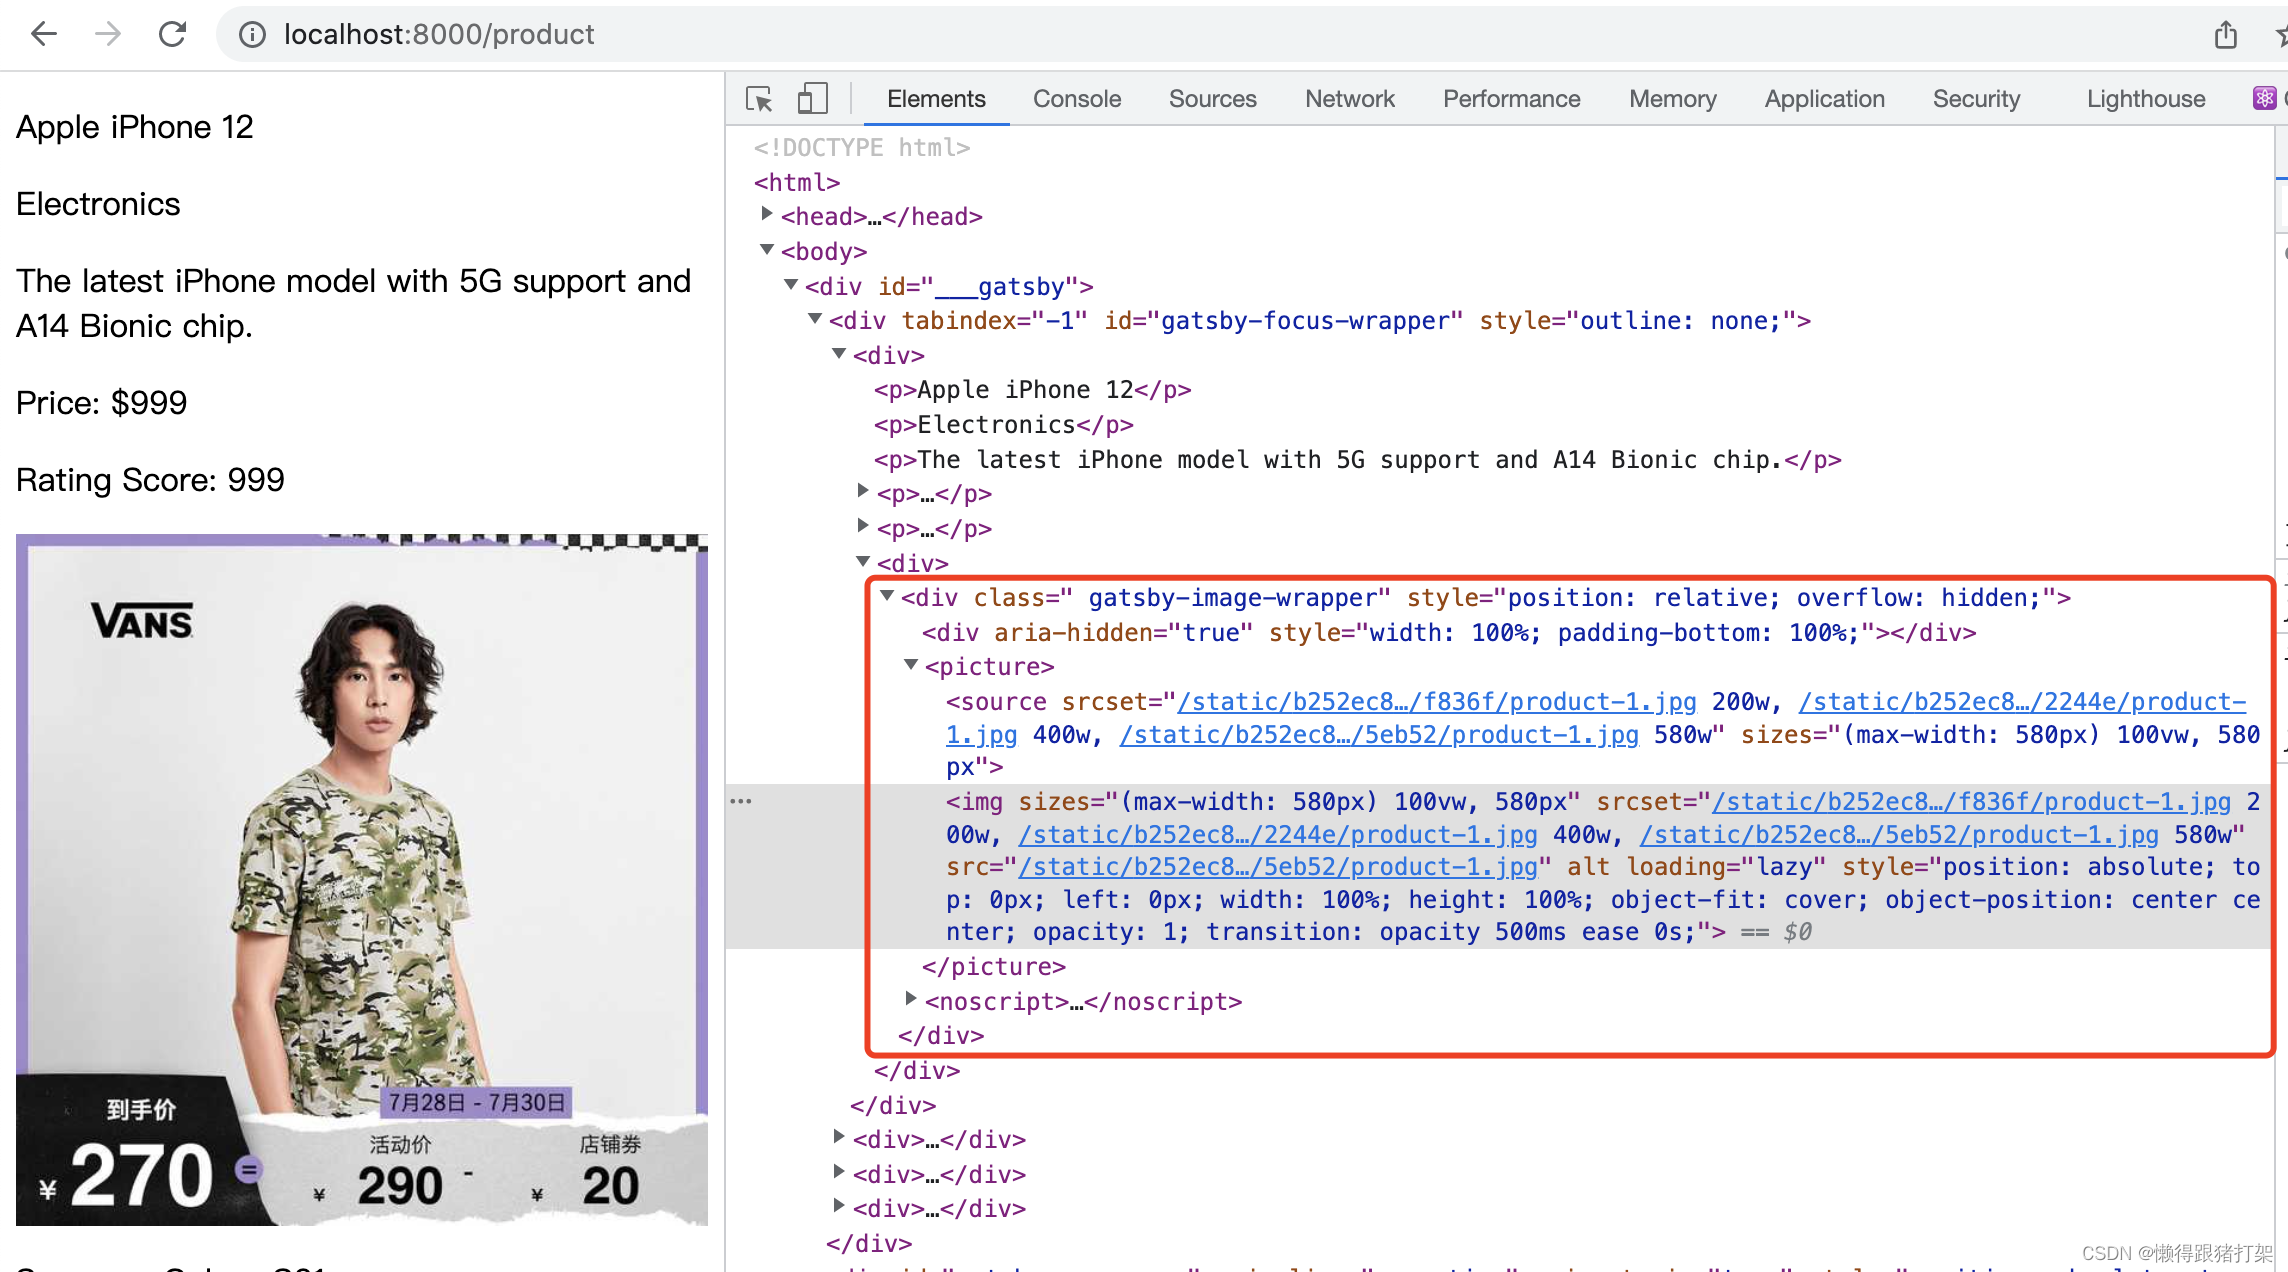
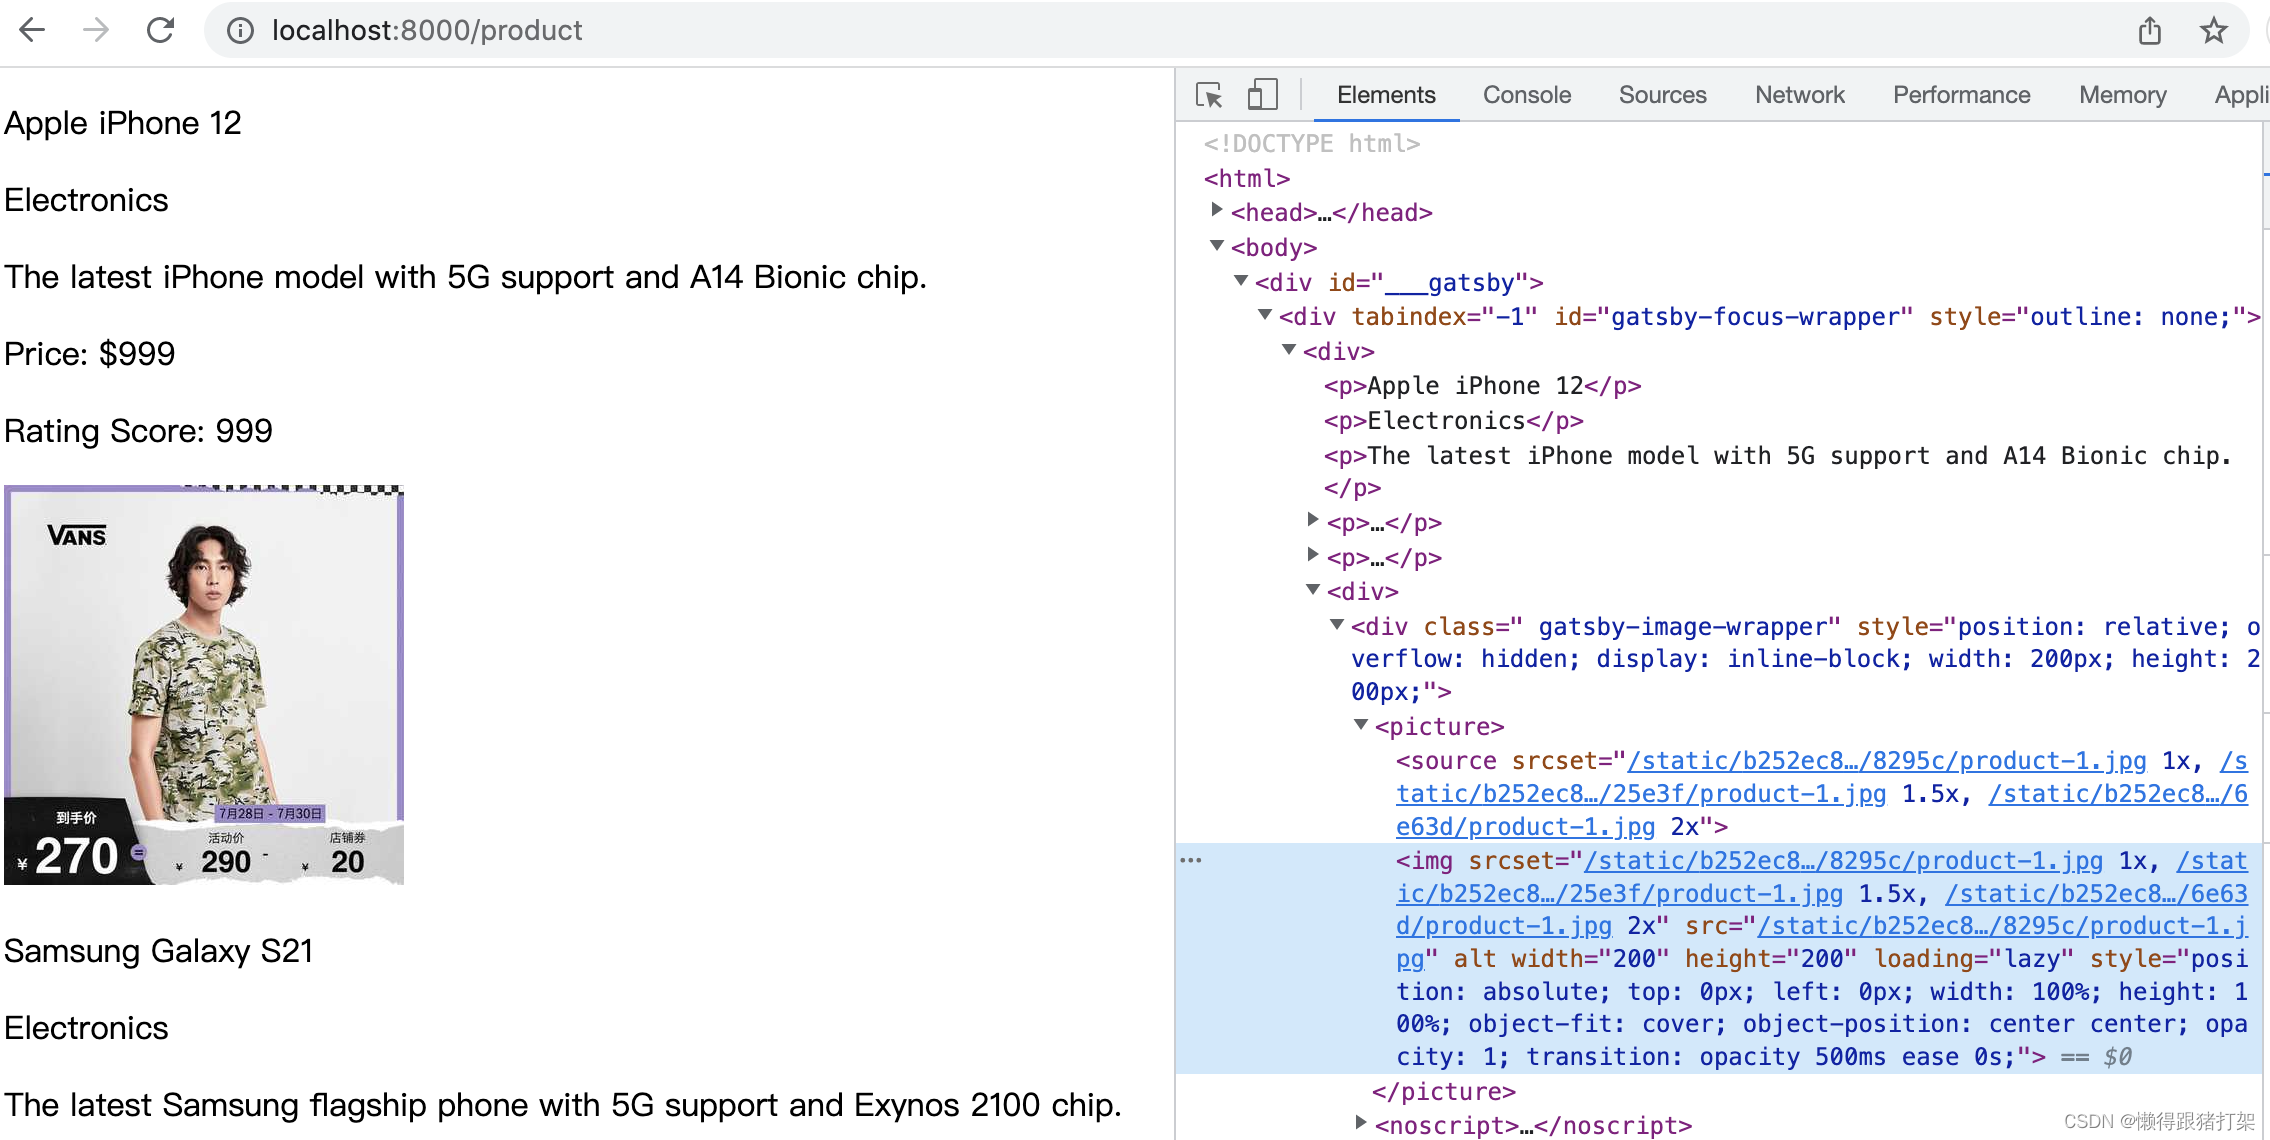
改用fixed给定加载图像的宽高:
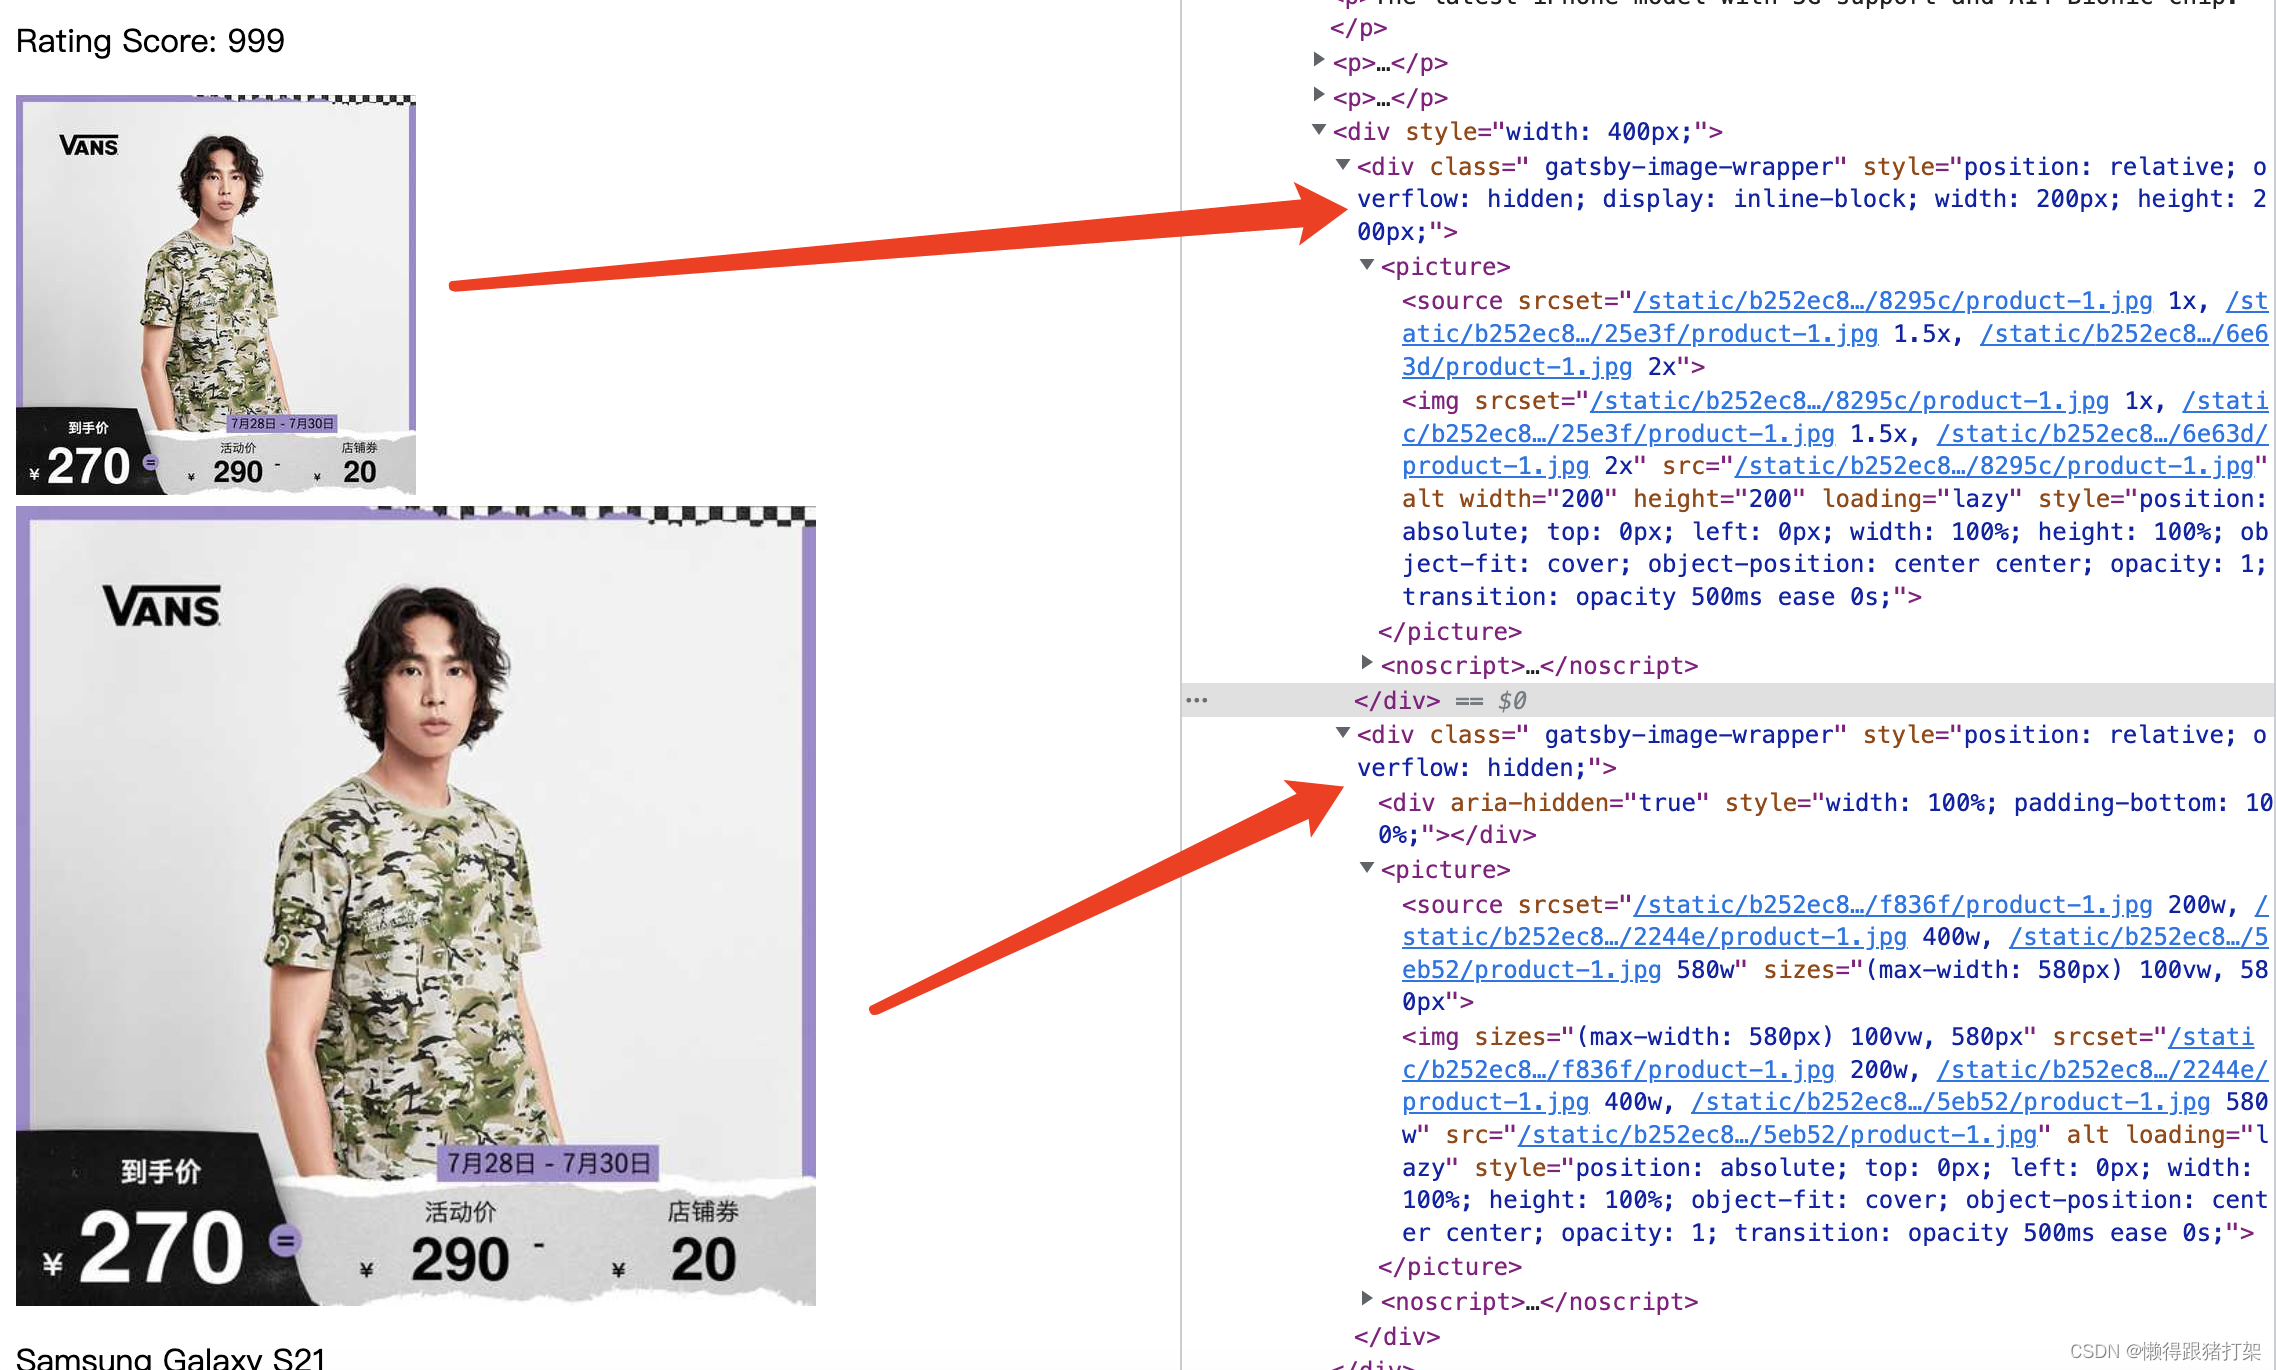
对比着看:
将本地markdown文件作为数据源构建文章列表
安装插件:
npm install [email protected]
构建文章列表
通过gatsby-source-filesystem 将markdown 文件数据放入数据层
通过gatsby-transformer-remark 将数据层中原始的markdown数据转换为对象格式
配置gatsby-config的plugins:
{
  resolve: `gatsby-source-filesystem`,
  options: {
    name: 'markdown',
    path: `${__dirname}/src/posts/`
  }
},
'gatsby-transformer-remark',
修改配置后重启项目:
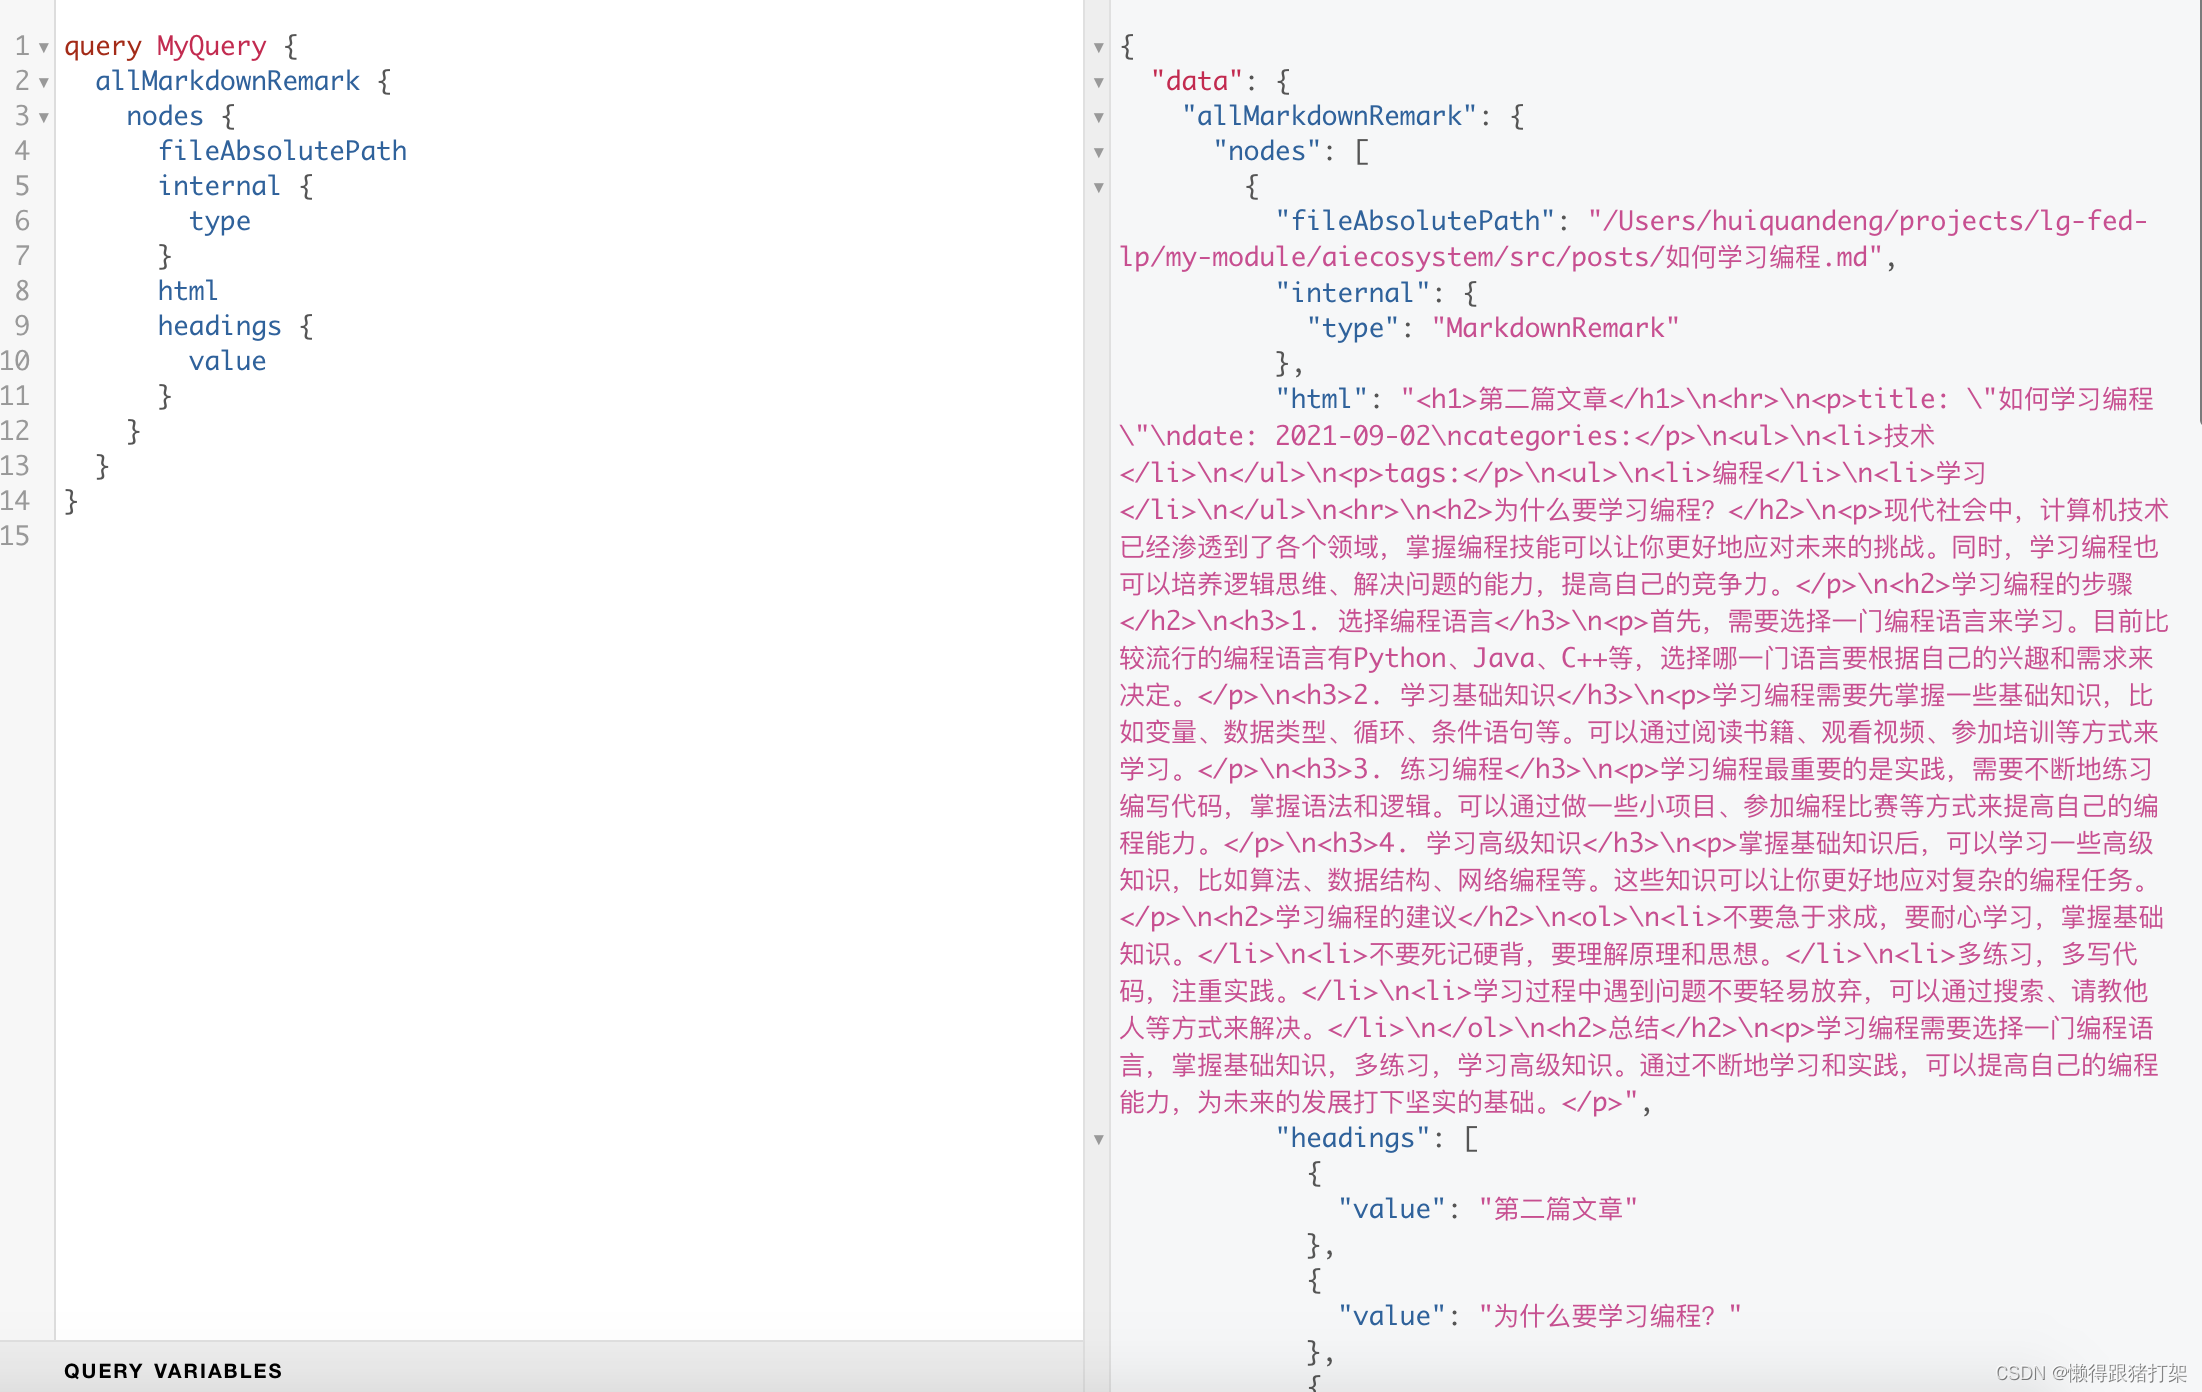
这里我们利用之前的src/pages/list.js 文件来展示我们的markdown文章列表:
import { graphql, Link } from 'gatsby'
import React from 'react'
import Header from '../components/Header'

export default function List ({ data }) {
  console.log(data)
  return (
    <div>
      <Header />
      <div>
        {data.allMarkdownRemark.nodes.map(post => (
          <div key={post.id}>
            <p>{post.frontmatter.title}</p>
            <p>Published: {post.frontmatter.date}</p>
            <div>
              {post.excerpt} <Link to={`/post/${post.id}`}>查看全文 </Link>
            </div>
            <br />
          </div>
        ))}
      </div>
    </div>
  )
}

export const query = graphql`
  query {
    allMarkdownRemark {
      nodes {
        id
        fileAbsolutePath
        internal {
          type
        }
        html
        excerpt
        headings {
          value
          depth
        }
        frontmatter {
          title
          date(formatString: "YYYY-MM-DD")
        }
      }
    }
  }
`
以编程方式为所有md数据节点添加slug属性
构建文章详情:
重新构建查询数据,添加slug作为请求标识,slug值为文件的名称:
abc.md -> /post/abc
在gatsby-node.js中导出一个方法:onCreateNode({node, actions})
我们可以在这个方法中为文章数据添加slug属性。该方法是在gatsby应用启动的时候,Gatsby会先去执行插件,通过插件从外部数据源当中获取数据,然后将获取到的数据再添加到数据层。向数据层中每添加一条数据,其实就是在创建一个数据节点node。每创建完一个节点,Gatsby都会去调用一次这个onCreateNode() 方法。也就是说onCreateNode方法是在每一个节点node创建完成之后调用的。
这个方法其实就是为开发者准备的用于修改添加到数据层的节点信息用的。
这里我们希望为每一篇markdown文章添加 slug属性正好就可以用到这个方法,再方法里面对添加节点的node.internal.type进行判断,进而决定是否为节点信息添加slug属性。
const path = require('path')

const onCreateNode = ({ node, actions }) => {
  const { createNodeField } = actions

  if (node.internal.type === 'MarkdownRemark') {
    const slug = path.basename(node.fileAbsolutePath, '.md')
    // 给节点信息node 添加 field
    // 最终添加的field会存放在node.fields对象中
    createNodeField({
      node,
      name: 'slug',
      value: slug
    })
  }
}

module.exports = {
  onCreateNode
}
创建文章详情页面,根据slug获取具体文章内容并展示
在gatsby-node.js中导出一个方法:createPages({graphql, actions}):
const path = require('path')

const onCreateNode = ({ node, actions }) => {
  const { createNodeField } = actions

  if (node.internal.type === 'MarkdownRemark') {
    const slug = path.basename(node.fileAbsolutePath, '.md')
    // 给节点信息node 添加 field
    // 最终添加的field会存放在node.fields对象中
    createNodeField({
      node,
      name: 'slug',
      value: slug
    })
  }
}

// 创建页面函数
async function createPages ({ graphql, actions }) {
  const { createPage } = actions
  // 获取模版的绝对路径
  const template = require.resolve('./src/templates/article.js')

  // 从数据层中获取模版所需要的数据
  const { data } = await graphql(`
    query {
      allMarkdownRemark {
        nodes {
          fields {
            slug
          }
        }
      }
    }
  `)

  // 根据模版和数据创建页面
  return data.allMarkdownRemark.nodes.map(node =>
    createPage({
      // 模版绝对路径
      component: template,
      // 访问地址
      path: `/article/${node.fields.slug}`,
      // 传递给模版的数据
      // 传递过去的数据可以在模版组件的props属性中获取到,属性为pageContext
      context: {
        slug: node.fields.slug
      }
    })
  )
}

module.exports = {
  createPages,
  onCreateNode
}
创建文章编程模版文件src/templates/article.js:
import { graphql } from 'gatsby'
import React from 'react'

export default function Article ({ data, pageContext }) {
  const { slug } = pageContext
  const tagStyle = {
    fontWeight: 'bolder',
    borderRadius: '20px',
    backgroundColor: 'cyan',
    padding: '4px 10px',
    marginLeft: '5px'
  }
  return (
    <div>
      <h1>{slug}.md</h1>
      <h2>{data.markdownRemark.frontmatter.title}</h2>
      <p>Published: {data.markdownRemark.frontmatter.date}</p>
      <p>
        Categories: {data.markdownRemark.frontmatter.categories}
        <span style={

    { float: 'right' }}>
          {data.markdownRemark.frontmatter.tags.map(tag => (
            <code style={tagStyle} key={tag}>
              {tag}
            </code>
          ))}
        </span>
      </p>
      <div dangerouslySetInnerHTML={

    { __html: data.markdownRemark.html }}></div>
    </div>
  )
}

export const query = graphql`
  query ($slug: String) {
    markdownRemark(fields: { slug: { eq: $slug } }) {
      html
      fields {
        slug
      }
      frontmatter {
        categories
        title
        tags
        date(formatString: "YYYY-MM-DD")
      }
    }
  }
`
解决markdown文件中的图片显示优化问题
处理markdown 文件中的图片
gatsby-remark-images:处理markdown 文章中的图片,以便可以在生产环境中使用,它是作为gatsby-transformer-remark 插件的options 配置选项plugins 使用的。
安装依赖插件:
npm install [email protected]
修改gatsby-config.js中的plugins 配置:
{
  resolve: 'gatsby-transformer-remark',
  options: {
    plugins: [
      {
        resolve: `gatsby-remark-images`,
        options: {
          // It's important to specify the maxWidth (in pixels) of
          // the content container as this plugin uses this as the
          // base for generating different widths of each image.
          maxWidth: 1000
        }
      }
    ]
  }
},
在posts文件夹中添加images目录,并在其下保存一张1.jpg图片,在“使用Markdown编写文章.md”文章中应用:
### 图片
使用``表示图片。
```

```


显示结果:

将CMS作为Gatsby应用程序的外部数据源
以Strapi 为例,演示如何从Strapi 中获取数据并存放到项目的数据层中,并通过graphql 查询并显示在页面中。
从Strapi 中获取数据
首先Strapi项目
npx create-strapi-app my-project --quickstart
快速创建一个基于Strapi的CMS服务器
使用gatsby-source-strapi 插件将strapi的数据放到gatsby的数据层中
安装依赖插件:
npm install [email protected]
plugins:[
    {
      resolve: 'gatsby-source-strapi',
      options: {
        apiURL: 'http://120.46.200.145:1337',
        contentTypes: ['posts']
      }
    }
// ...
]
注意⚠️:由于我的strapi的版本是4.3.6的,比较新,使用gatsby-source-strapi访问时,
如果是使用的@1.0.3版本需要设置collectionTypes的endpoint为'api/posts'等,给public角色开启post对应的读权限即可。
如果是使用的@2.0.0版本,需要设置一个拥有full access权限的API Token并在项目中配置.env.development 文件,给process.env 设置环境变量。
以上两个版本在调用请求数据时设置的path不一样。
1.0.3版本请求path:为collection名称s, 或者自定义的endpoint
2.0.0版本则在构建时请求的path是:path: '/api/content-type-builder/components'和 '/api/content-type-builder/content-types',
所以这里我把Strapi的API Token权限相关配置抽取到.env.development:
STRAPI_API_URL=http://120.46.200.145:1337
STRAPI_TOKEN=b023cbcxxxxxxa9013e816d5ede724929xxxxxx1e4f447e1cdeexxxxx825afexxx53fbbc2edcadd1656353bb1a18437bc49d6417b93e95afaa76a9f489bd41f3ee5c39dd114972a3cc9d73f7c8092f1cd212363a8340d9b15ca6307285fe032ba15bfd973c
GATSBY_IS_PREVIEW=true在gatsby-config.js文件中使用dotenv库将其加载到process.env中:
require('dotenv').config({
  path: `.env.${process.env.NODE_ENV}`
})
const strapiConfig = {
  apiURL: process.env.STRAPI_API_URL,
  accessToken: process.env.STRAPI_TOKEN,
  singleTypes: ['general'],
  collectionTypes: ['post', 'tag']
  // 这是适合[email protected]的配置
  // collectionTypes2: [
  //   {
  //     name: 'Post',
  //     endpoint: 'api/posts'
  //   },
  //   {
  //     name: 'Tag',
  //     endpoint: 'tags'
  //   }
  // ]
}

/**
 * @type {import('gatsby').GatsbyConfig}
 */
module.exports = {
  siteMetadata: {
    author: 'denghuiquan',
    title: `aiecosystem`,
    siteUrl: `https://www.yourdomain.tld`
  },
  plugins: [
    {
      resolve: `gatsby-source-filesystem`,
      options: {
        name: 'markdown',
        path: `${__dirname}/src/posts/`
      }
    },
    {
      resolve: `gatsby-source-filesystem`,
      options: {
        name: 'json',
        path: `${__dirname}/json/`
      }
    },
    {
      resolve: 'gatsby-transformer-remark',
      options: {
        plugins: [
          {
            resolve: `gatsby-remark-images`,
            options: {
              // It's important to specify the maxWidth (in pixels) of
              // the content container as this plugin uses this as the
              // base for generating different widths of each image.
              maxWidth: 800,
              withWebp: true
              // quality: 80
            }
          }
        ]
      }
    },
    'gatsby-plugin-sharp',
    'gatsby-transformer-sharp',
    'gatsby-transformer-json',
    {
      resolve: 'gatsby-source-strapi',
      options: strapiConfig
    }
  ]
}
更新gatsby-node.js:
const path = require('path')

// // 创建页面函数
// function createPages ({ actions }) {
//   const { createPage } = actions
//   // 获取模版的绝对路径
//   const template = require.resolve('./src/templates/person.js')

//   // 获取模版所需要的数据
//   const persons = [
//     { slug: 'zhangsan', name: '张三', age: 20 },
//     { slug: 'wangwu', name: '王武', age: 27 },
//     { slug: 'lisi', name: '李四', age: 27 }
//   ]
//   // 根据模版和数据创建页面
//   return persons.map(person =>
//     createPage({
//       // 模版绝对路径
//       component: template,
//       // 访问地址
//       path: `/person/${person.slug}`,
//       // 传递给模版的数据
//       // 传递过去的数据可以在模版组件的props属性中获取到,属性为pageContext
//       context: person
//     })
//   )
// }

// 创建页面函数
async function createPages ({ graphql, actions }) {
  const { createPage } = actions
  // 获取模版的绝对路径
  const template = require.resolve('./src/templates/article.js')

  // 从数据层中获取模版所需要的数据
  const { data } = await graphql(`
    query {
      allMarkdownRemark {
        nodes {
          fields {
            slug
          }
        }
      }
    }
  `)

  // 根据模版和数据创建页面
  return data.allMarkdownRemark.nodes.map(
    node =>
      node.fields?.slug && // 这里的前置判断是为了避免为strapi数据中的markdown内容创建文章页面,从而避免article.js在静态渲染时报错
      createPage({
        // 模版绝对路径
        component: template,
        // 访问地址
        path: `/article/${node.fields.slug}`,
        // 传递给模版的数据
        // 传递过去的数据可以在模版组件的props属性中获取到,属性为pageContext
        context: {
          slug: node.fields.slug
        }
      })
  )
}

const onCreateNode = ({ node, actions }) => {
  const { createNodeField } = actions

  if (
    node.internal.type === 'MarkdownRemark' &&
    node.fileAbsolutePath &&
    node.fileAbsolutePath.endsWith('.md') // 这里前置判断是为了避免为strapi数据中的markdown内容在被gatsby-transformer-remark自动化创建markdown内容节点时为其添加slug属性
  ) {
    const slug = path.basename(node.fileAbsolutePath, '.md')
    // 给节点信息node 添加 field
    // 最终添加的field会存放在node.fields对象中
    createNodeField({
      node,
      name: 'slug',
      value: slug
    })
  }
}

module.exports = {
  createPages,
  onCreateNode
}
查询:
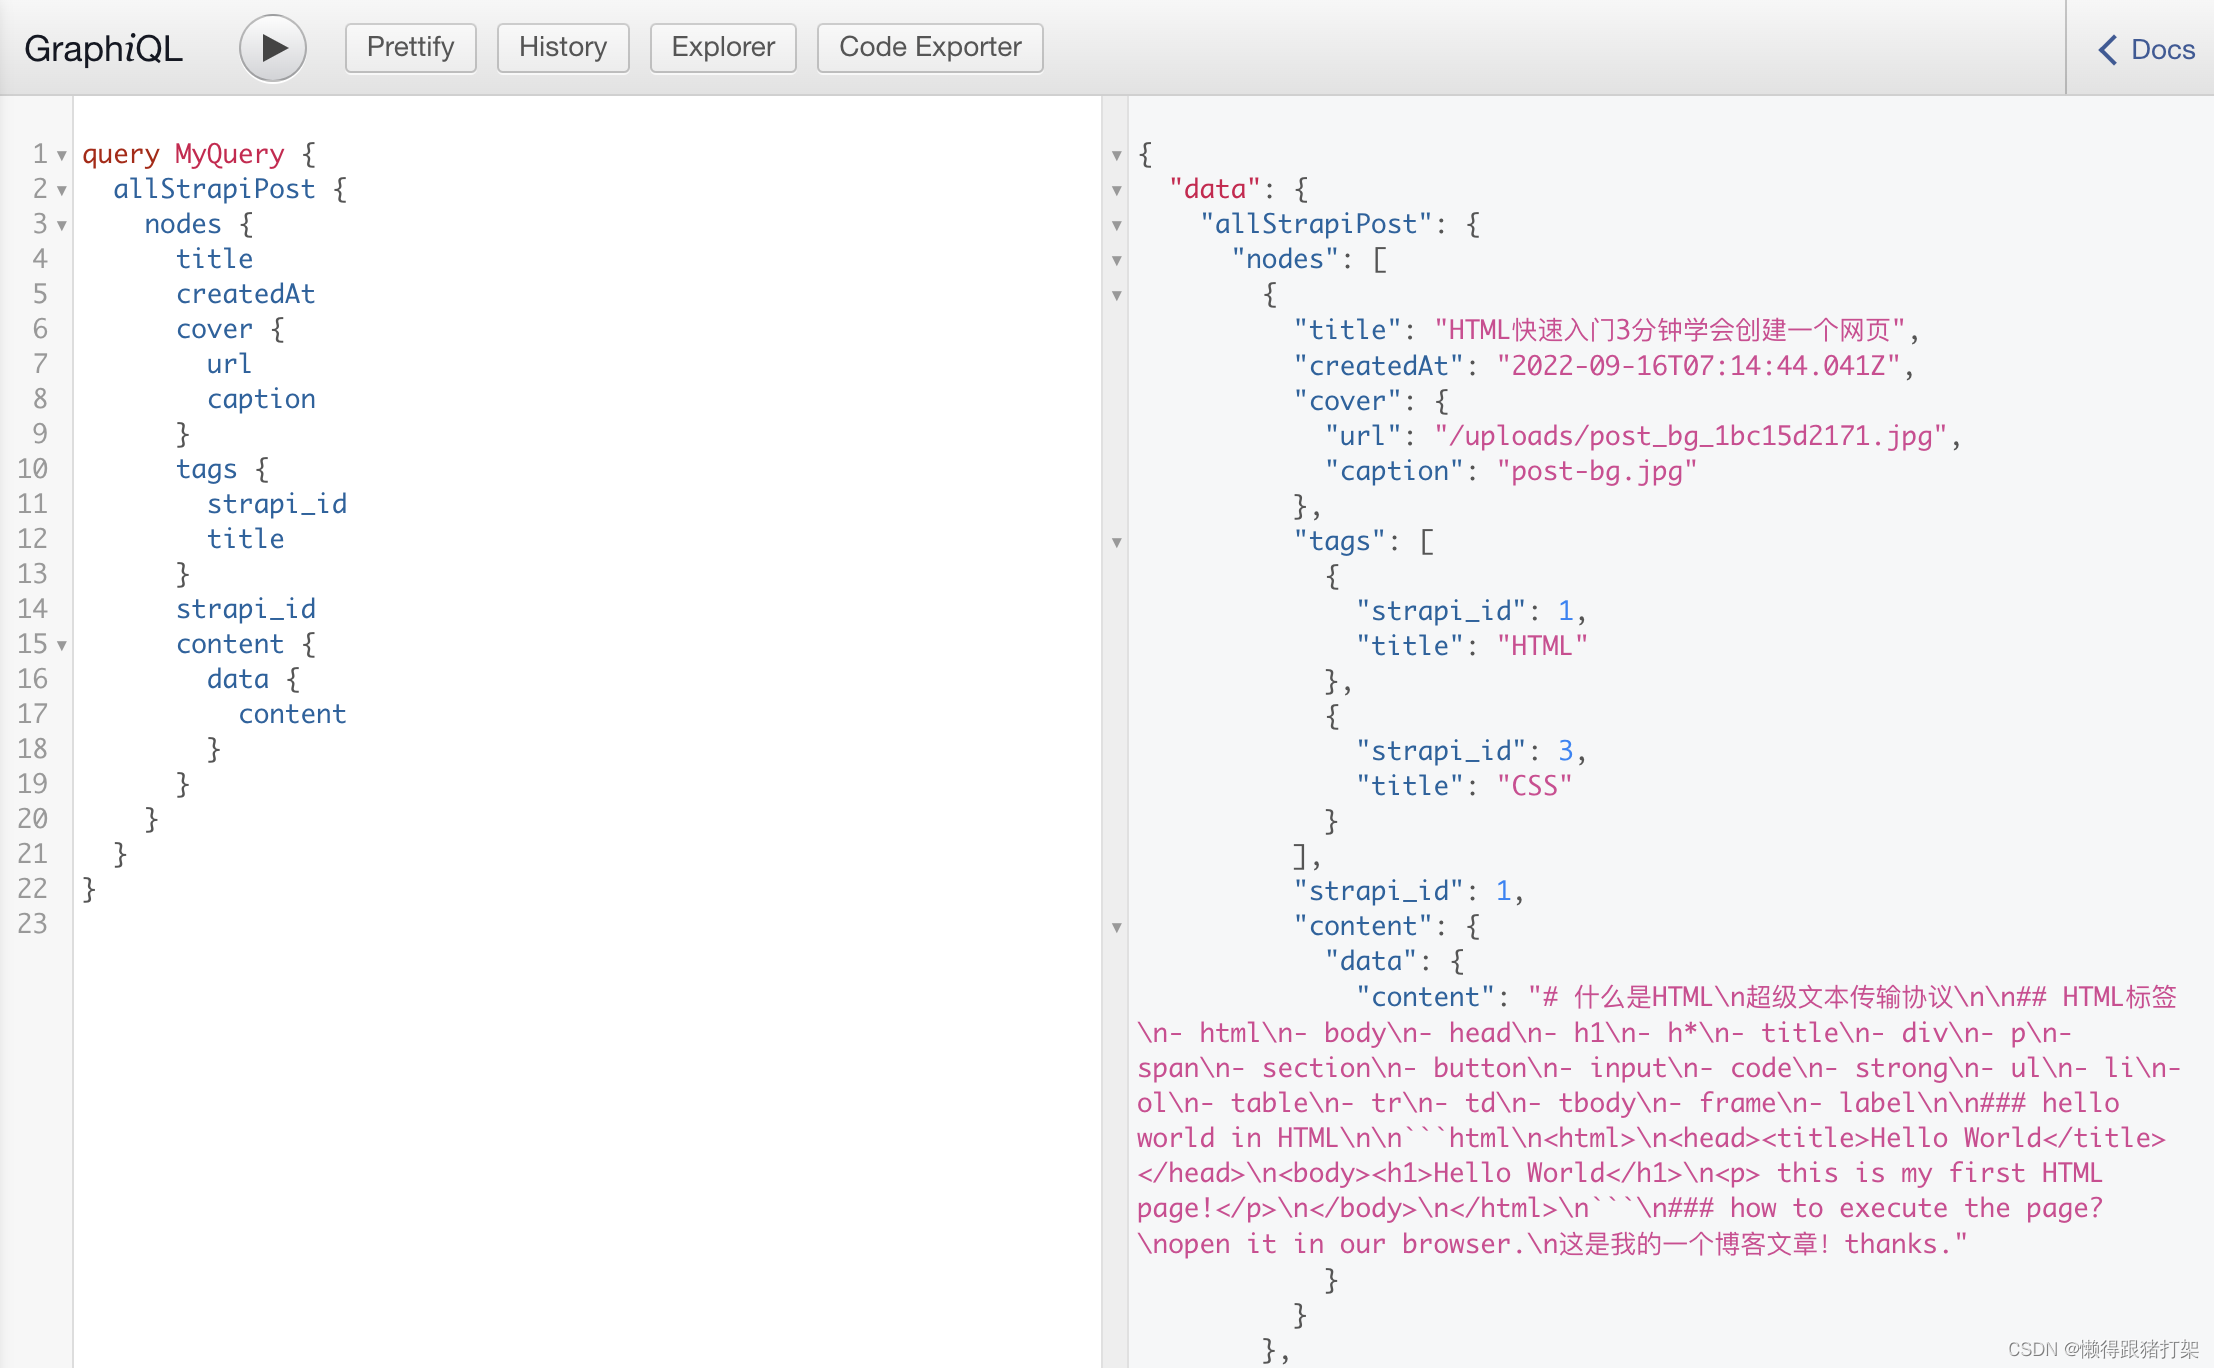
开发数据源插件-获取外部数据
数据源插件负责从Gatsby应用外部获取数据,创建数据查询节点供我们开发者使用。
gatsby clean 清除上一次的构建内容,避免重复内容产生冲突
在项目的的根目录下创建plugins文件夹,在此文件夹下继续创建具体的插件文件夹,如: gatsby-source-mystrapi文件夹
在插件文件夹中创建gatsby-node.js文件
插件实际上就是npm包
gatsby-node.js文件导出sourceNodes方法用于获取外部数据,创建数据查询节点,添加节点到数据层
在项目的 getsby-config.js 配置文件中配置我们创建好的插件gatsby-source-mystrapi,并传递插件所需的配置参数
重新运行应用即可
具体代码实现如下:
代码需要向外部strapi发起请求,我们使用axios库,安装axios:
npm install axios pluralize gatsby-node-helpers
pluralize用于把collections名统一转换: Post -> posts Tag -> tags的形式,拼接访问的最终的URL。
gatsby-node-helpers 创建节点所需要用到的辅助方法所在的包
完整的插件gatsby-node.js文件如下:
// Todo: 使用原生http代码替换axios
const axios = require('axios')
const pluralize = require('pluralize')
const createNodeHelper = require('gatsby-node-helpers').createNodeHelpers

// Todo: 在获取数据和创建数据节点的过程中输出一些当前处理内容进度相关的信息,方便后续的运行调试
async function sourceNodes (
  { createNodeId, createContentDigest, actions },
  configOptions
) {
  let { apiURL, accessToken, singleTypes, collectionTypes } = configOptions
  const { createNode } = actions
  // Todo:需要判断singleTypes、collectionTypes数组值类型,对类型做限制,不符合的报错提示
  const stypes = singleTypes.map(type => type.toLowerCase())
  const ctypes = collectionTypes.map(type => pluralize(type.toLowerCase()))

  // 对apiURL的值做判断,判断其是否由https://或http://开头
  // 使用正则表达式来判断,否则是则不做处理,否则为其在开头拼接http://
  if (!/^http[s]?:\/\//.test(apiURL)) apiURL = `http://${apiURL}`

  //  先处理singleTypes
  // Todo: singleType 请求的params为{"populate":"*"} 不需要分页
  let finalSingles = await getContents(stypes, apiURL, true)
  await createNodeForContents(finalSingles, true)

  // 再处理collectionTypes
  let finalCollections = await getContents(ctypes, apiURL)
  await createNodeForContents(finalCollections)

  async function createNodeForContents (contents, isSingleType) {
    for (const [key, value] of Object.entries(contents)) {
      let typeKey = key.replace(/^./, key[0].toUpperCase())
      if (!isSingleType) typeKey = typeKey.replace(/s$/, '')
      // 1. 构建数据节点对象 allMystrapiXXX, 如: allMystrapiPost
      const { createNodeFactory } = createNodeHelper({
        typePrefix: `Mystrapi${typeKey}`,
        createNodeId,
        createContentDigest
      })

      const createNodeObject = createNodeFactory('')

      // 2. 根据数据节点对象创建节点
      Array.isArray(value)
        ? value.forEach(async item => {
            await createNode(createNodeObject(item))
          })
        : await createNode(createNodeObject(value))
    }
  }
}

async function getContents (types, apiURL, isSingleType = false) {
  const final = {}
  const size = types.length
  let index = 0
  let baseParams = { populate: '*' }

  // 初始调用递归处理
  await loadNodeContents()

  // 返回全部获取完成的值,只要有一个失败就报错回退不错存储
  return final

  // 采用递归方式处理请求内容并缓存
  async function loadNodeContents () {
    if (index === size) return

    isSingleType ? await getDataOnce() : await getDataWithPagination()

    // 获取singleType的data
    async function getDataOnce () {
      let params = baseParams
      console.log(params)
      const { data } = await axios.get(`${apiURL}/api/${types[index]}`, {
        params
      })

      final[types[index++]] = data.data
    }

    // 获取collectionType的data, 分页式处理
    async function getDataWithPagination () {
      let done = false
      // Todo: 实现分页获取,以应对请求数据量过大的情况,一次请求数据毕竟是有上限的
      // {"pagination":{"pageSize":250,"page":1},"populate":"*"} 构建请求的params
      let params = { pagination: { pageSize: 80, page: 1 }, ...baseParams }

      while (!done) {
        console.log(params)
        let { data } = await axios.get(`${apiURL}/api/${types[index]}`, {
          params
        })
        let { meta } = data

        // 然后根据第一次请求回来的meta数据判断是否需要继续发起请求获取下一页数据,并构建当前分页的请求params
        meta.pagination.page === meta.pagination.pageCount
          ? (done = true)
          : params.pagination.page++

        final[types[index]]
          ? final[types[index]].concat(data.data)
          : (final[types[index]] = data.data)

        // 处理下一个type
        index++
      }
    }
    await loadNodeContents()
  }
}

module.exports = {
  sourceNodes
}
另外要想这个包能被作为配置使用,需要创建一个package.json文件:
{
  "name": "gatsby-source-mystrapi",
  "version": "0.0.1",
  "description": "a gatsby source plugin for fecthing data from strapi server",
  "main": "gatsby-node.js",
  "scripts": {
    "test": "echo \"Error: no test specified\" && exit 1"
  },
  "keywords": [
    "gatsby",
    "pluins",
    "strapi"
  ],
  "author": "denghuiquan <[email protected]>",
  "license": "MIT"
}
开发数据转换插件
transformer插件是要将source插件提供的数据转换为新的数据。例如:gatsby-transformer-xml文件转换插件。
在plugins目录下创建gatsby-transformer-xml文件夹
在该插件目录下创建gatsby-node.js文件
在文件中导出onCreateNode方法用于构建gatsby查询节点
根据节点类型筛选xml节点 node.internal.mediaType 为 application/xml
通过localNodeContent方法读取节点中的数据
通过xml2js 将xml数据转换为对象
将对象转换为gatsby查询节点
安装依赖:
npm install xml2js gatsby-node-helpers
创建根目录下的xml文件夹,并在内部创建book.xml文件:
<?xml version="1.0" encoding="UTF-8"?>
<catalog>
  <book id="bk101">
    <author>Gambardella, Matthew</author>
    <title>XML Developer's Guide</title>
    <genre>Computer</genre>
    <price>44.95</price>
    <publish_date>2000-10-01</publish_date>
    <description>An in-depth look at creating applications
      with XML.</description>
  </book>
  <book id="bk102">
    <author>Ralls, Kim</author>
    <title>Midnight Rain</title>
    <genre>Fantasy</genre>
    <price>5.95</price>
    <publish_date>2000-12-16</publish_date>
    <description>A former architect battles corporate zombies,
      an evil sorceress, and her own childhood to become queen
      of the world.</description>
  </book>
  <book id="bk103">
    <author>Corets, Eva</author>
    <title>Maeve Ascendant</title>
    <genre>Fantasy</genre>
    <price>5.95</price>
    <publish_date>2000-11-17</publish_date>
    <description>After the collapse of a nanotechnology
      society in England, the young survivors lay the
      foundation for a new society.</description>
  </book>
</catalog>
配置项目的gatsby-config.js中的plugins,添加下面的配置内容把xml文件添加到我们的数据层当中:
    {
      resolve: `gatsby-source-filesystem`,
      options: {
        name: 'xml',
        path: `${__dirname}/xml/`
      }
    },
重新运行项目,查询xml数据节点结果如下:
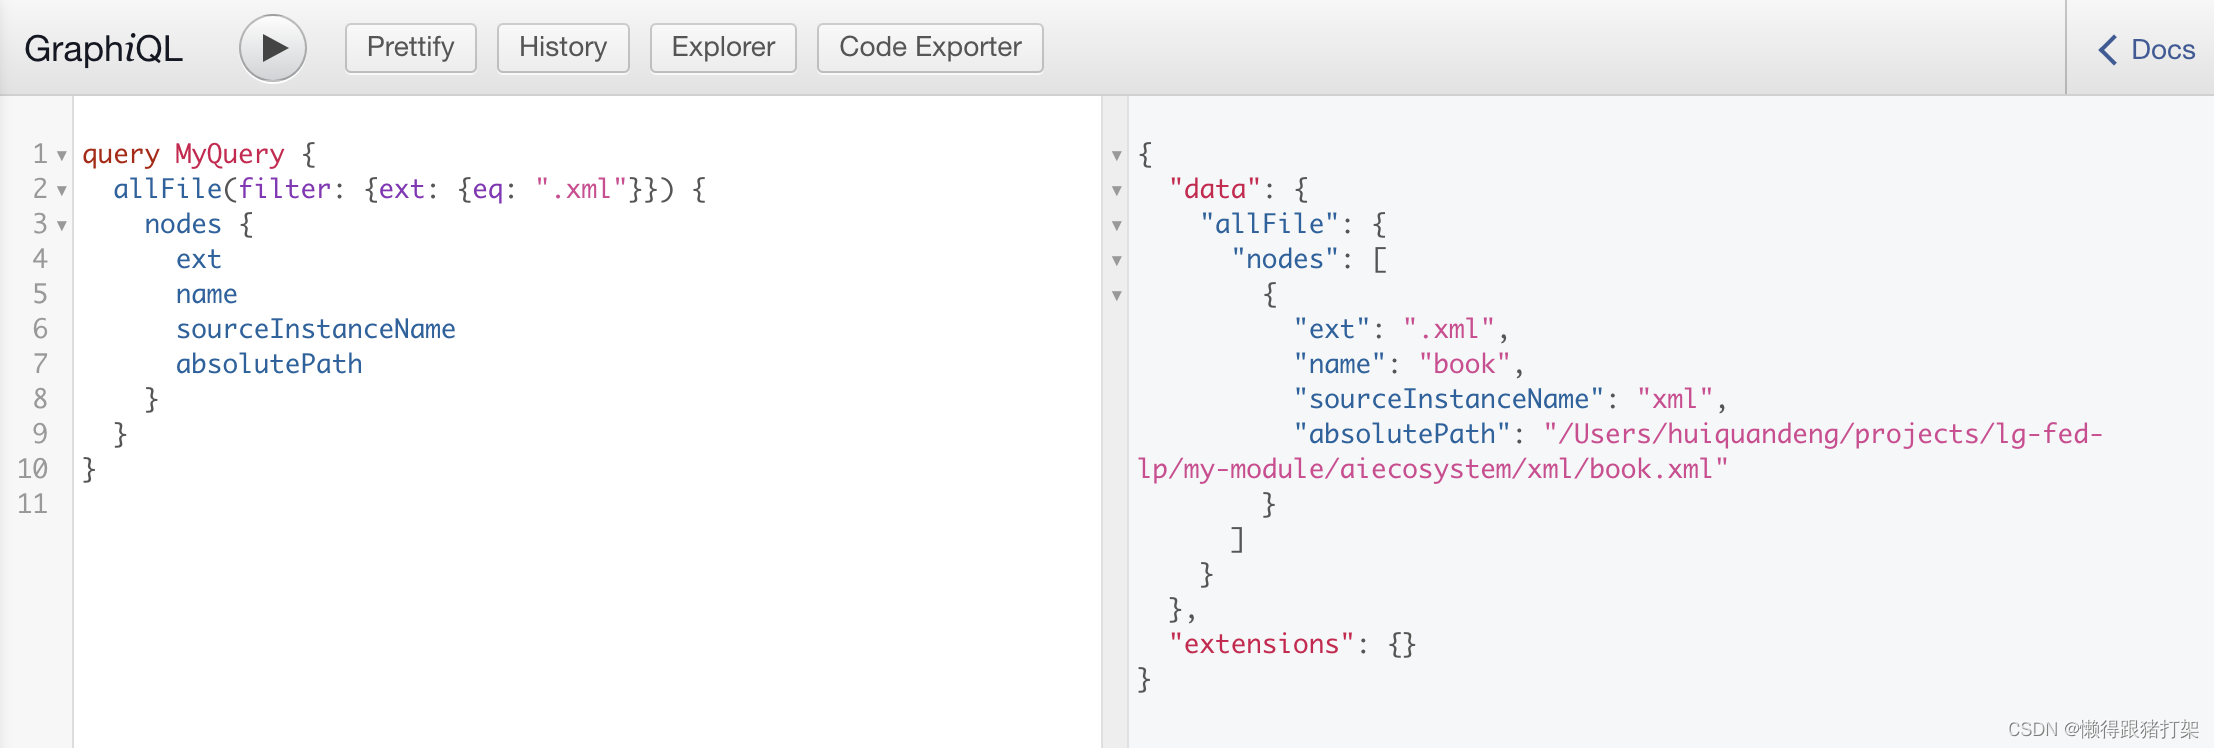
可以看到,我们的xml文件已经被添加到了数据层中。
接下来的工作就是要编写数据转换的插件,把这些xml文件内容读取到并转换为JavaScript对象,存储为新的数据查询节点。
这里同样需要使用到gatsby-node-helpers的方法来辅助创建数据查询节点。
首先创建gatsby-node.js文件:
const { randomUUID } = require('crypto')
const { parseStringPromise } = require('xml2js')
const createNodeHelper = require('gatsby-node-helpers').createNodeHelpers

async function onCreateNode (
  { createNodeId, createContentDigest, node, actions, loadNodeContent },
  configOptions
) {
  const { createNode } = actions
  if (node.internal.mediaType === 'application/xml') {
    const { name } = node
    const content = await loadNodeContent(node)
    const data = await parseStringPromise(content, {
      explicitArray: false,
      explicitRoot: false
    })
    // 1. 构建数据节点对象 allXml
    const { createNodeFactory } = createNodeHelper({
      typePrefix: `Xml${name.replace(/^./, name[0].toUpperCase())}`,
      createNodeId,
      createContentDigest
    })

    // 2. 根据数据节点对象创建节点
    const createNodeObject = createNodeFactory('')
    // Todo: 考虑xml内部组织结构的多样性
    const objs =
      Object.entries(data).length === 1 ? Object.values(data).at(0) : data

    Array.isArray(objs)
      ? objs.forEach(async item => {
          item.id = item.id || item['$']?.id || randomUUID()
          delete item.$
          await createNode(createNodeObject(item))
        })
      : await createNode(createNodeObject(objs))
  }
}

module.exports = {
  onCreateNode
}
在gatsby-config.js配置文件中配置当前创建的插件:gatsby-transformer-xml
require('dotenv').config({
  path: `.env.${process.env.NODE_ENV}`
})
const strapiConfig = {
  apiURL: process.env.STRAPI_API_URL,
  accessToken: process.env.STRAPI_TOKEN,
  singleTypes: ['general'],
  collectionTypes: ['post', 'tag']
  // 这是适合[email protected]的配置
  // collectionTypes2: [
  //   {
  //     name: 'Post',
  //     endpoint: 'api/posts'
  //   },
  //   {
  //     name: 'Tag',
  //     endpoint: 'tags'
  //   }
  // ]
}

/**
 * @type {import('gatsby').GatsbyConfig}
 */
module.exports = {
  siteMetadata: {
    author: 'denghuiquan',
    title: `aiecosystem`,
    siteUrl: `https://www.yourdomain.tld`
  },
  plugins: [
    {
      resolve: `gatsby-source-filesystem`,
      options: {
        name: 'markdown',
        path: `${__dirname}/src/posts/`
      }
    },
    {
      resolve: `gatsby-source-filesystem`,
      options: {
        name: 'json',
        path: `${__dirname}/json/`
      }
    },
    {
      resolve: `gatsby-source-filesystem`,
      options: {
        name: 'xml',
        path: `${__dirname}/xml/`
      }
    },
    {
      resolve: 'gatsby-transformer-remark',
      options: {
        plugins: [
          {
            resolve: `gatsby-remark-images`,
            options: {
              // It's important to specify the maxWidth (in pixels) of
              // the content container as this plugin uses this as the
              // base for generating different widths of each image.
              maxWidth: 800,
              withWebp: true
              // quality: 80
            }
          }
        ]
      }
    },
    'gatsby-plugin-sharp',
    'gatsby-transformer-sharp',
    'gatsby-transformer-json',
    {
      resolve: 'gatsby-source-strapi',
      options: strapiConfig
    },
    {
      resolve: 'gatsby-source-mystrapi',
      options: strapiConfig
    },
    'gatsby-transformer-xml'
  ]
}
重新启动项目,即可看到我们的xml文件在创建文件的数据查询节点时的内容:

gatsby SEO优化
gatsby-plugin-react-helmet 插件
react-helmet是一个组件,用于控制页面元数据,这对于SEO非常重要。
gatsby-plugin-react-helmet 用于将页面元数据添加到Gatsby构建的静态HTML页面中。
安装:
npm install [email protected] react-helmet
创建src/components/HeadSEO.js
import { graphql, useStaticQuery } from 'gatsby'
import React from 'react'
import { Helmet } from 'react-helmet'
export default function HeadSEO ({ title, description, meta, lang }) {
  const { site } = useStaticQuery(graphql`
    query {
      site {
        siteMetadata {
          title
          description
        }
      }
    }
  `)
  return (
    <Helmet
      htmlAttributes={

    { lang }}
      title={title}
      titleTemplate={`%s | ${site.siteMetadata.title}`}
      meta={[
        {
          name: 'description',
          content: description || site.siteMetadata.description
        }
      ].concat(meta)}
    ></Helmet>
  )
}

HeadSEO.defaultProps = {
  title: 'My First Gatsby WebSite',
  description: '一个Gatsby演示项目案例',
  meta: [],
  lang: 'en'
}
在页面上应用:
import { Link } from 'gatsby'
import * as React from 'react'
import HeadSEO from '../components/HeadSEO'

export default function IndexPage ({ data }) {
  return (
    <>
      <HeadSEO title='Index Page' />
      <div>
        <Link to='/list'>Article List</Link>
        <br />
        <Link to='/product'>Product Page</Link>
      </div>
    </>
  )
}
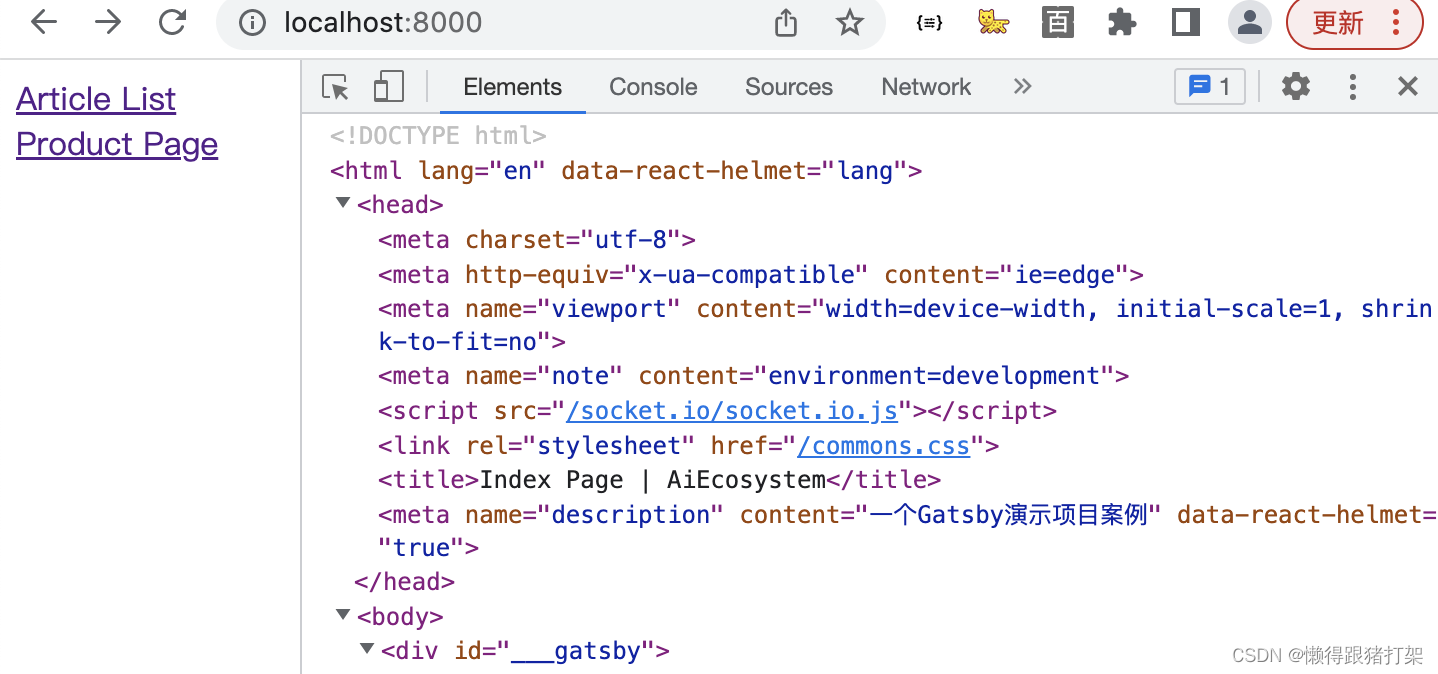
页面HTML结果:
让Gatsby应用支持less
下载插件
npm install [email protected]
配置插件
plugins: ['gatsby-plugin-less']创建样式文件
src/styles/index.module.less
.largeGreen {
color: lightseagreen;
font-weight: bolder;
font-size: x-large;
}
引入样式
import * as styles from '../styles/index.module.less'

// 使用
<Link className={styles.largeGreen} to='/list'>
  Article List
</Link>
<br />
<Link className={styles.largeGreen} to='/product'>
  Product Page
</Link>
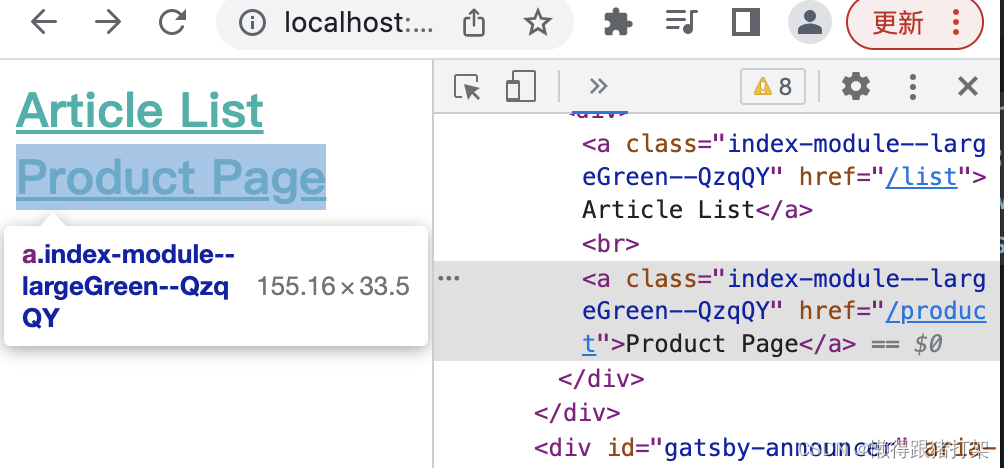
页面效果
