一、uni-app 介绍
使用uniCloud,可以自己一个人把小程序的前后端开发都搞定。不用买域名、不用买云服务器。最关键的是当小程序访问量小的时候,在后端服务器相关的资源是免费的。
二、uni-app(uniCloud)使用
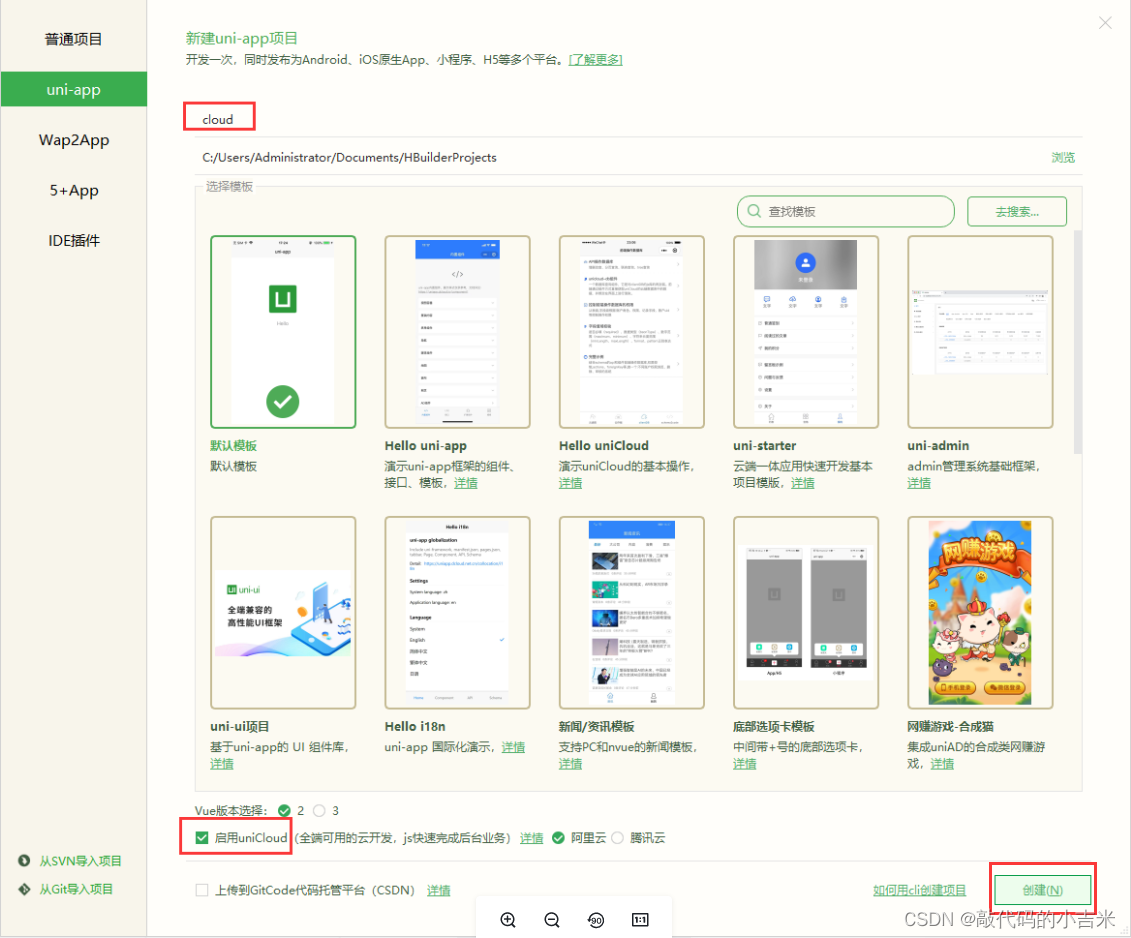
1. 创建uniCloud项目
2. 创建云服务空间
2.1 关联云空间
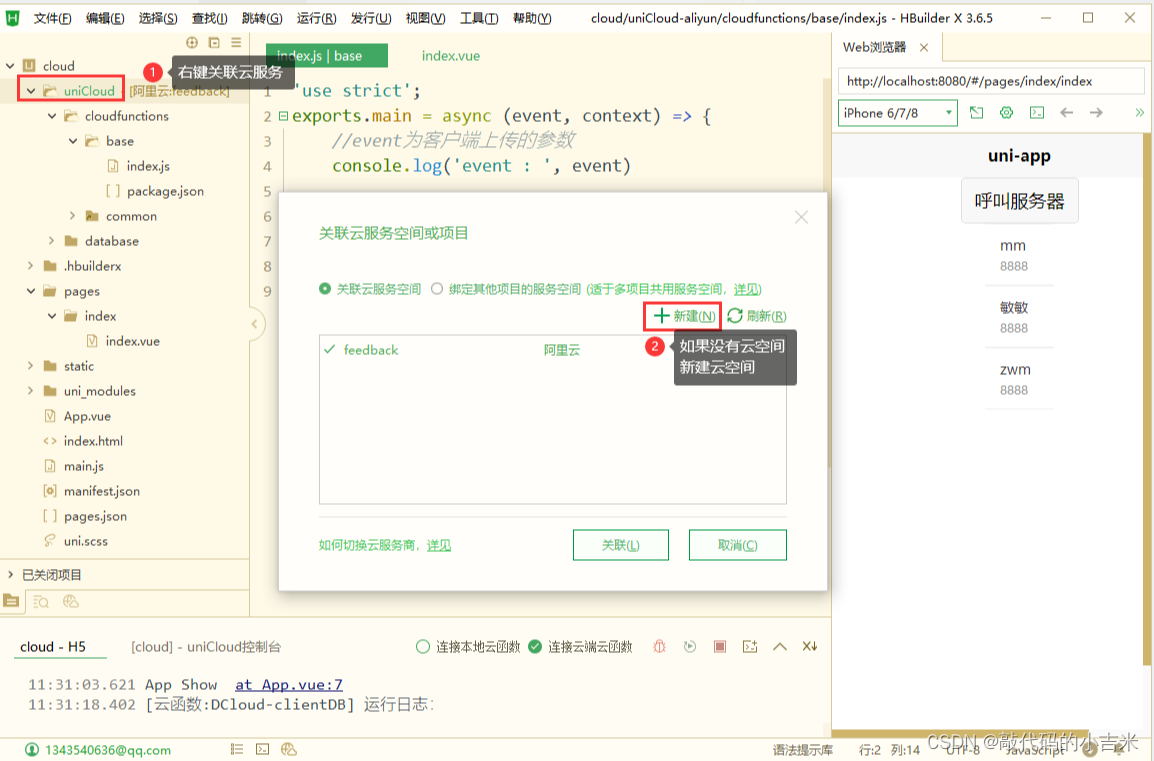
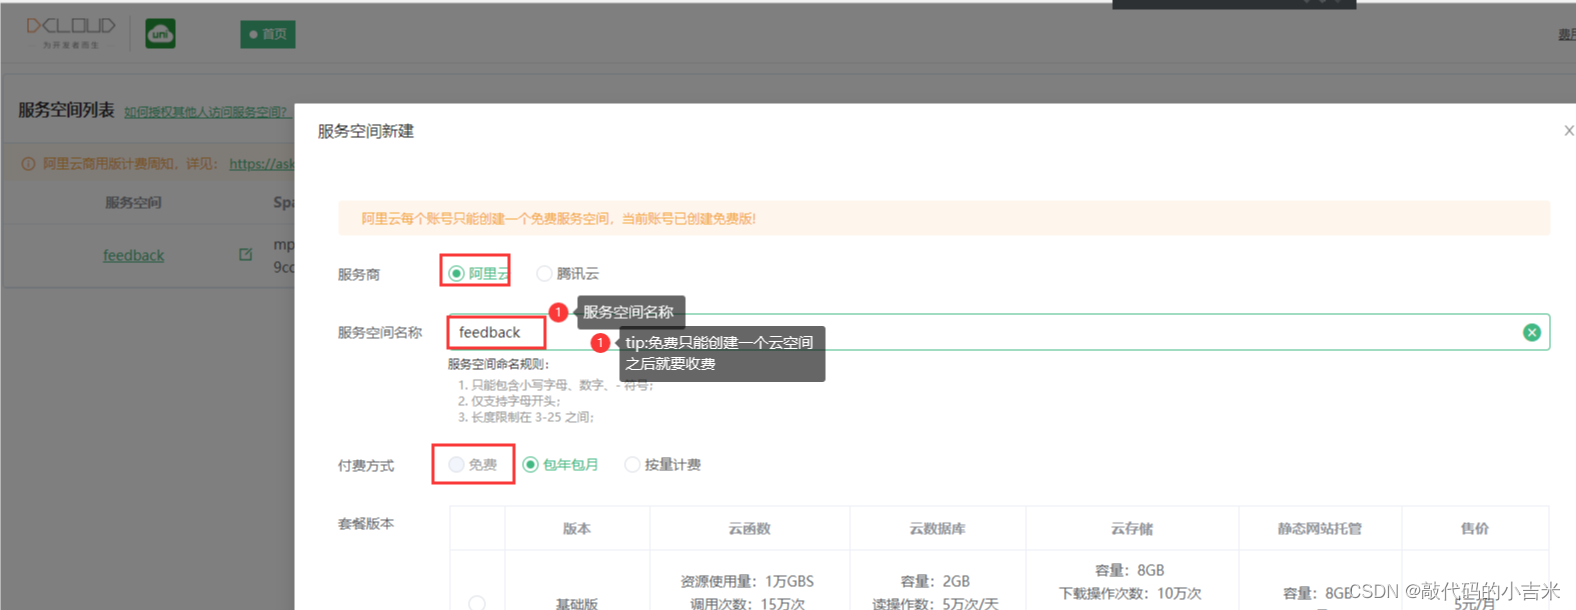
2.2 新建云空间
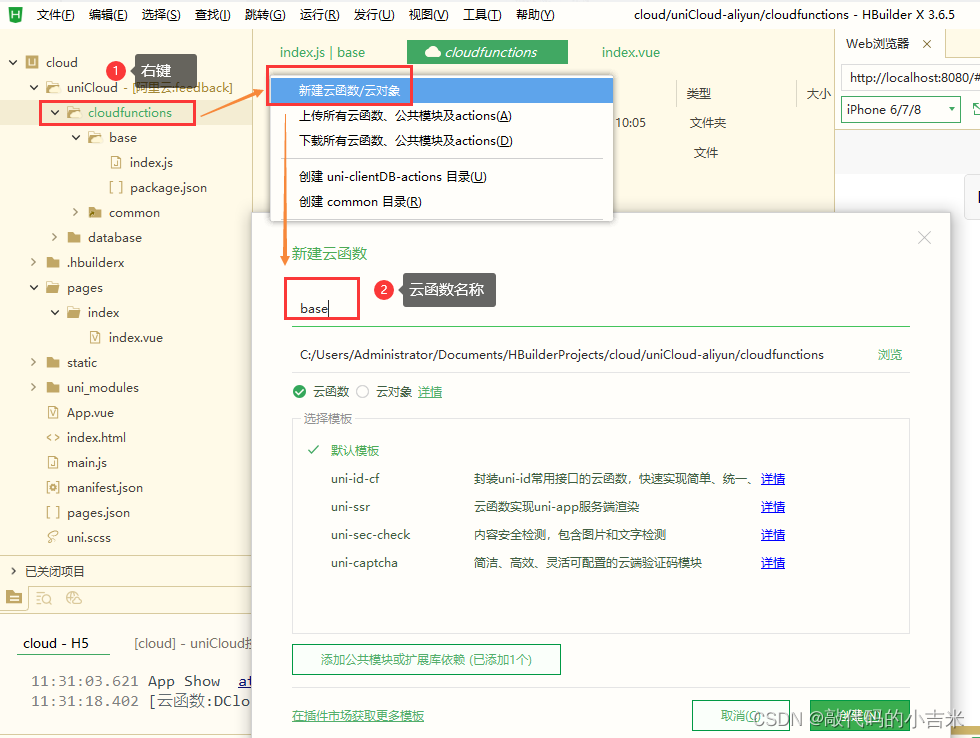
3. 云函数
3.1 创建云函数
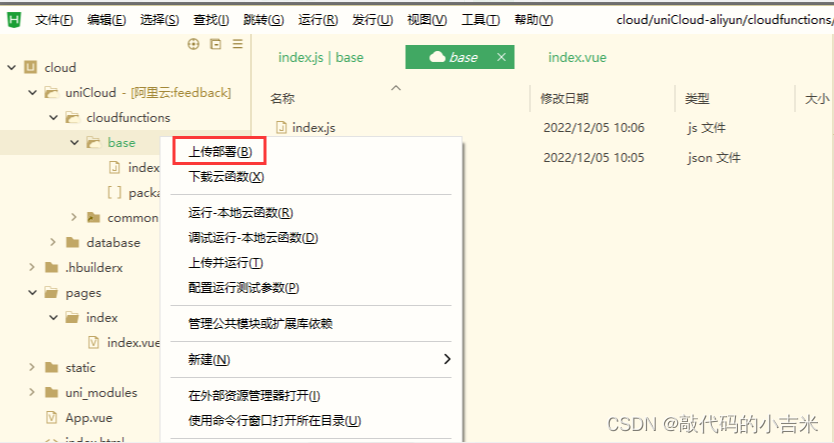
3.1.2 上传云函数
3.2 页面调用
在methods

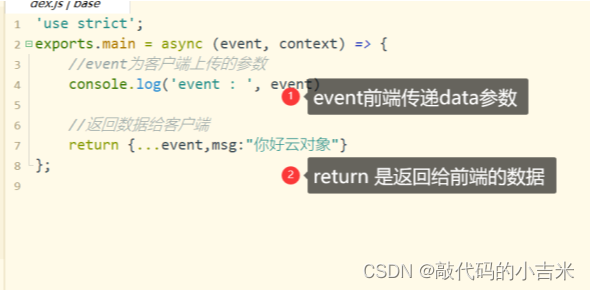
3.3 云函数编写
云函数index.js
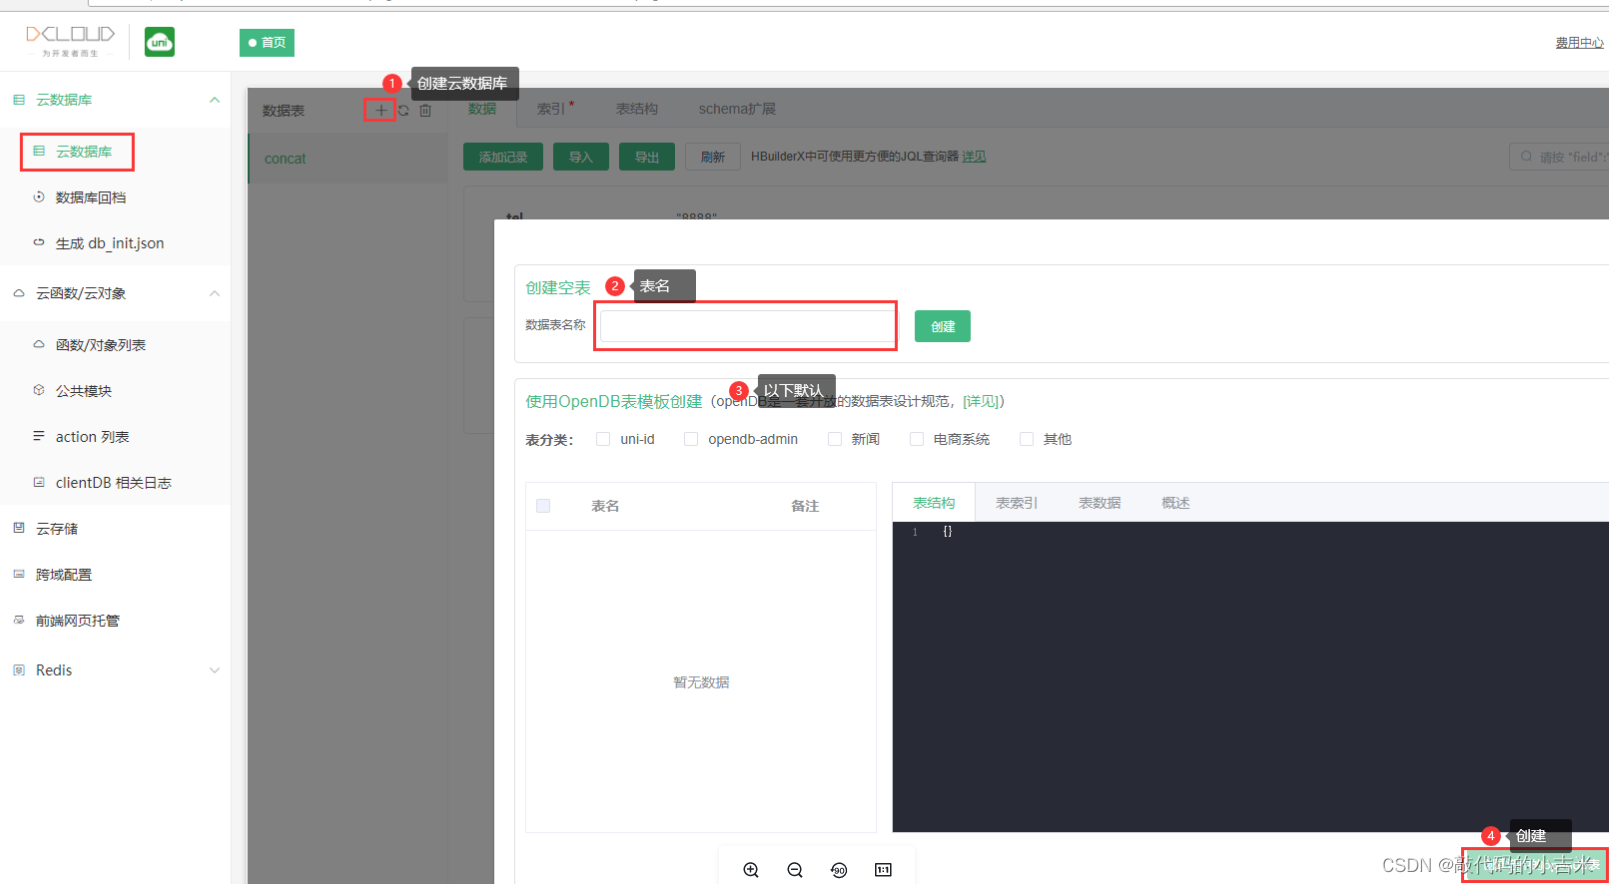
4. 云数据库
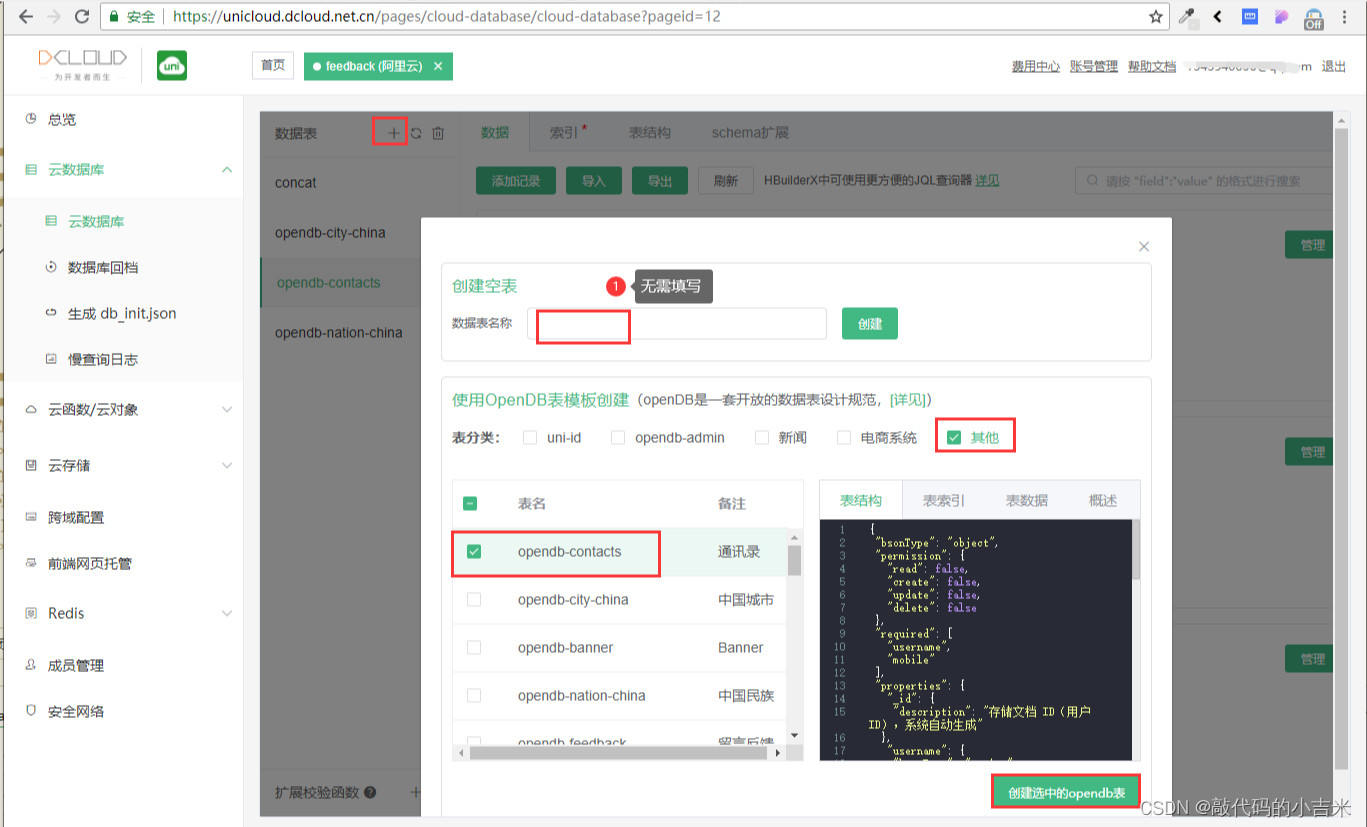
4.1 创建云数据
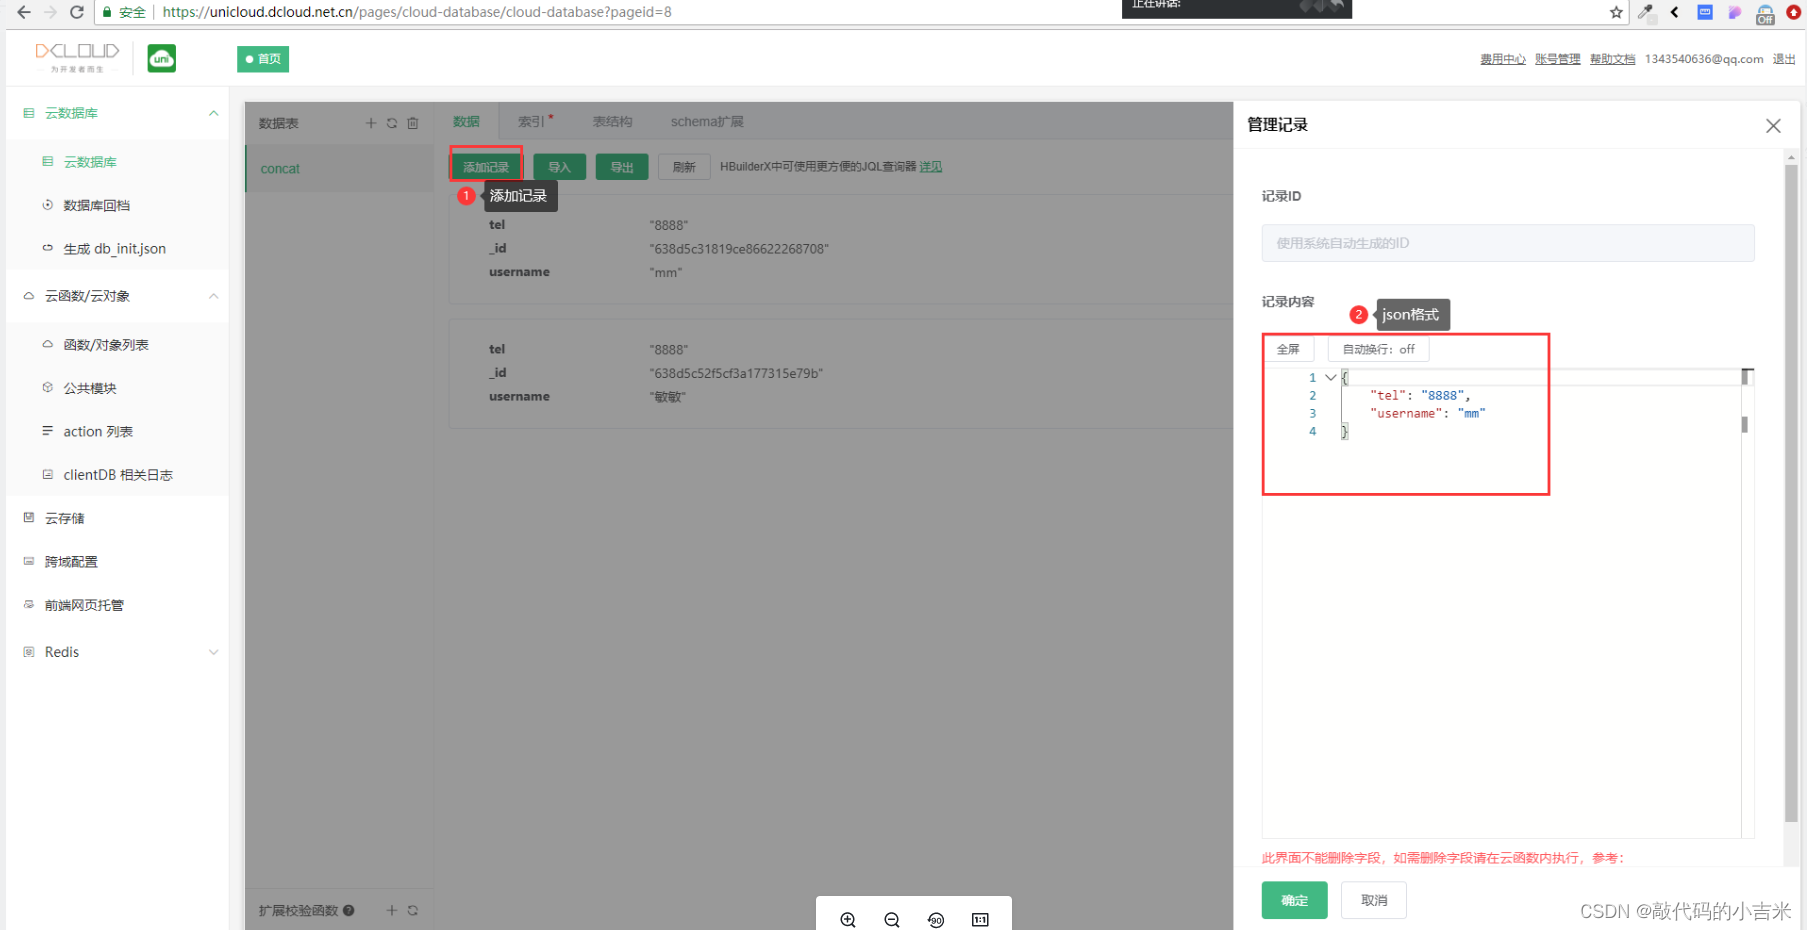
4.2 添加云数据
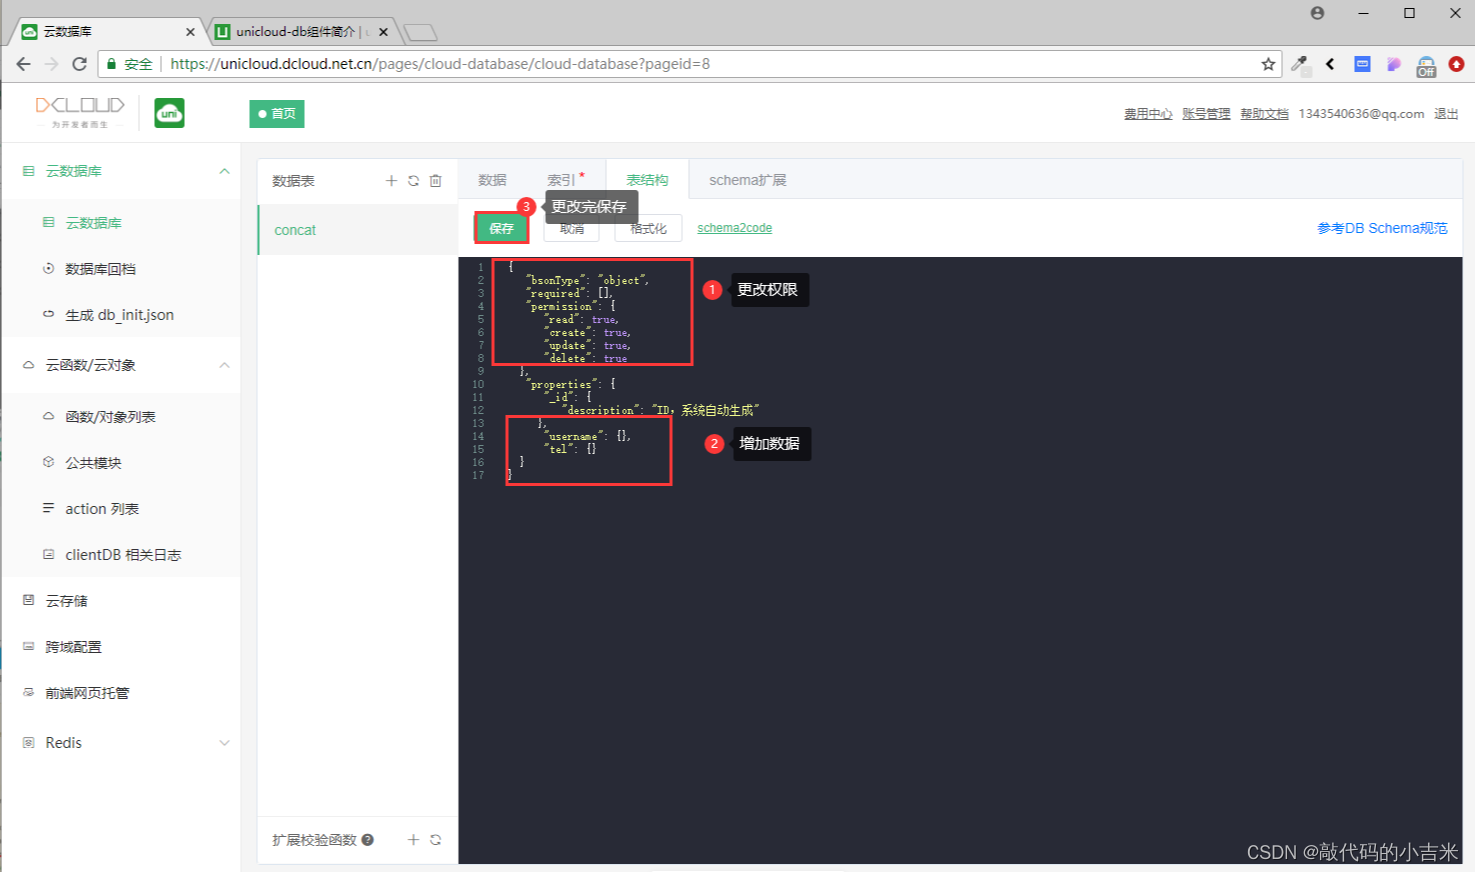
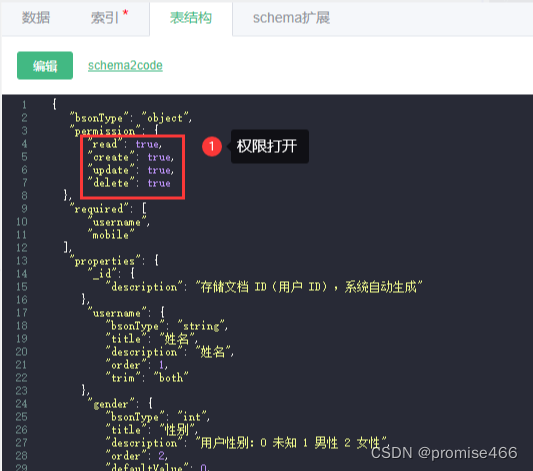
4.3 云数据–表结构介绍
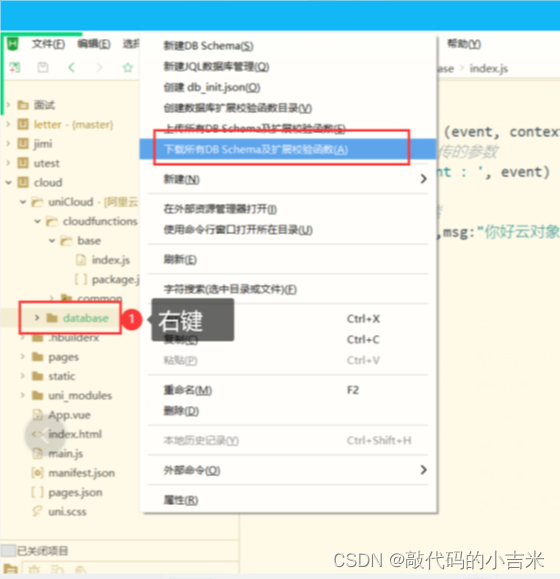
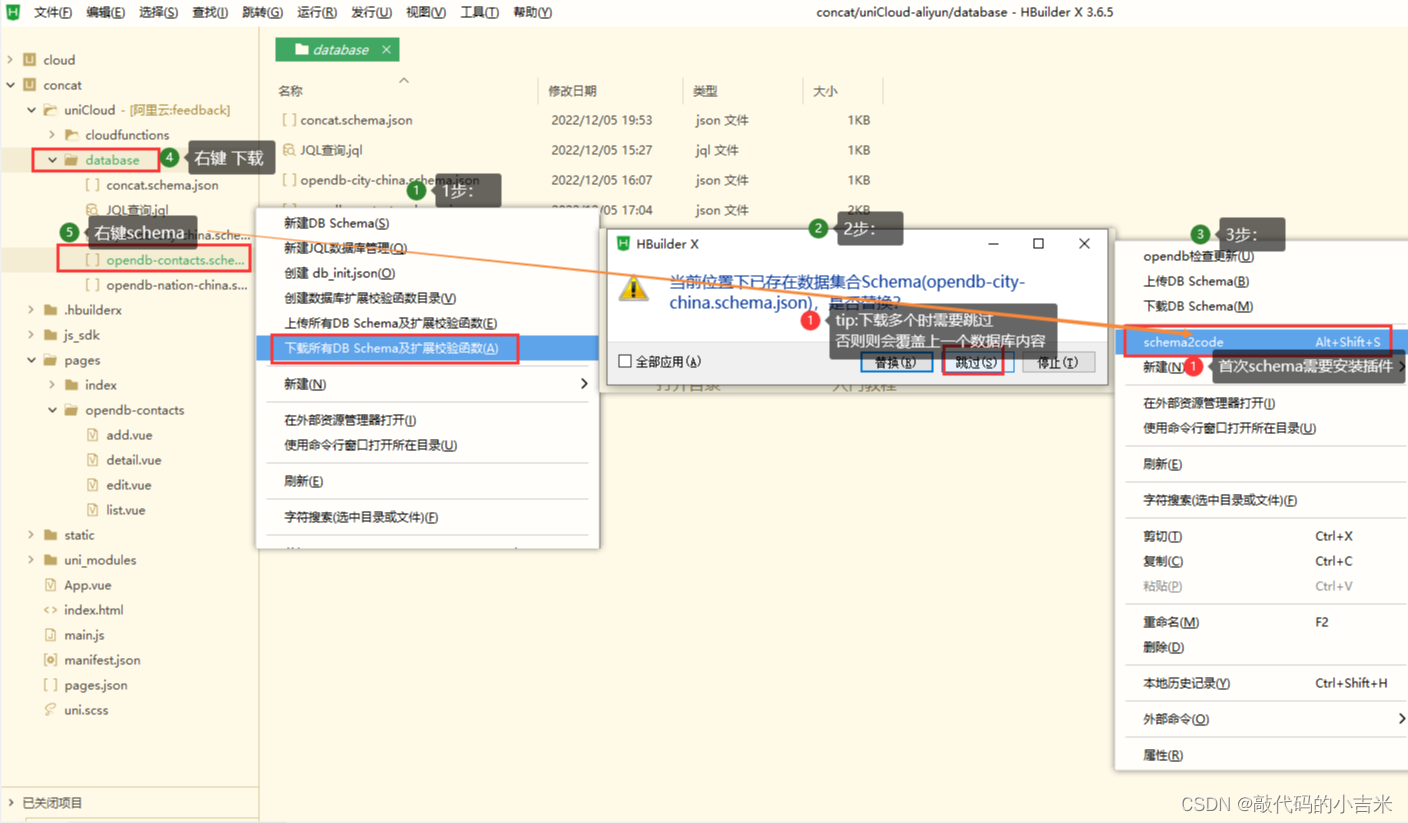
4.4 下载表结构(需要时下载)
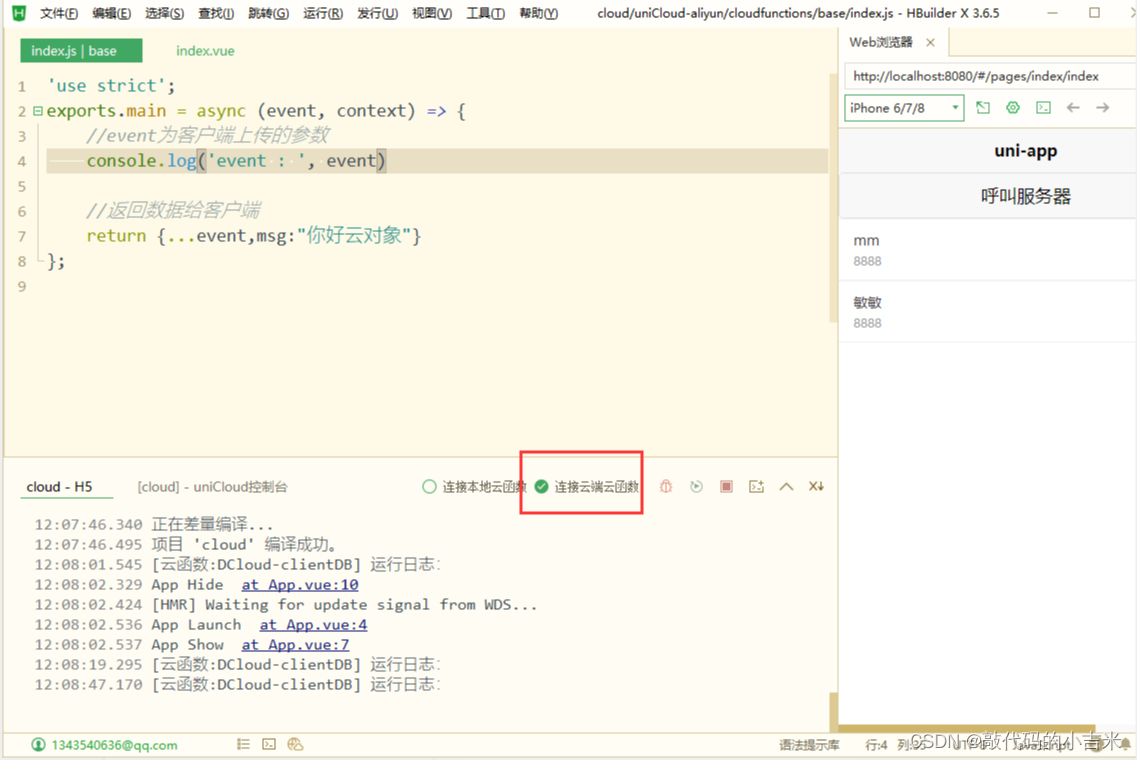
4.5 运行项目
tip:连接云函数
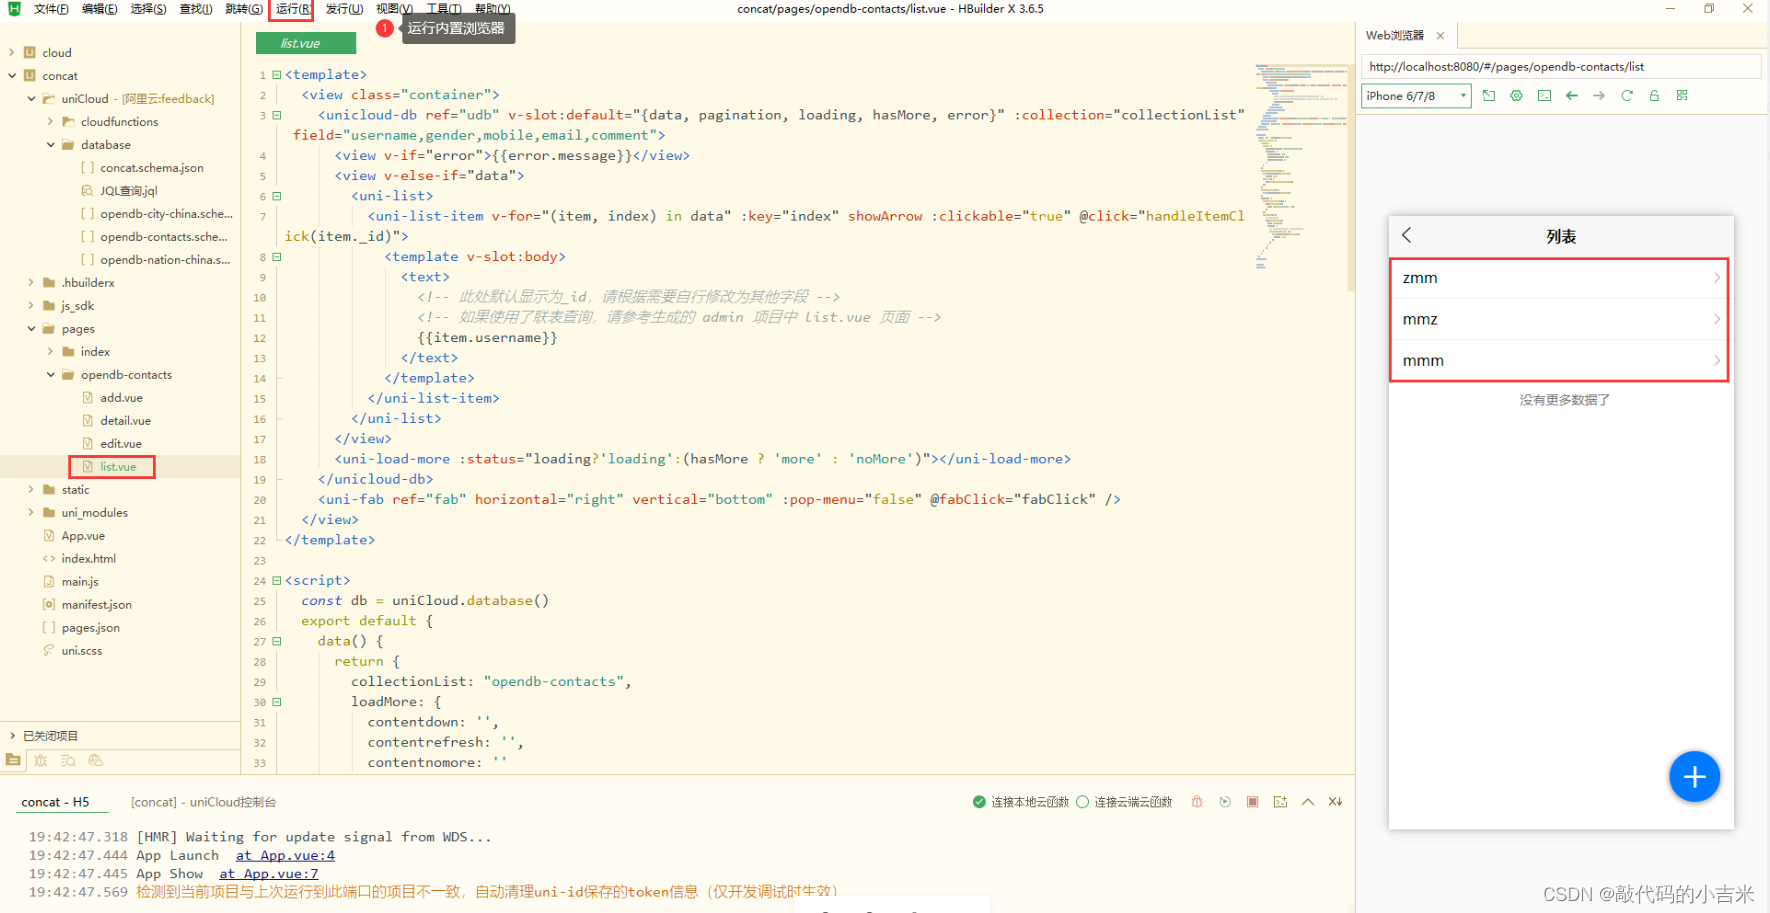
4.6 展示数据(前端)
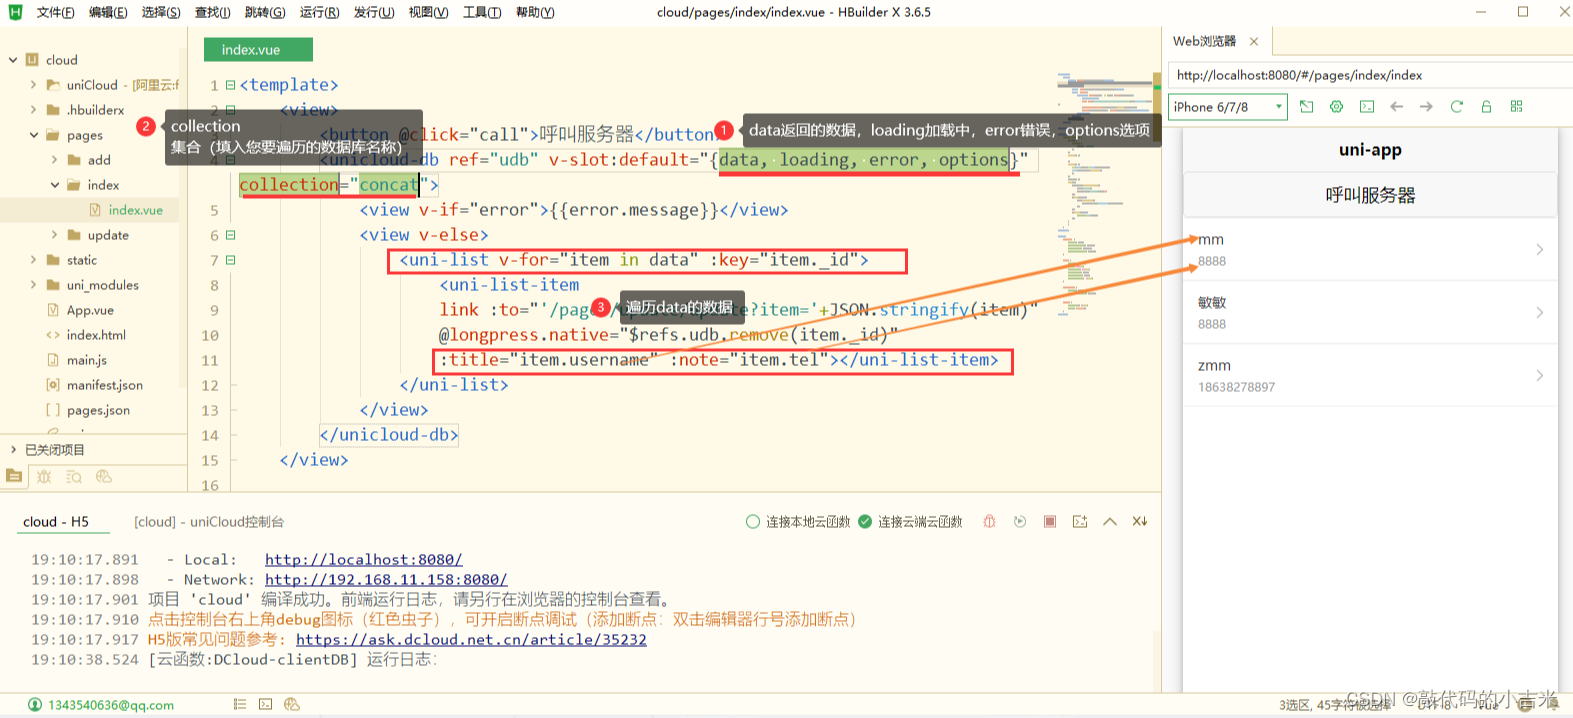
代码
<template>
	<view>
		<button @click="call">呼叫服务器</button>
		<unicloud-db v-slot:default="{data, loading, error, options}" collection="concat">
			<view v-if="error">{

   {error.message}}</view>
			<view v-else>
				<uni-list v-for="item in data" :key="item._id">
					<uni-list-item
					:title="item.username" :note="item.tel"></uni-list-item>
				</uni-list>
			</view>
		</unicloud-db>
	</view>

</template>

<script>
	export default {


		data() {


			return {


				title: 'Hello'
			}
		},
		onLoad() {


		},
		onShow() {


			if(this.$refs&&this.$refs.udb){


			this.$refs.udb.$refresh()
			}
		},
		methods: {


		call(){


			uniCloud.callFunction({


				name:"base",
				data:{

      name:"mumu",age:18}
			})
			.then(res=>{


				uni.showModal({


					content:JSON.stringify(res.result)
				})
			})
			.catch(err=>{


				console.log(err);
			})
		}
		}
	}
</script>

<style>
	.content {


		display: flex;
		flex-direction: column;
		align-items: center;
		justify-content: center;
	}

	.logo {


		height: 200rpx;
		width: 200rpx;
		margin-top: 200rpx;
		margin-left: auto;
		margin-right: auto;
		margin-bottom: 50rpx;
	}

	.text-area {


		display: flex;
		justify-content: center;
	}

	.title {


		font-size: 36rpx;
		color: #8f8f94;
	}
</style>
5. 云数据 增、删、改
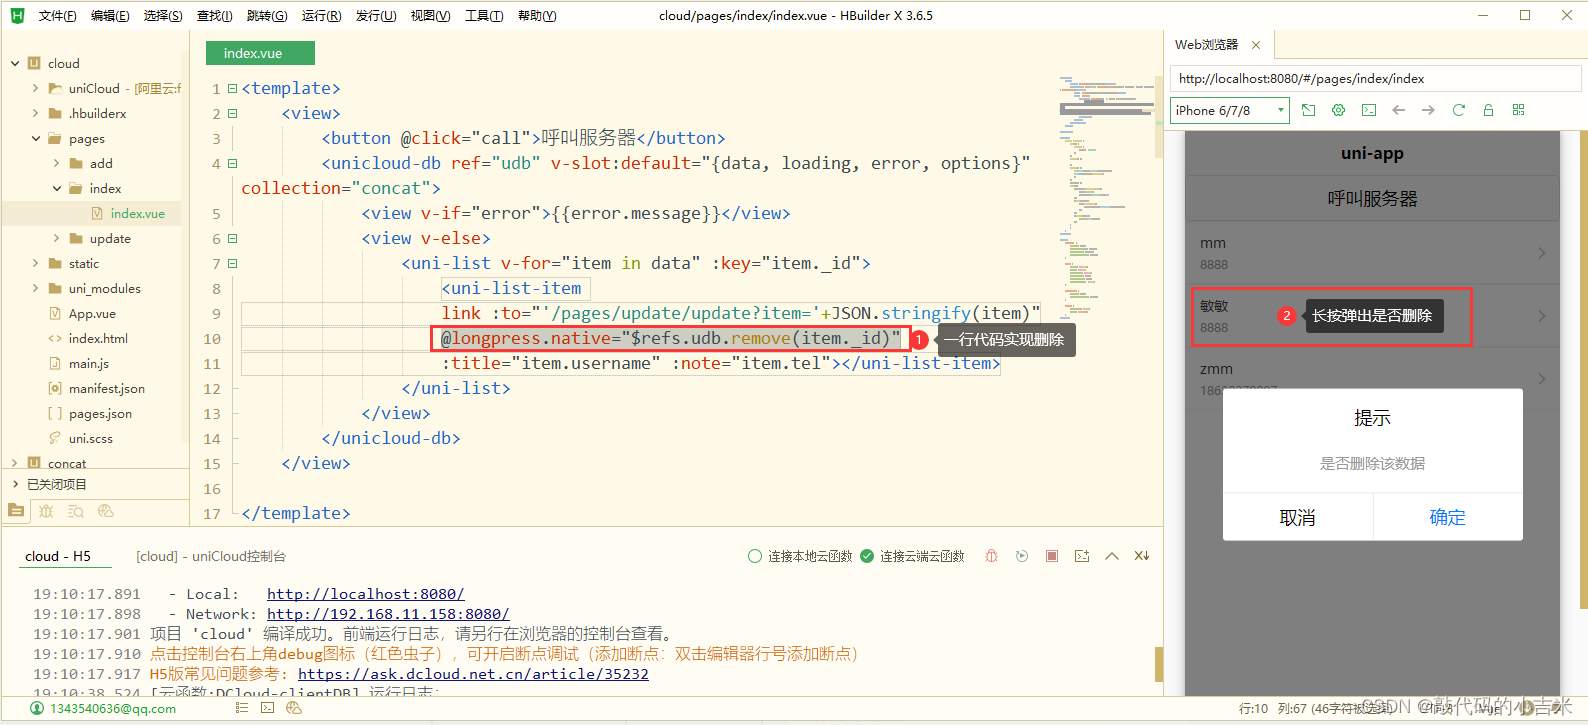
5.1 删除云数据
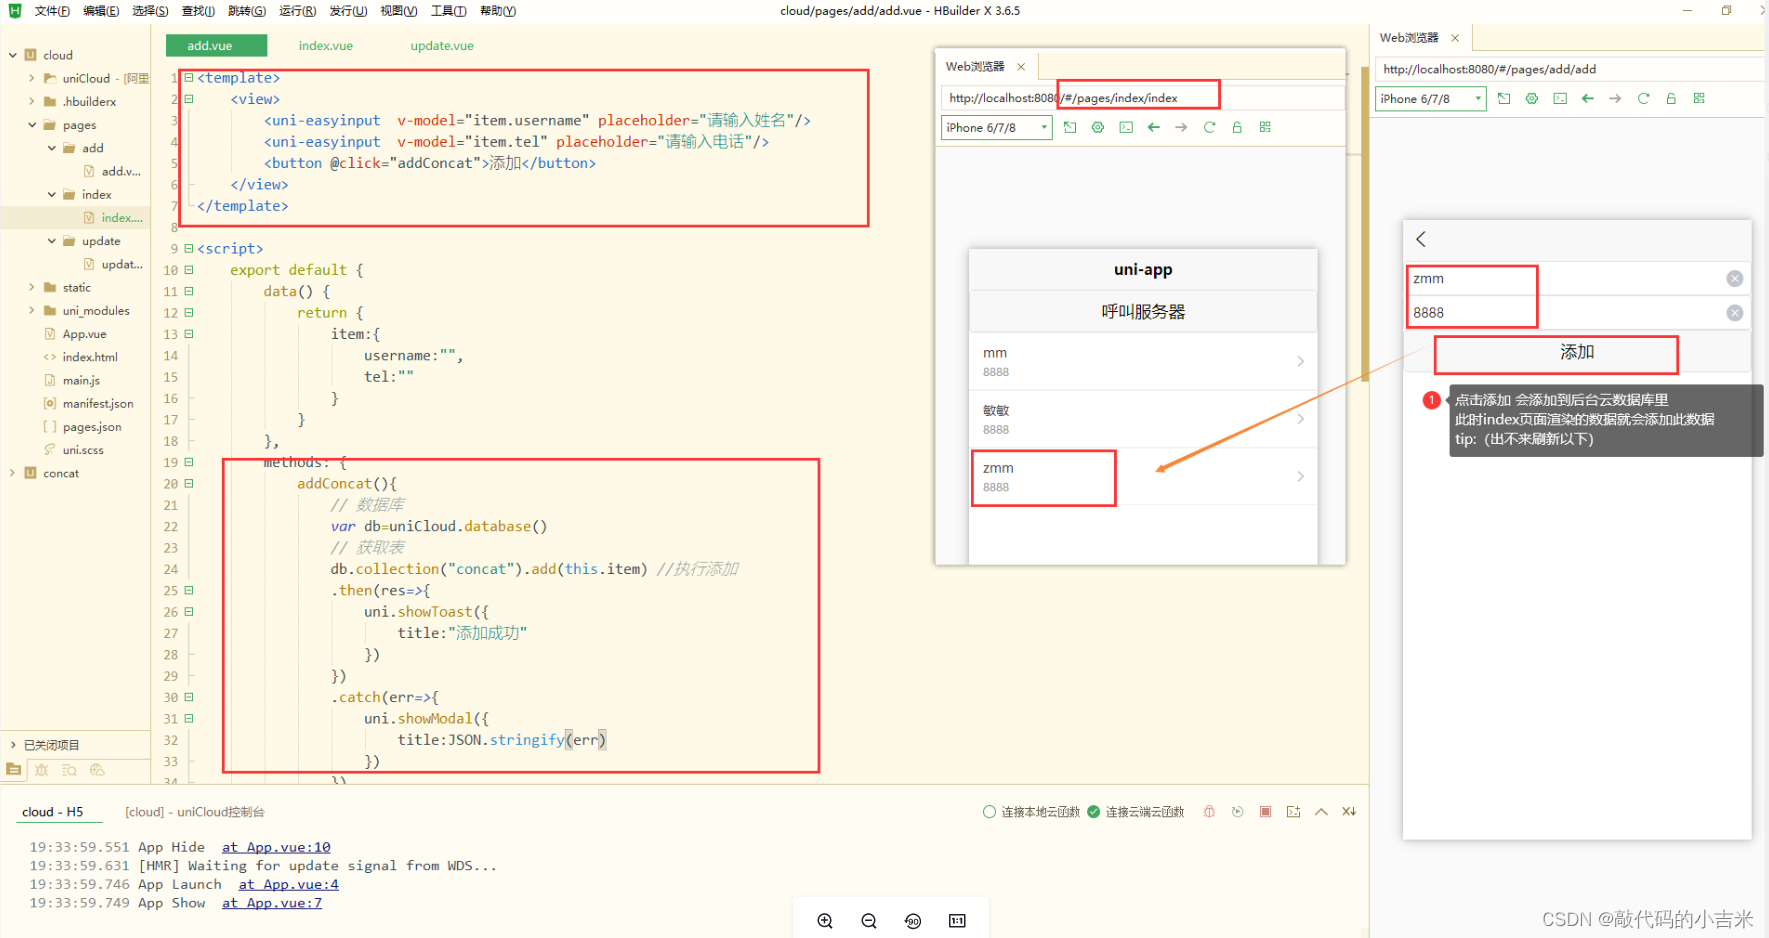
5.2 增加云数据
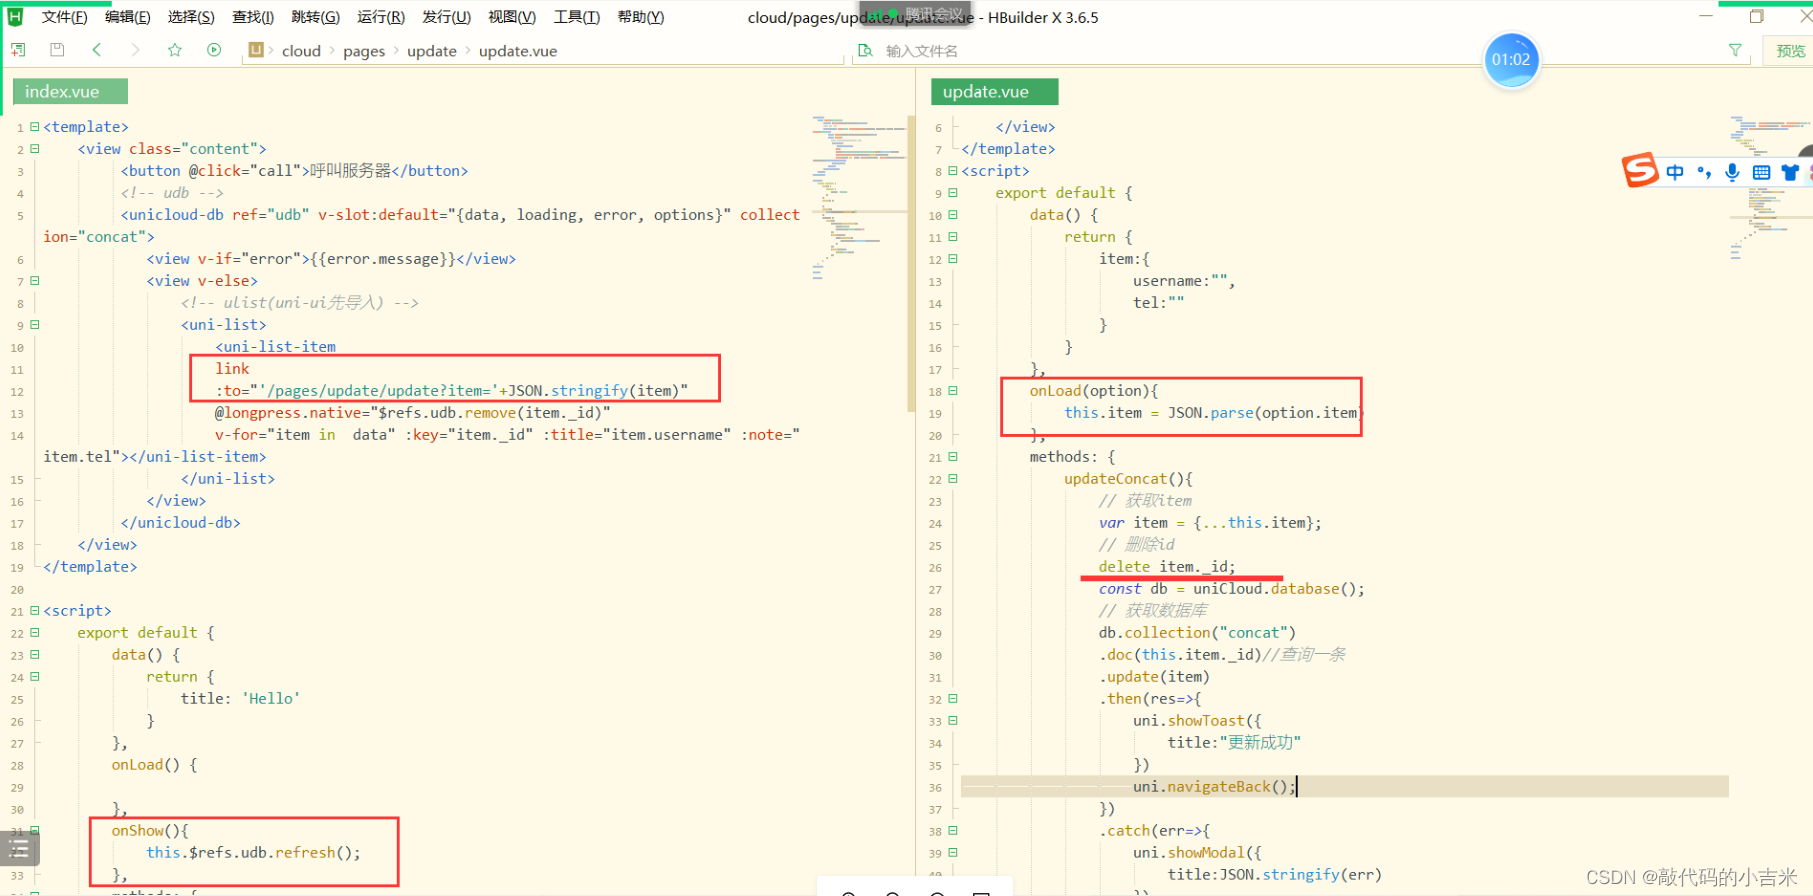
5.3 修改云数据
index 代码(删除)
<template>
	<view>
		<button @click="call">呼叫服务器</button>
		<unicloud-db ref="udb" v-slot:default="{data, loading, error, options}" collection="concat">
			<view v-if="error">{

   {error.message}}</view>
			<view v-else>
				<uni-list v-for="item in data" :key="item._id">
					<uni-list-item
					link :to="'/pages/update/update?item='+JSON.stringify(item)"
					@longpress.native="$refs.udb.remove(item._id)"
					:title="item.username" :note="item.tel"></uni-list-item>
				</uni-list>
			</view>
		</unicloud-db>
	</view>

</template>

<script>
	export default {


		data() {


			return {


				title: 'Hello'
			}
		},
		onLoad() {


		},
		onShow() {


			if(this.$refs&&this.$refs.udb){


			this.$refs.udb.$refresh()
			}
		},
		methods: {


		call(){


			uniCloud.callFunction({


				name:"base",
				data:{

      name:"mumu",age:18}
			})
			.then(res=>{


				uni.showModal({


					content:JSON.stringify(res.result)
				})
			})
			.catch(err=>{


				console.log(err);
			})
		}
		}
	}
</script>

<style>
	.content {


		display: flex;
		flex-direction: column;
		align-items: center;
		justify-content: center;
	}

	.logo {


		height: 200rpx;
		width: 200rpx;
		margin-top: 200rpx;
		margin-left: auto;
		margin-right: auto;
		margin-bottom: 50rpx;
	}

	.text-area {


		display: flex;
		justify-content: center;
	}

	.title {


		font-size: 36rpx;
		color: #8f8f94;
	}
</style>
添加代码
<template>
	<view>
		<uni-easyinput  v-model="item.username" placeholder="请输入姓名"/>
		<uni-easyinput  v-model="item.tel" placeholder="请输入电话"/>
		<button @click="addConcat">添加</button>
	</view>
</template>

<script>
	export default {


		data() {


			return {


				item:{


					username:"",
					tel:""
				}
			}
		},
		methods: {


			addConcat(){


				// 数据库
				var db=uniCloud.database()
				// 获取表
				db.collection("concat").add(this.item) //执行添加
				.then(res=>{


					uni.showToast({


						title:"添加成功"
					})
				})
				.catch(err=>{


					uni.showModal({


						title:JSON.stringify(err)
					})
				})
			}
		}
	}
</script>

<style>

</style>
修改代码
<template>
	<view>
		<uni-easyinput  v-model="item.username" placeholder="请输入姓名"/>
		<uni-easyinput  v-model="item.tel" placeholder="请输入电话"/>
		<button @click="updateConcat">更新</button>
	</view>
</template>

<script>
	export default {


		data() {


			return {


				item:{


					username:"",
					tel:""
				}
			}
		},
		methods: {


			updateConcat(){


				var item={

      ...this.item}
				// 删除id
				delete item._id
				const db=uniCloud.database()
				db.collection("concat")
				.doc(this.item._id)
				.update(item)
				.then(res=>{


					uni.showToast({


						title:"更新成功"
					})
				})
				.catch(err=>{


					uni.showModal({


					title:JSON.stringify(err)
					})
				})
			}
		},
		onLoad(option) {


			this.item=JSON.parse(option.item)
		}
	}
</script>

<style>

</style>
6. schema自动生成代码
6.1 创建云数据
6.2 下载 并 依赖schema合并
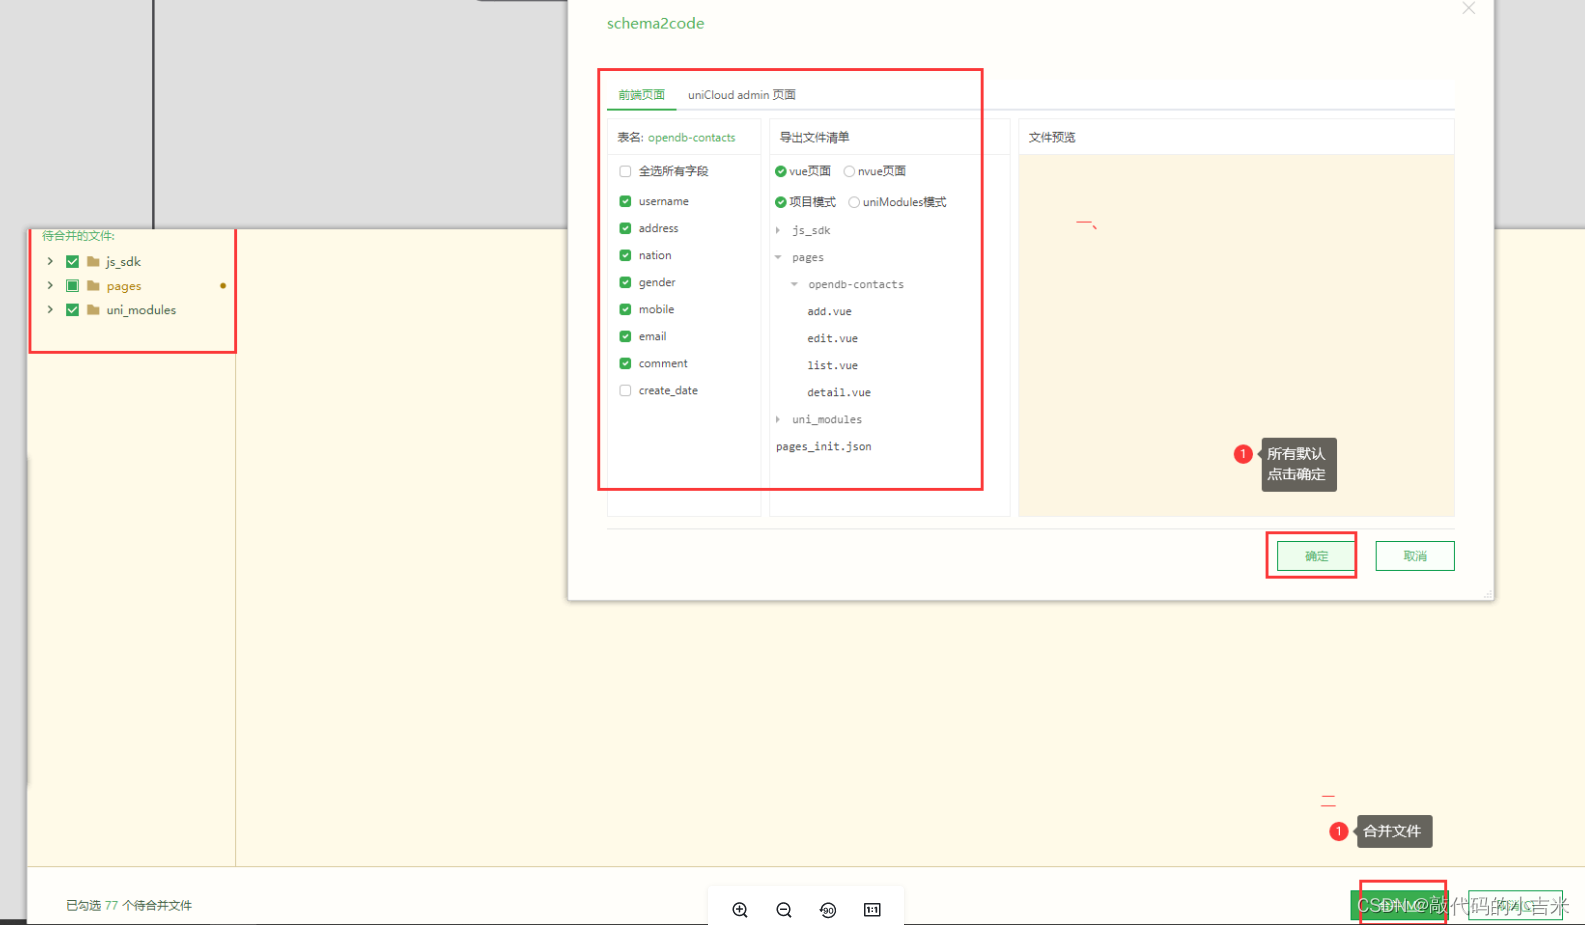
6.3 运行