目录
拉取指定版本的kettle源码与配置其启动环境
拉取kettle源码需要配置指定的maven环境(否则很多依赖都下载不了),具体的setting文件可以在官网下载(右键另存为就行,然后在idea中的maven配置中把setting文件更换为这个刚刚保存的文件):https://raw.githubusercontent.com/pentaho/maven-parent-poms/master/maven-support-files/settings.xml
这个文件的内容如下,下面的是把链接中的内容复制过来的:
<?xml version="1.0" encoding="UTF-8"?>
<settings xmlns="http://maven.apache.org/SETTINGS/1.0.0"
  xmlns:xsi="http://www.w3.org/2001/XMLSchema-instance"
  xsi:schemaLocation="http://maven.apache.org/SETTINGS/1.0.0 http://maven.apache.org/xsd/settings-1.0.0.xsd">
 <localRepository>D:\repo</localRepository>  <!-- 这个是自己的maven本地仓库 -->
  <!-- This is the recommended settings.xml for development of Hitachi Vantara projects. -->

  <!--
  If your wish to mirror everything through pentaho-public's repo uncomment bellow. Not recommended
  for external developers.
  -->
  <!--
  <mirrors>
    <mirror>
      <id>pentaho-public</id>
      <url>https://repo.orl.eng.hitachivantara.com/artifactory/pnt-mvn/</url>
      <mirrorOf>*</mirrorOf>
    </mirror>
  </mirrors>
  -->

  <!--
  Don't forget to add setting-security.xml so that the password get's decrypted
  -->
  <servers>
    <server>
      <id>pentaho-public</id>
      <username>devreaduser</username>
      <password>{zIMyJWfHKfoHiBJAVsAgW4E5BcJzR+nhTtgPy0J+/rs=}</password>
    </server>
  </servers>

  <!--
  You might want to tweak the 'updatePolicy' configuration to fit your need on having updated snapshots and
  releases. Our recommendation is to set it to 'never' and run maven with the '-U' flag when needed.
  -->
  <profiles>
    <profile>
      <id>pentaho</id>
      <activation>
        <activeByDefault>true</activeByDefault>
      </activation>
      <repositories>
        <repository>
          <id>pentaho-public</id>
          <name>Pentaho Public</name>
          <url>https://repo.orl.eng.hitachivantara.com/artifactory/pnt-mvn/</url>
          <releases>
            <enabled>true</enabled>
            <updatePolicy>always</updatePolicy>
          </releases>
          <snapshots>
            <enabled>true</enabled>
            <updatePolicy>always</updatePolicy>
          </snapshots>
        </repository>
      </repositories>
      <pluginRepositories>
        <pluginRepository>
          <id>pentaho-public</id>
          <name>Pentaho Public</name>
          <url>https://repo.orl.eng.hitachivantara.com/artifactory/pnt-mvn/</url>
          <releases>
            <enabled>true</enabled>
            <updatePolicy>always</updatePolicy>
          </releases>
          <snapshots>
            <enabled>true</enabled>
            <updatePolicy>always</updatePolicy>
          </snapshots>
        </pluginRepository>
      </pluginRepositories>
    </profile>
  </profiles>

  <!-- this lets you call plugins from these groups in their short form -->
  <pluginGroups>
    <pluginGroup>org.pentaho.maven.plugins</pluginGroup>
    <pluginGroup>com.pentaho.maven.plugins</pluginGroup>
    <pluginGroup>com.github.spotbugs</pluginGroup>
  </pluginGroups>
</settings>特别注意:从远程的仓库拉取代码的时候,一定要注意拉取的源码版本,可以使用命令行的git方式来完成仓库代码的获取,这样可以指定版本。
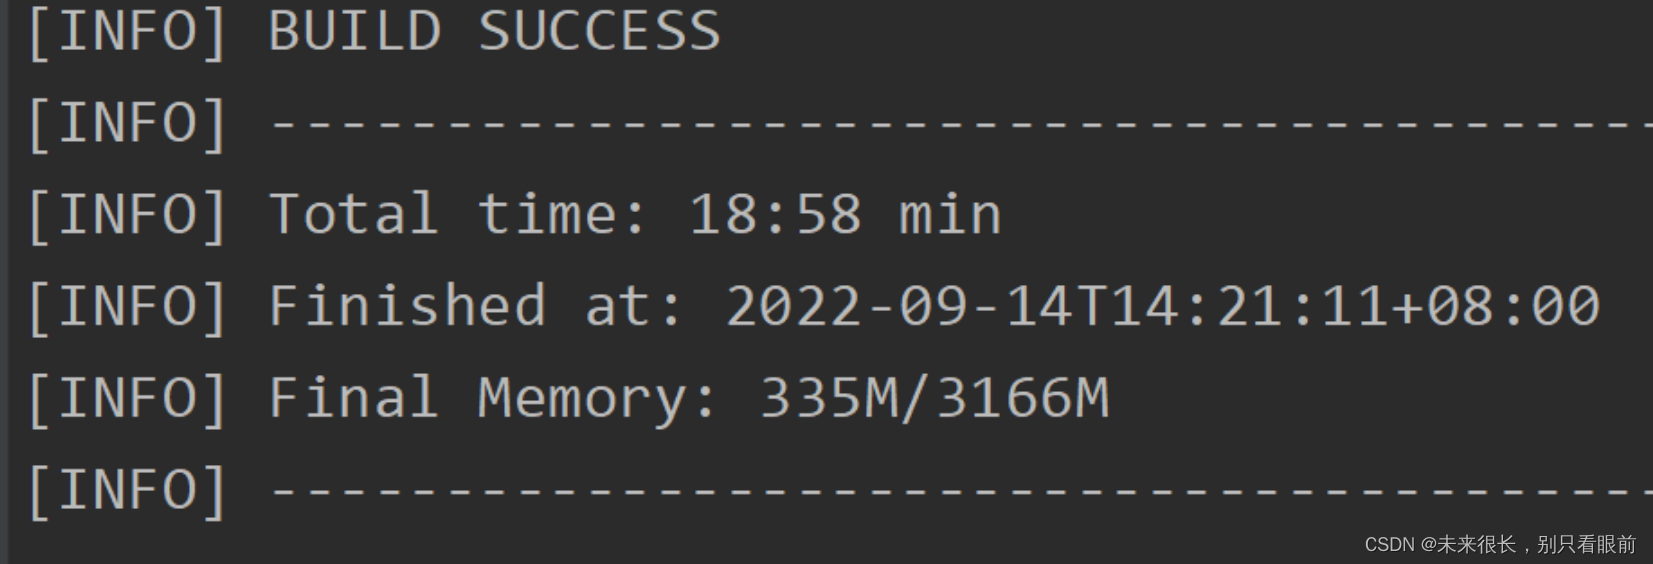
git clone -b 8.3 https://github.com/pentaho/pentaho-kettle.git这个拉取的过程网速是非常慢的,即便开了境外加速,还是会时不时的卡住,我这里18分钟已经是算快的了,拉取下载依赖个把小时都是非常正常的。
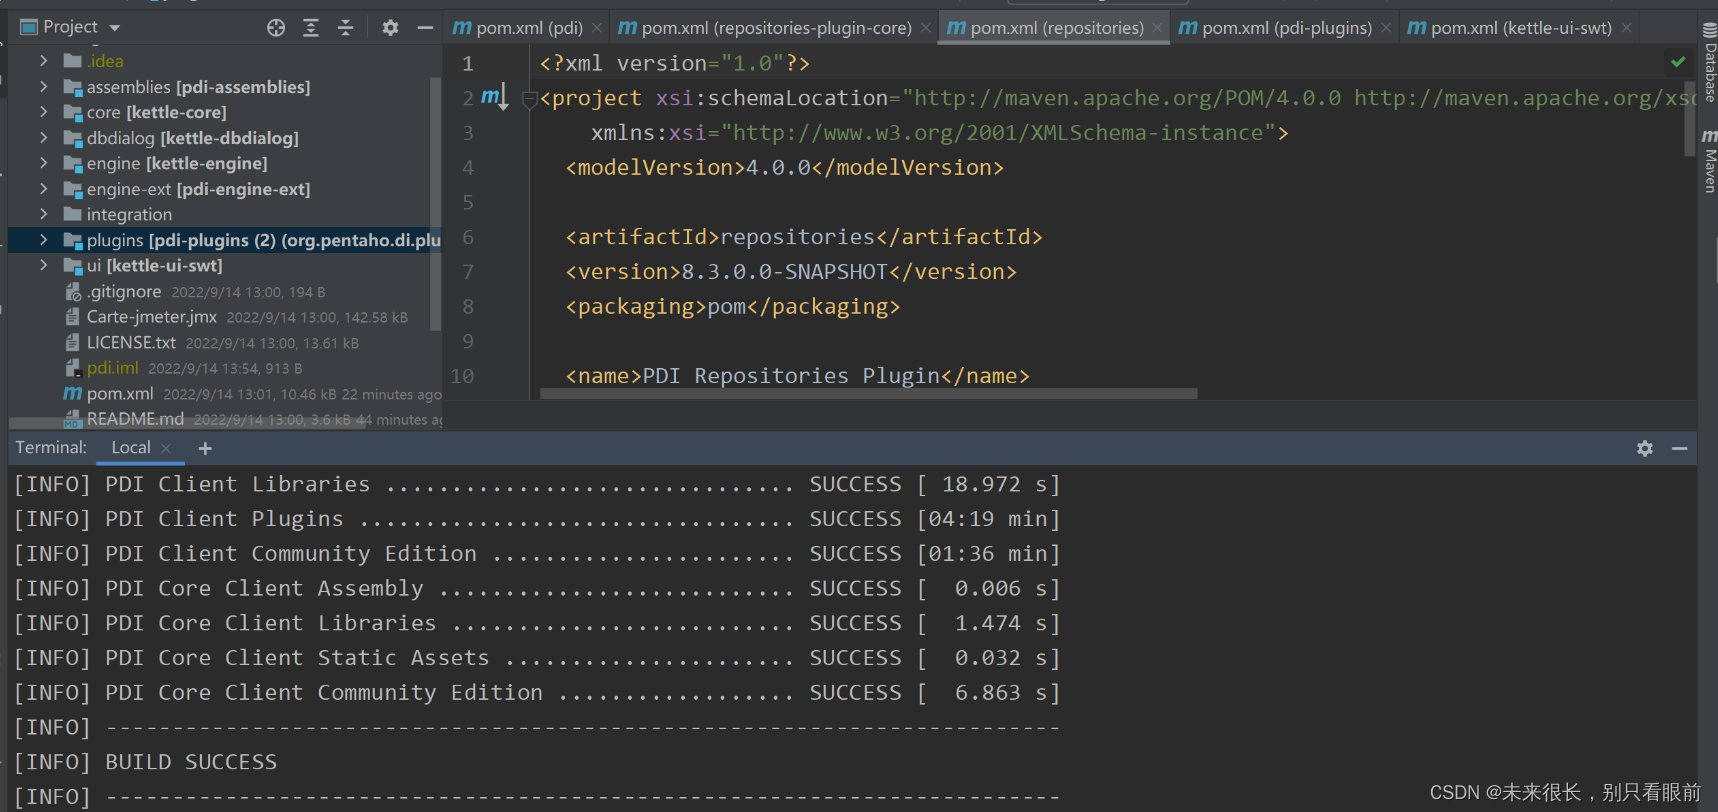
编译之后的文件在下面的路径:
注意:可能每个人的报错都不一样,与编辑工具和系统有很大的关系。
先对运行的程序进行设置一下:在打开的【Run/Debug Configurations】窗口中进行以下设置:
-Djava.ext.dirs="lib"
修改后的spoon程序配置:(按照下面的修改就行)
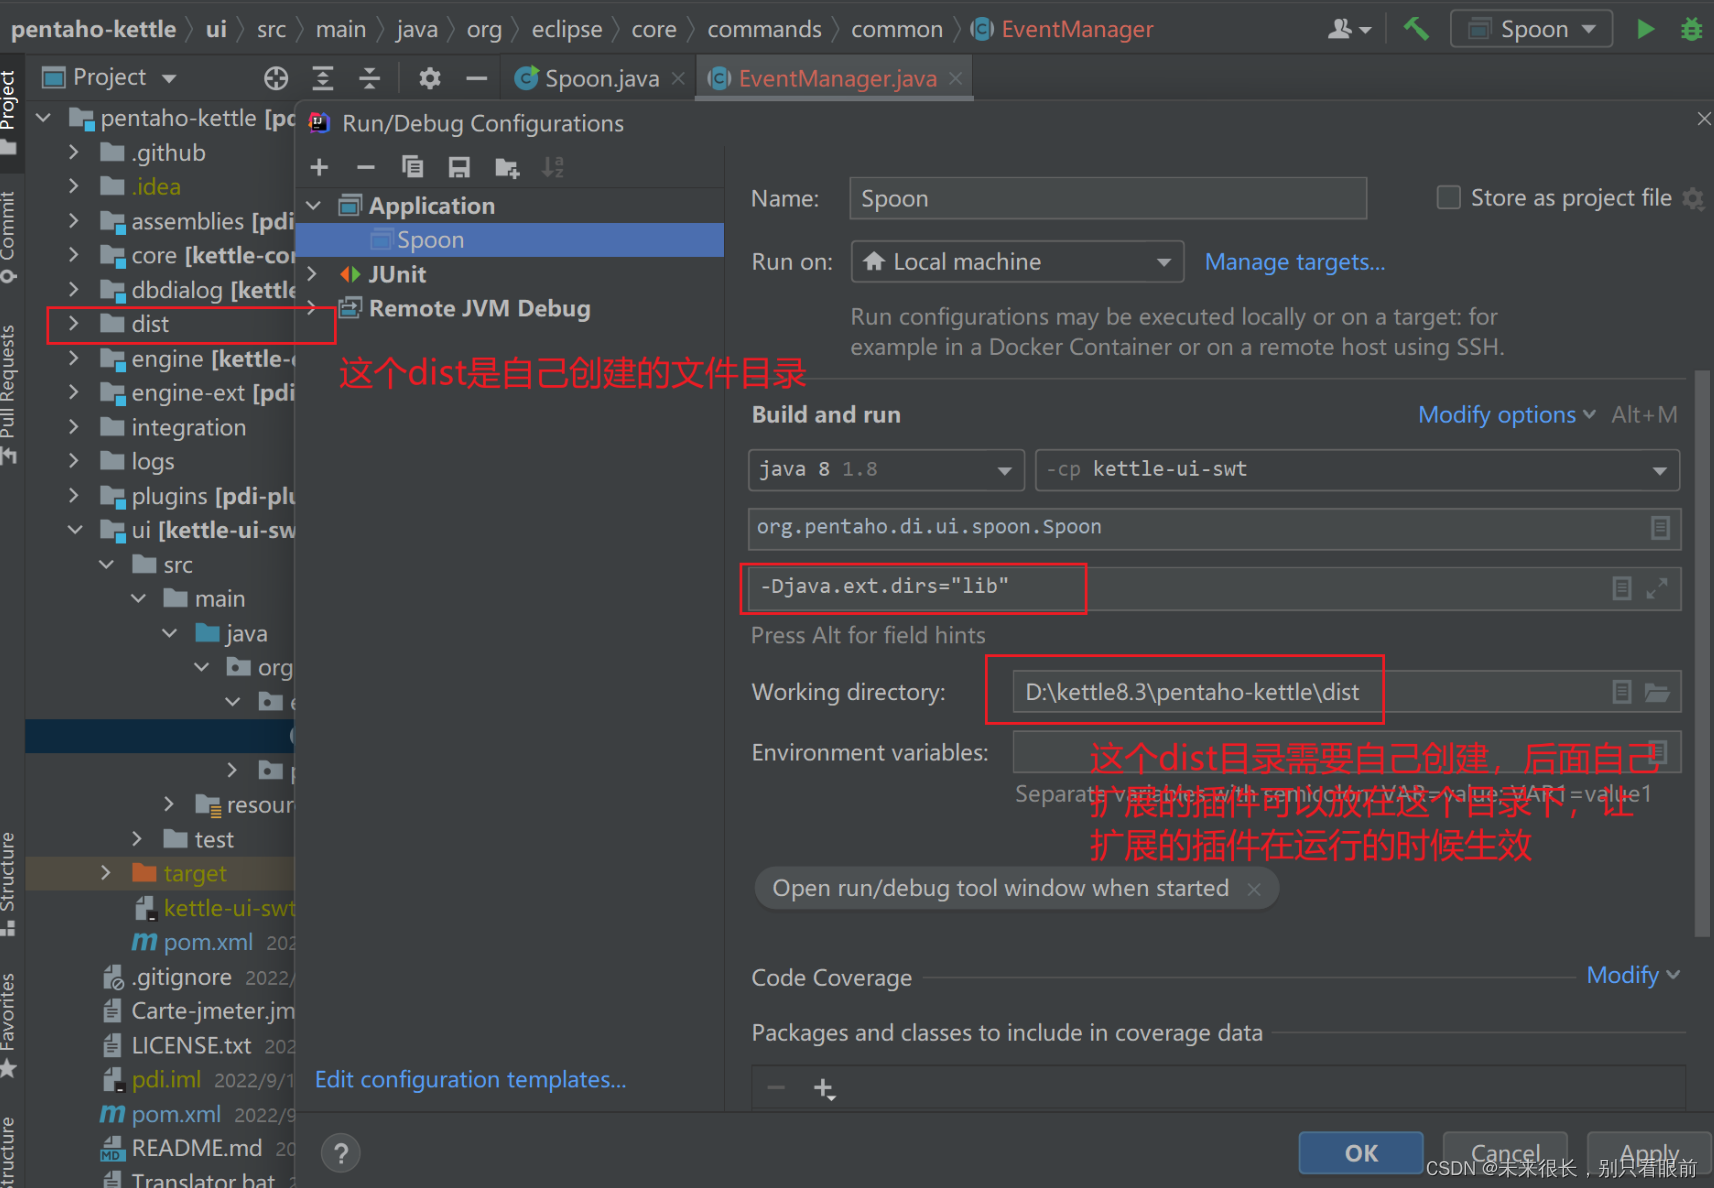
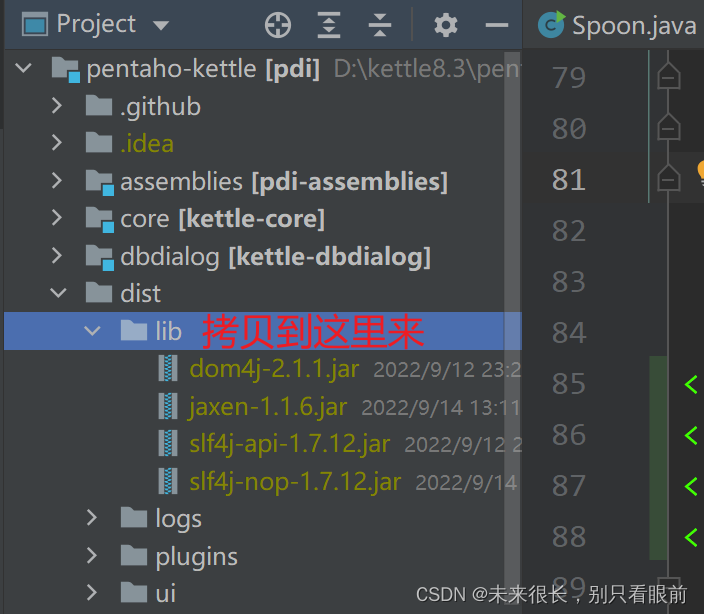
①在源码目录下新建目录 dist,在 dist 目录中新建子目录 lib
②将之前编译成功的发布包 zip 中的 ui 目录解压至<源码目录>\dist 中ui目录(后面会展示这个dist的各个目录结构的)

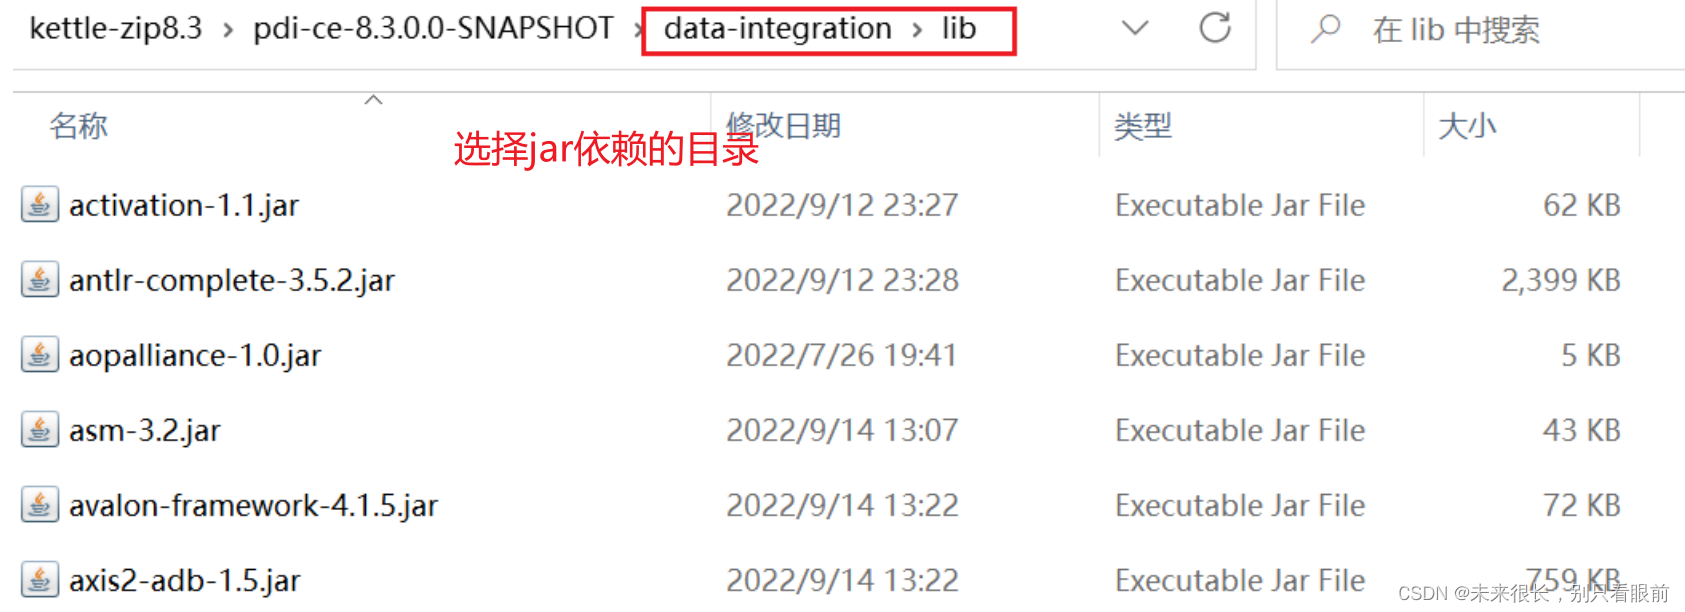
③将之前编译成功的发布包 zip 中的 lib 目录下的以下 4 个 jar 文件拷贝到<源码目录>\lib 中:
dom4j-2.1.1.jar
jaxen-1.1.6.jar
slf4j-api-1.7.7.jar
slf4j-nop-1.7.7.jar
dist目录如下:

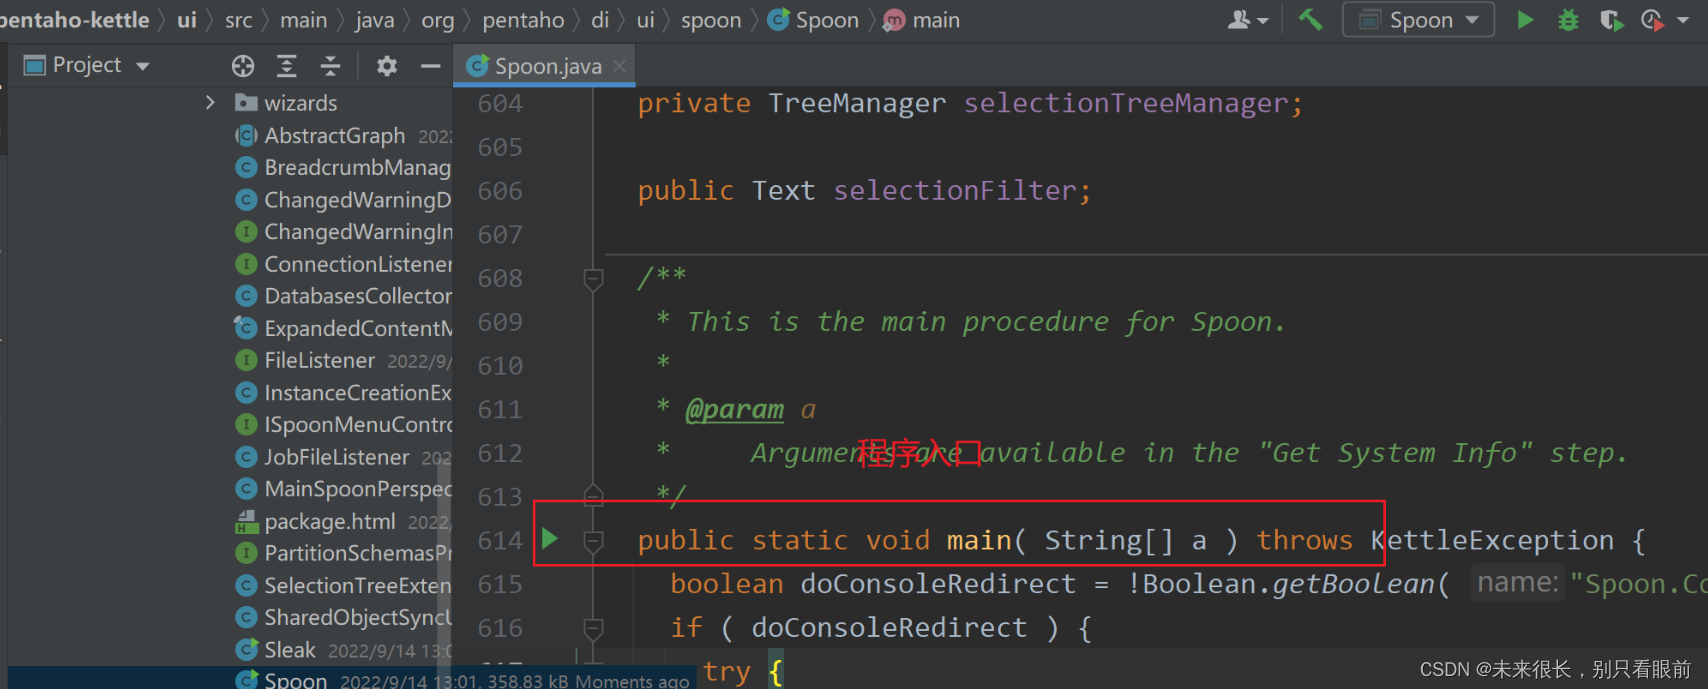
项目修改配置完成后,启动:kettle-ui-swt下的Spoon类进行运行,必然会报错:
启动过程中遇到的报错
报错1:找不到EventManager.class
1.解决方案:在org.eclipse.core.commands.common.EventManager 创建这个类:
然后复制下面的代码到刚刚创建的EventManager 类中:

注意这个类存放的包名(也是自己创建的):
package org.eclipse.core.commands.common;

// Source code recreated from a .class file by IntelliJ IDEA
// (powered by FernFlower decompiler)
//
import org.eclipse.core.runtime.ListenerList;

public abstract class EventManager {
    private static final Object[] EMPTY_ARRAY = new Object[0];
    private transient ListenerList listenerList = null;

    public EventManager() {
    }

    protected final synchronized void addListenerObject(Object listener) {
        if (this.listenerList == null) {
            this.listenerList = new ListenerList(1);
        }

        this.listenerList.add(listener);
    }

    protected final synchronized void clearListeners() {
        if (this.listenerList != null) {
            this.listenerList.clear();
        }

    }

    protected final Object[] getListeners() {
        ListenerList list = this.listenerList;
        return list == null ? EMPTY_ARRAY : list.getListeners();
    }

    protected final boolean isListenerAttached() {
        return this.listenerList != null;
    }

    protected final synchronized void removeListenerObject(Object listener) {
        if (this.listenerList != null) {
            this.listenerList.remove(listener);
            if (this.listenerList.isEmpty()) {
                this.listenerList = null;
            }
        }

    }
}
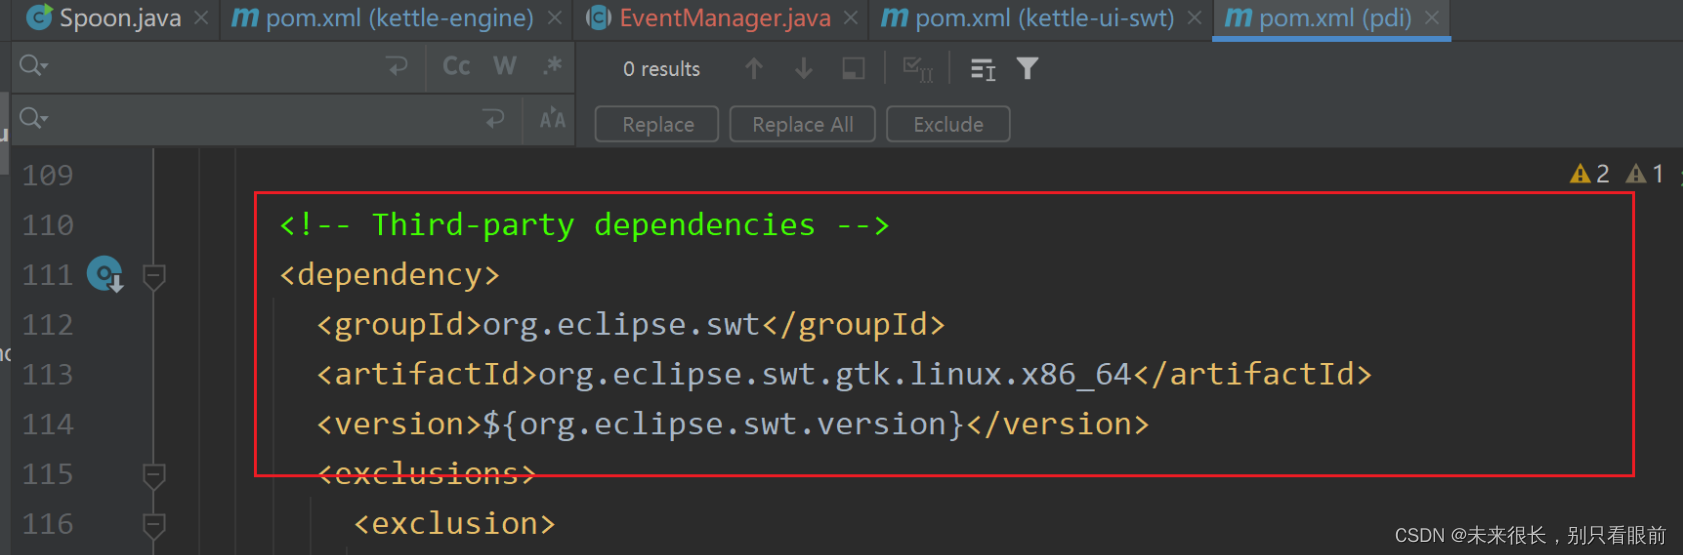
继续启动,继续报错: can't load library: xxxxxxx\swt-gtk-4623.dll

解决方案:
打开:<源码目录>\ui\pom.xml:

全局的这个Linux不要注释掉:
 在swt中的注释后,会重新加载项目,源码环境可能收到了破坏,所以需要手动刷新maven进行重新下载源码zip:
然后找到project structure 中的model,找到kettle-ui-swt这个模块,然后点一下这个模块,就可以看见这个模块的全部依赖了(如图)
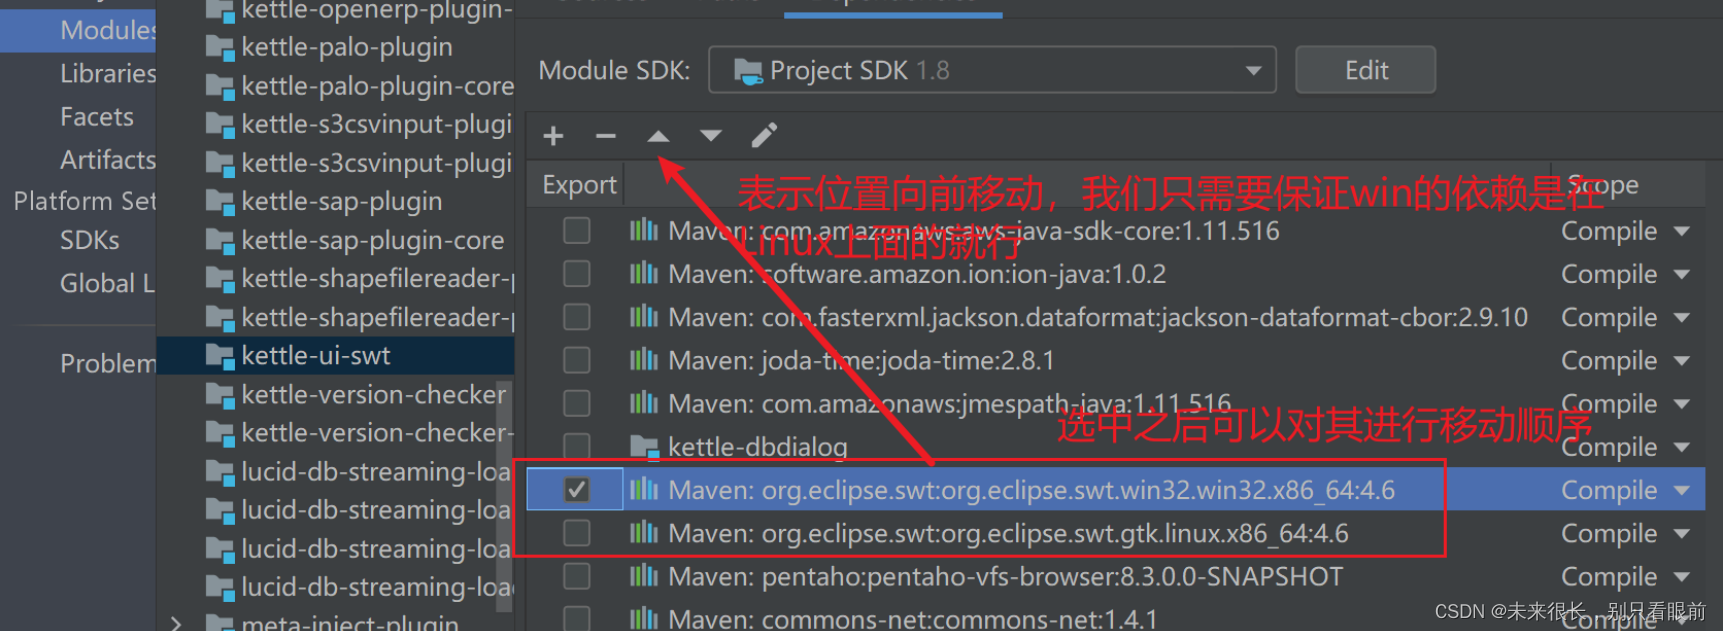
注意:其实上面那样做,可能有时候直接对这个项目的结构进行了移动或者是刷新了这个maven项目,那么可能这个win与linux的顺序就会被重置,所以这个时候需要再来配置一下就行,或者是等它继续报这个错误的时候再调整一下这两个依赖的顺序就行。
继续运行,继续报错:Error starting spoon shell java.lang.NoClassDefFoundError:org/jaxen/JaxenException

当然也可以不去注释,那么就需要自己去寻找这个依赖的jar,然后引入这个依赖就行。我使用的方式是注释掉这个作用域。
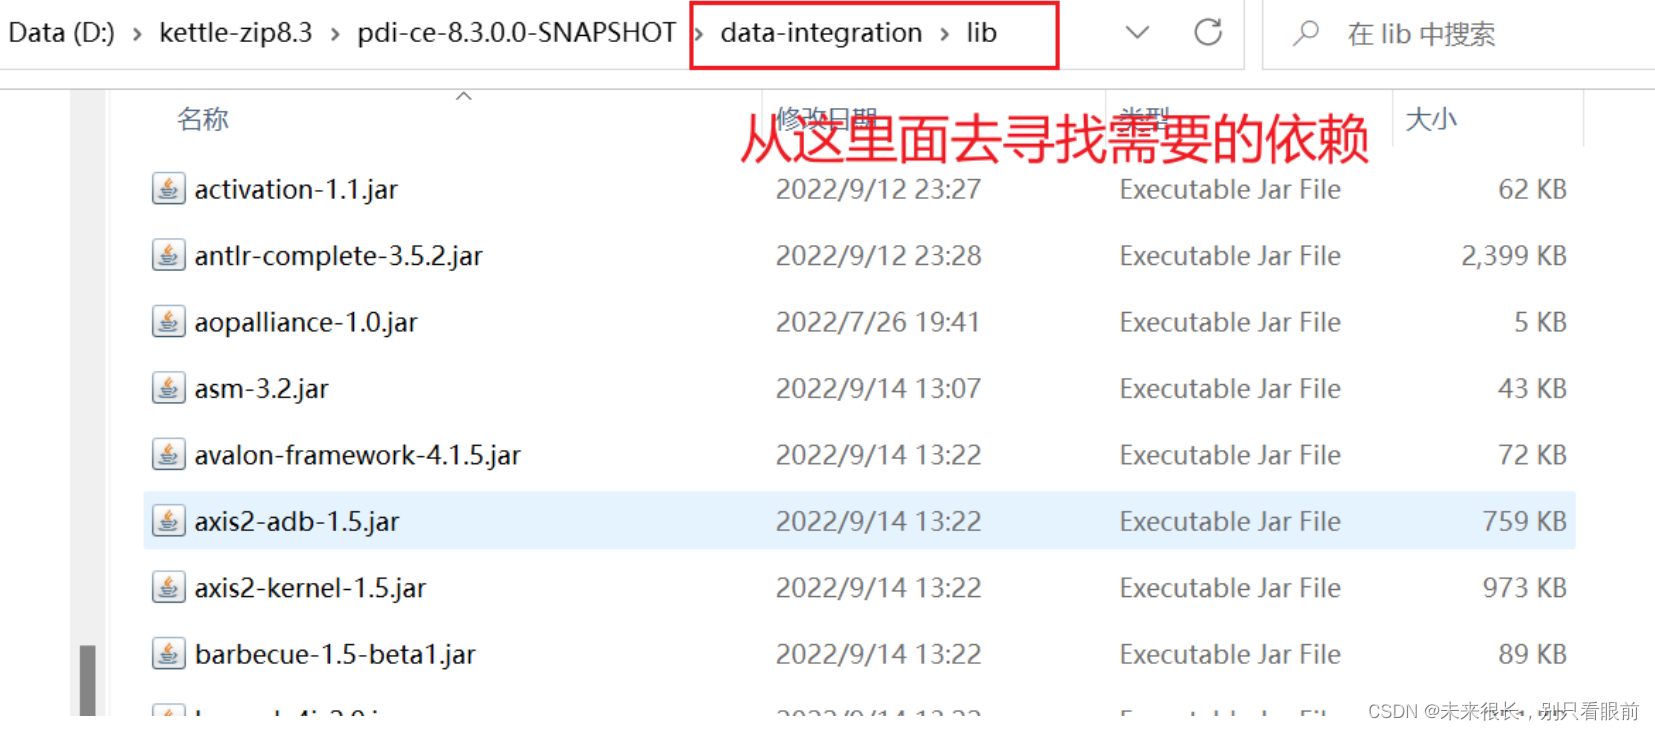
当然还可能报各种 ClassNotFoundException:
遇到这个错就查看一下缺少哪个 jar 包,从发布包(编译成功后的zip中去找lib目录)lib 目录中搜索找到需要的 jar 包后拷贝到<源码目录>\dist\lib即可。
其他遇到的错误:错误:找不到或无法加载主类org.pentaho.di.ui.spoon.Spoon
网络上找到的一个解决方案:

确实是这样解决的,不过我是通过不断的刷新这个maven,然后过了一段时间突然就开始自己下载这个源码zip压缩包以及一些其他的东西,然后这个问题就不在出现了。
继续运行,运行成功,会出现下面的页面:


引入插件或者是自定义插件
特别注意:
通过上面我这种方式配置源码环境,这样启动的kettle是没有插件的(这里的插件是指plugins中的插件都不在启动的程序中,原生的在engine模块的基础插件还是会在的),如果想加载插件到程序中那么则需要将编译后的zip包中的插件(jar)拷贝到dist的plugins中(拷贝的是jar架构包),这样插件和一些自定义插件才可以生效。
下面是演示把s3-csv-input插件引入kettle的运行中:直接把这个组件的jar复制到我们的dist目录下的plugins就行。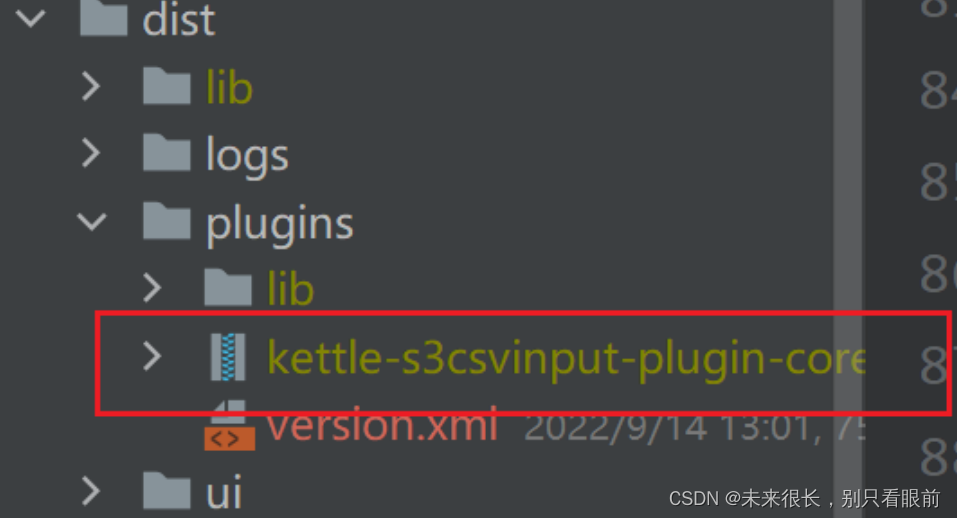
自定义插件也可以打包放在这里来使用和调试。
对自定义插件的调试可以参考我的另一篇博客:(1条消息) 对kettle客户端和源码环境进行远程debug调试 --- 对部署的java项目进行远程debug调试(idea版)_未来很长,别只看眼前的博客-CSDN博客

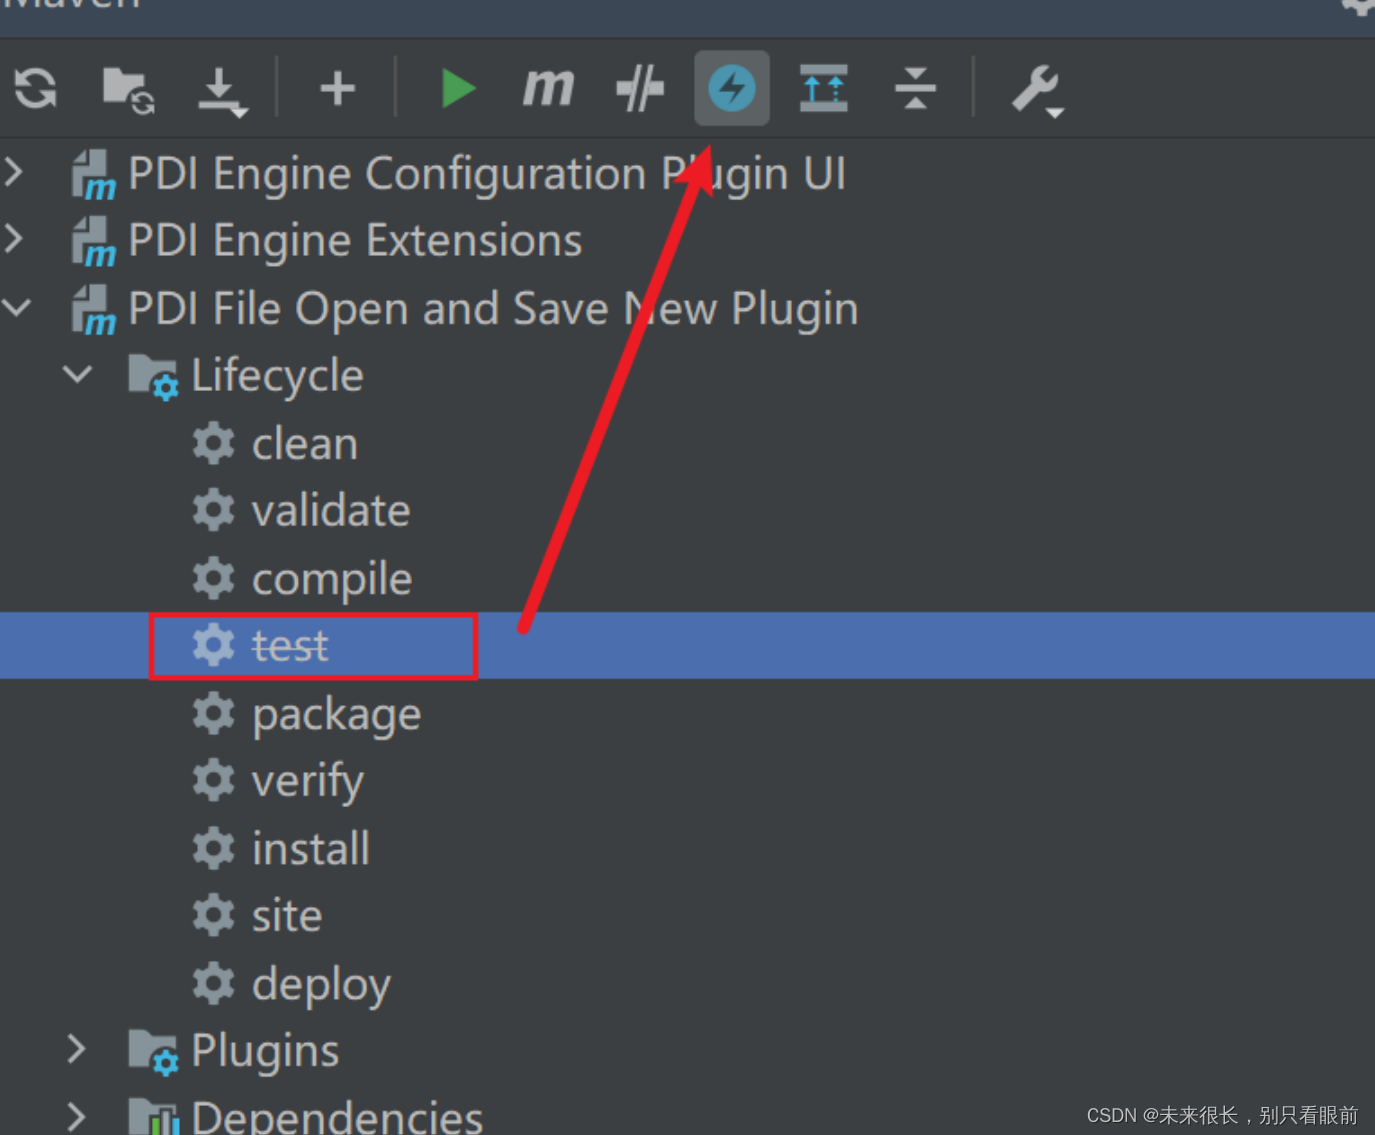
idea打包jar跳过test
补充一个小技巧:这个东西在自己测试的时候用用就行,在真实项目中还是需要通过测试才能打包的。
idea中install跳过测试这个环节:
maven命令栏的工具栏中有下面的图标,选中test,然后点击一下哪个闪电符号就行;