目录
1--配置Gradio
使用 pip 安装 Gradio:
pip install gradio2--Hello World案例
2-1--基本使用
import gradio as gr

def greet(name):
    return "Hello " + name + "!"

demo = gr.Interface(fn=greet, inputs="text", outputs="text")

demo.launch(share = True) 

类 gr.Interface()可以包含任何 Python 函数,其通过以下三个必需的参数进行初始化:
① fn:封装好的 Python 函数,即上例中的 greet() 函数;
② inputs:用于输入的组件,可以为 “text”、“image” 或 “audio”,上例中为 “text”;
③ outputs:用于输出的组件,可以为 “text”、“image” 或 “audio”,上例中为 “text”;
通过 launch() 运行定义的类对象,运行结果包括两个 url,第一个 local url 可以在本地打开和运行;第二个 public url 需要通过设置 share = True 才可生成,可用于分享在其它机器上打开和运行;
2-2--进阶使用
可通过 gr.Textbox() 来细化输入的组件 inputs,这里设置了输入框的行数为2,提示词为 Name Here...;
import gradio as gr

def greet(name):
    return "Hello " + name + "!"

demo = gr.Interface(
    fn=greet,
    inputs=gr.Textbox(lines=2, placeholder="Name Here..."),
    outputs="text",
)
demo.launch(share = True)

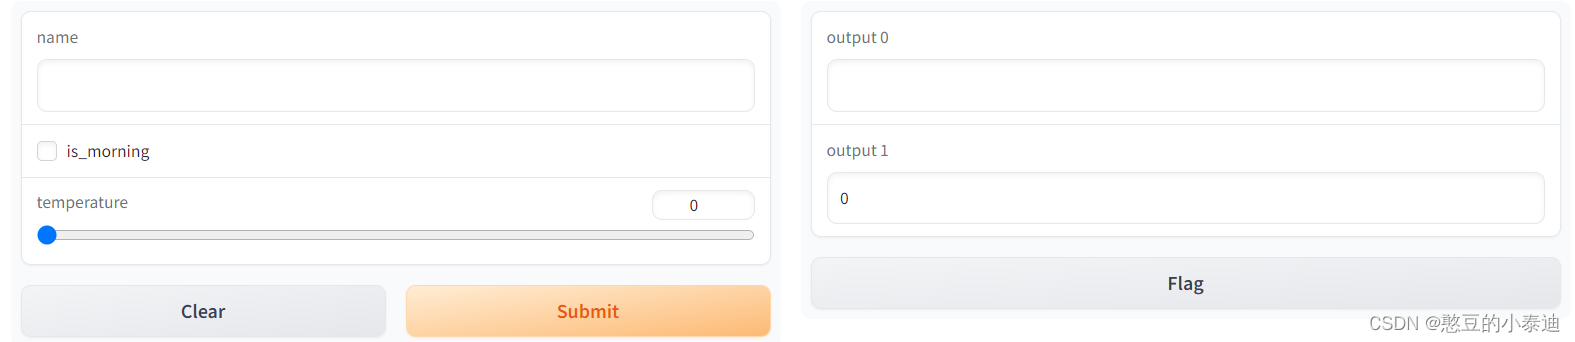
可设置多个输入输出,以实现更复杂的功能,以下函数设置了三个输入和两个输出;三个输入分别为 string(字符串)、boolean(布尔)和 number(数值);两个输出分别为string 和 number 类型;
函数的功能:输入 name,根据布尔输入 is_morning 判断问候是 moring 还是 evening,并将输入的 number 型华氏温度转换为摄氏温度(Celsius);
import gradio as gr

def greet(name, is_morning, temperature):
    salutation = "Good morning" if is_morning else "Good evening"
    greeting = f"{salutation} {name}. It is {temperature} degrees today"
    celsius = (temperature - 32) * 5 / 9
    return greeting, round(celsius, 2)

demo = gr.Interface(
    fn=greet,
    inputs=["text", "checkbox", gr.Slider(0, 100)],
    outputs=["text", "number"],
)
demo.launch(share = True)
3--图像案例
Gradio 支持 Image, DataFrame, Video, 或 Label 等类型,以下为简单的图像案例:
import numpy as np
import gradio as gr

def sepia(input_img):
    sepia_filter = np.array([
        [0.393, 0.769, 0.189],
        [0.349, 0.686, 0.168],
        [0.272, 0.534, 0.131]
    ])
    sepia_img = input_img.dot(sepia_filter.T)
    sepia_img /= sepia_img.max()
    return sepia_img

demo = gr.Interface(sepia, gr.Image(shape=(200, 200)), "image")
demo.launch()
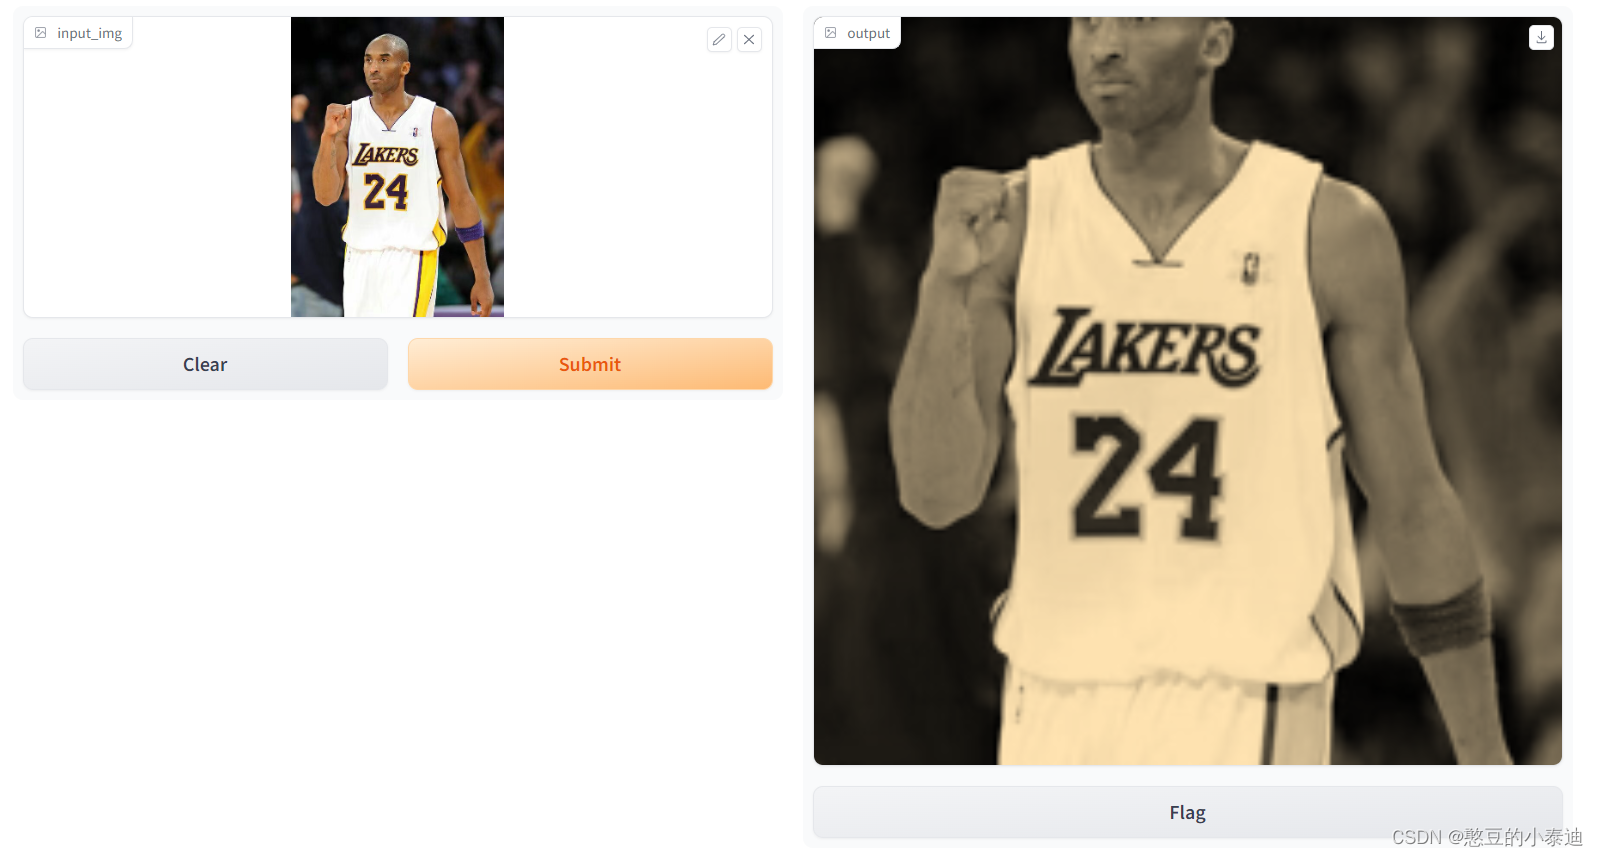
上述代码的功能是将输入的图片进行 sepia 滤波;其中输入和输出的组件都为 Image, 输入组件通过 gr.Image() 来设置其shape,即会对输入图片进行crop或resize的操作;实际输入是一个(w, h, 3)的 numpy 数组,3 表示 RGB,也可以通过 gr.Image(type="filepath", shape=(200, 200)) 来指定不直接转化为 numpy 数组;
import cv2
import numpy as np
import gradio as gr

def sepia(input_img):
    input_img = cv2.imread(input_img)
    sepia_filter = np.array([
        [0.393, 0.769, 0.189],
        [0.349, 0.686, 0.168],
        [0.272, 0.534, 0.131]
    ])
    sepia_img = input_img.dot(sepia_filter.T)
    sepia_img /= sepia_img.max()
    return sepia_img

demo = gr.Interface(sepia, gr.Image(type="filepath", shape=(200, 200)), "image")
demo.launch()
上述代码设置了 gr.Image(type="filepath"),不会自动将输入的图片转换为 numpy 数组,需要使用 opencv 等第三方库将图片转换为 numpy 数组;
3--常用类 Interface 和 Blocks
上述案例均使用封装程度很高的 Interface 类,在一定程度上限制了自由发挥;Gradio提供了支持灵活布局和数据流的 Blocks 类,其抽象程度不及 Interface 类,但其自由开发程度较高;
import gradio as gr

def greet(name):
    return "Hello " + name + "!"

with gr.Blocks() as demo:
    name = gr.Textbox(label="Name")
    output = gr.Textbox(label="Output Box")
    greet_btn = gr.Button("Greet")
    greet_btn.click(fn=greet, inputs=name, outputs=output, api_name="greet")

demo.launch()
上述案例定义了一个按钮 greet_btn,当点击按钮时会执行 greet 函数,函数的输入和输出均为 gr.Textbox() 类型,即字符串类型,其 label 分别注明 box 的名称;
上述案例可类比于 QT 中槽函数的使用,按钮绑定了一个 greet 的槽函数,当点击时会执行对应槽函数的内容;

import numpy as np
import gradio as gr

def flip_text(x):
    return x[::-1]

def flip_image(x):
    return np.fliplr(x)

with gr.Blocks() as demo:
    gr.Markdown("Flip text or image files using this demo.") # 使用 Markdown 输出一句话
    with gr.Tab("Flip Text"): # 新建一个 Tab
        text_input = gr.Textbox()
        text_output = gr.Textbox()
        text_button = gr.Button("Flip")
    with gr.Tab("Flip Image"): # 新建一个 Tab
        with gr.Row(): # 同一行排列
            image_input = gr.Image()
            image_output = gr.Image()
        image_button = gr.Button("Flip")

    with gr.Accordion("Open for More!"): # 可折叠的组件
        gr.Markdown("Look at me...")

    text_button.click(flip_text, inputs=text_input, outputs=text_output) # 按钮绑定相应的槽函数
    image_button.click(flip_image, inputs=image_input, outputs=image_output) # 按钮绑定相应的槽函数

demo.launch()
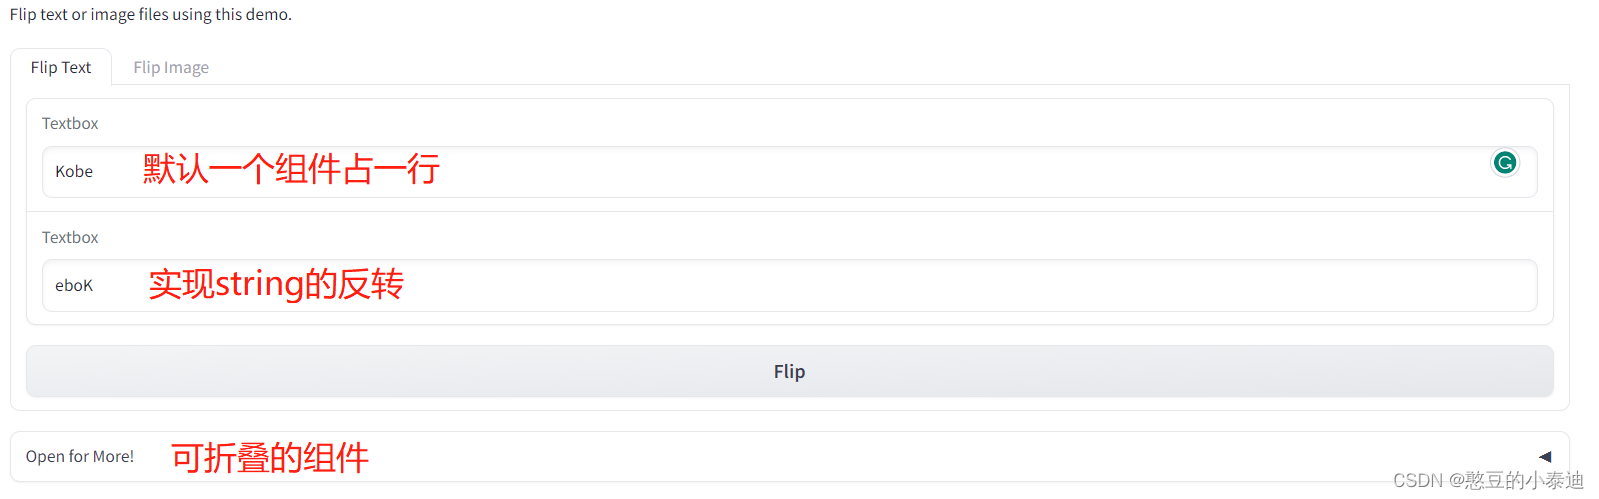
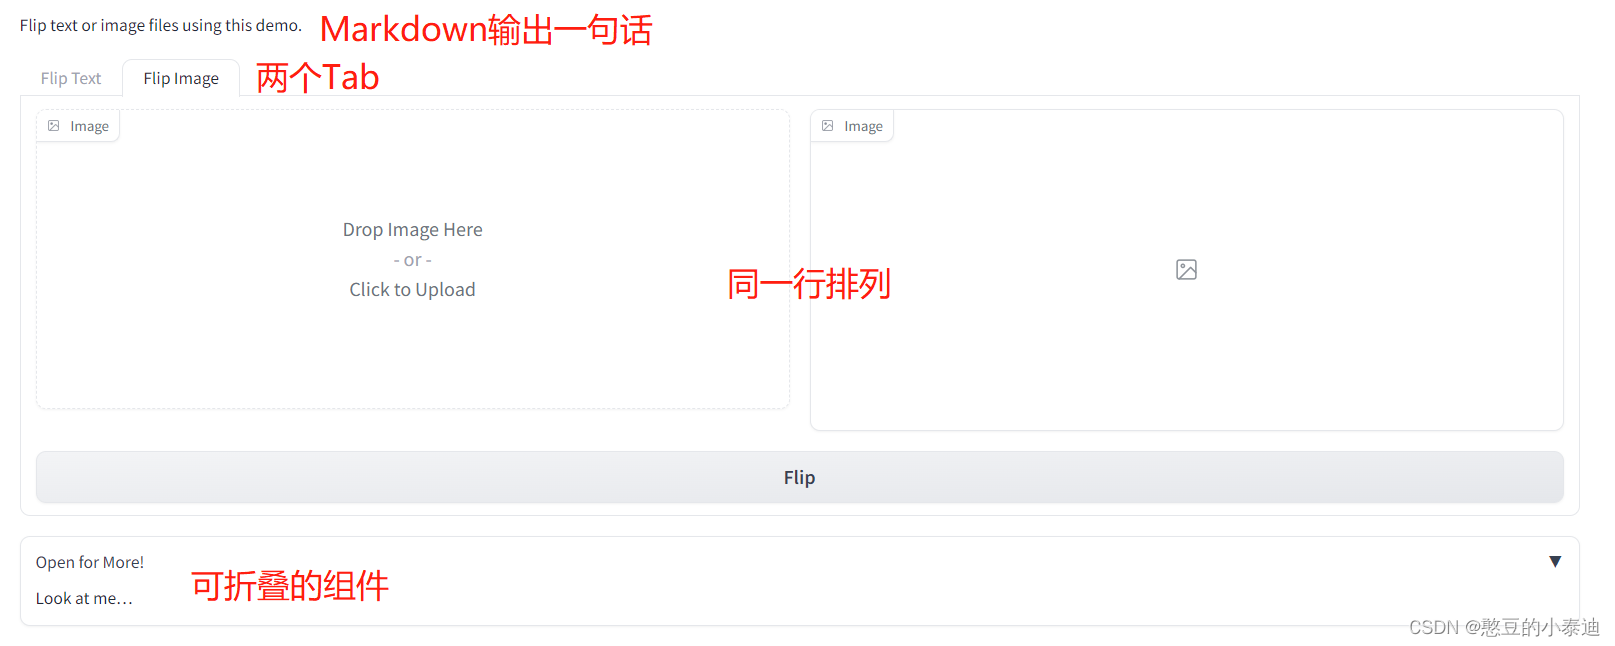
上述案例使用 gr.Tab() 创建了两个 Tab,在第一个 Tab 中组件默认一个组件占一行,在第二个 Tab 中使用 gr.Row() 设置两个 Image 组件在同一行排列;
案例使用 gr.Markdown() 输出一句话,并使用 gr.Accordion() 来设置一个可折叠的组件;
上述案例的功能是实现输入 Text 的反转,以及实现输入 Image 的左右反转;