月照入心头
世间的爱恨情仇
漂泊天涯回首怀念她眼眸 ----《孤城》
一个简易的编队仿真,主要是分享一下仿真的框架的编写方法。你要是想省事直接ROS小乌龟加个跟随节点就完事了,不需要这么麻烦。
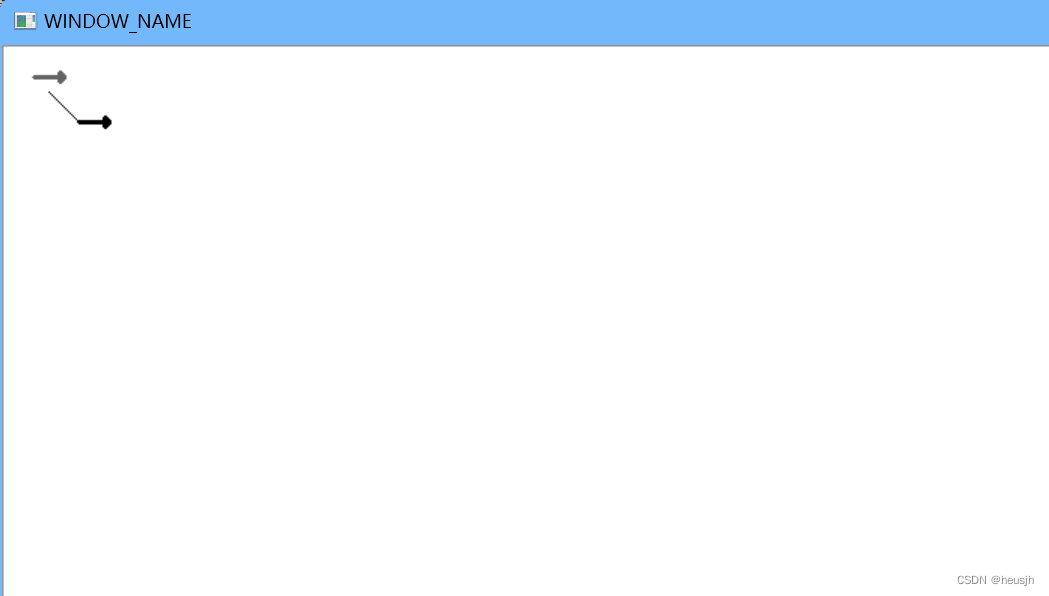
先上运行效果,初始状态:深色箭头是你通过awsd控制的主机,浅色箭头是电脑控制的从机。主机后面的连线终点是我预设的跟随点位,即浅色箭头需要收敛到连线终点上。
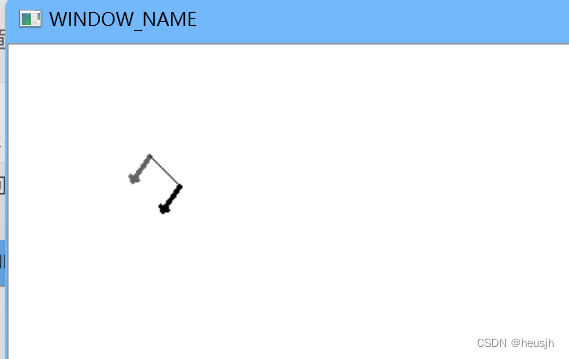
通过awsd随意控制主机前进或转向,从机逐渐向目标点收敛。并且方向也和主机相同。
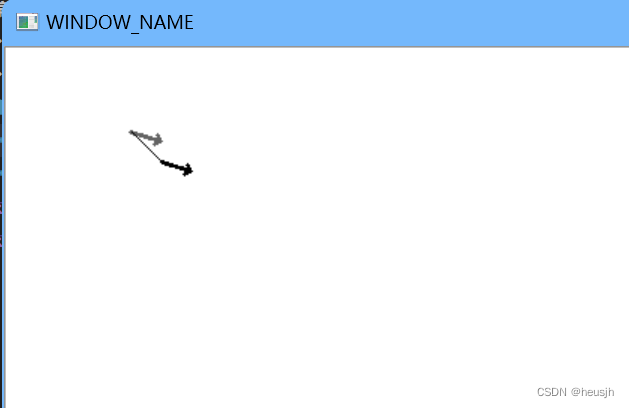
任意转向、移动均可跟随。
看完效果,说一下思路。
我的思路是主循环waitKey()监听键盘,键盘每发一次命令视为仿真世界度过一个虚拟时间单位。这个时间单位中,领航者根据键盘命令调头或者是前进,跟随着调用state_update()函数计算误差,并给出希望的速度、角度。调用完毕回归主循环更改其状态。即执行器在主循环中,跟随算法在state_update()函数中。另外就是注意一下sin和cos,在Mat坐标系里面因为y轴是倒过来的所以并不能直接用,需要你自己写一下。
至于编队算法,其实没有什么算法,就是一个简单的计算error然后sigmoid计算跟随速度。选择sigmoid是因为其将误差归一化,想要控制速度只需要简单乘个系数即可。也可选别的函数,合适自己的机器人即可。
操作方法和ROS小乌龟是一样的,ad是顺时针、逆时针转向,ws是沿当前方向前进或后退。代码编码是gbk,utf8打开是乱码。代码注释也已经很全了。编码和算法都没有什么难度。后续会更新带避障的编队跟随算法。所以,万水千山总是情,点个关注行不行?点个赞也行!
// NOTICE: You should open this file by GBK, NOT UTF-8, or you can't see my note.
#include <iostream>
#include <thread>
#include <cmath>
#include <opencv2/opencv.hpp>
#include <opencv2/imgproc/imgproc.hpp>
#include <opencv2/imgproc/types_c.h>
#include <opencv2/highgui/highgui.hpp>

using namespace std;
using namespace cv;

// 跟随者类型
class Follower{


    public:
    // 速度信息,都是统一的坐标系,不是自己朝向上的x和y
    float vx = 0;
    float vy = 0;

    // 角速度c++不太好模拟,这里我们假设底盘功率无穷大,且有着极佳的控制算法
    // 即下一时刻可以达到上一时刻的期望角度
    float next_theta = 0;

    // 位姿信息
    float x = 20.0;
    float y = 20.0;
    float theta = 0;

    // 因为领航者并不会主动告诉我们其当前角度,故我们需要存储领航者的上一时刻位置信息、通过arc tan解算。
    // 实际工程中注意存储该信息的时间戳,避免过期。
    float last_leader_locate_x = 50.0;
    float last_leader_locate_y = 50.0;

    // 更新状态函数
    void update_state();
}follower;

//领航者类型
class Leader{


    public:
    float x = 50.0;
    float y = 50.0;
    float theta = 0;
}leader;

void mouse_handle(int event, int x, int y, int flags, void* param);
float CV_frame_sin(float angle);
float CV_frame_cos(float angle);
float CV_frame_atan(float x, float y);
float sigmoid(float x);

int main()
{


    // 创建窗口
    namedWindow("WINDOW_NAME");
	setMouseCallback("WINDOW_NAME", mouse_handle);

    // 加载地图,并显示窗口
    Mat img = imread("map.jpg", 0);

    char ch = 0;
    while (true){


        // 按键控制领航者的车,操作方法同ROS小乌龟(其实这个就是简易版的小乌龟)
        ch = cv::waitKey(50);

        if (ch == 'a'){


            leader.theta = leader.theta + 3.14 / 10.0;
            follower.update_state();
            follower.theta = follower.next_theta;
            follower.x += follower.vx;
            follower.y += follower.vy;
        }
        if (ch == 'd'){


            leader.theta = leader.theta - 3.14 / 10.0;
            follower.update_state();
            follower.theta = follower.next_theta;
            follower.x += follower.vx;
            follower.y += follower.vy;
        }
        if (ch == 'w'){


            leader.x = leader.x + CV_frame_cos(leader.theta);
            leader.y = leader.y + CV_frame_sin(leader.theta);
            follower.update_state();
            follower.theta = follower.next_theta;
            follower.x += follower.vx;
            follower.y += follower.vy;
        }
        if (ch == 's'){


            leader.x = leader.x - CV_frame_cos(leader.theta);
            leader.y = leader.y - CV_frame_sin(leader.theta);
            follower.update_state();
            follower.theta = follower.next_theta;
            follower.x += follower.vx;
            follower.y += follower.vy;
        }

        Mat map = img.clone();

        cv::arrowedLine(map, cv::Point(int(leader.x), int(leader.y)), cv::Point(int(leader.x + 20 * CV_frame_cos(leader.theta)), int(leader.y + 20 * CV_frame_sin(leader.theta))), 0, 2, 8, 0, 0.2);
        cv::arrowedLine(map, cv::Point(int(follower.x), int(follower.y)), cv::Point(int(follower.x + 20 * CV_frame_cos(follower.theta)), int(follower.y + 20 * CV_frame_sin(follower.theta))), 100, 2, 8, 0, 0.2);
        cv::line(map, cv::Point(int(leader.x), int(leader.y)), cv::Point(int(leader.x) - 20, int(leader.y) - 20), 3);

        if (map.empty() != 1) imshow("WINDOW_NAME", map);
            else cout<<"map is empty!!check your image path!!"<<endl;

        cv::waitKey(10);
    }

    return 0;
}

void Follower::update_state()
{


    // 计算误差
    float error_x = (leader.x - this->x) - 20.0;
    float error_y = (leader.y - this->y) - 20.0;

    // 更新
    // 需要注意的是sigmiod的中心是(0, 0.5)
    this->vx = (sigmoid((error_x)) - 0.5) * 4;
    this->vy = (sigmoid((error_y)) - 0.5) * 4;

    if (this->last_leader_locate_x == leader.x && this->last_leader_locate_y == leader.y)
        this->next_theta = this->theta;
    else
        this->next_theta = CV_frame_atan((leader.y - this->last_leader_locate_y) , (leader.x - this->last_leader_locate_x));

    this->last_leader_locate_x = leader.x;
    this->last_leader_locate_y = leader.y;
}

// 由于CV坐标系里面的sin arctan和平面直角坐标系里面的不一样,故需要写CV坐标系下的三角函数
// 这里角度定义的是和平面直角坐标系一样,从平面直角坐标系的x轴开始,逆时针为正方向,顺时针为负方向

//CV_frame_sin: 和sin正好反过来,很好很好
// -  |  -
// -------
// +  |  +
float CV_frame_sin(float angle)
{


    // 回到0-2pi
    while (angle >= (3.14 * 2.0)) angle -= (3.14 * 2.0);
    while (angle <= -(3.14 * 2.0)) angle += (3.14 * 2.0);

    if (angle > 0) return -sin(angle);
        else return sin(-angle);
}

//CV_frame_cos:
// -  |  +
// -------
// -  |  +
// CV坐标系下cos虽然是一样的,但是为了API风格统一,仍然换个名
inline float CV_frame_cos(float angle)
{


    return cos(angle);
}

// 暂时没想到好办法,只能枚举。有点捞,肯定有简单的数学方法。
// 枚举每一个角度使其tan等于给定的比值
// x:对边(CV的y轴)     y:邻边(CV的x轴)
float CV_frame_atan(float x, float y)
{


    float ans = 0, step = 0.001;
    if ((x < 0 && y < 0) || (x < 0 && y > 0)) step = 0.001;
        else step = -0.001;

    // 竖直行动,除0没有意义,直接return完事了
    if (abs(y) <= 0.01){


        if (x >= 0) return -(3.14 / 2.0);
            else return (3.14 / 2.0);
    }
    // 水平行动,根据x轴移动方向确定是0度还是180度
    if (abs(x) <= 0.01){


        if (y>=0) return 0;
            else return -3.14;
    }

    while (abs(ans) <= 3.15){


        ans += step;
        if (abs(CV_frame_sin(ans) / CV_frame_cos(ans) - x / y) <= 0.01){


            return ans;
        }
    }

    // 此处待填充,目前没有发现能使其assert的值
    cout << "Assert"<<endl;
    return 0;
}

// 地图上单击任意地点重置领航车位置
void mouse_handle(int event, int x, int y, int flags, void* param)
{


	switch (event)
	{


		case EVENT_LBUTTONDOWN:
            leader.x = x;
            leader.y = y;
		break;
	}
}

float sigmoid(float x){


    return (1.0 / (1.0 + exp(-x)));
}

// 程序没什么难度,写的也很烂,将就看一下仿真的思路。
// 其实这个仿真用matlab模拟是最好,因为那里面是连续的,更符合现实。不过用c++比较符合工程中的栅格化地图。各有好处。
// 如果你是学术研究者,十分建议用matlab重写一下。
// 调了半天,发现这个opencv的Mat坐标系是真的sb啊,sin cos的变换还得自己改一下定义

// Author: Harbin Engineering University - Information and Communication Collage - Shi JiaHao.
// If you copy or download my program, please remain these declare before or at the end of your program.
用于编译的CmakeList如下:
cmake_minimum_required(VERSION 2.6)

project(test)

add_definitions(-w)

set(OpenCV_DIR D:/opencv/opencv3.4.6/opencv/build/x64/vc15/lib/)

find_package(OpenCV)

include_directories(${

    OpenCV_INCLUDE_DIRS})

add_executable(main main.cpp)

target_link_libraries(main ${

    OpenCV_LIBS})
地图你随便找一个就行,我这就放一张白纸。

部署的时候,下载这个图到cmake编译目录,改为map.jpg,当然你cmakelist里面的opencv包路径也改一下就可以用了,没有复杂的依赖。
沉醉在梦中
梦醒爱悄然落空
别离梦中故人不能再相拥 ----《孤城》