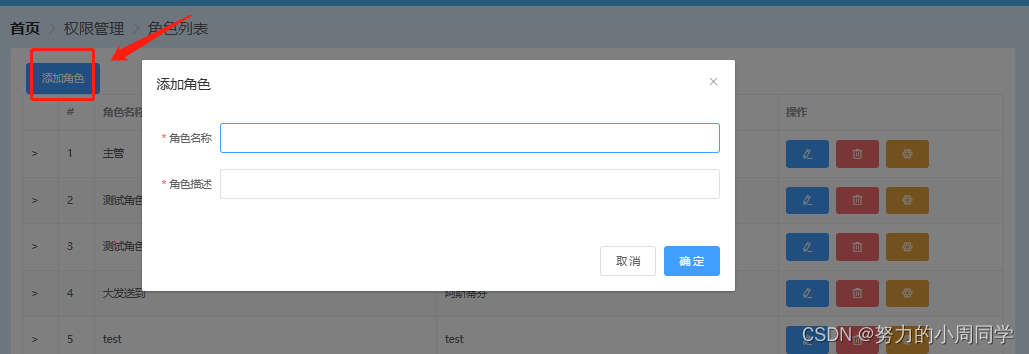
这是黑马vue电商项目后台,自己需要完成的功能,这里仅供参考当然还需要自己去理解.
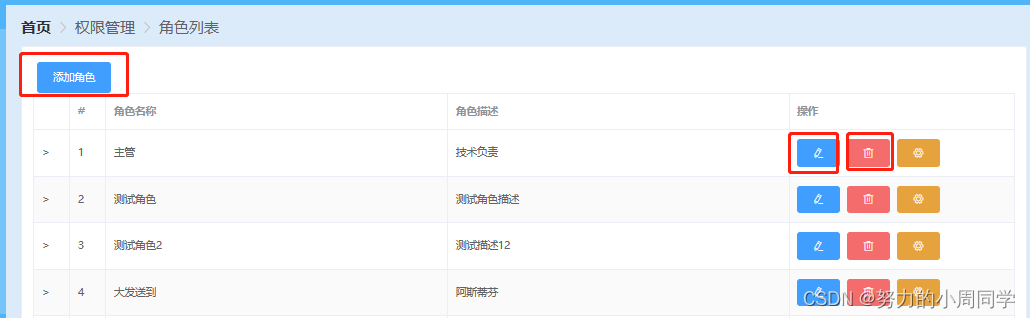
一.添加功能
在roles.vue中
1.添加角色的对话框
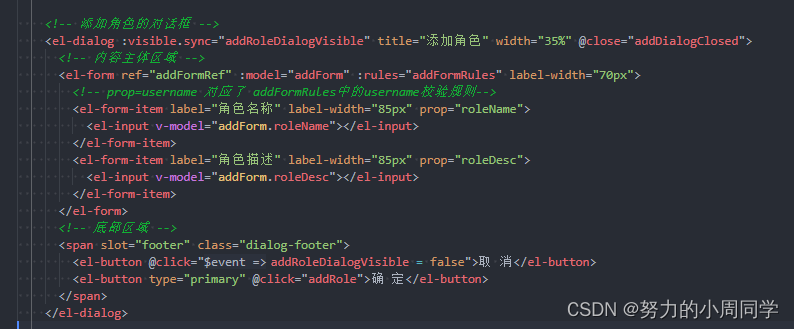
代码如下:
  <!-- 添加角色的对话框 -->
    <el-dialog :visible.sync="addRoleDialogVisible" title="添加角色" width="35%" @close="addDialogClosed">
      <!-- 内容主体区域 -->
      <el-form ref="addFormRef" :model="addForm" :rules="addFormRules" label-width="70px">
        <!-- prop=username 对应了 addFormRules中的username校验规则-->
        <el-form-item label="角色名称" label-width="85px" prop="roleName">
          <el-input v-model="addForm.roleName"></el-input>
        </el-form-item>
        <el-form-item label="角色描述" label-width="85px" prop="roleDesc">
          <el-input v-model="addForm.roleDesc"></el-input>
        </el-form-item>
      </el-form>
      <!-- 底部区域 -->
      <span slot="footer" class="dialog-footer">
        <el-button @click="addRoleDialogVisible = false">取 消</el-button>
        <el-button type="primary" @click="addRole">确 定</el-button>
      </span>
    </el-dialog>
2. 控制添加角色的对话框显示与隐藏
      // 控制添加角色对话框的显示与隐藏
      addRoleDialogVisible: false,
3. 双向绑定:module添加角色的值
      // 添加角色
      addForm: {
        roleName: '',
        roleDesc: ''
      },
4. 添加角色的验证规则
 addFormRules: {
        roleName: [
          {
            required: true,
            message: '请输入角色名称',
            trigger: 'blur'
          },
          {
            min: 2,
            max: 6,
            message: '角色名称长度在 2 到 6 个字符',
            trigger: 'blur'
          }
        ],
        roleDesc: [
          {
            required: true,
            message: '请输入角色描述',
            trigger: 'blur'
          }
        ]
      },
5. 添加角色的方法methods下
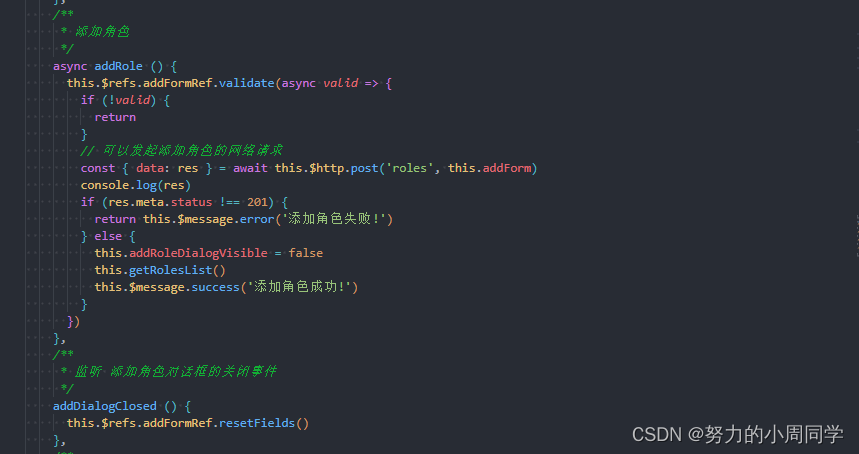
代码如下
   /**
     * 添加角色
     */
    async addRole () {
      this.$refs.addFormRef.validate(async valid => {
        if (!valid) {
          return
        }
        // 可以发起添加角色的网络请求
        const { data: res } = await this.$http.post('roles', this.addForm)
        console.log(res)
        if (res.meta.status !== 201) {
          return this.$message.error('添加角色失败!')
        } else {
          this.addRoleDialogVisible = false
          this.getRolesList()
          this.$message.success('添加角色成功!')
        }
      })
    },
6. 添加角色对话框关闭事件
    /**
     * 监听 添加角色对话框的关闭事件
     */
    addDialogClosed () {
      this.$refs.addFormRef.resetFields()
    },
到这里完成了添加角色的功能 .
二. 编辑角色功能
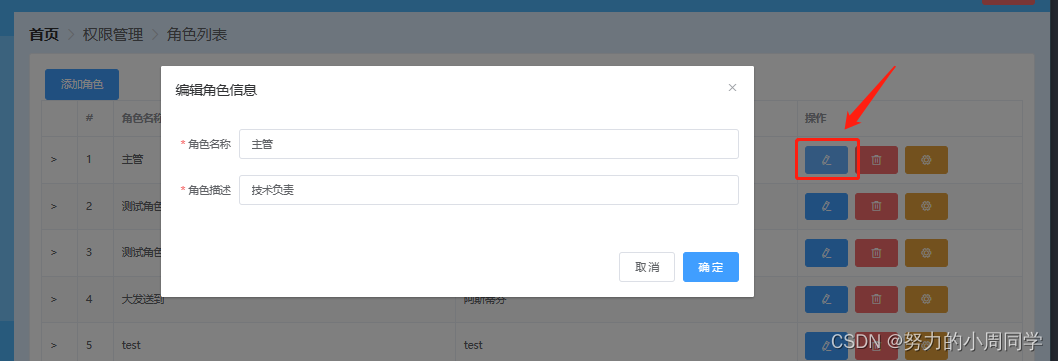
1.根据上面的步骤差不多
首页写一个编辑角色的对话框
代码如下:
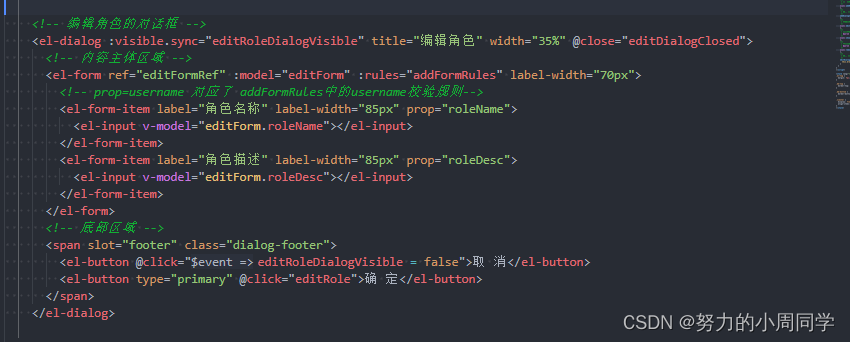
    <!-- 编辑角色的对话框 -->
    <el-dialog :visible.sync="editRoleDialogVisible" title="编辑角色" width="35%" @close="editDialogClosed">
      <!-- 内容主体区域 -->
      <el-form ref="editFormRef" :model="editForm" :rules="addFormRules" label-width="70px">
        <!-- prop=username 对应了 addFormRules中的username校验规则-->
        <el-form-item label="角色名称" label-width="85px" prop="roleName">
          <el-input v-model="editForm.roleName"></el-input>
        </el-form-item>
        <el-form-item label="角色描述" label-width="85px" prop="roleDesc">
          <el-input v-model="editForm.roleDesc"></el-input>
        </el-form-item>
      </el-form>
      <!-- 底部区域 -->
      <span slot="footer" class="dialog-footer">
        <el-button @click="editRoleDialogVisible = false">取 消</el-button>
        <el-button type="primary" @click="editRole">确 定</el-button>
      </span>
    </el-dialog>
2. 控制编辑角色的对话框的显示与隐藏
      //控制编辑角色的对话框的显示与隐藏
      editRoleDialogVisible: false
3. 获取值编辑角色的值
// 获取值编辑角色的值
 editForm: {},
4. 编辑角色的验证规则,这里我说明一下,我使用的是添加角色的验证规则因为是一样的,所以就没有写另外的
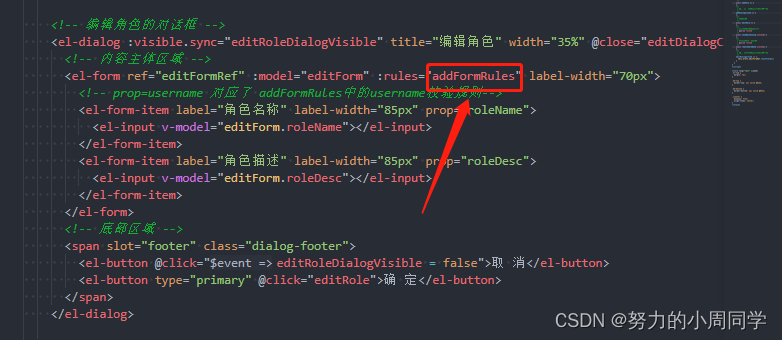
所以和上面添加角色的代码是一样的,前面写了, 这里只需要写相同的名称就可以了
5. 编辑角色的methods下方法
展示编辑角色的对话框
    /**
     * 展示编辑角色的对话框
     * @param roleId
     */
    async showEditDialog (roleId) {
      const { data: res } = await this.$http.get(`roles/${roleId}`)
      if (res.meta.status !== 200) {
        return this.$message.error('查询角色信息失败')
      } else {
        this.editForm = res.data
        this.editRoleDialogVisible = true
      }
    },
6. 编辑角色的方法
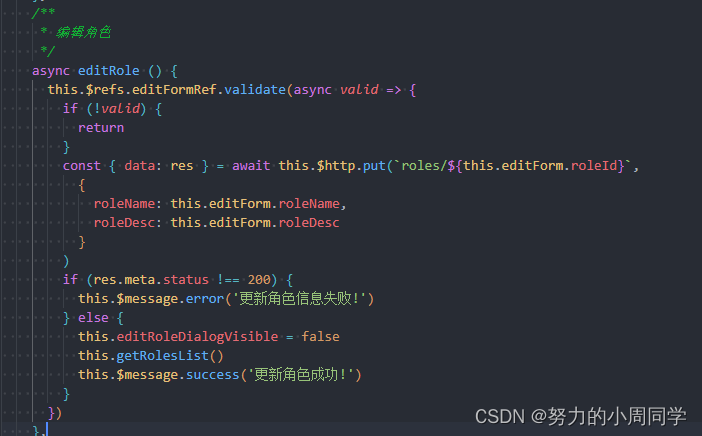
代码如下
 /**
     * 编辑角色
     */
    async editRole () {
      this.$refs.editFormRef.validate(async valid => {
        if (!valid) {
          return
        }
        const { data: res } = await this.$http.put(`roles/${this.editForm.roleId}`,
          {
            roleName: this.editForm.roleName,
            roleDesc: this.editForm.roleDesc
          }
        )
        if (res.meta.status !== 200) {
          this.$message.error('更新角色信息失败!')
        } else {
          this.editRoleDialogVisible = false
          this.getRolesList()
          this.$message.success('更新角色成功!')
        }
      })
    },
7. 监听修改角色对话框的关闭事件
    /**
     * 监听 修改角色对话框的关闭事件
     */
    editDialogClosed () {
      this.$refs.editFormRef.resetFields()
    }
三. 删除功能
根据ID删除角色
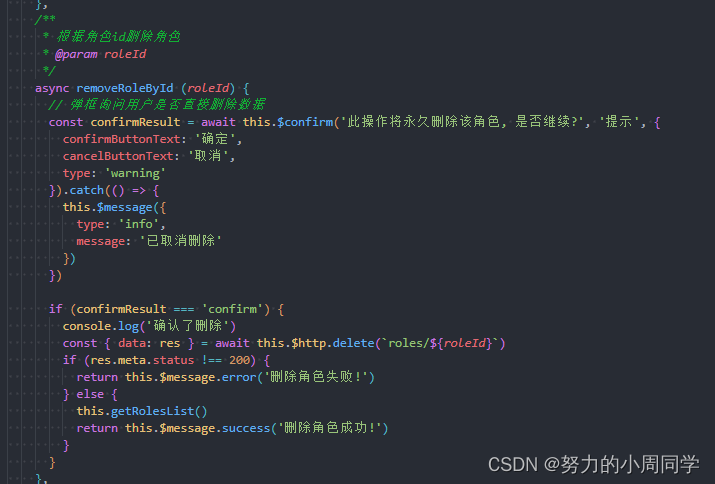
    /**
     * 根据角色id删除角色
     * @param roleId
     */
    async removeRoleById (roleId) {
      // 弹框询问用户是否直接删除数据
      const confirmResult = await this.$confirm('此操作将永久删除该角色, 是否继续?', '提示', {
        confirmButtonText: '确定',
        cancelButtonText: '取消',
        type: 'warning'
      }).catch(() => {
        this.$message({
          type: 'info',
          message: '已取消删除'
        })
      })

      if (confirmResult === 'confirm') {
        console.log('确认了删除')
        const { data: res } = await this.$http.delete(`roles/${roleId}`)
        if (res.meta.status !== 200) {
          return this.$message.error('删除角色失败!')
        } else {
          this.getRolesList()
          return this.$message.success('删除角色成功!')
        }
      }
    },