Vue【七】路由vue-router简单使用
前言
路由是游览器URL(统一资源定位器)中的哈希值(#hash)与展示视图组件之间的对应规则。在 web App 中, 经常会出现通过一个页面来展示和管理整个应用的功能。SPA 往往是功能复杂的应用,为了有效管理所有视图内容,前端路由 应运而生,优点是路由之间切换不会重新刷新页面,但是初次加载会缓慢。
一、路由——组件的分类
.vue的文件分两类:
- 页面组件
- 复用组件
本质上两类并没有区别,只是大家习惯上把页面组件放在src/views文件夹,复用组件放在src/components文件夹。
页面组件:页面展示配合路由使用。
复用组件:展示数据,常用于复用。
总结:views下的页面组件,配合路由切换,components下的一般引入到views下的vue中复用展示数据。

二、vue-router准备工作
在views中创建Your.vue,My.vue,It.vue三个组件:
Your.vue组件如下:
<template>
  <div>
  	// My组件为My,It组件为It
    Your组件
  </div>
</template>

<script>
export default {


}
</script>

<style>

</style>
在App.vue组件中添加以下内容:
<template>
  <div>
    <div class="footer_wrap">
      <a href="#/your">你的</a>
      <a href="#/my">我的</a>
      <a href="#/it">他的</a>
    </div>
    <div class="top">

    </div>
  </div>
</template>

<script>
export default {

      };
</script>

<style scoped>
.footer_wrap {


  position: fixed;
  left: 0;
  top: 0;
  display: flex;
  width: 100%;
  text-align: center;
  background-color: #333;
  color: #ccc;
}
.footer_wrap a {


  flex: 1;
  text-decoration: none;
  padding: 20px 0;
  line-height: 20px;
  background-color: #333;
  color: #ccc;
  border: 1px solid black;
}
.footer_wrap a:hover {


  background-color: #555;
}
.top {


  padding-top: 62px;
}
</style>
三、vue-router使用
- 安装vue-router
npm i [email protected]
vue2的版本要指定路由的版本,版本太高会报错,目前最新的路由版本跟vue3相匹配。
- 在
main.js中导入
import VueRouter from 'vue-router'
- 在
main.js中使用路由插件
Vue.use(VueRouter)
Tips:在vue中使用插件,都需要调用Vue.use()
- 在
main.js中创建路由对象
const router = new VueRouter({


})
- 在
main.js中挂挂载渲染
new Vue({


    router,
    render: h => h(App),
}).$mount('#app')
完成配置之后地址栏中就增加了#,如下图:

四、配置路由规则
在路由对象中配置路由规则:
咱们有三个组件,配置三个路由规则。
const router = new VueRouter({


    routes: [{


            path: '/your', //路由地址
            name:'your'   //路由名字,可以不写
            component: Your		//在这个地址下路由跳转的组件
        },
        {


            path: '/my',
            component: My
        },
        {


            path: '/it',
            component: It
        }
    ]
})
== 配置完路由规则,还必须要配置路由出口,小白一般容易忘==
咱们在App.vue中配置出口:
<template>
  <div>
    <div class="footer_wrap">
      <a href="#/your">你的</a>
      <a href="#/my">我的</a>
      <a href="#/it">他的</a>
    </div>
    <div class="top">
+       <router-view></router-view>
    </div>
  </div>
</template>
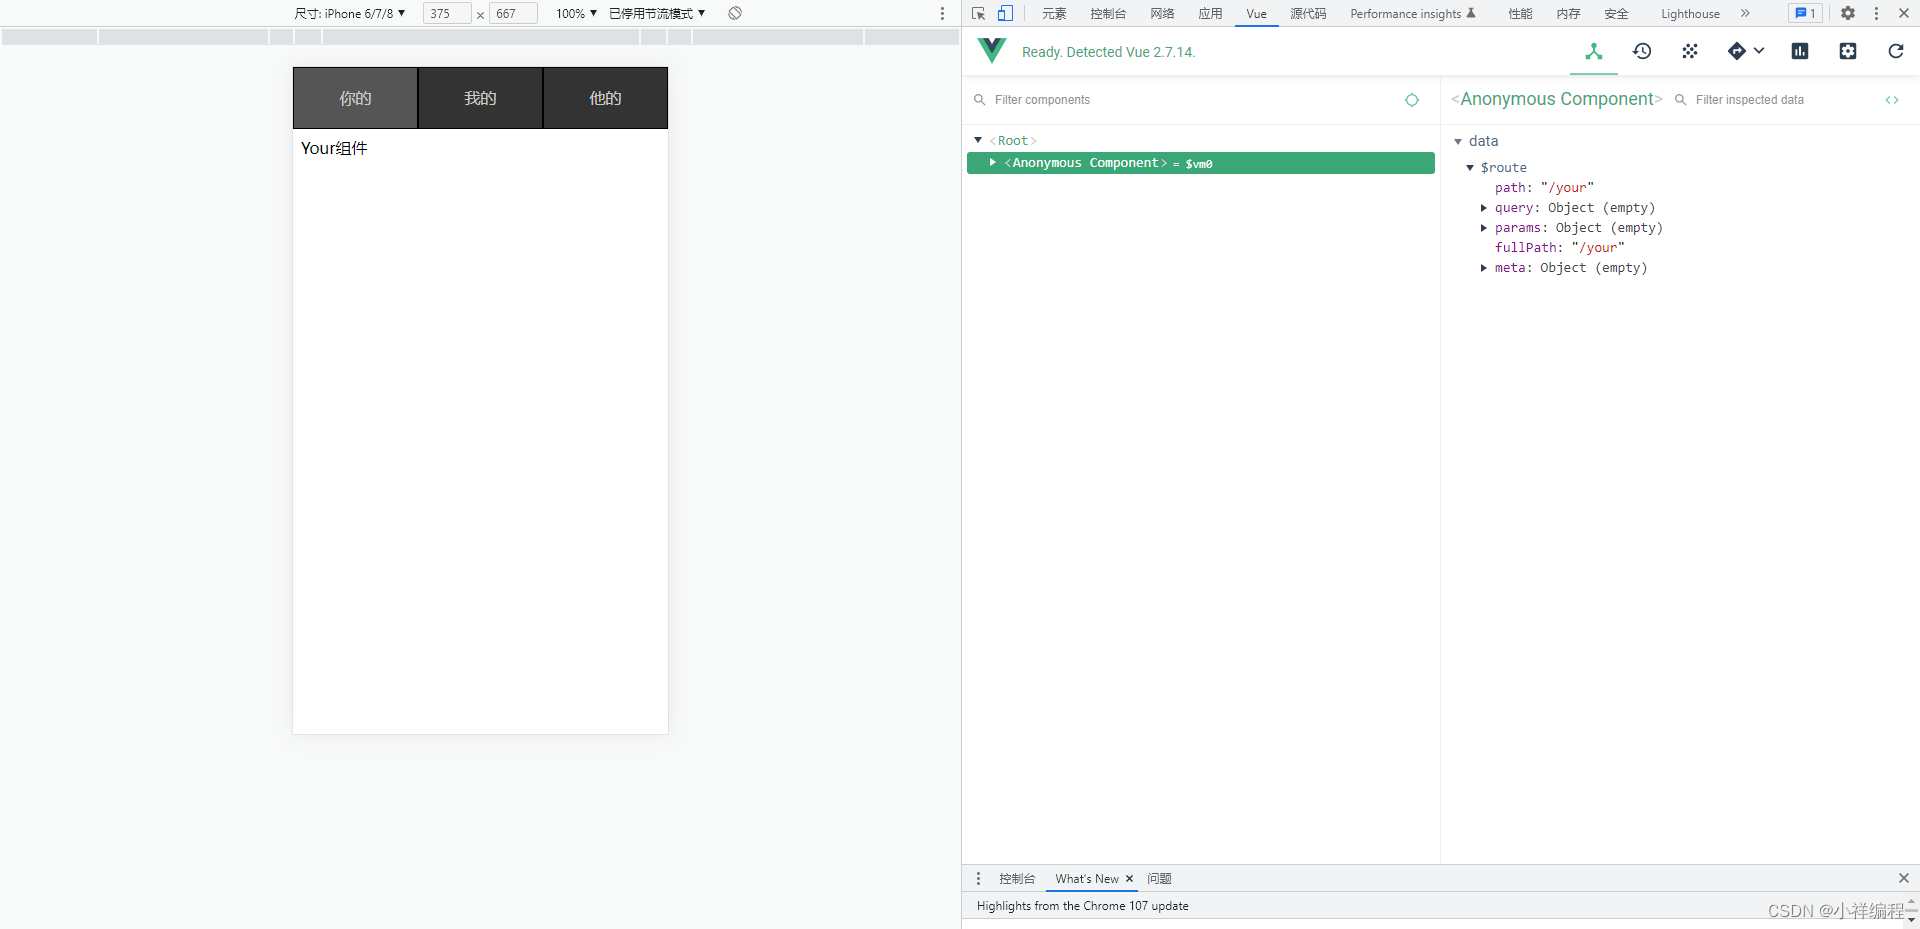
此时,效果图如下:

至此:路由的简单使用完成。
总结
本文主要简单讲了vue-router的基本使用,关于路由的其他使用,例如:路由封装、声明式导航以及编程式导航的讲解会在博主后续文章中讲解。(关注博主不迷路)