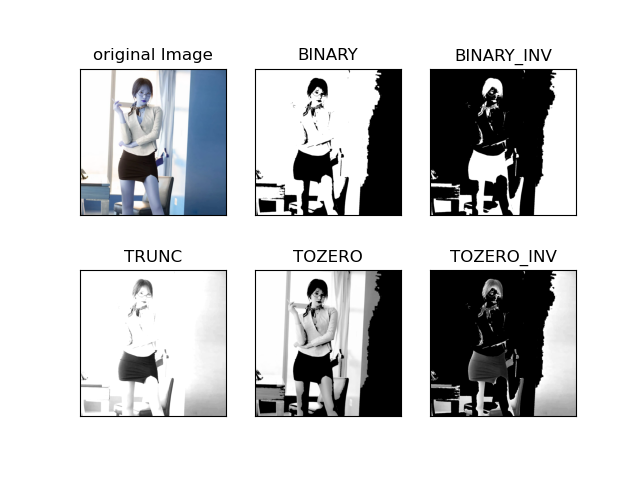
1 图像阈值
ret, dst = cv2.threshold(src, thresh, maxval, type)
- src: 输入图像,只能输入单通道图像,通常来说是灰度图
- dst: 输出图
- thresh: 阈值
- maxval:当像素值超过了阈值(或者小于阈值,根据type来决定),所赋予的值
- type:二值化操作的类型
- cv2.THRESH_BINARY 超过阈值部分取maxval(最大值),否则取0
- cv2.THRESH_BINARY_INV 超过阈值部分取0,否则取最大值
- cv2.THRESH_TRUNC 大于阈值部分设为阈值,否则不变
- cv2.THRESH_TOZERO 大于阈值部分不改变,否则设为0
- cv2.THRESH_TOZERO 大于阈值部分设为0,否则不改变
import cv2
import matplotlib.pyplot as plt
import numpy as np

# 图像阈值
img = cv2.imread('test2.jpg')
img_gray = cv2.cvtColor(img, cv2.COLOR_BGR2GRAY)
ret, thresh1 = cv2.threshold(img_gray, 127, 255, cv2.THRESH_BINARY)
ret, thresh2 = cv2.threshold(img_gray, 127, 255, cv2.THRESH_BINARY_INV)
ret, thresh3 = cv2.threshold(img_gray, 127, 255, cv2.THRESH_TRUNC)
ret, thresh4 = cv2.threshold(img_gray, 127, 255, cv2.THRESH_TOZERO)
ret, thresh5 = cv2.threshold(img_gray, 127, 255, cv2.THRESH_TOZERO_INV)
titles = ['original Image', 'BINARY', 'BINARY_INV', 'TRUNC', 'TOZERO', 'TOZERO_INV']
images = [img, thresh1, thresh2, thresh3, thresh4, thresh5]

for i in range(6):
    plt.subplot(2, 3, i + 1), plt.imshow(images[i], 'gray')
    plt.title(titles[i])
    plt.xticks([]), plt.yticks([])
plt.show()
2 图像滤波
import cv2
import numpy as np
# 图像平滑
img = cv2.imread('test1.jpg')
img = cv2.resize(img, (300, 300))
# 均值滤波,简单的平均卷积
blur = cv2.blur(img, (3, 3))
# 方框滤波:-1自动计算颜色通道,可以选择归一化
box_norm = cv2.boxFilter(img, -1, (3, 3), normalize=True)
# 方框滤波:不选择归一化,容易越界
box = cv2.boxFilter(img, -1, (3, 3), normalize=False)
# 高斯滤波:高斯模糊的卷积核里的数值满足高斯分布,相当于更加重视中间
gaussian = cv2.GaussianBlur(img, (5, 5), 1)
# 中值滤波:相当于用中值代替
median = cv2.medianBlur(img, 5)
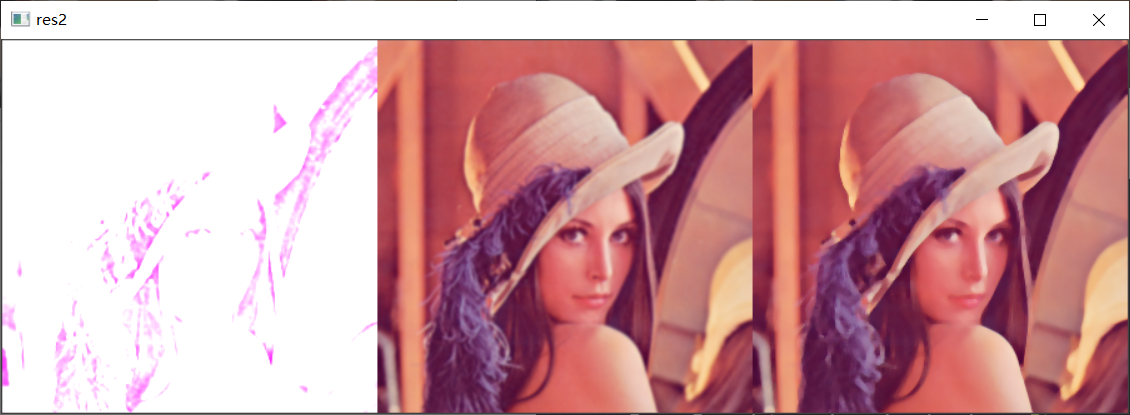
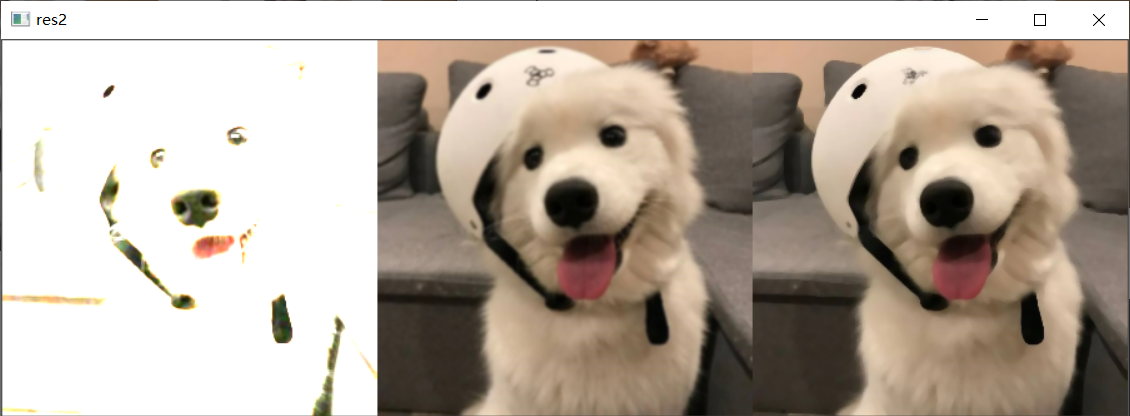
res1 = np.hstack((img, blur, box_norm))
res2 = np.hstack((box, gaussian, median))
cv2.imshow('res1', res1)
cv2.imshow('res2', res2)
cv2.waitKey(0)
cv2.destroyAllWindows()
从左到右依次是:原图,均值滤波,归一化的方框滤波
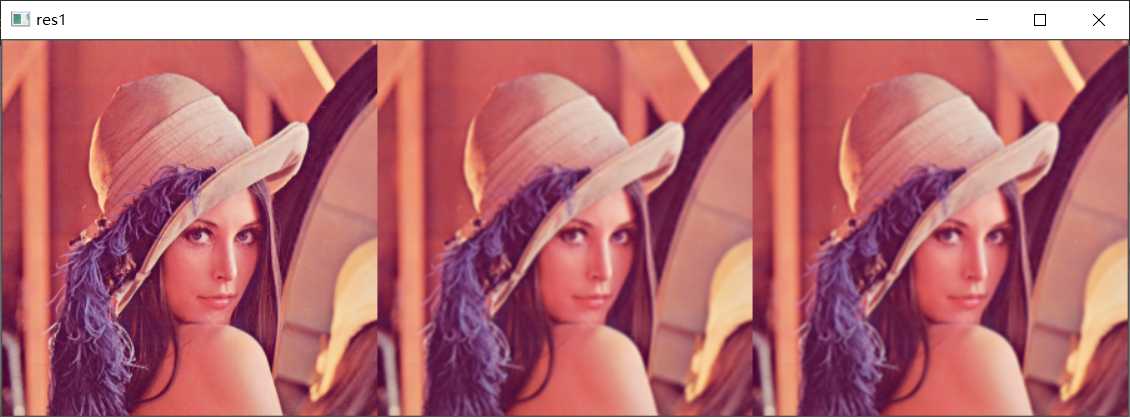

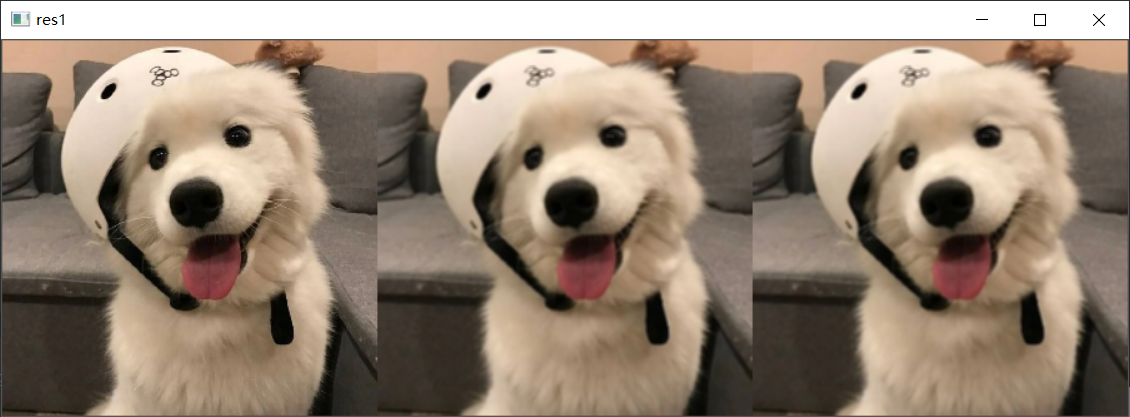
从左到右依次是:非归一化的方框滤波,高斯滤波,中值滤波

3 形态学-腐蚀操作
import cv2
import numpy as np
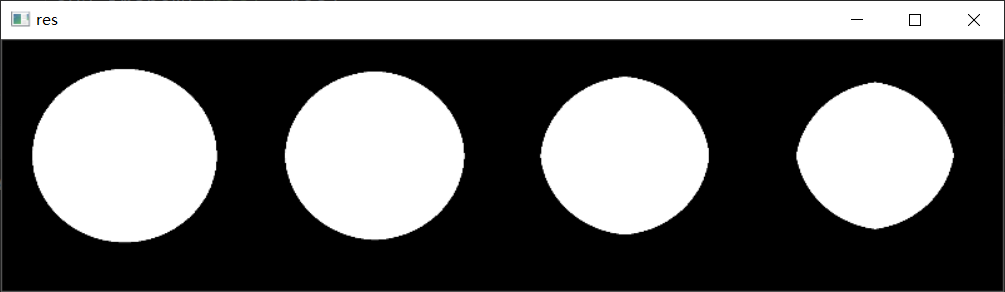
img = cv2.imread('data/circle.jpg')
img = cv2.resize(img, (200, 200))
kernel = np.ones((5, 5), np.uint8)
erosion_1 = cv2.erode(img, kernel, iterations=1)
erosion_2 = cv2.erode(img, kernel, iterations=3)
erosion_3 = cv2.erode(img, kernel, iterations=5)
res = np.hstack([img, erosion_1, erosion_2, erosion_3])
cv2.imshow('res', res)
cv2.waitKey(0)
4 形态学-膨胀操作
import cv2
import numpy as np
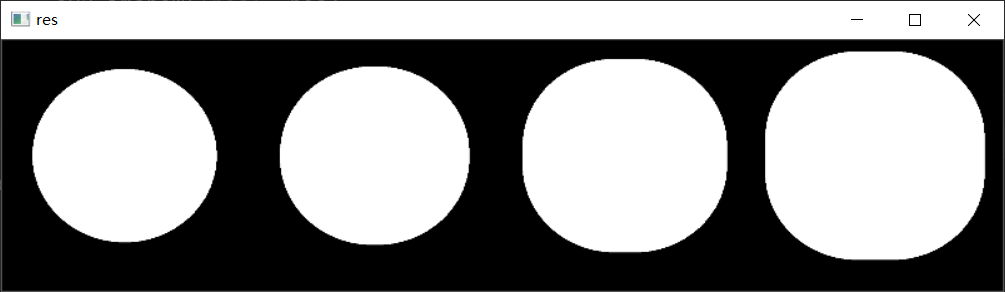
img = cv2.imread('data/circle.jpg')
img = cv2.resize(img, (200, 200))
kernel = np.ones((5, 5), np.uint8)
erosion_1 = cv2.dilate(img, kernel, iterations=1)
erosion_2 = cv2.dilate(img, kernel, iterations=4)
erosion_3 = cv2.dilate(img, kernel, iterations=7)
res = np.hstack([img, erosion_1, erosion_2, erosion_3])
cv2.imshow('res', res)
cv2.waitKey(0)
5 开运算与闭运算
开运算:先腐蚀,再膨胀
import cv2
import numpy as np

img = cv2.imread('data/test3.jpg')
img = cv2.resize(img, (500, 500))
# 开运算:先腐蚀,再膨胀
kernel = np.ones((5, 5), np.uint8)
opening = cv2.morphologyEx(img, cv2.MORPH_OPEN, kernel)
res = np.hstack([img, opening])
cv2.imshow('opening', res)
cv2.waitKey(0)
闭运算:先腐蚀,再膨胀
import cv2
import numpy as np

img = cv2.imread('data/test3.jpg')
img = cv2.resize(img, (500, 500))
# 开运算:先腐蚀,再膨胀
kernel = np.ones((5, 5), np.uint8)
closing = cv2.morphologyEx(img, cv2.MORPH_CLOSE, kernel)
res = np.hstack([img, closing])
cv2.imshow('closing', res)
cv2.waitKey(0)
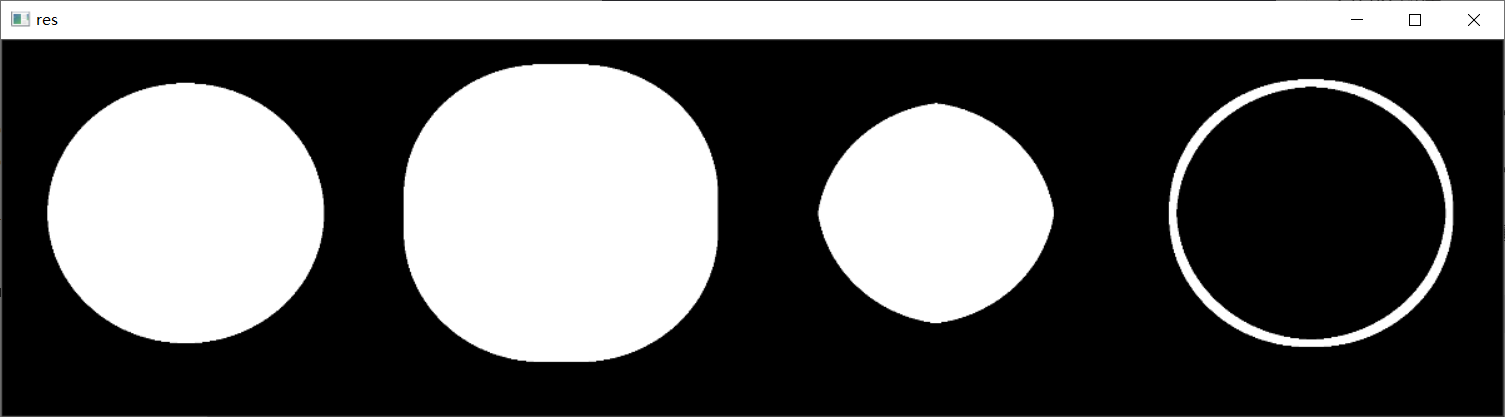
6 梯度
import cv2
import numpy as np

# 梯度=膨胀-腐蚀
img = cv2.imread('data/circle.png')
img = cv2.resize(img, (300, 300))
kernel = np.ones((7, 7), np.uint8)
dilate = cv2.dilate(img, kernel, iterations=5)
erosion = cv2.erode(img, kernel, iterations=5)
gradient = cv2.morphologyEx(img, cv2.MORPH_GRADIENT, kernel)
res = np.hstack([img, dilate, erosion, gradient])
cv2.imshow('res', res)
cv2.waitKey(0)