文章目录
1. 使用 npm init -y 初始化项目
2. 安装webpack相关依赖包
cnpm i webpack webpack-cli -D;
3. webpack 最基础配置
3.1 在项目根目录下创建 webpack 的配置文件 webpack.config.js, 进行下列最基本配置;
const path = require("path");

module.exports = {


  // 入口文件
  entry: "./src/index.js",

  // 输出路径
  output: {


    filename: "bundle.js", // 输出文件名称
    path: path.resolve(__dirname, "./dist"), // 输出路径
  },
};
3.2 编辑 package.json 文件,添加打包命令;
- 在
scripts中添加"build": "webpack", 最终结果如下
"scripts": {


  "test": "echo \"Error: no test specified\" && exit 1",
  "build": "webpack"
}
npx webpack或直接执行npx进行打包编译;
3.3 npm run build 运行打包工具
- 要根据
webpack.config.js配置文件中入口文件的配置,创建有符合路径的入口文件。
4. 配置 typescript 打包环境
4.1 cnpm i typescript ts-loader -D
4.2 在 webpack.config.js 中配置 typescript 的编译配置
const path = require("path");

module.exports = {


  // 入口文件
  entry: "./src/index.ts", // ************ --- 这里修改为 ts 文件

  // 输出路径
  output: {


    filename: "bundle.js", // 输出文件名称
    path: path.resolve(__dirname, "./dist"), // 输出路径
  },

  module: {


    rules: [
      {


        // 按规则匹配需要进行加载的文件
        test: /\.ts$/,
        // 使用加载器的名称
        use: 'ts-loader',
        // 排除不需要加载的文件
        exclude: /node_modules/,
      }
    ]
  },
}
4.3 tsconfig.json ts 的编译配置文件
- 在根目录下创建 ts 的编译配置文件
tsconfig.json, 直接创建,空文件也可以生效; - 或使用
tsc --init生成配置文件, 此配置文件含有一些默认配置,需要按需修改;
运行 npm run build 即可进行ts编译;
5. babel 低版本浏览器兼容
5.1 cnpm i @babel/core @babel/preset-env babel-loader core-js -D;
5.2 修改配置文件 webpack.config.js;
module.exports = {


  output: {


    // 1. *** --- 设置webpack不使用箭头函数 --- ***/
    environment: {


      arrowFunction: false,
    },
  },

  module: {


    rules: [
      {


        // 按规则匹配需要进行加载的文件
        test: /\.ts$/,
        // 使用加载器的名称
        // 加载器运行顺序, 由后往前;(此处: 先通过ts-loader将ts编译为js, 然后使用babel-loader进行兼容性处理)
        use: [

          // 2. *** --- babel最重要的一坨配置 --- *** //
          {


            loader: 'babel-loader',
            options:{


              presets: [
                [
                  "@babel/preset-env",
                  {


                    // 配置需要兼容的浏览器
                    targets: {


                      "chrome": "79",
                      "ie": "11",
                    },
                    // 指定core-js版本
                    "corejs": "3",
                    // 设置core-js的使用方式
                    "useBuiltIns": "usage", // usage: 按需加载
                  }
                ]
              ],
            },
          },
          // *** --- / 2. babel最重要的一坨配置 --- *** //

          'ts-loader',
        ],
        // 排除不需要加载的文件
        exclude: /node_modules/,
      }
    ]
  },
}
6. 编译时自动删除已有的历史 dist 文件
6.1 cnpm i clean-webpack-plugin -D: 安装第三方插件;
6.2 修改配置文件
const {

     CleanWebpackPlugin } = require("clean-webpack-plugin")

module.exports = {


  // ... 其余配置
  plugins: [
    new CleanWebpackPlugin(),
  ],
}
7. 指定html模板
cnpm i html-webpack-plugin -D: 安装依赖;- 修改配置文件
const {

     CleanWebpackPlugin } = require("clean-webpack-plugin");
const HtmlWebpackPlugin = require("html-webpack-plugin");

module.exports = {


  // ... 其余配置
  plugins: [
    new CleanWebpackPlugin(),
    // 指定模板文件
    // 插件会自动将编译出来的入口文件(./dist/bundle.js)引入到 html 文件中;
    // 如果html没有需要特殊配置,可直接省略指定模板文件, 如下:
    // new HtmlWebpackPlugin()
    new HtmlWebpackPlugin({


      template: "./index.html",
    }),
  ],
}
8. 热编译 & mode编译模式
动态监听ts文件改变,自动编译;
cnpm i webpack-dev-server -D- 配置调试命令
"scripts": {


  "test": "echo \"Error: no test specified\" && exit 1",
  "build": "webpack",
  // --open: 自动打开默认浏览器
  // --mode=development: 指定调试模式为开发(development)模式
  // --mode=production: 指定调试模式为生产(production)模式
  "dev": "webpack serve --open --mode=development",
  "prod": "webpack serve --open --mode=production"
}
- 查看当前调试模式
console.log(process.env.NODE_ENV);
cnpm run dev: 开启调试
最终状态
安装所有依赖
cnpm i -D webpack webpack-cli typescript ts-loader @babel/core @babel/preset-env babel-loader core-js clean-webpack-plugin html-webpack-plugin webpack-dev-server
webpack.config.js 配置文件最终状态
const path = require("path");
const {

     CleanWebpackPlugin } = require("clean-webpack-plugin");
const HtmlWebpackPlugin = require("html-webpack-plugin");

module.exports = {


  // 入口文件
  entry: "./src/index.ts",

  // 输出路径
  output: {


    filename: "bundle.js", // 输出文件名称
    path: path.resolve(__dirname, "./dist"), // 输出路径
    // 设置webpack不使用箭头函数
    environment: {


      arrowFunction: false,
    },
  },

  module: {


    rules: [
      {


        // 按规则匹配需要进行加载的文件
        test: /\.ts$/,
        // 使用加载器的名称
        // 加载器运行顺序, 由后往前;(此处: 先通过ts-loader将ts编译为js, 然后使用babel-loader进行兼容性处理)
        use: [

          // *** --- babel最重要的一坨配置 --- *** //
          {


            loader: 'babel-loader',
            options: {


              presets: [
                [
                  "@babel/preset-env",
                  {


                    // 配置需要兼容的浏览器
                    targets: {


                      "chrome": "79",
                      "ie": "11",
                    },
                    // 指定core-js版本
                    "corejs": "3",
                    // 设置core-js的使用方式
                    "useBuiltIns": "usage", // usage: 按需加载
                  }
                ]
              ],
            },
          },
          // *** --- / babel最重要的一坨配置 --- *** //
          'ts-loader',
        ],
        // 排除不需要加载的文件
        exclude: /node_modules/,
      }
    ]
  },

  plugins: [
    new CleanWebpackPlugin(),
    // 指定模板文件
    // 插件会自动将编译出来的入口文件(./dist/bundle.js)引入到 html 文件中;
    // 如果html没有需要特殊配置,可直接省略指定模板文件, 如下:
    // new HtmlWebpackPlugin()
    new HtmlWebpackPlugin({


      template: "./index.html",
    }),
  ],
}
package.json 文件最终状态
{


  "name": "typescript",
  "version": "1.0.0",
  "description": "",
  "main": "index.js",
  "scripts": {


    "test": "echo \"Error: no test specified\" && exit 1",
    "build": "webpack --mode=production",
    "dev": "webpack serve --open --mode=development",
    "prod": "webpack serve --open --mode=production"
  },
  "keywords": [],
  "author": "",
  "license": "ISC",
  "devDependencies": {


    "@babel/core": "^7.19.6",
    "@babel/preset-env": "^7.19.4",
    "babel-loader": "^8.2.5",
    "clean-webpack-plugin": "^4.0.0",
    "core-js": "^3.25.5",
    "html-webpack-plugin": "^5.5.0",
    "ts-loader": "^9.4.1",
    "typescript": "^4.8.4",
    "webpack": "^5.74.0",
    "webpack-cli": "^4.10.0",
    "webpack-dev-server": "^4.11.1"
  }
}
tsconfig.json 文件最终状态
- 此文件使用
tsc --init自动生成,不予展示;
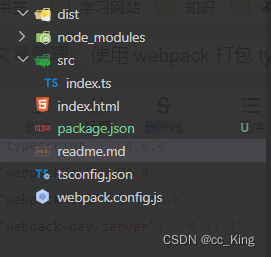
目录结构
至此:.ts 文件的 webpack 打包功能就实现了