Windows Subsystem for Linux (WSL) 是 Microsoft Windows 中的一个兼容层,允许用户在 Windows 10 和 Windows Server 2019 上本地运行 Linux 二进制文件。WSL 使用户能够运行完整的 Linux 用户环境,包括运行 Linux 应用程序和工具的能力,在 Windows 机器上,无需虚拟机或双启动设置。
WSL 提供与 Linux 兼容的内核接口,允许用户在 Windows 上运行原生 Linux 命令行工具和实用程序,以及完整的 Linux 图形应用程序。Linux环境运行在单独的轻量级虚拟机中,并与Windows文件系统集成,允许用户访问Windows和Linux文件系统上的文件和目录。
安装依赖项和 WLS2 可以在以前的发行版本中找到。
https://medium.com/@dufresne.danny/access-usb-devices-via-wsl2-kali-linux-2dbd105cdfd9允许 USB 传感器设备在 WSL 环境中被识别的主要基础是从源代码重建的内核。
重建 WSL 内核的过程包括以下步骤:
获取 Linux 内核源代码:你可以从 kernel.org 下载最新稳定版本的 Linux 内核,或者获取你的 WSL 环境当前使用的 Linux 内核版本的源代码。
sudo git clone https://github.com/microsoft/WSL2-Linux-Kernel.git安装构建依赖项:你需要安装各种开发工具和库以构建内核,包括 GCC 编译器、make 和其他包。可以在 WSL 环境中使用 Linux 发行版的包管理器安装这些包。
sudo apt update && sudo apt upgrade -y && \
sudo apt install -y build-essential flex bison \
libgtk2.0-dev libelf-dev libncurses-dev autoconf \
libudev-dev libtool zip unzip v4l-utils libssl-dev \
python3-pip cmake git iputils-ping net-tools
配置内核:在构建内核之前,你需要配置 WSL 环境的选项和设置。这是使用“sudo make menuconfig”完成的。
cd WSL2-Linux-Kernel
sudo cp /proc/config.gz config
sudo mv config .config
sudo make menuconfig
构建内核:在做出推荐选择之后。
Device Drivers

[ ] Network device support -> [*] Network device support
[ ] USB Network Adapters -> [*] USB Network Adapters
[ ] Multi-purpose USB Networking Framework -> [*] Multi-purpose USB Networking Framework
-M- CDC Ethernet support (smart devices such as cable modems)
[ ] Host for RNDIS and ActiveSync devices -> [*] Host for RNDIS and ActiveSync devices
<ESC><ESC><ESC><ESC>

Device Drivers

[ ] Multimedia support -> [*] Multimedia support
[ ] Filter Media Drivers -> [*] Filter Media Drivers
[ ] Autoselect ancillary devices -> [*] Autoselect ancillary devices
Media Device Types -> [ ] Cameras/video grabbers support -> [*] Cameras/video grabbers support
[ ] Media USB Adapters -> [*] Media USB Adapters
Video4linux options -> [*] v4L2 sub-device userspace API
Media drivers
[*] Media USB Drivers ->
< > USB Video Class (UVC) -> <*> USB Video Class (UVC)
[*] UVC input events device support
[*] GSPCA based webcams
< Save > -> < Exit > -> < Exit > -> < Exit > -> < Exit >
编译内核将生成一个 vmlinux 映像,然后可以在启动时加载该映像。
sudo make -j$(nproc)
sudo make modules_install -j$(nproc)
sudo make install -j$(nproc)
安装新内核:构建完成后,你需要在 WSL 环境中安装新内核及其模块。这涉及将相关文件复制到适当的位置并更新引导加载程序配置。
//Copy vmlinux image to C drive
sudo cp vmlinux /mnt/c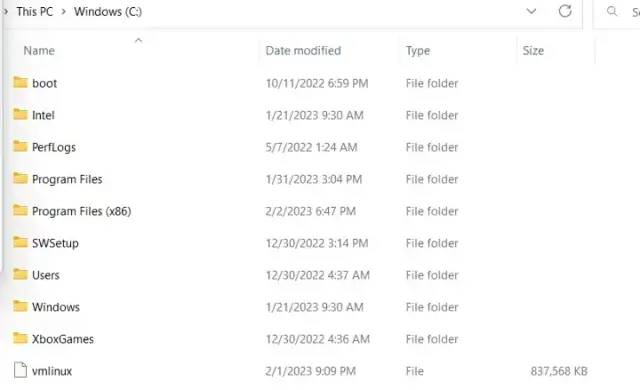
虚拟机映像
//create text file named .wslconfig, which points to vmlinux image.
C://Users/<user directory>
.wslconfig 内容
加载 powershell 实例并发出以下命令以重新加载新内核。
wsl --shutdown
wsl
安装 v4l-utils、guvcview、cheese 以验证安装。
sudo apt-get install v4l2-utils
sudo apt-get install guvcview
sudo apt-get install cheese
要验证安装,请使用以下命令。
// you will need to re attach busid to linux distro

//verify new loaded kernal
uname -a
//verify webcam is detected
v4l2-ctl --list-devices
//change permissions of video modules
sudo chmod 777 /dev/video0
sudo chmod 777 /dev/video1
//verify file can be opened
v4l2-ctl -d /dev/video0 --all
//use guvcview to check webcam accessibility
guvcview -d /dev/video0 //note I did have to downscale resolution to 640X480 and FPS to 15/1 from 30/1
差不多就是这样,你可以使用 Learning Opencv3(Authors: Adrian Kaehler, Gary Bradski)中的以下示例代码进行测试。
#include <opencv2/opencv.hpp>
#include <iostream>


using namespace cv;
int main( int argc, char** argv ){

        cv::namedWindow( "Example 2-10",
        cv::WINDOW_AUTOSIZE );

        cv::VideoCapture cap;
        int fps = 10;
        double fps2 = cap.get(cv::CAP_PROP_FPS);
        cap.set(CAP_PROP_FRAME_WIDTH, 160);//Setting the width of the video
        cap.set(CAP_PROP_FRAME_HEIGHT, 120);//Setting the height of the video//
        if (argc==1) {
                cap.open(0);
        }else {
        cap.open(argv[1]);
        }
        if( !cap.isOpened() ) {
        std::cerr << "Couldn't open capture." << std::endl;
                return -1;
        }
         cv::Mat frame;
        for(;;) {
                cap >> frame;
                if( frame.empty() ) break;
                cv::imshow( "Example 2-3", frame );
                if( (char) cv::waitKey(5) >= 0 )break;
}
}
参考资料(在 chatGPT 的帮助下撰写的文章)
https://medium.com/@petehouston/install-v4l-utils-on-debian-based-distros-d4f5c2fdcf61
https://version-2.com/en/2022/02/advice-on-camera-and-microphone-in-wsl2-ubuntu/
https://zenn.dev/pinto0309/articles/c3014043502245
☆ END ☆
如果看到这里,说明你喜欢这篇文章,请转发、点赞。微信搜索「uncle_pn」,欢迎添加小编微信「 woshicver」,每日朋友圈更新一篇高质量博文。
↓扫描二维码添加小编↓
