1 前言
本章介绍下使用mqtt示例发送消息。
2 代码
2.1 示例bug
官方示例:https://gitee.com/Lockzhiner-Electronics/lockzhiner-rk2206-openharmony3.0lts/blob/master/vendor/lockzhiner/rk2206/samples/d1_iot_mqtt/iot_mqtt.c
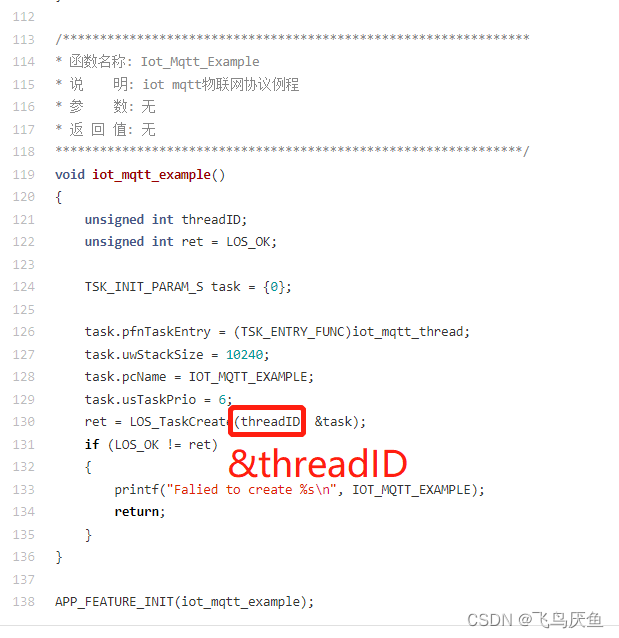
这里有一个bug,不知道后续有没有改回来,注意一下。
2.2 main.c
/*
 * Copyright (c) 2022 FuZhou Lockzhiner Electronic Co., Ltd. All rights reserved.
 * Licensed under the Apache License, Version 2.0 (the "License");
 * you may not use this file except in compliance with the License.
 * You may obtain a copy of the License at
 *
 *     http://www.apache.org/licenses/LICENSE-2.0
 *
 * Unless required by applicable law or agreed to in writing, software
 * distributed under the License is distributed on an "AS IS" BASIS,
 * WITHOUT WARRANTIES OR CONDITIONS OF ANY KIND, either express or implied.
 * See the License for the specific language governing permissions and
 * limitations under the License.
 */

#include "los_tick.h"
#include "los_task.h"
#include "los_config.h"
#include "los_interrupt.h"
#include "los_debug.h"
#include "los_compiler.h"
#include "lz_hardware.h"
#include "config_network.h"

#define  MAIN_TAG              "MAIN"
int DeviceManagerStart();
void IotInit(void);
// void nfc_example2();
// void uart_example();
void iot_mqtt_example();
/*****************************************************************************
 Function    : main
 Description : Main function entry
 Input       : None
 Output      : None
 Return      : None
 *****************************************************************************/
LITE_OS_SEC_TEXT_INIT int Main(void)
{


    int ret;
    LZ_HARDWARE_LOGD(MAIN_TAG, "%s: enter ...", __func__);

    HalInit();

    ret = LOS_KernelInit();
    if (ret == LOS_OK) {


        IotInit();

        printf("\n");

        printf("----------- test start -----------\n");
        // task_example2();
        // nfc_example2();
        iot_mqtt_example();
        // uart_example();
        printf("----------- test end -----------\n");

        printf("\n");

        OHOS_SystemInit();
        ClkDevInit();
        /* 开启驱动管理服务 */
        //DeviceManagerStart();
        // ExternalTaskConfigNetwork();
        LZ_HARDWARE_LOGD(MAIN_TAG, "%s: LOS_Start ...", __func__);
        LOS_Start();
    }

    while (1) {


        __asm volatile("wfi");
    }
}
PS:ExternalTaskConfigNetwork需要在main中先注释掉。
2.3 更改wifi账号和密码
lockzhiner-rk2206-openharmony3.0lts\device\rockchip\rk2206\sdk_liteos\board\src\config_network.c
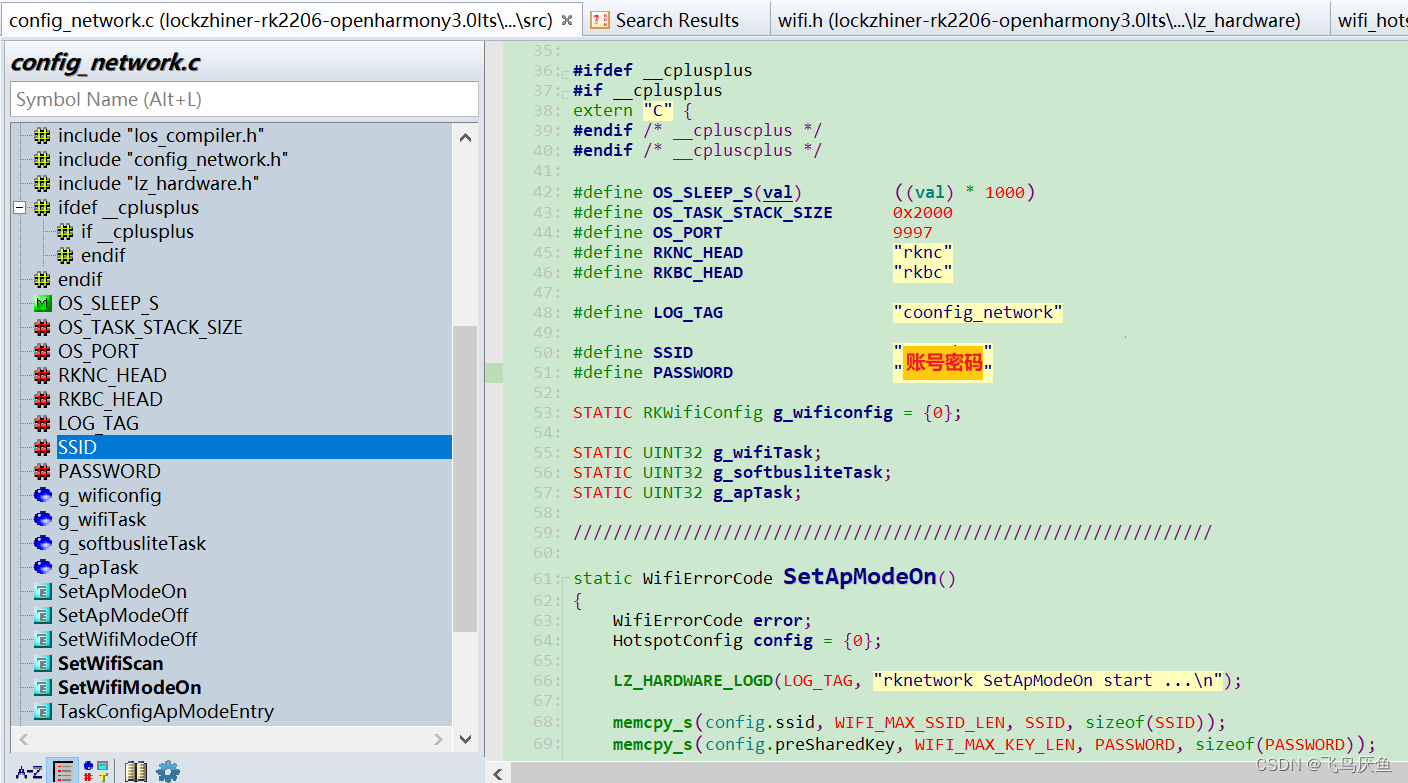
2.4 MQTT账号与密码设置
初始化
typedef struct
{


	/** The eyecatcher for this structure.  must be MQTC. */
	char struct_id[4];
	/** The version number of this structure.  Must be 0 */
	int struct_version;
	/** Version of MQTT to be used.  3 = 3.1 4 = 3.1.1
	  */
	unsigned char MQTTVersion;
	MQTTString clientID;
	unsigned short keepAliveInterval;
	unsigned char cleansession;
	unsigned char willFlag;
	MQTTPacket_willOptions will;
	MQTTString username;
	MQTTString password;
} MQTTPacket_connectData;


#define MQTTPacket_connectData_initializer {

       {

      'M', 'Q', 'T', 'C'}, 0, 4, {

      NULL, {

      0, NULL}}, 60, 1, 0, \
		MQTTPacket_willOptions_initializer, {

      NULL, {

      0, NULL}}, {

      NULL, {

      0, NULL}} }
仿照着添加mqtt账号和密码
这里使用的是示例的代码。增加账号和密码即可
begin:
    printf("NetworkConnect...\n");
    rc = NetworkConnect(&network, MQTT_HOST, MQTT_PORT);

    printf("MQTTClientInit...\n");
    MQTTClientInit(&client, &network, 2000, sendBuf, sizeof(sendBuf), readBuf, sizeof(readBuf));

    clientId.cstring = "RK2206-youkai";

    data.clientID          = clientId;
    data.willFlag          = 0;
    data.MQTTVersion       = 3;
    data.keepAliveInterval = 0;
    data.cleansession      = 1;

    // youkai add
    MQTTString username_t = MQTTString_initializer;
    username_t.cstring = "mqtt_id";
    MQTTString password_t = MQTTString_initializer;
    password_t.cstring = "mqtt_pw";
    data.password = password_t;
    data.username = username_t;
2.5 发送接口
    while (1)
    {


        sprintf(payload, "publish test");
        message.qos = 2;
        message.retained = 0;
        message.payload = payload;
        message.payloadlen = strlen(payload);

        if ((rc = MQTTPublish(&client, "IOT_MQTT", &message)) != 0){


            printf("Return code from MQTT publish is %d\n", rc);
            NetworkDisconnect(&network);
            MQTTDisconnect(&client);
            goto begin;
        }

        LOS_Msleep(5000);
    }
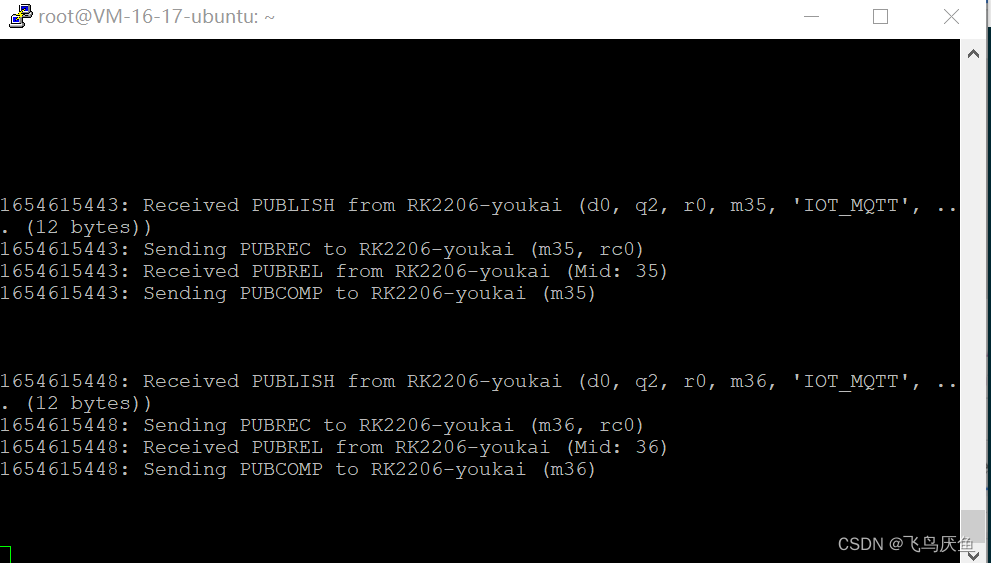
接口比较简单,MQTTPublish用于发送消息,其中IOT_MQTT也就是消息本身,可以注意服务器的接收内容。
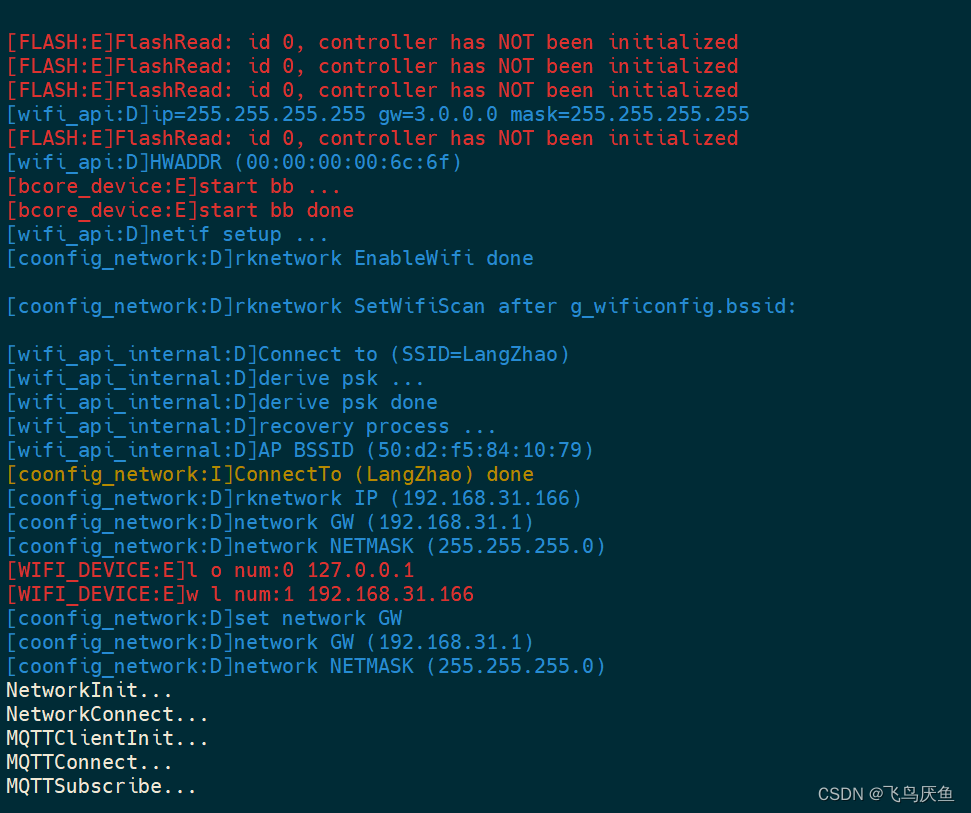
3结果
小凌派log
服务器log