目录

前言
需求: 使用FFmpeg获取RTSP流,抓取其中的一帧图片进行图像分析。
闲聊:本来,我这个工具是要在ARM机器上进行使用的,最后因为库的原因,并没有使用FFmepg去抓取图片。而是采用了ZLMediaKit去抓取图片,但这个工具有个较为致命的问题,就是每次要停止抓图,很麻煩。
但在本篇文章,并不会使用上面说的那种不好的方法,以后有空也可以讲解一下这种方法,没准自己能想到方法进行改进。
20221103
这个是在原来的文章的基础进行扩充的,也就是在这个时候,增加了对在ARM V7机器上使用FFmpeg 4.4.3进行抓流的尝试。这里进行一个总结。
我们看一下这里ffmpeg的最新版的一些介绍:
4.4.3 was released on 2022-10-09. It is the latest stable FFmpeg release from the 4.4 release branch, which was cut from master on 2021-04-08.
It includes the following library versions:
libavutil 56. 70.100
libavcodec 58.134.100
libavformat 58. 76.100
libavdevice 58. 13.100
libavfilter 7.110.100
libswscale 5. 9.100
libswresample 3. 9.100
libpostproc 55. 9.100
其实流程已经有了一定的改变了,包括一些函数都被弃用了,非常的烦恼,导致在查询资料的时候,很多查出来的都不能用,所以后面去看了一下源码,虽然有用,但其实用处也不是太大,后面也会把这部分源码稍微贴一下,供需要的人稍微看一下。
正文
一、环境
1、环境一
Win11+Qt5.15+MSVC2019+FFmpeg+OpenCV
FFmpeg的版本忘记了,应该是从网上下载的,这个网上下载个最新的版本,应该问题也不是很大。下载链接:https://ffmpeg.org/releases/?C=N;O=D
OpenCV的版本是我自己从网上下载的源码,可以参考这个链接进行下载:Ubuntu 16.04 + Qt 5.11 +opencv 3.4完美配置(亲测,最简单完美的方法)然后使用VS2019进行编译得到的库。如果你使用的不是MSVC2019而是MinGW,则要自己从新进行编译,网上找下教程,应该是挺容易的。然后,你再将编译好的include,bin,lib文件放在我当前的位置上,就可以了,或者,你自己放个位置,然后,pro文件中进行修改也是可以的。
程序链接: https://download.csdn.net/download/qq_43211060/85986887
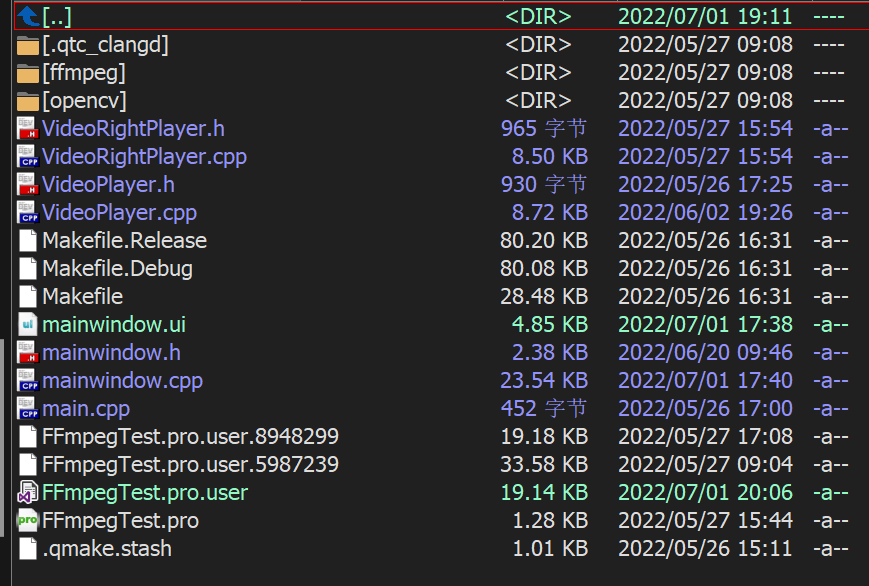
上图中的ffmpeg与opencv就是我放的所需要的库文件了,基本你只要环境跟我一样,应该是不用再下载,就可以直接打开Qt编译,编译后,会提示一些dll库没有,这个时候,你就把里面的ffmpeg和opencv里面的/bin文件夹中的dll文件拷贝放到你编译出来的exe文件中(一般是在build目录下),这样,应该编译就可以通过了。
2、环境二
这次的运行环境是在:
Linux version 3.4.39 (root@ubuntu) (gcc version 4.6.3 20120201 (prerelease) (crosstool-NG linaro-1.13.1-2012.02-20120222 - Linaro GCC 2012.02) )
所以,这次使用了最新版的FFmpeg(20221103当前最新),下载地址为:
二、程序效果
[外链图片转存失败,源站可能有防盗链机制,建议将图片保存下来直接上传(img-oROaFx3A-1667616485870)(Image/306_最新FFmpeg RTSP流抓取.assets/image-20221103110925281.png)]
这就是抓取下来的图片,因为只是为了提供一个接口,所以,并没有将图片实时显示出来。
三、FFmpeg抓取RTSP图片
1、Windows环境
- ffmpeg抓取图片的停止和开始是通过一个启动或终止一个线程来实现的。
/*线程*/
void VideoPlayer::startPlay()
{


 //调用 QThread 的start函数 将会自动执行下面的run函数 run函数是一个新的线程
    this->start();
}

void VideoPlayer::stopPlay()
{


 //调用 QThread 的start函数 将会自动执行下面的run函数 run函数是一个新的线程
//    thread()->terminate();
//    thread()->wait();
    this->terminate();
    this->wait();
}
- 核心抓取图片的线程
/*线程*/
void VideoPlayer::run()
{


    /*定义结构体 调用其成员函数*/
    //输入数据缓存,视音频流个数 视音频流 文件名 时长 比特率 解封装等
    AVFormatContext *pFormatCtx;
    AVCodecContext *pCodecCtx;
    AVCodec *pCodec;/*存储解码器信息*/
    AVFrame *pFrame, *pFrameRGB;/*存储解码器信息*/
    AVPacket *packet;/*数据包*/
   static uint8_t *out_buffer;

    /*处理图片像素数据 图片像素格式转换 图片拉伸等 */
    static struct SwsContext *img_convert_ctx;
         /*视频流*/       /*图像*/
    int videoStream, i, numBytes;
      /*解码*/   /*解码成功*/
    int ret, got_picture;

    avformat_network_init();//初始化FFmpeg网络模块
    av_register_all();//初始化FFMPEG  调用了这个才能正常适用编码器和解码器(弃用函数)


    pFormatCtx = avformat_alloc_context();//初始化内存

    //AVDictionary是FFmpeg的键值对存储工具,FFmpeg经常使用AVDictionary设置/读取内部参数
    AVDictionary *avdic=NULL;
    char option_key[]="rtsp_transport";
    char  m_bTcp;
    av_dict_set(&avdic,option_key,m_bTcp ? "udp" : "tcp",0);
    char option_key2[]="stimeout";
    char option_value2[]="3000000";
    av_dict_set(&avdic, "buffer_size", "1024000", 0);                 //画质优化
    av_dict_set(&avdic,option_key2,option_value2,0);
    //char url[]="rtsp://admin:[email protected]/stream0";/*网络摄像头的数据*/
    QByteArray ba=m_sUrlAddress.toLocal8Bit();
    char* url = ba.data();
    /*avformat_open_input函数*/
    //参数一:指向用户提供的AVFormatContext(由avformat_alloc_context分配)的指针。
    //参数二:要打开的流的url
    //参数三:fmt如果非空,则此参数强制使用特定的输入格式。否则6将自动检测格式。
    //参数四:包含AVFormatContext和demuxer私有选项的字典。返回时,此参数将被销毁并替换为包含找不到的选项
    if (avformat_open_input(&pFormatCtx, url, NULL, &avdic) != 0)    //打开多媒体并获取信息
    {


        printf("can't open the file. \n");
        return;
    }
    if(avdic != NULL)
    {


        av_dict_free(&avdic);
    }
    qDebug()<<"--->z pFormatCtx->streams[videoStream]->codec"<<pFormatCtx->streams[0]->codec->codec_id;
    //获取视频流信息
    /*avformat_find_stream_info函数*/
    //参数一:媒体文件上下文。
    //参数二:字典,一些配置选项。      /*媒体句柄*/
    if (avformat_find_stream_info(pFormatCtx, NULL) < 0)
    {


        printf("Could't find stream infomation.\n");
        return;
    }
    videoStream = -1;/*无视频流*/
    //循环查找视频中包含的流信息,直到找到视频类型的流
    /* pFormatCtx函数*/
    //unsigned int nb_streams    当前的流数量
    //AVStream **streams;  指针数组 视频流和语音流*/
    for (i = 0; i < pFormatCtx->nb_streams; i++)
    {


        qDebug()<<"--->z  run1"<<pFormatCtx->streams[i]->codec->codec_type;
        if (pFormatCtx->streams[i]->codec->codec_type == AVMEDIA_TYPE_VIDEO)//codec弃用函数
        {


            videoStream = i;
        }
    }
    //如果videoStream为-1 说明没有找到视频流
    if (videoStream == -1)
    {


        printf("Didn't find a video stream.\n");
        return;
    }

    //打印流信息
    //注意:最后一个参数填0,打印输入流;最后一个参数填1,打印输出流
    av_dump_format(pFormatCtx, 0, url,0);

    //查找解码器,获取指向视频流的编解码器上下文的指针
    pCodecCtx = pFormatCtx->streams[videoStream]->codec;
    //通过解封装之后从avstream结构体里获取CodecID(指定格式流)
    pCodec = avcodec_find_decoder(pCodecCtx->codec_id);
    qDebug()<<"--->z CVlcCameraCapture::run()2"<<pCodec<<pCodecCtx->codec_id<<pCodec<<videoStream;
    //设置编码器参数(不同参数对视频编质量或大小的影响)
    pCodecCtx->bit_rate =0;   //初始化为0   比特率
    pCodecCtx->time_base.num=1;  //下面两行:一秒钟25帧
    pCodecCtx->time_base.den=25;
    pCodecCtx->frame_number=1;   //每包一个视频帧

    /*编码器如果等于NULL 编码器没有找到*/
    if (pCodec == NULL)
    {


        printf("Codec not found.\n");
        return;
    }

    //打开解码器
    if (avcodec_open2(pCodecCtx, pCodec, NULL) < 0)
    {


        printf("Could not open codec.\n");
        return;
    }

    pFrame = av_frame_alloc();    //创建  存储解码器信息*/
    pFrameRGB = av_frame_alloc(); //创建  存储解码器信息*/

                                  //解码后的h264数据转换成RGB32
    img_convert_ctx = sws_getContext(pCodecCtx->width, pCodecCtx->height,
                 pCodecCtx->pix_fmt, pCodecCtx->width, pCodecCtx->height,
                        AV_PIX_FMT_RGB32, SWS_BICUBIC, NULL, NULL, NULL);


    //图像的像素格式  图像的像素宽度  图像的像素高度(计算这个格式的图片,需要多少字节来存储)
    numBytes = avpicture_get_size(AV_PIX_FMT_RGB32, pCodecCtx->width,pCodecCtx->height);//(弃用函数)
    qDebug() << numBytes;        //需要多少字节来存储

     out_buffer = (uint8_t *) av_malloc(numBytes * sizeof(uint8_t));
     /*瓜分分配的空间*/
     //瓜分上一步分配到的buffer.
     av_image_fill_arrays(pFrameRGB->data, pFrameRGB->linesize, out_buffer, AV_PIX_FMT_RGB32, pCodecCtx->width, pCodecCtx->height, 1);


    int y_size = pCodecCtx->width * pCodecCtx->height;
    packet = (AVPacket *) malloc(sizeof(AVPacket)); //申请一个视频帧包的大小
    av_new_packet(packet, y_size); //分配packet的数据,为packet分配一个指定大小的内存

     int as = 0;
    while (1)
    {


        //av_read_frame
        //返回流的下一帧。此函数返回存储在文件中的内容,不对有效的帧进行验证。获取存储在文件中的帧中,
        //并为每个调用返回一个。不会的省略有效帧之间的无效数据,以便给解码器最大可用于解码的信息。
        //返回0是成功,小于0则是错误,大于0则是文件末尾,所以大于等于0是返回成功
        //每解码一个视频帧,需要先调用 av_read_frame()获得一帧视频的压缩数据,然后才能对该数据进行解码
        if (av_read_frame(pFormatCtx, packet) <  0)
        {


           qDebug("a == %d\n",++as);

           if(as == 4)
           {


           qDebug(" 连接异常结束\n");
          thread()->terminate();
          thread()->wait();
          this->terminate();
          this->wait();
           }
           continue;
        }

          if(as != 0)
          {


              as = 0;
          }
        if (packet->stream_index == videoStream)
        {


           ret = avcodec_send_packet(pCodecCtx, packet);                    //发送数据到ffmepg,放到解码队列中
           got_picture = avcodec_receive_frame(pCodecCtx, pFrame);          //将成功的解码队列中取出1个frame

            if (ret < 0)
            {


                usleep(1000);
                printf("decode error.\n");
                continue;
            }

            if (!got_picture)
            {


                 //颜色空间转换,最后输出到out_buffer
                sws_scale(img_convert_ctx,(uint8_t const * const *) pFrame->data,
                        pFrame->linesize, 0, pCodecCtx->height, pFrameRGB->data,
                        pFrameRGB->linesize);//sws_scale库可以在一个函数里面同时实现:1.图像色彩空间转换;2.分辨率缩放;3.前后图像滤波处理。

                //把这个RGB数据 用QImage加载
                QImage tmpImg((uchar *)out_buffer,pCodecCtx->width,pCodecCtx->height,QImage::Format_RGB32);
                QImage image = tmpImg.copy(); //把图像复制一份 传递给界面显示
                emit sig_GetOneFrame(image);  //发送信号
             }
         }

        //释放一个包。
        av_free_packet(packet); //释放资源,否则内存会一直上升(弃用函数)
        av_packet_unref(packet);
        memset(out_buffer,0,sizeof(out_buffer));

    }
    av_free(out_buffer);
    av_free(pFrameRGB);
    avcodec_close(pCodecCtx);//关闭给定的avcodeContext并释放与之关联的所有数据
    if(NULL != pCodecCtx){


        avcodec_free_context(&pCodecCtx);
        avdic = NULL;
    }
    if(NULL != pFormatCtx){


    avformat_close_input(&pFormatCtx);//关闭打开的输入pFormatCtx。释放它和它的所有内容并设置为空。
    pFormatCtx = NULL;
    }

}
上面的注释应该是写的很清楚了,如果还不清楚,可以看下以下的这张图。

基本上这个流程还是比较入门的,值得记忆以下。
2、 ARM环境
流程图:
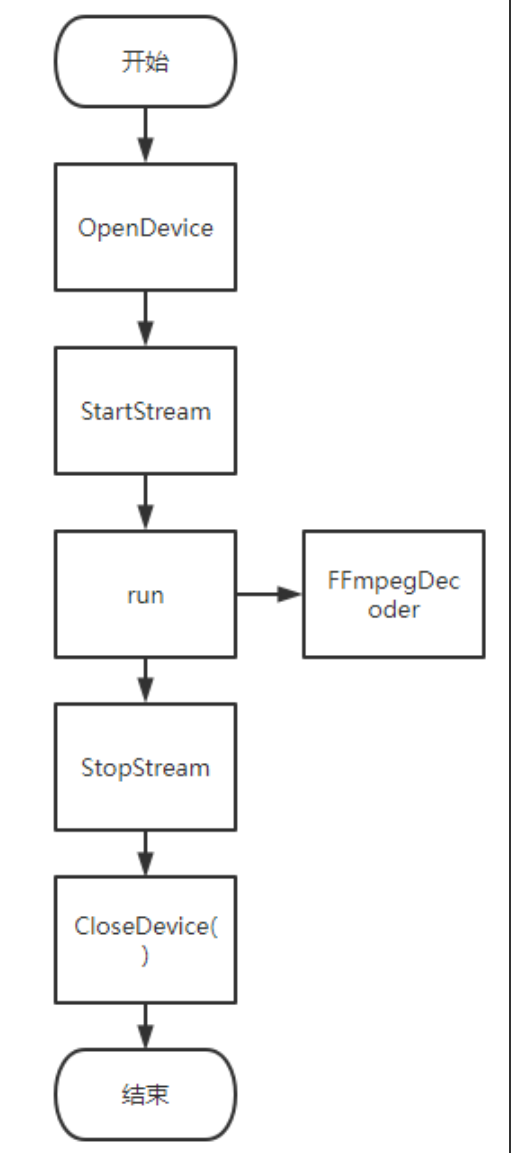
代码:
#include "FFmpegVideo.h"
#include <QMutexLocker>

CFFmpegVideo::CFFmpegVideo()
{


    m_bDeviceOpened = false;
    m_bVideoStreamOn = false;
}

CFFmpegVideo::~CFFmpegVideo()
{


    if (true == m_bDeviceOpened)
        CloseDevice();
}

bool CFFmpegVideo::OpenDevice(QString _sRemoteCode, QString _sUrl)
{


    QMutexLocker loker(&m_mutex);
    bool bRet = false;
    m_sRemoteCode = _sRemoteCode;
    std::string strUrl = _sUrl.toStdString();
    char *pUrl = (char *)strUrl.data();
    AVDictionary* options = NULL;

    av_dict_set(&options, "stimeout", std::to_string( 2* 1000000).c_str(), 0); //设置链接超时时间(us)
    av_dict_set(&options, "rtsp_transport", "tcp", 0);
    av_dict_set(&options, "mux_delay", "1", 0);  //强制使用tcp,udp在1080p下会丢包导致花屏
    av_dict_set(&options, "buffer_size", "260000", 0);
    av_dict_set(&options, "reorder_queue_size", "2000", 0);
    m_pInVFmtCtx = avformat_alloc_context();//初始化内存

    if (avformat_open_input(&m_pInVFmtCtx,pUrl,NULL,&options)<0){


        DLOG_TRACE << "Cannot open input url.\n";
        return bRet;
    }

    if (avformat_find_stream_info(m_pInVFmtCtx,NULL) < 0){


        DLOG_TRACE << "Cannot find stream info in input url";
        return bRet;
    }

    for (size_t i=0; i<m_pInVFmtCtx->nb_streams; i++)
    {


        if (m_pInVFmtCtx->streams[i]->codecpar->codec_type==AVMEDIA_TYPE_VIDEO)
        {


            m_iInVStreamIndex=(int)i;
            break;
        }
    }

    m_pCodecPara = m_pInVFmtCtx->streams[m_iInVStreamIndex]->codecpar;//输入视频流的编码参数

    m_pOutCodec = (AVCodec *)avcodec_find_decoder(m_pCodecPara->codec_id);
    m_pCodecCtx = avcodec_alloc_context3(m_pOutCodec);
    avcodec_parameters_to_context(m_pCodecCtx, m_pCodecPara);
    m_pCodecCtx->thread_count = 8;
    m_pCodecCtx->bit_rate = 0;

    m_pCodecCtx->time_base = (AVRational){

    1, 25};
    m_pCodecCtx->framerate = (AVRational){

    25, 1};

    m_pCodecCtx->gop_size = 10;
    m_pCodecCtx->max_b_frames = 1;
    m_pCodecCtx->pix_fmt = AV_PIX_FMT_YUV420P;

    if (0 == avcodec_open2(m_pCodecCtx, m_pOutCodec, NULL))
    {


        bRet = true;
        m_bDeviceOpened = true;
    }

    return bRet;
}

void CFFmpegVideo::CloseDevice()
{


    QMutexLocker loker(&m_mutex);
    avcodec_free_context(&m_pOutCodecCtx);
    avcodec_free_context(&m_pCodecCtx);
    av_frame_free(&m_pFrame);;
    avformat_close_input(&m_pInVFmtCtx);
    m_bDeviceOpened = false;
}

int CFFmpegVideo::StartStream()
{


    QMutexLocker loker(&m_mutex);
    int iRet = -1;

    m_pPacket = av_packet_alloc();
    m_pFrame = av_frame_alloc();
    m_pFrame->format = m_pCodecCtx->pix_fmt;
    m_pFrame->width  = m_pCodecCtx->width;
    m_pFrame->height = m_pCodecCtx->height;

    if (0 == av_frame_get_buffer(m_pFrame, 0))
    {


        m_bVideoStreamOn = true;
        iRet = 0;
    }

    return iRet;
}

void CFFmpegVideo::StopStream()
{


    m_bVideoStreamOn = false;
    DLOG_TRACE <<"--->z CFFmpegVideo::StopStream()"<<m_bVideoStreamOn;
}

int CFFmpegVideo::GetFrameImage()
{


    int iRet = -1;
    QImage oImg;

    if (m_pInVFmtCtx == nullptr || m_pPacket == nullptr)
    {


        return iRet;
    }

    while (m_bDeviceOpened && m_bVideoStreamOn)
    {


        iRet = av_read_frame(m_pInVFmtCtx,m_pPacket);

        if (iRet < 0)
        {


            DLOG_TRACE << "av_read_frame fail";
            return iRet;
        }

        if (m_pPacket->stream_index == m_iInVStreamIndex)
        {


            iRet = avcodec_send_packet(m_pCodecCtx, m_pPacket);
            DLOG_TRACE << "CFFmpegVideo::GetNextFrameImage iRet:"<<iRet;

            while (iRet >= 0)
            {


                iRet = avcodec_receive_frame(m_pCodecCtx, m_pFrame);

                if (iRet == AVERROR(EAGAIN))
                {


                    DLOG_TRACE << "InputVideo decoding";
                    continue;
                }
                else if (iRet < 0)
                {


                    DLOG_TRACE << "Error during decoding";
                    return iRet;
                }

                DLOG_TRACE << QString("saving frame %1").arg(m_pCodecCtx->frame_number).toStdString();
                break;
            }


            FFmpegDecoder(m_pFrame, oImg);
            m_oLatestImage = oImg.copy();
            emit SIGNAL_FFmpegImage(m_sRemoteCode, m_oLatestImage);
            iRet = 1;
            av_packet_unref(m_pPacket);
        }
    }

    return iRet;
}

void CFFmpegVideo::FFmpegDecoder(AVFrame *m_pFrame, QImage &_oImg)
{


    QMutexLocker oLocker(&m_mutex);
    if (m_pFrame)
    {


        int iVideoHeight = m_pFrame->height;
        int iVideoWidth = m_pFrame->width;

        if (iVideoHeight == 0 || iVideoWidth == 0)
            return;

        // 初始化存放 YUV 编码图片的 buffer 内存空间
        uint8_t* dst[4];
        int dstStride[4];
        _oImg = QImage(iVideoWidth,iVideoHeight,QImage::Format_RGB888);;
        av_image_fill_linesizes(dstStride, AV_PIX_FMT_RGB24, iVideoWidth);
        av_image_fill_arrays(dst, dstStride, (uint8_t*)_oImg.bits(), AV_PIX_FMT_RGB24, iVideoWidth, iVideoHeight, 1);

        if (m_pSwsContext == nullptr)
        {


            m_pSwsContext = sws_getContext(iVideoWidth, iVideoHeight, (AVPixelFormat)m_pFrame->format , m_pFrame->width, m_pFrame->height,AV_PIX_FMT_RGB24, SWS_BILINEAR, NULL, NULL, NULL);
            DCHECK_NOTNULL(m_pSwsContext);
        }
        sws_scale(m_pSwsContext, m_pFrame->data, (const int*)m_pFrame->linesize, 0, m_pFrame->height, dst, dstStride);
    }
}

void CFFmpegVideo::run()
{


    QImage oImg;
    if (m_pInVFmtCtx == nullptr || m_pPacket == nullptr)
    {


        return;
    }

    while (m_bDeviceOpened && m_bVideoStreamOn)
    {


        int iRet = av_read_frame(m_pInVFmtCtx,m_pPacket);

        if (iRet < 0)
        {


            DLOG_TRACE << "av_read_frame fail";
            return;
        }

        if (m_pPacket->stream_index == m_iInVStreamIndex)
        {


            iRet = avcodec_send_packet(m_pCodecCtx, m_pPacket);
            DLOG_TRACE << "CFFmpegVideo::GetNextFrameImage iRet:"<<iRet;

            while (iRet >= 0)
            {


                iRet = avcodec_receive_frame(m_pCodecCtx, m_pFrame);

                if (iRet == AVERROR(EAGAIN))
                {


                    DLOG_TRACE << "InputVideo decoding";
                    continue;
                }
                else if (iRet < 0)
                {


                    DLOG_TRACE << "Error during decoding";
                    return;
                }

                DLOG_TRACE << QString("saving frame %1").arg(m_pCodecCtx->frame_number).toStdString();
                break;
            }

            FFmpegDecoder(m_pFrame, oImg);
            m_oLatestImage = oImg.copy();
            emit SIGNAL_FFmpegImage(m_sRemoteCode, m_oLatestImage);
            av_packet_unref(m_pPacket);
        }
    }
}
四、图像抓取到后,进行图像分析
这里对图像的分析,主要是分析某一部分是否有想要的物体,所以采用了较为简单的物理方法,对取出的某一部分的ROI进行图像分析,从而确定是否有物体存在。
放一下这部分的函数:
bool CGunImageCheckMgr::GunImageDetect(int iPosition, QImage _oImg)
{


    if (_oImg.isNull())
    {


        return false;
    }

    QImage oImageCopy = _oImg.copy();
    Mat mapImg = ImageToMat(oImageCopy);
    int width = mapImg.cols;
    int height = mapImg.rows;
    Mat ImageSource = mapImg.clone();
    resize(mapImg,ImageSource,cv::Size(1920,1080));

    if (width<1920||height<1080)
    {


        LOG_INFO << "--> GunImageDetect oImg resize fail";
    }

    TGunImageCheckConfig tGunConfig = gGunImageCheckConfigQuery::instance()->GetImageCheckSimpleConfigByPosition(iPosition);
    return GunImageFindCounters(tGunConfig, ImageSource);
}

bool CGunImageCheckMgr::GunImageFindCounters(TGunImageCheckConfig &_tGunConfig, Mat _matImg)
{


    static int index = 0;
    Mat matImg = _matImg.clone();
    int iWidth = matImg.cols;
    int iHeight = matImg.rows;

    int x = _tGunConfig.iRoiX;
    int y = _tGunConfig.iRoiY;
    int iROIWidth = _tGunConfig.iRoiW;
    int iROIHeight = _tGunConfig.iRoiH;

    if ((x+iROIWidth) > iWidth || (y+iROIHeight) >iHeight)
        return false;
    Rect rect(x,y,iROIWidth,iROIHeight);
    Mat matImageRoi = matImg(rect);
    Mat matCannyResult = matImageRoi.clone();
    Canny(matImageRoi, matCannyResult, 30, 220);

    vector<vector<Point>> ImageContours;
    vector<Vec4i> ImageHierarchy;
    findContours(matCannyResult, ImageContours, ImageHierarchy, RETR_EXTERNAL, CHAIN_APPROX_SIMPLE);//RETR_EXTERNAL
    double sumArea = 0;
    double sumLength = 0;
    for (int t = 0; t < ImageContours.size(); t++)
    {


        double area = contourArea(ImageContours[t]);
        double length = arcLength(ImageContours[t], true);
        if (length < 40)
            continue;
        sumArea = sumArea + area;
        sumLength = sumLength+length;
        //cout << "第" << t << "该条轮廓面积=" << area<<";总面积="<<sumArea1<<";该条轮廓的长度: "<<length<<";周长为="<<sumLength1<<endl;//sum=320
    }

    if (sumLength >= _tGunConfig.iThreshold)
        return true;
    return false;
}
五、总结
1、知识总结
1、 变量分析
AVPacket:,数据包(已编码压缩),这里面的数据通常是一帧视频的数据,或者一帧音频的数据。
AVPacket 他本身是没有编码数据的,他只是管理编码数据。
-
AVCodecContext:这个结构体可以是 编码器 的上下文,也可以是 解码器 的上下文,两者使用的是同一种数据结构。 -
AVCodecParameters: 编解码参数。 -
AVFrame: 解码之后的 YUV 数据。AVFrame跟AVPacket类似,都是一个管理数据的结构体,他们本身是没有数据的,只是引用了数据。 -
·
AVCodec里面放的是 编解码信息 。 -
AVCodecParameters里面放的是 编解码参数。
2、API分析
1) avcodec_alloc_context3: 通过传递 AVCodec 编解码信息来初始化上下文。
2)av_packet_alloc: 初始化一个 AVPacket
-
av_read_frame: 从AVFormatContext容器里面读取一个AVPacket,需要注意,虽然函数名是frame,但是读取的是AVPacket. -
av_packet_unref:减少AVPacket对 编码数据的引用次数。减到 0 会释放 编码数据的内存 -
av_packet_free: 释放AVPacket自身的内存。里面会调av_packet_unref. -
av_read_frame: 如果你要调多次av_read_frame,只需要先用av_packet_unref消除AVPacket里面对之前的编码数据的引用即可。只有最后用不到AVPacket的时候,才需要调av_packet_free来释放AVPacket的内存。 -
avcodec_parameters_to_context: 把流的AVCodecParameters里面的 编解码参数 复制到AVCodecContext。 -
avcodec_open2: 打开一个编码器 或者 解码器。 -
avcodec_send_packet: 往AVCodecContext解码器 发送一个AVPacket。 -
avcodec_receive_frame: 从AVCodecContext解码器 读取一个AVFrame。
3、I帧、P帧、B帧、GOP、IDR 和PTS, DTS之间的关系
GOP ( Group of Pictures) 是一组连续的画面,由一张 I 帧和数张 B / P 帧组成,是视频图像编码器和解码器存取的基本单位,它的排列顺序将会一直重复到影像结束。I 帧是内部编码帧(也称为关键帧),P帧是前向预测帧(前向参考帧),B 帧是双向内插帧(双向参考帧)。简单地讲,I 帧是一个完整的画面,而 P 帧和 B 帧记录的是相对于 I 帧的变化。如果没有 I 帧,P 帧和 B 帧就无法解码。
1) I帧:即Intra-coded picture(帧内编码图像帧),I帧表示关键帧,你可以理解为这一帧画面的完整保留;解码时只需要本帧数据就可以完成(因为包含完整画面)。又称为内部画面 (intra picture),I 帧通常是每个 GOP(MPEG 所使用的一种视频压缩技术)的第一个帧,经过适度地压缩,做为随机访问的参考点,可以当成图象。
2) P帧:即Predictive-coded Picture(前向预测编码图像帧)。P帧表示的是这一帧跟之前的一个关键帧(或P帧)的差别,解码时需要用之前缓存的画面叠加上本帧定义的差别,生成最终画面。(也就是差别帧,P帧没有完整画面数据,只有与前一帧的画面差别的数据)
3) B帧:即Bidirectionally predicted picture(双向预测编码图像帧)。B帧是双向差别帧,也就是B帧记录的是本帧与前后帧的差别,换言之,要解码B帧,不仅要取得之前的缓存画面,还要解码之后的画面,通过前后画面的与本帧数据的叠加取得最终的画面。B帧压缩率高,但是解码时CPU会比较累。
4)DTS(Decoding Time Stamp):即解码时间戳,这个时间戳的意义在于告诉播放器该在什么时候解码这一帧的数据。
PTS(Presentation Time Stamp):即显示时间戳,这个时间戳用来告诉播放器该在什么时候显示这一帧的数据。
2、遇到的问题
1. FFmpeg attempted to set receive buffer to size 393216 but it only ended up set as 262142
这里要做设置:
    AVDictionary* options = NULL;
    av_dict_set(&options, "stimeout", std::to_string( 2* 1000000).c_str(), 0); //设置链接超时时间(us)
    av_dict_set(&options, "rtsp_transport", "tcp", 0);
    av_dict_set(&options, "mux_delay", "1", 0);  //强制使用tcp,udp在1080p下会丢包导致花屏
    av_dict_set(&options, "buffer_size", "260000", 0);
    av_dict_set(&options, "reorder_queue_size", "2000", 0);

	if(avformat_open_input(&inVFmtCtx,inVFileName,NULL,&options)<0){


        LOG_INFO << "Cannot open input file.\n";
        return ret;
    }
options设置完后,要在avformat_open_input这里引入。
2. 关于jitter buffer full
原因一: 实际出现原因是因为解码速度太慢了,导致某些帧被一直放到缓冲区里面,放多了就爆掉了。
原因而:并且,我还提升了线程的数量。
    m_pOutCodec = (AVCodec *)avcodec_find_decoder(m_pCodecPara->codec_id);
    m_pCodecCtx = avcodec_alloc_context3(m_pOutCodec);
    avcodec_parameters_to_context(m_pCodecCtx, m_pCodecPara);
    m_pCodecCtx->thread_count = 8;//就这个是关键。
原因三: 并且在解码里面加了一个锁,就好像解决了这个缓冲区溢出的问题。
可能就是因为解码还没结束就被下一个帧给占据掉了,所以,产生了越来越多的缓存帧。
3. 关于资源的释放
资源的释放,一不小心就有可能导致程序崩溃,所以,还是要小心。
    av_frame_free(&m_pFrame);;
    avcodec_close(m_pCodecCtx);
    avcodec_close(m_pOutCodecCtx);
    avcodec_free_context(&m_pOutCodecCtx);
    avcodec_free_context(&m_pCodecCtx);
    avformat_close_input(&m_pInVFmtCtx);
这是我的释放顺序。
4、关于将FFmpeg流进行保存
参考了这个:https://blog.csdn.net/m0_53601375/article/details/121076916
FFmpeg流保存void RtspStreamMuxTask::rtsp()
{
AVFormatContext *inVFmtCtx=NULL,*outFmtCtx=NULL;
int frame_index=0;//统计帧数
int inVStreamIndex=-1,outVStreamIndex=-1;//输入输出视频流在文件中的索引位置
const char *inVFileName = "rtsp://admin:[email protected]:554/type=0&id=1";
const char *outFileName = "video.mp4";
//======================输入部分============================//
inVFmtCtx = avformat_alloc_context();//初始化内存
//打开输入文件
//打开一个文件并解析。可解析的内容包括:视频流、音频流、视频流参数、音频流参数、视频帧索引。
//参数一:AVFormatContext **ps, 格式化的上下文(由avformat_alloc_context分配)的指针。
//参数二:要打开的流的url,地址最终会存入到AVFormatContext结构体当中。
//参数三:指定输入的封装格式。一般传NULL,由FFmpeg自行探测。
//参数四:包含AVFormatContext和demuxer私有选项的字典。返回时,此参数将被销毁并替换为包含找不到的选项
if(avformat_open_input(&inVFmtCtx,inVFileName,NULL,NULL)<0){
printf("Cannot open input file.\n");
return ;
}
//查找输入文件中的流
/*avformat_find_stream_info函数*/
//参数一:媒体文件上下文。
//参数二:字典,一些配置选项。 /*媒体句柄*/
if(avformat_find_stream_info(inVFmtCtx,NULL)<0){
printf("Cannot find stream info in input file.\n");
return ;
}
//查找视频流在文件中的位置
for(size_t i=0;i<inVFmtCtx->nb_streams;i++){
//nb_streams 视音频流的个数
//streams :输入视频的AVStream []数组 codec:该流对应的AVCodecContext
if(inVFmtCtx->streams[i]->codecpar->codec_type==AVMEDIA_TYPE_VIDEO){
//streams 视音频流
inVStreamIndex=(int)i;
break;
}
}
AVCodecParameters *codecPara = inVFmtCtx->streams[inVStreamIndex]->codecpar;//输入视频流的编码参数
printf("===============Input information========>\n");
av_dump_format(inVFmtCtx, 0, inVFileName, 0); //输出视频信息
printf("===============Input information========<\n");
//=====================输出部分=========================//
//打开输出文件并填充格式数据
//参数一:函数调用成功之后创建的AVFormatContext结构体。
//参数二:指定AVFormatContext中的AVOutputFormat,确定输出格式。指定为NULL,设定后两个参数(format_name或者filename)由FFmpeg猜测输出格式。。
//参数三:使用该参数需要自己手动获取AVOutputFormat,相对于使用后两个参数来说要麻烦一些。
//参数四:指定输出格式的名称。根据格式名称,FFmpeg会推测输出格式。输出格式可以是“flv”,“mkv”等等。
if(avformat_alloc_output_context2(&outFmtCtx,NULL,NULL,outFileName)<0){
printf("Cannot alloc output file context.\n");
return;
}
//打开输出文件并填充数据
if(avio_open(&outFmtCtx->pb,outFileName,AVIO_FLAG_READ_WRITE)<0){
printf("output file open failed.\n");
return;
}
//在输出的mp4文件中创建一条视频流
AVStream *outVStream = avformat_new_stream(outFmtCtx,NULL);//记录视频流通道数目。存储视频流通道。
if(!outVStream){
printf("Failed allocating output stream.\n");
return ;
}
outVStream->time_base.den=25;//AVRational这个结构标识一个分数,num为分数,den为分母(时间的刻度)
outVStream->time_base.num=1;
outVStreamIndex=outVStream->index;
//查找编码器
//参数一:id请求的编码器的AVCodecID
//参数二:如果找到一个编码器,则为NULL。
//H264/H265码流后,再调用avcodec_find_decoder解码后,再写入到/MP4文件中去
AVCodec *outCodec = avcodec_find_decoder(codecPara->codec_id);
if(outCodec==NULL){
printf("Cannot find any encoder.\n");
return;
}
//从输入的h264编码器数据复制一份到输出文件的编码器中
AVCodecContext *outCodecCtx=avcodec_alloc_context3(outCodec); //申请AVCodecContext空间。需要传递一个编码器,也可以不传,但不会包含编码器。
//AVCodecParameters与AVCodecContext里的参数有很多相同的
AVCodecParameters *outCodecPara = outFmtCtx->streams[outVStream->index]->codecpar;
//avcodec_parameters_copy()来copyAVCodec的上下文。
if(avcodec_parameters_copy(outCodecPara,codecPara)<0){
printf("Cannot copy codec para.\n");
return;
}
//基于编解码器提供的编解码参数设置编解码器上下文参数
//参数一:要设置参数的编解码器上下文
//参数二:媒体流的参数信息 , 包含 码率 , 宽度 , 高度 , 采样率 等参数信息
if(avcodec_parameters_to_context(outCodecCtx,outCodecPara)<0){
printf("Cannot alloc codec ctx from para.\n");
return ;
}
//设置编码器参数(不同参数对视频编质量或大小的影响)
/*outCodecCtx->time_base.den=25;
outCodecCtx->time_base.num=1;*/
outCodecCtx->bit_rate =0;//目标的码率,即采样的码率;显然,采样码率越大,视频大小越大 比特率
outCodecCtx->time_base.num=1;//下面两行:一秒钟25帧
outCodecCtx->time_base.den=15;
outCodecCtx->frame_number=1;//每包一个视频帧
//打开输出文件需要的编码器
if(avcodec_open2(outCodecCtx,outCodec,NULL)<0){
printf("Cannot open output codec.\n");
return ;
}
printf("============Output Information=============>\n");
av_dump_format(outFmtCtx,0,outFileName,1);//输出视频信息
printf("============Output Information=============<\n");
//写入文件头
if(avformat_write_header(outFmtCtx,NULL)<0){
printf("Cannot write header to file.\n");
return ;
}
//===============编码部分===============//
//AVPacket 数据结构 显示时间戳(pts)、解码时间戳(dts)、数据时长,所在媒体流的索引等
AVPacket *pkt = av_packet_alloc();
//存储每一个视频/音频流信息的结构体
AVStream *inVStream = inVFmtCtx->streams[inVStreamIndex];
//循环读取每一帧直到读完 从媒体流中读取帧填充到填充到Packet的数据缓存空间
while(av_read_frame(inVFmtCtx,pkt)>=0){
//循环读取每一帧直到读完
pkt->dts = 0;//不加这个时间戳会出问题,时间戳比之前小的话 FFmpeg会选择丢弃视频包,现在给视频包打时间戳可以重0开始依次递增。
if(pkt->stream_index==inVStreamIndex){
//确保处理的是视频流 stream_index标识该AVPacket所属的视频/音频流。
//FIXME:No PTS (Example: Raw H.264)
//Simple Write PTS
//如果当前处理帧的显示时间戳为0或者没有等等不是正常值
if(pkt->pts==AV_NOPTS_VALUE){
printf("frame_index:%d\n", frame_index);
//Write PTS时间 刻度
AVRational time_base1 = inVStream->time_base;
//Duration between 2 frames (us) 时长
//AV_TIME_BASE 时间基
//av_q2d(AVRational);该函数负责把AVRational结构转换成double,通过这个函数可以计算出某一帧在视频中的时间位置
//r_frame_rate
int64_t calc_duration = (double)AV_TIME_BASE / av_q2d(inVStream->r_frame_rate);
//Parameters参数
pkt->pts = (double)(frame_index*calc_duration) / (double)(av_q2d(time_base1)*AV_TIME_BASE);
pkt->dts = pkt->pts;
pkt->duration = (double)calc_duration / (double)(av_q2d(time_base1)*AV_TIME_BASE);
frame_index++;
}
//Convert PTS/DTS
//AVPacket
// pts 显示时间戳
// dts 解码时间戳
// duration 数据的时长,以所属媒体流的时间基准为单位
// pos 数据在媒体流中的位置,未知则值为-1
// 标识该AVPacket所属的视频/音频流。
pkt->pts = av_rescale_q_rnd(pkt->pts, inVStream->time_base, outVStream->time_base, (enum AVRounding)(AV_ROUND_NEAR_INF | AV_ROUND_PASS_MINMAX));
pkt->dts = av_rescale_q_rnd(pkt->dts, inVStream->time_base, outVStream->time_base, (enum AVRounding)(AV_ROUND_NEAR_INF | AV_ROUND_PASS_MINMAX));
pkt->duration = av_rescale_q(pkt->duration, inVStream->time_base, outVStream->time_base);
pkt->pos = -1;
pkt->stream_index = outVStreamIndex;
printf("Write 1 Packet. size:%5d\tpts:%ld\n", pkt->size, pkt->pts);
//Write
if (av_interleaved_write_frame(outFmtCtx, pkt) < 0) {
printf("Error muxing packet\n");
break;
}
//处理完压缩数据之后,并且在进入下一次循环之前,
//记得使用 av_packet_unref 来释放已经分配的AVPacket->data缓冲区。
av_packet_unref(pkt);
}
}
av_write_trailer(outFmtCtx);
//=================释放所有指针=======================
av_packet_free(&pkt);//堆栈上数据缓存空间
av_free(inVStream);//存储每一个视频/音频流信息的结构体
av_free(outVStream);//在输出的mp4文件中创建一条视频流
avformat_close_input(&outFmtCtx);//关闭一个AVFormatContext
avcodec_close(outCodecCtx);
avcodec_free_context(&outCodecCtx);
av_free(outCodec);
avcodec_parameters_free(&outCodecPara);
avcodec_parameters_free(&codecPara);
avformat_close_input(&inVFmtCtx);//关闭一个AVFormatContext
avformat_free_context(inVFmtCtx);//销毁函数
avio_close(outFmtCtx->pb);
}
————————————————
版权声明:本文为CSDN博主「HonoredGuest」的原创文章,遵循CC 4.0 BY-SA版权协议,转载请附上原文出处链接及本声明。
原文链接:https://blog.csdn.net/m0_53601375/article/details/121076916
3、其他
这里面的代码也是主要从网上参考的,所以,虽然上面也放了CSDN需要积分的链接,但是,自己有时也苦恼于没积分下载自己想要的文件,所以,这里也给出蓝奏云的链接,有需要的自取:蓝奏云链接:下载:https://wwm.lanzouq.com/it7HF07mdvti 密码:76s1
希望能帮到各位的同学,有帮助到你的话,希望能给个赞哈~让我知道自己的内容也帮助了其他人,这就很开心了。
参考
FFmpeg
- FFmpeg 解码音视频实例及碰到的问题记录(二)
- 海康、大华网络摄像机RTSP URL格式组成及参数配置
- ffmpeg解码器使用
- ffmpeg 下载链接
- Linux下交叉编译FFMPEG与X264库:目标板友善之臂Tiny4412开发板_EXYNOS4412(ARMV7_32位)
- ubuntu下交叉编译X264和FFMPEG到RK3399平台(编译器:aarch64-linux-gcc)
- 其他地方:
2、FFmpeg源代码结构图 - 解码_雷霄骅的博客-CSDN博客_ffmpeg雷霄骅
3、[总结]FFMPEG视音频编解码零基础学习方法_雷霄骅的博客-CSDN博客_ffmpeg 雷晓华
4、基于FFmpeg+SDL的视频播放器的制作——雷霄骅_哔哩哔哩_bilibili
5、即时通讯音视频开发(一):视频编解码之理论概述-实时音视频/专项技术区 - 即时通讯开发者社区!
6、ffmpeg相关资料_Will. Liu的博客-CSDN博客
7、FFmpeg 获取 rtsp rtmp 流_TYYJ-洪伟的博客-CSDN博客_ffmpeg rtsp rtmp
8、ffmpeg接收rtsp流问题 - yangzifb - 博客园
9、ffmpeg解码花屏问题_王健的博客-CSDN博客_ffmpeg推流花屏
10、FFmpeg 录制 RTSP 流 | 『魏超』的 blog
11、ffmpeg推流 av_dict_set 参数设置解析(降低延时、处理花屏、改善画面质量)(实时更新)_ZackZheng999的博客-CSDN博客_av_dict_set