目录
推荐写法:在跟src同级创建一个 plugins/element.js文件
项目搭建
整个项目用的是Vue2,然后脚手架是 @vue/cli 5.0.8(5版本的)
1.安装Vue脚手架
01.npm install -g @vue/cli 安装脚手架(应该都是安装好了的)
02.vue -V 查询脚手架版本
2.创建项目
vue create 项目名称
注意:项目名称不要用中文名
3.按需引入Element-UI
网址:https://element.eleme.cn/#/zh-CN/component/installation
01:npm 安装Element-UI
npm i element-ui -S
02: npm install babel-plugin-component -D
注意点:npm i xx -D:npm install xx --save-dev的简写,对模块进行局部安装,模块写入到 devDependencies 对象。将依赖安装在开发环境下。
03.在babel.config.js 文件中
module.exports = {
  presets: [
    '@vue/cli-plugin-babel/preset',
    // ["es2015", { "modules": false }]  原来是这样写,但是在最新版的脚手架下要向下面这种写
    ["@babel/preset-env", { "modules": false }],
  ],
  plugins: [
    [
      "component",
      {
        "libraryName": "element-ui",
        "styleLibraryName": "theme-chalk"
      }
    ]
  ]
}
推荐写法:在跟src同级创建一个 plugins/element.js文件
因为引入elementUI组件后, Vue.use();会出现很多次在main.js文件夹里面,我们应该让main.js文件中代码不那么繁琐。所以可以在在跟src同级创建一个 plugins/element.js文件。

在 plugins/element.js 文件中:类似于下面这种写法
//引入vue
import Vue from 'vue';
//引入要用到的 elementUI组件
import { Button, Row} from 'element-ui';

//应用引入的element-ui组件
Vue.use(Button);
Vue.use(Row);
然后在 main.js 中写 引入:
//引入存放elementUI相关组件的文件
import '../plugins/element.js'
就能实现跟把相关代码全写在main.js中一样的功能。
4.CSS预处理器SCSS
SCSS官网:
额,我用的css写的
5.reset.css文件 (去掉默认样式)
html, body, div, span, applet, object, iframe,
h1, h2, h3, h4, h5, h6, p, blockquote, pre,
a, abbr, acronym, address, big, cite, code,
del, dfn, em, img, ins, kbd, q, s, samp,
small, strike, strong, sub, sup, tt, var,
b, u, i, center,
dl, dt, dd, ol, ul, li,
fieldset, form, label, legend,
table, caption, tbody, tfoot, thead, tr, th, td,
article, aside, canvas, details, embed,
figure, figcaption, footer, header, hgroup,
menu, nav, output, ruby, section, summary,
time, mark, audio, video {
	margin: 0;
	padding: 0;
	border: 0;
	font-size: 100%;
	font: inherit;
	vertical-align: baseline;
}
/* HTML5 display-role reset for older browsers */
article, aside, details, figcaption, figure,
footer, header, hgroup, menu, nav, section {
	display: block;
}
body {
	line-height: 1;
}
ol, ul {
	list-style: none;
}
blockquote, q {
	quotes: none;
}
blockquote:before, blockquote:after,
q:before, q:after {
	content: '';
	content: none;
}
table {
	border-collapse: collapse;
	border-spacing: 0;
}我们把代码复制下来放在项目中新建的reset.css文件(assets/css/reset.css),然后在app.vue的style中进行引入:
<style lang='scss'>
  @import url('./assets/css/reset.css');
</style>
6.图标库安装使用
使用的是阿里巴巴字体图标库中的图标:使用步骤:
eg:
<i class="iconfont icon-gouwuchekong"></i>7.axios的安装使用
01.下载 axios
npm i --save axios02.在main.js中引入 axios,并挂载到原型上面,让其全局可以使用。
import axios from "axios";
axios.defaults.baseURL = "http://localhost:8080/api"  //引入axios   这个为前端地址
Vue.prototype.$axios = axios;  //把axios放到Vue的原型链上去
axios的跨域解决操作步骤:
8.路由vue-router的安装使用
去到我写的这个博客里面:路由的基本使用
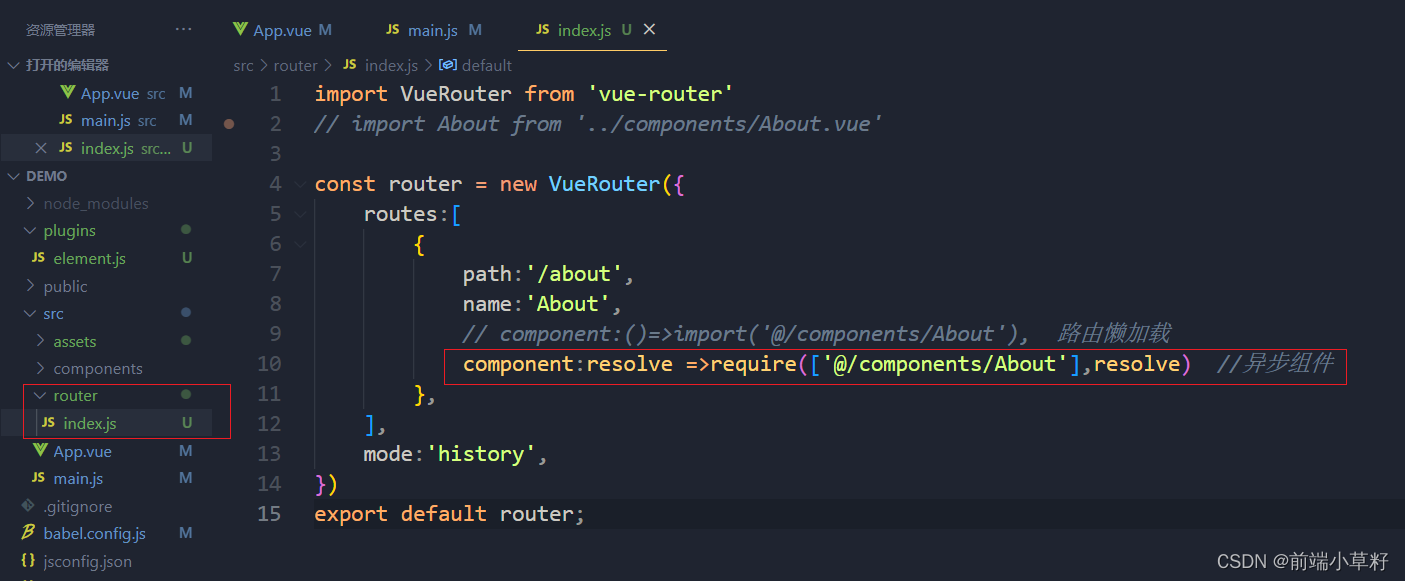
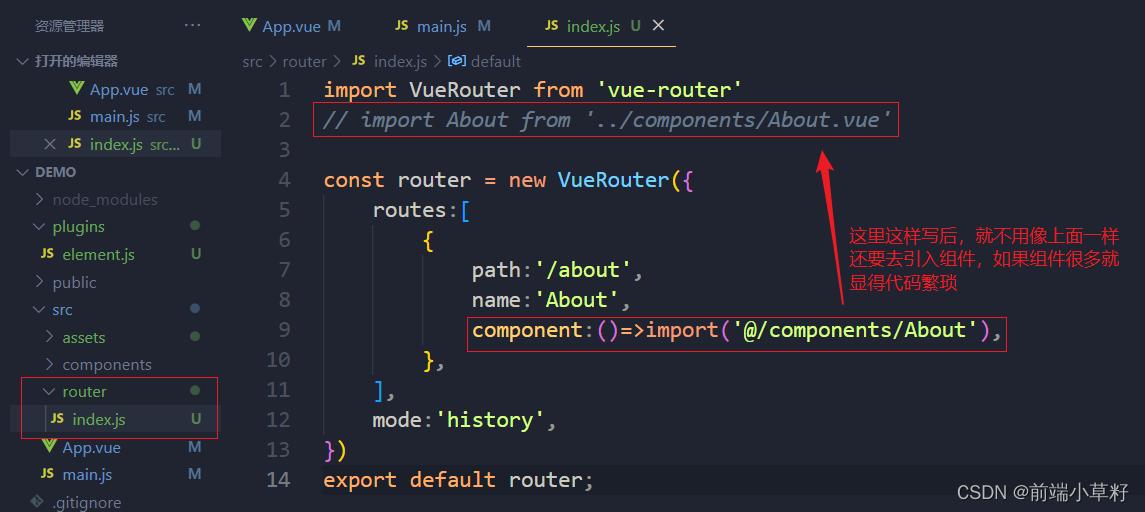
9.路由懒加载和异步组件
路由懒加载:
 异步组件:
异步组件: