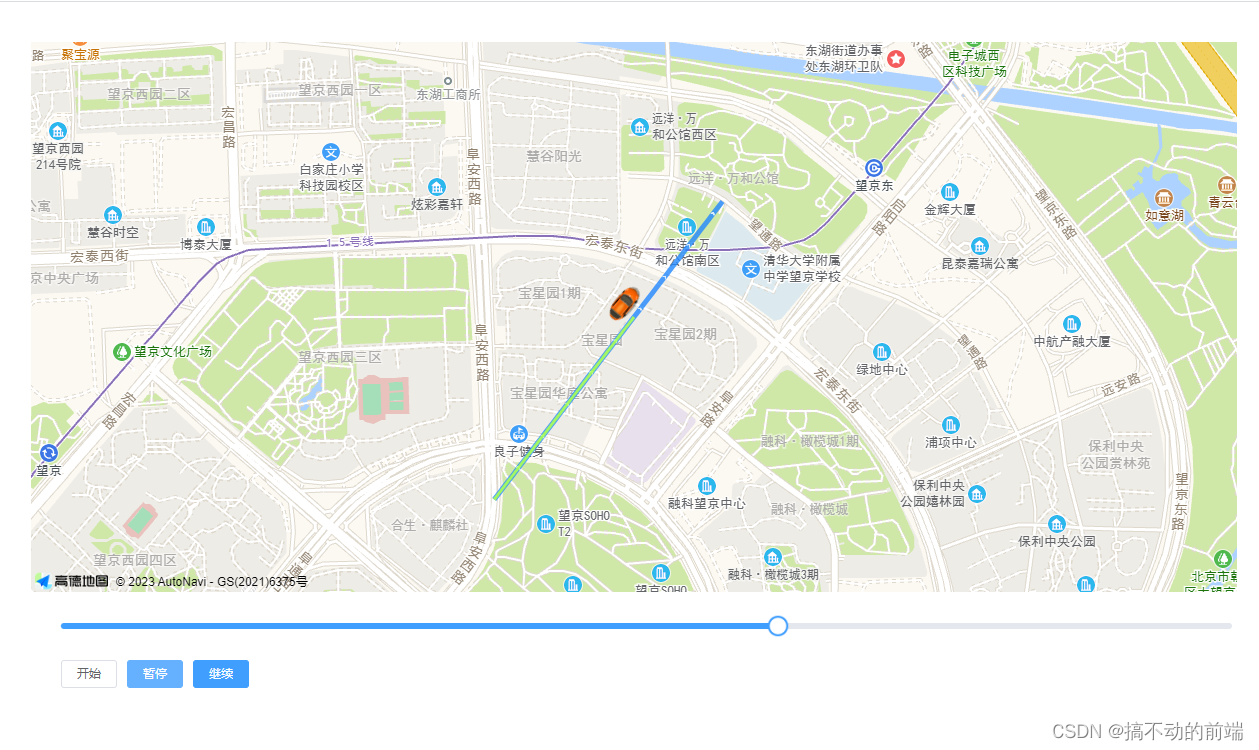
之前的文章有提到如何做轨迹点,这次有个想法,想做成轨迹线,同时支持轨迹拖拽和回放。先来看效果图 :

点击继续,轨迹就会随着之前的轨迹继续运动。
视频效果链接如下: 动画链接
题外话:之前想着使用高德地图自带的轨迹api去实现的,结果发现当我拖动进度条以后,重新去进行动画的时候,他会按照老的运动去运行,所以我这边就打算自己做轨迹动画了。
一:生成模拟的轨迹数据
  created() {
    for (let i = 0; i < 50; i++) {
      this.lineArr.push({
        GpsTime: `2023-03-17 15:33:${i}`,
        position: [116.478935 + i * 0.0001, 39.997761 + i * 0.0001]
      })
    }
    console.log(this.lineArr)
  },
后续的话可以调用接口来获取轨迹数据
二:在地图上生成轨迹
 // 创建主体
      this.marker = new AMap.Marker({
        map: map,
        position: this.lineArr[0].position,
        content: `<div>
        <img style="width: 40px;border-radius:50%" src="${this.avatar}" />
        </div>`,
        offset: new AMap.Pixel(-15, -25),
        autoRotation: true,
        // 小车旋转的方向
        angle: -50
      })
      // 绘制轨迹
      const polyline = new AMap.Polyline({
        map: map,
        path: newLineArr,
        showDir: true,
        strokeColor: '#28F', // 线颜色
        strokeWeight: 5, // 线宽
        strokeOpacity: 0.8, // 线透明度
        strokeStyle: 'solid' // 线样式
      })
三:让轨迹,车,进度条动起来
    this.trajectoryTime = setInterval(() => {
        // 自动适配视图
        map.setFitView()
        this.currentIndex++
        if (this.currentIndex <= this.maxIndex) {
          let trajecttoryList = []
          this.lineArr.map((item, index) => {
            if (index <= this.currentIndex) {
              trajecttoryList.push(item.position)
            }
          })
          // 设置标点
          this.marker.setPosition(this.lineArr[this.currentIndex].position)
          // 设置轨迹记录
          this.passedPolyline.setPath(trajecttoryList)
          // 设置地图中心
          map.setCenter(this.lineArr[this.currentIndex].position, true)
        } else {
          clearInterval(this.trajectoryTime)
        }
      }, this.markerSpeed)
四:拖动进度条,实现轨迹和车在指定位置
   // 滑动的时候停止定时器
      clearInterval(this.trajectoryTime)

      this.currentIndex = v

      let trajecttoryList = []
      this.lineArr.map((item, index) => {
        if (index <= v) {
          trajecttoryList.push(item.position)
        }
      })
      // 设置轨迹记录
      this.passedPolyline.setPath(trajecttoryList)
      // 设置maker 移动时候的位置
      this.marker.setPosition(this.lineArr[v].position)
      // 设置地图中心
      this.map.setCenter(this.lineArr[v].position, true)
五:点击继续,轨迹和车继续运动
 this.trajectoryTime = setInterval(() => {
        // 自动适配视图
        this.map.setFitView()
        this.currentIndex++
        if (this.currentIndex <= this.maxIndex) {
          let trajecttoryList = []
          this.lineArr.map((item, index) => {
            if (index <= this.currentIndex) {
              trajecttoryList.push(item.position)
            }
          })
          this.marker.setPosition(this.lineArr[this.currentIndex].position)
          // 设置轨迹记录
          this.passedPolyline.setPath(trajecttoryList)
          // 设置地图中心
          this.map.setCenter(this.lineArr[this.currentIndex].position, true)
        } else {
          clearInterval(this.trajectoryTime)
        }
      }, this.markerSpeed)
六:总结
采用定时器的方式,做出来的动画效果和高德自带的效果有一点点的差距,不过应该能接受,未使用高德的动画,是因为解决不了拖拽进度条以后,动画没有按照最新的轨迹来,还是按照老的轨迹行走,所以就想了别的方式,哪位大佬解决了这个问题,能否告诉我一声!!!
如需demo:[email protected]