文章目录
前言
badges :可以实现,比如信息个数,在widget的右上角显示,就可以使用该package 来使用
一、badges 是什么?
https://pub.flutter-io.cn/packages/badges
可以在widget 右上角或者其他位置依附的widget
二、使用步骤
1.引入库
dependencies:
  badges: ^2.0.3
2.使用
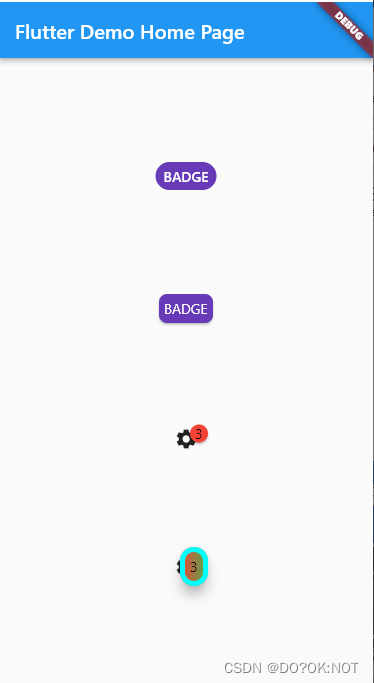
1.基础功能
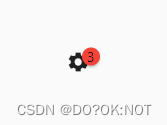
            Badge(
              badgeContent: const Text('3'),
              child: const Icon(Icons.settings),
            ),
2.各个参数功能使用
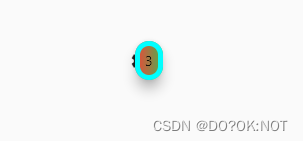
Badge(
   toAnimate: true,
   elevation: 10,
   //BadgePosition(top: -12, end: -10, bottom: 3)
   position: BadgePosition.topEnd(), //位置badge 的位置,围绕着child
   badgeContent: const Text('3'),
   gradient: const LinearGradient(
       colors: [Colors.red, Colors.green]), //content 设置渐变的颜色
   shape: BadgeShape.square, //设置形状,只有两种方形和圆形
   borderRadius: const BorderRadius.all(
       Radius.circular(15)), //BadgeShape.square 时可以设置圆角
   padding: const EdgeInsets.all(10), //边距
   animationDuration: const Duration(seconds: 2), //动画的时候
   animationType: BadgeAnimationType.fade, //动画的类型
   showBadge: true, //是否显示该标签
   ignorePointer: false,
   borderSide: BorderSide.lerp(
       const BorderSide(width: 5, color: Colors.red),
       const BorderSide(width: 5, color: Colors.green),
       10.0), //边框
   child: const Icon(Icons.settings),
 )
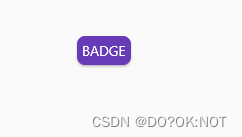
3.如果不添加chid 可以当做一个widget来使用
          //当做一个widget 来使用,而不是一个上标签
            Badge(
              toAnimate: false, //是否需要动画
              shape: BadgeShape.square, //widget 的形状
              badgeColor: Colors.deepPurple, //颜色
              borderRadius: BorderRadius.circular(8),
              badgeContent:

                  ///内容是个widget
                  const Text('BADGE', style: TextStyle(color: Colors.white)),
            ),
实际操作
实现一个点击floatbutton 信息就减少一条的操作,数量为0的时候,弹出snackbar,点击重置数量就又被重置:
snackbar 相关widget的学习,可以点击查看该链接
import 'package:flutter/material.dart';
import 'package:badges/badges.dart';
void main() {
runApp(const MyApp());
}
class MyApp extends StatelessWidget {
const MyApp({
super.key});
// This widget is the root of your application.
Widget build(BuildContext context) {
return MaterialApp(
title: 'Flutter Demo',
theme: ThemeData(
primarySwatch: Colors.blue,
),
home: const MyHomePage(title: 'Flutter Demo Home Page'),
);
}
}
class MyHomePage extends StatefulWidget {
const MyHomePage({
super.key, required this.title});
final String title;
State<MyHomePage> createState() => _MyHomePageState();
}
class _MyHomePageState extends State<MyHomePage> {
int _messageNum = 10;
Widget build(BuildContext context) {
// This method is rerun every time setState is called, for instance as done
// by the _incrementCounter method above.
//
// The Flutter framework has been optimized to make rerunning build methods
// fast, so that you can just rebuild anything that needs updating rather
// than having to individually change instances of widgets.
return Scaffold(
appBar: AppBar(
// Here we take the value from the MyHomePage object that was created by
// the App.build method, and use it to set our appbar title.
title: Text(widget.title),
),
body: Center(
// Center is a layout widget. It takes a single child and positions it
// in the middle of the parent.
child: Badge(
badgeColor: Colors.amber,
animationType: BadgeAnimationType.fade,
badgeContent: Text('$_messageNum'),
child: const Icon(
Icons.message,
size: 50,
),
),
),
floatingActionButton: FloatingActionButton(
child: const Icon(Icons.replay_rounded),
onPressed: () {
if (_messageNum <= 0) {
SnackBar snackBar = SnackBar(
dismissDirection: DismissDirection.down,
elevation: 10,
backgroundColor: Colors.redAccent,
content: Row(
children: const [Icon(Icons.done_all), Text('没有更多的消息了')]),
behavior: SnackBarBehavior.floating, //出现的位置
action: SnackBarAction(
label: '重置',
textColor: Colors.black,
onPressed: () {
// 点击确定之后的操作,
_messageNum = 10;
setState(() {
});
}),
shape: RoundedRectangleBorder(
borderRadius: BorderRadius.all(Radius.circular(15))));
ScaffoldMessenger.of(context).showSnackBar(snackBar);
} else {
_messageNum -= 1;
}
setState(() {
});
},
),
// This trailing comma makes auto-formatting nicer for build methods.
);
}
}
总结
欢迎关注,留言,咨询,交流!