前言
一、card是什么?
卡片组件,可以制作很多卡片类型的widget,比如商品,个人信息卡片等
二、使用步骤
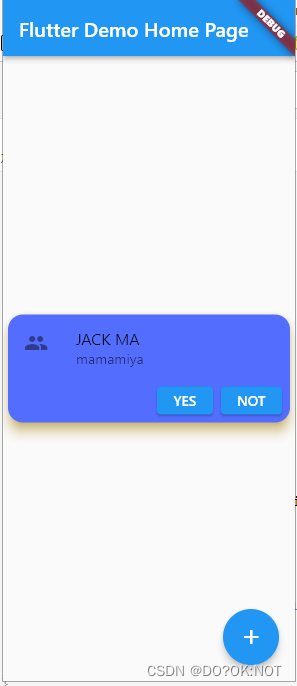
1.基础的使用
代码如下(示例):
import 'package:flutter/material.dart';
void main() {
runApp(const MyApp());
}
class MyApp extends StatelessWidget {
const MyApp({
super.key});
Widget build(BuildContext context) {
return MaterialApp(
title: 'Flutter Demo',
theme: ThemeData(
primarySwatch: Colors.blue,
),
home: const MyHomePage(title: 'Flutter Demo Home Page'),
);
}
}
class MyHomePage extends StatefulWidget {
const MyHomePage({
super.key, required this.title});
final String title;
State<MyHomePage> createState() => _MyHomePageState();
}
class _MyHomePageState extends State<MyHomePage> {
int _counter = 0;
void _incrementCounter() {
setState(() {
_counter++;
});
}
Widget build(BuildContext context) {
return Scaffold(
appBar: AppBar(
title: Text(widget.title),
),
body: Center(
child: Column(
mainAxisAlignment: MainAxisAlignment.center,
children: <Widget>[
Card(
color: Colors.indigoAccent,//卡片的颜色
elevation: 10,//阴影的大小
shadowColor: Colors.amber,//阴影的颜色
margin:const EdgeInsets.all(5),//外边距
shape: const RoundedRectangleBorder(
borderRadius: BorderRadius.all(Radius.circular(15))),
child: Column(
children: [
const ListTile(
leading: Icon(Icons.people),
title: Text('JACK MA'),
subtitle: Text('mamamiya'),
),
ButtonBar(
children: [
ElevatedButton(
onPressed: () {
}, child: const Text('YES')),
ElevatedButton(
onPressed: () {
}, child: const Text('NOT')),
],
)
],
),
)
],
),
),
floatingActionButton: FloatingActionButton(
onPressed: _incrementCounter,
tooltip: 'Increment',
child: const Icon(Icons.add),
), // This trailing comma makes auto-formatting nicer for build methods.
);
}
}
2.提升
自己制作一个商品滚动列表,使用card来制作,给card 添加圆角,图片添加圆角。显示部分商品的信息.
CircleAvatar:用户头像的圆角的控件,快速制作用户头像。或者是文本的原型
import 'package:flutter/material.dart';

void main() {


  runApp(const MyApp());
}

class MyApp extends StatelessWidget {


  const MyApp({

    super.key});

  @override
  Widget build(BuildContext context) {


    return MaterialApp(
      title: 'Flutter Demo',
      theme: ThemeData(
        primarySwatch: Colors.blue,
      ),
      home: const MyHomePage(title: 'Flutter Demo Home Page'),
    );
  }
}

class MyHomePage extends StatefulWidget {


  const MyHomePage({

    super.key, required this.title});

  final String title;

  @override
  State<MyHomePage> createState() => _MyHomePageState();
}

class _MyHomePageState extends State<MyHomePage> {


  Widget mycard() {


    return Card(
      // color: Colors.indigoAccent, //卡片的颜色
      elevation: 10, //阴影的大小
      shadowColor: Colors.grey, //阴影的颜色
      margin: const EdgeInsets.all(5), //外边距
      shape: const RoundedRectangleBorder(
          borderRadius: BorderRadius.all(Radius.circular(15))),
      child: Column(
        children: [
          //给图片加个外边距和圆角
          Padding(
            padding: const EdgeInsets.all(8.0),
            child: ClipRRect(
              borderRadius: const BorderRadius.all(Radius.circular(15)),
              child: Image.asset('assets/shoes.jpeg'),
            ),
          ),
          const ListTile(
            leading: CircleAvatar(
              backgroundImage: AssetImage('assets/shoes.jpeg'),
            ),
            title: Text('漂亮的鞋子'),
            subtitle: Text('我是一双来自网络图片的鞋子,侵删!!'),
          ),
          ButtonBar(
            children: [
              ElevatedButton(onPressed: () {

    }, child: const Text('YES')),
              ElevatedButton(onPressed: () {

    }, child: const Text('NOT')),
            ],
          )
        ],
      ),
    );
  }

  @override
  Widget build(BuildContext context) {


    return Scaffold(
      appBar: AppBar(
        title: Text(widget.title),
      ),
      body: Center(
        child: SingleChildScrollView(
          child: Column(
            mainAxisAlignment: MainAxisAlignment.center,
            children: List.generate(10, (index) => mycard()),
          ),
        ),
      ),
    );
  }
}
效果如图

总结
欢迎关注,留言,咨询,交流!