一.mysql源码安装
[root@server1 ~]# ls
mysql-boost-5.7.31.tar.gz nginx-1.20.1 nginx-1.20.1.tar.gz[root@server1 ~]# tar zxf mysql-boost-5.7.31.tar.gz
[root@server1 ~]# ls
mysql-5.7.31 mysql-boost-5.7.31.tar.gz nginx-1.20.1 nginx-1.20.1.tar.gz
[root@server1 ~]# cd mysql-5.7.31[root@server1 mysql-5.7.31]# cd Docs
[root@server1 Docs]# ls[root@server1 Docs]# cd ..
[root@server1 mysql-5.7.31]# cd BUILD
[root@server1 BUILD]# ls
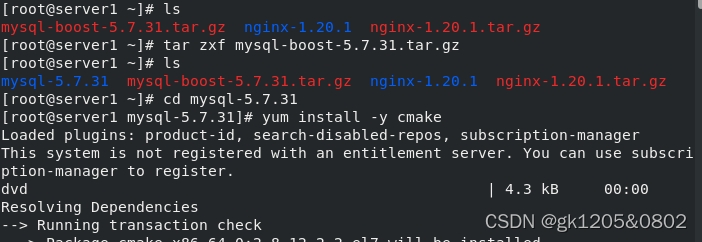

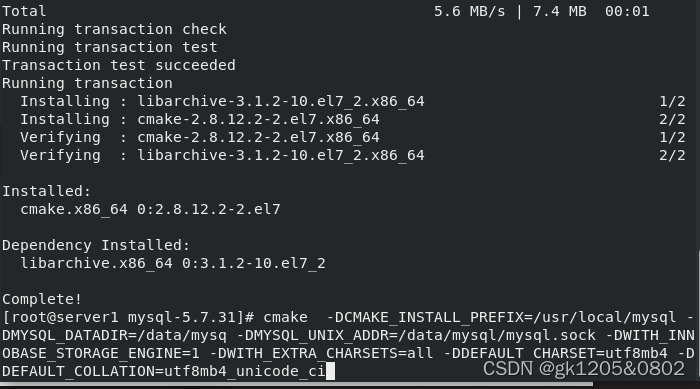
[root@server1 mysql-5.7.31]# yum install -y cmake
[root@server1 mysql-5.7.31]# cmake -DCMAKE_INSTALL_PREFIX=/usr/local/mysql -DMYSQL_DATADIR=/data/mysq -DMYSQL_UNIX_ADDR=/data/mysql/mysql.sock -DWITH_INNOBASE_STORAGE_ENGINE=1 -DWITH_EXTRA_CHARSETS=all -DDEFAULT_CHARSET=utf8mb4 -DDEFAULT_COLLATION=utf8mb4_unicode_ci
[root@server1 mysql-5.7.31]# yum install -y gcc-c++
[root@server1 mysql-5.7.31]# yum install -y ncurses-devel
[root@server1 mysql-5.7.31]# rm -fr CMakeCache.txt
[root@server1 mysql-5.7.31]# yum install -y bison
[root@server1 mysql-5.7.31]# make && make install


二.mysql安装配置
[root@server1 mysql-5.7.31]# cd /usr/local/mysql
[root@server1 mysql]# ls
[root@server1 mysql]# du -sh
1.9G .
[root@server1 mysql]# cd support-files
[root@server1 support-files]# ls
magic mysqld_multi.server mysql-log-rotate mysql.server
[root@server1 support-files]# cp mysql.server /etc/init.d/mysqld 复制脚本内容到mysqld
[root@server1 support-files]# ll /etc/init.d/mysqld
-rwxr-xr-x 1 root root 10565 Dec 9 23:49 /etc/init.d/mysqld
[root@server1 support-files]# useradd -M -d /data/mysql/ -s /sbin/nologin mysql
[root@server1 support-files]# id mysql
uid=1001(mysql) gid=1001(mysql) groups=1001(mysql)
[root@server1 support-files]# mkdir -p /data/mysql
[root@server1 support-files]# chown mysql.mysql /data/mysql[root@server1 support-files]# cd ..
[root@server1 mysql]# ls
[root@server1 mysql]# pwd

[root@server1 mysql]# echo $PATH
/usr/local/sbin:/usr/local/bin:/usr/sbin:/usr/bin:/root/bin[root@server1 mysql]# ls
[root@server1 mysql]# cd bin
[root@server1 bin]# ls
[root@server1 bin]# pwd
/usr/local/mysql/bin[root@server1 bin]# vim ~/.bash_profile
PATH=$PATH:$HOME/bin:/usr/local/mysql/bin
[root@server1 bin]# source ~/.bash_profile


[root@server1 bin]# cd
[root@server1 ~]# which mysql
/usr/local/mysql/bin/mysql
[root@server1 ~]# cd /usr/local
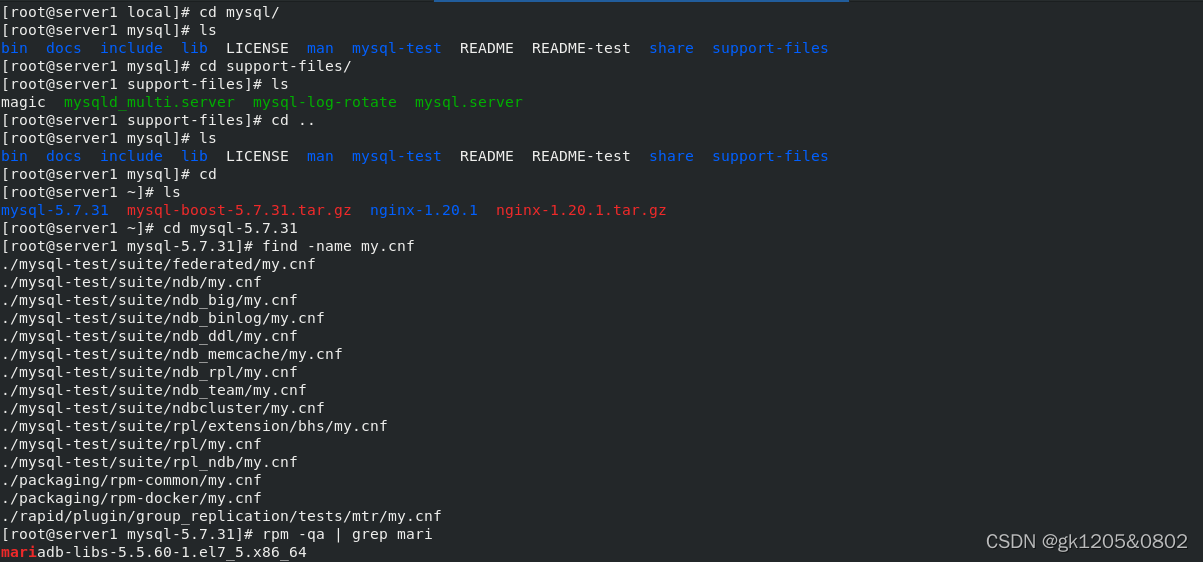
[root@server1 local]# cd mysql/
[root@server1 mysql]# ls
bin docs include lib LICENSE man mysql-test README README-test share support-files
[root@server1 mysql]# cd support-files/
[root@server1 support-files]# ls
magic mysqld_multi.server mysql-log-rotate mysql.server
[root@server1 support-files]# cd ..root@server1 mysql]# cd
[root@server1 ~]# cd mysql-5.7.31
[root@server1 mysql-5.7.31]# find -name my.cnf[root@server1 mysql-5.7.31]# cat ./packaging/rpm-common/my.cnf
[root@server1 mysql-5.7.31]# vim /etc/my.cnf
[mysqld]
basedir=/usr/local/mysql
datadir=/data/mysql
socket=/data/mysql/mysql.sock
symbolic-links=0
log-error=/data/mysql/mysqld.log
pid-file=/data/mysql/mysqld.pid


mysql 初始化配置
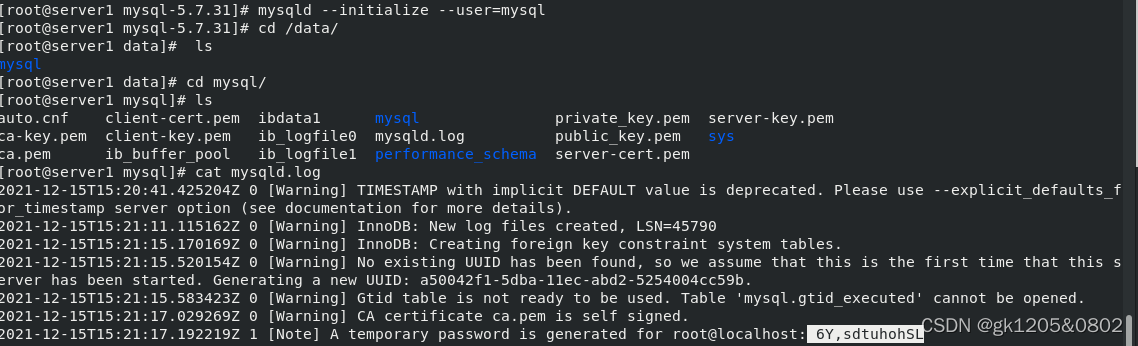
[root@server1 mysql-5.7.31]# mysqld --initialize --user=mysql ##如果初始化之后发现配置文件写错了,需要删除/data/mysql 下的所有文件,然后重新初始化
[root@server1 mysql-5.7.31]# cd /data/
[root@server1 data]# ls
mysql
[root@server1 data]# cd mysql/
[root@server1 mysql]# ls
[root@server1 mysql]# cat mysqld.log ##可查看日志,有初始密码
[root@server1 mysql]# /etc/init.d/mysqld start ##启动mysql
[root@server1 mysql]# mysql -p ##-p登陆,复制日志中的密码,登陆成功
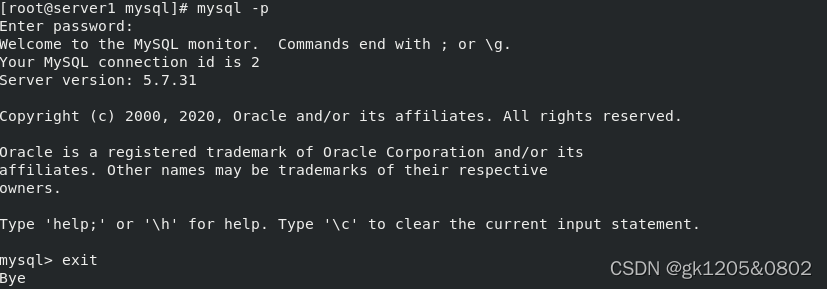
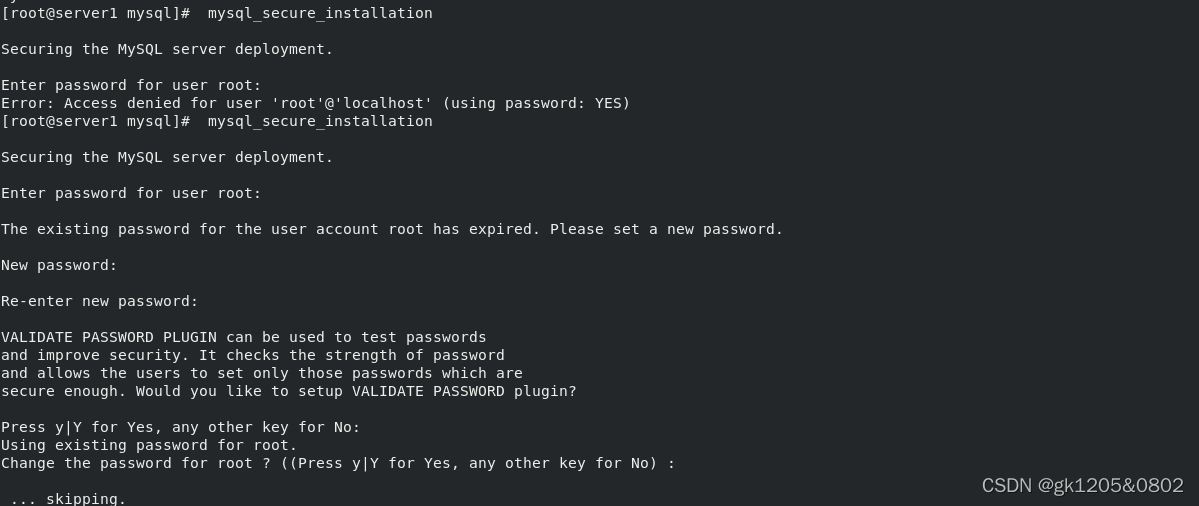
初始化脚本修改密码
[root@server1 mysql]# mysql_secure_installation
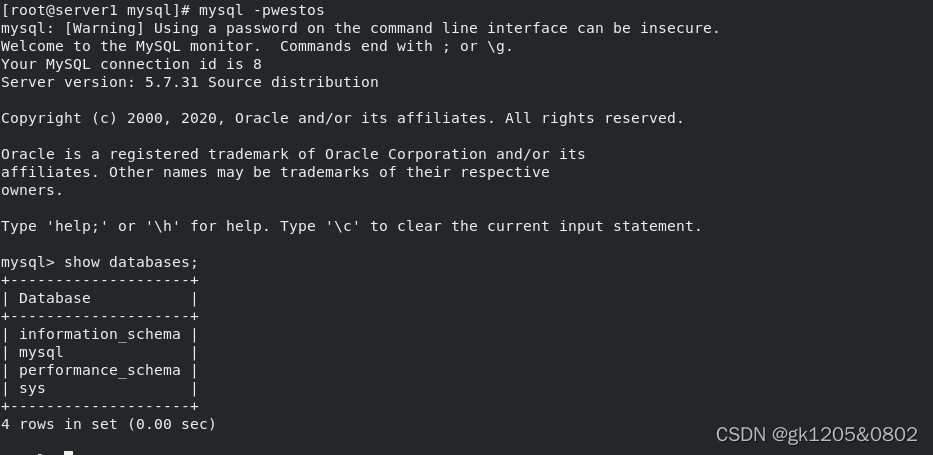
mysql -pwestos ##新密码登陆数据库
一.php源码安装
下载php的rpm包并解压
在解压之后的目录中,查看是否有configure,如果有此文件,使用./configure--->make---->make install方式进行源码安装
[root@server1 ~]# yum install -y bzip2
[root@server1 ~]# tar jxf php-7.4.12.tar.bz2
[root@server1 ~]# cd php-7.4.12/
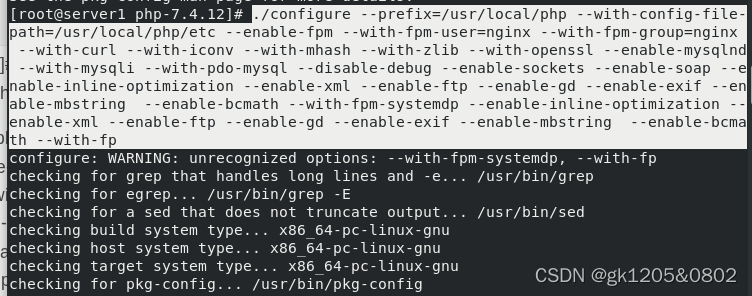
[root@server1 php-7.4.12]# ls[root@server1 php-7.4.12]# ./configure --prefix=/usr/local/php --with-config-file-path=/usr/local/php/etc --enable-fpm --with-fpm-user=nginx --with-fpm-group=nginx --with-curl --with-iconv --with-mhash --with-zlib --with-openssl --enable-mysqlnd --with-mysqli --with-pdo-mysql --disable-debug --enable-sockets --enable-soap --enable-inline-optimization --enable-xml --enable-ftp --enable-gd --enable-exif --enable-mbstring --enable-bcmath --with-fpm-systemdp --enable-inline-optimization --enable-xml --enable-ftp --enable-gd --enable-exif --enable-mbstring --enable-bcmath --with-fp
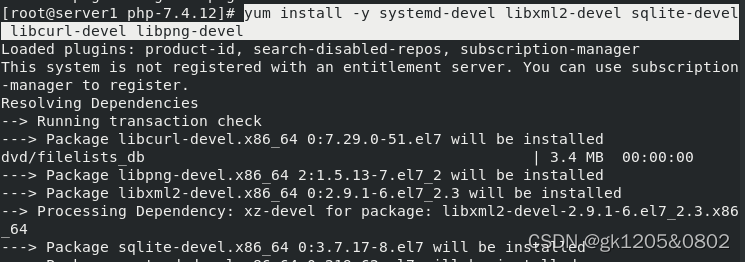
[root@server1 php-7.4.12]# yum install -y systemd-devel libxml2-devel sqlite-devel libcurl-devel libpng-devel
[root@server1 ~]# yum install -y oniguruma-6.8.2-1.el7.x86_64.rpm oniguruma-devel-6.8.2-1.el7.x86_64.rpm
[root@server1 php-7.4.12]# ./configure --prefix=/usr/local/php --with-config-file-path=/usr/local/php/etc --enable-fpm --with-fpm-user=nginx --with-fpm-group=nginx --with-curl --with-iconv --with-mhash --with-zlib --with-openssl --enable-mysqlnd --with-mysqli --with-pdo-mysql --disable-debug --enable-sockets --enable-soap --enable-inline-optimization --enable-xml --enable-ftp --enable-gd --enable-exif --enable-mbstring --enable-bcmath --with-fpm-systemdp --enable-inline-optimization --enable-xml --enable-ftp --enable-gd --enable-exif --enable-mbstring --enable-bcmath --with-fp
[root@server1 php-7.4.12]# make && make install


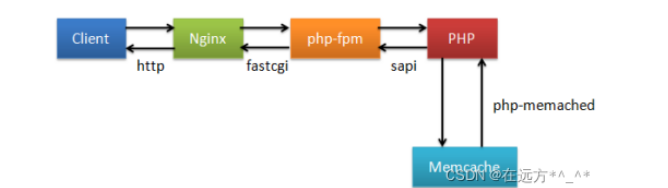
二.php架构
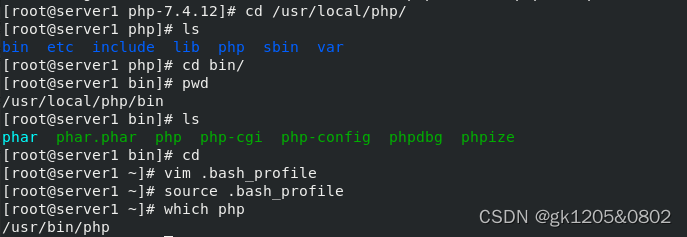
[root@server1 php-7.4.12]# cd /usr/local/php/
[root@server1 php]# ls
bin etc include lib php sbin var
[root@server1 php]# cd bin/
[root@server1 bin]# pwd
/usr/local/php/bin
[root@server1 bin]# ls
phar phar.phar php php-cgi php-config phpdbg phpize
[root@server1 bin]# cd
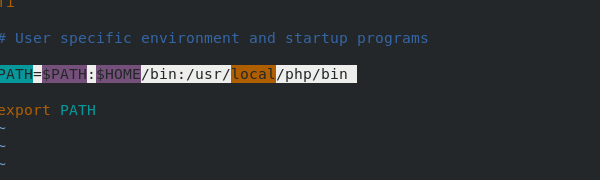
[root@server1 ~]# vim .bash_profilePATH=$PATH:$HOME/bin:/usr/local/php/bin
[root@server1 ~]# source .bash_profile
[root@server1 ~]# which php
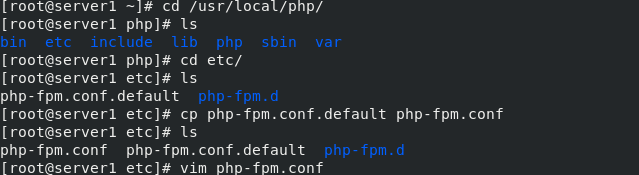
[root@server1 ~]# cd /usr/local/php/
[root@server1 php]# ls
bin etc include lib php sbin var
[root@server1 php]# cd etc/
[root@server1 etc]# ls
php-fpm.conf.default php-fpm.d
[root@server1 etc]# cp php-fpm.conf.default php-fpm.conf
[root@server1 etc]# ls
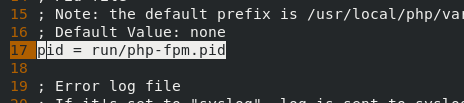
php-fpm.conf php-fpm.conf.default php-fpm.d[root@server1 etc]# vim php-fpm.conf
17 pid = run/php-fpm.pid
[root@server1 etc]# cd php-fpm.d/
[root@server1 php-fpm.d]# ls
www.conf.default
[root@server1 php-fpm.d]# cp www.conf.default www.conf

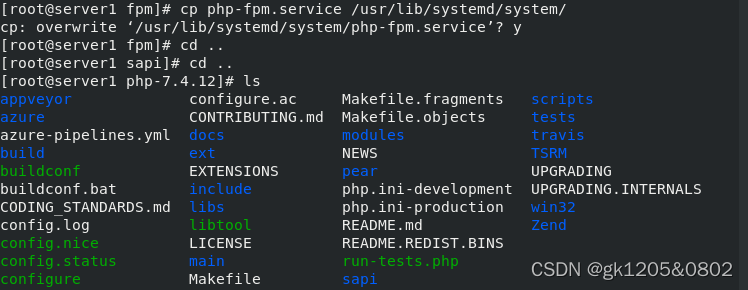
[root@server1 ~]# cd php-7.4.12/
[root@server1 php-7.4.12]# ls[root@server1 php-7.4.12]# cd sapi/
[root@server1 sapi]# ls[root@server1 sapi]# cd fpm/
[root@server1 fpm]# ll[root@server1 fpm]# pwd
/root/php-7.4.12/sapi/fpm
[root@server1 fpm]# cp php-fpm.service /usr/lib/systemd/system/[root@server1 fpm]# cd ..
[root@server1 sapi]# cd ..
[root@server1 php-7.4.12]# ls

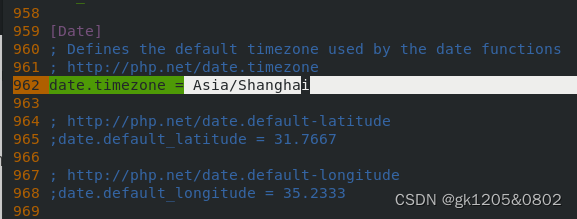
[root@server1 php-7.4.12]# cp php.ini-production /usr/local/php/etc/php.ini
[root@server1 php-7.4.12]# cd /usr/local/php/etc
[root@server1 etc]# ls
php-fpm.conf php-fpm.conf.default php-fpm.d php.ini
[root@server1 etc]# vim php.ini962 date.timezone = Asia/Shanghai

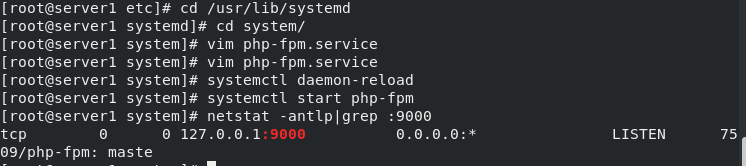
[root@server1 etc]# cd /usr/lib/systemd
[root@server1 systemd]# cd system/
[root@server1 system]# vim php-fpm.service#ProtectSystem=full ## 注释
[root@server1 system]# systemctl daemon-reload
[root@server1 system]# systemctl start php-fpm
[root@server1 system]# netstat -antlp|grep :9000
tcp 0 0 127.0.0.1:9000 0.0.0.0:* LISTEN 7509/php-fpm: maste

三.php+nginx
root@server1 system]# cd
[root@server1 ~]# cd /usr/local/nginx/conf/[root@server1 conf]# vim nginx.conf
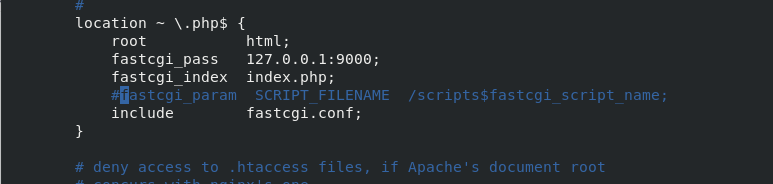
98 location ~ \.php$ {
99 root html;
100 fastcgi_pass 127.0.0.1:9000;
101 fastcgi_index index.php;
102 #fastcgi_param SCRIPT_FILENAME /scripts$fastcgi_script_name;
103 include fastcgi.conf;
104 }[root@server1 conf]# nginx -t
[root@server1 conf]# nginx -s reload

[root@server1 conf]# cd ..
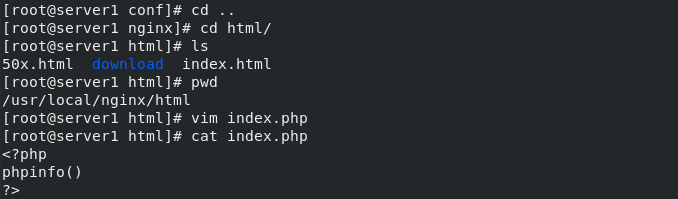
[root@server1 nginx]# cd html/
[root@server1 html]# ls
50x.html download index.html
[root@server1 html]# pwd
/usr/local/nginx/html
[root@server1 html]# vim index.php ##编写php测试页[root@server1 html]# cat index.php
<?php
phpinfo()
?>
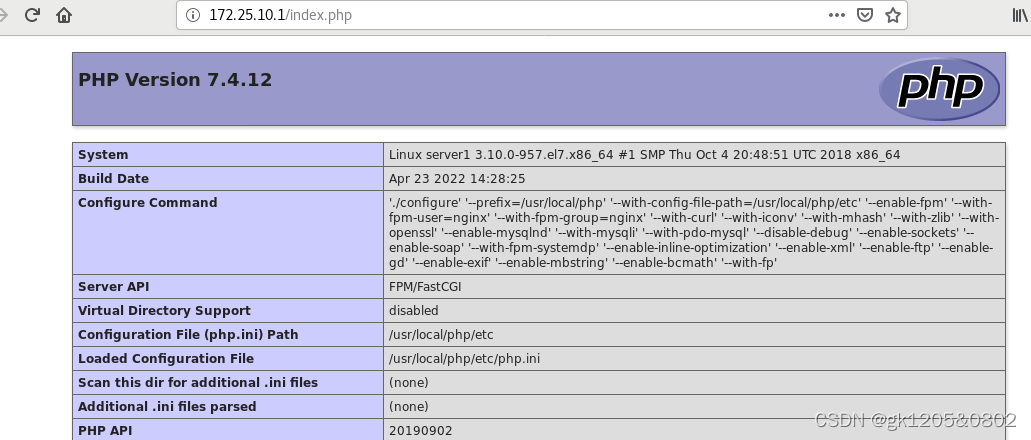
浏览器访问http://172.25.10.1/index.php
四.php添加memcache功能模块
[root@server1 html]# cd
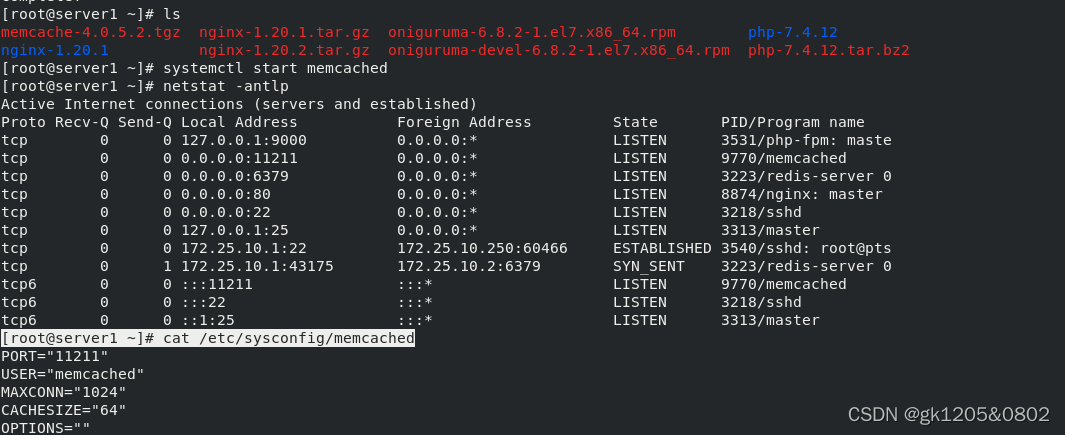
[root@server1 ~]# yum install -y memcached
[root@server1 ~]# systemctl start memcached
[root@server1 ~]# netstat -antlp
tcp 0 0 0.0.0.0:11211 0.0.0.0:* LISTEN 9770/memcached
[root@server1 ~]# cat /etc/sysconfig/memcached

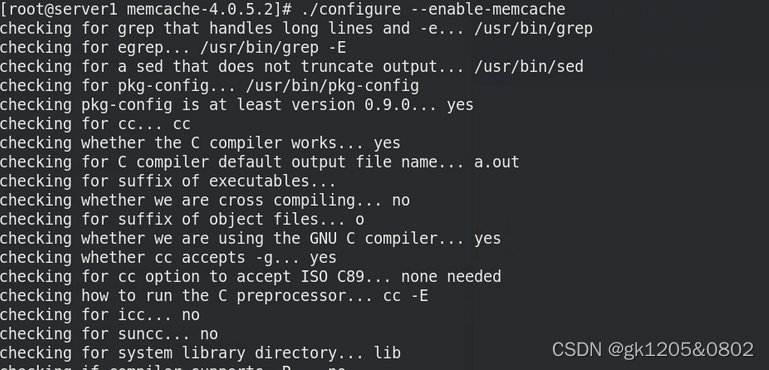
[root@server1 ~]# tar zxf memcache-4.0.5.2.tgz
[root@server1 ~]# ls[root@server1 ~]# cd memcache-4.0.5.2/
[root@server1 memcache-4.0.5.2]# ls[root@server1 memcache-4.0.5.2]# yum install -y autoconf 下载phpize
[root@server1 memcache-4.0.5.2]# phpize ##生成configure
[root@server1 memcache-4.0.5.2]# ./configure --enable-memcache ##添加模块
[root@server1 memcache-4.0.5.2]# make
[root@server1 memcache-4.0.5.2]# make install ##安装
Installing shared extensions: /usr/local/php/lib/php/extensions/no-debug-non-zts-20190902/
[root@server1 memcache-4.0.5.2]# cd /usr/local/php/lib/php/extensions/no-debug-non-zts-20190902/
[root@server1 no-debug-non-zts-20190902]# ls
memcache.so opcache.a opcache.so
[root@server1 no-debug-non-zts-20190902]# cd
[root@server1 ~]# cd /usr/local/php/etc/
[root@server1 etc]# ls
php-fpm.conf php-fpm.conf.default php-fpm.d php.ini

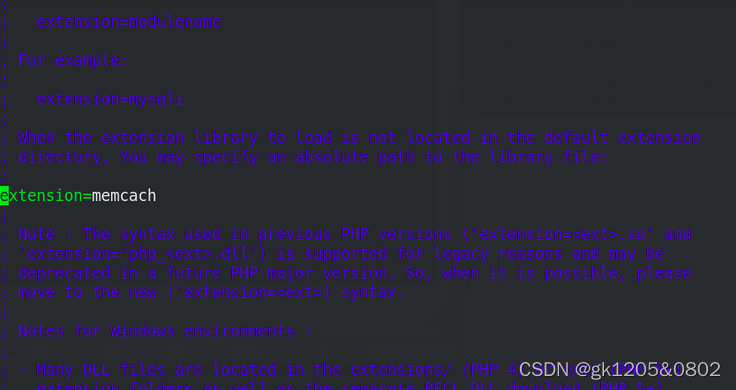
[root@server1 etc]# vim php.ini
900 extension=memcache
[root@server1 etc]# systemctl reload php-fpm ###刷新
[root@server1 etc]# php -m | grep memcache
memcache

[root@server1 etc]# cd
[root@server1 ~]# cd memcache-4.0.5.2/
[root@server1 memcache-4.0.5.2]# ls
[root@server1 memcache-4.0.5.2]# cp example.php memcache.php /usr/local/nginx/html/
 浏览器:http://172.25.10.1/example.php
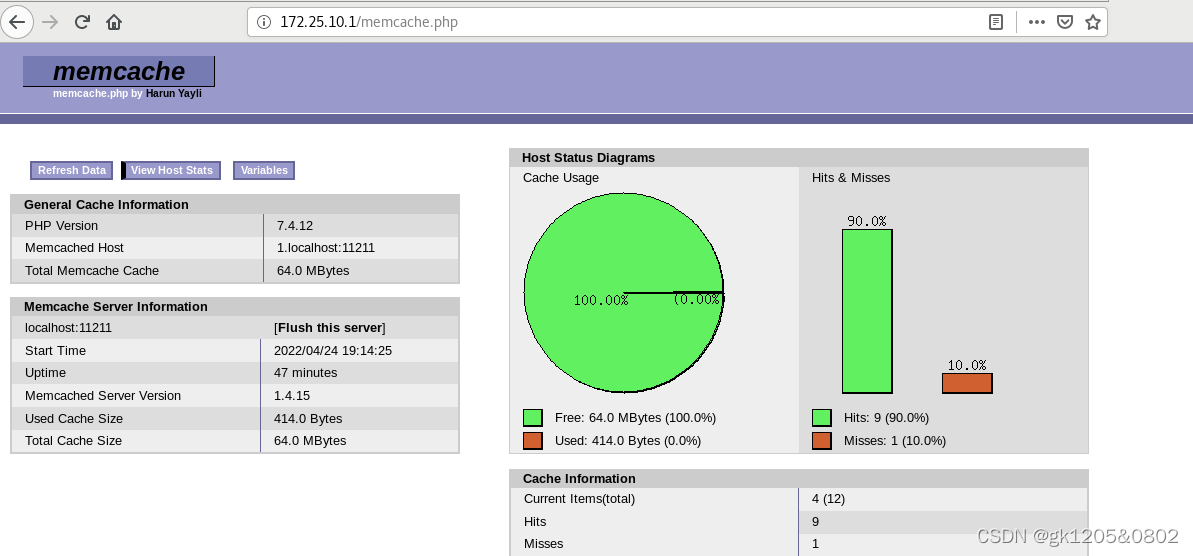
 [root@server1 html]# vim memcache.php
22 define('ADMIN_USERNAME','admin'); // Admin Username
23 define('ADMIN_PASSWORD','westos'); // Admin Password 修改账号和密码
28 $MEMCACHE_SERVERS[] = 'localhost:11211'; // add more as an array


访问 http://172.25.10.1/memcache.php
在客户端测试:
[root@westos_student73 Desktop]# ab -c 10 -n 1000 http://172.25.10.1/example.php ##数据处理无丢失


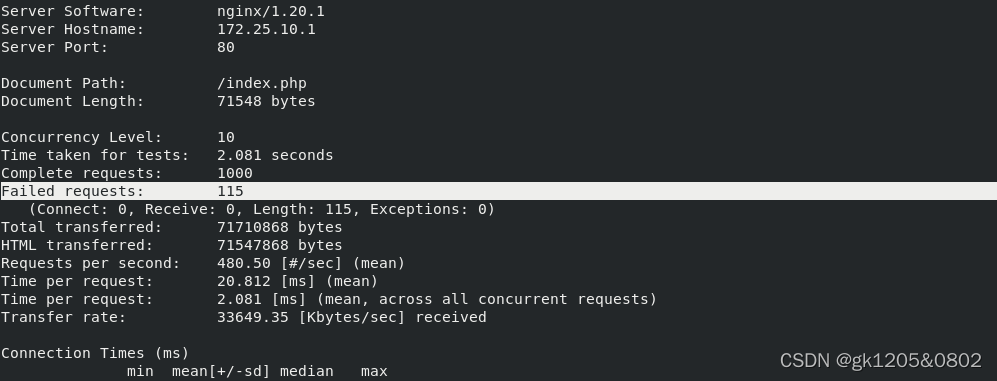
[root@westos_student73 Desktop]# ab -c 10 -n 1000 http://172.25.10.1/index.php ##数据处理有丢失

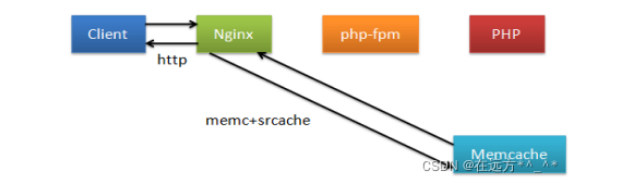
五. nginx高速缓存
使用memc-nginx和srcache-nginx模块构建高效透明的缓存机制
传统缓存策略:
传统缓存策略由php控制生命周期,高效缓存策略由memc+srcache在nginx部分缓存:
OpenResty 是一个基于 Nginx 与 Lua 的高性能 Web 平台,其内部集成了大量精良的 Lua 库、第三方模块以及大多数的依赖项。用于方便地搭建能够处理超高并发、扩展性极高的动态 Web 应用、Web 服务和动态网关。
OpenResty通过汇聚各种设计精良的 Nginx 模块(主要由 OpenResty 团队自主开发),从而将 Nginx 有效地变成一个强大的通用 Web 应用平台。这样,Web 开发人员和系统工程师可以使用 Lua 脚本语言调动 Nginx 支持的各种 C 以及 Lua 模块,快速构造出足以胜任 10K 乃至 1000K 以上单机并发连接的高性能 Web 应用系统。
Openresty里面有nginx模块,也有缓存模块,所以要用高速缓存,需要使Openresty里面的nginx运行
[root@server1 ~]# tar zxf openresty-1.19.9.1.tar.gz
[root@server1 ~]# ls[root@server1 ~]# cd openresty-1.19.9.1/
[root@server1 openresty-1.19.9.1]# ls[root@server1 openresty-1.19.9.1]# ./configure --help
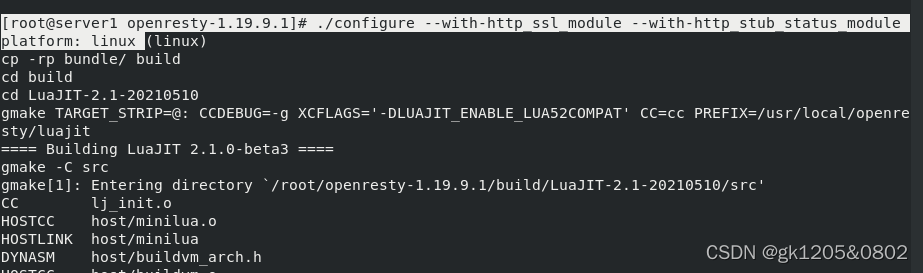
[root@server1 openresty-1.19.9.1]# ./configure --with-http_ssl_module --with-http_stub_status_module
[root@server1 openresty-1.19.9.1]# make && make install

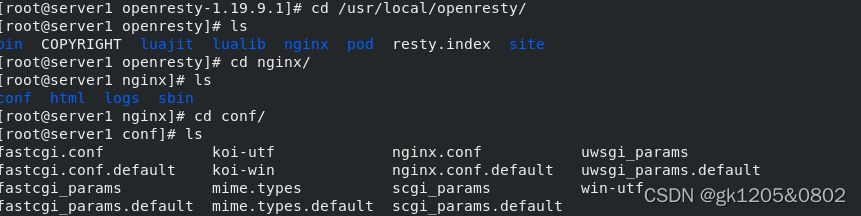
[root@server1 openresty-1.19.9.1]# cd /usr/local/openresty/
[root@server1 openresty]# ls
bin COPYRIGHT luajit lualib nginx pod resty.index site
[root@server1 openresty]# cd nginx/
[root@server1 nginx]# ls
conf html logs sbin
[root@server1 nginx]# cd conf/
[root@server1 conf]# ls
openresty+php
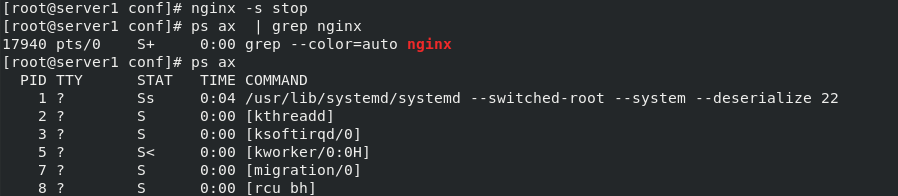
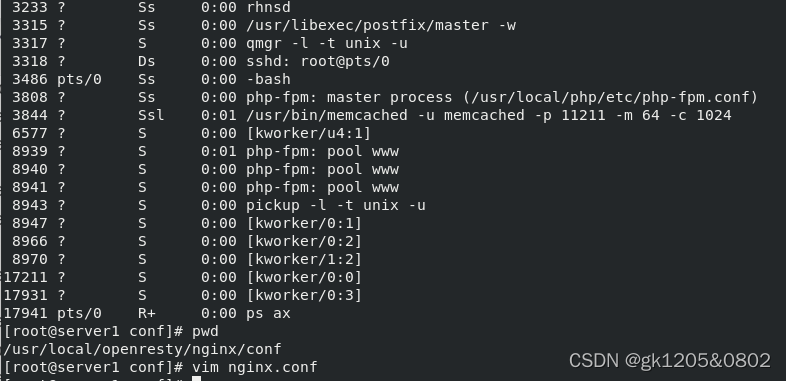
[root@server1 conf]# nginx -s stop ##防止冲突,停掉nginx
[root@server1 conf]# ps ax | grep nginx
17940 pts/0 S+ 0:00 grep --color=auto nginx
[root@server1 conf]# ps ax[root@server1 conf]# pwd
/usr/local/openresty/nginx/conf
[root@server1 conf]# vim nginx.conf2 user nginx;
3 worker_processes auto;13 worker_connections 65535;

[root@server1 conf]# cd ..
[root@server1 nginx]# ls
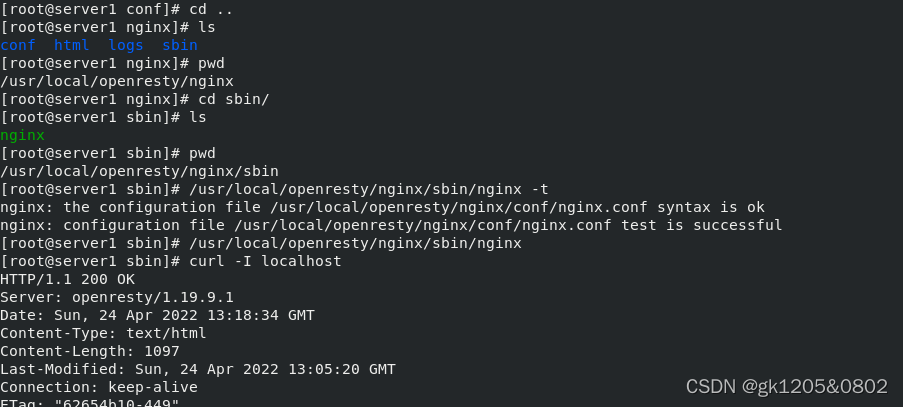
conf html logs sbin[root@server1 nginx]# cd sbin/
[root@server1 sbin]# ls
nginx
[root@server1 sbin]# pwd
/usr/local/openresty/nginx/sbin
[root@server1 sbin]# /usr/local/openresty/nginx/sbin/nginx -t[root@server1 sbin]# /usr/local/openresty/nginx/sbin/nginx
[root@server1 sbin]# curl -I localhost
[root@server1 sbin]# cd ..
[root@server1 nginx]# cd html/
[root@server1 html]# ls[root@server1 html]# cp /usr/local/nginx/html/index.php .
[root@server1 html]# cp /usr/local/nginx/html/example.php .
[root@server1 html]# ls
50x.html example.php index.html index.php


openresty和php整合成功
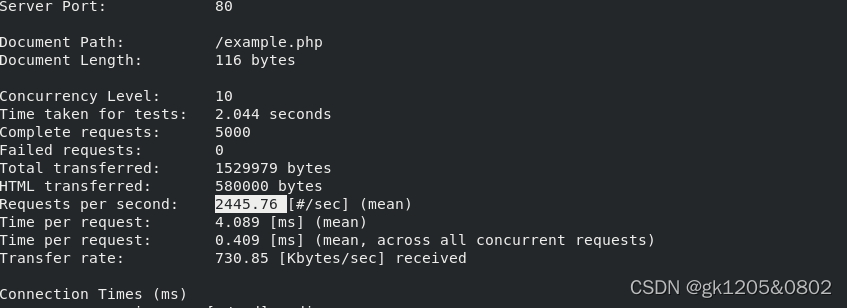
在真机中:[root@westos_student73 Desktop]# ab -c10 -n 5000 http://172.25.10.1/example.php

在真机中:
[root@westos_student73 Desktop]# ab -c10 -n 5000 http://172.25.10.1/index.php
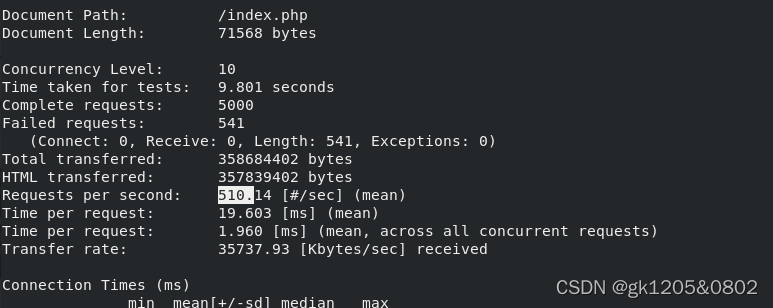
两个处理的时间差不多
openresty+nginx
[root@server1 html]# cd ..
[root@server1 nginx]# cd conf/
[root@server1 conf]# pwd
/usr/local/openresty/nginx/conf
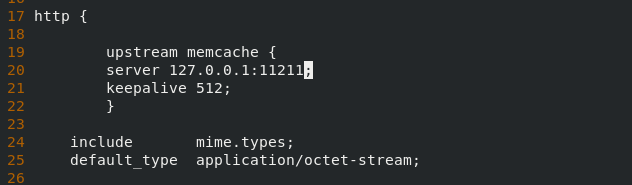
[root@server1 conf]# vim nginx.conf19 upstream memcache {
20 server 127.0.0.1:11211;
21 keepalive 512;
22 }
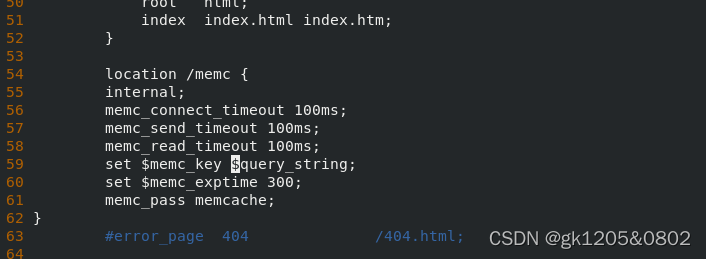
54 location /memc {
55 internal;
56 memc_connect_timeout 100ms;
57 memc_send_timeout 100ms;
58 memc_read_timeout 100ms;
59 set $memc_key $query_string;
60 set $memc_exptime 300;
61 memc_pass memcache;
62 }
82 set $key $uri$args;
83 srcache_fetch GET /memc $key;
84 srcache_store PUT /memc $key;当所请求的uri以“.php”结尾时,首先到memcache中查询有没有以$uri$args为key的数据,如果有则直接返回;否则,执行location的逻辑,如果返回的http状态码为200,则在输出前以$uri$args为key,将输入结果存入memcache

[root@server1 conf]# pwd
/usr/local/openresty/nginx/conf[root@server1 conf]# /usr/local/openresty/nginx/sbin/nginx -t
nginx: the configuration file /usr/local/openresty/nginx/conf/nginx.conf syntax is ok
nginx: configuration file /usr/local/openresty/nginx/conf/nginx.conf test is successful
[root@server1 conf]# /usr/local/openresty/nginx/sbin/nginx -s reload真机中:[root@westos_student73 Desktop]# ab -c10 -n 5000 http://172.25.10.1/example.php
真机中:[root@westos_student73 Desktop]# ab -c10 -n 5000 http://172.25.10.1/index.php
