SWIG 是一种软件开发工具,它将 C 和 C++ 编写的程序与各种高级编程语言连接起来。这里我们用它来将 C/C++ 转换成 Java。
一、Swig安装
1、下载
官网:SWIG官网下载
源码链接 GitHub:https://github.com/swig/swig.git
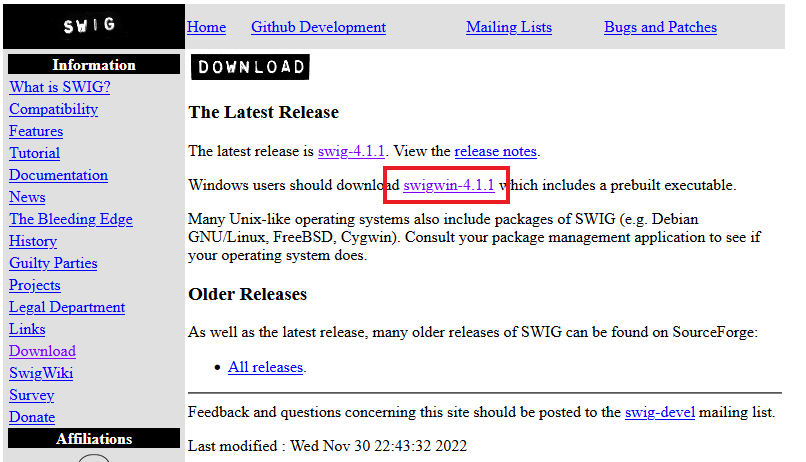
这两个地址可能会出现无法打开,或者无法下载的情况,直接在网上搜索“Swig下载”,在第三方平台下载一个即可。
2、安装
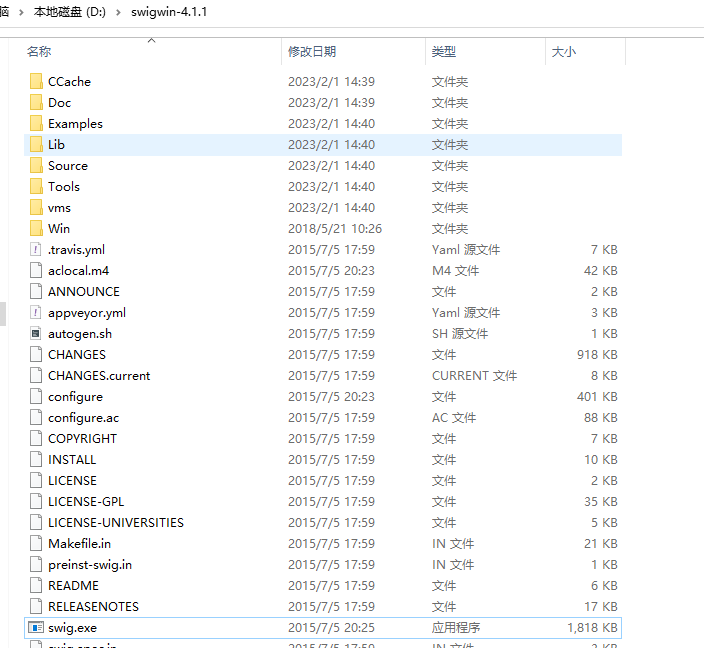
将下载的 swigwin-4.1.1.zip 压缩包解压,最好是解压到盘符根目录下,例如:D:\swigwin-4.1.1。可以看到有 swig.exe 在文件夹内。
3、设置系统变量
将 swig.exe 所在路径添加至系统变量 Path 中。

4、验证
win+r 打开cmd,输入swig -version 查看版本信息:

swig -version看到版本信息,就说明安装成功了。
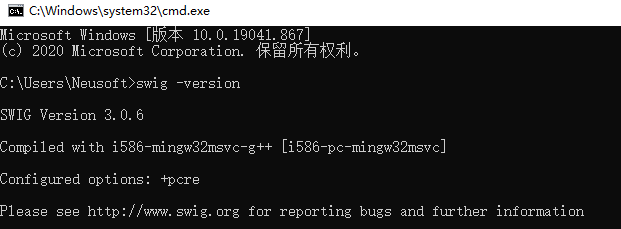
请忽略打印版本信息与上面版本信息不一致问题,以为官网下载异常,在网上随便找了一个版本下载。
二、Swig使用
首先,个人需求是 Android 项目调用 so 库中方法。而这个 so 库并没有使用 JNI 规范,无法使用 Java 代码直接调用,所以这里我们 C 中的方法编写 .i 文件,然后使用 Swig 工具通过 .i 文件生成 .java 文件,并最终生成一个 JNI 规范的 so 库。
1、so 库文件
例如:so 库中使用 c 写的 sotest.c。
/* File : sotest.c */
#include <time.h>
double My_variable = 3.0;
int fact(int n) {
if (n <= 1) return 1;
else return n*fact(n-1);
}
int my_mod(int x, int y) {
return (x%y);
}
char *get_time()
{
time_t ltime;
time(<ime);
return ctime(<ime);
}2、准备 .i 文件
下面是我们要做的,根据上面的 sotest.c 文件自己写一个 sotest.i 文件。
/* sotest.i */
 %module sotest
 %{
 /*将头文件或函数声明放在这里,如下所示 */
 extern double My_variable;
 extern int fact(int n);
 extern int my_mod(int x, int y);
 extern char *get_time();
 %}

 extern double My_variable;
 extern int fact(int n);
 extern int my_mod(int x, int y);
 extern char *get_time();
3、生成 java 文件
执行以下命令,Swig 会根据 sotest.i 接口定义脚本生成出若干个文件
swig -java sotest.i注意上面的 sotest.i 需要携带文件路径,例如我的文件放在 D 盘 SoTest 文件夹下,则命令为:swig -java D:\SoTest\sotest.i。执行完成文件夹下新增 sotest.java、sotestJNI.java 和 sotest_wrap.c 三个文件。
1)sotest.java
/* ----------------------------------------------------------------------------
 * This file was automatically generated by SWIG (http://www.swig.org).
 * Version 3.0.6
 *
 * Do not make changes to this file unless you know what you are doing--modify
 * the SWIG interface file instead.
 * ----------------------------------------------------------------------------- */


public class sotest {
  public static void setMy_variable(double value) {
    sotestJNI.My_variable_set(value);
  }

  public static double getMy_variable() {
    return sotestJNI.My_variable_get();
  }

  public static int fact(int n) {
    return sotestJNI.fact(n);
  }

  public static int my_mod(int x, int y) {
    return sotestJNI.my_mod(x, y);
  }

  public static String get_time() {
    return sotestJNI.get_time();
  }

}
2)sotestJNI.java
/* ----------------------------------------------------------------------------
 * This file was automatically generated by SWIG (http://www.swig.org).
 * Version 3.0.6
 *
 * Do not make changes to this file unless you know what you are doing--modify
 * the SWIG interface file instead.
 * ----------------------------------------------------------------------------- */


public class sotestJNI {
  public final static native void My_variable_set(double jarg1);
  public final static native double My_variable_get();
  public final static native int fact(int jarg1);
  public final static native int my_mod(int jarg1, int jarg2);
  public final static native String get_time();
}
从 Java 的角度讲,接口的封装已经完成,但 native 方法调用相应的动态库还需要打包。
4、打包
通过以下命令来打包。
gcc -c -fPIC sotest.c sotest_wrap.c -I F:\openjdk-19.0.2\jdk-19.0.2\include -I F:\openjdk-19.0.2\jdk-19.0.2\include\win32sotest.c 和 sotest_wrap.c 分别为原始的 c 文件和生成的 c 文件,后面的路径为自己安装 jdk 的路径,记得修改。jdk 请自行安装,环境变量配置参考 《JDK环境变量配置》。执行命令又发现 gcc "不是内部或外部命令,也不是可运行的程序",所以还需要配置 C 语言环境,安装 MinGw 并配置环境变量,滑倒下面会有相关介绍。
这里还要注意一个问题,上面的命令既可以使用 sotest.c 和 sotest_wrap.c 的绝对路径,也可以直接在 sotest.c 和 sotest_wrap.c 所在文件夹内使用,但是在使用绝对路径时生成的 .o 文件位置是在命运运行的路径下。
全部完成后在执行上面命令,这时会生成 sotest.o 和 sotest_wrap.o 两个文件。接着执行下面命令:
gcc -shared -o sotest.so sotest.o sotest_wrap.o这时就生成了我们想要的 sotest.so 文件。
5、验证
通过前面的方法调用生成的 so 库。
System.load("加载绝对路径文件");
System.loadLibrary("载系统库的默认路径")参考:SWIG初体验
三、MinGw 安装及配置
1、下载
网上搜索有很多,有的提供官网下载地址,有的提供安装包,还有的提供全量包。只要能使有都是可以的。其中官网地址下载和安装包安装,由于国内网络问题,可能会失败。我使用的是安装包,安装时第一次出现 mingw-get: *** ERROR *** setup: unable to continue 错误,重试一次后安装成功。
2、安装
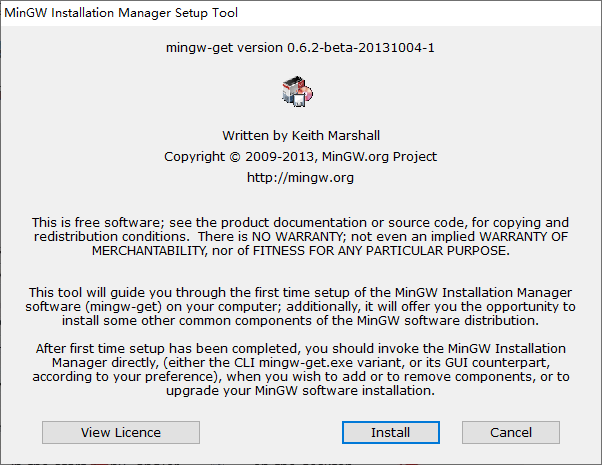
1)运行安装程序,点击 Install
2)选择安装位置,点击 Continue

就是这个阶段会去外网下载,很可能因为网络原因下载失败。
3)安装完成

4)选择所需环境的库

这里我只下载了 C++ 的,因为 C++ 的库已经下载完成,所以选中显示图标不一样。
5)应用,点击左上角【Installation】中的【Apply Changes】

6)点击【Apply】
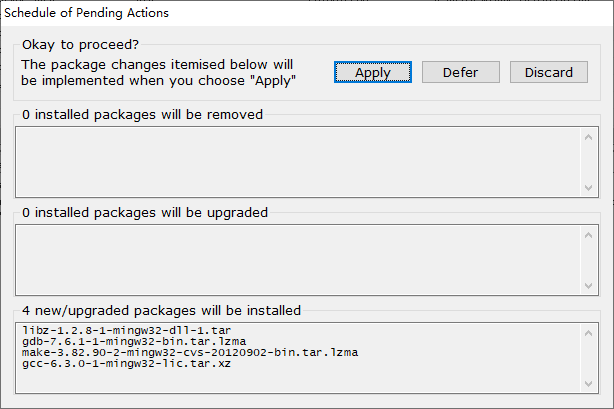
这是会下载对应环境的库,等待即可。
7)下载完成,点击 Close
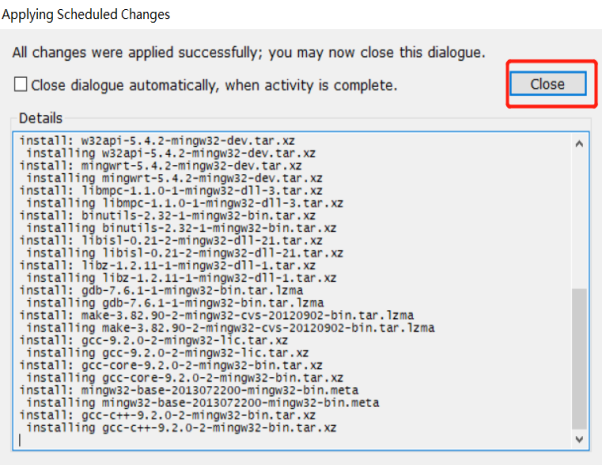
这样 MinGw 就安装完成了。
3、环境变量
在【系统变量】的【Path】中添加 MinGW 的 bin 路径就可以

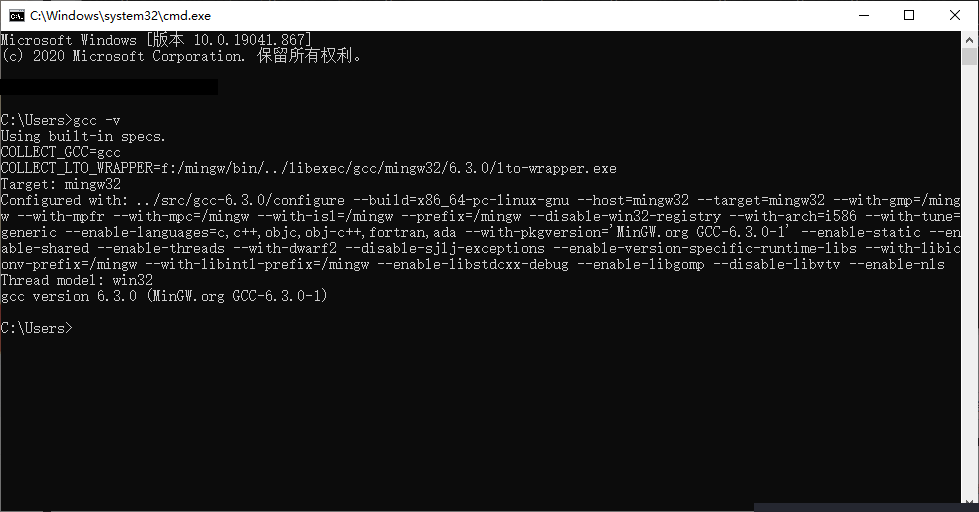
4、验证
打开终端,输入下面命令
gcc -v显示版本信息表示安装成功
参考: