samba是什么?
samba是文件共享服务器,一般应用在局域网中,能控制共享的权限,也能够方便的让用户在客户端和服务端都可以修改文件内容并同步提交.
配置samba流程
1、进入root权限
su root
2、安装samba主程序和通用程序
apt-get install samba samba-common
如果出现依赖无法安装或报错,建议使用aptitude安装samba
apt-get install aptitude
aptitude install samba samba-common
3、创建一个用于分享的samba目录
mkdir /home/username/share
4、给这个目录设置权限
chmod 777 /home/username/share
5、配置samba配置文件
vi /etc/samba/smb.conf
在samba服务器配置文件smb.conf最后一行添加如下代码:
[share] ##随便怎么命名但是不能有空格
    comment = Ubuntu_share	          ##注释名,随意
    path = /home/username/share       ##要共享的文件夹路径(自定义)
    public = yes		           ##意味着不用账户密码,可随意访问(不需要的删掉即可)
    browseable = yes
    writeable = yes
    read only = no
    valid users = username	           ##Ubuntu账户是啥这是啥,这个系统中已有的其他用户名也可
    create mask = 0777	           ##往下都是读写之类的权限,想搞清楚自查
    directory mask = 0777
    force user = nobody
    force group = nogroup
    available = yes
如果是添加新用户,比如一台服务器需要三四个人使用,除了root用户外,其他新增用户不必写这么多,填写以下步骤即可。
[share] ##随便怎么命名但是不能有空格
    comment = Ubuntu_share	          ##注释名,随意
    path = /home/username/share       ##要共享的文件夹路径(自定义)
    browseable = yes
    writeable = yes
    read only = no
    available = yes
6、创建账户、密码(一定要先配置第五步,才可以创建账户。samba帐号名必须已经是Linux中的用户名,如果你现在创建的用户不是linux中已有的系统用户,请退出安装samba操作,先进行新系统用户的创建)
smbpasswd -a username
7、重启服务
/etc/init.d/smbd restart //service smbd restart
8、添加开机自启动(Ubuntu18.04及以上系统需创建rc.local文件)(此步骤是否操作随意,无伤大雅)
8.1.创建rc-local.service文件
sudo vi /etc/systemd/system/rc-local.service
8.2.vim面板中输入:
[Unit]
Description=/etc/rc.local Compatibility
ConditionPathExists=/etc/rc.local

[Service]
Type=forking
ExecStart=/etc/rc.local start
TimeoutSec=0
StandardOutput=tty
RemainAfterExit=yes
SysVStartPriority=99

[Install]
WantedBy=multi-user.target
8.3.创建rc.local
sudo vi /etc/rc.local
8.4.输入:
#!/bin/sh -e
#
# rc.local
#
# This script is executed at the end of each multiuser runlevel.
# Make sure that the script will "exit 0" on success or any other
# value on error.
#
# In order to enable or disable this script just change the execution
# bits.
#
# By default this script does nothing.
echo "成功启动CAN驱动配置" > /usr/local/test.log

sudo modprobe can
sudo modprobe can_raw
sudo modprobe mttcan

sudo ip link set can0 type can bitrate 500000
sudo ip link set up can0

exit 0
8.5.添加rc.local可执行权限
sudo chmod +x /etc/rc.local
8.6.启动服务
sudo systemctl enable rc-local
8.7.启动服务,查看启动状态
sudo systemctl start rc-local.service
sudo systemctl status rc-local.service
一切正常就继续,如果无法启动,出现failed、exited code等字段,修改rc.local的第一行为:
#!/bin/bash
8.8.重启,/usr/local下能看到test.log文件说明自启动已经成功了。
9、按照上述步骤,samba已经安装完成,查看ubuntu的IP地址:
root@root-VirtualBox:~$ ifconfig
#没有提示或者报错就安装net-tools
apt-get install net-tools
重启网络
/etc/init.d/network restart //service network restart
注意:
安装完成后,输入ifconfig,若IP地址显示为10.0.2.15,需要关闭ubuntu,在虚拟机中的选择【设置】,【网络】,【连接方式】,选择【桥接网卡】。
结果如下:
#root@root-VirtualBox:~$ ifconfig
#enp0s3: flags=4163<UP,BROADCAST,RUNNING,MULTICAST>  mtu 1500
#        inet 192.168.7.112  netmask 255.255.255.0  broadcast 192.168.7.255
#        inet6 fe80::bf2b:7705:cc55:5867  prefixlen 64  scopeid 0x20<link>
#        ether 08:00:27:cf:9e:a6  txqueuelen 1000  (以太网)
#        RX packets 4350  bytes 863224 (863.2 KB)
#        RX errors 0  dropped 0  overruns 0  frame 0
#        TX packets 766  bytes 80082 (80.0 KB)
#        TX errors 0  dropped 0 overruns 0  carrier 0  collisions 0

#lo: flags=73<UP,LOOPBACK,RUNNING>  mtu 65536
#        inet 127.0.0.1  netmask 255.0.0.0
#        inet6 ::1  prefixlen 128  scopeid 0x10<host>
#        loop  txqueuelen 1000  (本地环回)
#        RX packets 211  bytes 20066 (20.0 KB)
#        RX errors 0  dropped 0  overruns 0  frame 0
#        TX packets 211  bytes 20066 (20.0 KB)
#        TX errors 0  dropped 0 overruns 0  carrier 0  collisions 0
所以服务器IP地址为192.168.7.112
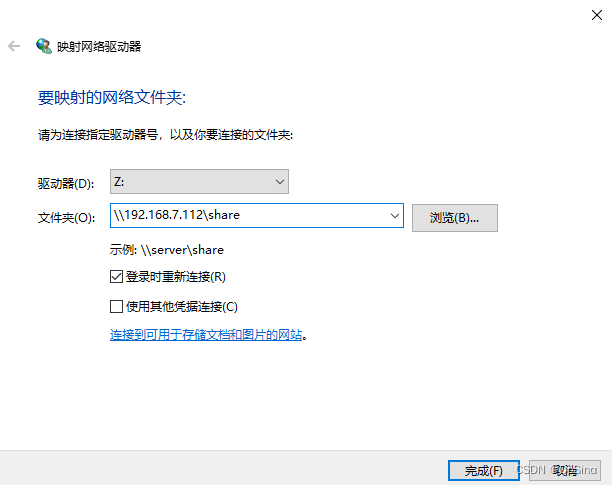
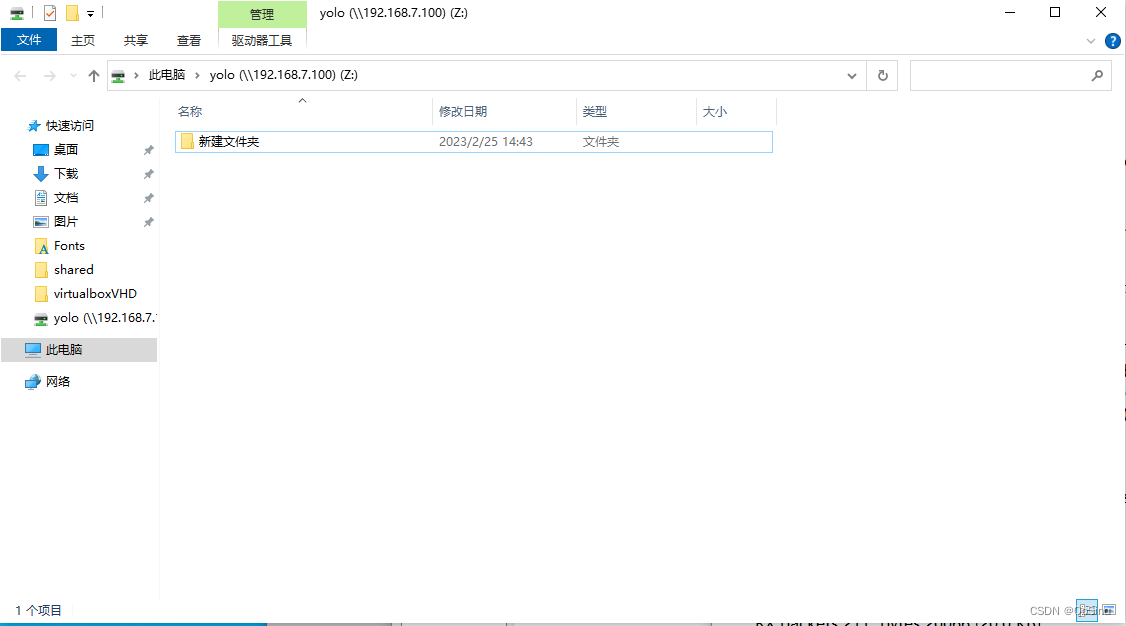
10、【此电脑】,右击选择【映射网络驱动器】,按格式规范填写:\serverip\new_usr_name,然后输入需要登陆的samba用户和密码。
注意:
如果无法访问samba用户,首先要查看路径的权限,为其赋权。
ll /home/new_usr_name/test
sudo chmod 777 /home/new_usr_name/test
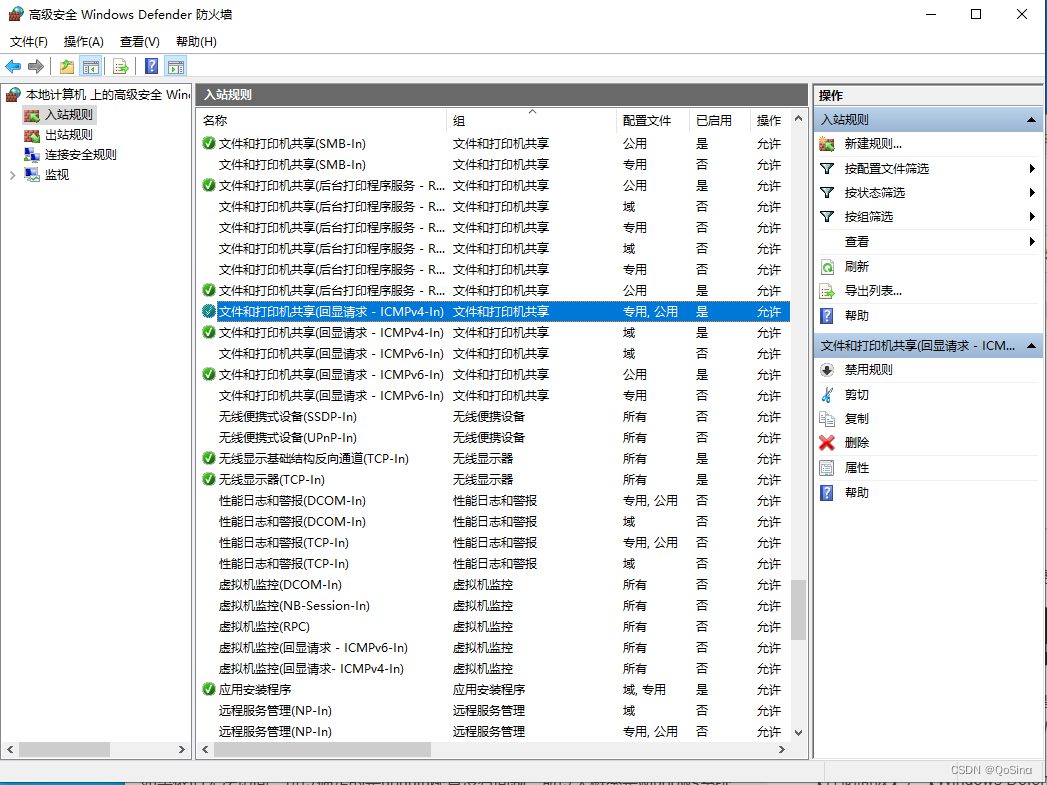
如果依旧无法访问,可以确定的是ubuntu配置没有问题,所以大概率是windows系统的影响,对于远程访问和映射,Windows系统默认是危险的,所以需要我们进行调整。
【控制面板】,【Windows Defender防火墙】,【高级设置】,【入站规则】,【文件和打印机共享(回显请求-ICMPv4-In)】,【启用规则】。
11、以上就是配置samba的方案以及一些解决问题的方法。