SpringBoot实现定时发送彩虹屁邮件
听闻女生喜欢浪漫而又有仪式感的事情,作为一名才华与颜值并存的程序猿,如何才能有格调却又不是身份的表达自己的爱慕之情呢,此文为你提供一篇实用干货,让你从此摆脱单身狗的束缚。
程序可以打成jar包发布到自己的服务器上,即可每天按时发送邮件到自定邮箱。也可在自己电脑上设置一个定时任务,按时发送。
实现需求:定时发送QQ邮件到指定邮箱,实时更新邮件内容(每封邮件内容中的彩虹屁都不一样),自定义精美模板
使用HttpClient远程获取彩虹屁生成器网站中的内容 网站:
-
https://chp.shadiao.app/
-
java Mail 实现发送邮件
-
SpringBoot 整合Scheduled 实现定时发送邮件
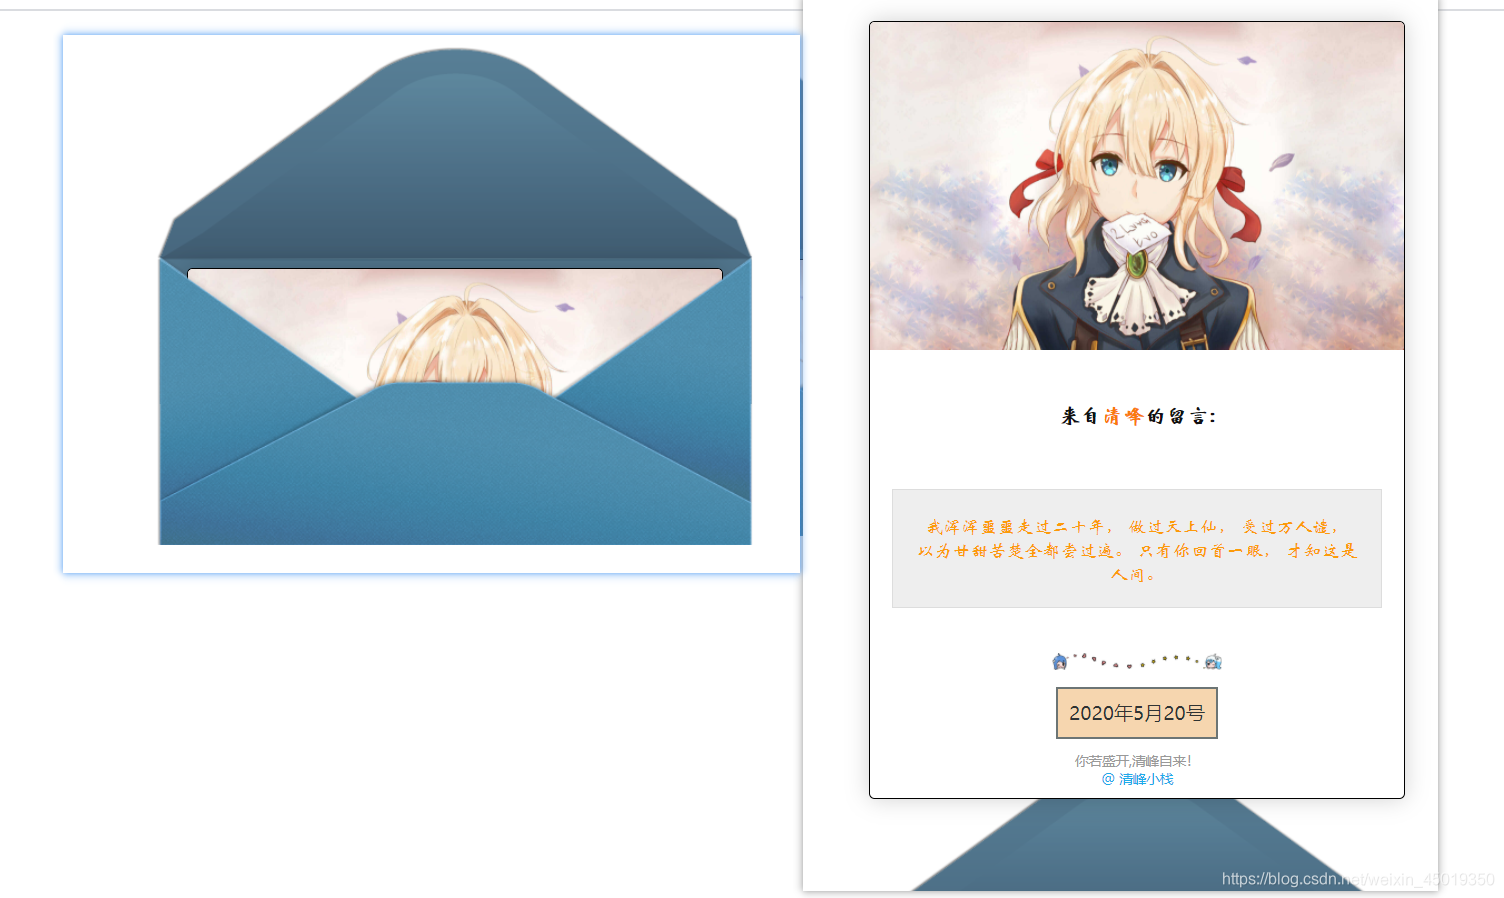
上图:QQ邮件样式(具有js动态上滑特效)
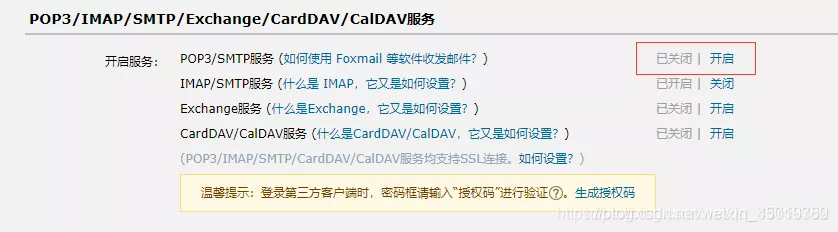
0、QQ邮箱设置
在编写配置前需要,在浏览器登录自己的邮箱在账号安全中设置开启POP3/SMTP服务
1、导入依赖
		<dependency>
            <groupId>org.springframework.boot</groupId>
            <artifactId>spring-boot-starter-web</artifactId>
        </dependency>
        <dependency>
            <groupId>org.springframework.boot</groupId>
            <artifactId>spring-boot-starter-test</artifactId>
        </dependency>
        <dependency>
            <groupId>org.springframework.boot</groupId>
            <artifactId>spring-boot-starter-mail</artifactId>
        </dependency>
        <!--spring-context-support 则是为将第三方库整合进 Spring 应用上下文 提供支持-->
        <dependency>
            <groupId>org.springframework</groupId>
            <artifactId>spring-context-support</artifactId>
        </dependency>
        <!-- httpclient 依赖 -->
        <dependency>
            <groupId>org.apache.httpcomponents</groupId>
            <artifactId>httpclient</artifactId>
            <version>4.5.12</version>
        </dependency>
yml配置文件
spring:
  mail:
    username: [email protected]  # 自己邮箱地址
    password: xxxxxxx        # SMTP|POP3|IMAP协议授权码
    host: smtp.qq.com        # 服务器地址。参考邮箱服务运营商提供的信息。
    properties:
      mail:
        smtp:
          auth: true          # 开启smtp协议验证
    port: 587

# 发给谁的邮箱
she:
  mail: [email protected]
2、远程爬取彩虹屁
https://chp.shadiao.app/api.php
主要采用网络请求的方式获取响应的数据HttpClients
/**远程获取要发送的信息*/
    public static String getOneS(){


        try {


            //创建客户端对象
            HttpClient client = HttpClients.createDefault();
            /*创建地址 https://du.shadiao.app/api.php*/
            HttpGet get = new HttpGet("https://chp.shadiao.app/api.php");
            //发起请求,接收响应对象
            HttpResponse response = client.execute(get);
            //获取响应体,响应数据是一种基于HTTP协议标准字符串的对象
            //响应体和响应头,都是封装HTTP协议数据。直接使用可能出现乱码或解析错误
            HttpEntity entity = response.getEntity();
            //通过HTTP实体工具类,转换响应体数据
            String responseString = EntityUtils.toString(entity, "utf-8");
       	    return responseString;
        } catch (IOException e) {


            throw  new RuntimeException("网站获取句子失败");
        }
    }
3、邮件发送
邮件发送由springboot进行依赖整合,将具体实现细节进行了封装我们只需关注业务代码本身即可,主要注入JavaMailSender对象
1、创建信息发送对象
2、创建复杂邮件发送助手对象
3、设置邮件发送者,接收者,主题内容,邮件内容
4、发送邮件
  public void sendMessage(String subject,String message) {


        try {


            MimeMessage mimeMessage = mailSender.createMimeMessage();
            MimeMessageHelper helper = new MimeMessageHelper(mimeMessage);
            helper.setFrom(from);//发送者邮件邮箱
            helper.setTo(sheMail);//收邮件者邮箱
            helper.setSubject(subject);//发件主题
            helper.setText(message,true);//发件内容
            mailSender.send(helper.getMimeMessage());//发送邮件
        } catch (MessagingException e) {


            e.printStackTrace();
        }
    }
4、发送定时任务
可不加@Controller @RequestMapping("/sendMessage"),加上主要是为了能够实现访问路径即可发送邮件,可不加。
实现定时任务注解 @Scheduled(cron = “0 20 5,17 * * *”) 主要采用cron表达式格式:六个或七个占位符分别表示:{秒数} {分钟} {小时} {日期} {月份} {星期} {年份(可为空)}
注意:要在启动引导类上开启定时任务@EnableScheduling
@Controller
//@Component
public class MyScheduled {


    @Autowired
    private SendMessage sendMessage;

// cronExpression定义时间规则:秒 分钟 小时 日期 月份 星期 年(可选)
    /*定时执行任务方法 每天5点和17点20执行该任务*/
//    @Scheduled(cron = "0 20 5,17 * * *")
    @Scheduled(cron = "0/30 * * * * ?")
//    @RequestMapping("/sendMessage")
    public String dsrw() {


        //获取彩虹屁
        String message = sendMessage.getOneS();
        //获取邮件模板
        String content = getContent(message);
        //发送邮件
        sendMessage.sendMessage("❤宝贝", content);
        return "index.html";
    }

    public String getContent(String message) {


        //格式化日期
        String date = new SimpleDateFormat("yyyy年MM月dd日").format(new Date());

        //自定义样式邮件模板
        String content = "此处放置你自己的能够以的邮件模板页面并开启html解析,true";
        return content;
    }
}
cron表达式各占位符详情:
cron表达式各占位符解释:
{秒数}{分钟} ==> 允许值范围: 0~59 ,不允许为空值,若值不合法,调度器将抛出SchedulerException异常
“*” 代表每隔1秒钟触发;
“,” 代表在指定的秒数触发,比如”0,15,45”代表0秒、15秒和45秒时触发任务
“-“代表在指定的范围内触发,比如”25-45”代表从25秒开始触发到45秒结束触发,每隔1秒触发1次
“/”代表触发步进(step),”/”前面的值代表初始值(““等同”0”),后面的值代表偏移量,比如”0/20”或者”/20”代表从0秒钟开始,每隔20秒钟触发1次,即0秒触发1次,20秒触发1次,40秒触发1次;”5/20”代表5秒触发1次,25秒触发1次,45秒触发1次;”10-45/20”代表在[10,45]内步进20秒命中的时间点触发,即10秒触发1次,30秒触发1次
{小时} ==> 允许值范围: 0~23 ,不允许为空值,若值不合法,调度器将抛出SchedulerException异常,占位符和秒数一样
{日期} ==> 允许值范围: 1~31 ,不允许为空值,若值不合法,调度器将抛出SchedulerException异常
{星期} ==> 允许值范围: 1~7 (SUN-SAT),1代表星期天(一星期的第一天),以此类推,7代表星期六(一星期的最后一天),不允许为空值,若值不合法,调度器将抛出SchedulerException异常
{年份} ==> 允许值范围: 1970~2099 ,允许为空,若值不合法,调度器将抛出SchedulerException异常
注意:除了{日期}和{星期}可以使用”?”来实现互斥,表达无意义的信息之外,其他占位符都要具有具体的时间含义,且依赖关系为:年->月->日期(星期)->小时->分钟->秒数
3.cron表达式的强大魅力在于灵活的横向和纵向组合以及简单的语法,用cron表达式几乎可以写出任何你想要触发的时间点与周期
经典案例:
“30 * * * * ?” 每半分钟触发任务
“30 10 * * * ?” 每小时的10分30秒触发任务
“30 10 1 * * ?” 每天1点10分30秒触发任务
“30 10 1 20 * ?” 每月20号1点10分30秒触发任务
“30 10 1 20 10 ? *” 每年10月20号1点10分30秒触发任务
“30 10 1 20 10 ? 2011” 2011年10月20号1点10分30秒触发任务
“30 10 1 ? 10 * 2011” 2011年10月每天1点10分30秒触发任务
“30 10 1 ? 10 SUN 2011” 2011年10月每周日1点10分30秒触发任务
“15,30,45 * * * * ?” 每15秒,30秒,45秒时触发任务
“15-45 * * * * ?” 15到45秒内,每秒都触发任务
“15/5 * * * * ?” 每分钟的每15秒开始触发,每隔5秒触发一次
“15-30/5 * * * * ?” 每分钟的15秒到30秒之间开始触发,每隔5秒触发一次
“0 0/3 * * * ?” 每小时的第0分0秒开始,每三分钟触发一次
“0 15 10 ? * MON-FRI” 星期一到星期五的10点15分0秒触发任务
“0 15 10 L * ?” 每个月最后一天的10点15分0秒触发任务
“0 15 10 LW * ?” 每个月最后一个工作日的10点15分0秒触发任务
“0 15 10 ? * 5L” 每个月最后一个星期四的10点15分0秒触发任务
“0 15 10 ? * 5#3” 每个月第三周的星期四的10点15分0秒触发任务
5、自定义模板
提供一个私家珍藏的html精美模板
<!DOCTYPE html>
<html lang="en">

<head>
    <meta http-equiv="Content-Type" content="text/html; charset=UTF-8">
    <base target="_blank"/>
    <style id="scrollbar" type="text/css">::-webkit-scrollbar {


        width: 0 !important
    }

    pre {


        white-space: pre-wrap !important;
        word-wrap: break-word !important;
        *white-space: normal !important
    }

    #letter img {


        max-width: 300px
    }</style>
    <style id="from-wrapstyle" type="text/css">#form-wrap {


        overflow: hidden;
        height: 447px;
        position: relative;
        top: 0px;
        transition: all 1s ease-in-out .3s;
        z-index: 0
    }</style>
    <style id="from-wraphoverstyle" type="text/css">#form-wrap:hover {


        height: 1300px;
        top: -200px
    }</style>
</head>
<body>
<div style="width: 530px;margin: 20px auto 0;height: 1000px;">
    <div id="form-wrap"><img src="https://cdn.jsdelivr.net/gh/Akilarlxh/[email protected]/source/img/before.png"
                             alt="before"
                             style="position: absolute;bottom: 126px;left: 0px;background-repeat: no-repeat;width: 530px;height: 317px;z-index:-100">
        <div style="position: relative;overflow: visible;height: 1500px;width: 500px;margin: 0px auto;transition: all 1s ease-in-out .3s;padding-top:200px;">
            <form>
                <div style="background: white;width: 95%;max-width: 800px;margin: auto auto;border-radius: 5px;border: 1px solid;overflow: hidden;-webkit-box-shadow: 0px 0px 20px 0px rgba(0, 0, 0, 0.12);box-shadow: 0px 0px 20px 0px rgba(0, 0, 0, 0.18);">
                    <img style="width:100%;overflow: hidden;"
                         src="https://ae01.alicdn.com/kf/U5bb04af32be544c4b41206d9a42fcacfd.jpg"/>
                    <div style="padding: 5px 20px;"><br>
                        <div><h3
                                style="text-decoration: none; color: rgb(17,17,17); text-align: center;font-family: 华文新魏">
                            来自<span style="color: #fa7a0a">清峰</span>的留言:</h3>
                        </div>

                        <br>
                        <!--内容区域height:200px-->
                        <div id="letter"
                             style="overflow:auto;height:285px;width:100%;display:block;word-break: break-all;word-wrap: break-word;">
                            <div style="text-align: center; border-bottom: #ddd 1px solid;border-left: #ddd 1px solid;padding-bottom: 20px;background-color: #eee;margin: 15px 0px;padding-left: 20px;padding-right: 20px;border-top: #ddd 1px solid;border-right: #ddd 1px solid;padding-top: 20px;font-family: "
                                 Arial
                            ", "Microsoft YaHei" , "黑体" , "宋体" , sans-serif;">
                            <!--要显示的内容-->
                            <span style="color: #fc9b0a;font-family: 华文新魏">
                                我浑浑噩噩走过二十年, 做过天上仙, 受过万人谴, 以为甘甜苦楚全都尝过遍。 只有你回首一眼, 才知这是人间。</span>

                        </div>

                        <div style="text-align: center;margin-top: 40px;"><img
                                src="https://ae01.alicdn.com/kf/U0968ee80fd5c4f05a02bdda9709b041eE.png" alt="hr"
                                style="width:100%; margin:5px auto 5px auto; display: block;"/><a
                                style="text-transform: uppercase;text-decoration: none;font-size: 17px;border: 2px solid #6c7575;color: #2f3333;padding: 10px;display: inline-block;margin: 10px auto 0;background-color: rgb(246, 214, 175);"
                                target="_blank" href="#">2020年5月20号</a>
                        </div>
                        <p style="font-size: 12px;text-align: center;color: #999;">你若盛开,清峰自来!<br><a
                                style="text-decoration:none; color:rgb(30,171,234)" href="http://www.qingfenginn.top">@
                            清峰小栈</a>
                        </p>

                    </div>

                </div>
        </div>
        </form>
    </div>
    <img src="https://cdn.jsdelivr.net/gh/Akilarlxh/[email protected]/source/img/after.png" alt="after"
         style="      position: absolute;bottom: -2px;left: 0;background-repeat: no-repeat;width: 530px;height: 259px;z-index:100">
</div>
</div>
</body>

</body>
</html>
6、设置定时任务
程序可以打成jar包发布到自己的服务器上,即可每天按时发送邮件到自定邮箱。也可在自己电脑上设置一个定时任务,按时发送。
1、部署到服务器方式可参考https://blog.csdn.net/weixin_45019350/article/details/108963951
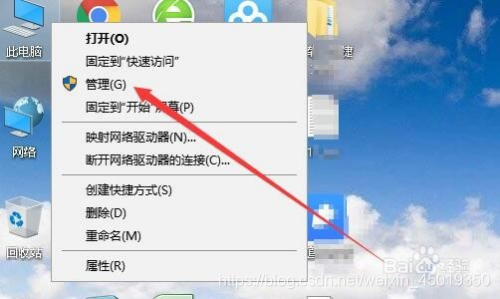
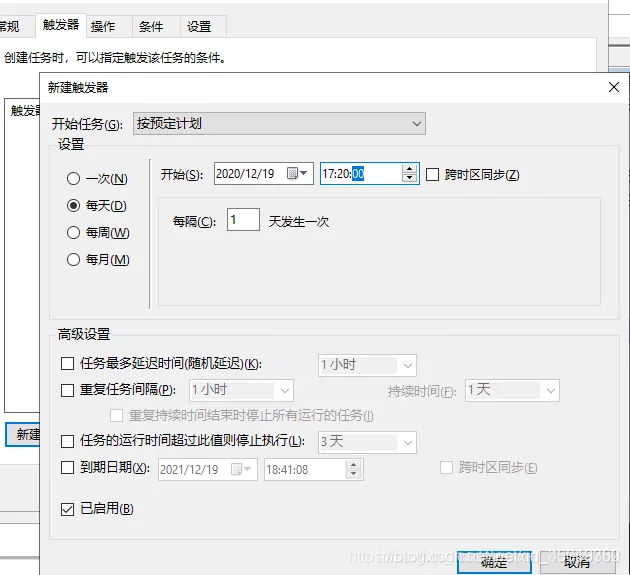
2、Windows电脑设置定时任务
win10 定时运jar 包 在任务计划程序中创建任务
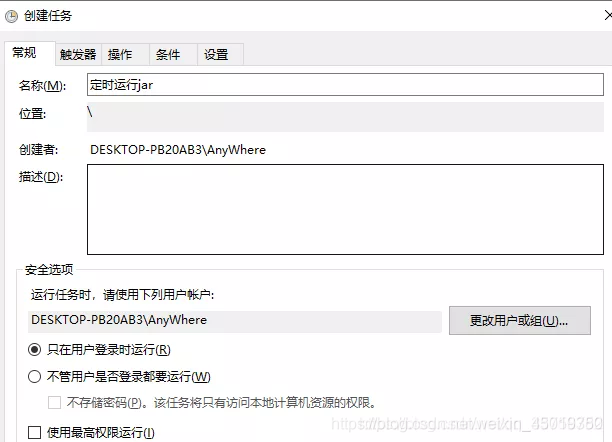
1)新建触发器
2)新建操作,在程序或脚本输入执行的jar命令,点击确定

3)然后可以看见,创建好的任务
