版权声明:本文为博主原创文章,遵循 CC 4.0 BY-SA 版权协议,转载请附上原文出处链接和本声明。
springBoot 邮件发送实现
1、首先在Pom文件中添加springBoot邮件依赖
源码如下:
<!--springBoot邮件依赖-->
<dependency>
    <groupId>org.springframework.boot</groupId>
    <artifactId>spring-boot-starter-mail</artifactId>
</dependency>
2、在resources文件中创建配置文件spring-mail.xml,配置文件如下所示
<?xml version="1.0" encoding="UTF-8"?>
<beans xmlns="http://www.springframework.org/schema/beans"
   xmlns:xsi="http://www.w3.org/2001/XMLSchema-instance"
   xsi:schemaLocation="http://www.springframework.org/schema/beans http://www.springframework.org/schema/beans/spring-beans-4.1.xsd">

   <bean id="javaMailSender" class="org.springframework.mail.javamail.JavaMailSenderImpl">
      <!-- 邮件地址    服务器端邮箱地址-->
      <property name="host" value="(邮箱服务器地址,QQ邮箱、网易邮箱等不同获取方法如下)"></property>
      <property name="username" value="(邮箱名称)" />
      <!--有些邮箱使用安全码登录,获取安全码即可  -->
        <property name="password" value="************" />
      <property name="javaMailProperties">
         <props>
            <prop key="mail.smtp.auth">true</prop>
            <prop key="mail.smtp.timeout">3000</prop>
            <prop key="mail.smtp.starttls.enable">false</prop>
            <prop key="mail.debug">true</prop>
         </props>
      </property>
   </bean>
</beans>
登录邮箱后——邮箱服务器地址获取(每个邮箱不同,若是其他邮箱具体操作找度娘)
然后勾选服务

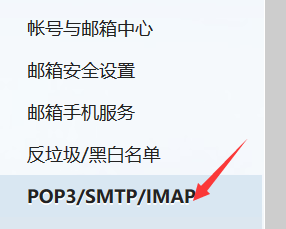
接下来选择邮件发送服务器

3、邮件发送的工具类
package com.lzjy.mailUtil;

import org.springframework.context.support.ClassPathXmlApplicationContext;
import org.springframework.mail.javamail.JavaMailSender;
import org.springframework.mail.javamail.MimeMessageHelper;

import javax.mail.MessagingException;
import javax.mail.internet.MimeMessage;
public class SendEmailUtil  {

   public  String email(String emailName){
        //加载配置文件
        ClassPathXmlApplicationContext ac=new ClassPathXmlApplicationContext("spring-mail.xml");
        //发送邮件对象
        JavaMailSender mailSender=(JavaMailSender) ac.getBean("javaMailSender");
      //发送邮件对象
      String maileToAddress = emailName;//目标邮箱地址
        String subject = "XXXX";//邮件标题
        //生成随机码
        String captcha=RandomCaptcha.getStringRandom(6);
        String message = "***********";//邮件内容正文
        System.out.println("To: " + maileToAddress);
        System.out.println("Subject: " + subject);
        System.out.println("Message: " + message);
        //邮件对象
        MimeMessage mimeMessage=mailSender.createMimeMessage();
        try {
            MimeMessageHelper mimeMessageHelper=new MimeMessageHelper(mimeMessage, true);
            mimeMessageHelper.setTo(maileToAddress);//收件人邮箱user.getMail()
            mimeMessageHelper.setFrom("发件人邮箱详细地址");//发件人邮箱
            mimeMessage.setSubject(subject);
            mimeMessage.setText(message);
            mailSender.send(mimeMessage);
            return captcha;
        } catch (MessagingException e) {
            e.printStackTrace();
            return e.toString();
        }

   }
}
4、控制器controller如下
//这是我写过邮箱验证码的控制器,若有借鉴具体情况具体修改
@RequestMapping("/emailYzm")
@ResponseBody
public Map<String,String> emailYzm(String email,HttpSession session){

    String yzm=null;
    if(email==null||"".equals(email)){
        System.out.println("邮箱地址不能为空");
    }else{
        SendEmailUtil send=new SendEmailUtil();
        yzm= send.email(email);

    }
    Map<String,String> map=new HashMap<String, String>();
    map.put("yzm", yzm);
    session.setAttribute("yzm", yzm);
    return map;
}
5、前端请求
页面按钮:<button type="button" class="btn btn-info" id="yzm">获取验证码</button>$(function(){
/*邮箱验证码 */
$("#yzm").click(function(){
var url="${root}/register/emailYzm";
var email=$("#emali").val();
if (!/^[a-z\d]+(\.[a-z\d]+)*@([\da-z](-[\da-z])?)+(\.{1,2}[a-z]+)+$/.test(email)){
var s5=document.getElementById("s4");
s5.innerHTML="<font color='red'>邮箱格式不正确!正确格式如:[email protected]</font>";
}else{
$.post(url,{"email":email},function(res){
$("#coYzm").val(res.yzm);
$("#yzm").html("输入验证码");
},"json")
var s5=document.getElementById("s4");
s5.innerHTML="";
}
})
})注:红色部分按个人情况修改
完成、若各位觉得有所帮助赞一个!