一、前言
使用vuex可以实现数据的共享。
二、安装
vscode中新建终端安装vuex。由于vue2不能使用vuex4的版本,所以在安装时需要指定版本3
npm i vuex@3三、vuex工作流
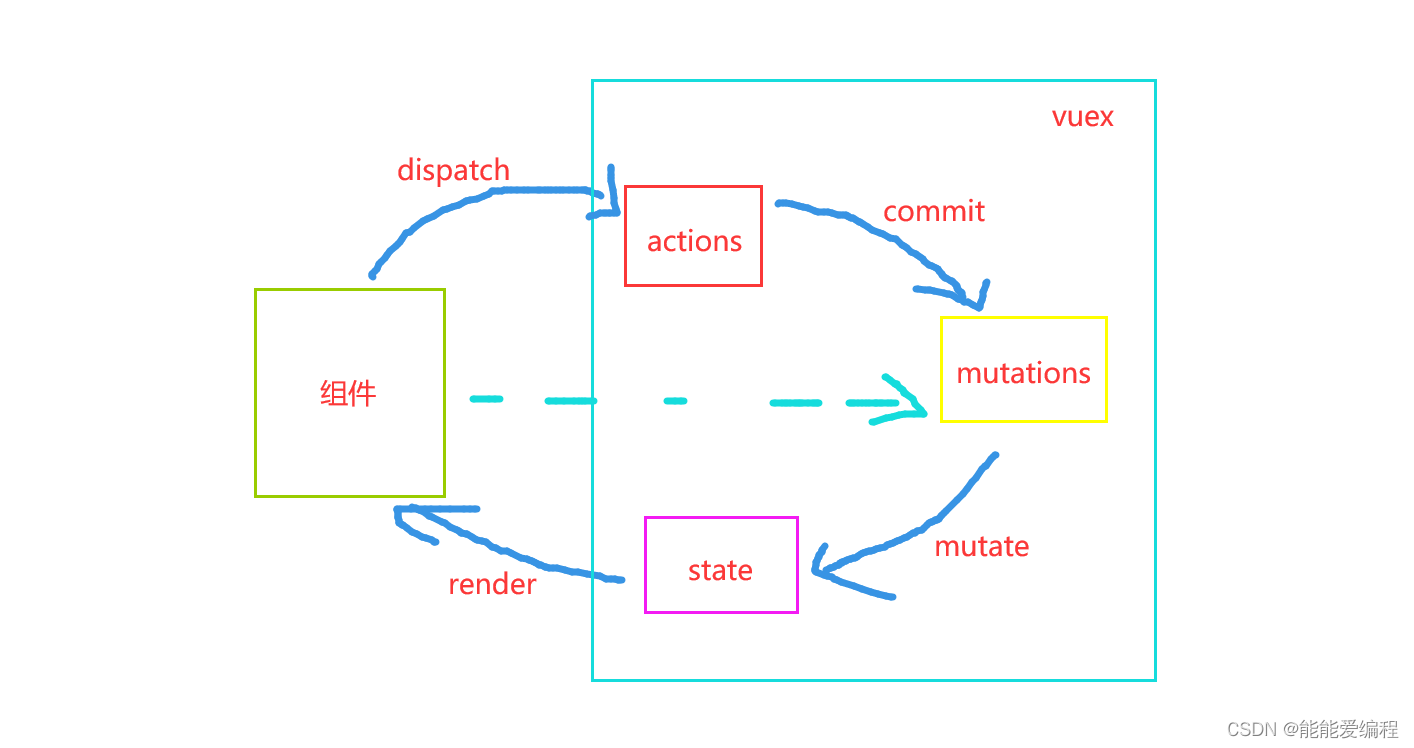
vuex核心包括actions、mutations、state。
①state用来存储数据;
②actions用来响应组件的事件,也可以对数据进行加工,或者进行后端请求,也就是说组件中调用dispatch方法,可以触发actions中的方法;
③mutations用来操作state,actions中调用commit方法来调用mutations。
④其他:当不需要对数据进行额外加工的时候,可以直接在组件中调用commit方法触发mutations中的方法
四、配置
步骤一:新建文件夹store,文件夹下新建index.js文件
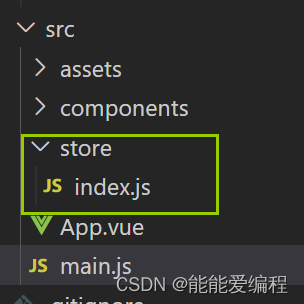
步骤二:index.js中完成配置:还没有配置数据和事件
import Vue from 'vue'
import Vuex from 'vuex'
Vue.use(Vuex)

// 用来存储数据
const state = {

}
// 响应组件中的事件
const actions = {

}
// 操作数据
const mutations = {

}
// 用来将state数据进行加工
const getters = {

}
// 新建并暴露store
export default new Vuex.Store({
    state,
    actions,
    mutations,
    getters
})
步骤三:main.js中引入
import Vue from 'vue'
import App from './App.vue'
import store from './store/index';

Vue.config.productionTip = false

new Vue({
  render: h => h(App),
  store
}).$mount('#app')
五、使用
5.1、常规写法
1、state
组件中使用$store.state.xxx获取值,例如:
<li v-for="p in $store.state.person" :key="p.id">
   姓名:{

   { p.personName }} 年龄:{

   { p.age }}
   <button @click="deletePerson(p.id)">删除</button>
</li>
vuex的index.js:
const state = {
    person: [
        { id: nanoid(), personName: "张三", age: 18 },
        { id: nanoid(), personName: "张4", age: 28 },
        { id: nanoid(), personName: "张5", age: 38 },
    ]
}
2、getter
组件中使用$store.getters.xxx获取getters中的返回值
<span> 学生年龄总和:{

   { $store.getters.getAllPersonAge }} </span>
index.js:
// 用来将state数据进行加工:类似于computed
const getters = {
    getAllPersonAge(state) {
        var sumAge = 0;
        state.person.forEach(element => {
            sumAge += element.age
        });
        return sumAge
    }
}
3、actions
组件中使用this.$store.dispatch("aaa", xxx)触发actions中的aaa方法,参数为xxx
<input type="text" v-model="newPerson" />
<button @click="addPerson">添加</button>

addPerson() {
   if (this.newPerson == "") {
      alert("请输入姓名");
      return;
   }
   this.$store.dispatch("addPerson", this.newPerson);
   this.newPerson=""
},
index.js
// 响应组件中的事件
const actions = {
    //添加人员
    addPerson(content, value) {
        console.log(value)
        const person = {
            id: nanoid(),
            personName: value,
            age: 18//暂时写死
        }
        content.commit("addPerson", person)
    }
}
4、mutations
组件中:
<button @click="deletePerson(p.id)">删除</button>

deletePerson(id) {
      this.$store.commit("deletePerson", id);
},
index.js
const mutations = {
    addPerson(_, value) {
        this.state.person.unshift(value)
    },
    deletePerson(_, id) {
        const newArr = this.state.person.filter(p => {
            return p.id != id
        })
        this.state.person = newArr
    }
}
5.2 四个map写法
上述写法都需要手动写this.$store.xxx比较麻烦,可以在组件中引入vuex的四个map,简化操作
组件中引入:
import { mapState, mapActions, mapGetters, mapMutations } from "vuex";使用:
computed: {
    ...mapState(["person"]),
    ...mapGetters(["getAllPersonAge"]),
},
methods: {
    ...mapActions({
    addPerson1: "addPerson",   //第一个为本地方法名,第二个参数为actions中的方法名
}),
    ...mapMutations(["deletePerson"]),//当本地和index.js中的方法名一致时,可以简化成数组写法
},
使用:直接使用上面中定义的参数名
  <input type="text" v-model="newPerson" />
    <button @click="addPerson1(newPerson)">添加</button>
    <ul>
      <li v-for="p in person" :key="p.id">
        姓名:{

   { p.personName }} 年龄:{

   { p.age }}
        <button @click="deletePerson(p.id)">删除</button>
      </li>
    </ul>
  <span> 学生年龄总和:{

   { getAllPersonAge }} </span>
五、其他
以上就是vuex的所有介绍,我们一起进步。