SSM项目-商城后台管理系统
申明: 未经许可,禁止以任何形式转载,若要引用,请标注链接地址。 全文共计39077字,阅读大概需要10分钟
更多学习内容, 欢迎关注我的个人公众号:不懂开发的程序猿
开发说明
开发环境
| 工具 | 版本 |
|---|---|
| 后台框架 | Sprig5 + SpringMVC + Mybatis |
| 服务器 | Tomcat 8.5.73 |
| 数据库 | MySQL 8.0.28 |
| Build Tools | Maven 3.8.5 |
| 前端 | jQuery + Bootstrap + JavaScript |
| 开发工具 | IDEA 2022.3 |
项目界面演示
项目功能
1、介绍项目实现功能,使用到的技术点,使用到的框架,演示最终效果。
2、创建数据库和表,添加idea可视化。
3、完成SSM框架的搭建。
4、添加字符编码过滤器,实现中文编码解析。
5、使用数据库连接池技术,使用mybatis框架完成底层实体类的创建和数据访问层的实现。
6、实现登录功能。
7、实现登录成功后全部商品分页显示。
8、实现Ajax的翻页功能。
9、添加监听器,实现获取全部商品类型功能。
10、实现商品增加功能。
11、实现Ajax商品删除功能。
12、实现Ajax商品批量删除功能。
13、实现商品修改的回显功能。
14、实现商品修改功能。
15、实现按商品名称条件查询并分页功能,翻页使用Ajax技术。
16、实现按商品类型查询并分页功能,翻页使用Ajax技术。
17、实现按商品价格查询并分页功能,翻页使用Ajax技术。
18、实现按商品名称、商品类型、商品价格多条件查询并分页,翻页使用Ajax技术。
19、实现退出功能。
具体的技术指标
- 熟悉Spring框架的使用
- 熟悉SpringMVC框架的使用;
- 熟悉MyBatis框架的使用
- 掌握JSP的标签库的使用
- 掌握EL表达式的使用
- 掌握AJAX异步刷新技术的使用
- 掌握文件上传实现
- 掌握异步AJAX分页实现
- 熟悉企业日常的接口开发流程
- 熟悉企业的项目进度控制规范
- 建立起软件开发的基本思想和积累开发中常见的设计思路
- 巩固SSM框架以及JavaEE的相关知识点,增强对各个知识点的进一步认识
开发过程
1、搭建SSM框架
1.1、建库建表
DROP DATABASE IF EXISTS xiaomissm;
CREATE DATABASE xiaomissm DEFAULT CHARSET utf8;

/*打开DB*/
USE xiaomissm;
DROP TABLE IF EXISTS `orderdetail`;
DROP TABLE IF EXISTS `xmorder`;
DROP TABLE IF EXISTS `carshop`;
DROP TABLE IF EXISTS `address`;
DROP TABLE IF EXISTS `users`;
DROP TABLE IF EXISTS product_info;
DROP TABLE IF EXISTS product_type;
DROP TABLE IF EXISTS admin;


#DROP TABLE xiaomi_admin;
#################################管理员表
CREATE TABLE admin(
a_id INT AUTO_INCREMENT PRIMARY KEY,
a_name VARCHAR(20),
a_pass VARCHAR(20)
);
INSERT INTO admin(a_id,a_name,a_pass) VALUES(1,'admin','admin');

##########################商品类型表
CREATE TABLE product_type
(
type_id INT AUTO_INCREMENT PRIMARY KEY,
type_name VARCHAR(20)
);

####################添加数据
INSERT INTO product_type(type_name) VALUES('手机');
INSERT INTO product_type(type_name) VALUES('电脑');
INSERT INTO product_type(type_name) VALUES('电视');


#############################商品表
CREATE TABLE product_info
(
p_id INT AUTO_INCREMENT PRIMARY KEY,
p_name VARCHAR(20),
p_content VARCHAR(200), ##############33商品规格/简介
p_price INT, ###############价格
p_image VARCHAR(200), #############图片
p_number INT, ########数量
type_id INT,
p_date DATE,
FOREIGN KEY(type_id) REFERENCES product_type(type_id)
);
##添加
INSERT INTO product_info(p_name,p_content,p_price,p_image,p_number,type_id,p_date) VALUES('小米Note2','双曲面 黑色 6GB内存 64GB闪存',2899,'xmNote2.jpg',500,1,'2018-01-04');
INSERT INTO product_info(p_name,p_content,p_price,p_image,p_number,type_id,p_date) VALUES('红米Note5A','5.5英寸 粉色 2GB内存 16GB闪存',699,'hmNote5A.jpg',500,1,'2018-01-05');
INSERT INTO product_info(p_name,p_content,p_price,p_image,p_number,type_id,p_date) VALUES('红米Note4X','5.5英寸 绿色 4GB内存 64GB闪存',1299,'hmNote4X.jpg',500,1,'2018-01-06');
INSERT INTO product_info(p_name,p_content,p_price,p_image,p_number,type_id,p_date) VALUES('红米4','5英寸 金色 3GB内存 32GB闪存',999,'hm4.jpg',500,1,'2018-01-07');
INSERT INTO product_info(p_name,p_content,p_price,p_image,p_number,type_id,p_date) VALUES('红米4X','5英寸 黑色 3GB内存 32GB闪存',899,'hm4X.jpg',500,1,'2018-01-08');

INSERT INTO product_info(p_name,p_content,p_price,p_image,p_number,type_id,p_date) VALUES('小米平板3','7.9英寸 金色 4GB内存 64GB闪存',1499,'xmPad3.jpg',500,2,'2018-01-09');
INSERT INTO product_info(p_name,p_content,p_price,p_image,p_number,type_id,p_date) VALUES('小米Air12','12.5英寸 银色 4GB内存 128GB闪存',3599,'xmAir12.jpg',500,2,'2018-01-18');
INSERT INTO product_info(p_name,p_content,p_price,p_image,p_number,type_id,p_date) VALUES('小米Air13','13.3英寸 银色 8GB内存 256GB闪存',4999,'xmAir13.jpg',500,2,'2018-01-17');
INSERT INTO product_info(p_name,p_content,p_price,p_image,p_number,type_id,p_date) VALUES('小米Pro','15.6英寸 灰色 16GB内存 256GB闪存',6999,'xmPro.jpg',500,2,'2018-01-16');

INSERT INTO product_info(p_name,p_content,p_price,p_image,p_number,type_id,p_date) VALUES('小米电视4','49英寸 原装LG屏 3840×2160 真4K',3299,'xmTV4-49.jpg',500,3,'2018-01-15');
INSERT INTO product_info(p_name,p_content,p_price,p_image,p_number,type_id,p_date) VALUES('小米电视4','55英寸 原装三星屏 3840×2160 真4K',3999,'xmTV4-55.jpg',500,3,'2018-01-13');
INSERT INTO product_info(p_name,p_content,p_price,p_image,p_number,type_id,p_date) VALUES('小米电视4','65英寸 原装三星屏 3840×2160 真4K',8999,'xmTV4-65.jpg',500,3,'2018-01-22');
INSERT INTO product_info(p_name,p_content,p_price,p_image,p_number,type_id,p_date) VALUES('小米电视4A','43英寸 FHD全高清屏 1920*1080',1999,'xmTV4A-43.jpg',500,3,'2018-01-11');
INSERT INTO product_info(p_name,p_content,p_price,p_image,p_number,type_id,p_date) VALUES('小米电视4A','49英寸 FHD全高清屏 1920*1080',2299,'xmTV4A-49.jpg',500,3,'2018-01-21');
INSERT INTO product_info(p_name,p_content,p_price,p_image,p_number,type_id,p_date) VALUES('小米MIX2','全陶瓷 黑色 8GB内存 128GB闪存',4699,'xmMIX2.jpg',500,1,'2018-04-01');
INSERT INTO product_info(p_name,p_content,p_price,p_image,p_number,type_id,p_date) VALUES('小米Note3','全网通 蓝色 6GB内存 64GB闪存',2499,'xmNote3.jpg',500,1,'2018-03-01');
INSERT INTO product_info(p_name,p_content,p_price,p_image,p_number,type_id,p_date) VALUES('小米6','玻璃金属 白色 6GB内存 128GB闪存',2899,'xm6.jpg',500,1,'2018-02-01');
INSERT INTO product_info(p_name,p_content,p_price,p_image,p_number,type_id,p_date) VALUES('小米MAX2','全金属 金色 4GB内存 64GB闪存',1599,'xmMAX2.jpg',500,1,'2018-01-02');
INSERT INTO product_info(p_name,p_content,p_price,p_image,p_number,type_id,p_date) VALUES('小米5X','全金属 金色 4GB内存 64GB闪存',1499,'xm5X.jpg',500,1,'2018-01-03');
1.2、新建Maven工程
1.3、配置pom.xml
<project xmlns="http://maven.apache.org/POM/4.0.0" xmlns:xsi="http://www.w3.org/2001/XMLSchema-instance"
         xsi:schemaLocation="http://maven.apache.org/POM/4.0.0 http://maven.apache.org/maven-v4_0_0.xsd">
    <modelVersion>4.0.0</modelVersion>

    <groupId>com.jerry</groupId>
    <artifactId>missm</artifactId>
    <version>1.0</version>
    <packaging>war</packaging>

    <!-- 集中定义依赖版本号 -->
    <properties>
        <junit.version>4.12</junit.version>
        <spring.version>5.2.5.RELEASE</spring.version>
        <mybatis.version>3.5.1</mybatis.version>
        <mybatis.spring.version>1.3.1</mybatis.spring.version>
        <mybatis.paginator.version>1.2.15</mybatis.paginator.version>
        <mysql.version>8.0.27</mysql.version>
        <slf4j.version>1.6.4</slf4j.version>
        <druid.version>1.1.12</druid.version>
        <pagehelper.version>5.1.2</pagehelper.version>
        <jstl.version>1.2</jstl.version>
        <servlet-api.version>3.0.1</servlet-api.version>
        <jsp-api.version>2.0</jsp-api.version>
        <jackson.version>2.9.6</jackson.version>
    </properties>

    <dependencies>
        <!-- spring -->
        <dependency>
            <groupId>org.springframework</groupId>
            <artifactId>spring-context</artifactId>
            <version>${spring.version}</version>
        </dependency>
        <dependency>
            <groupId>org.springframework</groupId>
            <artifactId>spring-beans</artifactId>
            <version>${spring.version}</version>
        </dependency>
        <dependency>
            <groupId>org.springframework</groupId>
            <artifactId>spring-webmvc</artifactId>
            <version>${spring.version}</version>
        </dependency>
        <dependency>
            <groupId>org.springframework</groupId>
            <artifactId>spring-jdbc</artifactId>
            <version>${spring.version}</version>
        </dependency>
        <dependency>
            <groupId>org.springframework</groupId>
            <artifactId>spring-aspects</artifactId>
            <version>${spring.version}</version>
        </dependency>
        <dependency>
            <groupId>org.springframework</groupId>
            <artifactId>spring-jms</artifactId>
            <version>${spring.version}</version>
        </dependency>
        <dependency>
            <groupId>org.springframework</groupId>
            <artifactId>spring-context-support</artifactId>
            <version>${spring.version}</version>
        </dependency>
        <dependency>
            <groupId>org.springframework</groupId>
            <artifactId>spring-test</artifactId>
            <version>${spring.version}</version>
        </dependency>
        <!-- Mybatis -->
        <dependency>
            <groupId>org.mybatis</groupId>
            <artifactId>mybatis</artifactId>
            <version>${mybatis.version}</version>
        </dependency>
        <dependency>
            <groupId>org.mybatis</groupId>
            <artifactId>mybatis-spring</artifactId>
            <version>${mybatis.spring.version}</version>
        </dependency>
        <dependency>
            <groupId>com.github.miemiedev</groupId>
            <artifactId>mybatis-paginator</artifactId>
            <version>${mybatis.paginator.version}</version>
        </dependency>
        <dependency>
            <groupId>com.github.pagehelper</groupId>
            <artifactId>pagehelper</artifactId>
            <version>${pagehelper.version}</version>
        </dependency>
        <!-- MySql -->
        <dependency>
            <groupId>mysql</groupId>
            <artifactId>mysql-connector-java</artifactId>
            <version>${mysql.version}</version>
        </dependency>
        <!-- 连接池 -->
        <dependency>
            <groupId>com.alibaba</groupId>
            <artifactId>druid</artifactId>
            <version>${druid.version}</version>
        </dependency>

        <!-- junit -->
        <dependency>
            <groupId>junit</groupId>
            <artifactId>junit</artifactId>
            <version>${junit.version}</version>
            <scope>test</scope>
        </dependency>


        <!-- JSP相关 -->
        <dependency>
            <groupId>jstl</groupId>
            <artifactId>jstl</artifactId>
            <version>${jstl.version}</version>
        </dependency>
        <dependency>
            <groupId>javax.servlet</groupId>
            <artifactId>javax.servlet-api</artifactId>
            <version>3.0.1</version>
            <scope>provided</scope>
        </dependency>
        <dependency>
            <groupId>javax.servlet</groupId>
            <artifactId>jsp-api</artifactId>
            <scope>provided</scope>
            <version>${jsp-api.version}</version>
        </dependency>
        <!-- Jackson Json处理工具包 -->
        <dependency>
            <groupId>com.fasterxml.jackson.core</groupId>
            <artifactId>jackson-databind</artifactId>
            <version>${jackson.version}</version>
        </dependency>
        <!--    文件异步上传-->
        <dependency>
            <groupId>commons-io</groupId>
            <artifactId>commons-io</artifactId>
            <version>2.4</version>
        </dependency>
        <dependency>
            <groupId>commons-fileupload</groupId>
            <artifactId>commons-fileupload</artifactId>
            <version>1.3.1</version>
        </dependency>

        <!--log4j 日志文件-->
        <dependency>
            <groupId>log4j</groupId>
            <artifactId>log4j</artifactId>
            <version>1.2.17</version>
        </dependency>


    </dependencies>

    <!-- 插件配置 -->
    <build>
        <plugins>
            <plugin>
                <groupId>org.apache.maven.plugins</groupId>
                <artifactId>maven-compiler-plugin</artifactId>
                <configuration>
                    <source>1.8</source>
                    <target>1.8</target>
                    <encoding>UTF-8</encoding>
                </configuration>
            </plugin>
        </plugins>
        <!--识别所有的配置文件-->
        <resources>
            <resource>
                <directory>src/main/java</directory>
                <includes>
                    <include>**/*.properties</include>
                    <include>**/*.xml</include>
                </includes>
                <filtering>false</filtering>
            </resource>
            <resource>
                <directory>src/main/resources</directory>
                <includes>
                    <include>**/*.properties</include>
                    <include>**/*.xml</include>
                </includes>
                <filtering>false</filtering>
            </resource>
        </resources>
    </build>


</project>
1.4、目录结构
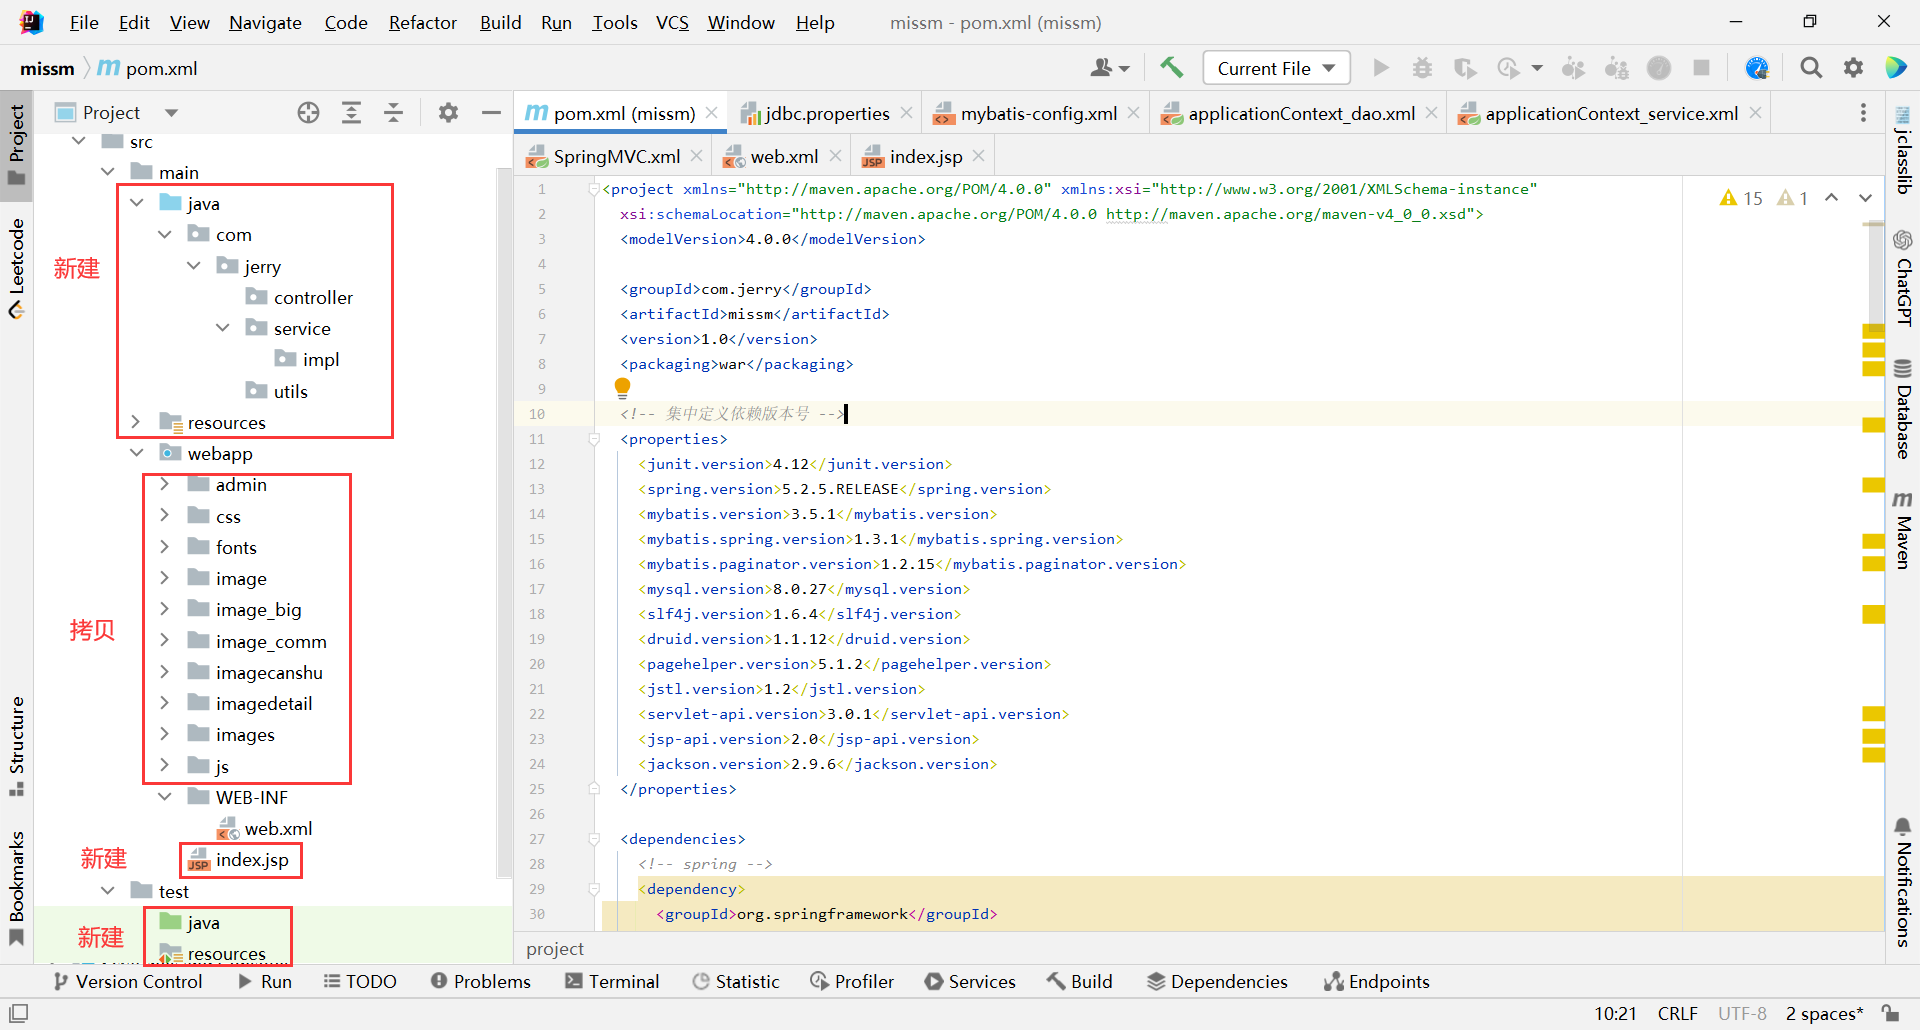
1.5、jdbc.properties
jdbc.driver=com.mysql.cj.jdbc.Driver
jdbc.url=jdbc:mysql://localhost:3306/xiaomissm?useSSL=false&serverTimezone=Asia/Shanghai&allowPublicKeyRetrieval=true
jdbc.username=root
jdbc.password=root
1.6、mybatis-config.xml
<?xml version="1.0" encoding="UTF-8" ?>
<!DOCTYPE configuration
        PUBLIC "-//mybatis.org//DTD Config 3.0//EN"
        "http://mybatis.org/dtd/mybatis-3-config.dtd">
<configuration>
    <settings>
        <!--将下划线映射为驼峰-->
        <setting name="mapUnderscoreToCamelCase" value="true"/>
    </settings>
    <plugins>
        <!--配置分页插件-->
        <plugin interceptor="com.github.pagehelper.PageInterceptor"></plugin>
    </plugins>
</configuration>
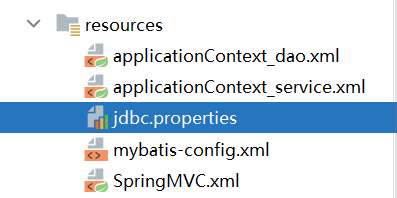
1.7 两个Spring的配置文件
applicationContext_dao.xml
<?xml version="1.0" encoding="UTF-8"?>
<beans xmlns="http://www.springframework.org/schema/beans"
       xmlns:xsi="http://www.w3.org/2001/XMLSchema-instance"
       xmlns:context="http://www.springframework.org/schema/context"
       xsi:schemaLocation="http://www.springframework.org/schema/beans
       http://www.springframework.org/schema/beans/spring-beans.xsd
       http://www.springframework.org/schema/context
       https://www.springframework.org/schema/context/spring-context.xsd">

    <!--    读取jdbc.properties属性文件-->
    <context:property-placeholder location="classpath:jdbc.properties"></context:property-placeholder>

    <!--    创建数据源-->
    <bean id="dataSource" class="com.alibaba.druid.pool.DruidDataSource">
        <property name="driverClassName" value="${jdbc.driver}"></property>
        <property name="url" value="${jdbc.url}"></property>
        <property name="username" value="${jdbc.username}"></property>
        <property name="password" value="${jdbc.password}"></property>
    </bean>

    <!--    创建SqlSessionFactoryBean-->
    <bean id="sqlSessionFactory" class="org.mybatis.spring.SqlSessionFactoryBean">
        <!--        配置数据源-->
        <property name="dataSource" ref="dataSource"></property>
        <!--        配置mybatis核心配置文件-->
        <property name="configLocation" value="classpath:SqlMapConfig.xml"></property>
        <!--        配置实体类-->
        <property name="typeAliasesPackage" value="com.jerry.pojo"></property>
    </bean>
    <!--    创建mapper文件的扫描器-->
    <bean class="org.mybatis.spring.mapper.MapperScannerConfigurer">
        <property name="basePackage" value="com.jerry.mapper"></property>
        <property name="sqlSessionFactoryBeanName" value="sqlSessionFactory"></property>
    </bean>
</beans>
applicationContext_service.xml
<?xml version="1.0" encoding="UTF-8"?>
<beans xmlns="http://www.springframework.org/schema/beans"
       xmlns:xsi="http://www.w3.org/2001/XMLSchema-instance"
       xmlns:context="http://www.springframework.org/schema/context"
       xmlns:tx="http://www.springframework.org/schema/tx"
       xmlns:aop="http://www.springframework.org/schema/aop"
       xsi:schemaLocation="http://www.springframework.org/schema/beans
       http://www.springframework.org/schema/beans/spring-beans.xsd
       http://www.springframework.org/schema/context
       https://www.springframework.org/schema/context/spring-context.xsd
        http://www.springframework.org/schema/tx
        http://www.springframework.org/schema/tx/spring-tx.xsd
        http://www.springframework.org/schema/aop
         https://www.springframework.org/schema/aop/spring-aop.xsd">
    <!--    设置业务逻辑层的包扫描器,目的是在指定的路径下,使用@Service注解的类,Spring负责创建对象,并添加依赖-->
    <context:component-scan base-package="com.jerry.service"></context:component-scan>

    <!--    设置事务管理器-->
    <bean id="dataSourceTransactionManager" class="org.springframework.jdbc.datasource.DataSourceTransactionManager">
        <property name="dataSource" ref="dataSource"/>
    </bean>

    <!--    添加事务的切面-->
    <tx:advice id="transactionInterceptor" transaction-manager="dataSourceTransactionManager">
        <tx:attributes>
            <tx:method name="*select*" read-only="true"/>
            <tx:method name="*find*" read-only="true"/>
            <tx:method name="*get*" read-only="true"/>
            <tx:method name="*search*" read-only="true"/>
            <!--增删改必须支持事务-->
            <tx:method name="*insert*" propagation="REQUIRED"/>
            <tx:method name="*save*" propagation="REQUIRED"/>
            <tx:method name="*add*" propagation="REQUIRED"/>
            <tx:method name="*delete*" propagation="REQUIRED"/>
            <tx:method name="*remove*" propagation="REQUIRED"/>
            <tx:method name="*clear*" propagation="REQUIRED"/>
            <tx:method name="*update*" propagation="REQUIRED"/>
            <tx:method name="*modify*" propagation="REQUIRED"/>
            <tx:method name="*change*" propagation="REQUIRED"/>
            <tx:method name="*set*" propagation="REQUIRED"/>
            <!--不包含的也支持事务-->
            <tx:method name="*" propagation="SUPPORTS"/>
        </tx:attributes>
    </tx:advice>
    <!--    完成切面和切入点的织入-->
    <aop:config>
        <aop:pointcut id="interceptor" expression="execution(* com.jerry..service.*.*(..))"/>
        <!--绑定-->
        <aop:advisor advice-ref="transactionInterceptor" pointcut-ref="interceptor"/>
    </aop:config>
</beans>
1.8、SpringMVC.xml
<?xml version="1.0" encoding="UTF-8"?>
<beans xmlns="http://www.springframework.org/schema/beans"
       xmlns:xsi="http://www.w3.org/2001/XMLSchema-instance"
       xmlns:context="http://www.springframework.org/schema/context"
       xmlns:mvc="http://www.springframework.org/schema/mvc"
       xsi:schemaLocation="http://www.springframework.org/schema/beans
       http://www.springframework.org/schema/beans/spring-beans.xsd
       http://www.springframework.org/schema/context
       https://www.springframework.org/schema/context/spring-context.xsd
       http://www.springframework.org/schema/mvc
       https://www.springframework.org/schema/mvc/spring-mvc.xsd">

    <!--扫描控制层组件-->
    <context:component-scan base-package="com.jerry.controller"></context:component-scan>

    <!--配置视图解析器-->
    <bean id="viewResolver" class="org.springframework.web.servlet.view.InternalResourceViewResolver">
        <property name="prefix" value="/admin/"></property>
        <property name="suffix" value=".jsp"></property>
    </bean>

    <!-- 开启MVC的注解驱动 -->
    <mvc:annotation-driven/>

    <!--    配置文件上传解析器-->
    <bean id="multipartResolver" class="org.springframework.web.multipart.commons.CommonsMultipartResolver"></bean>
</beans>
1.9、web.xml
<?xml version="1.0" encoding="UTF-8"?>
<web-app xmlns="http://xmlns.jcp.org/xml/ns/javaee"
         xmlns:xsi="http://www.w3.org/2001/XMLSchema-instance"
         xsi:schemaLocation="http://xmlns.jcp.org/xml/ns/javaee http://xmlns.jcp.org/xml/ns/javaee/web-app_4_0.xsd"
         version="4.0">

    <!--    字符编码过滤器必须写在第一个,其他的框架配置写在下面-->
    <!-- 配置Spring的字符编码过滤器 -->
    <filter>
        <filter-name>CharacterEncodingFilter</filter-name>
        <filter-class>org.springframework.web.filter.CharacterEncodingFilter</filter-class>
        <init-param>
            <param-name>encoding</param-name>
            <param-value>UTF-8</param-value>
        </init-param>
        <init-param>
            <param-name>forceEncoding</param-name>
            <param-value>true</param-value>
        </init-param>
    </filter>
    <filter-mapping>
        <filter-name>CharacterEncodingFilter</filter-name>
        <url-pattern>/*</url-pattern>
    </filter-mapping>

    <!--    注册SpringMVC框架-->
    <servlet>
        <servlet-name>SpringMVC</servlet-name>
        <servlet-class>org.springframework.web.servlet.DispatcherServlet</servlet-class>
        <init-param>
            <param-name>contextConfigLocation</param-name>
            <param-value>classpath:SpringMVC.xml</param-value>
        </init-param>
        <load-on-startup>1</load-on-startup>
    </servlet>
    <servlet-mapping>
        <servlet-name>SpringMVC</servlet-name>
        <url-pattern>*.action</url-pattern>
    </servlet-mapping>

    <!--    注册Spring框架-->
    <listener>
        <listener-class>org.springframework.web.context.ContextLoaderListener</listener-class>
    </listener>
    <context-param>
        <param-name>contextConfigLocation</param-name>
        <param-value>classpath:applicationContext_*.xml</param-value>
    </context-param>
    <!--    欢迎页面 直接访问登陆页面-->
    <welcome-file-list>
        <welcome-file>/admin/login.jsp</welcome-file>
    </welcome-file-list>
</web-app>
1.10、log4j.xml
<?xml version="1.0" encoding="UTF-8" ?>
<!DOCTYPE log4j:configuration SYSTEM "log4j.dtd">
<log4j:configuration xmlns:log4j="http://jakarta.apache.org/log4j/">
    <appender name="STDOUT" class="org.apache.log4j.ConsoleAppender">
        <param name="Encoding" value="UTF-8"/>
        <layout class="org.apache.log4j.PatternLayout">
            <param name="ConversionPattern" value="%-5p %d{MM-dd HH:mm:ss,SSS}%m (%F:%L) \n"/>
        </layout>
    </appender>
    <logger name="java.sql">
        <level value="debug"/>
    </logger>
    <logger name="org.apache.ibatis">
        <level value="info"/>
    </logger>
    <root>
        <level value="debug"/>
        <appender-ref ref="STDOUT"/>
    </root>
</log4j:configuration>
1.11、index.jsp
<%--
  Created by IntelliJ IDEA.
  User: Admin
  Date: 2023/2/12
  Time: 11:37
  To change this template use File | Settings | File Templates.
--%>
<%@ page contentType="text/html;charset=UTF-8" language="java" %>
<html>
<head>
    <title>Title</title>
</head>
<body>

</body>
</html>
1.12、mybatis逆向工程生成pojo和mapper
MyBatisGeneratorTools自动生成mapper接口和pojo实体类
2、实现登录功能
2.1、编写业务层代码
AdminService
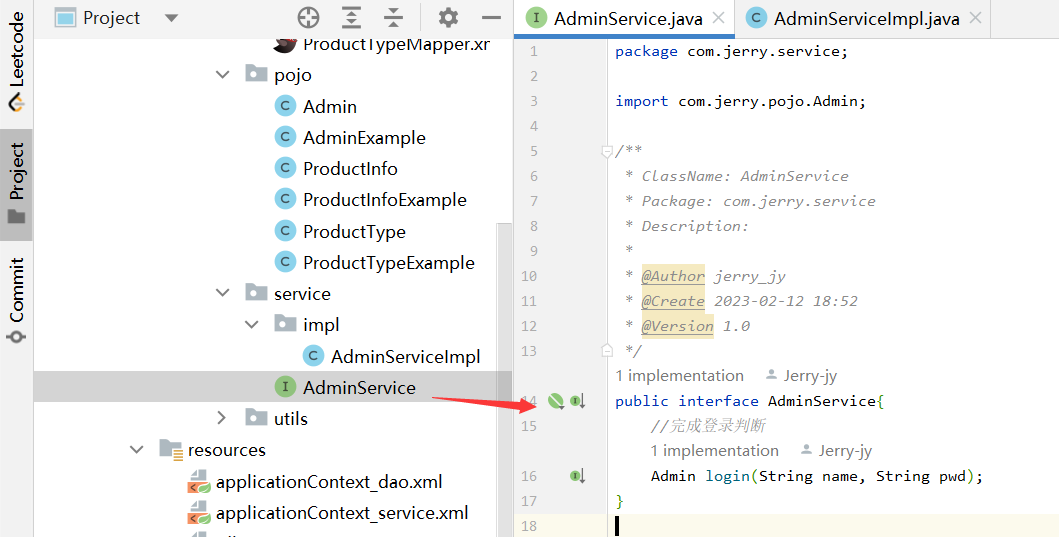
AdminServiceImpl
package com.jerry.service.impl;

import com.jerry.mapper.AdminMapper;
import com.jerry.pojo.Admin;
import com.jerry.pojo.AdminExample;
import com.jerry.service.AdminService;
import com.jerry.utils.MD5Util;
import org.springframework.beans.factory.annotation.Autowired;
import org.springframework.stereotype.Service;

import java.util.List;

/**
 * ClassName: AdminServiceImpl
 * Package: com.jerry.service.impl
 * Description:
 *
 * @Author jerry_jy
 * @Create 2023-02-12 18:54
 * @Version 1.0
 */

@Service
public class AdminServiceImpl implements AdminService {


    //在业务逻辑层中,一定有数据访问层的对象
    @Autowired
    AdminMapper adminMapper;

    @Override
    public Admin login(String name, String pwd) {


        //根据传入的用户或到数据库中查询相应用户对象
        //如果有条件,则一定要创建AdminExample的对象,用来封装条件
        AdminExample example = new AdminExample();

        //添加用户名a_name条件
        example.createCriteria().andANameEqualTo(name);

        List<Admin> list = adminMapper.selectByExample(example);
        if (list.size()>0){


            Admin admin = list.get(0);
            //如果查询到用户,再进行密码的密文比对,注意密码是密文的
            /**
             * admin.getApass ==> d033e22ae348aeb5660fc2140aec35850c4da997
             * pwd ==> admin
             * 在进行密码的密文对比时,将用户从前端页面输入的密码pwd进行md5加密,再与数据库中的查到的对象密码进行比对
             */
//            String md5 = MD5Util.getMD5(pwd);
//            if (md5==admin.getaPass()){


//                return admin;
//            }
            return admin;
        }else {


            // 没查到,就返回null
            return null;
        }


    }
}
2.2、编写控制层代码
AdminAction
package com.jerry.controller;

import com.jerry.pojo.Admin;
import com.jerry.service.AdminService;
import org.springframework.beans.factory.annotation.Autowired;
import org.springframework.stereotype.Controller;
import org.springframework.web.bind.annotation.RequestMapping;

import javax.servlet.http.HttpServletRequest;

/**
 * ClassName: AdminAction
 * Package: com.jerry.controller
 * Description:
 *
 * @Author jerry_jy
 * @Create 2023-02-12 19:13
 * @Version 1.0
 */

@Controller
@RequestMapping("/admin")
public class AdminAction {


    //切记:在所有的界面层,一定有业务逻辑层的对象
    @Autowired
    AdminService adminService;

    //实现登录判断,并进行相应的跳转
    @RequestMapping("/login.action")
    public String login(String name, String pwd, HttpServletRequest request) {


        Admin admin = adminService.login(name, pwd);
        if (admin != null) {


            //登录成功
//            request.setAttribute("admin", admin);
            request.getSession().setAttribute("admin", admin);
            return "main";

        } else {


            //登录失败
            request.setAttribute("errmsg", "用户名或密码不正确!");
            return "login";
        }

    }

}
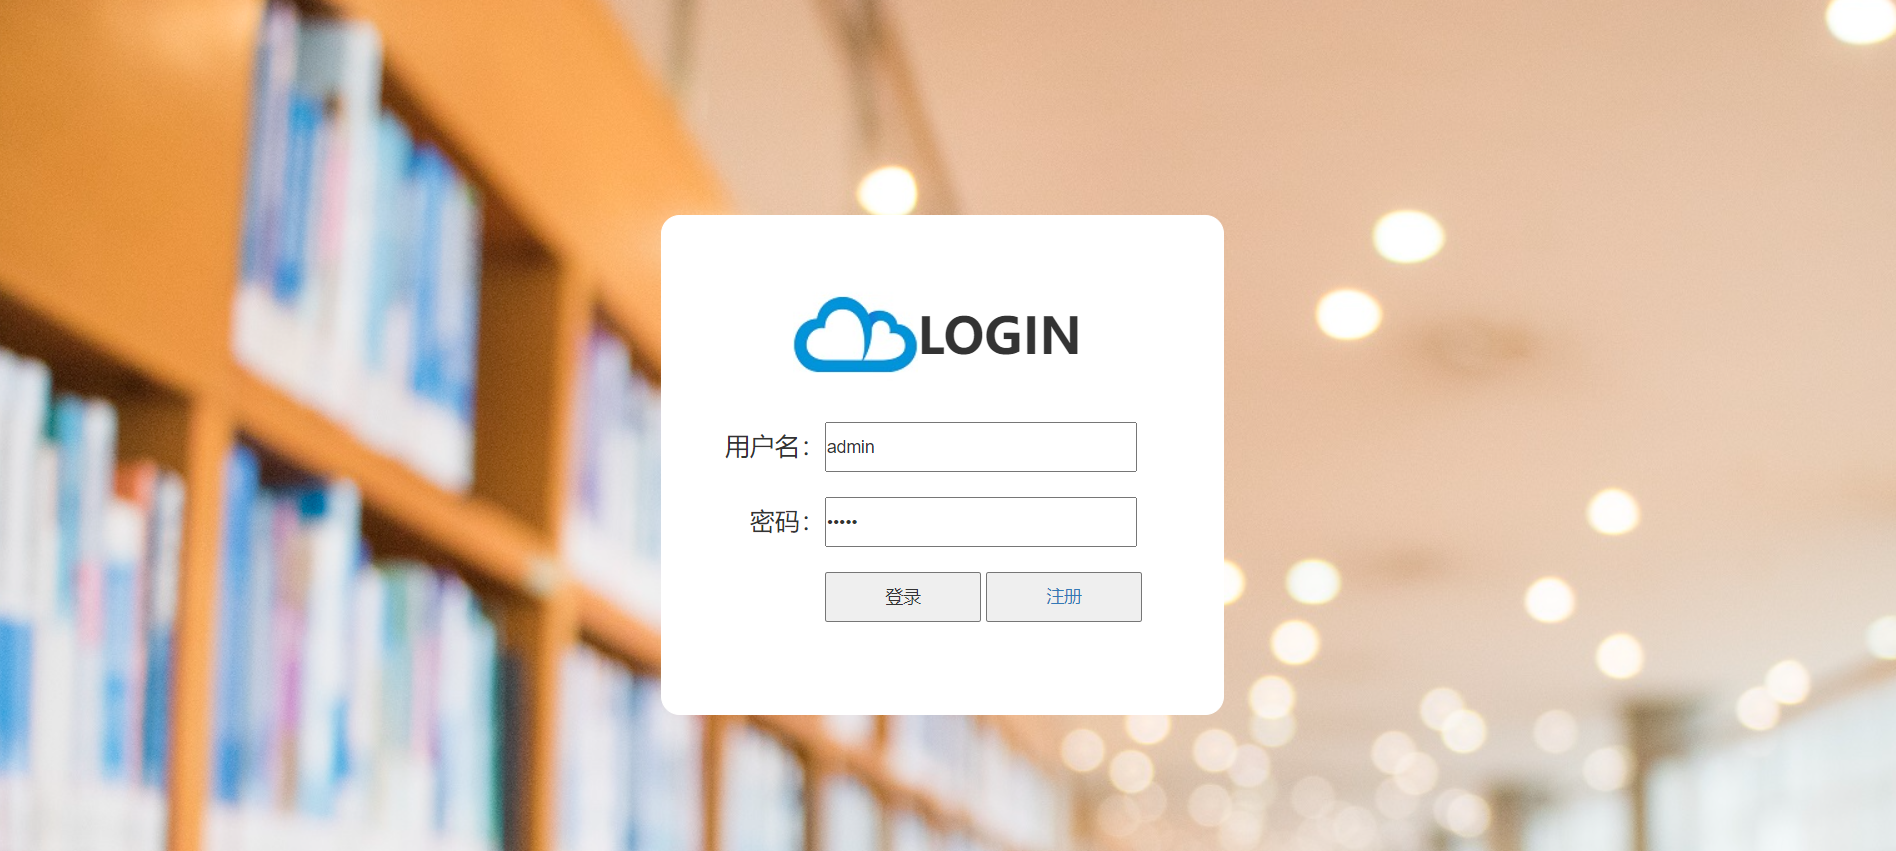
2.3、登录页
http://localhost:8080/admin/login.jsp
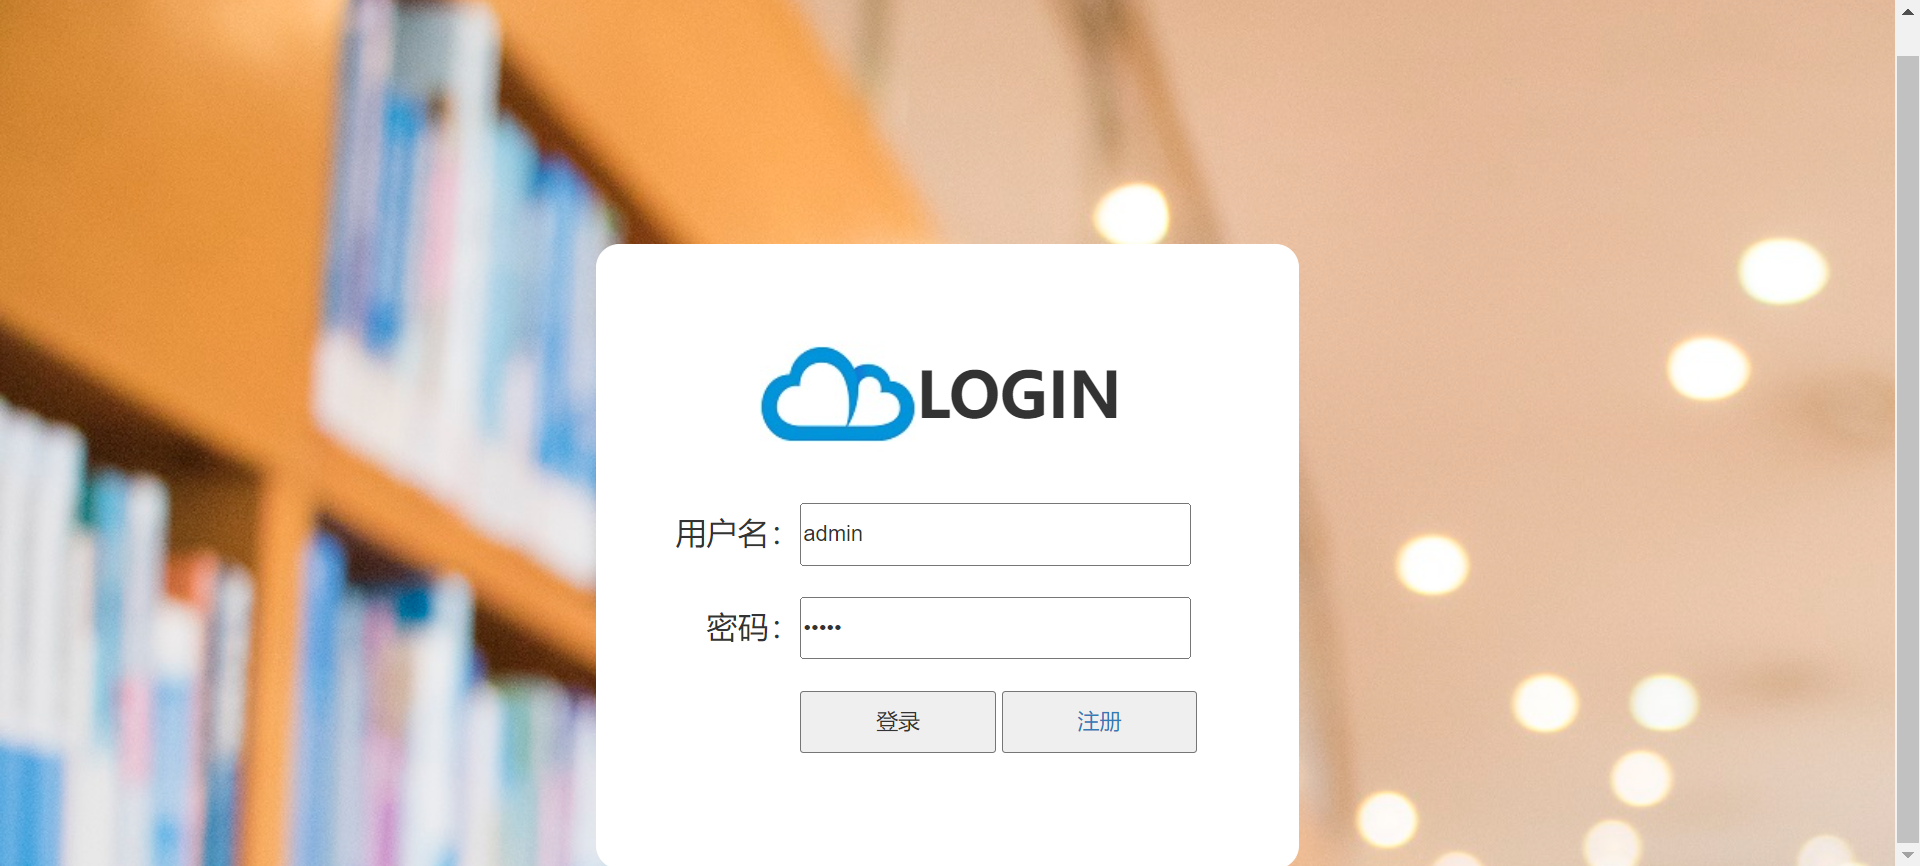
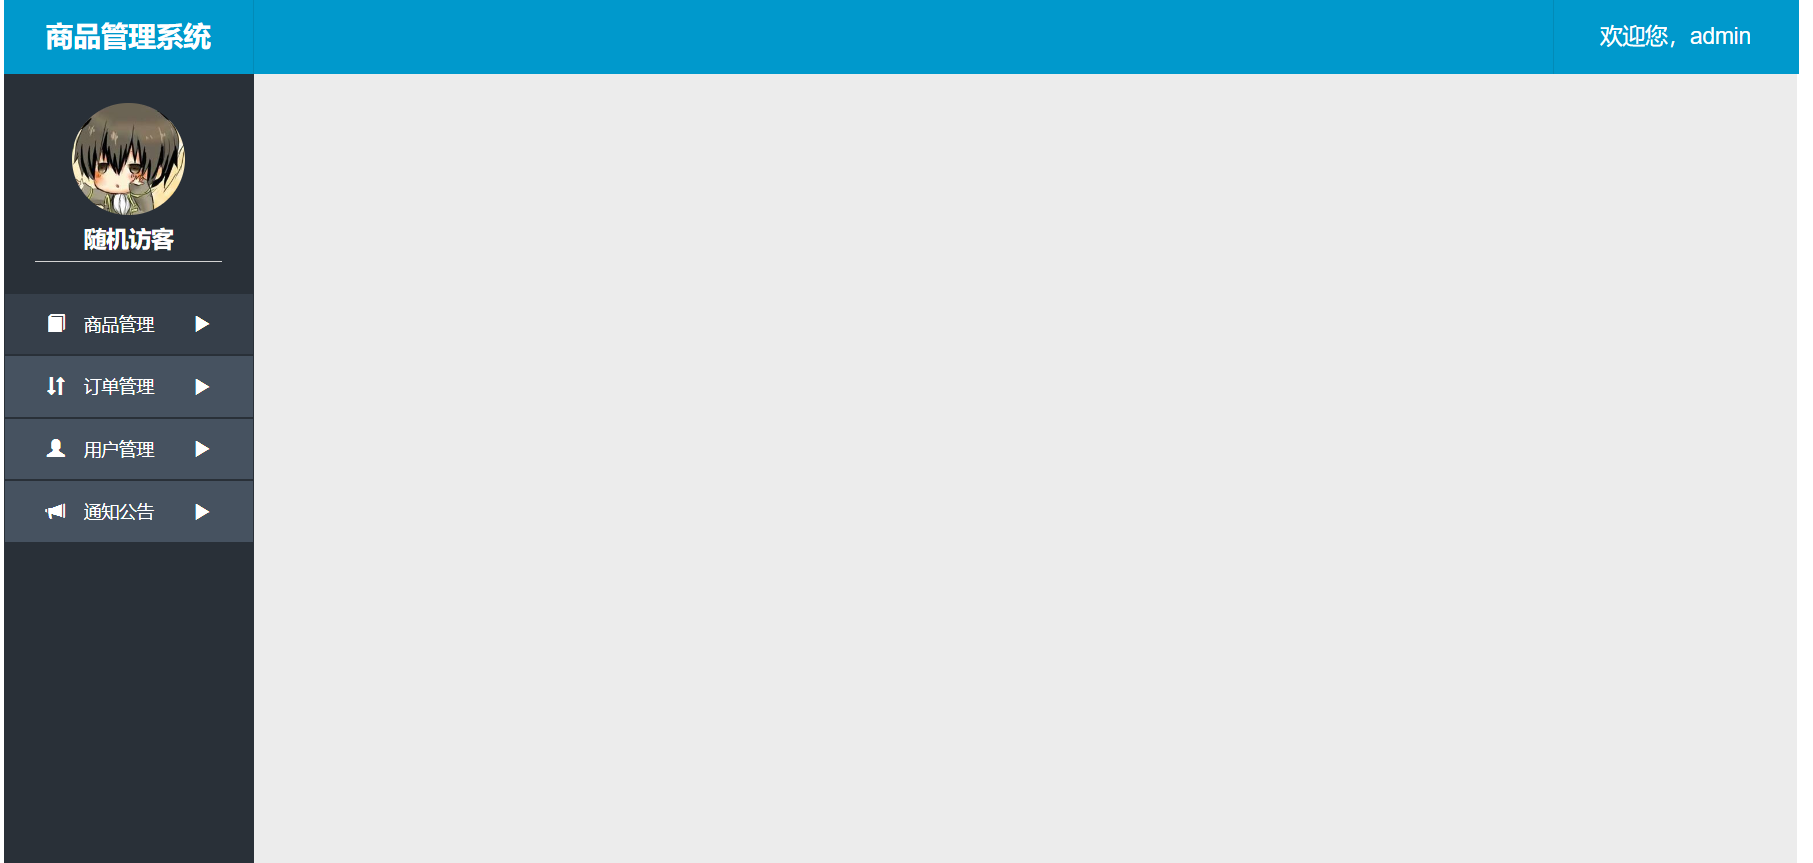
登录成功页==>商品后台管理页
3、显示全部商品
3.1、编写业务层代码
ProductInfoService
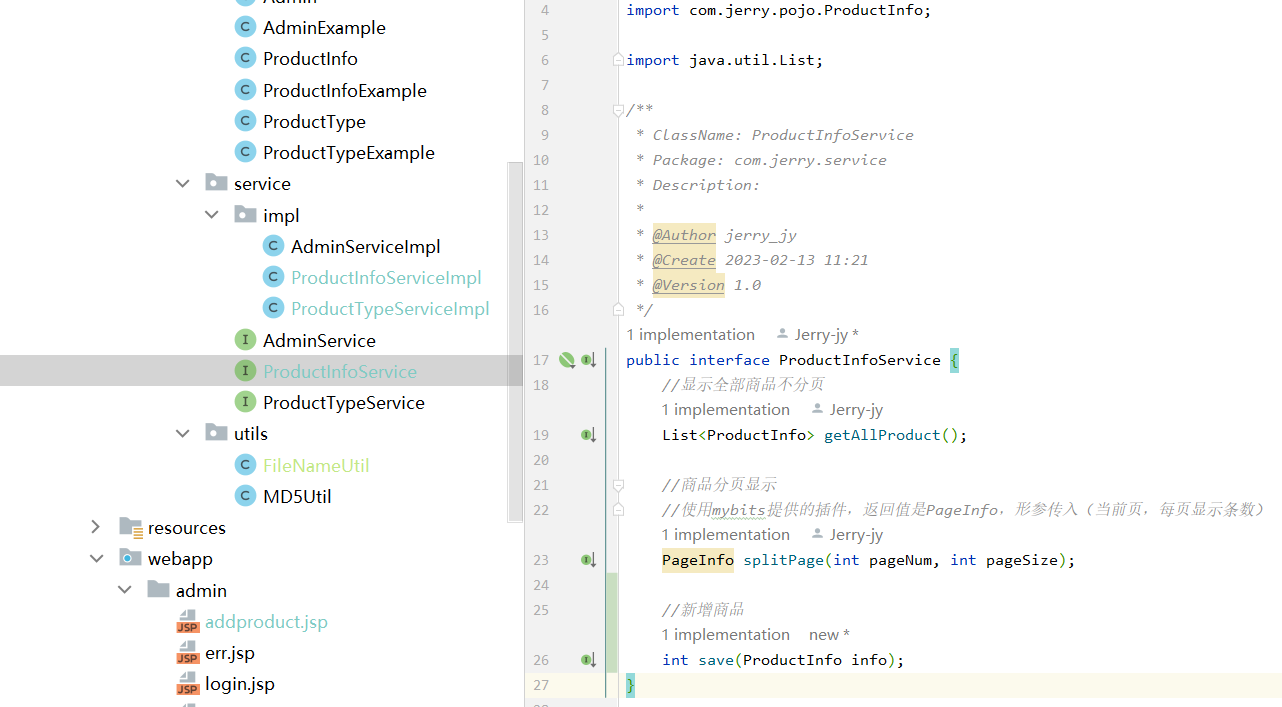
public interface ProductInfoService {


    //显示全部商品不分页
    List<ProductInfo> getAllProduct();
}
ProductInfoServiceImpl
public class ProductInfoServiceImpl implements ProductInfoService {


   @Autowired
    ProductInfoMapper productInfoMapper;

    @Override
    public List<ProductInfo> getAllProduct() {


        return productInfoMapper.selectByExample(new ProductInfoExample());

    }
}
3.2、编写控制层代码
ProductInfoAction
@Controller
@RequestMapping("/prod")
public class ProductInfoAction {


    @Autowired
    ProductInfoService productInfoService;

    //显示全部商品不分页
    @RequestMapping("/getAll")
    private String getAllProduct(HttpServletRequest request){


        List<ProductInfo> list = productInfoService.getAllProduct();
        request.setAttribute("list", list);
        return "product";
    }

}
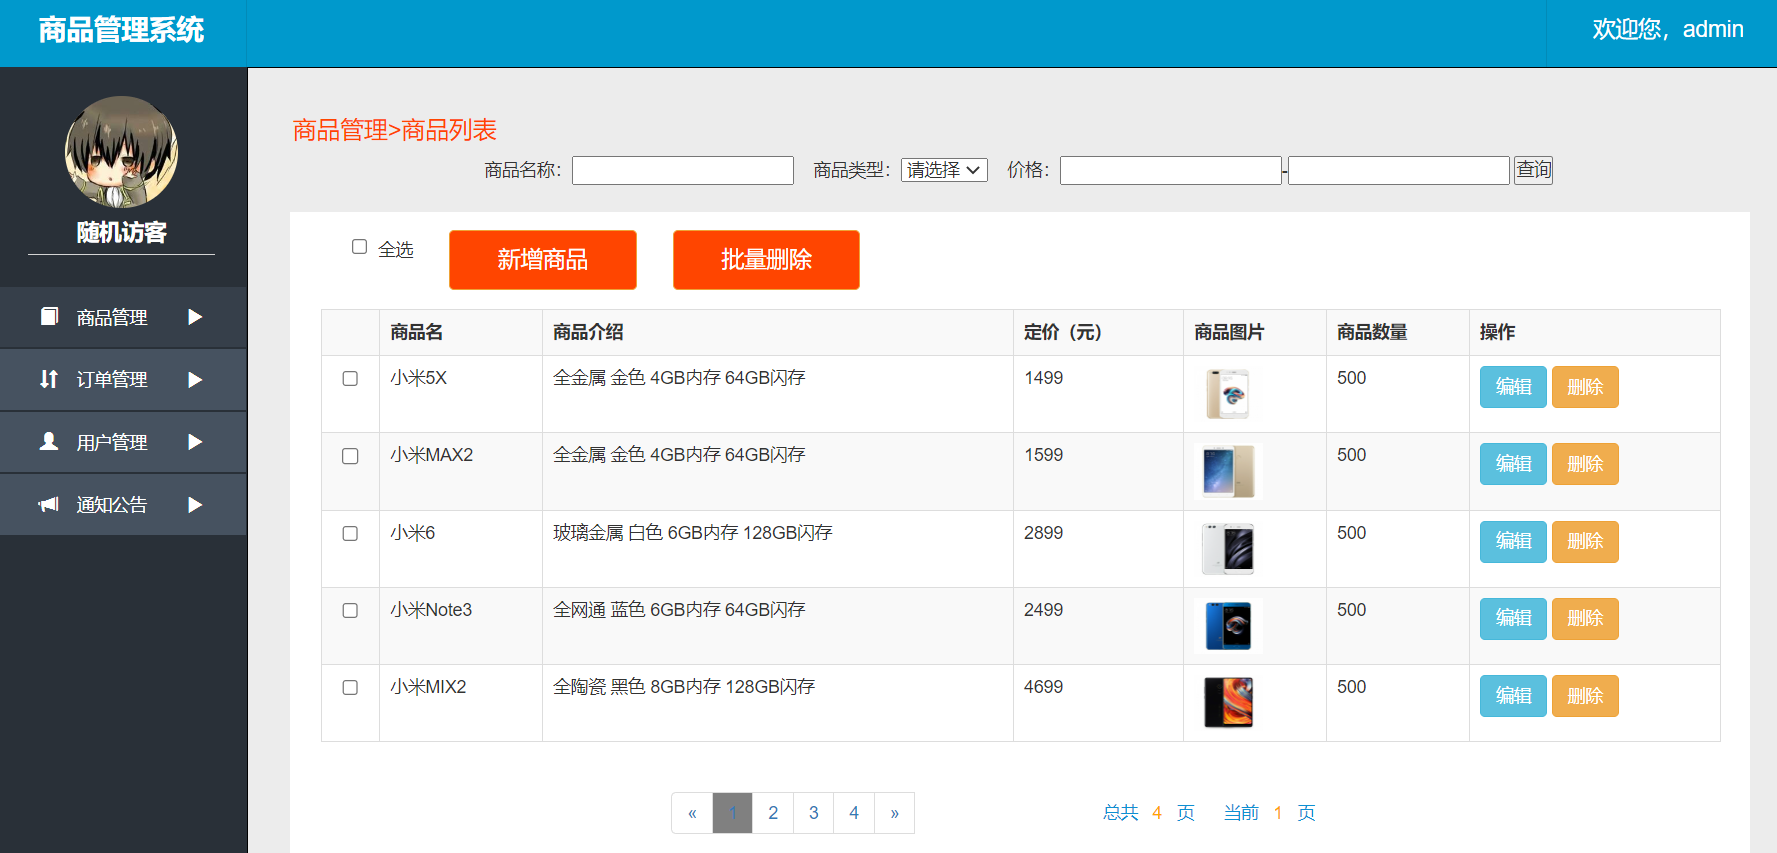
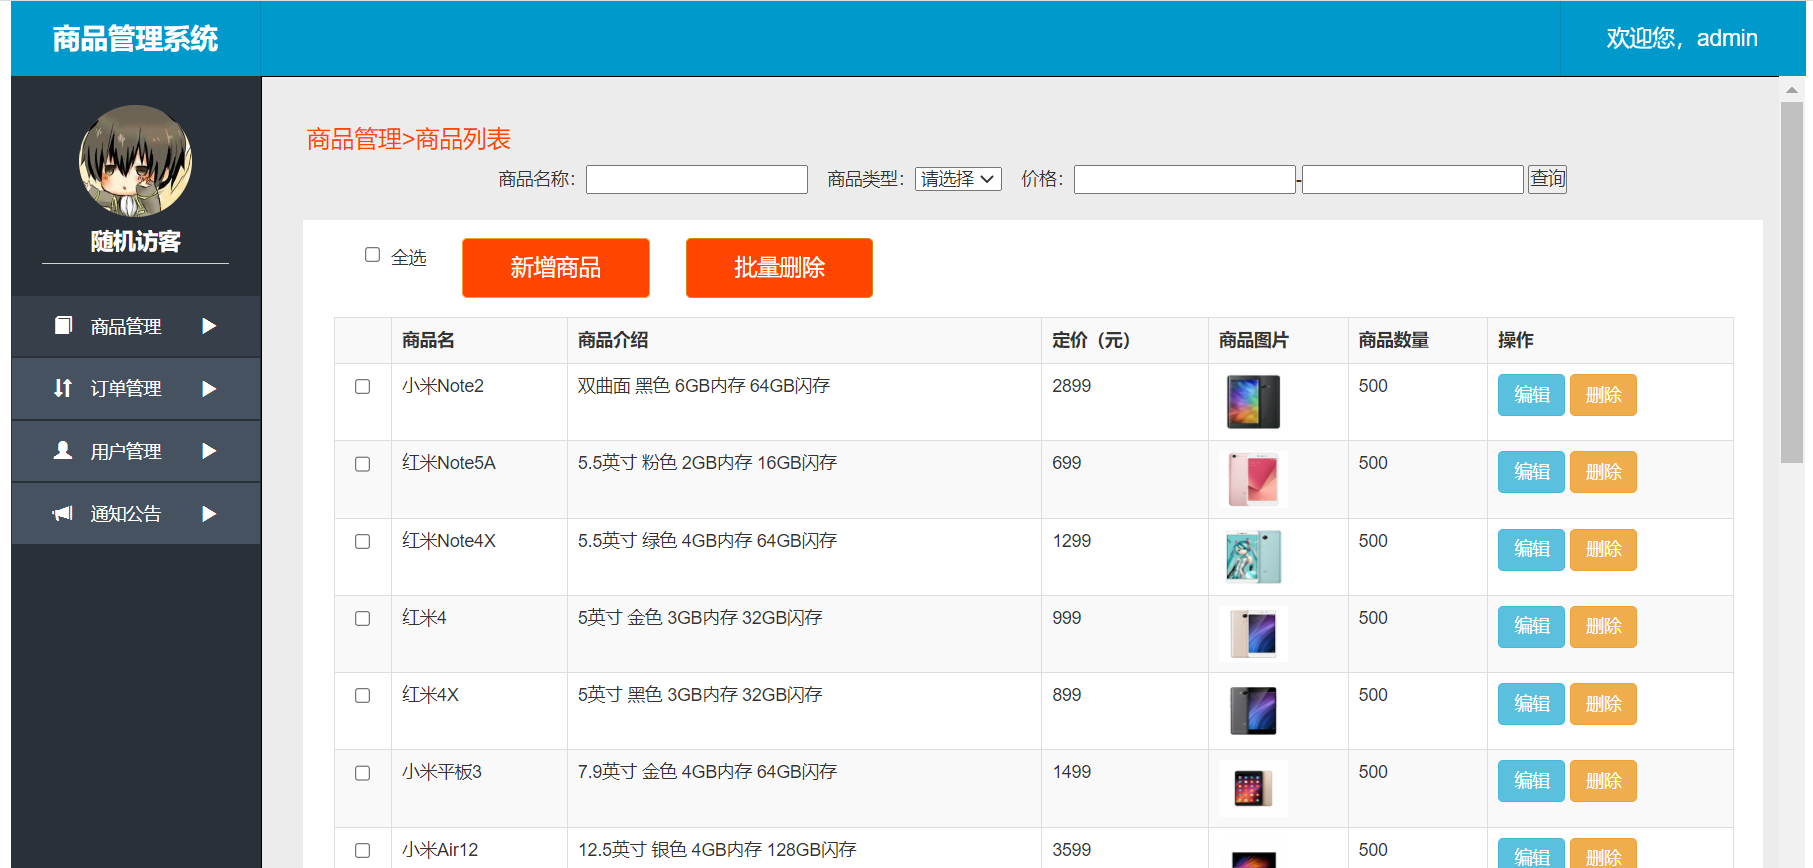
3.3、商品管理页
4、分页显示商品
4.1、编写业务层代码
ProductInfoService
public interface ProductInfoService {


    //显示全部商品不分页
    List<ProductInfo> getAllProduct();

    //商品分页显示
    //使用mybits提供的插件,返回值是PageInfo,形参传入(当前页,每页显示条数)
    PageInfo splitPage(int pageNum, int pageSize);
}
ProductInfoServiceImpl
@Service
public class ProductInfoServiceImpl implements ProductInfoService {


   @Autowired
    ProductInfoMapper productInfoMapper;

    @Override
    public List<ProductInfo> getAllProduct() {


        return productInfoMapper.selectByExample(new ProductInfoExample());

    }

    @Override
    public PageInfo splitPage(int pageNum, int pageSize) {


        //分页插件pageHelper工具类完成分页设置
        //SELECT * FROM product_info LIMIT 10,5;
        PageHelper.startPage(pageNum, pageSize);

        //进行PageInfo的数据封装,然后返回一个pageinfo对象就行了
        //1、进行条件查询,必须创建ProductInfoExample对象
        ProductInfoExample example = new ProductInfoExample();
        //2、设置排序,按主键降序排序
        //SELECT * FROM product_info ORDER BY p_id DESC;
        example.setOrderByClause("p_id desc");
        //3、排完序后,取集合。切记:一定在取集合前,设置PageHelper.startPage(pageNum, pageSize);
        List<ProductInfo> list = productInfoMapper.selectByExample(example);
        //4、将倒序排的集合,封装为PageInfo
        PageInfo<ProductInfo> pageInfo = new PageInfo<>(list);
        return pageInfo;
    }
}
4.2、编写控制层代码
@Controller
@RequestMapping("/prod")
public class ProductInfoAction {


    //每页显示的记录数
    public static final int PAGE_SIZE = 5;
    @Autowired
    ProductInfoService productInfoService;

    //显示全部商品不分页
    @RequestMapping("/getAll")
    private String getAllProduct(HttpServletRequest request) {


        List<ProductInfo> list = productInfoService.getAllProduct();
        request.setAttribute("list", list);
        return "product";
    }

    //显示第一页的5条记录
    @RequestMapping("/split")
    private String split(HttpServletRequest request) {


        //得到第一页的数据
        PageInfo info = productInfoService.splitPage(1, PAGE_SIZE);
        request.setAttribute("info", info);
        return "product";
    }

    //Ajax分页的翻页处理
    @ResponseBody
    @RequestMapping("/ajaxSplit")
    private void ajaxSplit(int page, HttpSession session) {


        //取得当前page参数的页面数据
        PageInfo info = productInfoService.splitPage(page, PAGE_SIZE);

        session.setAttribute("info", info);
    }
}
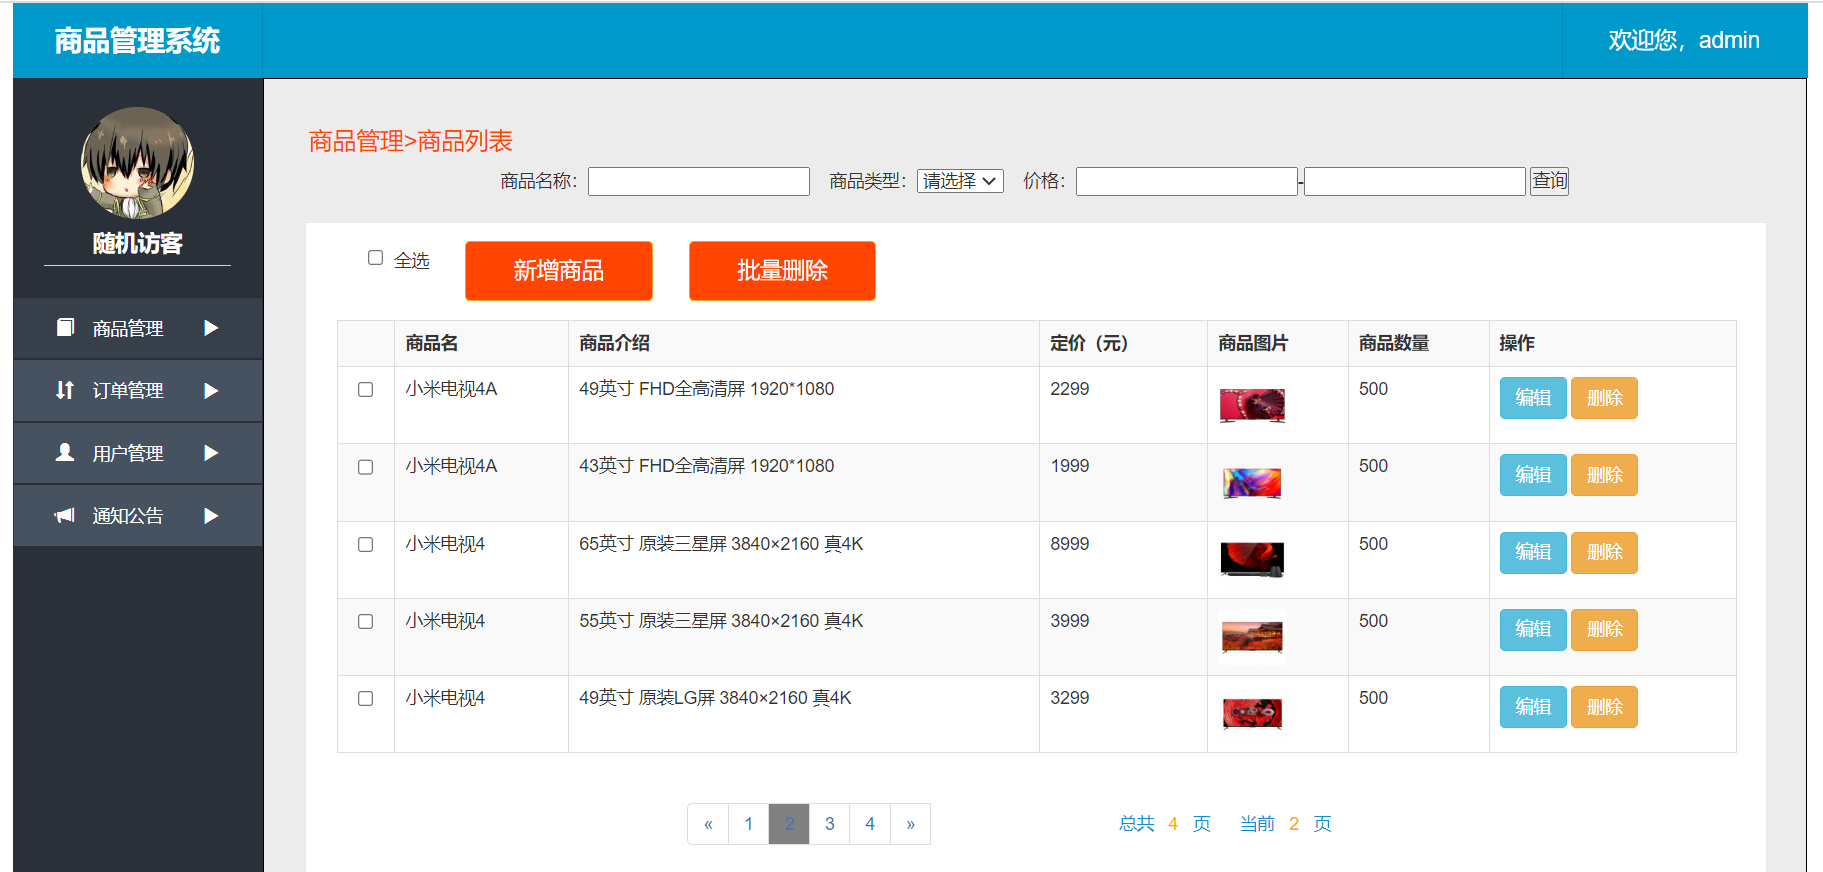
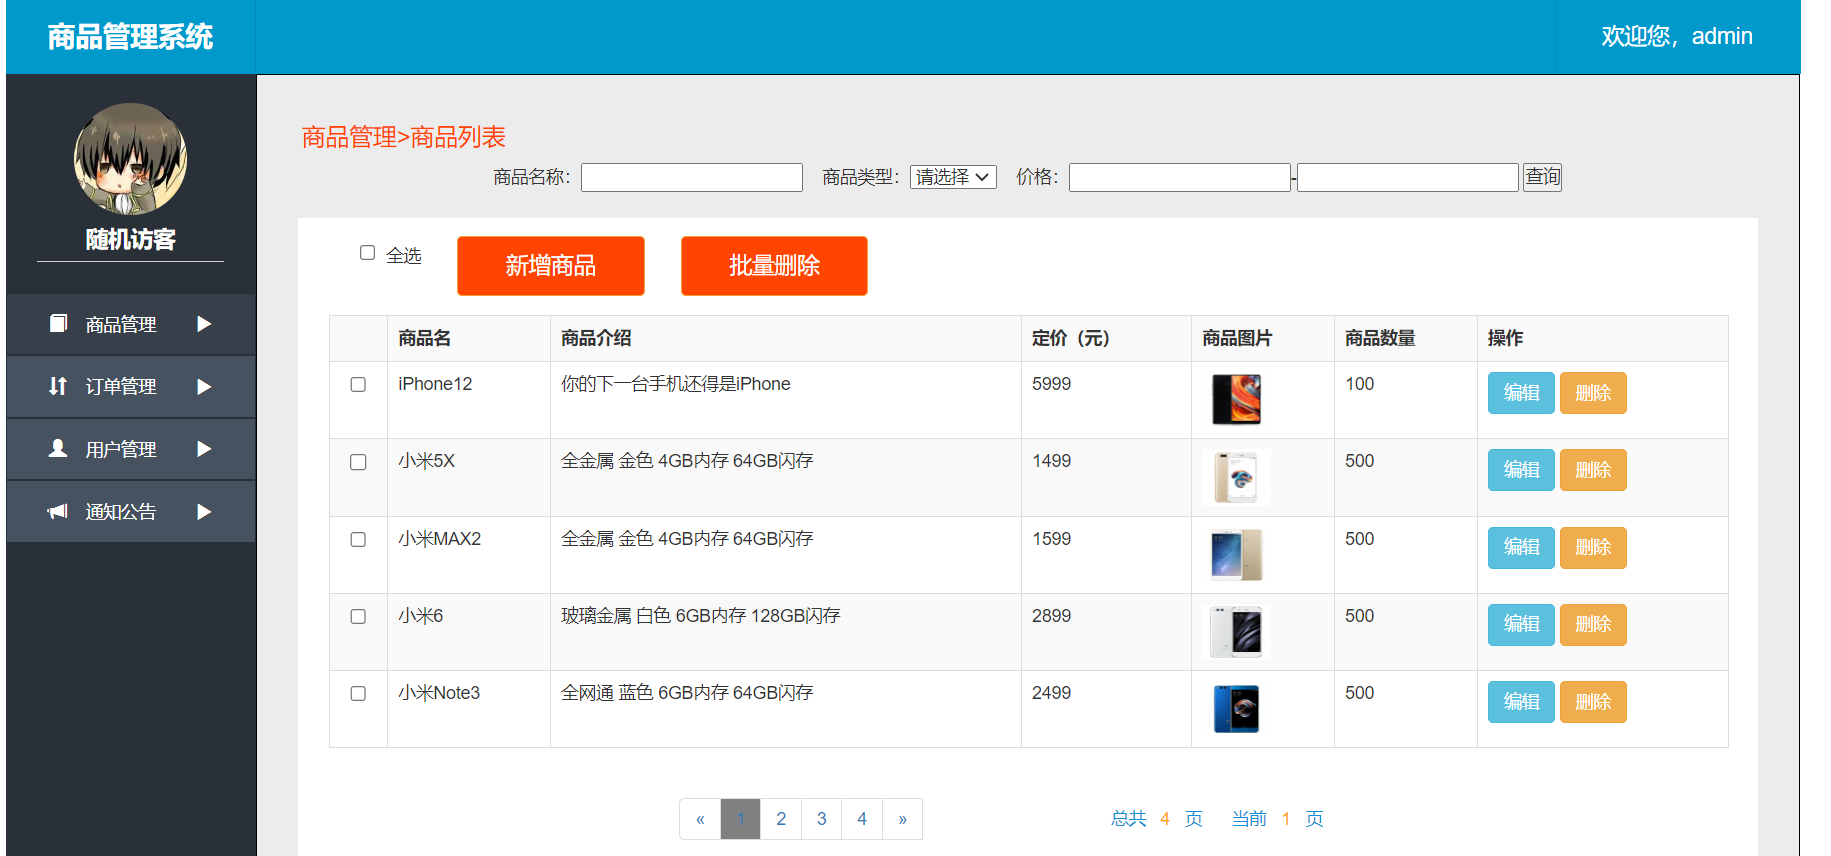
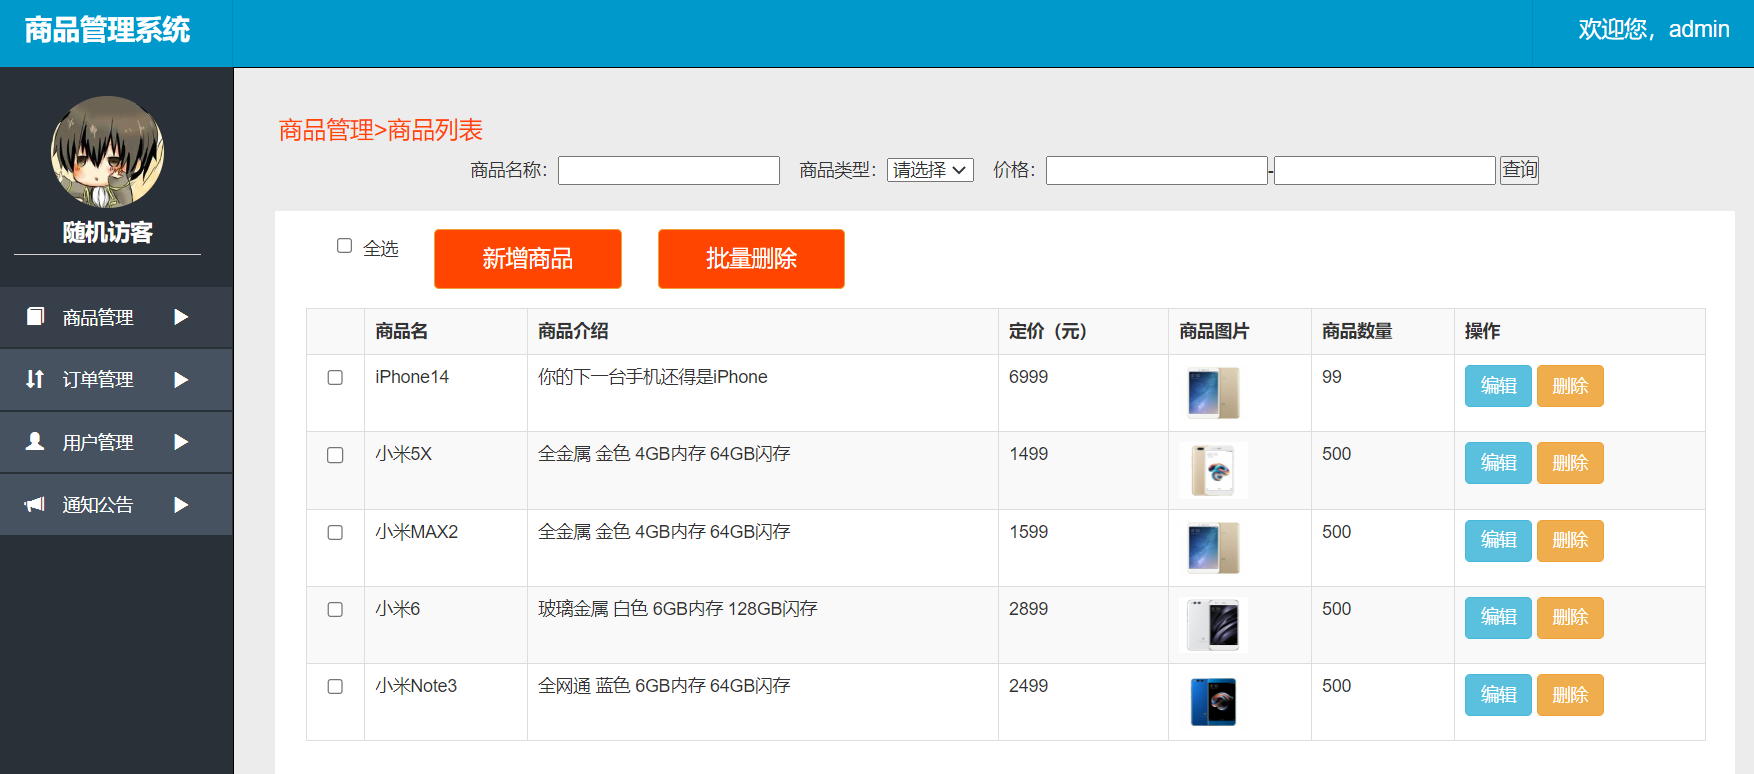
4.3、商品分页显示
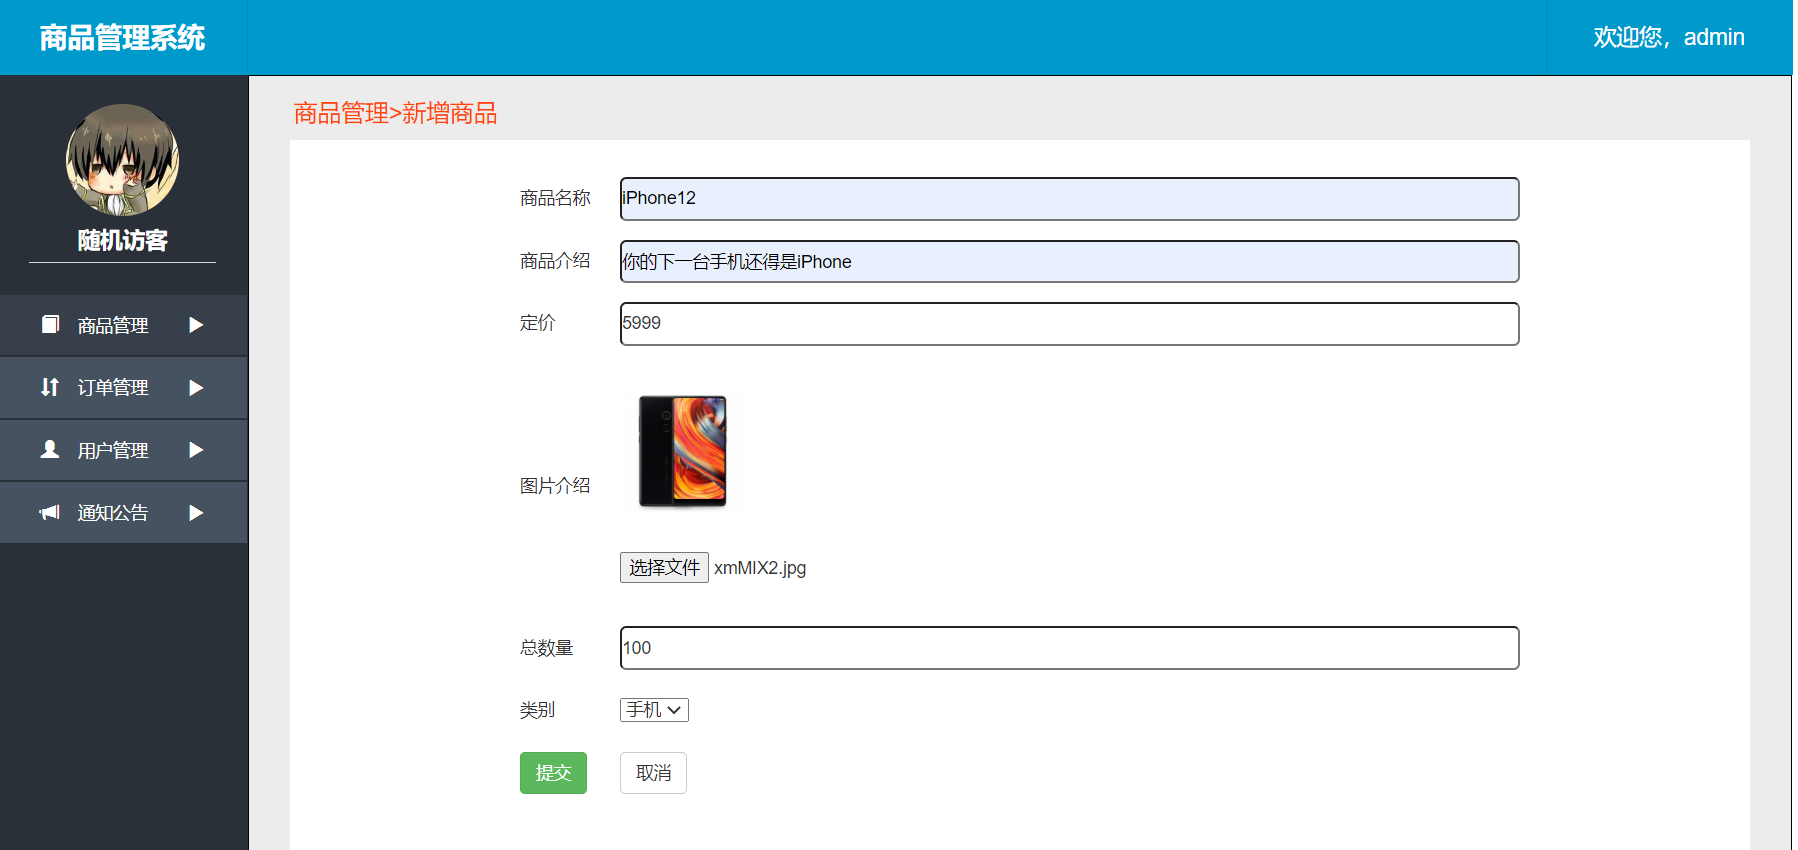
5、新增(上架)商品
5.1、获取商品类别
ProductTypeListener
package com.jerry.listener;

import com.jerry.pojo.ProductType;
import com.jerry.service.ProductTypeService;
import org.springframework.context.ApplicationContext;
import org.springframework.context.support.ClassPathXmlApplicationContext;

import javax.servlet.ServletContextEvent;
import javax.servlet.ServletContextListener;
import javax.servlet.annotation.WebListener;
import java.util.List;

/**
 * ClassName: ProductTypeListener
 * Package: com.jerry.listener
 * Description:
 *
 * @Author jerry_jy
 * @Create 2023-02-13 16:47
 * @Version 1.0
 */

@WebListener
public class ProductTypeListener implements ServletContextListener {


    @Override
    public void contextInitialized(ServletContextEvent servletContextEvent) {


        //Spring注册监听器也是通过ContextLoaderListener,因此我们要手动管理ProductTypeListener
        //如果交给Spring管理就不知道哪个Listener先被创建
        //1、手动从Spring容器中取出ProductTypeServiceImpl的对象
        ApplicationContext context = new ClassPathXmlApplicationContext("applicationContext_*.xml");
        ProductTypeService productTypeService = (ProductTypeService) context.getBean("ProductTypeServiceImpl");
        List<ProductType> typeList = productTypeService.getAll();

        //2、放入全局作用域中,供新增页面、修改页面、前台的查询功能提供全部的商品类别集合
        servletContextEvent.getServletContext().setAttribute("typeList",typeList);

    }

    @Override
    public void contextDestroyed(ServletContextEvent servletContextEvent) {


    }
}
5.2、Ajax上传图片并回显
ProductInfoAction
//异步Ajax文件上传处理
@ResponseBody
@RequestMapping("ajaxImg")
public Object ajaxImg(MultipartFile pimage,HttpServletRequest request){


    //1、提取、生成文件名UUID+上传图片后缀名.jpg .png
    String saveFileName = FileNameUtil.getUUIDFileName() + FileNameUtil.getFileType(pimage.getOriginalFilename());
    //2、获取图片的存取路径
    String path = request.getServletContext().getRealPath("/image_big");
    //3、转存
    try {


        pimage.transferTo(new File(path+File.separator+saveFileName));
    } catch (IOException e) {


        throw new RuntimeException(e);
    }
    //返回客户端的JSON对象, 封装图片路径,为了在页面上回显图片
    JSONObject object = new JSONObject();
    object.put("imgurl", saveFileName);

    return object.toString();
}
5.3、新增商品
业务层
ProductInfoService
//新增商品
int save(ProductInfo info);
ProductInfoServiceImpl
@Override
public int save(ProductInfo info) {


    return productInfoMapper.insert(info);
}
控制层
ProductInfoAction
//新增商品
@RequestMapping("/save")
public String save(ProductInfo info, HttpServletRequest request) {


    info.setpImage(saveFileName);
    info.setpDate(new Date());

    int num=-1;
    try {


        num=productInfoService.save(info);
    } catch (Exception e) {


        throw new RuntimeException(e);
    }

    if (num>0){


        request.setAttribute("msg", "增加成功");
    }else {


        request.setAttribute("msg", "增加失败");
    }

    //增加成功后应该重新访问数据库,所以跳转到分页显示的action上
    return "forward:/prod/split.action";
}
5.4、新增(上架)商品页面展示
6、更新商品
6.1、回显并更新商品
业务层
ProductInfoService
    //按主键id查询商品
    ProductInfo selectById(int pid);

    //更新商品
    int update(ProductInfo info);
ProductInfoServiceImpl
    @Override
    public ProductInfo selectById(int pid) {


        return productInfoMapper.selectByPrimaryKey(pid);
    }

    @Override
    public int update(ProductInfo info) {


        return productInfoMapper.updateByPrimaryKey(info);
    }
控制层
ProductInfoAction
//根据主键id查询商品
@RequestMapping("/one")
public String one(int pid, Model model){


    ProductInfo info = productInfoService.selectById(pid);
    model.addAttribute("prod", info);
    return "update";
}

    //更新商品
    @RequestMapping("/update")
    public String update(ProductInfo info, HttpServletRequest request) {


        //1、因为Ajax的异步图片上传,如果有上传过,则 saveFileName 里有上传过来的名称,
        //如果没有使用异步Ajax上传过图片,则saveFileName="",则实体类使用隐藏表单域提供上来的pImage原始图片的名称;
        if (!saveFileName.equals("")) {


            info.setpImage(saveFileName);
        }
        //完成更新处理
        int num = -1;
        //切记:对于增删改的操作,一定要进行try-catch的异常捕获
        try {


            num = productInfoService.update(info);
        } catch (Exception e) {


            throw new RuntimeException(e);
        }
        if (num>0){


            //更新成功
            request.setAttribute("msg", "更新成功");
        }else {


            //更新失败
            request.setAttribute("msg", "更新失败");
        }

        //处理完更新后,saveFileName里可能有数据
        //而下一次使用这个变量作为判断的依据,就会出错,所以必须清空saveFileName
        saveFileName = "";
        //redirect会导致request请求丢失,改用forward
        return "forward:/prod/split.action";
    }
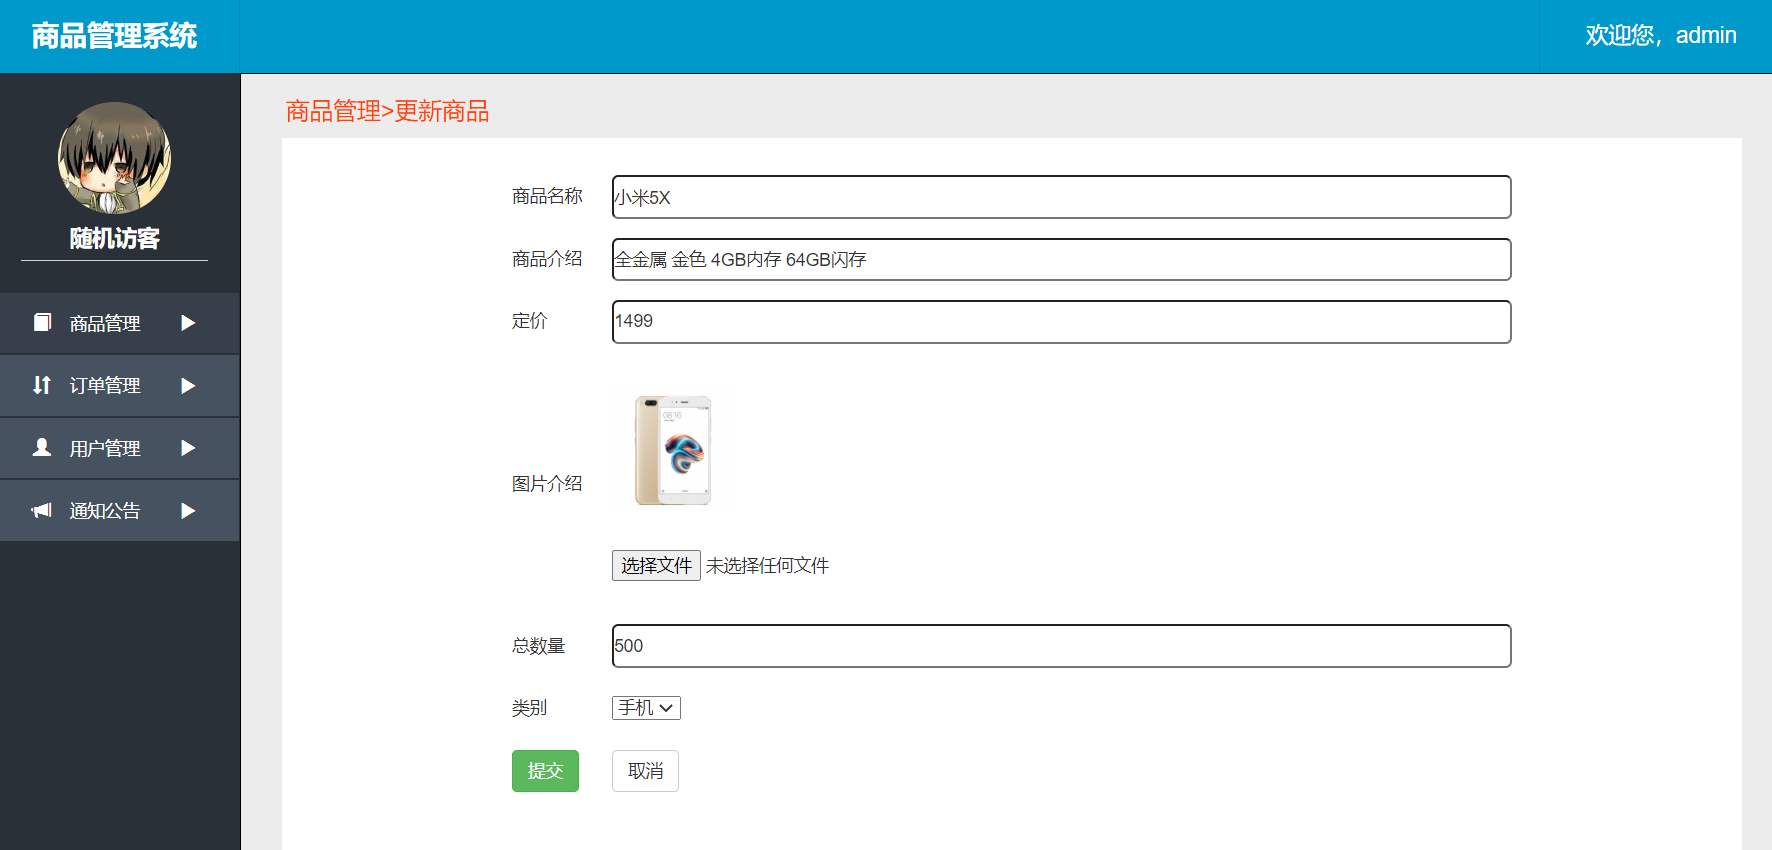
6.2、页面展示

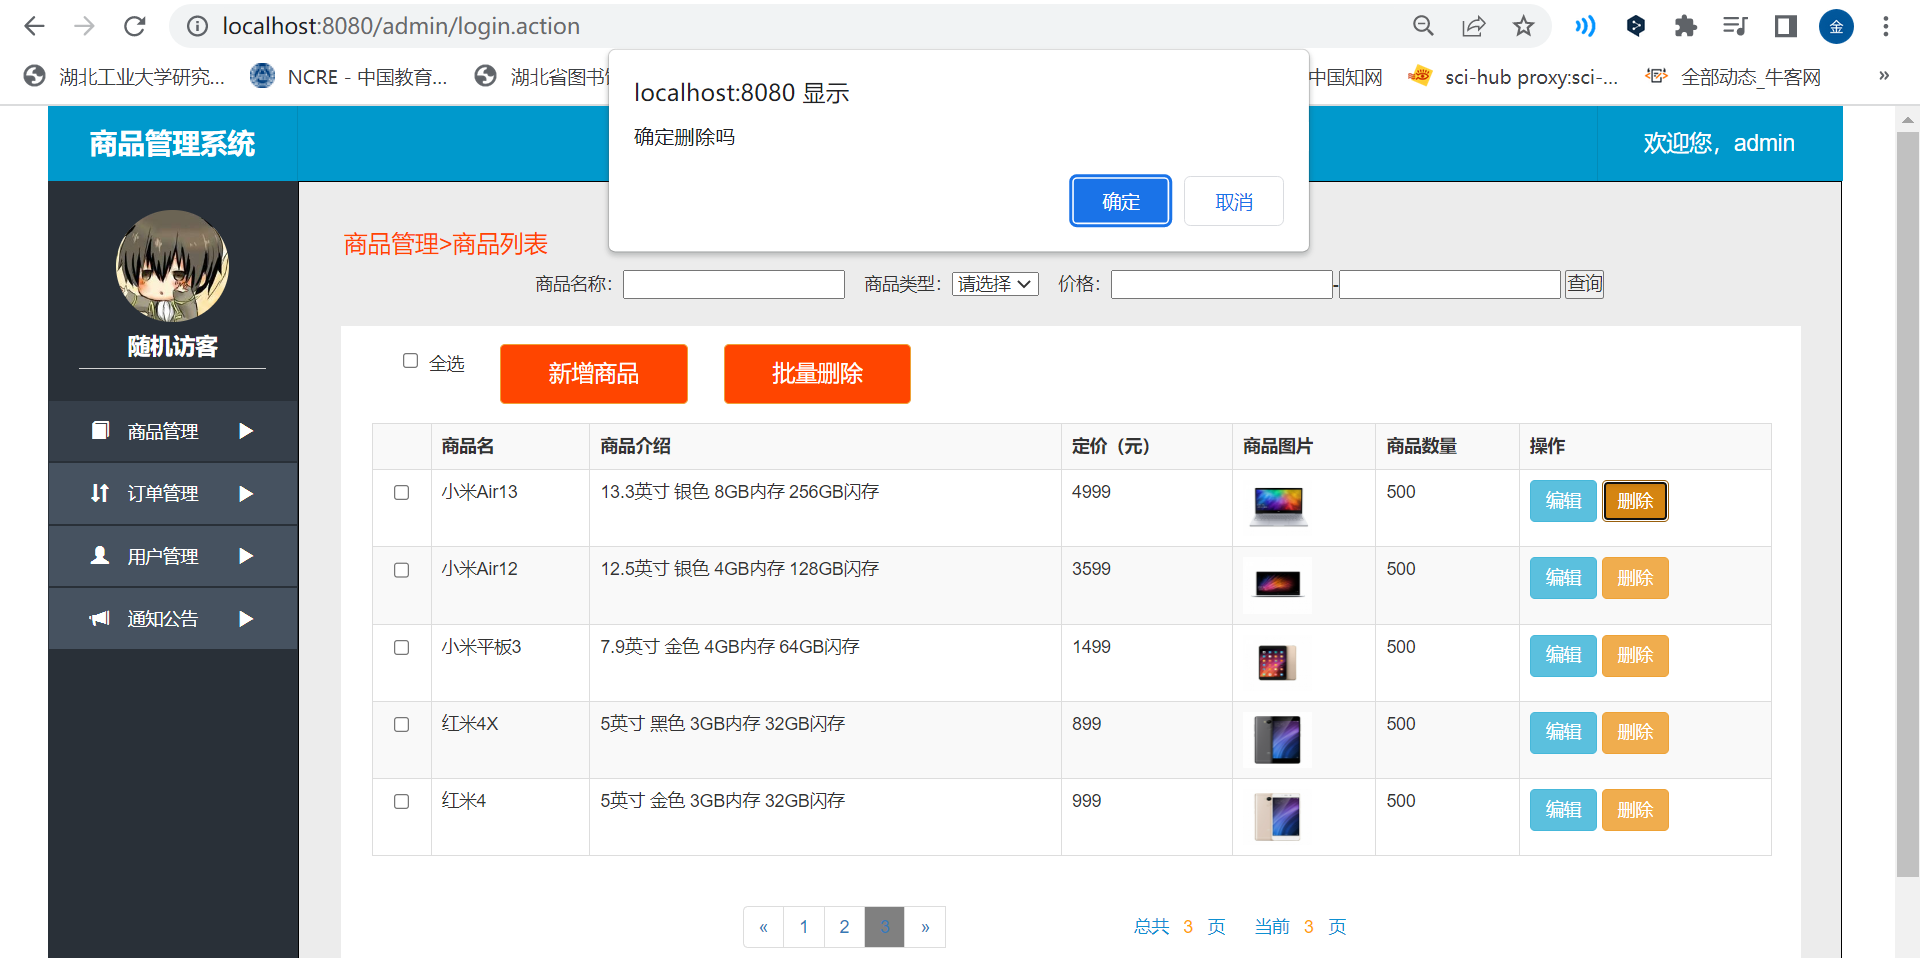
7、删除商品
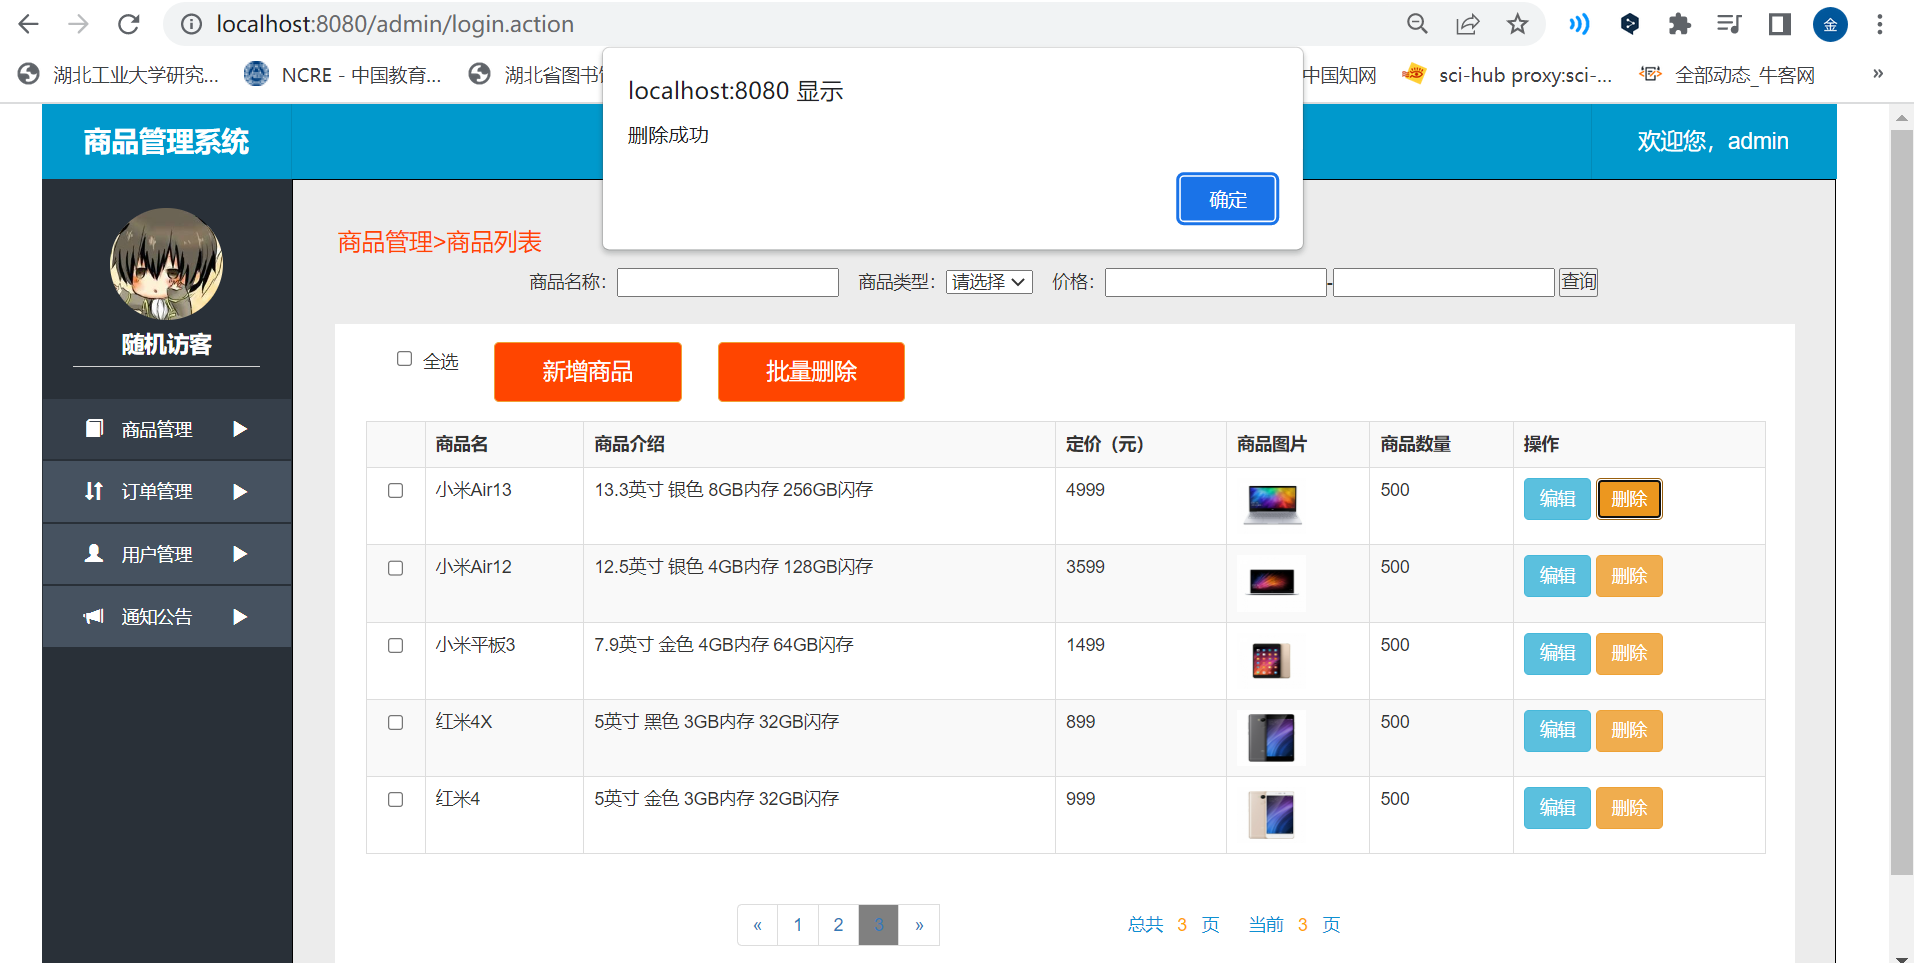
7.1、单个删除
ProductInfoService
//单个商品的删除
int delete(int pid);
ProductInfoServiceImpl
@Override
public int delete(int pid) {


    return productInfoMapper.deleteByPrimaryKey(pid);
}
ProductInfoAction
//单个删除
@RequestMapping("/delete")
public String delete(int pid, HttpServletRequest request) {


    int num = -1;

    try {


        num = productInfoService.delete(pid);
    } catch (Exception e) {


        throw new RuntimeException(e);
    }
    if (num > 0) {


        request.setAttribute("msg", "删除成功");
    } else {


        request.setAttribute("msg", "删除失败");
    }

    return "forward:/prod/deleteAjaxSplit.action";
}

@ResponseBody
@RequestMapping(value = "deleteAjaxSplit", produces = "text/html;charset=UTF-8")
public Object deleteAjaxSplit(HttpServletRequest request) {


    //取第一页的数据
    PageInfo info = productInfoService.splitPage(1, PAGE_SIZE);
    request.getSession().setAttribute("info", info);
    return request.getAttribute("msg");
}
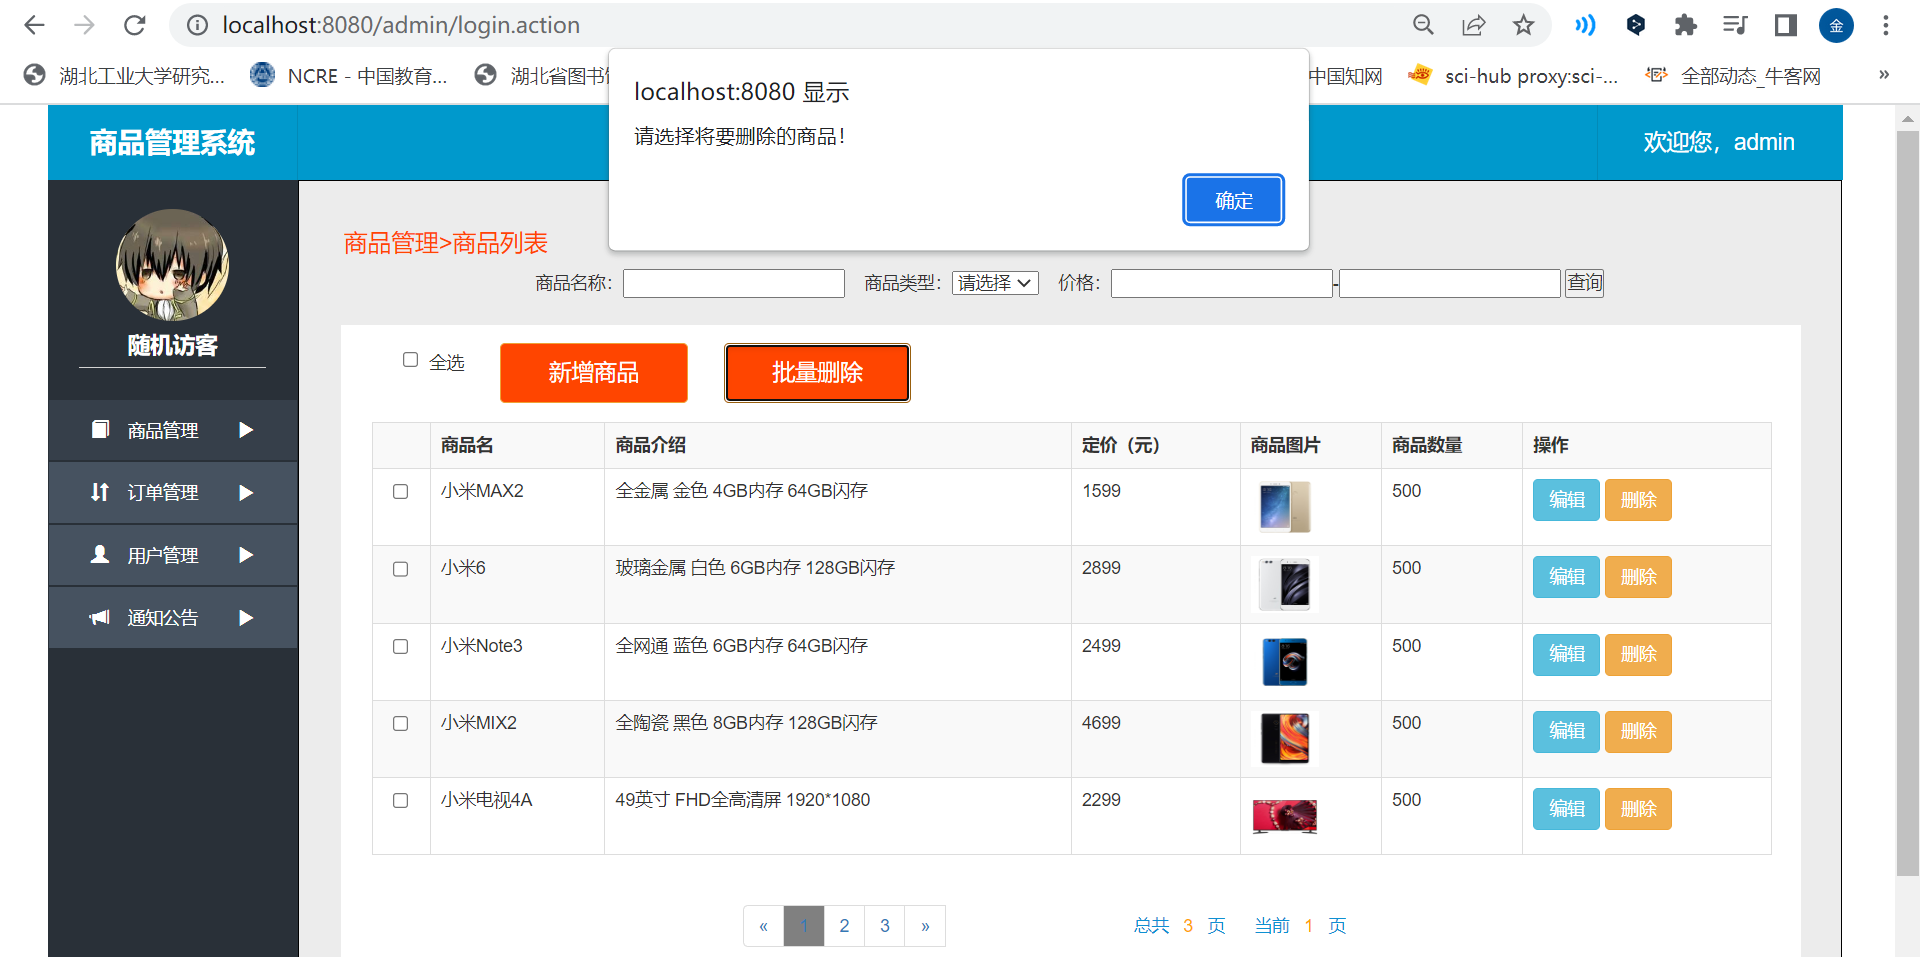
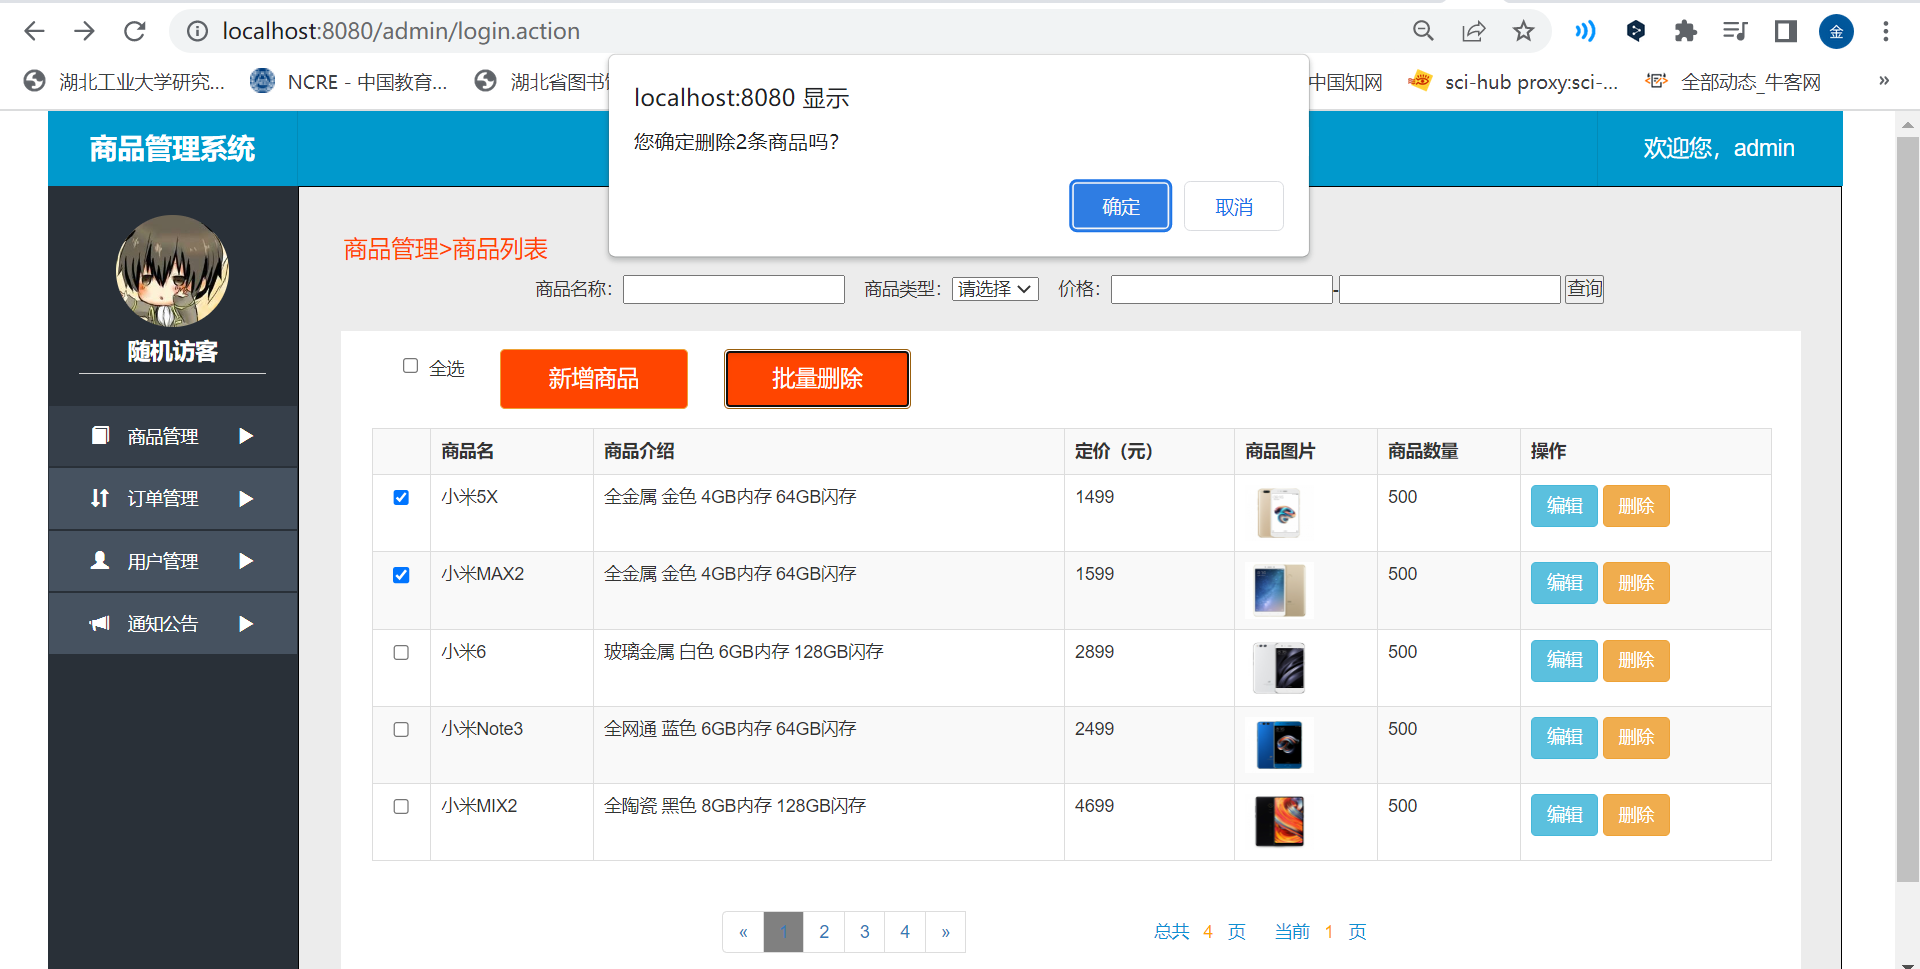
7.2、批量删除
ProductInfoMapper
//批量删除商品的功能
int deleteBatch(String []ids);
ProductInfoMapper.xml
<delete id="deleteBatch">
  delete from product_info where p_id in
                           <foreach collection="array" item="pid" separator="," open="(" close=")">
                             #{pid}
                           </foreach>
</delete>
ProductInfoService
//批量删除商品
int deleteBatch(String []ids);
ProductInfoServiceImpl
@Override
public int deleteBatch(String[] ids) {


    return productInfoMapper.deleteBatch(ids);
}
ProductInfoAction
//批量删除商品
@RequestMapping("/deleteBatch")
public String deleteBatch(String pids, HttpServletRequest request) {


    //将上传上来的字符串截断开,形成商品id的字符数组
    String[] split = pids.split(",");
    int num = -1;
    try {


        num = productInfoService.deleteBatch(split);
    } catch (Exception e) {


        throw new RuntimeException(e);
    }
    try {


        if (num > 0){


            request.setAttribute("msg", "批量删除成功");
        }else {


            request.setAttribute("msg", "批量删除失败");
        }
    } catch (Exception e) {


        request.setAttribute("msg", "商品不能删除");
    }

    return "forward:/prod/deleteAjaxSplit.action";
}
7.3、页面展示
单个删除
批量删除
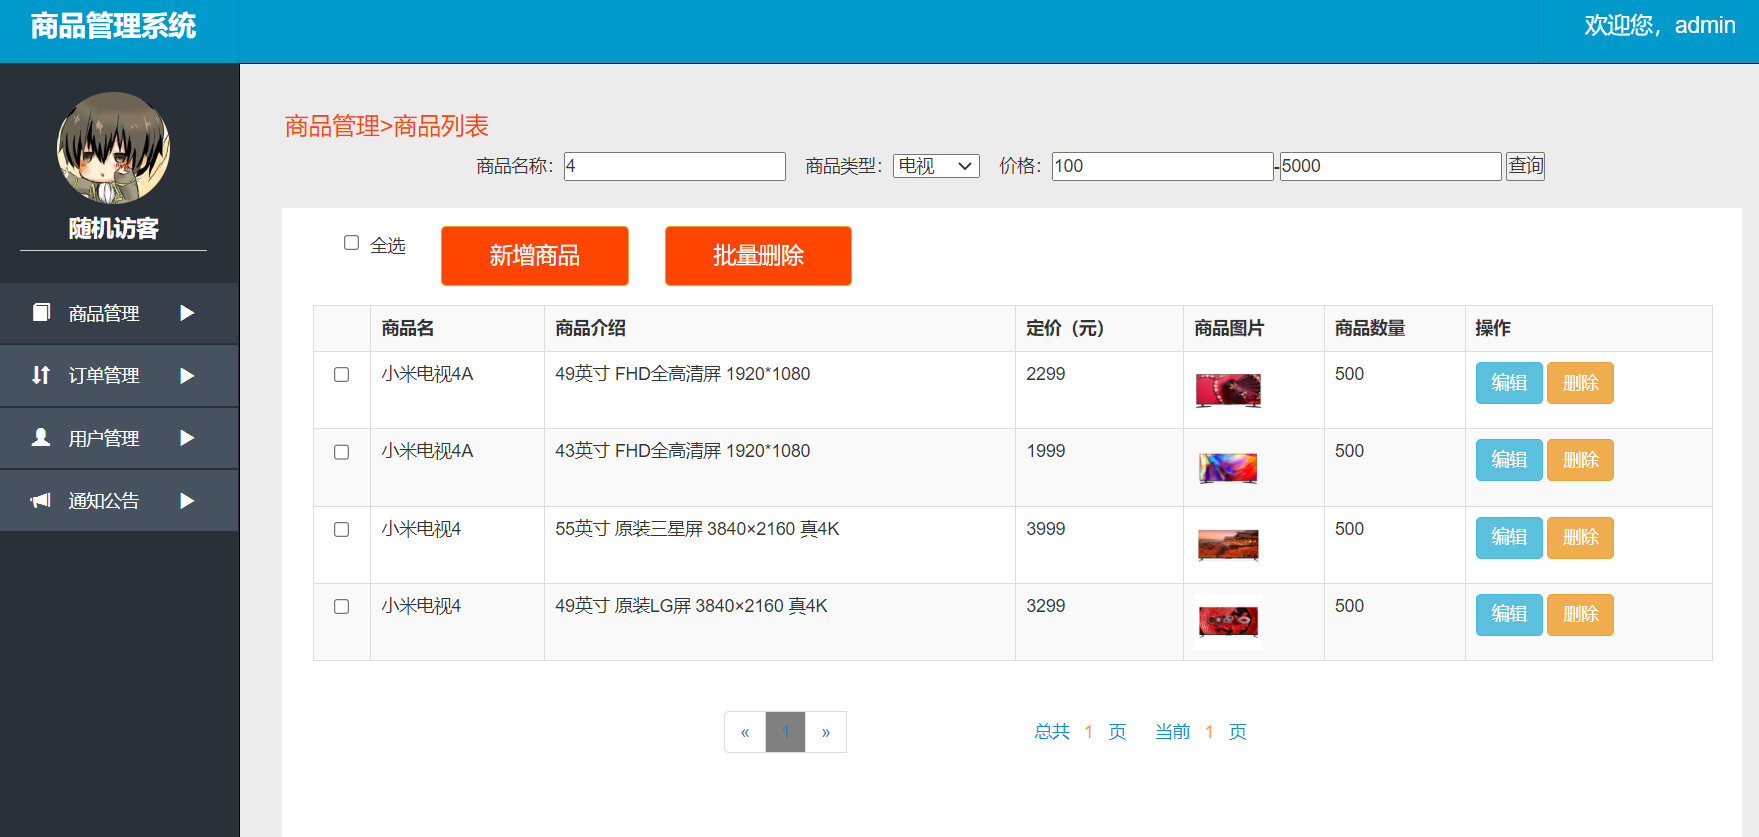
8、查询商品
8.0、编写多条件查询语句
多条件的查询【条件】封装在vo对象中
package com.jerry.pojo.vo;

/**
 * ClassName: ProductInfoVo
 * Package: com.jerry.pojo.vo
 * Description:
 *
 * @Author jerry_jy
 * @Create 2023-02-14 11:49
 * @Version 1.0
 */
public class ProductInfoVo {


    //商品名称
    private String pname;

    //商品类型
    private Integer typeid;

    //最低价格
    private Integer lprice;

    //最高价格
    private Integer hprice;

    //设置页码
    private Integer page = 1;

    public ProductInfoVo() {


    }

    public ProductInfoVo(String pname, Integer typeid, Integer lprice, Integer hprice, Integer page) {


        this.pname = pname;
        this.typeid = typeid;
        this.lprice = lprice;
        this.hprice = hprice;
        this.page = page;
    }

    public String getPname() {


        return pname;
    }

    public void setPname(String pname) {


        this.pname = pname;
    }

    public Integer getTypeid() {


        return typeid;
    }

    public void setTypeid(Integer typeid) {


        this.typeid = typeid;
    }

    public Integer getLprice() {


        return lprice;
    }

    public void setLprice(Integer lprice) {


        this.lprice = lprice;
    }

    public Integer getHprice() {


        return hprice;
    }

    public void setHprice(Integer hprice) {


        this.hprice = hprice;
    }

    public Integer getPage() {


        return page;
    }

    public void setPage(Integer page) {


        this.page = page;
    }

    @Override
    public String toString() {


        return "ProductInfoVo{" +
                "pname='" + pname + '\'' +
                ", typeid=" + typeid +
                ", lprice=" + lprice +
                ", hprice=" + hprice +
                ", page=" + page +
                '}';
    }
}
ProductInfoMapper
//多条件查询
List<ProductInfo> selectCondition(ProductInfoVo vo);
ProductInfoMapper.xml
<!--
多条件查询 拼接
List<ProductInfo> selectCondition(ProductInfoVo vo);
-->
<select id="selectCondition" parameterType="com.jerry.pojo.vo.ProductInfoVo" resultMap="BaseResultMap">
select
<include refid="Base_Column_List"></include>
from product_info
<!--拼接条件-->
<where>
<!--商品名称不为空,拼接商品名称模糊查询-->
<if test="pname != null and pname != -1">
and p_name like '%${pname}%'
</if>
<!--商品类型不为空,拼接商品类型查询-->
<if test="typeid != null and type != ''">
and type_id = #{typeid}
</if>
<!--如果最低价格不为空 且大于0(vo在类中实现),最高价格为空,则查询大于最低价格的所有商品-->
<if test="(lprice != null and lprice != '') and (hprice == null or hprice == '')">
and p_price >= #{lprice}
</if>
<!--如果最低价格为空,最高价格不为空 且大于0,则查询小于最高价格的所有商品-->
<if test="(lprice == null or lprice == '') and (hprice != null and hprice != '')">
and p_price <= #{hprice}
</if>
<!--如果最低价格不为空,最高价格不为空,则查询介于最高价格和最低价格之间的所有商品-->
<if test="(lprice != null and lprice != '') and (hprice != null and hprice != '')">
and p_price between #{lprice} and #{hprice}
</if>
</where>
order by p_id desc
</select>
SelectConditionTest
package com.jerry;

import com.jerry.mapper.ProductInfoMapper;
import com.jerry.pojo.ProductInfo;
import com.jerry.pojo.vo.ProductInfoVo;
import org.junit.Test;
import org.junit.runner.RunWith;
import org.springframework.beans.factory.annotation.Autowired;
import org.springframework.test.context.ContextConfiguration;
import org.springframework.test.context.junit4.SpringJUnit4ClassRunner;

import java.util.List;

/**
 * ClassName: SelectConditionTest
 * Package: com.jerry
 * Description:
 *
 * @Author jerry_jy
 * @Create 2023-02-14 12:24
 * @Version 1.0
 */

@RunWith(SpringJUnit4ClassRunner.class)
@ContextConfiguration(locations = {

    "classpath:applicationContext_dao.xml","classpath:applicationContext_service.xml"})
public class SelectConditionTest {


    @Autowired
    ProductInfoMapper productInfoMapper;

    @Test
    public void test(){


        ProductInfoVo vo = new ProductInfoVo();
        List<ProductInfo> list = productInfoMapper.selectCondition(vo);
        list.forEach(System.out::println);
    }
}
8.1、编写业务层代码
ProductInfoService
//多条件商品的查询 分页
PageInfo<ProductInfo> splitPageVo(ProductInfoVo vo, int pageSize);
ProductInfoServiceImpl
@Override
public PageInfo<ProductInfo> splitPageVo(ProductInfoVo vo, int pageSize) {


    //取出集合之前,先要取出PageHelper.startPage()属性设置
    PageHelper.startPage(vo.getPage(), pageSize);
    List<ProductInfo> list = productInfoMapper.selectCondition(vo);
    return new PageInfo<>(list);
}
8.2、编写控制层代码
package com.jerry.controller;

import com.github.pagehelper.PageInfo;
import com.jerry.pojo.ProductInfo;
import com.jerry.pojo.vo.ProductInfoVo;
import com.jerry.service.ProductInfoService;
import com.jerry.utils.FileNameUtil;
import org.json.JSONObject;
import org.springframework.beans.factory.annotation.Autowired;
import org.springframework.stereotype.Controller;
import org.springframework.ui.Model;
import org.springframework.web.bind.annotation.RequestMapping;
import org.springframework.web.bind.annotation.ResponseBody;
import org.springframework.web.multipart.MultipartFile;

import javax.servlet.http.HttpServletRequest;
import javax.servlet.http.HttpSession;
import java.io.File;
import java.io.IOException;
import java.util.Date;
import java.util.List;

/**
 * ClassName: ProductInfoAction
 * Package: com.jerry.controller
 * Description:
 *
 * @Author jerry_jy
 * @Create 2023-02-13 11:33
 * @Version 1.0
 */

@Controller
@RequestMapping("/prod")
public class ProductInfoAction {


    //每页显示的记录数
    public static final int PAGE_SIZE = 5;

    //异步上传的文件图片的名称
    String saveFileName = "";

    @Autowired
    ProductInfoService productInfoService;

    //显示全部商品不分页
    @RequestMapping("/getAll")
    public String getAllProduct(HttpServletRequest request) {


        List<ProductInfo> list = productInfoService.getAllProduct();
        request.setAttribute("list", list);
        return "product";
    }

    //显示第一页的5条记录
    @RequestMapping("/split")
    public String split(HttpServletRequest request) {


        PageInfo info = null;
        Object vo = request.getSession().getAttribute("prodVo");
        if (vo != null) {


            info = productInfoService.splitPageVo((ProductInfoVo) vo, PAGE_SIZE);
            request.getSession().removeAttribute("prodVo");
        } else {


            //得到第一页的数据
            info = productInfoService.splitPage(1, PAGE_SIZE);
        }

        request.setAttribute("info", info);
        return "product";
    }

    //Ajax分页的翻页处理
    @ResponseBody
    @RequestMapping("/ajaxSplit")
    public void ajaxSplit(ProductInfoVo vo, HttpSession session) {


        //取得当前page参数的页面数据
        PageInfo info = productInfoService.splitPageVo(vo, PAGE_SIZE);
        session.setAttribute("info", info);
    }

    //异步Ajax文件上传处理
    @ResponseBody
    @RequestMapping("ajaxImg")
    public Object ajaxImg(MultipartFile pimage, HttpServletRequest request) {


        //1、提取、生成文件名UUID+上传图片后缀名.jpg .png
        saveFileName = FileNameUtil.getUUIDFileName() + FileNameUtil.getFileType(pimage.getOriginalFilename());
        //2、获取图片的存取路径
        String path = request.getServletContext().getRealPath("/image_big");
        //3、转存
        try {


            pimage.transferTo(new File(path + File.separator + saveFileName));
        } catch (IOException e) {


            throw new RuntimeException(e);
        }
        //返回客户端的JSON对象, 封装图片路径,为了在页面上回显图片
        JSONObject object = new JSONObject();
        object.put("imgurl", saveFileName);

        return object.toString();
    }

    //新增商品
    @RequestMapping("/save")
    public String save(ProductInfo info, HttpServletRequest request) {


        info.setpImage(saveFileName);
        info.setpDate(new Date());

        int num = -1;
        try {


            num = productInfoService.save(info);
        } catch (Exception e) {


            throw new RuntimeException(e);
        }

        if (num > 0) {


            request.setAttribute("msg", "增加成功");
        } else {


            request.setAttribute("msg", "增加失败");
        }

        //清空saveFileName这个变量,为了下次新增或修改的异步Ajax的上传处理
        saveFileName = "";
        //增加成功后应该重新访问数据库,所以跳转到分页显示的action上
        return "forward:/prod/split.action";
    }

    //根据主键id查询商品
    @RequestMapping("/one")
    public String one(int pid, ProductInfoVo vo, Model model, HttpSession session) {


        ProductInfo info = productInfoService.selectById(pid);
        model.addAttribute("prod", info);
        //将多条件以及页码放在session中,更新处理结束后,分页时读取条件和页码
        session.setAttribute("prodVo", vo);
        return "update";
    }

    //更新商品
    @RequestMapping("/update")
    public String update(ProductInfo info, HttpServletRequest request) {


        //1、因为Ajax的异步图片上传,如果有上传过,则 saveFileName 里有上传过来的名称,
        //如果没有使用异步Ajax上传过图片,则saveFileName="",则实体类使用隐藏表单域提供上来的pImage原始图片的名称;
        if (!saveFileName.equals("")) {


            info.setpImage(saveFileName);
        }
        //完成更新处理
        int num = -1;
        //切记:对于增删改的操作,一定要进行try-catch的异常捕获
        try {


            num = productInfoService.update(info);
        } catch (Exception e) {


            throw new RuntimeException(e);
        }
        if (num > 0) {


            //更新成功
            request.setAttribute("msg", "更新成功");
        } else {


            //更新失败
            request.setAttribute("msg", "更新失败");
        }

        //处理完更新后,saveFileName里可能有数据
        //而下一次使用这个变量作为判断的依据,就会出错,所以必须清空saveFileName
        saveFileName = "";
        //redirect会导致request请求丢失,改用forward
        return "forward:/prod/split.action";
    }

    //单个删除
    @RequestMapping("/delete")
    public String delete(int pid, ProductInfoVo vo, HttpServletRequest request) {


        int num = -1;

        try {


            num = productInfoService.delete(pid);
        } catch (Exception e) {


            throw new RuntimeException(e);
        }
        if (num > 0) {


            request.setAttribute("msg", "删除成功");
            request.getSession().setAttribute("deleteProductVo", vo);
        } else {


            request.setAttribute("msg", "删除失败");
        }

        return "forward:/prod/deleteAjaxSplit.action";
    }

    @ResponseBody
    @RequestMapping(value = "deleteAjaxSplit", produces = "text/html;charset=UTF-8")
    public Object deleteAjaxSplit(HttpServletRequest request) {


        //取第一页的数据
        PageInfo info = null;
        Object vo = request.getSession().getAttribute("deleteProductVo");
        if (vo != null) {


            info = productInfoService.splitPageVo((ProductInfoVo) vo, PAGE_SIZE);
        } else {


            info = productInfoService.splitPage(1, PAGE_SIZE);
        }
        request.getSession().setAttribute("info", info);
        return request.getAttribute("msg");
    }

    //批量删除商品
    @RequestMapping("/deleteBatch")
    public String deleteBatch(String pids, HttpServletRequest request) {


        //将上传上来的字符串截断开,形成商品id的字符数组
        String[] split = pids.split(",");
        int num = -1;
        try {


            num = productInfoService.deleteBatch(split);
        } catch (Exception e) {


            throw new RuntimeException(e);
        }
        try {


            if (num > 0) {


                request.setAttribute("msg", "批量删除成功");
            } else {


                request.setAttribute("msg", "批量删除失败");
            }
        } catch (Exception e) {


            request.setAttribute("msg", "商品不能删除");
        }

        return "forward:/prod/deleteAjaxSplit.action";
    }

    //多条件商品的查询
    @ResponseBody
    @RequestMapping("/condition")
    public void condition(ProductInfoVo vo, HttpSession session) {


        List<ProductInfo> list = productInfoService.selectCondition(vo);
        session.setAttribute("list", list);
    }
}
8.3、页面展示
9、项目托管
Gitee
https://gitee.com/jinyang-jy/xiaomissm.git
GitHub
https://github.com/Jerry-jy/missm.git
10、项目所需前端页面资料
链接:https://pan.baidu.com/s/1CGnGV4anjBHVI_tLqLYXfw?pwd=2022
提取码:2022
–end–