目录
首先理解模块和组件的基本概念:
一.模块
1.理解:向外提供特定功能的js程序,一般就是一个js文件
2.为什么: js文件很多很复杂
3.作用:复用js, 简化js的编写,提高js运行效率
模块化: 当应用中的js都以模块来编写的,那这个应用就是一个模块化的应用。
二.组件 (快捷键< +v + 回车 生成单组件模板)
组件的定义: 实现应用中局部功能代码和资源的集合
组件化:当应用中的功能都是以多组件的方式来编写的,那这个应用就是一个组件化的应用。
解决传统js编写存在的问题:
1.依赖关系混乱,不好维护。
2.代码复用率不高。
先看看非单文件组件的使用,以便于理解单组件开发的优势:
三.非单文件组件
1.基本使用:
Vue中使用组件的三大步骤:
一、定义组件(创建组件)
二、注册组件
三、使用组件(写组件标签)
一、如何定义一个组件?
使用Vue.extend(options)创建,其中options和new Vue(options)时传入的那个options几 乎一样,但也有点区别;
区别如下:
1.el不要写,为什么? ——— 最终所有的组件都要经过一个vm的管理,由vm中的el 决定服务哪个容器。
2.data必须写成函数,为什么? ———— 避免组件被复用时,数据存在引用关系。
备注:使用template可以配置组件结构。
二、如何注册组件?
1.局部注册:靠new Vue的时候传入components选项
2.全局注册:靠Vue.component('组件名',组件)
三、编写组件标签:(标签执行时会自动创建VueComponents实例)
<school></school>
For example:
<!DOCTYPE html>
<html>
	<head>
		<meta charset="UTF-8" />
		<title>基本使用</title>
		<script type="text/javascript" src="../js/vue.js"></script>
	</head>
	<body>
		<!-- 准备好一个容器-->
		<div id="root">
			<hello></hello>
			<hr>
			<h1>{

   {msg}}</h1>
			<hr>
			<!-- 第三步:编写组件标签 -->
			<school></school>
			<hr>
			<!-- 第三步:编写组件标签 -->
			<student></student>
		</div>

		<div id="root2">
			<hello></hello>
		</div>
	</body>

	<script type="text/javascript">
		Vue.config.productionTip = false

		//第一步:创建school组件
		const school = Vue.extend({
			template:`
				<div class="demo">
					<h2>学校名称:{

   {schoolName}}</h2>
					<h2>学校地址:{

   {address}}</h2>
					<button @click="showName">点我提示学校名</button>
				</div>
			`,
			// el:'#root', //组件定义时,一定不要写el配置项,因为最终所有的组件都要被一个vm管理,由vm决定服务于哪个容器。
			data(){
				return {
					schoolName:'尚硅谷',
					address:'北京昌平'
				}
			},
			methods: {
				showName(){
					alert(this.schoolName)
				}
			},
		})

		//第一步:创建student组件
		const student = Vue.extend({
			template:`
				<div>
					<h2>学生姓名:{

   {studentName}}</h2>
					<h2>学生年龄:{

   {age}}</h2>
				</div>
			`,
			data(){
				return {
					studentName:'张三',
					age:18
				}
			}
		})

		//第一步:创建hello组件
		const hello = Vue.extend({
			template:`
				<div>
					<h2>你好啊!{

   {name}}</h2>
				</div>
			`,
			data(){
				return {
					name:'Tom'
				}
			}
		})

		//第二步:全局注册组件
		Vue.component('hello',hello)

		//创建vm
		new Vue({
			el:'#root',
			data:{
				msg:'你好啊!'
			},
			//第二步:注册组件(局部注册)
			components:{
				school,
				student
			}
		})

		new Vue({
			el:'#root2',
		})
	</script>
</html>
2.需要注意的点
1.关于组件名:
一个单词组成:
第一种写法(首字母小写):school
第二种写法(首字母大写):School
多个单词组成:
第一种写法(kebab-case命名):my-school
第二种写法(CamelCase命名):MySchool (需要Vue脚手架支持)
备注:
(1).组件名尽可能回避HTML中已有的元素名称,例如:h2、H2都不行。
(2).可以使用name配置项指定组件在开发者工具中呈现的名字。
2.关于组件标签:
第一种写法:<school></school>
第二种写法:<school/>
备注:不用使用脚手架时,<school/>会导致后续组件不能渲染。
3.一个简写方式:
const school = Vue.extend(options) 可简写为:const school = options
3.关于VueComponent:(了解即可)
关于VueComponent:
1.school组件(见代码)本质是一个名为VueComponent的构造函数,且不是程序员定义的,是Vue.extend生成的。
2.我们只需要写<school/>或<school></school>,Vue解析时会帮我们创建school组件的实例对象,
即Vue帮我们执行的:new VueComponent(options)。
3.特别注意:每次调用Vue.extend,返回的都是一个全新的VueComponent!!!!
4.关于this指向:
(1).组件配置中:
data函数、methods中的函数、watch中的函数、computed中的函数 它们的this均是【VueComponent实例对象】。
(2).new Vue(options)配置中:
data函数、methods中的函数、watch中的函数、computed中的函数 它们的this均是【Vue实例对象】。
5.VueComponent的实例对象,以后简称vc(也可称之为:组件实例对象)。
Vue的实例对象,以后简称vm。
For exampel:
<!DOCTYPE html>
<html>
	<head>
		<meta charset="UTF-8" />
		<title>VueComponent</title>
		<script type="text/javascript" src="../js/vue.js"></script>
	</head>
	<body>
		<!-- 准备好一个容器-->
		<div id="root">
			<school></school>
			<hello></hello>
		</div>
	</body>

	<script type="text/javascript">
		Vue.config.productionTip = false

		//定义school组件
		const school = Vue.extend({
			name:'school',
			template:`
				<div>
					<h2>学校名称:{

   {name}}</h2>
					<h2>学校地址:{

   {address}}</h2>
					<button @click="showName">点我提示学校名</button>
				</div>
			`,
			data(){
				return {
					name:'尚硅谷',
					address:'北京'
				}
			},
			methods: {
				showName(){
					console.log('showName',this)
				}
			},
		})

		const test = Vue.extend({
			template:`<span>atguigu</span>`
		})

		//定义hello组件
		const hello = Vue.extend({
			template:`
				<div>
					<h2>{

   {msg}}</h2>
					<test></test>
				</div>
			`,
			data(){
				return {
					msg:'你好啊!'
				}
			},
			components:{test}
		})


		// console.log('@',school)
		// console.log('#',hello)

		//创建vm
		const vm = new Vue({
			el:'#root',
			components:{school,hello}
		})
	</script>
</html>
4.一个重要的内置关系
1.一个重要的内置关系:VueComponent.prototype.__proto__ === Vue.prototype
2.为什么要有这个关系:让组件实例对象(vc)可以访问到 Vue原型上的属性、方法。
四.单文件组件:
1.单组件结构:
.vue 文件 将文件分为了三部分
①结构<template>
②交互代码<script>
③样式<style>
For example:
<template>
<div class=".demo">
<h2>学生姓名:{
{name}}</h2>
<h2>学生年龄:{
{age}}</h2>
</div>
</template>
<script>
export default {
name:'Student',
data(){
return {
name:'张三',
age:18
}
}
}
</script>
<style>
.demo{
background-color: orange;
}
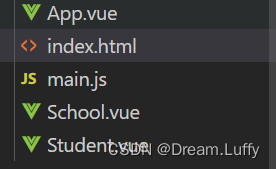
</style>2.基本项目结构:
在vue脚手架上操作时,一般有三个基础文件
①App.vue
②main.js
③index.html
结构如下:
其中
App.vue 用于集成所有组件:
<template>
	<div>
		<School></School>
		<Student></Student>
	</div>
</template>

<script>
	//引入School和Student组件
	import School from './School.vue'
	import Student from './Student.vue'

	export default {
		name:'App',
		components:{
			School,
			Student
		}
	}
</script>
main.js创建Vue实例,并指明挂载在哪, 作为入口
import App from './App.vue'

new Vue({
	el:'#root',
	template:`<App></App>`,
	components:{App},
})
index.html用于创建挂载所需要的容器
<!DOCTYPE html>
<html>
	<head>
		<meta charset="UTF-8" />
		<title>练习一下单文件组件的语法</title>
	</head>
	<body>
		<!-- 准备一个容器 -->
		<div id="root"></div>
	</body>
</html>