功能分别是:
1、竖屏的前置,后置显示 加 拍照
2、横屏的前置,后置显示 加 拍照
整个项目的代码贴出来了,里面加了有备注,不理解的也可以去参考官网点击跳转到官网
- 首先选择前置后置布局效果如下
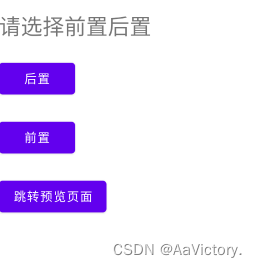
- 布局代码如下:
<?xml version="1.0" encoding="utf-8"?>
<LinearLayout xmlns:android="http://schemas.android.com/apk/res/android"
    xmlns:app="http://schemas.android.com/apk/res-auto"
    xmlns:tools="http://schemas.android.com/tools"
    android:layout_width="match_parent"
    android:layout_height="match_parent"
    android:orientation="vertical"
    tools:context=".MainActivity3">
    <TextView
        android:layout_marginTop="20dp"
        android:id="@+id/textView"
        android:layout_width="wrap_content"
        android:layout_height="wrap_content"
        android:textSize="25sp"
        android:text="请选择前置后置"
        />
    <Button
        android:onClick="btn1"
        android:layout_marginTop="20dp"
        android:layout_width="wrap_content"
        android:layout_height="wrap_content"
        android:text="后置"
        />
    <Button
        android:onClick="btn2"
        android:layout_marginTop="20dp"
        android:layout_width="wrap_content"
        android:layout_height="wrap_content"
        android:text="前置"
        />
    <Button
        android:onClick="btn3"
        android:layout_marginTop="20dp"
        android:layout_width="wrap_content"
        android:layout_height="wrap_content"
        android:text="跳转预览页面"
        />
</LinearLayout>
- MainActivity3 处理
public class MainActivity3 extends AppCompatActivity {


    private TextView textView;
    private static int mode=1;
    @Override
    protected void onCreate(Bundle savedInstanceState) {


        super.onCreate(savedInstanceState);
        setContentView(R.layout.activity_main3);
        textView=findViewById(R.id.textView);
        if (ContextCompat.checkSelfPermission(this, Manifest.permission.CAMERA) == PackageManager.PERMISSION_DENIED) {


            if (Build.VERSION.SDK_INT >= Build.VERSION_CODES.M) {


                requestPermissions(new String[]{

    Manifest.permission.CAMERA}, 11);
            }
        }
    }
    public static int getMode(){


        return mode;
    }
    public void btn1(View view) {


        mode=0;
        textView.setText("当前是后置");
    }
    public void btn2(View view) {


        mode=1;
        textView.setText("当前是前置");
    }
    public void btn3(View view) {


        startActivity(new Intent(this,MainActivity2.class));
    }
}
- 预览,拍照,效果如下图:
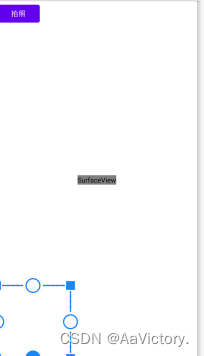
- 代码布局如下:
<?xml version="1.0" encoding="utf-8"?>
<RelativeLayout xmlns:android="http://schemas.android.com/apk/res/android"
    xmlns:app="http://schemas.android.com/apk/res-auto"
    xmlns:tools="http://schemas.android.com/tools"
    android:layout_width="match_parent"
    android:layout_height="match_parent"
    android:background="@color/gray"
    tools:context=".MainActivity2">
    <Button
        android:onClick="photograph"
        android:layout_width="wrap_content"
        android:layout_height="wrap_content"
        android:text="拍照"
        />
    <SurfaceView
        android:id="@+id/surface_view"
        android:layout_centerInParent="true"
        android:layout_width="wrap_content"
        android:layout_height="wrap_content" />

    <ImageView
        android:id="@+id/image"
        android:layout_alignParentBottom="true"
        android:layout_width="150dp"
        android:layout_height="150dp"
        />
</RelativeLayout>
- 整个处理如下
public class MainActivity2 extends AppCompatActivity {


    private Camera mCamera;
    private boolean isPreview = false;
    private SurfaceView surfaceView;
    private ImageView image;
    private Bitmap bitmap;

    @Override
    protected void onCreate(Bundle savedInstanceState) {


        super.onCreate(savedInstanceState);
        setContentView(R.layout.activity_main2);
        surfaceView=findViewById(R.id.surface_view);
        image=findViewById(R.id.image);
        //判断是前置还是后置
        if (Utils.isCurOriLand(this)){

    //横屏
            if (MainActivity3.getMode()==0){

    //后置
                surfaceView.getLayoutParams().width=640;
                surfaceView.getLayoutParams().height=480;
            }else {

    //前置
                surfaceView.getLayoutParams().width=480;
                surfaceView.getLayoutParams().height=640;
            }
        }else {

    //竖屏
            if (MainActivity3.getMode()==0){

    //后置
                surfaceView.getLayoutParams().width=480;
                surfaceView.getLayoutParams().height=640;
            }else {

    //前置
                surfaceView.getLayoutParams().width=640;
                surfaceView.getLayoutParams().height=480;
            }
        }

        SurfaceView mSurfaceView = (SurfaceView) findViewById(R.id.surface_view);
        // 获得 SurfaceHolder 对象
        SurfaceHolder mSurfaceHolder = mSurfaceView.getHolder();

        // 设置 Surface 格式
        // 参数: PixelFormat中定义的 int 值 ,详细参见 PixelFormat.java
        mSurfaceHolder.setFormat(PixelFormat.TRANSPARENT);

        // 如果需要,保持屏幕常亮
        // mSurfaceHolder.setKeepScreenOn(true);

        // 设置 Surface 的分辨率
        // mSurfaceHolder.setFixedSize(width,height);

        // 添加 Surface 的 callback 接口
        mSurfaceHolder.addCallback(mSurfaceCallback);
    }
    private SurfaceHolder.Callback mSurfaceCallback = new SurfaceHolder.Callback() {


        /**
         *  在 Surface 首次创建时被立即调用:活得叫焦点时。一般在这里开启画图的线程
         * @param surfaceHolder 持有当前 Surface 的 SurfaceHolder 对象
         */
        @Override
        public void surfaceCreated(SurfaceHolder surfaceHolder) {


            try {


                //打开硬件摄像头 这两句默认是后摄像头,如果指定摄像头用 : Camera.open(CameraId) CameraId  0 (后置)  1 (前置)
                // Camera.open() 默认返回的后置摄像头信息 //导包得时候一定要注意是android.hardware.Camera
                // setCameraDisplayOrientation(MainActivity2.this,0,camera);

                //设置角度,此处 CameraId  0 (后置)  1 (前置)
                if (MainActivity3.getMode()==0){

    //后置
                    mCamera = Camera.open(Camera.CameraInfo.CAMERA_FACING_BACK);//打开硬件摄像头,这里导包得时候一定要注意是android.hardware.Camera
                    setCameraDisplayOrientation( MainActivity2.this,0,mCamera);
                }else {

    //前置
                    mCamera = Camera.open(Camera.CameraInfo.CAMERA_FACING_FRONT);//打开硬件摄像头,这里导包得时候一定要注意是android.hardware.Camera
                    setCameraDisplayOrientation(MainActivity2.this,1,mCamera);
                }

                //此处也可以设置摄像头参数
                Camera.Parameters parameters = mCamera.getParameters();//得到摄像头的参数
//                parameters.setPictureFormat(PixelFormat.RGB_888);//设置照片的格式
                parameters.setPictureFormat(PixelFormat.JPEG);//设置照片的格式
                parameters.setJpegQuality(85);//设置照片的质量
                parameters.setPreviewSize(640, 480);
                parameters.setPictureSize(640, 480);//设置照片的大小,默认是和屏幕一样大
//                parameters.setPictureSize(480, 640);//设置照片的大小,默认是和屏幕一样大
                mCamera.setParameters(parameters);//设置需要预览的尺寸

                mCamera.setPreviewDisplay(surfaceHolder);//通过SurfaceView显示取景画面 相机
                mCamera.setPreviewCallback(previewCallback);//预览相机
                mCamera.startPreview();//开始预览
                isPreview = true;//设置是否预览参数为真
            } catch (IOException e) {


                Log.e("TAG", e.toString());
            }
        }

        /**
         *  在 Surface 格式 和 大小发生变化时会立即调用,可以在这个方法中更新 Surface
         * @param surfaceHolder   持有当前 Surface 的 SurfaceHolder 对象
         * @param format          surface 的新格式
         * @param width           surface 的新宽度
         * @param height          surface 的新高度
         */
        @Override
        public void surfaceChanged(SurfaceHolder surfaceHolder, int format, int width, int height) {


        }

        /**
         *  在 Surface 被销毁时立即调用:失去焦点时。一般在这里将画图的线程停止销毁
         * @param surfaceHolder 持有当前 Surface 的 SurfaceHolder 对象
         */
        @Override
        public void surfaceDestroyed(SurfaceHolder surfaceHolder) {


            if(mCamera != null){


                if(isPreview){

    //正在预览
                    mCamera.stopPreview();
                    mCamera.setPreviewCallback(null);
                    mCamera.release();
                    mCamera = null;
                }
            }
        }
    };

    private Camera.PreviewCallback previewCallback=new Camera.PreviewCallback() {


        @Override
        public void onPreviewFrame(byte[] data, Camera camera) {


            if (Utils.isCurOriLand(getApplicationContext())) {

    //横屏
                if (MainActivity3.getMode()==0) {

    //后置
                    bitmap = NV21ToBitmap.getInstance(MainActivity2.this).nv21ToBitmap(data, 640, 480, 0,false);
                }else {

    //前置
                    bitmap = NV21ToBitmap.getInstance(MainActivity2.this).nv21ToBitmap(data, 640, 480, 90,false);
                }
            }else {


                if (MainActivity3.getMode()==0) {

    //后置
                    bitmap = NV21ToBitmap.getInstance(MainActivity2.this).nv21ToBitmap(data, 640, 480, 90,false);
                }else {

    //前置
                    bitmap = NV21ToBitmap.getInstance(MainActivity2.this).nv21ToBitmap(data, 640, 480, 0,true);
                }
            }
        }
    };

    /**
     * 设置 摄像头的角度
     * @param activity 上下文
     * @param cameraId 摄像头ID(假如手机有N个摄像头,cameraId 的值 就是 0 ~ N-1)
     * @param camera   摄像头对象
     */
    public static void setCameraDisplayOrientation(Activity activity,
                                                   int cameraId, Camera camera) {


        Camera.CameraInfo info = new Camera.CameraInfo();
        //获取摄像头信息
        Camera.getCameraInfo(cameraId, info);
        int rotation = activity.getWindowManager().getDefaultDisplay().getRotation();
        //获取摄像头当前的角度
        int degrees = 0;
        switch (rotation) {


            case Surface.ROTATION_0:
                degrees = 0;
                break;
            case Surface.ROTATION_90:
                if (MainActivity3.getMode()==0){

    //后置
                    degrees = 90;
                }else {


                    degrees = 270;
                }
                break;
            case Surface.ROTATION_180:
                degrees = 180;
                break;
            case Surface.ROTATION_270:
                degrees = 270;
                break;
        }
        int result;
        if (info.facing == Camera.CameraInfo.CAMERA_FACING_FRONT) {


            result = (info.orientation + degrees) % 360;
            result = (360 - result) % 360; // compensate the mirror
        } else {


            // back-facing
            result = (info.orientation - degrees + 360) % 360;
        }
        camera.setDisplayOrientation(result);
    }

    public void photograph(View view) {


        image.setImageBitmap(bitmap);
    }
}
- 一些工具类如下:
public class NV21ToBitmap {


    private RenderScript rs;
    private ScriptIntrinsicYuvToRGB yuvToRgbIntrinsic;
    private Type.Builder yuvType, rgbaType;
    private Allocation in, out;
    private static NV21ToBitmap nv21ToBitmap;

    public static NV21ToBitmap getInstance(Context context) {


        if (null == nv21ToBitmap) {


            synchronized (NV21ToBitmap.class) {


                nv21ToBitmap = new NV21ToBitmap(context);
            }
        }
        return nv21ToBitmap;
    }

    private NV21ToBitmap(Context context) {


        rs = RenderScript.create(context);
        yuvToRgbIntrinsic = ScriptIntrinsicYuvToRGB.create(rs, Element.U8_4(rs));
    }

    public Bitmap nv21ToBitmap(byte[] nv21, int width, int height , int displayOrientation,
                               boolean isMirror) {


        yuvType = new Type.Builder(rs, Element.U8(rs)).setX(nv21.length);
        in = Allocation.createTyped(rs, yuvType.create(), Allocation.USAGE_SCRIPT);

        rgbaType = new Type.Builder(rs, Element.RGBA_8888(rs)).setX(width).setY(height);
        out = Allocation.createTyped(rs, rgbaType.create(), Allocation.USAGE_SCRIPT);

        in.copyFrom(nv21);
        yuvToRgbIntrinsic.setInput(in);
        yuvToRgbIntrinsic.forEach(out);
        Bitmap bmpout = Bitmap.createBitmap(width, height, Bitmap.Config.ARGB_8888);
        out.copyTo(bmpout);
        Matrix matrix = new Matrix();
        matrix.postRotate(displayOrientation, bmpout.getWidth() / 2, bmpout.getHeight() / 2);
        if (isMirror) {


            matrix.postScale(-1.0f, 1.0f);//前置的图像是镜像的
        }

        return Bitmap.createBitmap(bmpout, 0, 0, bmpout.getWidth(), bmpout.getHeight(), matrix, true);
    }
}


public class Utils {


    /**
     * 获取当前屏幕是否是横屏(默认)
     *
     * @param context
     * @return
     */
    public static boolean isCurOriLand(Context context) {


        boolean isLand = true;
        try {


            Configuration mConfiguration = context.getResources().getConfiguration(); //获取设置的配置信息
            int ori = mConfiguration.orientation; //获取屏幕方向
            if (ori == mConfiguration.ORIENTATION_LANDSCAPE) {


                //横屏
                isLand = true;
            } else if (ori == mConfiguration.ORIENTATION_PORTRAIT) {


                //竖屏
                isLand = false;
            }
        } catch (Exception e) {


            e.printStackTrace();
        }
        return isLand;
    }
}