Wish today!!!
关于我为什么一上来就要说这句话!
这个事还得从很久很久以前说起。
那天我看到一只鸡穿着背带裤打着… 呸。。。 不好意思,说错了。
这事还是因为某天,我使用Vue3的版本做了个小商场网站。
后来上线后,才发现没有被baidu收录!
这意味着,没有收录后,用户就不能从百度搜到我的网站。
后来查到vue有个预渲染这个插件,就是prerender-spa-plugin
后来在网山查找了大量文章,都是vue2的,用不了我的vue3,甚至还有的标题写着vue3配置prerender-spa-plugin的,打开内容是vue2的文章,真实太可气了!!

有的还需要fq去下载谷歌的无头浏览器headless
无意中找到了一篇文章https://blog.csdn.net/weixin_51357044/article/details/126516287解决了vue3的问题。
解决问题
一行命令,一个配置就解决此问题了。
npm i prerender-spa-plugin-next --save
vue.config.js
const {

     defineConfig } = require('@vue/cli-service')

// vue.config.js
const path = require("path");
// 预渲染
const PrerenderSPAPlugin = require('prerender-spa-plugin-next');

module.exports = defineConfig({


  transpileDependencies: true,
  //关闭语法检测
  lintOnSave: false,

  // prerender-spa-plugin-next预渲染
  configureWebpack: {


    plugins: [
      new PrerenderSPAPlugin({


        // 需要预渲染的页面,跟router路由一致
        routes: [ '/', '/test' ],
      })
    ]
  }

})
vue3在路由里面需要设置
const router = createRouter({


    // 这里跟Vue2不一样!Vue2这里要改成 mode:‘history’,但是!Vue3这块是这样用的。
    history:createWebHistory(),
    routes
})
编译后的vue文件目录
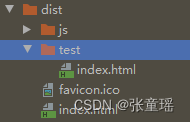
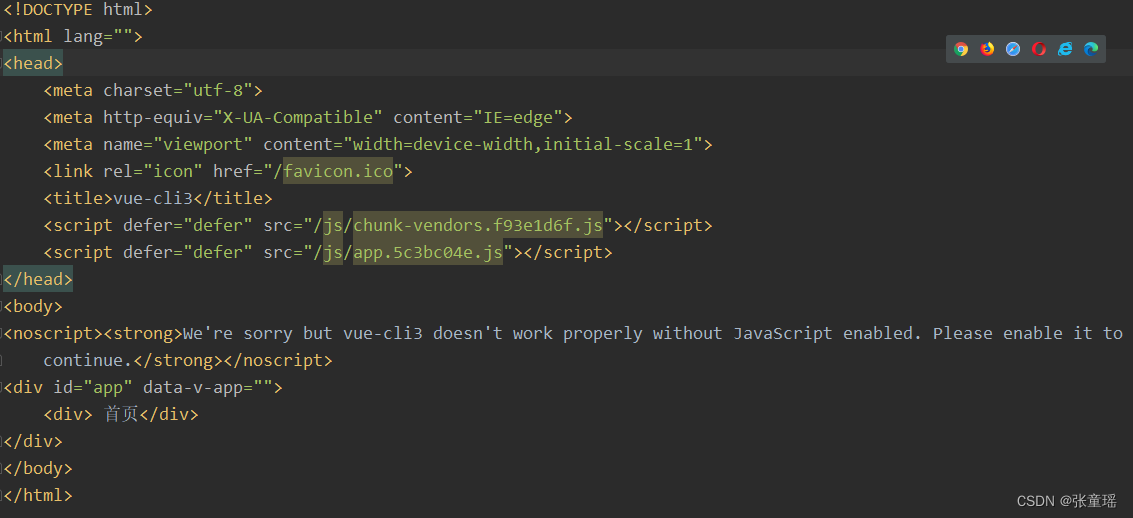
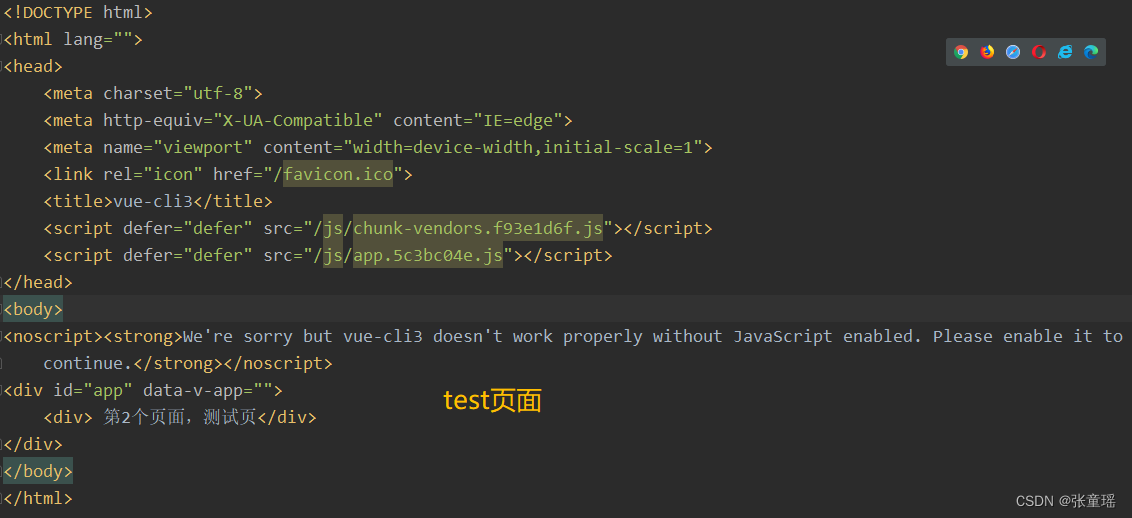
每个页面都有编译好的html代码
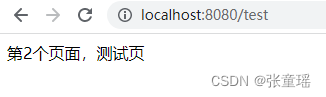
还可以路由传值

完整的配置
index.vue
<template>
    <div>
        首页
    </div>
</template>

<script>
</script>

<style scoped>

</style>
test.vue
<template>
    <div>
        第2个页面,测试页{

    {

    this.$route.params.name == null ? '' : ',你好穿个参数,我的名字叫:'+this.$route.params.name}}
    </div>
</template>

<script>

</script>

<style scoped>

</style>
router.js
// 引入路由,相关说明如下
// createWebHashHistory:url地址栏有#/号
// createWebHistory:url地址栏没有#/号
import {

    createRouter, createWebHashHistory, createWebHistory} from 'vue-router'

const routes = [
    {


        path: '/',
        name: 'index',
        component: () => import('@/views/index/index')
    },
    {


        path: '/test',
        name: 'test',
        component: () => import('@/views/test/test')
    },
    {


        path: '/test/:name',
        name: 'test-name',
        component: () => import('@/views/test/test')
    }
]

const router = createRouter({


    // 这里跟Vue2不一样!Vue2这里要改成 mode:‘history’,但是!Vue3这块是这样用的。
    history:createWebHistory(),
    routes
})

export default router
main.js
import {

     createApp } from 'vue'
import App from './App.vue'
import router from '@/router'

createApp(App).use(router).mount('#app')
vue.config.js
const {

     defineConfig } = require('@vue/cli-service')

// vue.config.js
const path = require("path");
// 预渲染
const PrerenderSPAPlugin = require('prerender-spa-plugin-next');

module.exports = defineConfig({


  transpileDependencies: true,
  //关闭语法检测
  lintOnSave: false,

  // prerender-spa-plugin-next预渲染
  configureWebpack: {


    plugins: [
      new PrerenderSPAPlugin({


        // 需要预渲染的页面,跟router路由一致
        routes: [ '/', '/test' ],
      })
    ]
  }

})

参考文章:https://blog.csdn.net/weixin_51357044/article/details/126516287