pyqt5实战-目标检测-图像处理-人脸检测之UI界面
今天挖掘了一个很不错的界面,使用pyqt5实现,可以加载摄像头进行目标检测,也可以手动打开图片或者视频,进行检测,封装得很好。这里以人脸检测,人脸疲劳检测(检测眨眼),微笑检测三个功能为例子。
算法库
所使用的检测算法模型为MediaPipe。MediaPipe为我们日常使用的革命性产品和服务提供动力。与资源消耗型的机器学习框架不同,MediaPipe只需要最少的资源。它是如此微小和高效,甚至嵌入式物联网设备都可以运行它。2019年,MediaPipe公开发布后,为研究人员和开发人员开辟了一个全新的机会世界。
MediaPipe是一个用于构建机器学习管道的框架,用于处理视频、音频等时间序列数据。这个跨平台框架适用于桌面/服务器、Android、iOS和嵌入式设备,如Raspberry Pi和Jetson Nano。
MediaPipe封装很多检测算法,其中就包括人脸检测算法:
人脸检测
Face Mesh
虹膜
手
姿态
人体
人物分割
头发分割
目标检测
Box Tracking
Instant Motion Tracking
3D目标检测
特征匹配
AutoFlip
MediaSequence
YouTube-8M
更多详细介绍可看:
MediaPipe介绍
环境配置
python3.7
mediapipe
dlib
opencv
scipy
imutils
代码简介
这里可以分为三种功能,分别为摄像头检测,图片检测,视频文件检测,核心代码如下:
(1)摄像头检测:
# 摄像头识别
def show_camera(self):
flag, self.camera_image = self.ui.cap.read()
self.frameCount += 1

if self.enableDet:
    self.fd.detection(self.camera_image)
    img_src = self.fd.image
else:
    img_src = self.camera_image

ih, iw, _ = img_src.shape
w = self.ui.out_video.geometry().width()
h = self.ui.out_video.geometry().height()

if iw > ih:
    scal = w / iw
    nw = w
    nh = int(scal * ih)
    img_src_ = resize(img_src, (nw, nh))

else:
    scal = h / ih
    nw = int(scal * iw)
    nh = h
    img_src_ = resize(img_src, (nw, nh))

img_src_ = flip(img_src_, 1)

show = cvtColor(img_src_, COLOR_BGR2RGB)

self.autoSave(img_src_)

showImage = QtGui.QImage(show.data, show.shape[1], show.shape[0], show.shape[2] * show.shape[1], QtGui.QImage.Format_RGB888)
self.ui.out_video.setPixmap(QtGui.QPixmap.fromImage(showImage))

self.showCounter()
(2)图片检测,视频文件检测:
def open_file(self):
     imgName, imgType = QFileDialog.getOpenFileName(None, '选取视频或图片', os.getcwd(), '(*.mp4 *.avi, *.jpg *.png)')
     if str(imgName) == "":
         return

     if str(imgName).split(".")[1] == 'mp4' or str(imgName).split(".")[1] == 'avi': # 视频
         video = cv.VideoCapture(imgName)
         # 获取图像width, height
         while video.isOpened():
             success, data = video.read()
             if not success:
                 break
             # img_src = self.fd.detection_vedio(data)
             # if img_src.all() == None:
             #     continue
             cv.imshow("video", data)
             k = cv.waitKey(10)
             if k & 0xFF == ord('q'):
                 break
         video.release()
         cv.destroyAllWindows()

     else: # 图片
         image = cv.imread(imgName)
         img_src = self.fd.detection_face(image)
         if img_src.all() == None:
             return
         ih, iw, _ = img_src.shape
         w = self.ui.out_video.geometry().width()
         h = self.ui.out_video.geometry().height()

         if iw > ih:
             scal = w / iw
             nw = w
             nh = int(scal * ih)
             img_src_ = resize(img_src, (nw, nh))

         else:
             scal = h / ih
             nw = int(scal * iw)
             nh = h
             img_src_ = resize(img_src, (nw, nh))

         img_src_ = flip(img_src_, 1)

         show = cvtColor(img_src_, COLOR_BGR2RGB)

         showImage = QtGui.QImage(show.data, show.shape[1], show.shape[0], show.shape[2] * show.shape[1],
                                  QtGui.QImage.Format_RGB888)
         self.ui.out_video.setPixmap(QtGui.QPixmap.fromImage(showImage))
MediaPipe的人脸检测例程:
def detection_face(self, image):
    with self.mp_face_detection.FaceDetection(model_selection=0, min_detection_confidence=0.5) as face_detection:
        results = face_detection.process(cvtColor(image, COLOR_BGR2RGB))
        if not results.detections:  #如果没有人脸
            return None
        if results.detections:
            for detection in results.detections:
                (x1, y1), (x2, y2) = drawing_utils.draw_detection(image, detection)
            annotated_image = image.copy()
        return annotated_image


def detection_vedio(self, image):
    with self.mp_face_detection.FaceDetection(model_selection=0, min_detection_confidence=0.5) as face_detection:
        # Flip 图片
        # BGR 图片转化到 RGB.
        image = cvtColor(flip(image, 1), COLOR_BGR2RGB)
        # 为了提高性能,可以选择将图像标记为不可写,以便通过引用传递
        image.flags.writeable = False
        results = face_detection.process(image)

        # 画出检测到的人脸
        image.flags.writeable = True
        image = cvtColor(image, COLOR_RGB2BGR)
        if not results.detections:  # 如果没有人脸
            return None
        if results.detections:
            for detection in results.detections:
                drawing_utils.draw_detection(image, detection)
        annotated_image = image.copy()
        return annotated_image
其他检测算法只需要封装为函数即可,就可以直接调用。除了算法之外,界面的设计是使用pyqt5进行的,部分代码如下:
def retranslateUi(self, mainWindow):
    _translate = QtCore.QCoreApplication.translate
    mainWindow.setWindowTitle(_translate("mainWindow", "Face detector"))
    self.label_5.setText(_translate("mainWindow", "设置"))
    self.label_10.setText(_translate("mainWindow", "Input"))
    self.fileButton.setToolTip(_translate("mainWindow", "file"))
    self.cameraButton.setToolTip(_translate("mainWindow", "camera"))
    self.saveCheckBox.setText(_translate("mainWindow", "自动保存"))
    self.label_11.setText(_translate("mainWindow", "结果"))
    self.resetButton.setToolTip(_translate("mainWindow", "重置"))
    self.smileLabel.setText(_translate("mainWindow", "微笑"))
    self.LBlinkLabel.setText(_translate("mainWindow", "左眼眨眼"))
    self.RBlinkLabel.setText(_translate("mainWindow", "右眼眨眼"))
    self.TBlinkLabel.setText(_translate("mainWindow", "总眨眼次数"))
    self.label_6.setText(_translate("mainWindow", "视频"))
    self.runButton.setToolTip(_translate("mainWindow", "enable detector"))
效果
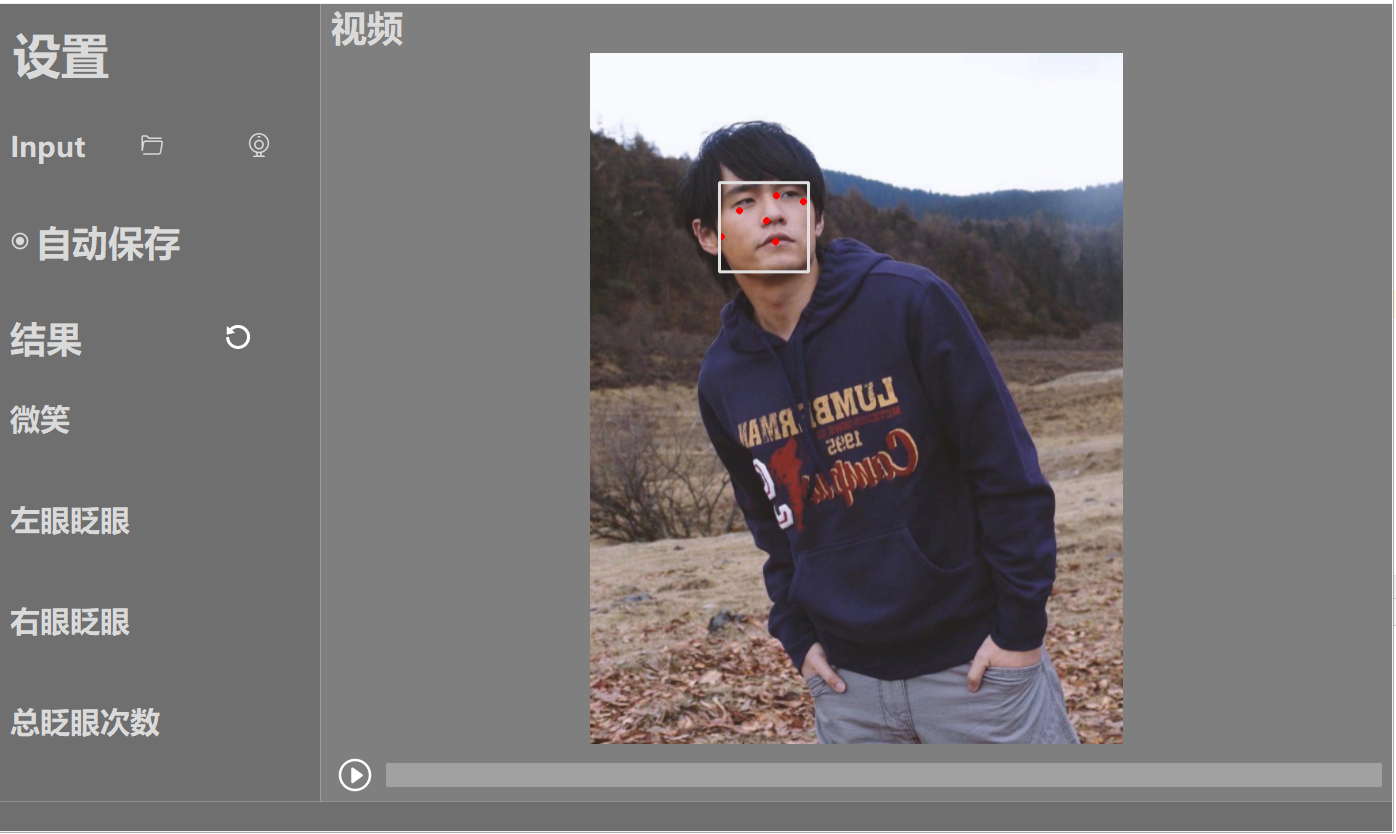

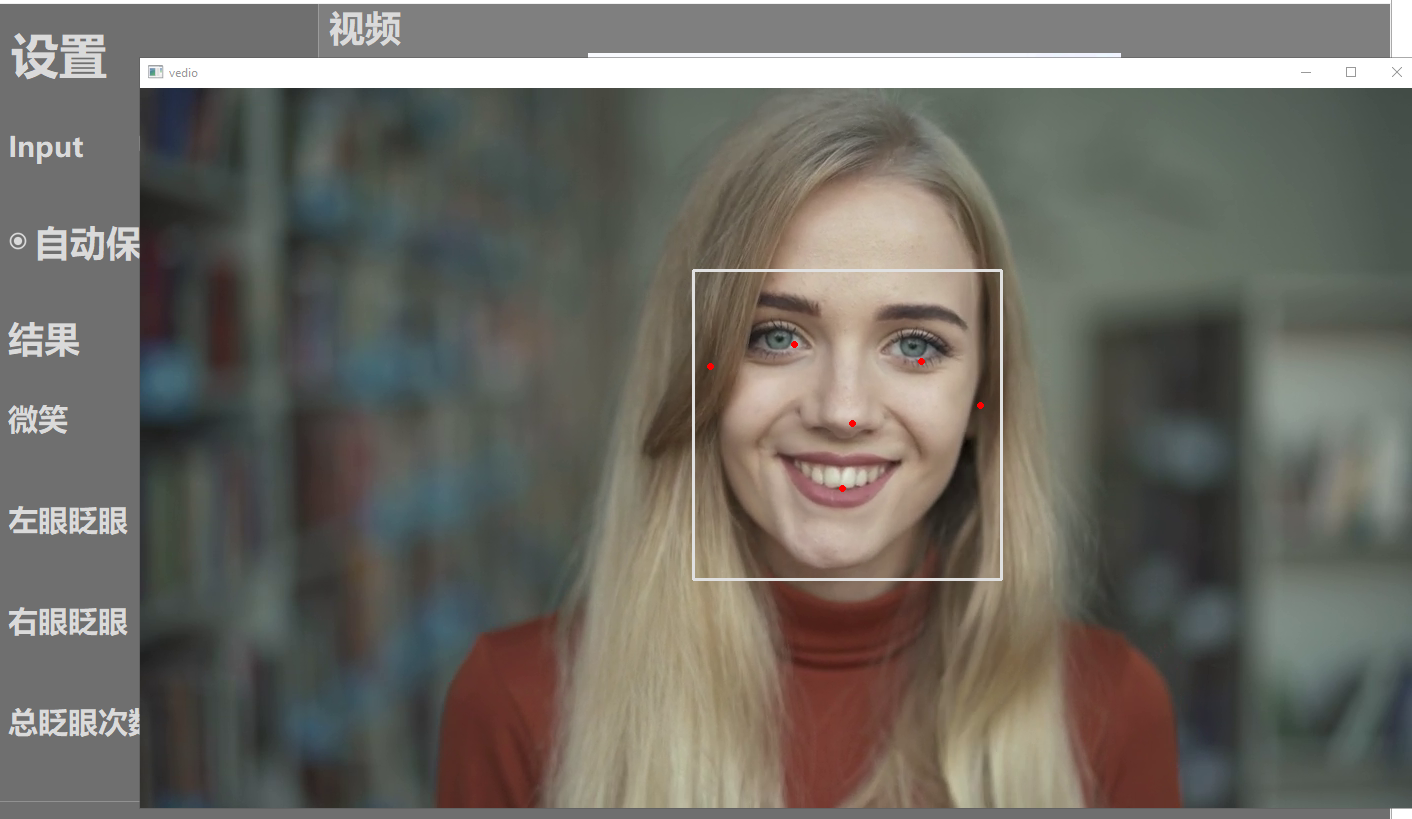
也可以加载电脑摄像头,进行实时监测。
注意
其他检测算法都可以集成到这个系统里面,实现一个封装利用。需要代码的私信我。