1. 人脸关键点检测介绍
人脸关键点检测是检测人脸上的一些特征,通常检测点的数量为5,68,98点。
其流程为:输入一张图片->网络模型->关键点。
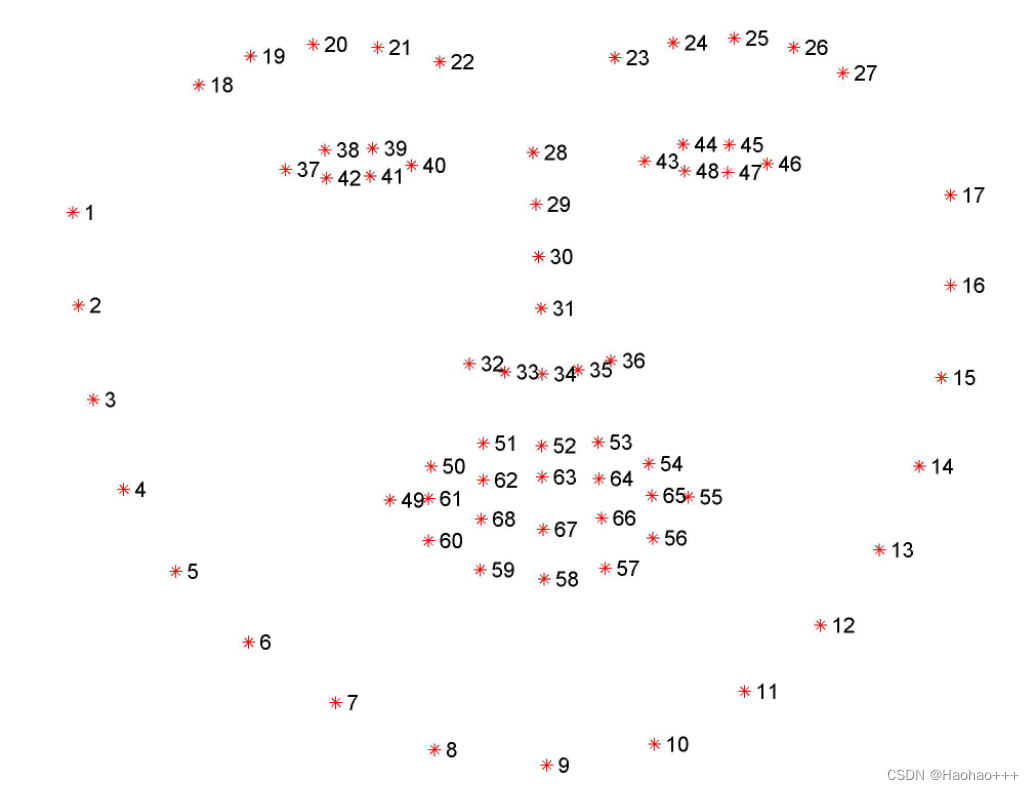
此博客以68点为例实现人脸关键点检测。
如图:
实现步骤:
- 获得到人脸图片以及其关键点坐标,也就是数据集。
- 数据处理
- 构建网络模型
- 训练模型
- 预测图片
2. 数据集
链接:https://pan.baidu.com/s/14W6OIU3h3FVwSEoEmlx8xA 提取码:bj9n
或者登录:https://aistudio.baidu.com/aistudio/datasetdetail/69065
3. 数据预处理
灰度化和数据归一化
由于是对人脸的特征点进行预测,对颜色是不敏感的,所以我们可以把图片进行灰度化处理,然后对图片进行归一化,再将将坐标点放缩到 [-1, 1]加快模型训练速度。
Resize和RandomCrop
将图片调整为指定大小并随机位置裁剪输入的图像,也就是数据增强。
4. 构建网络模型
我们使用mobilenetv2作为主干网络进行特征提取,只需在网络模型后面增加一层ReLU函数和一层输出为68的点的线性层即可。
from tensorflow.keras.layers import (
    Activation, BatchNormalization, Conv2D, DepthwiseConv2D, Dropout,ZeroPadding2D, Add, Dense,
    GlobalAveragePooling2D, Input, Reshape
)
from tensorflow.keras.models import Model
from tensorflow.keras import backend as K

def correct_pad(inputs, kernel_size):
    img_dim = 1
    input_size = K.int_shape(inputs)[img_dim:(img_dim + 2)] # 224, 224


    if isinstance(kernel_size, int):
        kernel_size = (kernel_size, kernel_size) # 1,1

    if input_size[0] is None:
        adjust = (1, 1)
    else:
        adjust = (1 - input_size[0] % 2, 1 - input_size[1] % 2) # 1, 1

    correct = (kernel_size[0] // 2, kernel_size[1] // 2) # 0,0

    return ((correct[0] - adjust[0], correct[0]),
            (correct[1] - adjust[1], correct[1]))

# 保证特征层为8得倍数
def _make_divisible(v, divisor=8, min_value=None):
    if min_value is None:
        min_value = divisor
    new_v = max(min_value, int(v + divisor / 2) // divisor * divisor)
    if new_v < 0.9 * v:
        new_v += divisor
    return new_v

def relu6(x):
    return K.relu(x, max_value=6)

def Conv2D_block(inputs, filters, kernel_size=(3, 3), strides=(1, 1)):
    x = Conv2D(
        filters=filters, kernel_size=kernel_size, padding='valid',
        use_bias=False, strides=strides
    )(inputs)
    x = BatchNormalization(epsilon=1e-3,
                           momentum=0.999)(x)
    x = Activation(relu6)(x)

    return x

def bottleneck(inputs, expansion, stride, alpha, filters):
    in_channels = K.int_shape(inputs)[-1]
    pointwise_conv_filters = int(filters * alpha)
    pointwise_filters = _make_divisible(pointwise_conv_filters, 8)
    x = inputs
    # 数据扩充
    x = Conv2D(expansion * in_channels,
               kernel_size=1,
               padding='same',
               use_bias=False,
               activation=None)(x)
    x = BatchNormalization(epsilon=1e-3,
                           momentum=0.999)(x)
    x = Activation(relu6)(x)

    if stride == 2:
        x = ZeroPadding2D(padding=correct_pad(x, 3))(x)

    # 深度卷积
    x = DepthwiseConv2D(kernel_size=3,
                        strides=stride,
                        activation=None,
                        use_bias=False,
                        padding='same' if stride == 1 else 'valid')(x)
    x = BatchNormalization(epsilon=1e-3,
                           momentum=0.999)(x)

    x = Activation(relu6)(x)

    # 1x1卷积用于改变通道数
    x = Conv2D(pointwise_filters,
               kernel_size=1,
               padding='same',
               use_bias=False,
               activation=None)(x)

    x = BatchNormalization(epsilon=1e-3,
                           momentum=0.999)(x)

    if (in_channels == pointwise_filters) and stride == 1:
        return Add()([inputs, x])
    return x


def MobilenetV2(inputs, alpha=1.0, dropout=1e-3, classes=17):

    first_block_filters = _make_divisible(32 * alpha, 8)
    x = ZeroPadding2D(padding=correct_pad(inputs, 3))(inputs)
    x = Conv2D_block(x, filters=first_block_filters, kernel_size=3, strides=(2, 2))

    x = bottleneck(x, filters=16, alpha=alpha, stride=1, expansion=1)

    x = bottleneck(x, filters=24, alpha=alpha, stride=2, expansion=6)
    x = bottleneck(x, filters=24, alpha=alpha, stride=1, expansion=6)

    x = bottleneck(x, filters=32, alpha=alpha, stride=2, expansion=6)
    x = bottleneck(x, filters=32, alpha=alpha, stride=1, expansion=6)
    x = bottleneck(x, filters=32, alpha=alpha, stride=1, expansion=6)
    x = bottleneck(x, filters=64, alpha=alpha, stride=2, expansion=6)
    x = bottleneck(x, filters=64, alpha=alpha, stride=1, expansion=6)
    x = bottleneck(x, filters=64, alpha=alpha, stride=1, expansion=6)
    x = bottleneck(x, filters=64, alpha=alpha, stride=1, expansion=6)

    x = bottleneck(x, filters=96, alpha=alpha, stride=1, expansion=6)
    x = bottleneck(x, filters=96, alpha=alpha, stride=1, expansion=6)
    x = bottleneck(x, filters=96, alpha=alpha, stride=1, expansion=6)
    x = bottleneck(x, filters=160, alpha=alpha, stride=2, expansion=6)
    x = bottleneck(x, filters=160, alpha=alpha, stride=1, expansion=6)
    x = bottleneck(x, filters=160, alpha=alpha, stride=1, expansion=6)

    x = bottleneck(x, filters=320, alpha=alpha, stride=1, expansion=6)

    if alpha > 1.0:
        last_block_filters = _make_divisible(1280 * alpha, 8)
    else:
        last_block_filters = 1280

    x = Conv2D_block(x, filters=last_block_filters, kernel_size=1, strides=(1, 1))

    x = GlobalAveragePooling2D()(x)
    x = Dropout(dropout, name='dropout')(x)
    x = Dense(1000)(x)
    x = Dense(512)(x)
    x = Activation('relu')(x)
    x = Dense(classes)(x)
    return x


if __name__ == '__main__':
    inputs = Input(shape=(224,224,1))
    classes = 136
    model = Model(inputs=inputs, outputs=MobilenetV2(inputs=inputs, classes=classes))

    model.summary()
5. 训练模型
评估指标
人脸关键点一般是NMS作为评估指标,即所有预测点和真实标签之间的L2 Norm,在除以关键点的个数x两只眼睛的距离。
e = ∑ i = 1 N ∣ ∣ x i − x i ∗ ∣ ∣ 2 N × d e=\frac{\sum^N_{i=1}||x_i - x^*_i||_2}{N \times d} e=N×d∑i=1N∣∣xi−xi∗∣∣2
其中:
x i x_i xi为预测第 i i i个的坐标。
x i ∗ x^*_i xi∗为第 i i i个真实标签。
d d d为距离,两眼瞳孔距离或者两眼外眼角距离。
def nme(y_true, y_pred):

    y_true = np.array(y_true, np.float32).reshape((-1, 2))
    y_pred = np.array(y_pred, np.float32).reshape((-1, 2))

    interocular = np.linalg.norm(y_true[36, ] - y_true[45, ])
    rmse = np.sum(np.linalg.norm(y_pred - y_true, axis=1)) / (interocular * y_pred.shape[0])
    return rmse
损失函数
使用SmoothL1Loss。
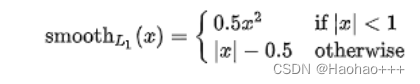
SmoothL1Loss对于离群点更加鲁棒,回归更好。
import tensorflow as tf

def SmoothL1Loss(delta=1.0):
    def _SmoothL1Loss(y_true, y_pred):
        loss = tf.keras.losses.huber(y_true, y_pred, delta=delta)
        loss = tf.reduce_mean(loss)
        return loss
    return _SmoothL1Loss
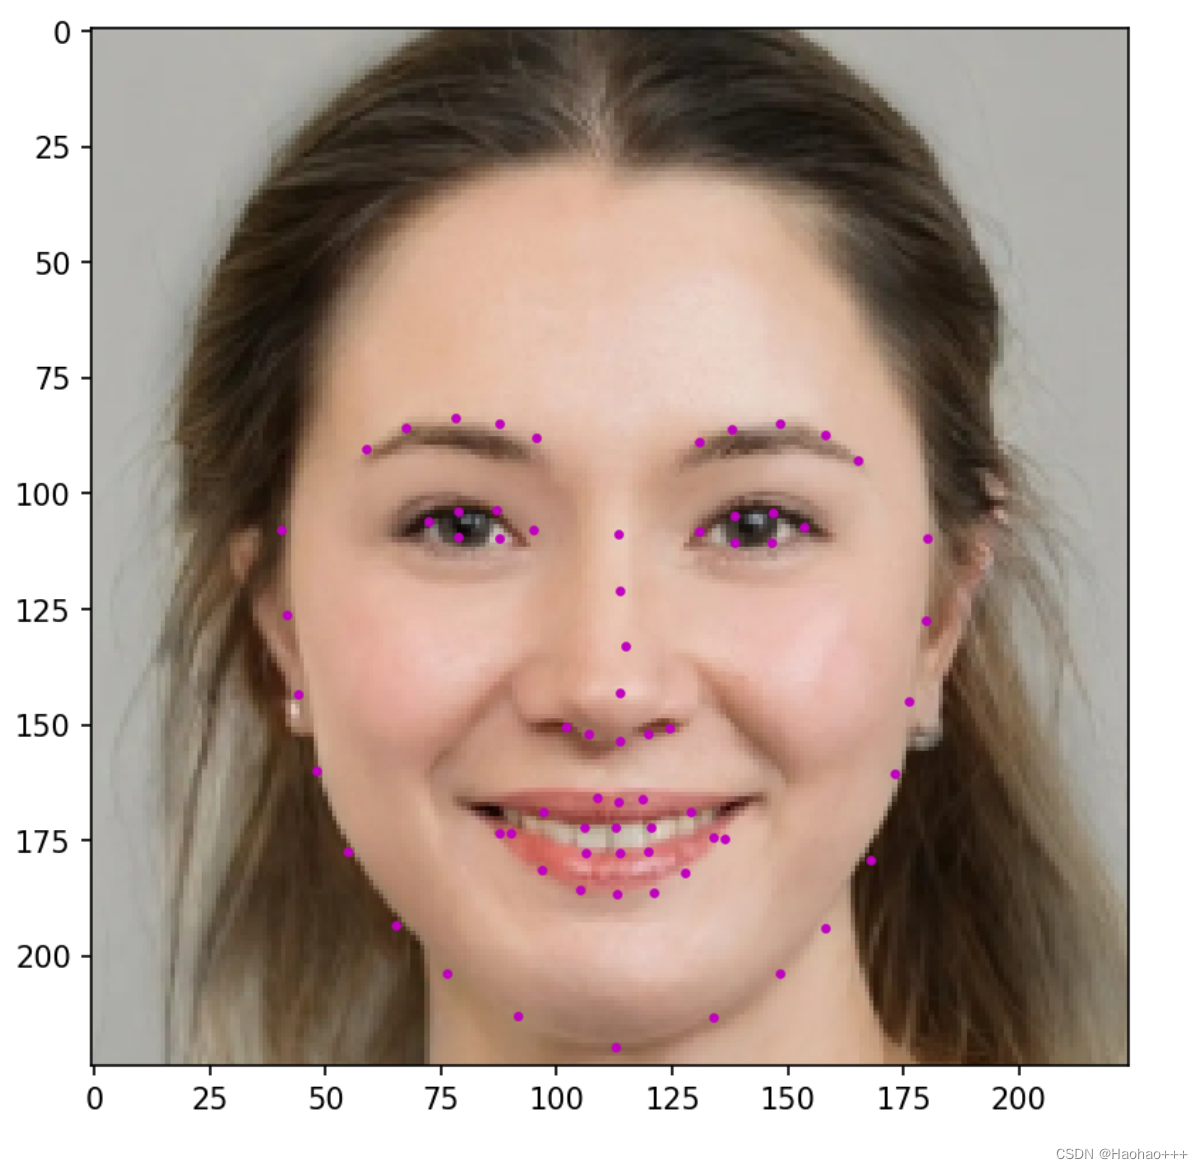
6. 预测图片
效果如下:
7. 代码仓库
gitee地址:https://gitee.com/Hao_gg/facekeypoints-tf2
github地址:https://github.com/hao-ux/facekeypoints-tf2