前言
本章会介绍Vue的几个有用的知识点v-once,ref,provide,inject。当我们学会了如何将Dom元素渲染出来后接下来就是性能的考验了,因为我们不仅要展示出界面,还应该让界面流畅的运行,所以控制渲染的次数是很有必要的,这时v-once就派上用场了;有时我们需要获取到dom 节点以及组件的引用,我们就需要ref来实现,另外还有一对很有用的关键字就是provide/inject,它允许我们将值从父组件传递到孙子组件。
示例解析
1.v-once的使用
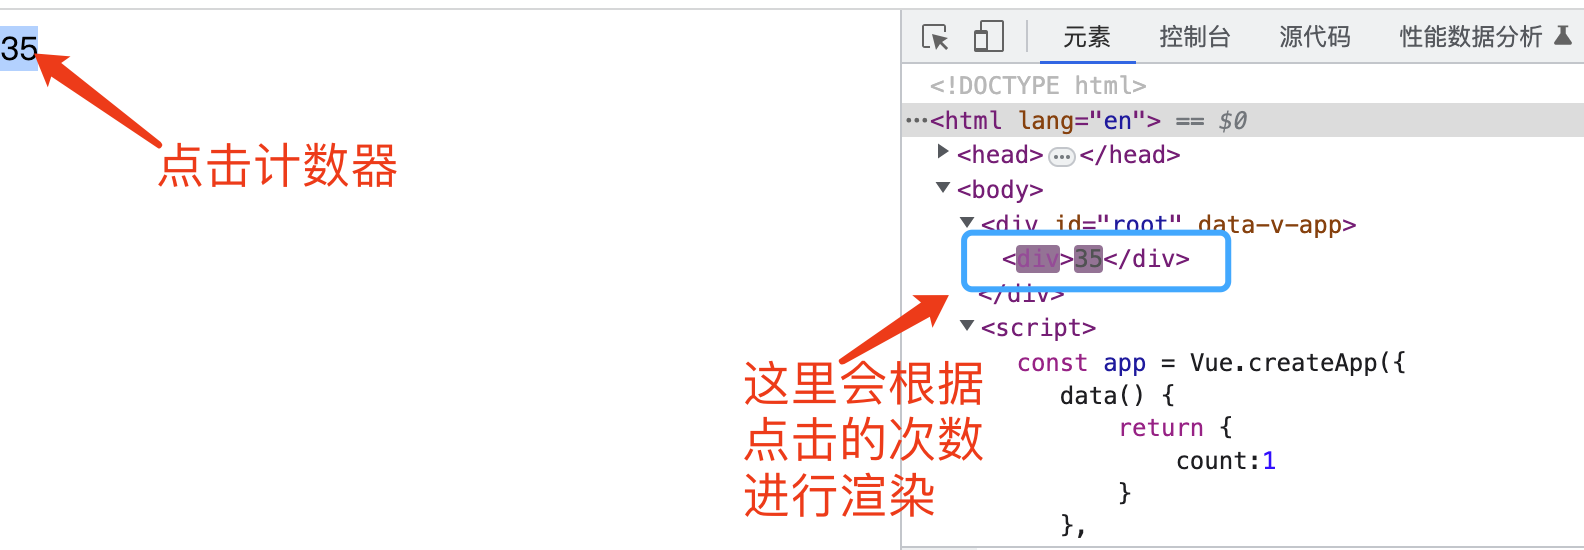
为了演示,我们使用一个div来展示一个数字,点击div这个数字会做加一操作然后再次显示,代码如下:
<!DOCTYPE html>
<html lang="en">
<head>
    <meta charset="UTF-8">
    <meta http-equiv="X-UA-Compatible" content="IE=edge">
    <meta name="viewport" content="width=device-width, initial-scale=1.0">
    <title>V-Once的使用</title>
    <script src="https://unpkg.com/vue@next"></script>
</head>
<body>
    <div id="root"></div>
</body>
<script>

 const app = Vue.createApp({


    data() {


        return {


            count:1
        }
    },
        template:
        `
        <div @click="count+=1">
           {

       {count}}
        </div>
        `
    });
    const vm = app.mount('#root');
</script>
</html>
这时我们每点击一次div,都会重新渲染一下dom,如下图所示:
 这时我们给要展示的div加上v-once关键字代码如下:
<!DOCTYPE html>
<html lang="en">
<head>
    <meta charset="UTF-8">
    <meta http-equiv="X-UA-Compatible" content="IE=edge">
    <meta name="viewport" content="width=device-width, initial-scale=1.0">
    <title>V-Once的使用</title>
    <script src="https://unpkg.com/vue@next"></script>
</head>
<body>
    <div id="root"></div>
</body>
<script>

 const app = Vue.createApp({


    data() {


        return {


            count:1
        }
    },
        template:
        `
        <div @click="count+=1" v-once>
           {

       {count}}
        </div>
        `
    });
    const vm = app.mount('#root');
</script>
</html>
这时再点击div,会发现不会再重复渲染了,当然也不会显示计数器增加一之后的值了,因为只渲染一次嘛
注:这个例子只是为了展示v-once的用法
2.使用ref操作dom节点以及调用子组件的函数
Vue没有出现之前,我们要获取dom节点并操作它需要使用js去获取然后再操作很麻烦,但是在Vue中获取和操作dom元素却很简单,使用ref就行,并且当子组件中定义了一个方法时,我们在父组件想要调用这个方法也可以使用ref,请看下面的代码演示
首先我们定义一个组件,以一个对话框的形式展示hello world,并且定义了一个sayHello()方法
  app.component('common-item',{
        methods: {
            sayHello(){
                alert('hello')
            }
        },
        template:`<div>hello world</div>`
    });
在Vue模版中引用组件,并且我们在组件的父div和组件上都加上ref关键字
      template:
        `
        <div ref="GetDiv">
           <common-item ref="common" />
        </div>
        `
接下来我们在Vue的mounted函数中去验证我们获取dom元素以及操作dom的方法
   mounted() {
        // 获取dom必须在mounted获取
        console.log(this.$refs.GetDiv);
        console.log(this.$refs.common);
        this.$refs.GetDiv.innerHTML='hello';
        this.$refs.common.sayHello();
    },
我们打印了获取到的div和子组件,并且将我们获取到的div修改成了hello world ,并且调用了子组件的sayHello方法
运行结果:

所有代码如下:
<!DOCTYPE html>
<html lang="en">
<head>
    <meta charset="UTF-8">
    <meta http-equiv="X-UA-Compatible" content="IE=edge">
    <meta name="viewport" content="width=device-width, initial-scale=1.0">
    <title>ref的使用</title>
    <script src="https://unpkg.com/vue@next"></script>
</head>
<body>
    <div id="root"></div>
</body>
<script>

 const app = Vue.createApp({


    mounted() {


        // 获取dom必须在mounted获取
        console.log(this.$refs.GetDiv);
        console.log(this.$refs.common);
        this.$refs.GetDiv.innerHTML='hello';
        this.$refs.common.sayHello();
    },

        template:
        `
        <div ref="GetDiv">
           <common-item ref="common" />
        </div>
        `
    });

    app.component('common-item',{


        methods: {


            sayHello(){


                alert('hello')
            }
        },
        template:`<div>hello world</div>`
    });

    const vm = app.mount('#root');
</script>
</html>
3.provide和inject的使用
前面我们已经知道了如何在父子组件之间传值,但是现在假如我们一个界面中有三个组件,分别时父组件,子组件,孙子组件,我们要把值从父组件传递到孙子组件,按照以前的做法,我们需要先把值传递给子组件,再由子组件传递给孙子组件,特别的麻烦,所以出现了provide和inject这两个关键字,这和java的IOC有点相似,父组件提供数据的时候通过provide去提供,想要使用的组件使用inject接收,这样就非常方便了,请看演示代码
首先我们定义两个组件,一个子组件child,另一个孙子组件,child-child,在子组件中使用孙子组件,孙子组件使用inject来获取父组件提供的值,代码如下:
    app.component('child',{
        template:`<child-child />`
    });

    app.component('child-child',{
        inject:['count'],
        template:`<div>{

   {count}}</div>`
    });
然后在父组件中使用子组件
 template:
        `
        <div>
           <child />
        </div>
        `
提供值给孙子组件:
    data() {
        return {
            count:456
        }
    },

    provide(){
        return{count:this.count}
        },
这样就可以不通过子组件,而将数据从父组件传递到孙子组件了,所有代码如下:
<!DOCTYPE html>
<html lang="en">
<head>
    <meta charset="UTF-8">
    <meta http-equiv="X-UA-Compatible" content="IE=edge">
    <meta name="viewport" content="width=device-width, initial-scale=1.0">
    <title>provide/inject的使用</title>
    <script src="https://unpkg.com/vue@next"></script>
</head>
<body>
    <div id="root"></div>
</body>
<script>

 const app = Vue.createApp({


    data() {


        return {


            count:456
        }
    },

    provide(){


        return{

      count:this.count}
        },

    template:
        `
        <div>
           <child />
        </div>
        `
    });

    app.component('child',{


        template:`<child-child />`
    });

    app.component('child-child',{


        inject:['count'],
        template:`<div>{

       {count}}</div>`
    });
    const vm = app.mount('#root');
</script>
</html>
总结
本文主要介绍了一下几个知识点
1.使用v-once可以让dom元素只渲染一次
2.使用ref可以获取到子组件的引用和dom元素
3.使用provide和inject可以不通过子组件将数据从父组件传递到孙子组件