前言
当我们的UI界面显示出来后,需要和用户进行交互,即用户点击某个控件,比如是一个按钮,需要跳转到另一个界面的时候,如果直接跳转到另一个界面,功能是实现了,但是未免有些生硬,因为用户体验不是很好,这时就需要动画的润色了,添加一个好的转场动画能让用户使用起来拥有更好的体验,并且动画还可以让一些耗时的任务看起来不那么“耗时”,比如当用户下载一个文件时,假如没有动画,系统一直卡在下载当那个页面(其实系统没有卡住,只是在下载,用户以为卡住了),那么下载完文件后就会直接显示一个下载完成的界面给到用户,用户是很蒙的。但是使用一个进度条动画,告诉用户文件正在下载的话,用户的体验会更好,至少他知道此时系统没有卡死。所以本文将介绍使用Vue实现动画效果。
示例解析
使用Vue实现过渡动画
实现一个过渡动画,过渡动画的效果是由蓝色渐渐变成红色,有一个switch按钮,点击时会做效果的切换,如果当前是蓝色,点击会过渡到红色,如果当前是红色,点击会过渡到蓝色。效果如下:

代码实现如下:
首先我们需要定义一个CSS过渡动画,如下:
  <style>
        /* 过渡动画 */
    .transition{


       transition: 3s background-color ease;
    }
  </style>
然后在Vue中使用:
 const app = Vue.createApp({
        data() {
            return {
                styleObj:{
                    background:'blue'
                }
            }
        },
        methods: {
            handleClick(){
                if(this.styleObj.background === 'blue'){
                    this.styleObj.background = 'red';
                }else{
                    this.styleObj.background = 'blue';
                }
            }
        },
        template:
        `
        <div class="transition" :style="styleObj">
        hello world
        </div>
        <button @click="handleClick">switch</button>
        `
    });
在Vue中使用的时候,我们定义了一个对象styleObj 表示当前的背景色,当我们点击switch按钮时,通过js方法handleClick将当前演示切换到红色,再点击又切换回来,实现的方案就是我们使用vue将css给添加到我们的vue模版div中。
所有代码如下:
<!DOCTYPE html>
<html lang="en">
<head>
    <meta charset="UTF-8">
    <meta http-equiv="X-UA-Compatible" content="IE=edge">
    <meta name="viewport" content="width=device-width, initial-scale=1.0">
    <title>过渡动画</title>
    <style>
        /* 过渡动画 */
        .transition{


            transition: 3s background-color ease;
        }
    </style>
    <script src="https://unpkg.com/vue@next"></script>
</head>
<body>
    <div id="root"></div>
</body>
<script>

 const app = Vue.createApp({


        data() {


            return {


                styleObj:{


                    background:'blue'
                }
            }
        },
        methods: {


            handleClick(){


                if(this.styleObj.background === 'blue'){


                    this.styleObj.background = 'red';
                }else{


                    this.styleObj.background = 'blue';
                }
            }
        },
        template:
        `
        <div class="transition" :style="styleObj">hello world </div>
        <button @click="handleClick">switch</button>
        `
    });

    const vm = app.mount('#root');
</script>
</html>
使用Vue实现动画效果
学会了过渡动画,接下来我们再来看看动画效果,我们可以使用Vue实现一个动画效果,使用一个CSS帧动画,让一个div往左移100像素,退到50像素最后恢复到原来的位置,效果如下:

代码实现如下:
首先定义一个CSS帧动画:
  <style>
        @keyframes leftToRight {


            0%{


                transform: translateX(-100px);
            }

            50%{


                transform: translateX(-50px);
            }

            0%{


                transform: translateX(0px);
            }
        }
        .animation{


            animation: leftToRight 3s;
        }
    </style>
然后在Vue中使用时:
const app = Vue.createApp({
data() {
return {
animate:{
animation:true
}
}
},
template:
`
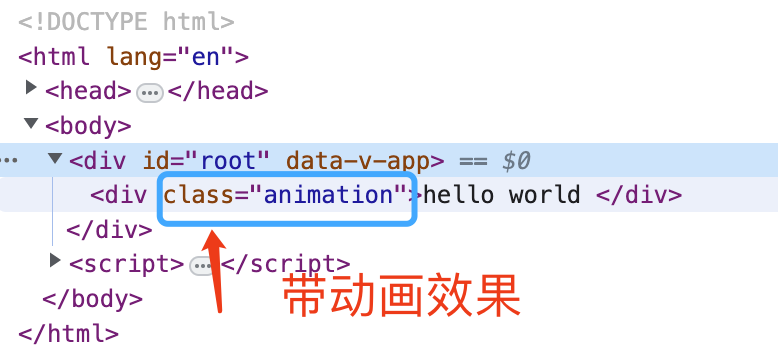
<div :class="animate">hello world </div>
`
});
我们使用一个animate对象去控制animate,这个animate即为是否带动画效果,如果带动画效果,animation为true会直接在需要带动画效果的div上加上我们定义的animation。若是animation为false,则不会加上这个我们定义的名为animation的class,也就不会带动画效果了
所有代码如下:
<!DOCTYPE html>
<html lang="en">
<head>
    <meta charset="UTF-8">
    <meta http-equiv="X-UA-Compatible" content="IE=edge">
    <meta name="viewport" content="width=device-width, initial-scale=1.0">
    <title>动画效果</title>
    <style>
        @keyframes leftToRight {


            0%{


                transform: translateX(-100px);
            }

            50%{


                transform: translateX(-50px);
            }

            0%{


                transform: translateX(0px);
            }
        }
        .animation{


            animation: leftToRight 3s;
        }
    </style>
    <script src="https://unpkg.com/vue@next"></script>
</head>
<body>
    <div id="root"></div>
</body>
<script>

 const app = Vue.createApp({


        data() {


            return {


                animate:{


                    animation:true
                }
            }
        },

        template:
        `
        <div :class="animate">hello world </div>
        `
    });

    const vm = app.mount('#root');
</script>
</html>
完成一个组件的转场动画
接下来我们利用vue提供的
<transition></transition>完成一个转场动画,点击switch按钮,hello world先以帧动画的方式进程,然后再点击switch按钮,hello world再以过渡动画的方式出场。效果如下:

代码实现如下:
首先我们先在CSS中定义好动画效果:
   <style>
        /* 定义动画效果 */
        @keyframes shake {


            0% {


                transform: translateX(-100px);;
            }

            50% {


                transform: translateX(-50px);;
            }
            100% {


                transform: translateX(50px);;
            }
        }
        /* 过渡动画 */
        .transition{


            transition: 3s background-color ease;
        }

        /* 让opacity做一个动画的缓慢替换 */
        .v-enter-active{


            animation:shake 3s;
        }

        .v-leave-active{


            transition: opacity 3s ease-out;
        }
           /* 入场动画 */
        .v-enter-from{


            opacity: 0;
        }

        /* 动画结束 */
        .v-enter-to{


            opacity: 1;
        }

        .v-leave-to{


            opacity: 0;
        }
    </style>
进场的时候使用帧动画将显示内容的div先向左移动100px,然后是50px,然后再向右移动50px到了显示的位置,然后用过渡动画定义一个淡入的效果,即将透明度由0变成1,使用vue的类名
v-enter-from表示进场动画开始的时候,定义透明度opacity为0,v-enter-active表示进场动画在中间状态时,我们使用帧动画做一个效果,v-enter-to表示进场动画结束时,将透明度opacity置为1,表示完全显示,v-leave-from表示离场动画开始,v-leave-active表示离场动画在中间状态开始执行,v-leave-to表示离场动画结束时,离场时我们将透明度由1变成0。
注意:在定义离场动画时,眼尖的读者可能会发现我们没有使用v-leave-from,这里其实加上和不加一样,因为离场动画的开始透明度本来就是1,即内容本来就是显示的,所以没有必要加上。当然加上也是正确的
Vue在使用的时候,使用<transition></transition>标签来使用我们定义的动画,代码如下:
 const app = Vue.createApp({
        data() {
            return {
                show:false
            }
        },
        methods: {
            handleClick(){
                this.show = !this.show;
            }
        },

        // 加了自定义的名字
        template:
        `
        <transition>
            <div v-if="show" >hello world </div>
        </transition>
        <button @click="handleClick">switch</button>
        `
    });
我们使用一个
show变量来控制div的入场和离场动画的执行,所有代码如下
<!DOCTYPE html>
<html lang="en">
<head>
    <meta charset="UTF-8">
    <meta http-equiv="X-UA-Compatible" content="IE=edge">
    <meta name="viewport" content="width=device-width, initial-scale=1.0">
    <title>过渡与动画--入场和出场</title>
    <style>
        /* 定义动画效果 */
        @keyframes shake {


            0% {


                transform: translateX(-100px);;
            }

            50% {


                transform: translateX(-50px);;
            }


            100% {


                transform: translateX(50px);;
            }

        }
        /* 过渡动画 */
        .transition{


            transition: 3s background-color ease;
        }

        /* 让opacity做一个动画的缓慢替换 */
        .v-enter-active{


            animation:shake 3s;
        }

        .v-leave-active{


            transition: opacity 3s ease-out;
        }
           /* 入场动画 */
        .v-enter-from{


            opacity: 0;
        }

        /* 动画结束 */
        .v-enter-to{


            opacity: 1;
        }
        .v-leave-to{


            opacity: 0;
        }
    </style>
    <script src="https://unpkg.com/vue@next"></script>
</head>
<body>
    <div id="root"></div>
</body>
<script>
 const app = Vue.createApp({


        data() {


            return {


                show:false
            }
        },
        methods: {


            handleClick(){


                this.show = !this.show;
            }
        },

        template:
        `
        <transition>
            <div v-if="show" >hello world </div>
        </transition>
        <button @click="handleClick">switch</button>
        `
    });

    const vm = app.mount('#root');
</script>
</html>
在上面定义动画的时候,我们需要使用.v-enter-active之类的Vue专有关键字定义,那这个名字可以修改吗?答案是可以的,首先在transition标签中加上我们要定义的名字,假设为“hello”
   <transition name="hello">
     <div v-if="show" >hello world </div>
  </transition>
使用的时候将.v-xxxx-xx中的v使用hello代替,如下所示:
 <style>
        /* 定义动画效果 */
        @keyframes shake {


            0% {


                transform: translateX(-100px);;
            }
            50% {


                transform: translateX(-50px);;
            }
            100% {


                transform: translateX(50px);;
            }
        }
        /* 过渡动画 */
        .transition{


            transition: 3s background-color ease;
        }
        /* 入场动画 */
        .hello-enter-from{


            opacity: 0;
        }
        /* 让opacity做一个动画的缓慢替换 */
        .hello-enter-active{


            animation:shake 3s;
        }
        .hello-leave-active{


            transition: opacity 3s ease-out;
        }
        /* 动画结束 */
        .hello-enter-to{


            opacity: 1;
        }
        .hello-leave-to{


            opacity: 0;
        }
    </style>
效果与我们上面实现的转场动画完全一样,那有读者说我就想使用自己定义的名字,不要啥v-enter-from,v-leave-to之类的,可以吗?答案是当然可以
使用transition标签时,我们在标签中加上下面的属性
<transition
  enter-active-class="你定义的名字"
  leave-active-class="你定义的名字">
   <div v-show="show" >hello world </div>
</transition>
然后定义动画效果时使用你自定义的名字就行了,Vue的这个支持自定义名字的这个功能非常的有用,因为我们可以借助它来接入第三方动画库的效果。比如我们接入一个Animate.css动画库中的一个闪烁效果Animate.css官网
<transition
  enter-active-class="animate__animated animate__flash"
  leave-active-class="animate__animated animate__flash">
  <div v-show="show" >hello world </div>
</transition>
这样就可以完成一个三方动画效果的接入了,直接把三方实现的CSS动画效果的样式类名给到Vue的transition就可以了
所有代码如下:
<!DOCTYPE html>
<html lang="en">
<head>
    <meta charset="UTF-8">
    <meta http-equiv="X-UA-Compatible" content="IE=edge">
    <meta name="viewport" content="width=device-width, initial-scale=1.0">
    <link
    rel="stylesheet"
    href="https://cdnjs.cloudflare.com/ajax/libs/animate.css/4.1.1/animate.min.css"
  />
    <title>接入三方动画效果</title>

    <script src="https://unpkg.com/vue@next"></script>
</head>
<body>
    <div id="root"></div>
</body>
<script>

    // 过渡与动画
 const app = Vue.createApp({


        data() {


            return {


                show:false
            }
        },
        methods: {


            handleClick(){


                this.show = !this.show;
            }
        },

        template:
        `
        <transition
            enter-active-class="animate__animated animate__flash"
            leave-active-class="animate__animated animate__flash">
            <div v-show="show" >hello world </div>
        </transition>
        <button @click="handleClick">switch</button>
        `
    });

    const vm = app.mount('#root');
</script>
</html>
运行效果:

总结
本文主要介绍了使用Vue实现动画效果,以及接入第三方动画的效果,本文只是实现了一些简单的动画,意在入门,读者有更好的动画实现方式,欢迎评论区交流