KVM快照就是将虚拟机在某一个时间点上的磁盘内容(全部/或部分)、内存和设备状态保存一下,以备将来恢复之用。
一、内存状态快照:只是保持内存和虚机使用的其它资源的状态。如果虚机状态快照在做和恢复之间磁盘没有被修改,那么虚机将保持一个持续的状态;如果被修改了,那么很可能导致数据corruption。
virsh save命令,对运行中的vm01运行 “virsh save” 命令。命令执行完成后,vm01变成 “shut off” 状态。
[root@localhost ~]# virsh save --help
  NAME
    save - save a domain state to a file

  SYNOPSIS
    save <domain> <file> [--bypass-cache] [--xml <string>] [--running] [--paused] [--verbose]

  DESCRIPTION
    Save the RAM state of a running domain.

  OPTIONS
    [--domain] <string>  domain name, id or uuid
    [--file] <string>  where to save the data
    --bypass-cache   avoid file system cache when saving
    --xml <string>   filename containing updated XML for the target
    --running        set domain to be running on restore
    --paused         set domain to be paused on restore
    --verbose        display the progress of save
使用save命令进行内存快照的制作,把当前的内存数据保存到一个文件。
[root@localhost ~]# mkdir /kvm/backup
mkdir: cannot create directory ‘/kvm/backup’: No such file or directory
[root@localhost ~]# mkdir -p /kvm/backup
[root@localhost ~]# virsh list
 Id    Name                           State
----------------------------------------------------
 2     vm01                           running

[root@localhost ~]# virsh save vm01 /kvm/backup/vm01-save --bypass-cache --running

Domain vm01 saved to /kvm/backup/vm01-save
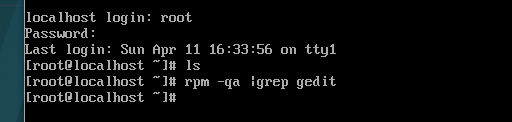
再次开启vm01,在vm01中安装一个gedit软件包,并在根目录下创建一个测试文件。

重新制定一个快照,并查看。
[root@localhost ~]# virsh save vm01 /kvm/backup/vm01-save2 --bypass-cache --running --verbose
Save: [100 %]
Domain vm01 saved to /kvm/backup/vm01-save2

[root@localhost ~]# ll -h /kvm/backup/
total 1.2G
-rw-------. 1 root root 404M Apr 28 15:12 vm01-save
-rw-------. 1 root root 765M Apr 28 15:30 vm01-save2
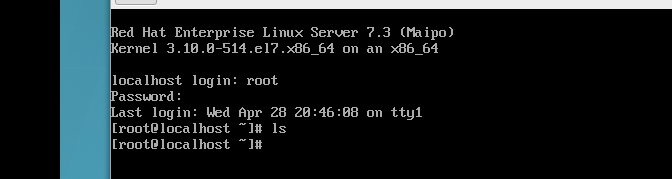
vm01关机后,使用virsh restore来恢复。
首先使用vm01-save来恢复,发现关机的过程中有报错

再使用vm01-save2来恢复,一切正常。

再次打开vm01,将之前安装的gedit和ceshi文件都删除,关机后再使用vm01-save恢复,则一切正常。
恢复前删除gedit和ceshi文件。

恢复后:

内存快照操作比较简单,但是它对还原点的要求很高,如果有磁盘文件和之前还原点的存在不一致,就会出现错误。所以不推荐使用。
二、磁盘快照:磁盘的内容在某个时间点上被保存,然后可以被恢复。
磁盘快照有两种:
1、内部快照 - 使用单个的 qcow2 的文件来保存快照和快照之后的改动。这种快照是 libvirt 的默认行为,现在的支持很完善(创建、回滚和删除),但是只能针对 qcow2 格式的磁盘镜像文件,而且其过程较慢等。
2、外部快照 - 快照是一个只读文件,快照之后的修改是另一个 qcow2 文件中。外置快照可以针对各种格式的磁盘镜像文件。外置快照的结果是形成一个 qcow2 文件链:original <- snap1 <- snap2 <- snap3。
快照链就是多个快照组成的关系链,这些快照按照创建时间排列成链,像下面这样,本文章要解释的就是怎么创建这条链,链中快照的相互关系,缩短链,以及如何利用这条链回滚我们的虚拟机到某个状态
base-image<–guest1<–snap1<–snap2<–snap3<–snap4<–当前(active)
如上,base-image是制作好的一个qcow2格式的磁盘镜像文件,它包含有完整的OS以及引导程序,现在以这个base-image为模板创建多个虚拟机,简单点方法,每创建一个虚拟机我们就把这个镜像完整复制一份,但这种做法效率底下,满足不了生产需要,这是就用到了qcow2镜像的特性copy-on-write
qcow2(qemu copy-on-write)格式镜像支持快照,具有创建一个base-image,以及在base-image(backing file)基础上创建多个copy-on-write overlays镜像的能力,
解释下backing file和overlay, 上面那条链中,我们为base-image创建一个guest1,那么此时base-image就是guest1的backing file,guest1就是base-image的overlay,同理,为guest1虚拟机创建了一个快照snap1,此时guest1就是snap1的backing file,snap1是guest1的overlay,backing files和overlays十分有用,可以快速的创建瘦装备实例,特别是在开发测试过程中可以快速回滚到之前某个状态。
磁盘内部快照:使用virsh snapshot-create-as命令。
[root@localhost ~]# virsh snapshot-create-as --help
  NAME
    snapshot-create-as - Create a snapshot from a set of args

  SYNOPSIS
    snapshot-create-as <domain> [--name <string>] [--description <string>] [--print-xml] [--no-metadata] [--halt] [--disk-only] [--reuse-external] [--quiesce] [--atomic] [--live] [--memspec <string>] [[--diskspec] <string>]...

  DESCRIPTION
    Create a snapshot (disk and RAM) from arguments

  OPTIONS
    [--domain] <string>  domain name, id or uuid
    --name <string>  name of snapshot
    --description <string>  description of snapshot
    --print-xml      print XML document rather than create
    --no-metadata    take snapshot but create no metadata
    --halt           halt domain after snapshot is created
    --disk-only      capture disk state but not vm state
    --reuse-external  reuse any existing external files
    --quiesce        quiesce guest's file systems
    --atomic         require atomic operation
    --live           take a live snapshot
    --memspec <string>  memory attributes: [file=]name[,snapshot=type]
    [--diskspec] <string>  disk attributes: disk[,snapshot=type][,driver=type][,file=name]

运行命令后,在创建快照的过程中,vm01系统会自动切换到暂停状态,快照的数据会存在镜像文件中。
[root@localhost ~]# virsh snapshot-list vm01
 Name                 Creation Time             State
------------------------------------------------------------
 vm01-snap            2021-04-28 17:47:54 +0800 running

[root@localhost ~]# qemu-img info /var/lib/libvirt/images/vm01.dsk
image: /var/lib/libvirt/images/vm01.dsk
file format: qcow2
virtual size: 9.0G (9663676416 bytes)
disk size: 1.8G
cluster_size: 65536
Snapshot list:
ID        TAG                 VM SIZE                DATE       VM CLOCK
1         vm01-snap              401M 2021-04-28 17:47:54   02:12:29.717
Format specific information:
    compat: 1.1
    lazy refcounts: true
测试,在vm01中创建文件test和安装gedit软件包。

再回滚到快照的还原点,使用命令virsh snapshot-revert。
恢复虚拟机快照必须关闭虚拟机。
还原时需要点时间,而且会有些错误信息提示(没有记录下来),不过打开虚拟机,发现并没有影响。
虚拟机正常还原到快照的时刻。
删除快照命令为virsh snapshot-delete。
[root@localhost ~]# virsh snapshot-list vm01
 Name                 Creation Time             State
------------------------------------------------------------
 vm01-snap            2021-04-28 20:46:55 +0800 running

[root@localhost ~]# virsh snapshot-delete --help
  NAME
    snapshot-delete - Delete a domain snapshot

  SYNOPSIS
    snapshot-delete <domain> [--snapshotname <string>] [--current] [--children] [--children-only] [--metadata]

  DESCRIPTION
    Snapshot Delete

  OPTIONS
    [--domain] <string>  domain name, id or uuid
    --snapshotname <string>  snapshot name
    --current        delete current snapshot
    --children       delete snapshot and all children
    --children-only  delete children but not snapshot
    --metadata       delete only libvirt metadata, leaving snapshot contents behind

[root@localhost ~]# virsh snapshot-delete vm01 --snapshotname vm01-snap
Domain snapshot vm01-snap deleted

[root@localhost ~]# virsh snapshot-list vm01
 Name                 Creation Time             State
------------------------------------------------------------

[root@localhost ~]# qemu-img info /var/lib/libvirt/images/vm01.dsk
image: /var/lib/libvirt/images/vm01.dsk
file format: qcow2
virtual size: 9.0G (9663676416 bytes)
disk size: 1.8G
cluster_size: 65536
Format specific information:
    compat: 1.1
    lazy refcounts: true
[root@localhost ~]#
2、 外部快照 (external snapshot)- 当创建一个快照时,创建时的状态保存在当前使用的磁盘文件中,即成为一个backingfile,此时创建一个新的overlay,保存以后写入的数据,快照之后的修改是另一个 qcow2 文件中。外置快照可以针对各种格式的磁盘镜像文件。外置快照的结果是形成一个 qcow2 文件链:original <- snap1 <- snap2 <- snap3。
创建外部快照时,虚拟机需要关闭。还是使用命令snapshot-create-as来进行。
[root@localhost ~]# virsh snapshot-create-as --help
  NAME
    snapshot-create-as - Create a snapshot from a set of args

  SYNOPSIS
    snapshot-create-as <domain> [--name <string>] [--description <string>] [--print-xml] [--no-metadata] [--halt] [--disk-only] [--reuse-external] [--quiesce] [--atomic] [--live] [--memspec <string>] [[--diskspec] <string>]...

  DESCRIPTION
    Create a snapshot (disk and RAM) from arguments

  OPTIONS
    [--domain] <string>  domain name, id or uuid
    --name <string>  name of snapshot
    --description <string>  description of snapshot
    --print-xml      print XML document rather than create
    --no-metadata    take snapshot but create no metadata
    --halt           halt domain after snapshot is created
    --disk-only      capture disk state but not vm state
    --reuse-external  reuse any existing external files
    --quiesce        quiesce guest's file systems
    --atomic         require atomic operation
    --live           take a live snapshot
    --memspec <string>  memory attributes: [file=]name[,snapshot=type]
    [--diskspec] <string>  disk attributes: disk[,snapshot=type][,driver=type][,file=name]

[root@localhost ~]# virsh snapshot-list vm01
 Name                 Creation Time             State
------------------------------------------------------------

[root@localhost ~]# virsh snapshot-create-as vm01 --name vm01-snap1 --disk-only --atomic
Domain snapshot vm01-snap1 created
[root@localhost ~]# cd /var/lib/libvirt/images/
[root@localhost images]# ls
rhel7.qcow2  storage_pool  vm01_2.img  vm01.vm01-snap1
share        vm01_1.img    vm01.dsk    vm02.qcow2
[root@localhost images]# qemu-img info vm01.dsk
image: vm01.dsk
file format: qcow2
virtual size: 9.0G (9663676416 bytes)
disk size: 1.8G
cluster_size: 65536
Format specific information:
    compat: 1.1
    lazy refcounts: true
[root@localhost images]# virsh snapshot-list vm01
 Name                 Creation Time             State
------------------------------------------------------------
 vm01-snap1           2021-04-29 07:33:01 +0800 shutoff
查看到vm01下的快照,刚创建的vm01-snap1是关闭状态。而vm01的镜像文件中也不再有快照信息存在,新的快照信息是单独存放在/var/lib/libvirt/images/目录下的。
[root@localhost images]# virsh domblklist vm01
Target     Source
------------------------------------------------
vda        /var/lib/libvirt/images/vm01.vm01-snap1
vdb        /var/lib/libvirt/images/storage_pool/newone.vm01-snap1
[root@localhost images]# qemu-img info vm01.vm01-snap1
image: vm01.vm01-snap1
file format: qcow2
virtual size: 9.0G (9663676416 bytes)
disk size: 196K
cluster_size: 65536
backing file: /var/lib/libvirt/images/vm01.dsk
backing file format: qcow2
Format specific information:
    compat: 1.1
    lazy refcounts: false
[root@localhost images]# qemu-img info vm01.dsk
image: vm01.dsk
file format: qcow2
virtual size: 9.0G (9663676416 bytes)
disk size: 1.8G
cluster_size: 65536
Format specific information:
    compat: 1.1
    lazy refcounts: true
查看虚拟机磁盘信息时,发现磁盘后缀名变成了.vm01-snap1,发现vm01.vm01-snap1的信息中多了backing file的信息。虚拟机使用的是最后一个快照的磁盘(称作active),重点要理解的是快照之间是相互依赖的(上一个依赖下一个),每一部分都保存有数据,所有的快照合起来保存虚拟机的全部数据查看具体的磁盘镜像信息时。
也可以使用qemu-img info --backing-chain命令查看完整的快照链。
[root@localhost images]# qemu-img info --backing-chain vm01.vm01-snap1
image: vm01.vm01-snap1
file format: qcow2
virtual size: 9.0G (9663676416 bytes)
disk size: 196K
cluster_size: 65536
backing file: /var/lib/libvirt/images/vm01.dsk
backing file format: qcow2
Format specific information:
    compat: 1.1
    lazy refcounts: false

image: /var/lib/libvirt/images/vm01.dsk
file format: qcow2
virtual size: 9.0G (9663676416 bytes)
disk size: 1.8G
cluster_size: 65536
Format specific information:
    compat: 1.1
    lazy refcounts: true
[root@localhost images]#
开启虚拟机vm01,在vm01中创建一个新文件做测试。

重新进行了快照vm01-snap2。
再将虚拟机还原到vm01-snap1。发现存在问题。
[root@localhost vm01]# virsh snapshot-revert vm01 --snapshotname vm01-snap1
error: unsupported configuration: revert to external snapshot not supported yet
还原快照的办法:
创建一个新的active层,以backing-file文件来创建。(有两个硬盘,因此创建两个对应的文件)
[root@localhost vm01]# qemu-img create -f qcow2 -o backing_file=/var/lib/libvirt/images/vm01.dsk,backing_fmt=qcow2 /var/lib/libvirt/images/revert-vm01.qcow2
Formatting '/var/lib/libvirt/images/revert-vm01.qcow2', fmt=qcow2 size=9663676416 backing_file='/var/lib/libvirt/images/vm01.dsk' backing_fmt='qcow2' encryption=off cluster_size=65536 lazy_refcounts=off
[root@localhost images]# qemu-img create -f qcow2 -o backing_file=/var/lib/libvirt/images/storage_pool/newone.qcow2,backing_fmt=qcow2 /var/lib/libvirt/images/storage_pool/revert-newone.qcow2
Formatting '/var/lib/libvirt/images/storage_pool/revert-newone.qcow2', fmt=qcow2 size=214749184 backing_file='/var/lib/libvirt/images/storage_pool/newone.qcow2' backing_fmt='qcow2' encryption=off cluster_size=65536 lazy_refcounts=off
修改vm01的配置文件,让配置文件指向刚才创建的快照。
root@localhost ~]# cd /etc/libvirt/qemu/
[root@localhost qemu]# ls
autostart  networks  rhel_ftp.xml  vm01.xml  vm02.xml
[root@localhost qemu]# cp vm01.xml vm01.xml.bak
[root@localhost qemu]# vi vm01.xml
[root@localhost qemu]# cat vm01.xml |grep source
  <resource>
  </resource>
      <source file='/var/lib/libvirt/images/revert-vm01.qcow2'/>
      <source file='/var/lib/libvirt/images/storage_pool/revert-newone.qcow2'/>
      <source network='default'/>
再将最后一份快照的信息也做变更。
[root@localhost vm01]# cat vm01-snap2.xml |grep source
      <source file='/var/lib/libvirt/images/revert-vm01.qcow2'/>
      <source file='/var/lib/libvirt/images/storage_pool/revert-newone.qcow2'/>
    <resource>
    </resource>
        <source file='/var/lib/libvirt/images/vm01.vm01-snap1'/>
        <source file='/var/lib/libvirt/images/storage_pool/newone.vm01-snap1'/>
        <source network='default'/>
使用virsh snapshot-current命令恢复之前的状态。
[root@localhost qemu]# virsh snapshot-current --help
  NAME
    snapshot-current - Get or set the current snapshot

  SYNOPSIS
    snapshot-current <domain> [--name] [--security-info] [--snapshotname <string>]

  DESCRIPTION
    Get or set the current snapshot

  OPTIONS
    [--domain] <string>  domain name, id or uuid
    --name           list the name, rather than the full xml
    --security-info  include security sensitive information in XML dump
    --snapshotname <string>  name of existing snapshot to make current
[root@localhost qemu]# virsh snapshot-current vm01 --snapshotname vm01-snap2
Snapshot vm01-snap2 set as current
[root@localhost qemu]# virsh shutdown vm01
Domain vm01 is being shutdown
vm01重新开启后,发现之前创建的文件消失了。
最后将快照vm01.vm01-snap2的镜像删除,因为它的内容已经被替换了。不过以防万一,先进行备份,确保无误。
[root@localhost vm02]# cd /var/lib/libvirt/images/
[root@localhost images]# ls
revert-s1.qcow2    share         vm01_2.img       vm01.vm01-snap2
revert-vm01.qcow2  storage_pool  vm01.dsk         vm02.qcow2
rhel7.qcow2        vm01_1.img    vm01.vm01-snap1  vm02.s1
[root@localhost images]# cp vm01.vm01-snap2 vm01.vm01-snap2.bak
[root@localhost images]# rm vm01.vm01-snap2 -rf
[root@localhost images]# virsh snapshot-current vm01 vm01-snap2
Snapshot s1 set as current
[root@localhost images]# virsh shutdown vm01
Domain vm02 is being shutdown

[root@localhost images]# virsh start vm01
error: Domain is already active
一切正常!
参考:
https://www.cnblogs.com/guge-94/p/11827390.html
https://www.cnblogs.com/liucx/p/11777336.html