1、JSX
在React17之前,我们写React代码的时候都会去引入React,并且自己的代码中没有用到,这是为什么呢?
这是因为我们的 JSX 代码会被 Babel 编译为 React.createElement,我们来看一下babel的表示形式。

需要注意的是:
- 自定义组件时需要首字母用大写,会被识别出是一个组件,这是一个规定。
- 小写默认会认为是一个html标签,编译成字符串。
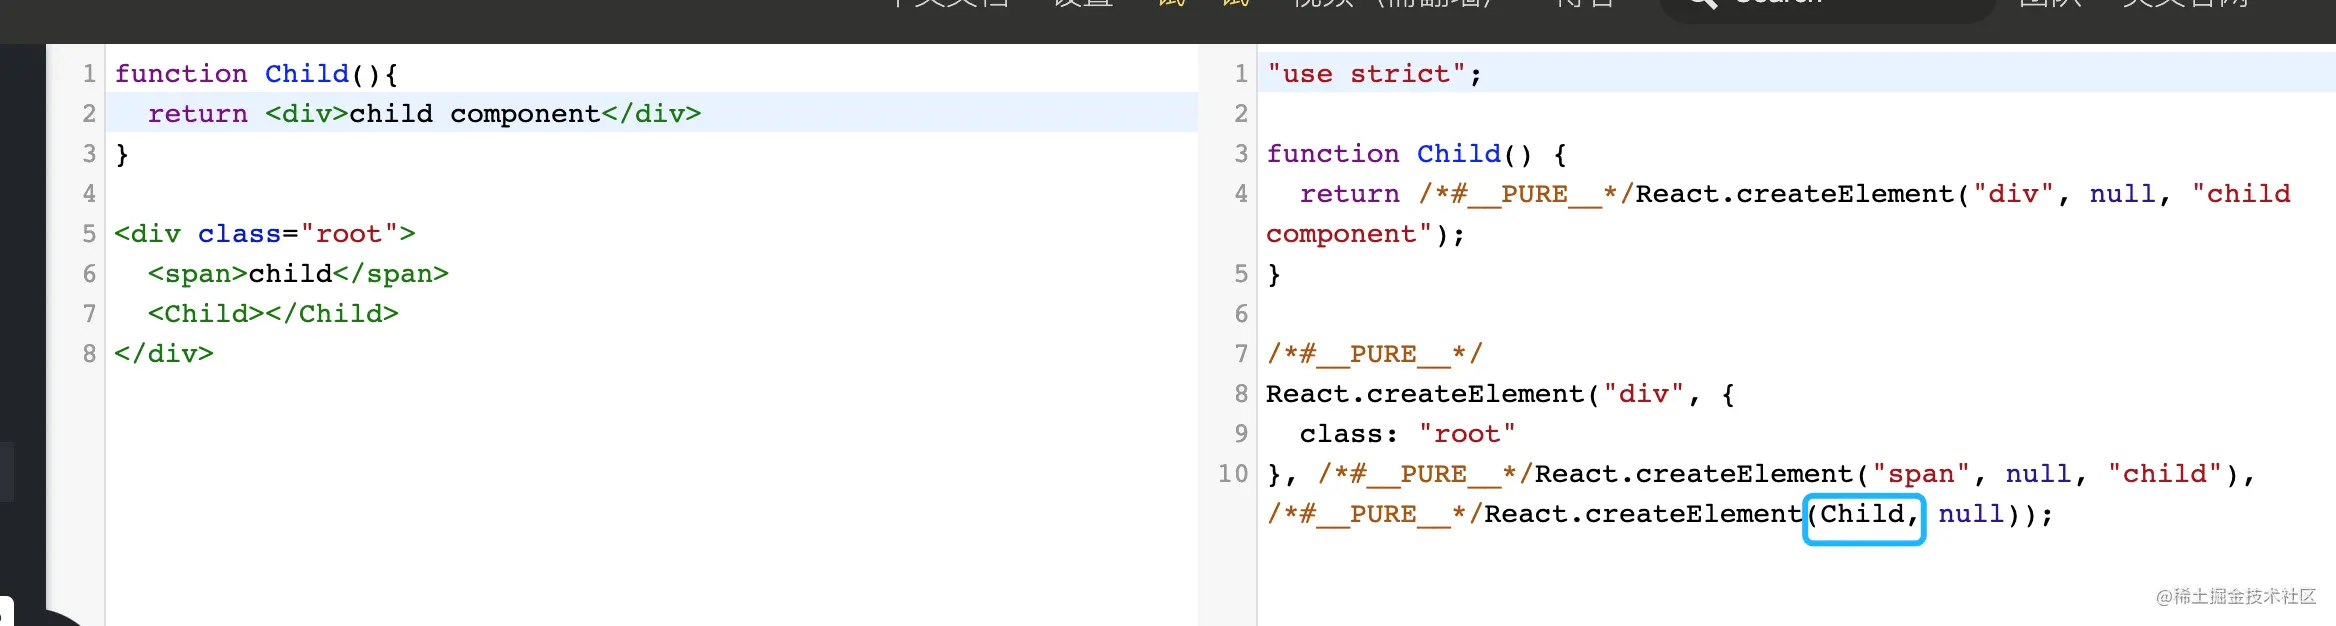
结论:JSX 的本质是React.createElement这个 JavaScript 调用的语法糖。是JS的语法扩展
2、React.createElement源码阅读
从上面我们知道jsx通过babel编译成React.createElement,下面我们就去看一下相关源码:
2.1 入参解读
入参解读:创造一个元素需要知道哪些信息
export function createElement(type, config, children)
createElement 有 3 个入参,这 3 个入参囊括了 React 创建一个元素所需要知道的全部信息。
- type:用于标识节点的类型。它可以是类似“h1”“div”这样的标准 HTML 标签字符串,也可以是 React 组件类型或 React fragment 类型。
- config:以对象形式传入,组件所有的属性都会以键值对的形式存储在 config 对象中。
- children:以对象形式传入,它记录的是组件标签之间嵌套的内容,也就是所谓的“子节点”“子元素”。
React.createElement("ul", {


  // 传入属性键值对
  className: "list"
   // 从第三个入参开始往后,传入的参数都是 children
}, React.createElement("li", {


  key: "1"
}, "1"), React.createElement("li", {


  key: "2"
}, "2"));
对应的DOM结构
<ul className="list">
  <li key="1">1</li>
  <li key="2">2</li>
</ul>
从入口文件React.js文件可知,React.createElement方法是从ReactElement文件引入进来的,我们就进入这个文件,定位到createElement方法。


2.1.1 先来看config参数的处理
// config 对象中存储的是元素的属性
  if (config != null) {


    // 进来之后做的第一件事,是依次对 ref、key、self 和 source 属性赋值
    if (hasValidRef(config)) {


      ref = config.ref;
    }
    // 此处将 key 值字符串化
    if (hasValidKey(config)) {


      key = '' + config.key;
    }
    self = config.__self === undefined ? null : config.__self;
    source = config.__source === undefined ? null : config.__source;
    // 接着就是要把 config 里面的属性都一个一个挪到 props 这个之前声明好的对象里面
    for (propName in config) {


      if (
        // 筛选出可以提进 props 对象里的属性
        hasOwnProperty.call(config, propName) &&
        !RESERVED_PROPS.hasOwnProperty(propName)
      ) {


        props[propName] = config[propName];
      }
    }
  }
这段代码对 ref 以及 key 做了个验证处理,具体如何验证我们先不关心,从方法名称上来辨别一下,然后遍历 config 并把属性提进 props 对象里。
const RESERVED_PROPS = {


  key: true,
  ref: true,
  __self: true,
  __source: true,
};
也就是把ref和key剔除。
2.1.2 接下来是一段对于 children 的操作
// childrenLength 指的是当前元素的子元素的个数,减去的 2 是 type 和 config 两个参数占用的长度
  const childrenLength = arguments.length - 2;
  // 如果抛去type和config,就只剩下一个参数,一般意味着文本节点出现了
  if (childrenLength === 1) {


    // 直接把这个参数的值赋给props.children
    props.children = children;
    // 处理嵌套多个子元素的情况
  } else if (childrenLength > 1) {


    // 声明一个子元素数组
    const childArray = Array(childrenLength);
    // 把子元素推进数组里
    for (let i = 0; i < childrenLength; i++) {


      childArray[i] = arguments[i + 2];
    }
    // 最后把这个数组赋值给props.children
    props.children = childArray;
  }
首先把第二个参数之后的参数取出来,然后判断长度是否大于一。大于一的话就代表有多个 children,这时候 props.children 会是一个数组,否则的话只是一个对象。
2.1.3 最后返回一个调用ReactElement执行方法,并传入刚才处理过的参数
参考 前端进阶面试题详细解答
// 最后返回一个调用ReactElement执行方法,并传入刚才处理过的参数
  return ReactElement(
    type,
    key,
    ref,
    self,
    source,
    ReactCurrentOwner.current,
    props,
  );
2.1.4 处理传入的defaultProps
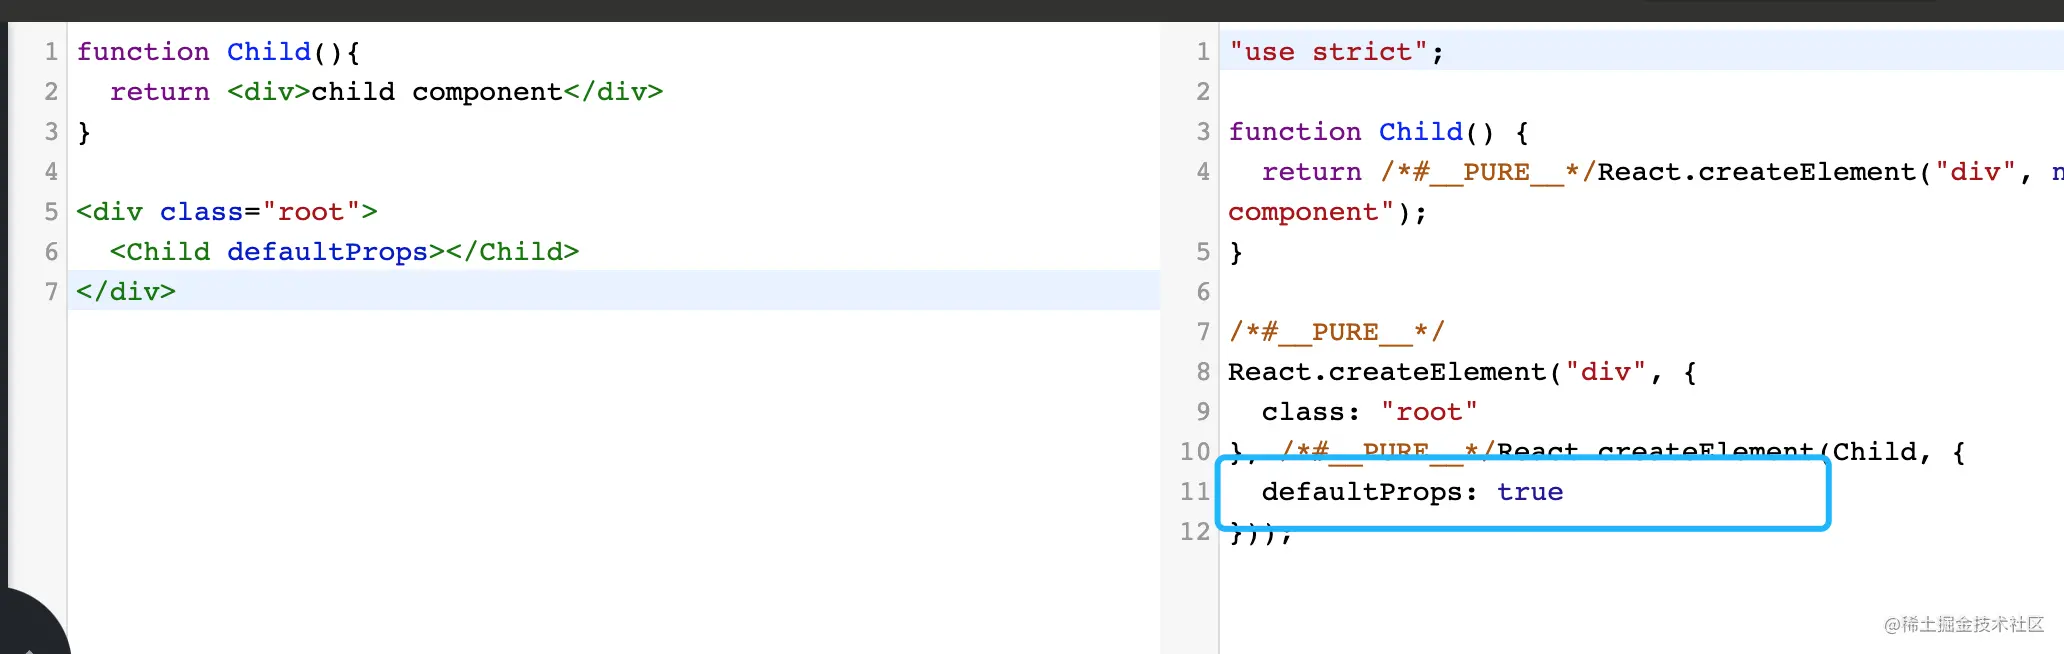
// 处理 defaultProps
  if (type && type.defaultProps) {


    const defaultProps = type.defaultProps;
    for (propName in defaultProps) {


      if (props[propName] === undefined) {


        props[propName] = defaultProps[propName];
      }
    }
  }
2.2 小结
createElement 中并没有十分复杂的涉及算法或真实 DOM 的逻辑,它的每一个步骤几乎都是在格式化数据。
3、出参解读
 上面已经分析过,createElement 执行到最后会 return 一个针对 ReactElement 的调用。
3.1 ReactElement源码拆解
const ReactElement = function(type, key, ref, self, source, owner, props) {


  const element = {


    // REACT_ELEMENT_TYPE是一个常量,用来标识该对象是一个ReactElement
    $$typeof: REACT_ELEMENT_TYPE,

    // 内置属性赋值
    type: type,
    key: key,
    ref: ref,
    props: props,

    // 记录创造该元素的组件
    _owner: owner,
  };

  //
  if (__DEV__) {


    // 这里是一些针对 __DEV__ 环境下的处理,对于大家理解主要逻辑意义不大,此处我直接省略掉,以免混淆视听
  }

  return element;
};
$$typeof 来帮助我们识别这是一个 ReactElement
3.2 小结
ReactElement 其实只做了一件事情就是组装数据。
可以在React中尝试打印:
const AppJSX = (<div className="App">
  <h1 className="title">I am the title</h1>
  <p className="content">I am the content</p>
</div>)

console.log(AppJSX)
得到的控制台结果: 
这个 ReactElement 对象实例,本质上是以 JavaScript 对象形式存在的对 DOM 的描述,也就是虚拟 DOM
3.3 扩展知识
既然是虚拟 DOM,就意味着和渲染到页面上的真实 DOM 不是一个东西,那就需要用ReactDOM.render方法来渲染真实DOM。
ReactDOM.render(
    // 需要渲染的元素(ReactElement)
    element,
    // 元素挂载的目标容器(一个真实DOM)
    container,
    // 回调函数,可选参数,可以用来处理渲染结束后的逻辑
    [callback]
)
ReactDOM.render 方法可以接收 3 个参数,其中第二个参数就是一个真实的 DOM 节点,这个真实的 DOM 节点充当“容器”的角色,React 元素最终会被渲染到这个“容器”里面去。比如,示例中的 App 组件,它对应的 render 调用是这样的:
const rootElement = document.getElementById("root");
ReactDOM.render(<App />, rootElement);