进程与线程
- 进程
简单的可以认为是一个程序执行的过程。进程就是活跃的程序,在内存中运行,占用系统的资源。 - 线程
线程也叫轻量级进程,通常一个进程包含若干个线程。线程可以利用进程所拥有的资源。在引入线程的操作系统中,通常都是把进程作为分配资源的基本单位,而把线程作为独立运行和独立调度的基本单位,比如我们在利用微信聊天的同时,也可以和别人文字聊天。
并发
两个或者多个独立的活动同时进行的现象称为并发。并发可以简单的认为,可以理解成多个应用程序同时运行。在单核CPU中,并发实际上是一种假象,进程之间实际上是按照一定的分配算法轮流使用CPU。
并发的实现主要有两种方式:
1.多进程实现并发
2.单个进程,多个线程实现并发,就是一个主线程多个子线实现。
C++中创建线程的方式
- 头文件 #include
- 创建线程:调用 thread 类去调用一个线程的对象
#include<iostream>
#include<thread>
using namespace std;
void print(){


	cout<<"子线程在运行。。。"<<endl;
}
int main(){


	//创建线程
	thread t1(print);//print为线程处理函数
	cout<<"主线程。。。"<<endl;
	return 0;
}
运行结果:
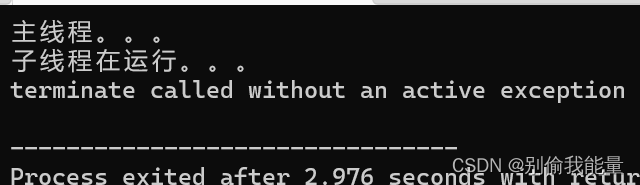
可以看到,主线程和子线程的运行顺序是不一样的,在其他的编译器中,可能不会出现“子线程在运行。。。”的语句。
join( )函数
可以利用 join 函数加入,汇合线程,阻塞主线程。添加以后等线程运行结束之后才运行主线程。注意 一个线程只能join一次,不能重复。
#include<iostream>
#include<thread>
#include<windows.h>
using namespace std;
//线程处理函数
void print(){


	Sleep(2000);//休眠2s
	cout<<"子线程在运行..."<<endl;
}
int main(){


	//创建线程
	thread t1(print);
	t1.join();//阻塞 ,添加以后等线程运行结束之后才运行主线程
	cout<<"主线程..."<<endl;
	return 0;
}
//运行结果:
/*
子线程在运行。。。
主线程。。。
*/
detach( )函数
detach( ) 函数用于打破主线程和子线程之间的依赖关系,将子线程和主线程之间进行分离,不影响。
detach后,就不能再join
void print(){


	Sleep(2000);//休眠2s
	cout<<"子线程在运行..."<<endl;
}
int main(){


	//创建线程
	thread t1(print);
	t1.detach();//子线程与主线程分离
	cout<<"主线程..."<<endl;
	return 0;
}
//运行结果:
/*
主线程...
*/
joinable( )函数
joinable( ) 函数是一个布尔类型的函数,他会返回一个布尔值来表示当前的线程是否是可执行线程(能被join或者detach),因为相同的线程不能join两次,也不能join完再detach,同理也不能detach,所以joinable函数就是用来判断当前这个线程是否可以joinable的。
#include<iostream>
#include<thread>
using namespace std;
void print(){


	cout<<"子线程在运行。。。"<<endl;
}
int main(){


	thread t1(print);
	t1.join();
	cout<<"主线程..."<<endl;
	if(t1.joinable())
		cout<<"能join"<<endl;
	else
		cout<<"不能进行join"<<endl;
	return 0;
}
//运行结果
/*
子线程在运行。。。
主线程...
不能进行join
*/
创建线程的方式
创建线程的方式根据线程处理函数的不同,一共可以分成6种。
1.不带参的方式创建线程
不带参数的普通函数作为线程处理函数。
#include<iostream>
#include<thread>
using namespace std;
void print(){


	cout<<"子线程在运行。。。"<<endl;
}
int main(){


	//创建线程
	thread t1(print);//print为线程处理函数
	cout<<"主线程。。。"<<endl;
	return 0;
}
/*
子线程在运行。。。
主线程。。。
*/
2.通过类和对象创建线程
利用类中的仿函数作为线程处理函数。
#include<iostream>
#include<thread>
using namespace std;
class A{


	//STL 仿函数 类名模仿函数的行为
	void operator()(){


		cout<<"子线程..."<<endl;
	}
};
int main(){


	//正常写法1  对象充当线程处理函数
	A a;
	thread t1(a);
	t1.join();

	//写法2
//	thread t1((A()));
//	t1.join();

	cout<<"主线程..."<<endl;
}
3.通过Lambda表达式创建线程
Lambda表达式简单地说,就是将函数定义和调用放在一处实现。
#include<iostream>
#include<thread>
using namespace std;
int main(){


	thread  t1([]{

    cout<<"子线程调用..."<<endl;});
	t1.join();
	cout<<"主线程..."<<endl;
}
//运行结果
/*
子线程调用...
主线程...
*/
4.带参的方式创建线程
将带参数的函数作为线程处理函数。
#include<iostream>
#include<thread>
using namespace std;
void p1(int &n){


	cout<<"子线程"<<n<<endl;
	n++;
}
int main(){


	int n=0;
	thread t3(p1,std::ref(n));//ref用于包装引用传值
	t3.join();
	thread t31(p1,std::ref(n));
	t31.join();
	cout<<"主线程..."<<endl;
}
/*
子线程0
子线程1
主线程...
*/
5.智能指针的方式创建线程
就是以智能指针为参数的函数作为线程处理函数
void p2(unique_ptr<int> ptr){


	cout<<"子线程:"<<ptr.get()<<endl;
	cout<<"子线程id: "<<this_thread::get_id()<<endl;//get_id函数获取线程id
}

int main(){


	//智能指针为参数的线程处理函数
	int *p=new int(12);
	cout<<*p<<endl;//12
	unique_ptr<int> ptr(new int(1000));
	cout<<"主线程:"<<ptr.get()<<endl;//ptr.get() 获取智能指针的地址
	thread t4(p2,move(ptr));
	t4.join();
	cout<<"主线程id: "<<this_thread::get_id()<<endl;
	cout<<"主线程..."<<ptr.get()<<endl;//0000000 因为上面的语句将智能指针移动到p3中去,子线程结束后,智能指针自动释放啦。
}
/*
12
主线程:0x2b630bb1760
子线程:0x2b630bb1760
子线程id: 2
主线程id: 1
主线程...000000000
*/
6.类的成员函数创建线程
将类的成员函数作为线程处理函数
class B{


public:
	void p3(int &num){


		num=1100;
		cout<<"子线程id:"<<this_thread::get_id()<<endl;
	}
};
int main(){


	//类的成员函数充当线程处理函数
	B b;
	int num=10;
	//需要告诉是哪一个对象的成员函数
	thread t5(&B::p3,b,ref(num));//注意创建thread类对象的方式
	t5.join();
	cout<<"主线程id: "<<this_thread::get_id()<<endl;
}
/*
子线程id:2
主线程id: 1
*/