前言
Worker Service是微软提供的一个项目模板,它继承于BackgroundService。在使用.NET Framework时,我们可以使用Windows Service来创建Windows服务,而在使用.NET Core及更高的.NET版本时,就可以使用Worker Service来取代Windows Service,以便创建跨平台服务。
在微软的.NET文档的运行时库(Runtime libraries)分支中,辅助角色服务(Worker Services)详细介绍了Worker Service的使用。
以下为微软文档的链接:
.NET 中的辅助角色服务 | Microsoft Docs
本文代码已上传至GitHub,项目链接如下:
https://github.com/XMNHCAS/WorkerServiceDemo
创建项目
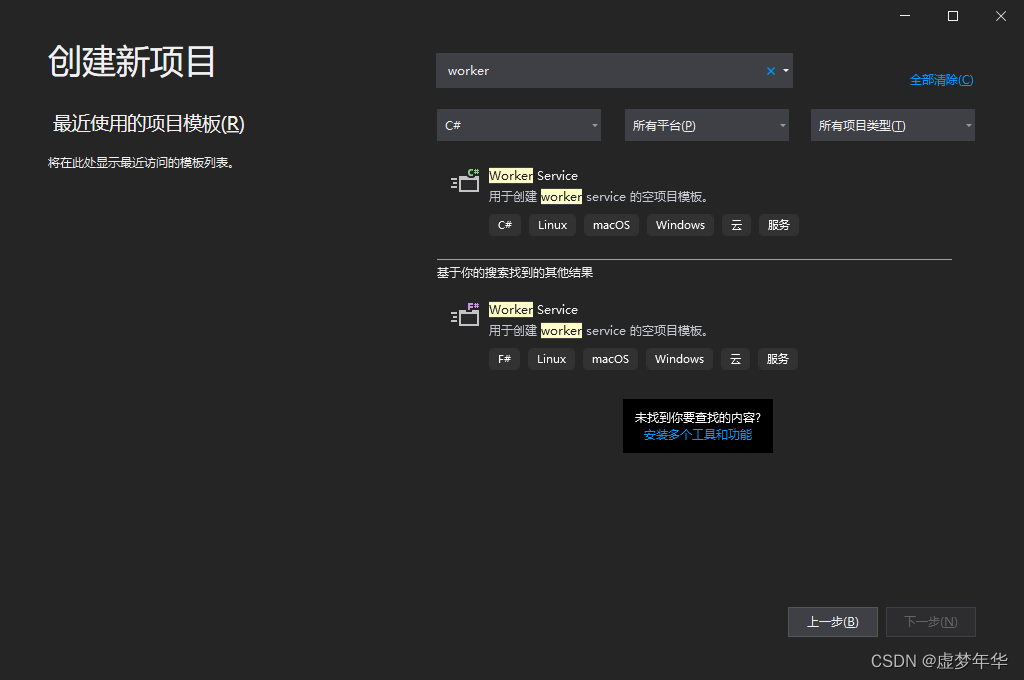
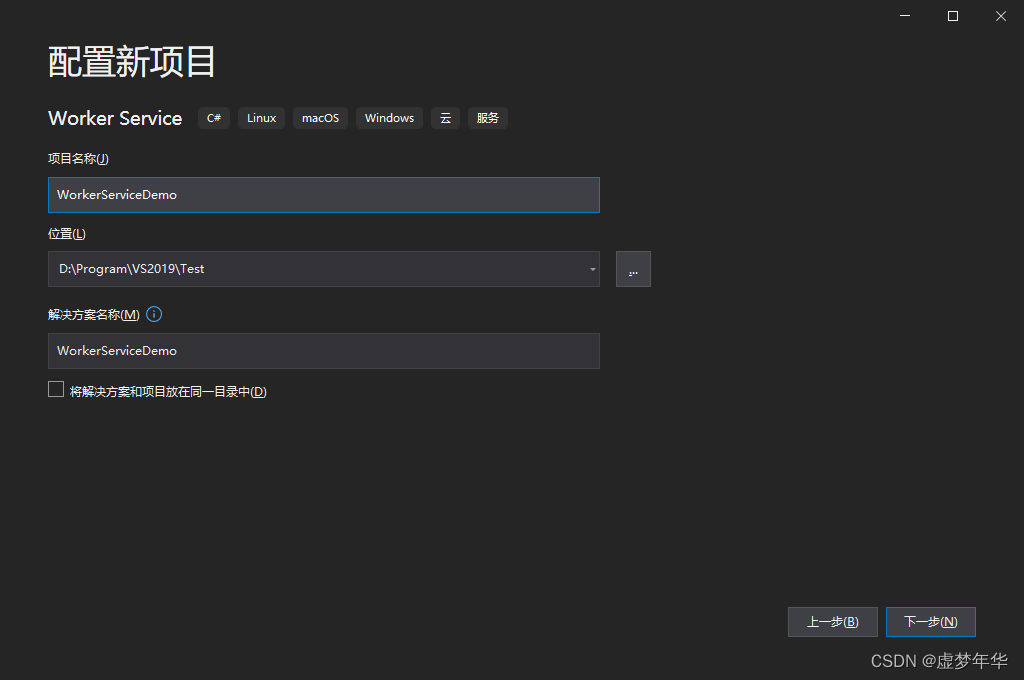
打开Visual Studio,创建一个新的Worker Service项目,如下图所示:
创建完成后,直接运行,会出现一个控制台窗口,并打印出运行信息:
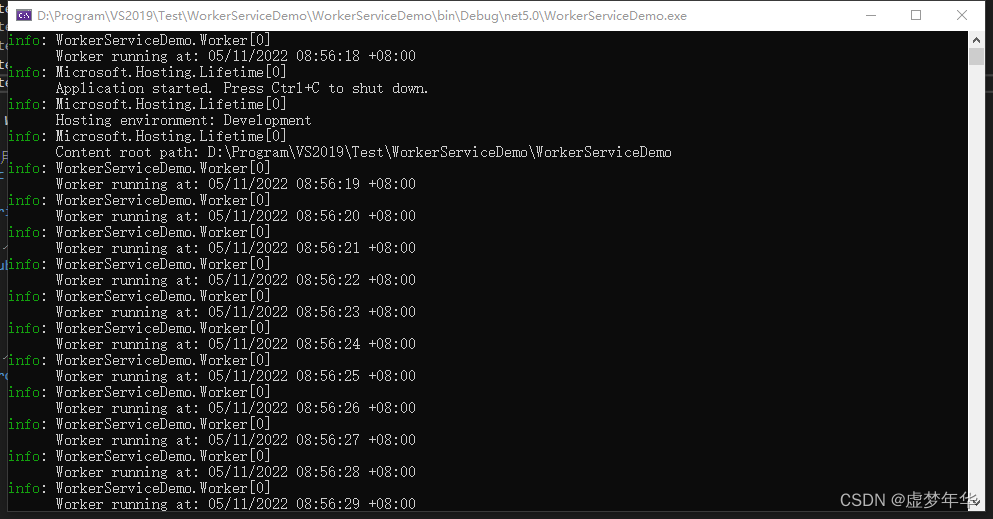
项目创建成功后,Windows会预设一个Worker Service的模板,它主要文件为Program.cs和Worker.cs,其中Program.cs提供了服务的启动入口,而Worker则是服务的具体功能实现。
打开Program.cs,可以看到,它使用了CreateHostBuilder方法返回了一个添加了Worker类作为托管服务的host,然后调用它的Build方法生成实例并调用Run方法来运行该实例。整个Program.cs的结构与普通的控制台应用程序基本相同。
using Microsoft.Extensions.DependencyInjection;
using Microsoft.Extensions.Hosting;
using System;
using System.Collections.Generic;
using System.Linq;
using System.Threading.Tasks;

namespace WorkerServiceDemo
{
    public class Program
    {
        public static void Main(string[] args)
        {
            CreateHostBuilder(args).Build().Run();
        }

        public static IHostBuilder CreateHostBuilder(string[] args) =>
            Host.CreateDefaultBuilder(args)
                .ConfigureServices((hostContext, services) =>
                {
                    services.AddHostedService<Worker>();
                });
    }
}
实际上,Worker Service在部署完成后,就是一个没有窗口的控制台应用程序。在开发过程中,Worker Service的输出控制台界面使得它较Windows Service更容易调试。
基础应用
应用过程
接下来我们来使用Worker Service创建一个简单Demo服务,具体实现功能就是在一个日志文件中定时记录一些消息。
首先我们创建一个InfoLogWorker类,并使其继承于BackgroundService类,并将Program配置的服务改成InfoLogWorker。
public class Program
{
    public static void Main(string[] args)
    {
        CreateHostBuilder(args).Build().Run();
    }

    public static IHostBuilder CreateHostBuilder(string[] args) =>
        Host.CreateDefaultBuilder(args)
            .ConfigureServices((hostContext, services) =>
            {
                    //services.AddHostedService<Worker>();
                    services.AddHostedService<LogInfoWorker>();
            });
}
可以看到,BackgroundService提供了三个虚方法和一个抽象方法,我们需要对StartAsync、StopAsync和ExecuteAsync三个方法进行重写。
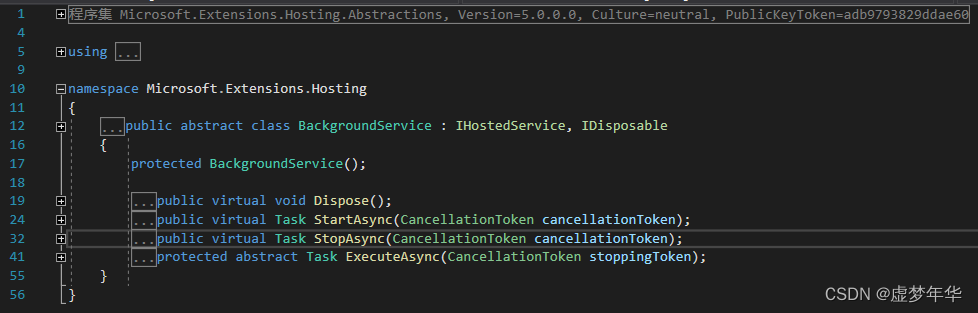
其中StartAsync会在服务开启时被调用,而StopAsync则是在服务停止时被调用,ExecuteAsync是必须要被实现的方法,它定义了服务运行时需要执行的操作。
在重写完成这个三个方法之后,我们再创建一个ILogger的只读字段,并在构造函数中获取它的实例,之后将会使用它在调试时打印出我们需要的信息。然后我们再定义一个ServiceRunningMethod方法,用以定义服务运行时需要实现的具体功能。
具体定义如下:
using Microsoft.Extensions.Hosting;
using Microsoft.Extensions.Logging;
using System;
using System.Collections.Generic;
using System.Linq;
using System.Text;
using System.Threading;
using System.Threading.Tasks;

namespace WorkerServiceDemo
{
    class LogInfoWorker : BackgroundService
    {
        /// <summary>
        /// 日志字段
        /// </summary>
        private readonly ILogger<LogInfoWorker> logger;

        /// <summary>
        /// 构造函数
        /// </summary>
        /// <param name="logger"></param>
        /// <param name="hostApplicationLifetime"></param>
        public LogInfoWorker(ILogger<LogInfoWorker> logger) => this.logger = logger;

        /// <summary>
        /// 服务启动时执行的操作
        /// </summary>
        /// <param name="cancellationToken"></param>
        /// <returns></returns>
        public override async Task StartAsync(CancellationToken cancellationToken)
        {
            await base.StartAsync(cancellationToken);
        }

        /// <summary>
        /// 服务运行时执行的操作
        /// </summary>
        /// <param name="stoppingToken"></param>
        /// <returns></returns>
        protected override async Task ExecuteAsync(CancellationToken stoppingToken)
        {
            Task task = ServiceRunningMethod(stoppingToken);
            await Task.WhenAll(task);
        }

        /// <summary>
        /// 服务停止时执行的操作
        /// </summary>
        /// <param name="cancellationToken"></param>
        /// <returns></returns>
        public override async Task StopAsync(CancellationToken cancellationToken)
        {
            await base.StopAsync(cancellationToken);
        }

        /// <summary>
        /// 运行时执行的方法
        /// </summary>
        /// <param name="stoppingToken"></param>
        /// <returns></returns>
        private Task ServiceRunningMethod(CancellationToken stoppingToken)
        {
            return Task.Run(() => { }, stoppingToken);
        }
    }
}
接下来我们需要在定义好的方法中,实现运行日志的记录。首先定义日志文件输出目录的只读字段,并创建FileOperation方法,用以实现日志操作。
/// <summary>
/// 日志输出目录
/// </summary>
private readonly string LogPath = $"{AppDomain.CurrentDomain.BaseDirectory}LogInfo.log";
/// <summary>
/// 文件操作
/// </summary>
/// <param name="fileMode">操作类型</param>
/// <param name="methodName">调用此方法的方法</param>
/// <param name="message">写入的消息</param>
private void FileOperation(FileMode fileMode, string methodName, string message)
{
FileStream fs = new FileStream(LogPath, fileMode, FileAccess.Write);
StreamWriter sw = new StreamWriter(fs);
sw.WriteLine($"{DateTime.Now} : [{methodName}] {message}");
sw.Close();
fs.Close();
}
然后在StartAsync和StopAsync中分别添加记录操作。
/// <summary>
/// 服务启动时执行的操作
/// </summary>
/// <param name="cancellationToken"></param>
/// <returns></returns>
public override async Task StartAsync(CancellationToken cancellationToken)
{
FileOperation(FileMode.OpenOrCreate, "StartAsync", "Service started.");
logger.LogInformation($"{DateTime.Now} : Service has been requested to start.");
await base.StartAsync(cancellationToken);
}/// <summary>
/// 服务停止时执行的操作
/// </summary>
/// <param name="cancellationToken"></param>
/// <returns></returns>
public override async Task StopAsync(CancellationToken cancellationToken)
{
logger.LogInformation($"{DateTime.Now} : Service has been requested to stop.");
await base.StopAsync(cancellationToken);
}最后定义运行时的操作,在服务被停止的时候,退出循环,并记录服务已停止。我们在ExecuteAsync方法中创建一个新的Task实例来调用ServiceRunningMethod,并通过Task.WhenAll(),使得ServiceRunningMethod在服务被停止之前被一直执行。
/// <summary>
/// 运行时执行的方法
/// </summary>
/// <param name="stoppingToken"></param>
/// <returns></returns>
private Task ServiceRunningMethod(CancellationToken stoppingToken)
{
return Task.Run(() =>
{
while (!stoppingToken.IsCancellationRequested)
{
//记录日志
logger.LogInformation($"{DateTime.Now} : Service is running.");
FileOperation(FileMode.Append, "ServiceRunningMethod", "Service is running.");
Thread.Sleep(2000);
}
logger.LogInformation($"{DateTime.Now} : Service stopped.");
//记录服务已停止
FileOperation(FileMode.Append, "ServiceRunningMethod", "Service stopped.");
}, stoppingToken);
}运行结果如下,服务成功运行,而且日志也被记录: 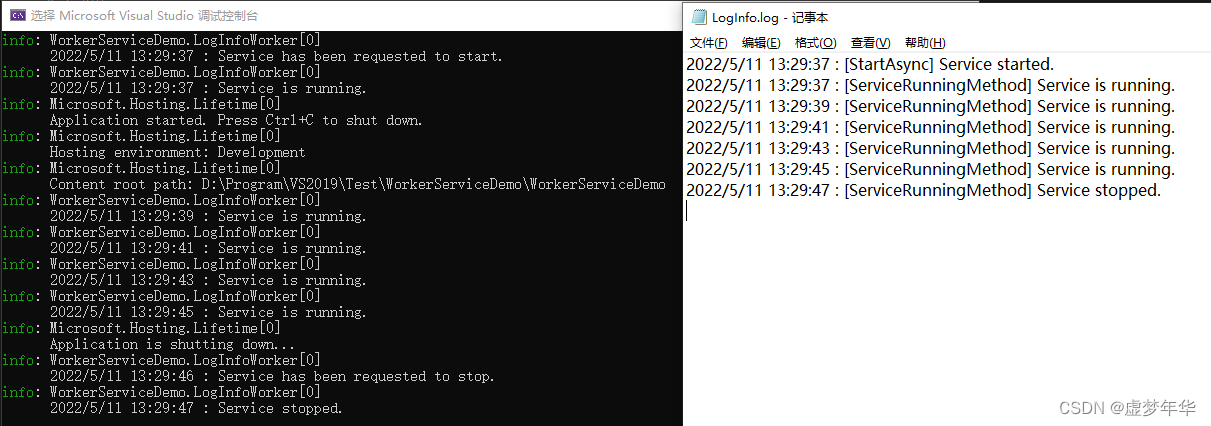
虽然我们可以通过在ServiceRunningMethod退出循环后加入结束操作,但是假如我们需要在服务运行时使用多个子线程来执行不同的操作,如果在其中任一子线程中来加入这样的结束操作,就有可能会出现错误。此时我们可以通过调用IHostApplicationLifetime接口,来阻止服务停止,并执行我们需要的结束操作,然后在等待结束操作完成后手动停止服务。
首先先创建IHostApplicationLifetime的只读字段,并改写构造函数,添加IHostApplicationLifetime的参数,注入创建IHostApplicationLifetime实例。
/// <summary>
/// 应用程序生命周期字段
/// </summary>
private readonly IHostApplicationLifetime hostApplicationLifetime;
/// <summary>
/// 构造函数
/// </summary>
/// <param name="logger"></param>
/// <param name="hostApplicationLifetime"></param>
public LogInfoWorker(ILogger<LogInfoWorker> logger, IHostApplicationLifetime hostApplicationLifetime) =>
(this.logger, this.hostApplicationLifetime) = (logger, hostApplicationLifetime);接着将ServiceRunningMethod中的停止操作分离为一个单独的方法。
/// <summary>
/// 运行时执行的方法
/// </summary>
/// <param name="stoppingToken"></param>
/// <returns></returns>
private Task ServiceRunningMethod(CancellationToken stoppingToken)
{
return Task.Run(() =>
{
while (!stoppingToken.IsCancellationRequested)
{
//记录日志
logger.LogInformation($"{DateTime.Now} : Service is running.");
FileOperation(FileMode.Append, "ServiceRunningMethod", "Service is running.");
Thread.Sleep(2000);
}
}, stoppingToken);
}
/// <summary>
/// 服务结束前的操作
/// </summary>
private void BeforeStopMethod()
{
logger.LogInformation($"{DateTime.Now} : Service is stopping.");
Thread.Sleep(3000);
logger.LogInformation($"{DateTime.Now} : Service stopped.");
//记录服务已停止
FileOperation(FileMode.Append, "ServiceRunningMethod", "Service stopped.");
}然后改写ExecuteAsync,使得服务在被停止前,先执行BeforeStopMethod,再手动将服务停止。
/// <summary>
/// 服务运行时执行的操作
/// </summary>
/// <param name="stoppingToken"></param>
/// <returns></returns>
protected override async Task ExecuteAsync(CancellationToken stoppingToken)
{
try
{
Task task = ServiceRunningMethod(stoppingToken);
await Task.WhenAll(task);
}
catch (Exception ex)
{
logger.LogError(ex.ToString());
FileOperation(FileMode.Append, "ExecuteAsync", ex.ToString());
}
finally
{
BeforeStopMethod();
//手动停止服务
hostApplicationLifetime.StopApplication();
}
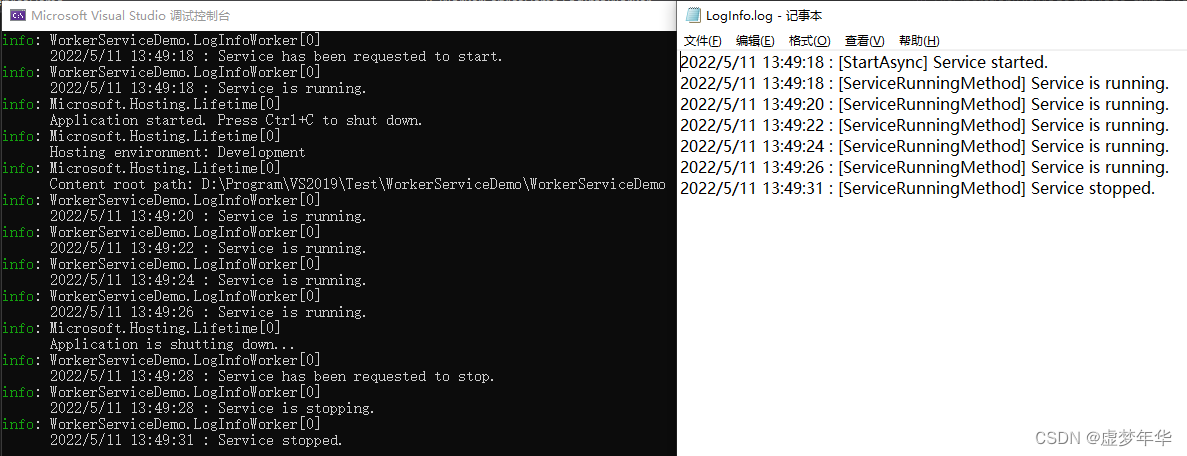
}最后运行结果如下:
 到这里,我们的Demo服务就已经完成了。
LogInfoWorker.cs完整代码
using Microsoft.Extensions.Hosting;
using Microsoft.Extensions.Logging;
using System;
using System.Collections.Generic;
using System.IO;
using System.Linq;
using System.Text;
using System.Threading;
using System.Threading.Tasks;
namespace WorkerServiceDemo
{
class LogInfoWorker : BackgroundService
{
/// <summary>
/// 日志字段
/// </summary>
private readonly ILogger<LogInfoWorker> logger;
/// <summary>
/// 应用程序生命周期字段
/// </summary>
private readonly IHostApplicationLifetime hostApplicationLifetime;
/// <summary>
/// 日志输出目录
/// </summary>
private readonly string LogPath = $"{AppDomain.CurrentDomain.BaseDirectory}LogInfo.log";
/// <summary>
/// 构造函数
/// </summary>
/// <param name="logger"></param>
/// <param name="hostApplicationLifetime"></param>
public LogInfoWorker(ILogger<LogInfoWorker> logger, IHostApplicationLifetime hostApplicationLifetime) =>
(this.logger, this.hostApplicationLifetime) = (logger,hostApplicationLifetime);
/// <summary>
/// 服务启动时执行的操作
/// </summary>
/// <param name="cancellationToken"></param>
/// <returns></returns>
public override async Task StartAsync(CancellationToken cancellationToken)
{
FileOperation(FileMode.OpenOrCreate, "StartAsync", "Service started.");
logger.LogInformation($"{DateTime.Now} : Service has been requested to start.");
await base.StartAsync(cancellationToken);
}
/// <summary>
/// 服务运行时执行的操作
/// </summary>
/// <param name="stoppingToken"></param>
/// <returns></returns>
protected override async Task ExecuteAsync(CancellationToken stoppingToken)
{
try
{
Task task = ServiceRunningMethod(stoppingToken);
await Task.WhenAll(task);
}
catch (Exception ex)
{
logger.LogError(ex.ToString());
FileOperation(FileMode.Append, "ExecuteAsync", ex.ToString());
}
finally
{
BeforeStopMethod();
//手动停止服务
hostApplicationLifetime.StopApplication();
}
}
/// <summary>
/// 服务停止时执行的操作
/// </summary>
/// <param name="cancellationToken"></param>
/// <returns></returns>
public override async Task StopAsync(CancellationToken cancellationToken)
{
logger.LogInformation($"{DateTime.Now} : Service has been requested to stop.");
await base.StopAsync(cancellationToken);
}
/// <summary>
/// 运行时执行的方法
/// </summary>
/// <param name="stoppingToken"></param>
/// <returns></returns>
private Task ServiceRunningMethod(CancellationToken stoppingToken)
{
return Task.Run(() =>
{
while (!stoppingToken.IsCancellationRequested)
{
//记录日志
logger.LogInformation($"{DateTime.Now} : Service is running.");
FileOperation(FileMode.Append, "ServiceRunningMethod", "Service is running.");
Thread.Sleep(2000);
}
}, stoppingToken);
}
/// <summary>
/// 服务结束前的操作
/// </summary>
private void BeforeStopMethod()
{
logger.LogInformation($"{DateTime.Now} : Service is stopping.");
Thread.Sleep(3000);
logger.LogInformation($"{DateTime.Now} : Service stopped.");
//记录服务已停止
FileOperation(FileMode.Append, "ServiceRunningMethod", "Service stopped.");
}
/// <summary>
/// 文件操作
/// </summary>
/// <param name="fileMode">操作类型</param>
/// <param name="methodName">调用此方法的方法</param>
/// <param name="message">写入的消息</param>
private void FileOperation(FileMode fileMode, string methodName, string message)
{
    FileStream fs = new FileStream(LogPath, fileMode, FileAccess.Write);
    StreamWriter sw = new StreamWriter(fs);
    sw.WriteLine($"{DateTime.Now} : [{methodName}] {message}");
    sw.Close();
    fs.Close();
}
}
}
Windows环境下部署
命令
以下为部署需要用到的命令:
| 说明 | 命令 |
| 安装服务 | sc.exe create 服务名 binPath=路径 |
| 卸载服务 | sc.exe delete 服务名 |
| 启动服务 | sc.exe start 服务名 |
| 停止服务 | sc.exe stop 服务名 |
| 设置服务自动启动 | sc.exe config 服务名 start= auto |
| 设置服务手动启动 | sc.exe config 服务名 start= demand |
| 查看服务状态 | sc.exe query 服务名 |
需要注意,上面所有的命令都需要具有管理员权限的CMD或者PowerShell来进行执行。
NuGet程序包引用
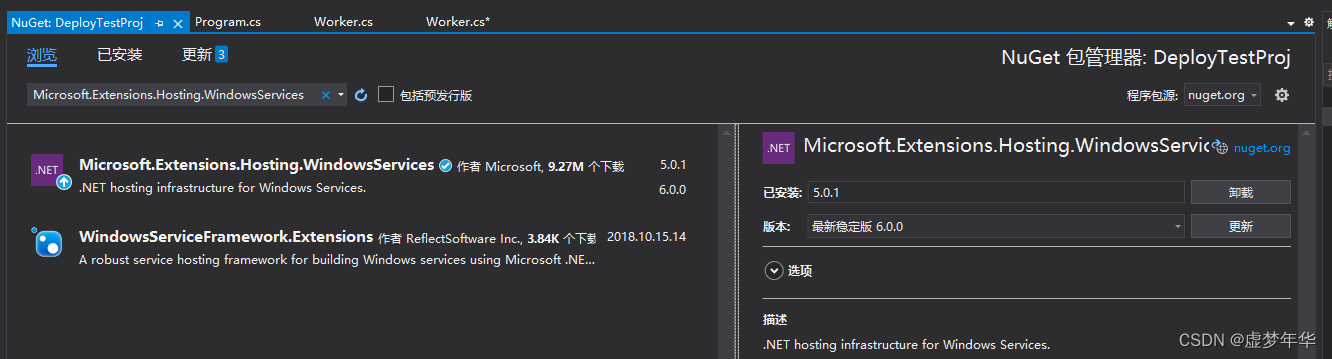
Worker Service依赖的.NET框架为.NET Core3.1及以上,所以Worker Service项目是可以跨平台部署的,不过需要针对不同平台下载不同的包。针对Windows平台,我们需要使用NuGet添加Microsoft.Extensions.Hosting.WindowsServic程序包。在添加时,需要注意安装的版本,目前这个程序包的最新版本为6.0.0,适配与.NET6的项目,而本文实例使用的是.NET5,所以安装5.0.1版本的程序包。
在添加完成后,我们在Program.cs的CreateHostBuilder方法,添加UseWindowsService(),这样生成的可执行文件就可以作为服务被部署到Windows系统里了。
public static IHostBuilder CreateHostBuilder(string[] args) =>
    Host.CreateDefaultBuilder(args)
        .UseWindowsService() //配置为Windows服务
        .ConfigureServices((hostContext, services) =>
        {
                    services.AddHostedService<LogInfoWorker>();
        });
如果是在Linux上部署,就是引用Microsoft.Extensions.Hosting.Systemd程序包,然后在在Program.cs的CreateHostBuilder方法,添加.UseSystemd(),最后发布为Linux版本的可执行文件即可,然后用将生成出来的文件放到Linux系统中,按照Linux的普通服务部署即可。
安装与卸载
安装服务首先需要生成可执行文件。而生成可部署的可执行文件有两种方法,一种是发布,一种是Release模式生成。微软官方文档演示的是发布,故这里不赘述。此处使用Release生成的文件。
将生成模式调成Release,然后右击项目选择生成,在项目的文件所在位置的bin文件夹内会生成一个Release文件夹,里面就是生成好的可执行文件。将这个文件夹拷贝到D盘。

打开Windows PowerShell(管理员),执行安装命令:
sc.exe create wsdemo binPath=D:\Release\net5.0\WorkerServiceDemo.exe
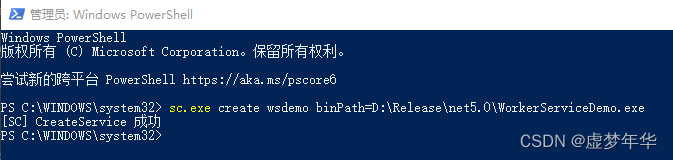
打开运行,输入services.msc,打开服务管理器,可以找到我们刚刚安装成功的wsdemo服务。

再回到PowerShell,执行卸载命令:
sc.exe delete wsdemo
![]()
切回到服务管理窗口,刷新一下,我们刚刚安装了的wsdemo就已经消失了。
启动与停止
在服务安装完成后,我们可以用以下命令来实现服务的启动与停止。如果在上面卸载了服务,那么再安装一次即可。
启动服务:sc.exe start wsdemo
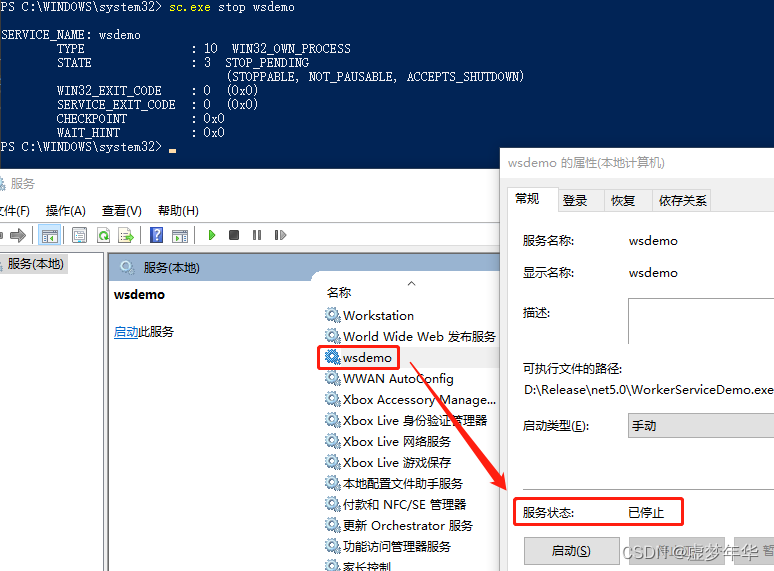
停止服务:sc.exe stop wsdemo
执行启动服务命令后,打开服务管理窗口,可以看到服务已经成功运行。

执行停止命令后的,打开服务管理窗口,并打开wsdemo服务的属性,可以看到该服务已经停止。
回到程序的目录,可以看到生成了一个LogInfo.log文件,也成功记录的服务运行的信息,说明服务启停及运行正常。 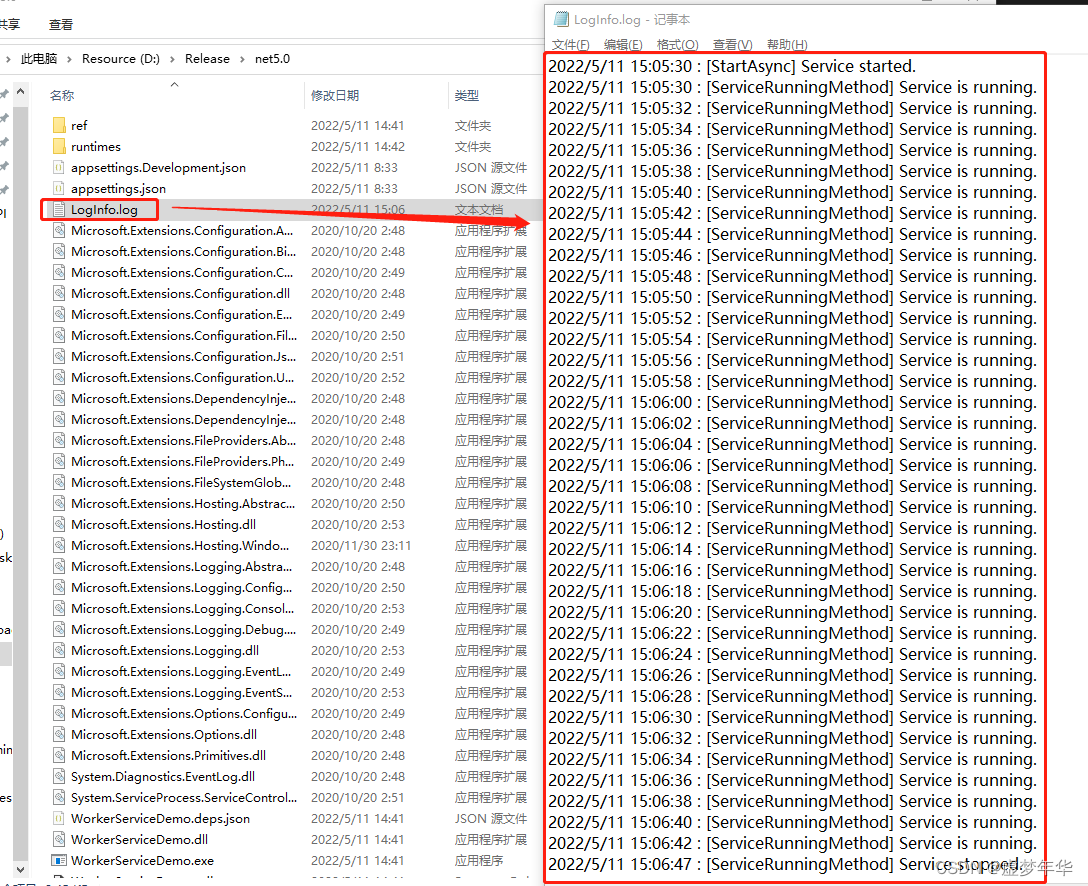
在Windows下,启动服务和停止服务也可以直接使用服务管理器来手动启停。
设置自动启动与手动启动
将服务设置为自动启动和手动启动的命令如下:
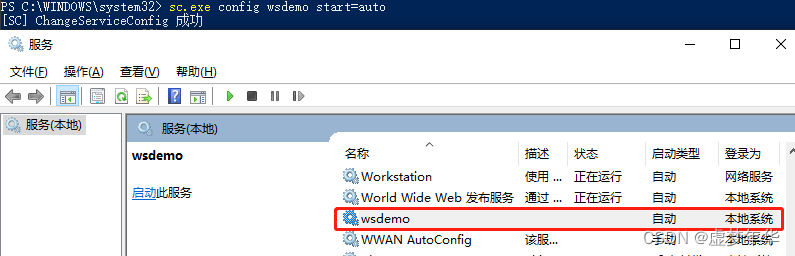
自动启动:sc.exe config wsdemo start= auto
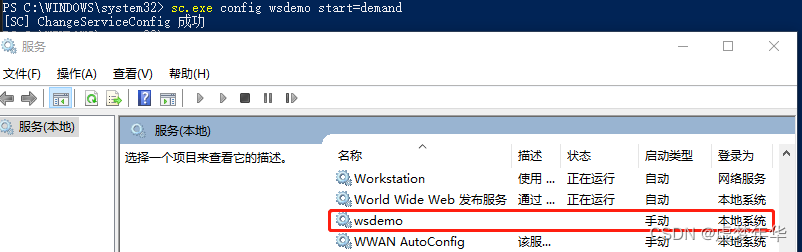
手动启动:sc.exe config wsdemo start= demand
需要注意,“=” 后面最好加上空格,否则在win10以下版本的系统可能会报错。
执行设置自动启动命令,打开服务管理窗口,可以看到服务被切换成自动启动。
执行设置手动启动命令,打开服务管理窗口,可以看到服务被切换成手动启动。
当然这个自动和手动也是可以在服务管理窗口进行手动设置的,使用命令的方式更适合批处理部署。
总结
本文介绍了Worker Service的基础应用,实际使用时可根据这个思路进行功能扩展。微软官方文档有更加详细的说明及示例,如果需要再深入了解,可以多参考微软官方文档。