前言
在使用 Qt Quick 开发的过程中,有时我们会遇到这样的需求,界面窗口显示出来后,某些 Item 并不存在,当发生了鼠标点击或者某种事件触发之后,才会去创建这些Item并显示出来,这就是我们经常说的动态创建组件。本章节博主就整理了几种在 QML 中动态创建组件的方法。
方法一:Model + View
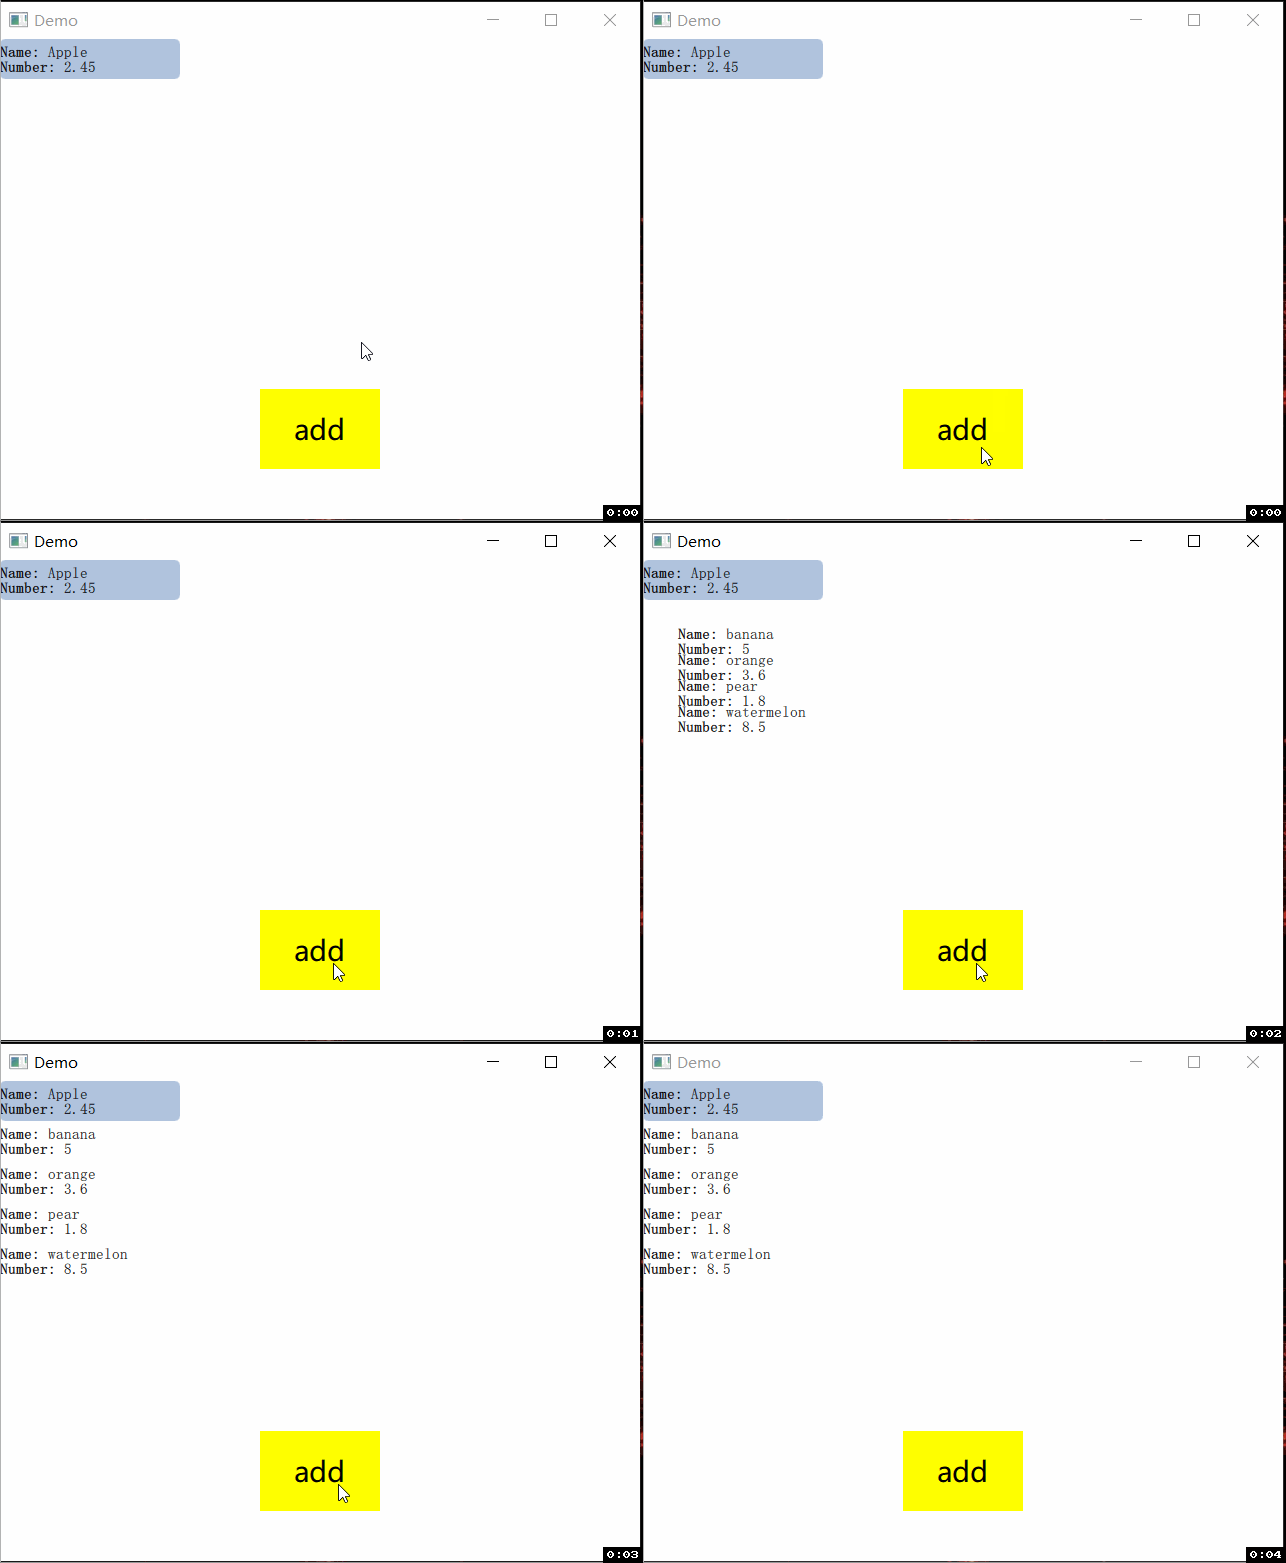
首先需要定义好 view 和 model,当我们获取到一组新的数据需要在界面上显示的时候,可以通过在model中添加数据的方式,在view中动态显示。
示例:
import QtQuick 2.12
import QtQuick.Window 2.12

Window {
    visible: true
    width: 640
    height: 480

    ListView {
        id: view
        width: parent.width
        height: 300
        clip: true
        focus: true

        model: ListModel {
            id: model

            ListElement { name: "Apple"; cost: 2.45 }
        }

        delegate: Component {
            Item {
                width: 180; height: 40
                Column {
                    anchors.verticalCenter: parent.verticalCenter
                    Text { text: '<b>Name:</b> ' + name }
                    Text { text: '<b>Number:</b> ' + cost }
                }
            }
        }

        highlight: Rectangle {
            color: "lightsteelblue"
            radius: 5
        }

        add: Transition {
            NumberAnimation { properties: "x,y"; from: 100; duration: 1000 }
        }
    }

    Rectangle {
        width: 120
        height: 80
        anchors.bottom: parent.bottom
        anchors.bottomMargin: 50
        anchors.horizontalCenter: parent.horizontalCenter
        color: "yellow"

        Text {
            anchors.centerIn: parent
            font.pixelSize: 28
            font.family: "微软雅黑"
            color: "black"
            text: qsTr("add")
        }

        MouseArea {
            anchors.fill: parent
            onClicked: {
                addItemToListView("banana", 5)
                addItemToListView("orange", 3.6)
                addItemToListView("pear", 1.8)
                addItemToListView("watermelon", 8.5)
            }
        }
    }

    function addItemToListView(name, cost)
    {
        model.append({ "name":name, "cost":cost })
    }
}

方法二:Loader +Component
MyItem1.qml

import QtQuick 2.0

Rectangle {
    width: 640
    height: 300
    color: "yellow"

    Text {
        anchors.centerIn: parent
        font.pixelSize: 48
        font.family: "微软雅黑"
        text: "I am yellow !"
        color: "black"
    }
}
MyItem2.qml

import QtQuick 2.0

Rectangle {
    width: 640
    height: 300
    color: "red"

    Text {
        anchors.centerIn: parent
        font.pixelSize: 48
        font.family: "微软雅黑"
        text: "I am red !"
        color: "black"
    }
}
import QtQuick 2.12
import QtQuick.Window 2.12
import QtQuick.Controls 2.5

Window {
    visible: true
    width: 640
    height: 480

    property bool jud: true
    property int count: 0

    Loader {
        id: loader
        anchors.top: parent.top
        anchors.left: parent.left
        asynchronous: false // 异步加载,默认false
    }

    Text {
        id: text
        anchors.horizontalCenter: parent.horizontalCenter
        anchors.bottom: parent.bottom
        anchors.bottomMargin: 100
        font.pixelSize: 24
        font.family: "微软雅黑"
        color: "black"
        text: JSON.stringify(count)
    }

    Button {
        anchors.horizontalCenter: parent.horizontalCenter
        anchors.bottom: parent.bottom
        anchors.bottomMargin: 40
        text: "load"
        onClicked: {
            timer1.start()
            timer2.start()
        }
    }

    Timer {
        id: timer1
        interval: 10
        repeat: true
        onTriggered: {
            count++
        }
    }

    Timer {
        id: timer2
        interval: 10
        repeat: true
        onTriggered: {
            if (jud) {
                loader.source = "MyItem1.qml"
            } else {
                loader.source = "MyItem2.qml"
            }

            jud = !jud
        }
    }
}

这里说明一下,Loader 使用同步加载的方式在这个 Demo 中其实是不会卡顿的,Item 切换非常流畅,上图gif中出现卡顿是因为录制GIF的工具帧数没有跟上。。。也是有点无语。小伙伴们可以自己跑一下程序看一下效果。
Loader 的 asynchronous 属性代表是否异步加载,默认是false。当与源属性一起使用时,加载和编译也将在后台线程中执行。异步加载会跨多个帧创建组件声明的对象,并减少动画中出现故障的可能性。
异步加载时,状态将更改为Loader.loading。创建整个组件后,该项将可用,状态将更改为Loader.Ready。在进行异步加载时将此属性的值更改为false将强制立即同步完成。这允许在异步加载完成之前必须访问加载程序内容时,开始异步加载,然后强制完成。
方法三:createObject / createQmlObject
MyItem.qml

import QtQuick 2.0
import QtQuick.Controls 2.5

Rectangle {
    id: rec

    property alias textInformation : myText.text
    signal destroyMyself(var object)

    Text {
        id: myText
        anchors.left: parent.left
        anchors.leftMargin: 10
        anchors.verticalCenter: parent.verticalCenter
        font.pixelSize: 24
        font.family: "微软雅黑"
        color: "black"
    }

    Button {
        anchors.right: parent.right
        anchors.rightMargin: 10
        anchors.verticalCenter: parent.verticalCenter
        text: "delete"

        onClicked: {
            destroyMyself(rec)
        }
    }
}
main.qml

import QtQuick 2.12
import QtQuick.Window 2.12
import QtQuick.Controls 2.5

Window {
    visible: true
    width: 1024
    height: 768

    Column {
        id: column
        anchors.top: parent.top
        anchors.left: parent.left
        width: parent.width
        height: 700
        spacing: 5
    }

    Button {
        id: createObjectBtn
        anchors.left: parent.left
        anchors.bottom: parent.bottom
        anchors.leftMargin: 120
        anchors.bottomMargin: 50
        text: "createObject"
        onClicked: {
            createObject()
        }
    }

    Button {
        id: createQmlObjectBtn
        anchors.right: parent.right
        anchors.bottom: parent.bottom
        anchors.rightMargin: 120
        anchors.bottomMargin: 50
        text: "createQmlObject"
        onClicked: {
            createQmlObject()
        }
    }

    Component {
        id: myComponent

        Rectangle {
            id: rec

            property alias textInformation : myText.text
            signal destroyMyself(var object)

            Text {
                id: myText
                anchors.left: parent.left
                anchors.leftMargin: 10
                anchors.verticalCenter: parent.verticalCenter
                font.pixelSize: 24
                font.family: "微软雅黑"
                color: "black"
            }

            Button {
                anchors.right: parent.right
                anchors.rightMargin: 10
                anchors.verticalCenter: parent.verticalCenter
                text: "delete"

                onClicked: {
                    destroyMyself(rec)
                }
            }
        }
    }

    function componentDestroy(object) {
        object.destroy()
    }

    function createObject() {
        // createComponent from external file "MyItem.qml"
        var component = Qt.createComponent("MyItem.qml")
        if (component.status === Component.Ready) {
            var obj = component.createObject(column, { "color": "yellow",
                                                       "width": column.width,
                                                       "height": 50,
                                                       "textInformation": 'createComponent from external file "MyItem.qml"' })
            obj.destroyMyself.connect(componentDestroy)
        }

        // createComponent from internal file myComponent
        var obj2 = myComponent.createObject(column, { "color": "red",
                                                      "width": column.width,
                                                      "height": 50,
                                                      "textInformation": "createComponent from internal file myComponent" })
        obj2.destroyMyself.connect(componentDestroy)
    }

    function createQmlObject() {
        var newObject = Qt.createQmlObject('import QtQuick 2.0; Rectangle {color: "blue"; width: 1024; height: 50}',
                                           column,
                                           "");
    }
}


object createQmlObject(qml, object parent, string filepath)
返回从给定的qml字符串创建的具有指定父级的新对象,如果创建对象时出错,则返回null。 如果指定了filepath,它将用于为创建的对象报告错误。
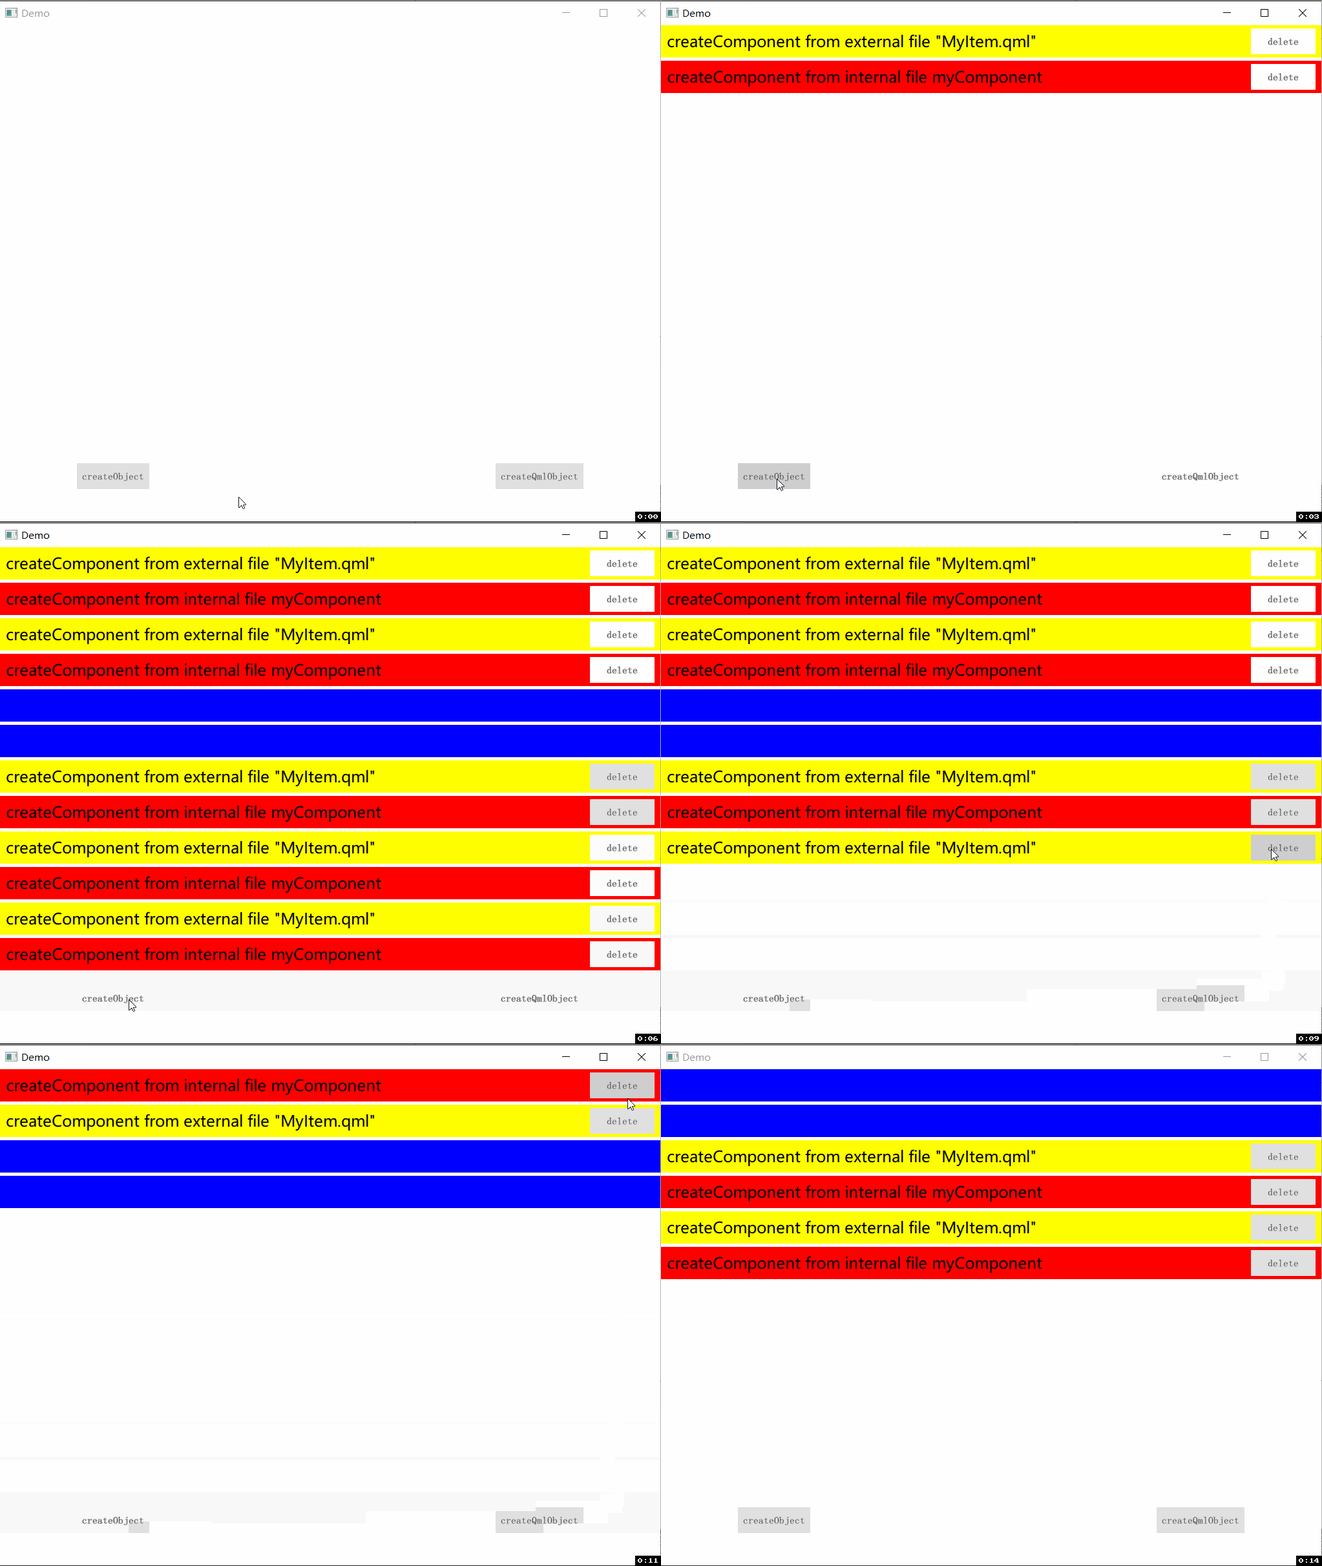
查看示例的代码可以发现,通过 createQmlObject 动态创建不是很方便,因为如果组件的样式或功能比较多的话,qml字符串就会很长很繁琐。
object createObject(parent, object properties)
可以在文件中或者在外部把组件定义好,如果是外部定义的需要先通过 createComponent 创建组件,然后再通过 createObject 创建此组件的对象实例。
本文福利,莬费领取Qt开发学习资料包、技术视频,内容包括(C++语言基础,C++设计模式,Qt编程入门,QT信号与槽机制,QT界面开发-图像绘制,QT网络,QT数据库编程,QT项目实战,QSS,OpenCV,Quick模块,面试题等等)↓↓↓↓↓↓见下面↓↓文章底部点击莬费领取↓↓