至于jcenter与maven的区别就不介绍了,好处就是提高开发效率,省时省事省心,在也不用import moudle,com aar***了。首先需要在Bintray jcenter官网注册一个自己的账号,或者用github账号登陆,如果github上面绑定的邮箱是手机邮箱的话是登陆不上的,所以最好在注册jcenter的时候申请一个gmail的邮箱 ,文章末尾放上一个可以翻墙的vpn apk。去google开始吧。
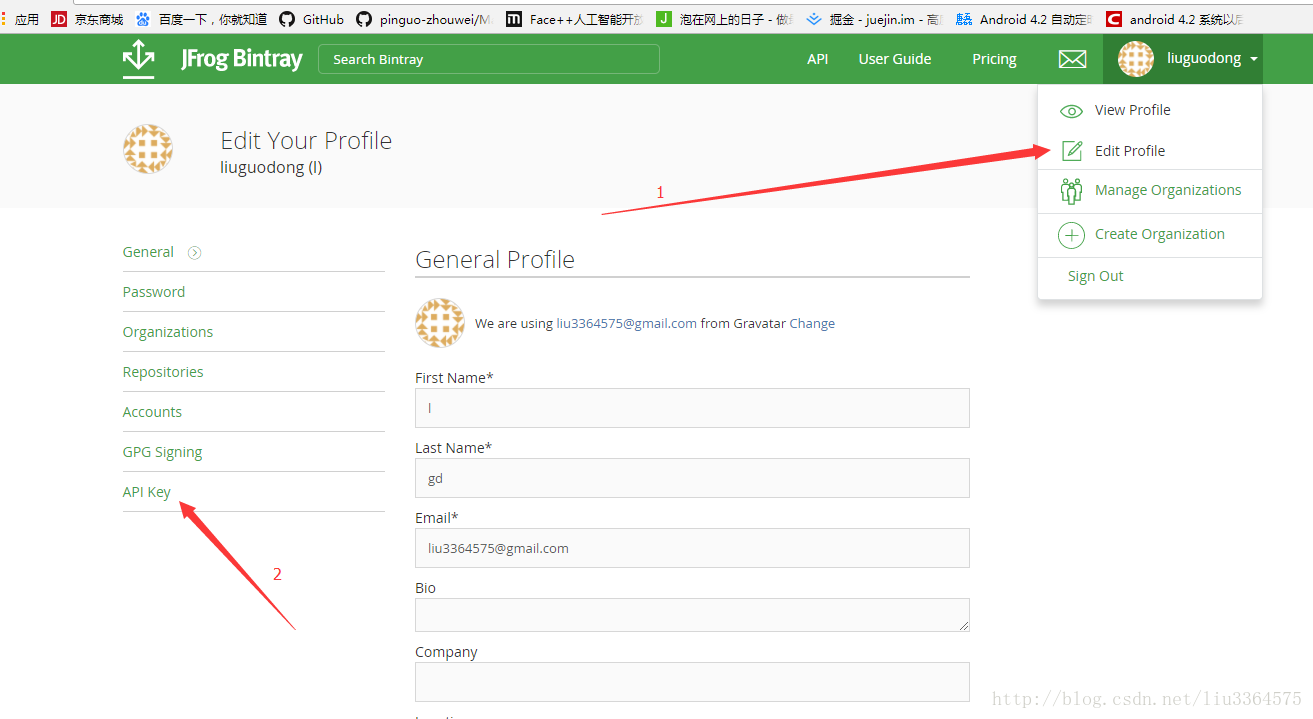
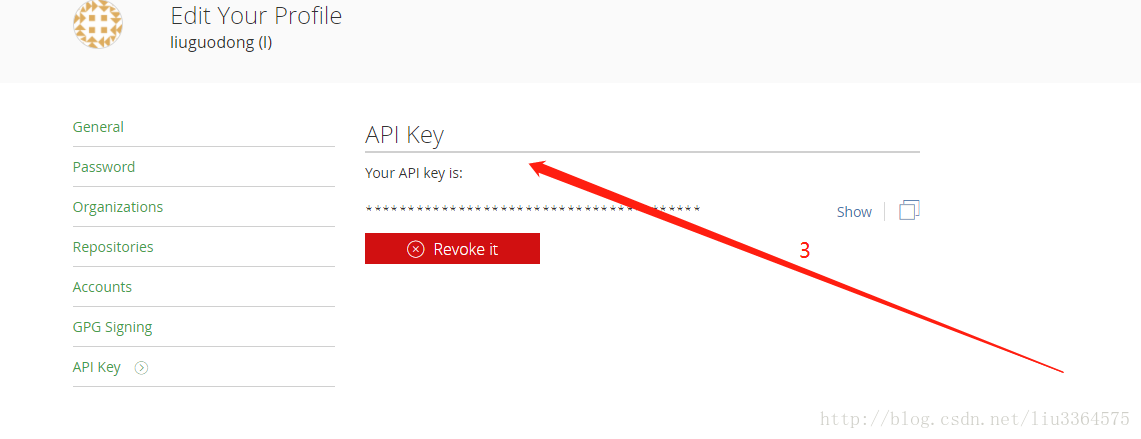
经过上面的123步骤之后吧key保存下来一会用
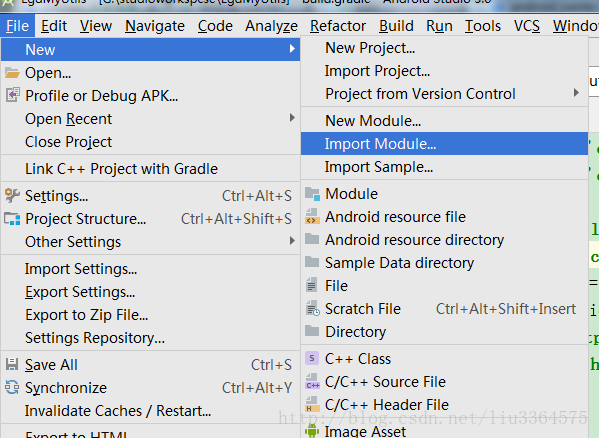
经过以上步骤将库创建完毕后稍微写点代码测试用,接下来在根build.gralde中和库的build.gradle配置要上传的bintary-release插件
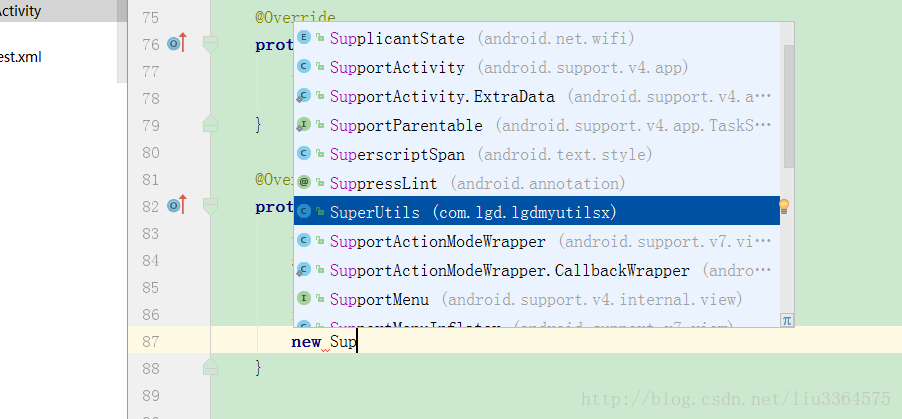
如图:
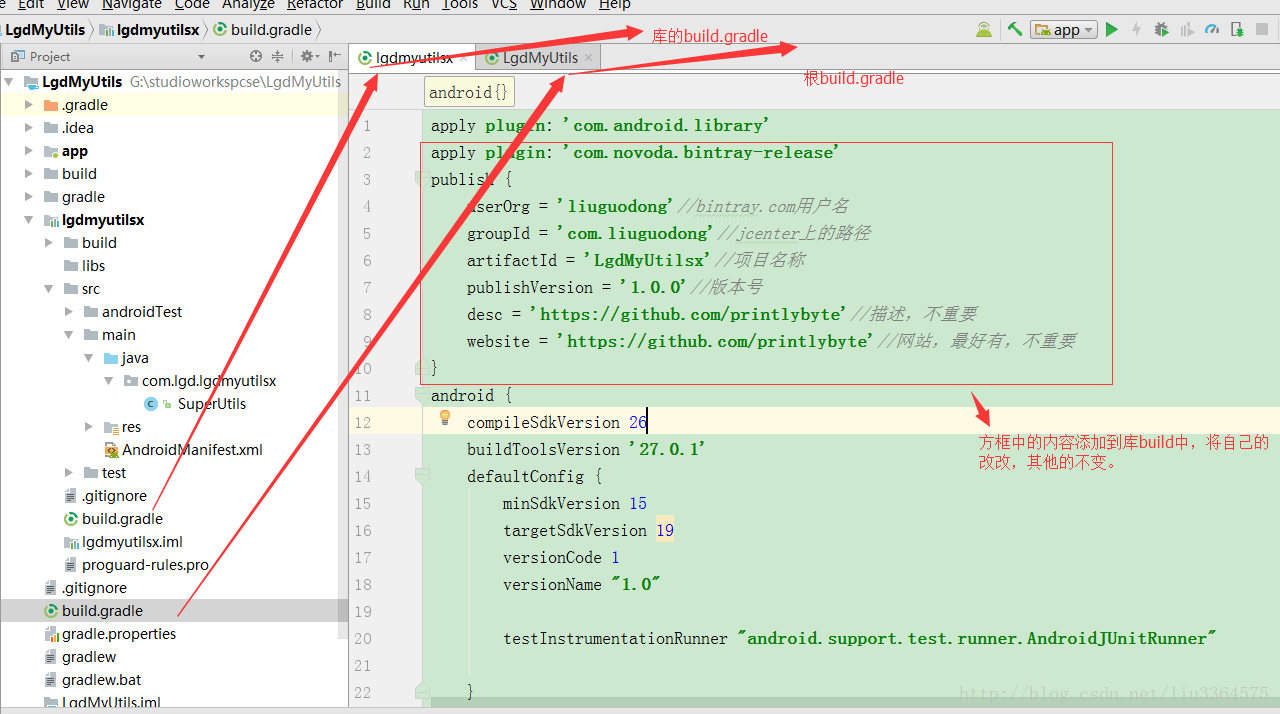
图中代码:库build.gradle
扫描二维码关注公众号,回复:
145935 查看本文章

apply plugin: 'com.android.library'
apply plugin: 'com.novoda.bintray-release'
publish {
    userOrg = 'liuguodong'//bintray.com用户名
    groupId = 'com.liuguodong'//jcenter上的路径
    artifactId = 'LgdMyUtilsx'//项目名称
    publishVersion = '1.0.0'//版本号
    desc = 'https://github.com/printlybyte'//描述,不重要
    website = 'https://github.com/printlybyte'//网站,最好有,不重要
}
android {
    compileSdkVersion 26
    buildToolsVersion '27.0.1'
    defaultConfig {
        minSdkVersion 15
        targetSdkVersion 19
        versionCode 1
        versionName "1.0"

        testInstrumentationRunner "android.support.test.runner.AndroidJUnitRunner"

    }

    buildTypes {
        release {
            minifyEnabled false
            proguardFiles getDefaultProguardFile('proguard-android.txt'), 'proguard-rules.pro'
        }
    }

}

dependencies {
    implementation fileTree(dir: 'libs', include: ['*.jar'])

    implementation 'com.android.support:appcompat-v7:26.1.0'
    testImplementation 'junit:junit:4.12'
    androidTestImplementation 'com.android.support.test:runner:1.0.1'
    androidTestImplementation 'com.android.support.test.espresso:espresso-core:3.0.1'
}
//解决错误的GBK不可映射编码
allprojects {
    tasks.withType(Javadoc) {
        options{
            encoding "UTF-8"
            charSet 'UTF-8'
            links "http://docs.oracle.com/javase/7/docs/api"
        }
    }
}
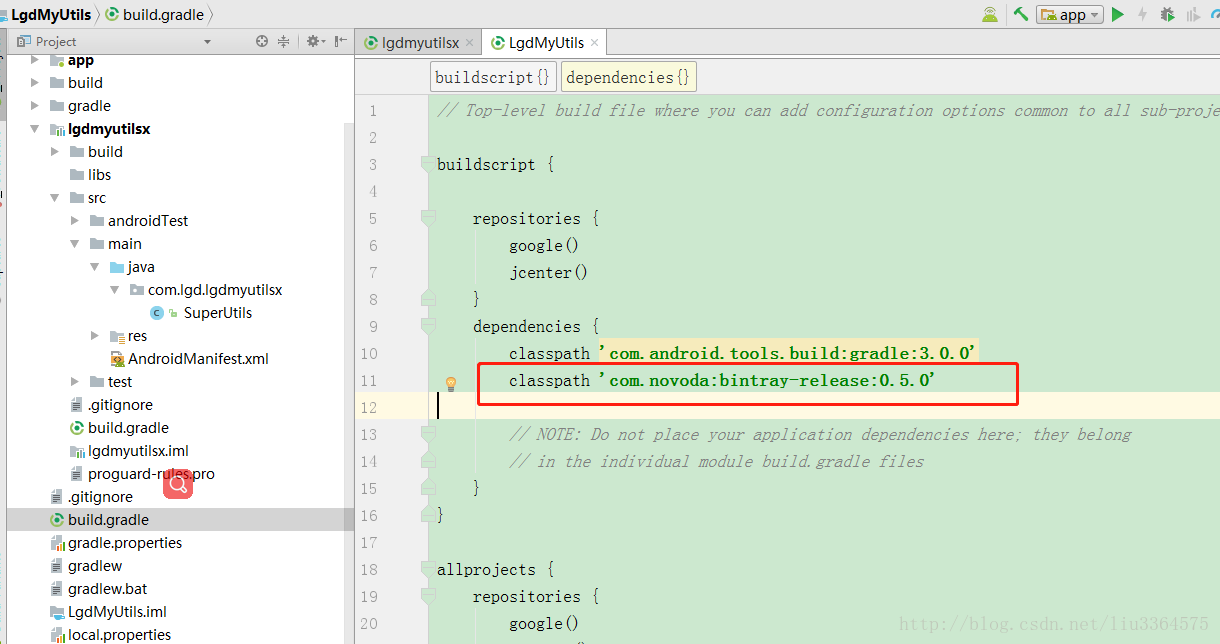
根build.gradle
// Top-level build file where you can add configuration options common to all sub-projects/modules.

buildscript {

    repositories {
        google()
        jcenter()
    }
    dependencies {
        classpath 'com.android.tools.build:gradle:3.0.0'
        classpath 'com.novoda:bintray-release:0.5.0'

        // NOTE: Do not place your application dependencies here; they belong
        // in the individual module build.gradle files
    }
}

allprojects {
    repositories {
        google()
        jcenter()
    }
}

task clean(type: Delete) {
    delete rootProject.buildDir
}
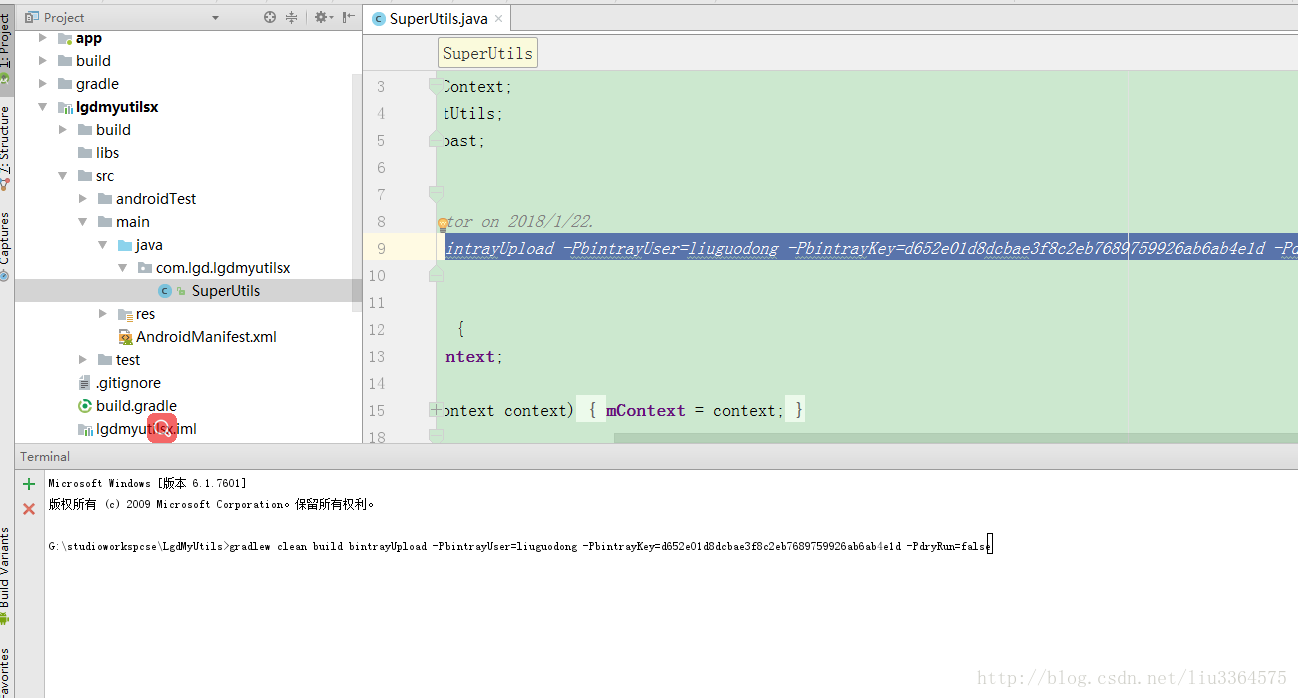
接下来按下Alt+F12打开Terminal(路径默认是当前工程下)输入
gradlew clean build bintrayUpload -PbintrayUser=liuguodong -PbintrayKey=******************************* -PdryRun=false
其中PbintrayUser 是你的bintray账户名字 key为刚才保存的那个key ,然后回车 如果出现错误看末尾
到此完成上传:
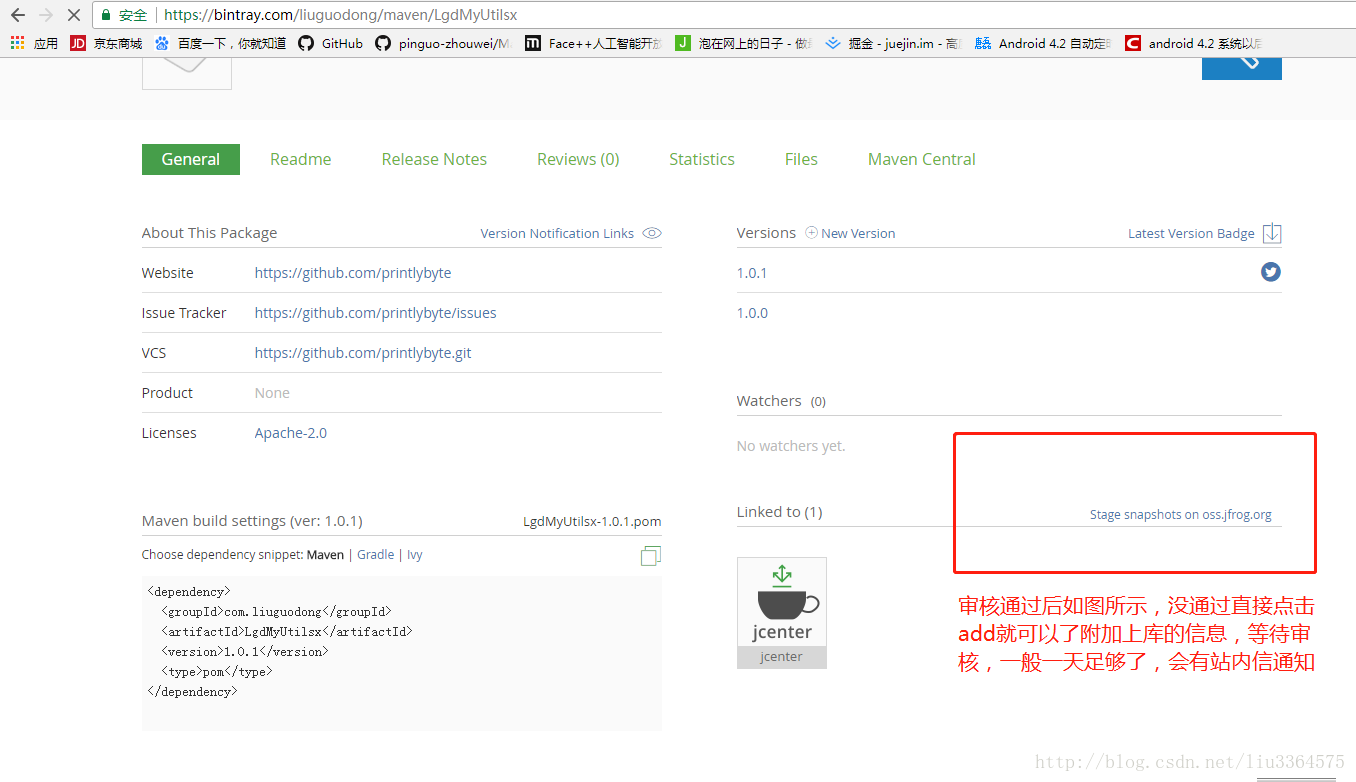
引用:
到此完成上传,可能会出现的问题:
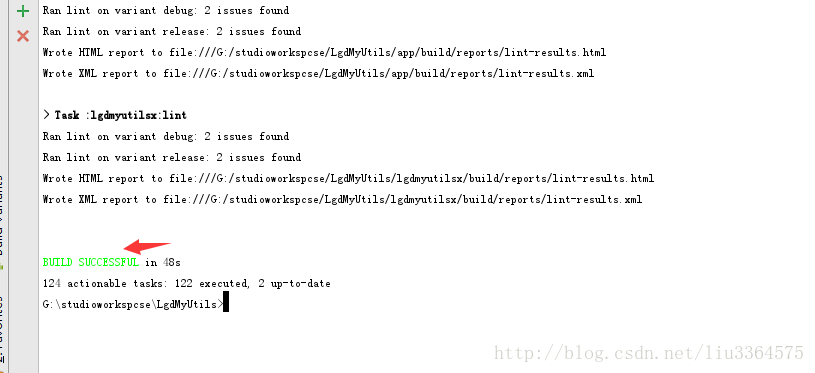
(1)如图
解决方法:在要上传的gradle 文件的android节点里面添加以下代码:
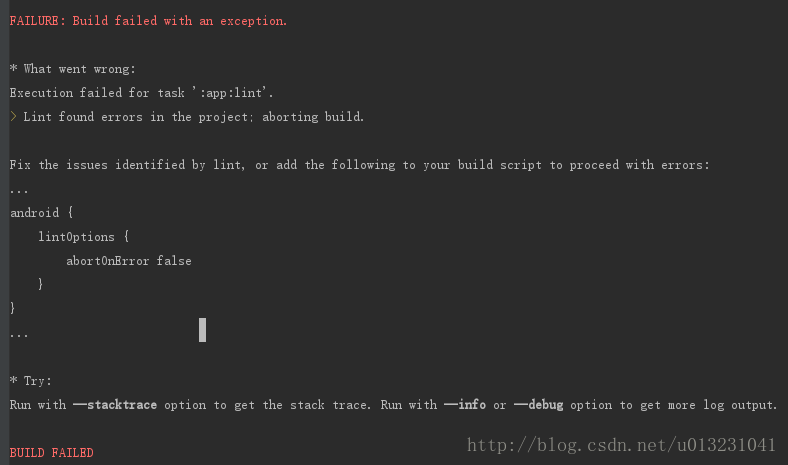
lintOptions {
        abortOnError false
}- 1
- 2
- 3
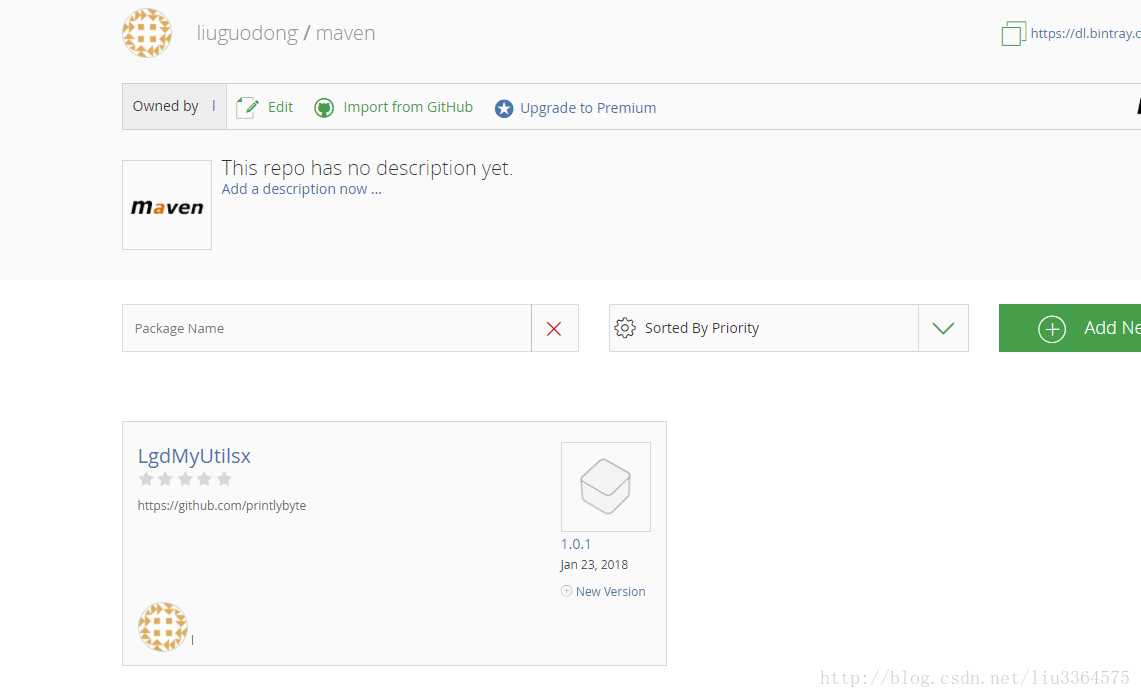
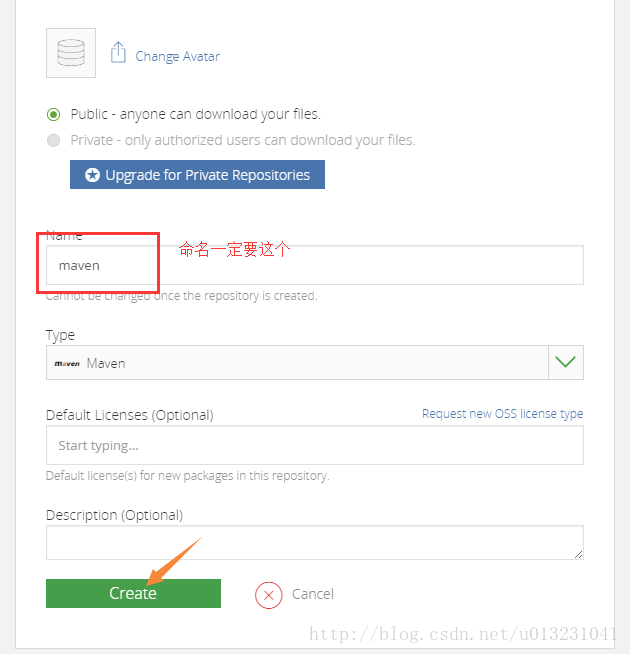
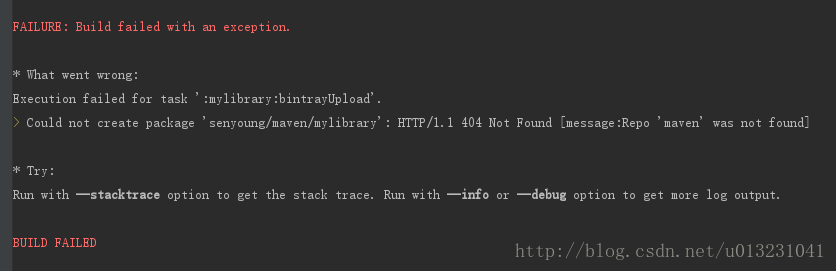
(2)如图
出现Could not create package是因为插件创建不了库。
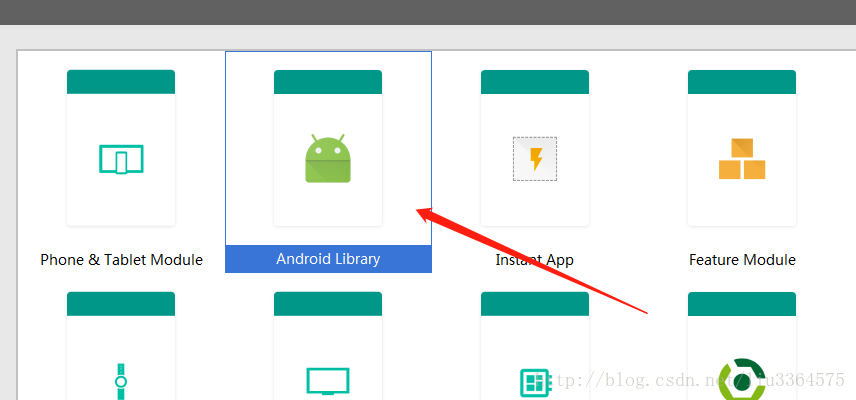
解决方法:我们手动创建一个 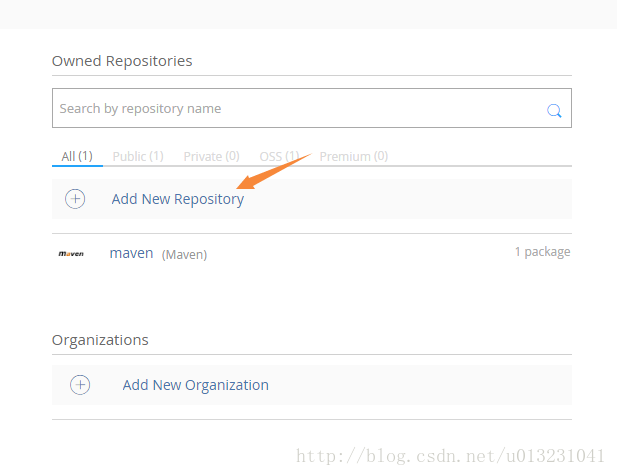
(3)有可能出现乱码问题
解决问题:在项目根目录gradle文件中添加以下代码
allprojects {
tasks.withType(Javadoc) {
    options{
        encoding "UTF-8"
        charSet 'UTF-8'
        links "http://docs.oracle.com/javase/7/docs/api"
    }
  }
}
vpn:http://download.csdn.net/download/liu3364575/10221239,不想下载的在下面评论留下邮箱