前言
之前介绍过通过snack3快速对接物模型,不知道大家还有没有影响。记得还留了一个作业给大家想想,就是这么兼容多型号、多版本,这次就来跟大家分享下这么集成多型号。
一、物模型文件调整
上次是利用snack3 + 物模型json文件,快速对接。这次要支持多型号,那肯定首先物模型json文件调整时少不了的。
[
  {


    "profile": {


      "device_category": "温度检测器",
      "device_unit": "WD-470AA1-01-0114",
      "version": "1.0"
    },
    "properties": [
      {


        "dataType": {


          "specs": {


            "1": "成功"
          },
          "type": "enum"
        },
        "identifier": "ack_state",
        "name": "指令下发状态"
      },
      {


        "dataType": {


          "specs": {


            "unit": "V"
          },
          "type": "double"
        },
        "identifier": "battery_voltage",
        "name": "电池电压"
      },
      {


        "dataType": {


          "specs": {

    },
          "type": "string"
        },
        "identifier": "date",
        "name": "数据上报时间"
      },
      {


        "dataType": {


          "specs": {


            "unit": "℃"
          },
          "type": "double"
        },
        "name": "温度",
        "identifier": "temperature"
      }
    ],
    "services": [
      {


        "inputs": [
          {


            "dataType": {


              "specs": {


                "unit": "/"
              },
              "type": "int"
            },
            "identifier": "year",
            "name": "年"
          },
          {


            "dataType": {


              "specs": {


                "unit": "/"
              },
              "type": "int"
            },
            "name": "月",
            "identifier": "month"
          },
          {


            "dataType": {


              "specs": {


                "unit": "/"
              },
              "type": "int"
            },
            "name": "日",
            "identifier": "day"
          },
          {


            "dataType": {


              "specs": {


                "unit": "/"
              },
              "type": "int"
            },
            "name": "时",
            "identifier": "hour"
          },
          {


            "dataType": {


              "specs": {


                "unit": "/"
              },
              "type": "int"
            },
            "name": "分",
            "identifier": "minute"
          },
          {


            "dataType": {


              "specs": {


                "unit": "/"
              },
              "type": "int"
            },
            "name": "秒",
            "identifier": "second"
          }
        ],
        "identifier": "setTime",
        "name": "时间同步设置",
        "dataType": {


          "specs": {

    }
        }
      },
      {


        "inputs": [
          {


            "dataType": {


              "specs": {


                "unit": "s",
                "min": "60",
                "max": "86340"
              },
              "type": "int"
            },
            "identifier": "heart_beat",
            "name": "心跳时间"
          }
        ],
        "identifier": "heartbeat",
        "name": "心跳周期设置",
        "dataType": {


          "specs": {

    }
        }
      }
    ]
  },
  {


    "profile": {


      "device_category": "温度检测器",
      "device_unit": "WD-470AA1-01-0241",
      "version": "1.0"
    },
    "properties": [
      {


        "dataType": {


          "specs": {

    },
          "type": "string"
        },
        "name": "设备ID",
        "identifier": "device_id"
      },
      {


        "dataType": {


          "specs": {


            "0": "未校准",
            "1": "已校准"
          },
          "type": "bool"
        },
        "name": "温度校准状态",
        "identifier": "temp_calibration_state"
      },
      {


        "dataType": {


          "specs": {


            "0": "低于10%",
            "1": "10%~20%",
            "2": "20%~30%",
            "3": "30%~50%",
            "4": "50%以上"
          },
          "type": "enum"
        },
        "name": "电量等级",
        "identifier": "battery_level"
      },
      {


        "dataType": {


          "specs": {


            "unit": "min",
            "min": "1",
            "max": "1440"
          },
          "type": "int"
        },
        "name": "心跳周期",
        "identifier": "heartbeat_time"
      },
      {


        "identifier": "temperature",
        "name": "温度",
        "dataType": {


          "type": "double",
          "specs": {


            "unit": "℃",
            "unit_name": "摄氏度",
            "min": "-20",
            "max": "60"
          }
        }
      }
    ],
    "services": [
      {


        "name": "设置心跳周期",
        "identifier": "set_heartbeat_time",
        "inputs": [
          {


            "dataType": {


              "specs": {


                "unit": "min",
                "min": "1",
                "max": "1440"
              },
              "type": "int",
              "default": 60
            },
            "name": "心跳周期",
            "identifier": "heartbeat_time"
          }
        ],
        "isPooling": 0,
        "ackTimeout": null,
        "ackType": 0,
        "dataType": {


          "specs": {

    }
        }
      },
      {


        "name": "校准温度",
        "identifier": "calibrate_temperature",
        "inputs": [
          {


            "dataType": {


              "specs": {


                "min": "-2",
                "max": "2"
              },
              "type": "double",
              "default": 1
            },
            "name": "系数",
            "identifier": "k"
          },
          {


            "dataType": {


              "specs": {


                "min": "-10",
                "max": "10",
                "unit": "℃"
              },
              "type": "double",
              "default": 0
            },
            "name": "偏移量",
            "identifier": "b"
          }
        ],
        "isPooling": 0,
        "ackTimeout": null,
        "ackType": 0,
        "dataType": {


          "specs": {

    }
        }
      }
    ]
  }
]
这里实际就是将json文件格式调整问json集合数组,一个元素时一个型号,例如这里就是个型号:WD-470AA1-01-0114、WD-470AA1-01-0241
二、使用步骤
1.下行指令扩展
原下行指令转换(核心):
/**
     * 读取物模型并返回下行服务
     *
     * @param deviceTypeNo 设备类型编码
     * @param servicesId   下行标识
     * @return
     */
    public static cn.hutool.json.JSONObject getDownCommand(String deviceTypeNo, String servicesId) {


        cn.hutool.json.JSONObject json = new cn.hutool.json.JSONObject();
        //设备类型编码获取物模型
        String thingsJsonUrl = "/things/" + deviceTypeNo + ".json";
        try {


            String thingsJsonStr = ResourcesUtil.getResourceAsString(thingsJsonUrl);
            ONode jsonONode = ONode.loadStr(thingsJsonStr);
            ONode commandONode = jsonONode.select("$.services[?(identifier == '" + servicesId + "')]");
            if (!commandONode.isNull()) {


                commandONode = commandONode.get(0);
                json = JSONUtil.parseObj(ONode.serialize(commandONode));
            }
            return json;
        } catch (Exception e) {


            log.error("读取linkos物模型,获取下行service服务异常,原因:", e.getMessage());
        }
        return null;
    }
现扩展下行转换(核心):
/**
     * 获取转化后的下行指令
     *
     * @param deviceTypeNo 设备类型编码
     * @param servicesId   服务id
     * @param unitCode     型号编码
     * @return 下行指令
     */
    public static cn.hutool.json.JSONObject getDownCommand(String deviceTypeNo, String servicesId, String unitCode) {


    	//这里根据型号编码是否空判定是否走多型号物模型
        if (StringUtils.isBlank(unitCode)) {


            return getDownCommand(deviceTypeNo, servicesId);
        }
        cn.hutool.json.JSONObject json = new cn.hutool.json.JSONObject();
        //设备类型编码获取物模型
        String thingsJsonUrl = "/things/" + deviceTypeNo + ".json";
        try {


            String thingsJsonStr = ResourcesUtil.getResourceAsString(thingsJsonUrl);
            ONode jsonONode = ONode.loadStr(thingsJsonStr);
            ONode commandONode = jsonONode.select("$.[?(@.profile.device_unit == '" + unitCode + "')]").get(0).select("$.services[?(identifier == '" + servicesId + "')]");
            if (!commandONode.isNull()) {


                commandONode = commandONode.get(0);
                json = JSONUtil.parseObj(ONode.serialize(commandONode));
            }
            return json;
        } catch (Exception e) {


            log.error("读取linkos物模型,获取下行service服务异常,原因:", e.getMessage());
        }
        return null;
    }
实际上就是根据型号编码判定是否走多型号支持。
这里snack3功不可没,就是这:
ONode commandONode = jsonONode.select(“ . [ ? ( @ . p r o f i l e . d e v i c e u n i t = = ′ " + u n i t C o d e + " ′ ) ] " ) . g e t ( 0 ) . s e l e c t ( " .[?(@.profile.device_unit == '" + unitCode + "')]").get(0).select(" .[?(@.profile.deviceunit==′"+unitCode+"′)]").get(0).select(".services[?(identifier == '” + servicesId + “')]”);这一行连续过滤轻轻松松找到对应的物模型下行指令信息。
2.业务模块支持
业务模块有设置设备的厂家、品牌、型号信息:
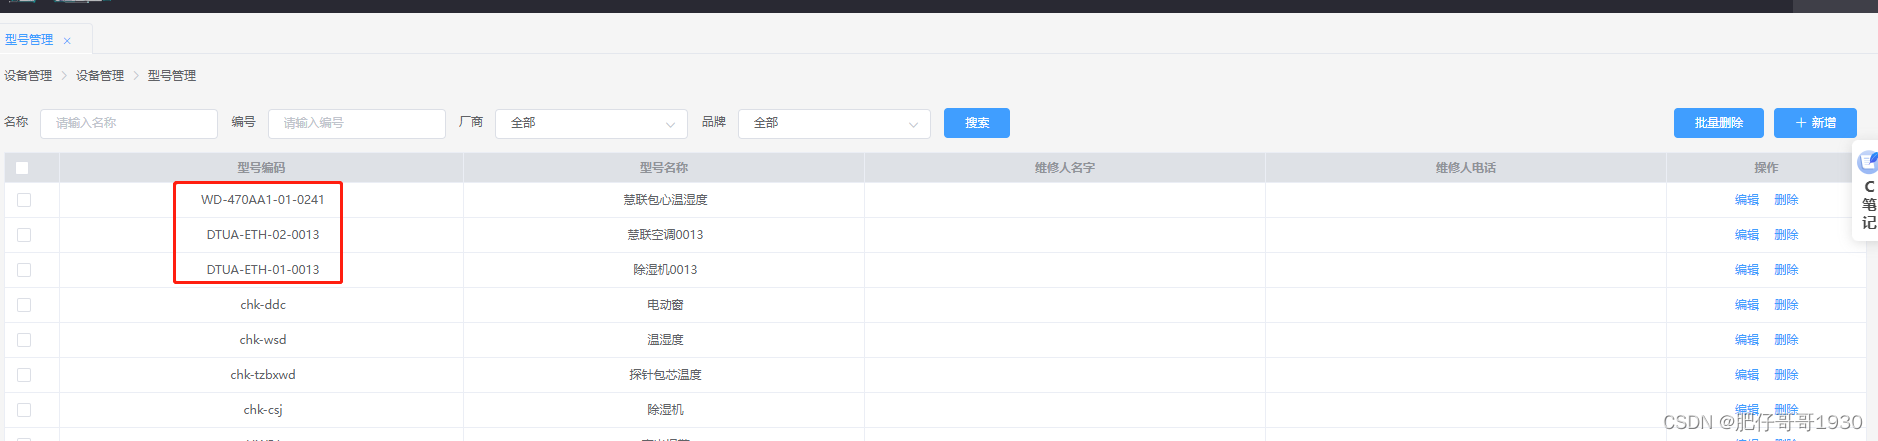
那么业务系统只需要在定义型号时,设置为跟物模型文件里的型号一致就ok。
总结
- 设计思路还是很重要的,我这个支持多型号,实际在上次就计划了,早就留好了扩展的口子
- snack3确实挺好用
- 常规的设备厂家、品牌、型号 + snack3跟物模型json赋能,真的是对接物模型平台so easy。
要支持多版本,相信大家也知道怎么处理了。好,就写到这里,UPing!