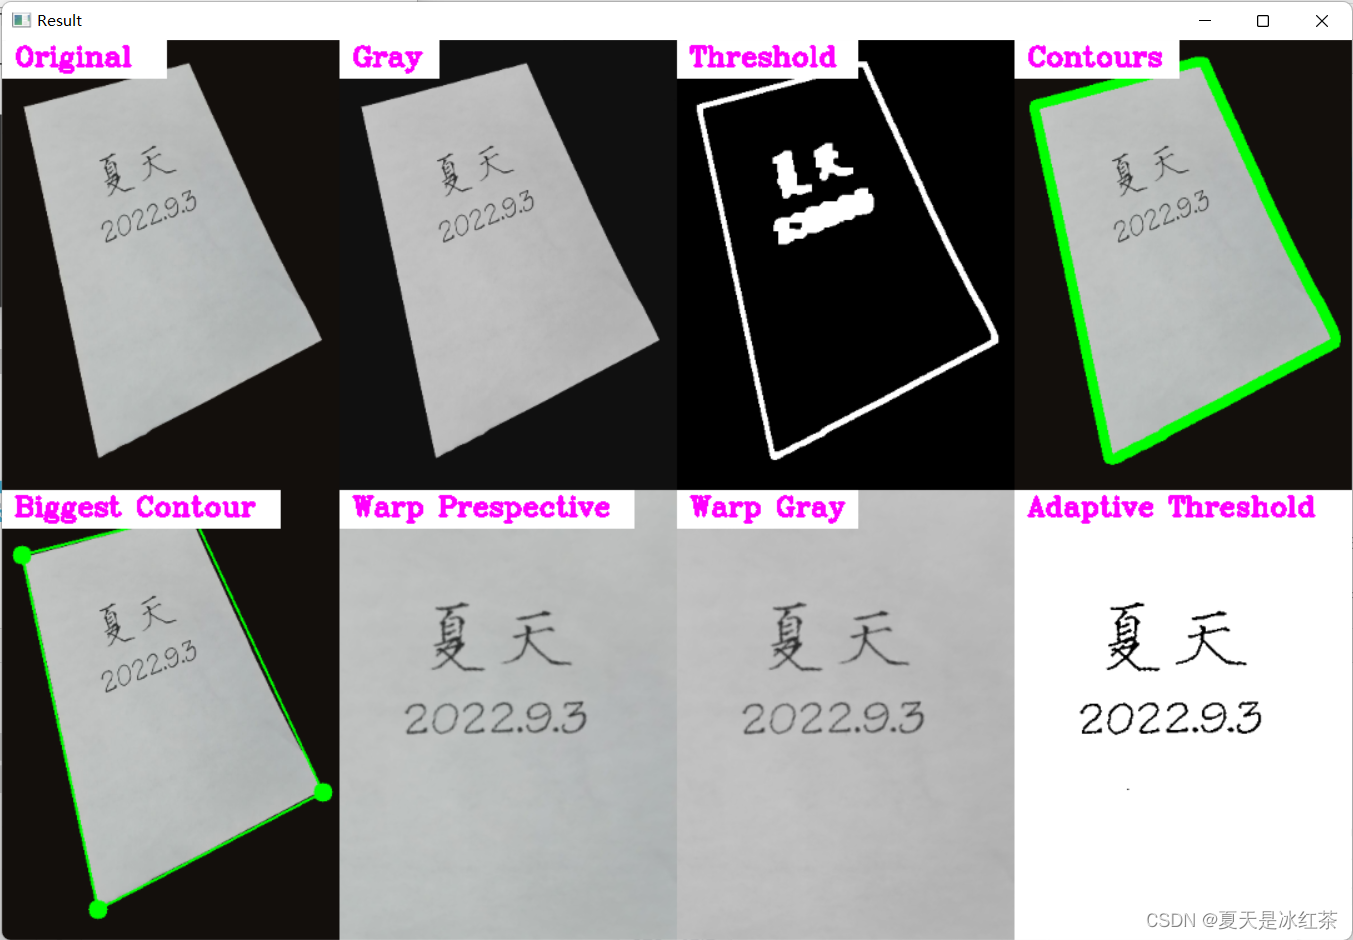
1,效果展示
网络摄像头扫描:
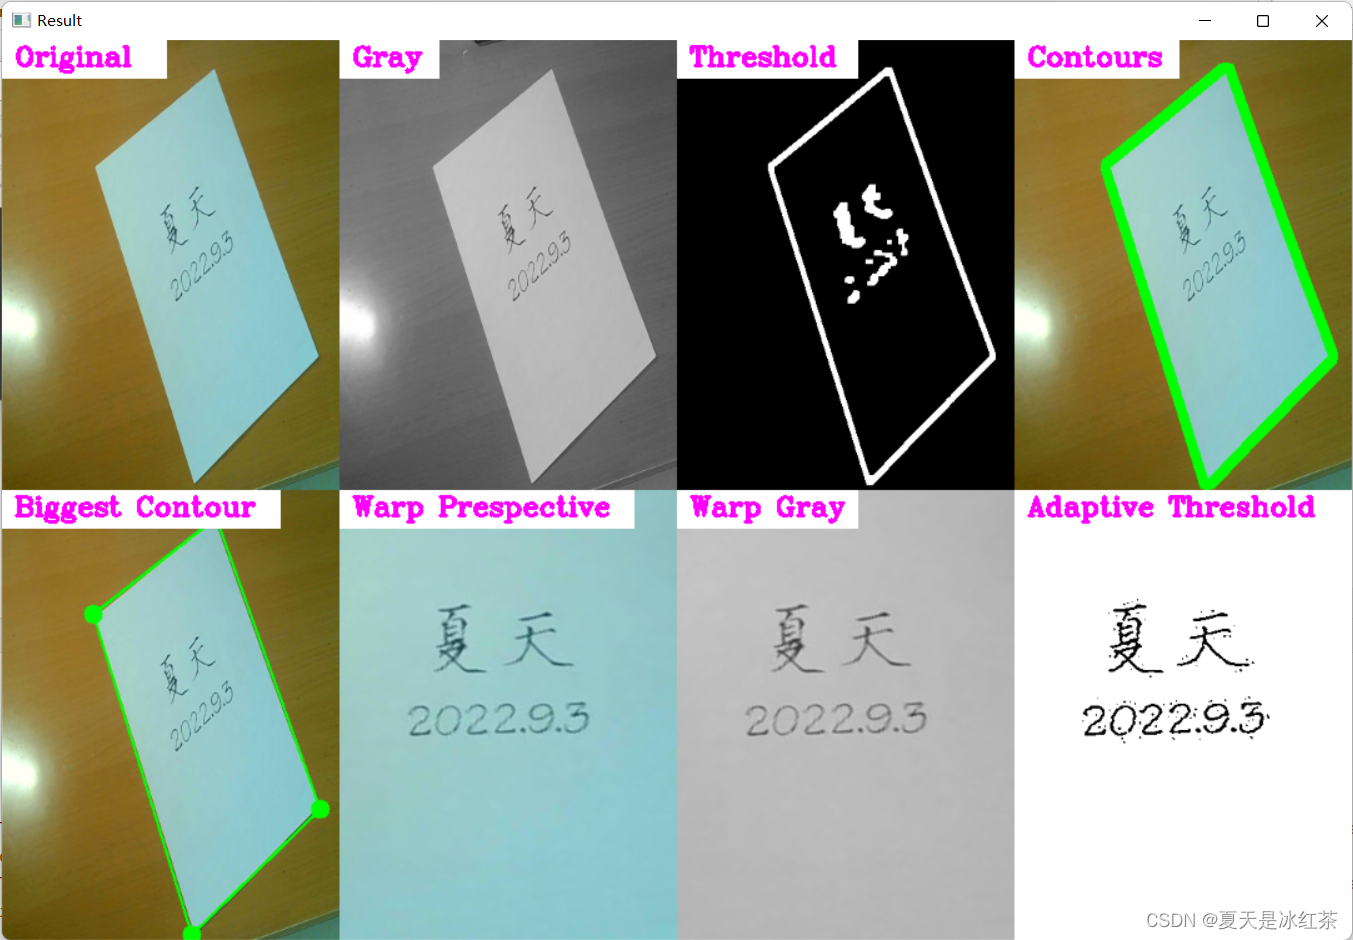
图片扫描:
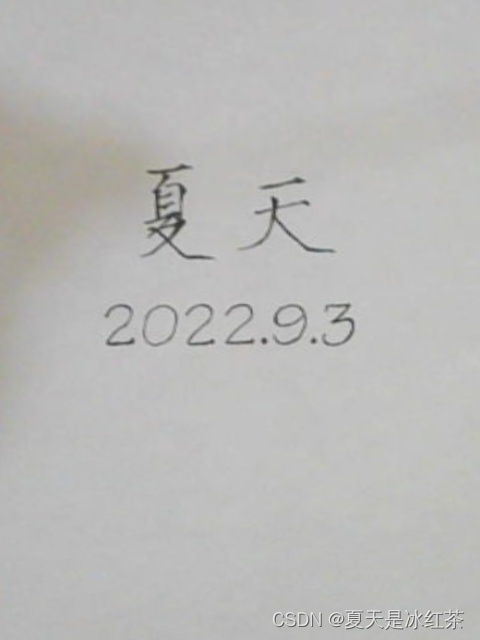
最终扫描保存的图片:
(视频)
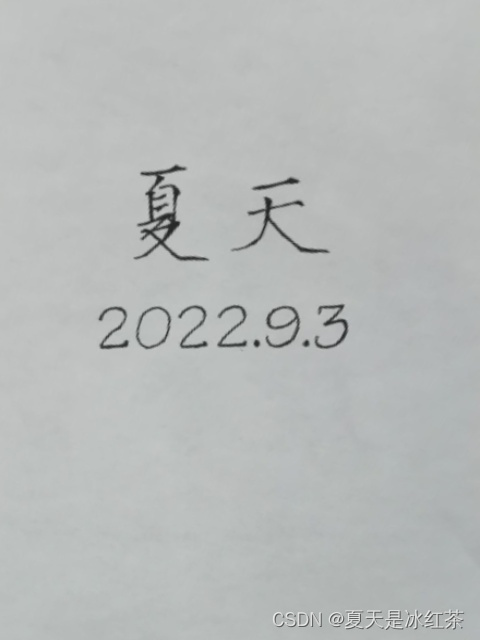
(图片)
2,项目准备
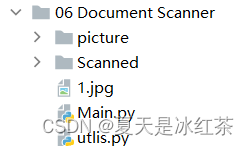
今天的项目文件只需要两个.py文件,其中一个.py文件是已经写好的函数,你将直接使用它,我不会在此多做讲解,因为我们将会在主要的.py文件import 导入它,如果想了解其中函数是如何写的,请自行学习。
utlis.py,需要添加的.py文件
import cv2
import numpy as np

# TO STACK ALL THE IMAGES IN ONE WINDOW
def stackImages(imgArray,scale,lables=[]):
    rows = len(imgArray)
    cols = len(imgArray[0])
    rowsAvailable = isinstance(imgArray[0], list)
    width = imgArray[0][0].shape[1]
    height = imgArray[0][0].shape[0]
    if rowsAvailable:
        for x in range ( 0, rows):
            for y in range(0, cols):
                imgArray[x][y] = cv2.resize(imgArray[x][y], (0, 0), None, scale, scale)
                if len(imgArray[x][y].shape) == 2: imgArray[x][y]= cv2.cvtColor( imgArray[x][y], cv2.COLOR_GRAY2BGR)
        imageBlank = np.zeros((height, width, 3), np.uint8)
        hor = [imageBlank]*rows
        hor_con = [imageBlank]*rows
        for x in range(0, rows):
            hor[x] = np.hstack(imgArray[x])
            hor_con[x] = np.concatenate(imgArray[x])
        ver = np.vstack(hor)
        ver_con = np.concatenate(hor)
    else:
        for x in range(0, rows):
            imgArray[x] = cv2.resize(imgArray[x], (0, 0), None, scale, scale)
            if len(imgArray[x].shape) == 2: imgArray[x] = cv2.cvtColor(imgArray[x], cv2.COLOR_GRAY2BGR)
        hor= np.hstack(imgArray)
        hor_con= np.concatenate(imgArray)
        ver = hor
    if len(lables) != 0:
        eachImgWidth= int(ver.shape[1] / cols)
        eachImgHeight = int(ver.shape[0] / rows)
        print(eachImgHeight)
        for d in range(0, rows):
            for c in range (0,cols):
                cv2.rectangle(ver,(c*eachImgWidth,eachImgHeight*d),(c*eachImgWidth+len(lables[d][c])*13+27,30+eachImgHeight*d),(255,255,255),cv2.FILLED)
                cv2.putText(ver,lables[d][c],(eachImgWidth*c+10,eachImgHeight*d+20),cv2.FONT_HERSHEY_COMPLEX,0.7,(255,0,255),2)
    return ver

def reorder(myPoints):

    myPoints = myPoints.reshape((4, 2))
    myPointsNew = np.zeros((4, 1, 2), dtype=np.int32)
    add = myPoints.sum(1)

    myPointsNew[0] = myPoints[np.argmin(add)]
    myPointsNew[3] =myPoints[np.argmax(add)]
    diff = np.diff(myPoints, axis=1)
    myPointsNew[1] =myPoints[np.argmin(diff)]
    myPointsNew[2] = myPoints[np.argmax(diff)]

    return myPointsNew


def biggestContour(contours):
    biggest = np.array([])
    max_area = 0
    for i in contours:
        area = cv2.contourArea(i)
        if area > 5000:
            peri = cv2.arcLength(i, True)
            approx = cv2.approxPolyDP(i, 0.02 * peri, True)
            if area > max_area and len(approx) == 4:
                biggest = approx
                max_area = area
    return biggest,max_area
def drawRectangle(img,biggest,thickness):
    cv2.line(img, (biggest[0][0][0], biggest[0][0][1]), (biggest[1][0][0], biggest[1][0][1]), (0, 255, 0), thickness)
    cv2.line(img, (biggest[0][0][0], biggest[0][0][1]), (biggest[2][0][0], biggest[2][0][1]), (0, 255, 0), thickness)
    cv2.line(img, (biggest[3][0][0], biggest[3][0][1]), (biggest[2][0][0], biggest[2][0][1]), (0, 255, 0), thickness)
    cv2.line(img, (biggest[3][0][0], biggest[3][0][1]), (biggest[1][0][0], biggest[1][0][1]), (0, 255, 0), thickness)

    return img

def nothing(x):
    pass

def initializeTrackbars(intialTracbarVals=0):
    cv2.namedWindow("Trackbars")
    cv2.resizeWindow("Trackbars", 360, 240)
    cv2.createTrackbar("Threshold1", "Trackbars", 200,255, nothing)
    cv2.createTrackbar("Threshold2", "Trackbars", 200, 255, nothing)


def valTrackbars():
    Threshold1 = cv2.getTrackbarPos("Threshold1", "Trackbars")
    Threshold2 = cv2.getTrackbarPos("Threshold2", "Trackbars")
    src = Threshold1,Threshold2
    return src
3,代码的讲解与展示
import cv2
import numpy as np
import utlis


########################################################################
webCamFeed = True                                                      #
pathImage = "1.jpg"                                                    #
cap = cv2.VideoCapture(1)                                              #
cap.set(10,160)                                                        #
heightImg = 640                                                        #
widthImg  = 480                                                        #
########################################################################

utlis.initializeTrackbars()
count=0

while True:

    if webCamFeed:
        ret, img = cap.read()
    else:
        img = cv2.imread(pathImage)
    img = cv2.resize(img, (widthImg, heightImg))
    imgBlank = np.zeros((heightImg,widthImg, 3), np.uint8)
    imgGray = cv2.cvtColor(img, cv2.COLOR_BGR2GRAY)
    imgBlur = cv2.GaussianBlur(imgGray, (5, 5), 1) # 添加高斯模糊
    thres=utlis.valTrackbars() #获取阈值的轨迹栏值
    imgThreshold = cv2.Canny(imgBlur,thres[0],thres[1]) # 应用CANNY模糊
    kernel = np.ones((5, 5))
    imgDial = cv2.dilate(imgThreshold, kernel, iterations=2)
    imgThreshold = cv2.erode(imgDial, kernel, iterations=1)

    # 查找所有轮廓
    imgContours = img.copy()
    imgBigContour = img.copy()
    contours, hierarchy = cv2.findContours(imgThreshold, cv2.RETR_EXTERNAL, cv2.CHAIN_APPROX_SIMPLE) # FIND ALL CONTOURS
    cv2.drawContours(imgContours, contours, -1, (0, 255, 0), 10) # 绘制所有检测到的轮廓

    # 找到最大的轮廓
    biggest, maxArea = utlis.biggestContour(contours) # 找到最大的轮廓
    if biggest.size != 0:
        biggest=utlis.reorder(biggest)
        cv2.drawContours(imgBigContour, biggest, -1, (0, 255, 0), 20) # 画最大的轮廓
        imgBigContour = utlis.drawRectangle(imgBigContour,biggest,2)
        pts1 = np.float32(biggest) # 为扭曲准备点
        pts2 = np.float32([[0, 0],[widthImg, 0], [0, heightImg],[widthImg, heightImg]]) # 为扭曲准备点
        matrix = cv2.getPerspectiveTransform(pts1, pts2)
        imgWarpColored = cv2.warpPerspective(img, matrix, (widthImg, heightImg))

        #从每侧移除20个像素
        imgWarpColored=imgWarpColored[20:imgWarpColored.shape[0] - 20, 20:imgWarpColored.shape[1] - 20]
        imgWarpColored = cv2.resize(imgWarpColored,(widthImg,heightImg))

        # 应用自适应阈值
        imgWarpGray = cv2.cvtColor(imgWarpColored,cv2.COLOR_BGR2GRAY)
        imgAdaptiveThre= cv2.adaptiveThreshold(imgWarpGray, 255, 1, 1, 7, 2)
        imgAdaptiveThre = cv2.bitwise_not(imgAdaptiveThre)
        imgAdaptiveThre=cv2.medianBlur(imgAdaptiveThre,3)

        # 用于显示的图像阵列
        imageArray = ([img,imgGray,imgThreshold,imgContours],
                      [imgBigContour,imgWarpColored, imgWarpGray,imgAdaptiveThre])

    else:
        imageArray = ([img,imgGray,imgThreshold,imgContours],
                      [imgBlank, imgBlank, imgBlank, imgBlank])

    # 显示标签
    lables = [["Original","Gray","Threshold","Contours"],
              ["Biggest Contour","Warp Prespective","Warp Gray","Adaptive Threshold"]]

    stackedImage = utlis.stackImages(imageArray,0.75,lables)
    cv2.imshow("Result",stackedImage)

    # 按下“s”键时保存图像
    if cv2.waitKey(1) & 0xFF == ord('s'):
        cv2.imwrite("Scanned/myImage"+str(count)+".jpg",imgWarpColored)
        cv2.rectangle(stackedImage, ((int(stackedImage.shape[1] / 2) - 230), int(stackedImage.shape[0] / 2) + 50),
                      (1100, 350), (0, 255, 0), cv2.FILLED)
        cv2.putText(stackedImage, "Scan Saved", (int(stackedImage.shape[1] / 2) - 200, int(stackedImage.shape[0] / 2)),
                    cv2.FONT_HERSHEY_DUPLEX, 3, (0, 0, 255), 5, cv2.LINE_AA)
        cv2.imshow('Result', stackedImage)
        cv2.waitKey(300)
        count += 1
    elif cv2.waitKey(1) & 0xFF == 27:
        break
今天需要要讲解的还是主函数Main.py,由我来讲解,其实我也有点压力,因为这个项目它涉及了Opencv核心知识点,有的地方我也需要去查找,因为学久必会忘,更何况我也是刚刚起步的阶段,所以我会尽我所能的去讲清楚。
注意:我是以网络摄像头为例,读取图片的方式,同理可得。
- 首先,请看#号框内,我们将从这里开始起,设立变量webCamFeed,用其表示是否打开摄像头,接着亮度,宽,高的赋值。utlis.initializeTrackbars()是utlis.py文件当中的轨迹栏初始化函数。
- 然后,我们依次对图像进行大小调整、灰度图像、高斯模糊、Canny边缘检测、扩张、侵蚀。
- 之后,找出图像可以检测的所有轮廓,并找到最大的轮廓并且画出来,同时要为扫描到的文档找到四个顶点,也就是扭曲点,用cv2.getPerspectiveTransform()函数找到点的坐标,用cv2.warpPerspective()函数输出图像,如果到了这一步,我们去运行一下会发现有边角是桌子的颜色但并没有很多,所以我们需要从每侧移除20个像素,应用自适应阈值让图像变得较为清晰——黑色的文字更加的明显。
- 接着,配置utlis.stackImages()需要的参数——图像(列表的形式),规模,标签(列表的形式,可以不用标签,程序一样可以正确运行),展示窗口。
- 最后,如果你觉得比较满意,按下s键,即可保存,并在图中央出现有"Scan Saved"的矩形框。点击Esc键即可退出程序。
4,项目资源
5,项目总结与评价
它是一个很好的项目,要知道我们要实现这种效果,即修正文档,还得清晰,要么有VIP,兑换积分,看广告等。如果你发现扫描的文档不清晰,请修改合适的分辨率。以我个人来看,它的实用性很高。本来今天是想要做人脸识别的项目的,但后面我一直没有解决下载几个包错误的问题(现在已经解决),文档扫描是明天的项目,今天是赶着做好的,那么希望你在今天的项目中玩得开心!