前言:
测试框架的设计有两种思路,一种是自底向上,从脚本逐步演变完善成框架,这种适合新手了解框架的演变过程。另一种则是自顶向下,直接设计框架结构和选取各种问题的解决方案,这种适合有较多框架事件经验的人。本章和下一张分别从两种设计思路来介绍框架的搭建过程。
【文章末尾给大家留下了大量的福利】

从脚本到用例
相比于一堆测试脚本,使用规范化的测试用例格式会方便我们灵活的执行和管理用例。一个完整的自动化测试用例应包含:
- 测试准备(setup):测试准备步骤、用例辅助方法或工具,可以共用;
- 测试步骤(test steps):核心测试步骤;
- 断言(assertions):期望结果于实际结果的比对,用例可以报告不止一个断言;
- 测试清理(teardown):对执行测试造成的影响进行清理和还原,以免影响后续执行,可以共用。
编写测试函数
将测试脚本转化为Pytest测试用例的方法非常简单,只要将测试过程编写为test开头的测试函数即可。
有时候我们为了快速实现一个功能,会直接把代码按步骤写到模块里,如下例:
代码test_baidu_search_v0.9.py内容
Copy
from selenium import webdriver from time import sleep driver = webdriver.Chrome() driver.get("https://www.baidu.com") driver.find_element_by_id('kw').send_keys(' 北凡000') driver.find_element_by_id('su').click() sleep(1) if '北凡000' in driver.title: print('通过') else: print('失败') driver.quit()
然后我们开启第一步优化,首先,可以把步骤写到一个函数里,这样方便在脚步中写多个用例,另外,我们可以按照Pytest测试框架用例到写法,写成标准的用例。期望结果的判断我们使用标准的assert断言语句,修改后如下:
代码test_baidu_search_v1.0.py内容
Copy
from selenium import webdriver from time import sleep def test_baidu_search_01(): driver = webdriver.Chrome() driver.get("https://www.baidu.com") driver.find_element_by_id('kw').send_keys('北凡000') driver.find_element_by_id('su').click() sleep(1) assert '北凡000' in driver.title, '标题不包含北凡000' # 自定义失败消息 driver.quit()
不同于v0.9版Python脚本的运行方法(命令行使用python <脚步路径>),Pytest用例脚本使用pytest <脚本路径>或python -m pytest <脚本路径>来执行。
我们也可以在Pytest用例脚本下面加上以下语句,
Copy
if __name__ == '__main__': pytest.main([__file__])
这样便可以像Python脚本一样直接运行。其中__file__指当前脚本,也可以添加其他运行参数,如-qs等。
使用断言
测试用例中必须包含期望结果来验证执行的通过与否。不同于“调试”,需要有人值守来人工判断没个执行过程是否通过,自动化“测试”往往需要批量运行,并自动判断用例是否通过。断言即是执行过程中的实际结果与期望结果的自动对比。
Pytest中使用标准的assert语句来进行断言。assert断言语句在用例执行失败时(和期望结果不一致)会抛出AssertionError异常,测试框架会自动捕获该异常,并将用例标记为执行失败状态,并且不会因为异常导致执行中断而影响其他用例的执行。
注:在用例中也可以使用if判断配合pytest.fail()或者手动抛出AsserionError异常来将用例设置为失败状态,示例如下:
Copy
if '韩志超' not in driver.title: # rasie AssersionError('标题不包含北凡000') pytest.fail('标题不包含北凡000')
Web UI自动化测试过程中常用的断言策略有以下几种:
- 流程成功执行视为通过:按确定的元素操作步骤,可以正常完成整个流程视为通过;
- 通过标题断言:通过当前网页标题driver.title来判断处于某一页面上;
- 通过URL断言:通过当前URL,driver.current_url来判断处于某一页面上;
- 通过页面源码断言:通过网页源代码driver.page_source中包含特定信息来判断处于某一页面上;
- 通过存在特定元素断言:通过存在某个特定元素来判断处于某一页面上。
通过元素判断是否在某一页面上的示例如下:
Copy
from selenium import webdriver from selenium.common.exceptions import NoSuchElementException def test_open_baidu(): driver = webdriver.Chrome() driver.get("https://www.baidu.com") try: driver.find_element_by_id('kw') # 尝试定位搜索框 except NoSuchElementException: pytest.fail('不存在搜索框')
在框架中,可以将常用的断言方法进行封装以方便使用。
分离测试准备及清理方法
在测试用例中,我们要尽可能的分离核心测试步骤,将可以共用的测试准备及测试清理步骤单独提取出来,以方便复用。
在上例中,我们核心的测试步骤是从打开百度网站到断言网页标题,而启动浏览器和关闭浏览器可以视为测试准备和测试清理方法。
测试准备和测试清理方法我们可以使用Pytest中的setup_function()及teardown_function()方法,也可以使用自定义的Fixture方法来吧两个方法集中的一个函数中,如下例:
代码test_baidu_search_v3.py内容
Copy
from time import sleep from selenium import webdriver import pytest def setup_function(): global driver driver = webdriver.Chrome() def teardown_function(): driver.quit() def test_baidu_search_01(driver): driver.get("https://www.baidu.com") driver.find_element_by_id('kw').send_keys('北凡000') driver.find_element_by_id('su').click() sleep(1) assert '北凡000' in driver.title if __name__ == '__main__': pytest.main([__file__])
使用自定义Fixture方法#
代码test_baidu_search_v4.py内容
Copy
from time import sleep from selenium import webdriver import pytest @pytest.fixture def driver(): dr = webdriver.Chrome() yield dr dr.quit() def test_baidu_search_01(driver): driver.get("https://www.baidu.com") driver.find_element_by_id('kw').send_keys('北凡000') driver.find_element_by_id('su').click() sleep(1) assert '北凡000' in driver.title if __name__ == '__main__': # --html需要pip install pytest-html pytest.main([__file__, '--html=report.html','--self-contained-html'])
上例中我们自定义了一个名为driver的Fixture方法。yield上面对的所有语句属于测试准,这里创建了一个浏览器驱动对象dr。yield语句将dr对象交给用例执行,并等待用例执行完毕,再执行下面的测试清理语句,退出浏览器。
用例中使用Fixture函数名driver作为参数来注入测试准备和测试清理方法,用例中使用的driver即Fixture函数yield返回的dr,浏览器驱动对象。
使用Pytest-selenium插件
Pytest框架的优点之一是,拥有很多功能丰富的插件。使用这些插件可以省略我们自己编写Fixture方法的过程,直接安装使用。
上例中我们自己编写了一个名为driver的fixture方法,我们也可以直接使用Pytest-Selenium插件,该插件提供了一个全局的driver(或selenium)Fixture方法,可以直接使用,并且支持切换使用的浏览器。安装Pytest-Selenium插件,并修改代码如下:
代码test_baidu_search_v5.py内容
Copy
from time import sleep from selenium import webdriver import pytest def test_baidu_search_01(driver): driver.get("https://www.baidu.com") driver.find_element_by_id('kw').send_keys('北凡000') driver.find_element_by_id('su').click() sleep(1) assert '北凡000' in driver.title if __name__ == '__main__': # --html需要pip install pytest-html # --driver 需要pip install pytest-selenium pytest.main([__file__, '--driver=chrome', '--html=report.html','--self-contained-html'])
pytest-selenium还支持配置浏览器选项及配合pytest-html失败自动截图等功能,详细可以参考其官方使用文档https://pytest-selenium.readthedocs.io/en/latest/。
注:pytest-selenium默认会拦截所有接口请求,可以在pytest.ini中配置sensitive_url = ''来设置无敏感url。
生成测试报告
使用Pytest框架生成测试报告最常用的插件有pytest-html和allure-pytest两种,前者简单,可以生成单文件测试报告。后者华丽,功能强大,使用较为复杂。本章我们使用pytest-html来生成报告,allure-pytest的具体使用下章讲解。
pytest-html的使用方式非常简单,安装pytest-html并使用--html来生成报告即可:
if name == 'main':
# --html需要pip install pytest-html
pytest.main([file, '--html=report.html','--self-contained-html'])
注:如果想自己生成HTML测试报告,可以在conftest.py文件中通过pytest_terminal_summary钩子方法terminalreporter参数对象的stats属性结合三方库Jinjia2来自定义生成报告。
增加易维护性
众所周知,UI的变动导致Web自动化用例的维护成本非常高,当一个元素变动时(如登录按钮),所有使用到这个元素的用例都将因此而失败,逐个修改每一条用例的成本是非常高的。
最好的做法就是使用模块封装的方式来隔离变动,隔离变动旨在隔离易变的和稳定的,常用的策略为:
- 代码:隔离易变(如元素定位)和稳定的(页面操作),可以使用模块封装的方式对易变的操作进行封装;
- 数据:变动较频繁,建议与代码隔离,以降低代码的修改;
- 配置:配置也是数据的一种,主要用于增加框架使用的灵活性,配置变动也较频繁,讲义与代码隔离。
另外使用数据驱动、添加日志和失败自动截图也是快速定位问题、降低维护成本的有效方法。
元素失败自动截图
我们可以封装通用的定位元素方法来代替driver.find_element(),在其中捕获异常并截图。
并且为了方便区分元素,定位元素时为元素添加了一个高亮黄色的边框。实现方式如下:
Copy
import time import os from selenium import webdriver from selenium.webdriver.support.wait import WebDriverWait from selenium.webdriver.support import expected_conditions as EC from selenium.common.exceptions import TimeoutException, NoSuchElementException SNAPSHOTS_DIR = 'snapshots' def find_element(driver: webdriver.Chrome, by, value, timeout=5): style = 'background: green; border: 2px solid red;' js = 'arguments[0].setAttribute("style", arguments[1]);' try: WebDriverWait(driver, timeout).until( EC.presence_of_element_located((by,value)) ) except TimeoutException: snapshot_file = 'snapshot_%s.png' % int(time.time()) driver.save_screenshot(os.path.join(SNAPSHOTS_DIR, snapshot_file)) raise NoSuchElementException('%s 秒内未找到元素 %s=%s' % (timeout, by, value)) else: element = driver.find_element(by, value) driver.execute_script(js, element, style) # 添加高亮样式 return element
分层-封装测试步骤
我们可以使用分层的方式,将每个测试步骤,如打开百度、输入关键词、点击搜索按钮等,封装成函数以供用例调用。
我们可以每个元素操作封装一个函数,也可以封装一个包含这3步操作等搜索函数,来完成所有步骤。前一种方法虽然麻烦,但可以保证步骤操作的灵活性,并自由组合,如打开百度其他用例也可使用,如输入关键词后不点击搜索按钮等,示例代码如下:
代码test_baidu_search_v6.py内容
Copy
from time import sleep from selenium import webdriver import pytest def find_element(driver, by, value, timeout=5): ... def open_baidu(driver): print('打开百度') driver.get("https://www.baidu.com") def input_keyword(driver, keyword): print(f'输入关键字 {keyword}') find_element(driver, 'id', 'kw').send_keys(keyword) def click_search_btn(driver): print('点击百度一下按钮') find_element(driver, 'id', 'su').click() def test_baidu_search_01(driver): open_baidu(driver) # Step 01 input_keyword(driver, '北凡000') # Step 02 click_search_btn(driver) # Step 03 sleep(1) assert '北凡' in driver.title # 断言 if __name__ == '__main__': # --html需要pip install pytest-html pytest.main([__file__, '--html=report.html','--self-contained-html'])
当我们将元素的操作进行封装,以实现只在一个地方定位和操作易变的元素。所有使用到该元素的该操作时(如输入关键词),都应该调用封装的函数,而不是直接定位函数完成操作。这样当元素变动是,只需要修复所封装的元素操作方法即可(用例不用修改)。这大大降低了维护成本。
分离测试数据
相对于代码来说,测试数据是易变的,同时不同悲催环境使用的测试数据集也应该不一样。
在数据量较少的情况下,我们可以用一个JSON或YAML文件来存储所需的测试数据。
文件data.json内容
Copy
{ "keywords": ["北凡000","北凡", "北凡000"] }
文件data.yaml内容
Copy
keywords: - 北凡000 - 北凡 - 北凡000
代码test_baidu_search_v7.py内容
Copy
import json import yaml # 需要pip install pyyaml安装 import pytest def load_json(file_path): print(f'加载JSON文件{ file_path }') with open('data.json') as f: return json.load(f) def load_yaml(file_path): print(f'加载YAML文件{ file_path }') with open('data.json') as f: return yaml.safe_load(f) @pytest.fixture def case_data(): # return load_json('demo.json') return load_yaml('demo.yaml') @pytest.fixture def driver(): dr = webdriver.Chrome() yield dr dr.quit() def test_baidu_search_01(driver, case_data): keyword = case_data['keywords'][0] # 从用例数据中选取指定数据 driver.get("https://www.baidu.com") driver.find_element_by_id('kw').send_keys(keyword) driver.find_element_by_id('su').click() sleep(1) assert '北凡' in driver.title
注:Fixtrue函数不建议用使用test_开头,如test_data定义fixture,以免识别为测试用例。
使用数据驱动
示例代码如下:
Copy
import pytest KEYWORD_LIST= load_yaml('demo.yaml')['keywords'] @pytest.mark.paramitrize('keyword', KEYWORD_LIST) def test_baidu_search_01(driver, keyword): # keyword对应每一个要搜索的关键词 driver.get("https://www.baidu.com") driver.find_element_by_id('kw').send_keys(keyword) driver.find_element_by_id('su').click() sleep(1) assert keyword in driver.title # 有可能失败
使用日志
在项目中必要的输出信息可以帮助我们显示测试步骤的一些中间结果和快速的定位问题,虽然Pytest框架可以自动捕获print信息并输出屏幕或报告中,当时更规范的应使用logging的记录和输出日志。 相比print, logging模块可以分等级记录信息。
日志等级
实用方法层、页面对象层、Fixture业务层、用例层都可以直接使用logging来输出日志, 使用方法。
Copy
# test_logging.py import logging def test_logging(): logging.debug('调试信息') logging.info('步骤信息') logging.warning('警告信息,一般可以继续进行') logging.error('出错信息') try: assert 0 except Exception as ex: logging.exception(ex) # 多行异常追溯信息,Error级别 logging.critical("严重出错信息")
使用pytest运行不会有任何的log信息,因为Pytest默认只在出错的信息中显示WARNING以上等级的日志。 要开启屏幕实时日志,并修改log显示等级。
Log等级: NOTSET < DEBUG < INFO < WARNING(=WARN) < ERROR < CRITICAL
Copy
# pytest.ini [pytest] log_cli=True log_cli_level=INFO
运行pytest test_logging.py,查看结果:
Copy
----------------------------- live log call ------------------------------- INFO root:test_logging.py:5 步骤信息 WARNING root:test_logging.py:6 警告信息,一般可以继续进行 ERROR root:test_logging.py:7 出错信息 ERROR root:test_logging.py:11 assert 0 Traceback (most recent call last): File "/Users/apple/Desktop/demo/test_logging.py", line 9, in test_logging assert 0 AssertionError: assert 0 CRITICAL root:test_logging.py:12 严重出错信息
由于日志等级设置的为INFO级别,因此debug的日志不会输出。
对于不同层日志级别的使用规范,可以在实用方法层输出debug级别的日志,如组装的文件路径,文件读取的数据,执行的sql,sql查询结果等等。 在PageObject层输出info级别的日志,如执行某个页面的某项操作等。 Fixtures层和用例层可以根据需要输出一些必要的info,warning或error级别的信息。
日志格式
默认的日志格式没有显示执行时间,我们也可以自定义日志输出格式。
Copy
# pytest.ini ... log_cli_format=%(asctime)s %(levelname)s %(message)s log_cli_date_format=%Y-%m-%d %H:%M:%S %(asctime)s表示时间,默认为Sat Jan 13 21:56:34 2022这种格式,我们可以使用log_cli_date_format来指定时间格式。 %(levelname)s代表本条日志的级别 %(message)s为具体的输出信息
再次运行pytest test_logging.py,显示为以下格式:
Copy
-------------------------------- live log call ------------------------------- 2022-8-06 21:44:50 INFO 步骤信息 2022-8-06 21:44:50 WARNING 警告信息,一般可以继续进行 2022-8-06 21:44:50 ERROR 出错信息 2022-8-06 21:44:50 ERROR assert 0 Traceback (most recent call last): File "/Users/apple/Desktop/demo/test_logging.py", line 9, in test_logging assert 0 AssertionError: assert 0 2022-8-06 21:44:50 CRITICAL 严重出错信息
更多日志显示选项
- %(levelno)s: 打印日志级别的数值
- %(pathname)s: 打印当前执行程序的路径,其实就是sys.argv[0]
- %(filename)s: 打印当前执行程序名
- %(funcName)s: 打印日志的当前函数
- %(lineno)d: 打印日志的当前行号
- %(thread)d: 打印线程ID
- %(threadName)s: 打印线程名称
- %(process)d: 打印进程ID
输出日志到文件
在pytest.ini中添加以下配置
Copy
... log_file = logs/pytest.log log_file_level = debug log_file_format = %(asctime)s %(levelname)s %(message)s log_file_date_format = %Y-%m-%d %H:%M:%S
log_file是输出的文件路径,输入到文件的日志等级、格式、日期格式要单独设置。 遗憾的是,输出到文件的日志每次运行覆盖一次,不支持追加模式。
用例依赖处理#
一般来说,不建议用例之间存在顺序依赖。用例应该不依赖其他任何用例能够独立运行。加入确实存在步骤的先后顺序,如:
Copy
def test_add_customer(): pass def test_query_customer(): pass def test_delete_customer(): pass
假设测试查询客户及测试删除用户需要先添加用户,常用的处理方法如下:
- 使用步骤封装代替用例顺序依赖
将业务步骤单独封装,并在用例中进行调用,如:
Copy
def add_customer(): pass def query_customer(): pass def delete_customer(): pass def test_add_customer(): add_customer() def test_query_customer(): add_customer() query_customer() def test_delete_customer(): add_customer() delete_customer()
虽然add_customer()方法会执行多次,但是每条用例都可以单独执行,比较推荐这种方式。
- 使用例按顺序执行
如果想要强制用例有序可以使用插件pytest-ordering,使用pip安装后,使用方式如下:
Copy
@pytest.mark.run(order=1) def test_add_customer(): pass @pytest.mark.run(order=2) def test_query_customer(): pass @pytest.mark.run(order=3) def test_delete_customer(): pass
增加灵活性
实现多环境切换
对于自动化测试框架来说,希望能一套用例来可以跑多套环境。不同环境的执行流程基本是一样的,不一样的是服务器地址(base_url)和所使用的数据。
我们可以使用pytest-base-url插件,配合pytest-variables插件来实现服务器地址和测试数据的切换。示例如下:
Copy
from time import sleep from selenium import webdriver import pytest def test_baidu_search_01(driver, base_url, variables): url = base_url + '/' keyword = variables['keywords'][0] driver.get(url) driver.find_element_by_id('kw').send_keys(keyword) driver.find_element_by_id('su').click() sleep(1) assert '北凡' in driver.title if __name__ == '__main__': # --html需要pip install pytest-html # --driver 需要pip install pytest-selenium # --base-url 需要pip install pytest-base-url # --variables 需要安装 pip install pytest-variables pytest.main([__file__, '--driver=chrome', '--html=report.html','--self-contained-html', '--base-url=https://www.baidu.com', '--variables=test.json'])
测试环境数据test.json内容如下:
Copy
{ "keywords": ["北凡000","北凡", "北凡000"] }
由于pytest-selenium默认把所有url当作敏感url,我们需要在pytest.ini中通过配置进行关闭,即设置无敏感url。具体设置方法如下:
Copy
[pytest] sensitive_url = None
用例标记
除了使用目录来按模块来整理用例外,我们也可以通过规范用例命令规则及自定义标签来组织用例。除@pytest.mark.skip、@pytest.mark.skipIf、@pytest.mark.xfail、@pytest.mark.paramitrize等系统标记外,我们可以自定义任何标记来使用,如使用smoke标记冒烟用例,使用destructive标记破坏性用例(有修改操作未还原的),使用abnormal标记异常用例,使用flaky标记不稳定用例,使用h5标记H5相关用例。
在严格模式下,可用标签需要在pytest.ini例出来,以防止随意使用任意标签导致的标签混乱问题。在pytest.ini文件注册标签如下:
Copy
[pytest] markers = smoke: smoke test case destructive: destructive test case abnormal: abnormal test case flaky: flaky test case h5: h5 test case hzc: testcase by hzc 用例标记方式如下 ```python @pytest.mark.smoke def test_baidu_search_01(driver, base_url, variables): ...
用例可以添加多个标记,运行时可以使用pytest -m 命令挑选标签执行,如
Copy
pytest -m "smoke and h5"
即运行带例smoke和h5两个标签的用例,另外也支持or,not等多个标签的逻辑判断。
在规划标记是,也可以按维护人添加标记,以方便运行某人负责的所有用例。
用例等级
除了自定义用例标记外,我们可以对用例重要性进行评级,来快速回归不同优先级的用例。对用例进行标记等级,我们可以使用三方插件pytest-level。
安装方式
Copy
pip install pytest-level
标记用例
Copy
@pytest.mark.smoke @pytest.mark.level(1) def test_baidu_search_01(driver, base_url, variables): ...
运行方式
Copy
pytest --level=1
用例顺序
在某些情况下我们如何希望用例有序,可以使用pytest-ordering插件实现。
安装方法
Copy
pip install pytest-ordering
标记用例
Copy
import pytest @pytest.mark.run(order=1) def test_login(): pass @pytest.mark.run(order=2) def test_add_goods(): pass @pytest.mark.run(order=3) def test_query_goods(): pass @pytest.mark.run(order=4) def test_del_goods(): pass
运行时用例便可按数字从小到大的顺序运行。
一般情况下,不建议用例之间有顺序依赖。每条用例应该可以独立执行的,有依赖的测试用例建议作为测试步骤放到一个大的场景用例中去,这样可以确保执行的有序,如:
Copy
def login(username, password): pass def add_goods(goods_name, *args): pass def query_goods(goods_name): pass def del_goods(goods_name): pass def test_login(): login('user', 'pwd') # ... 断言,结果判断 def test_add_goods(): login('user', 'pwd') add_goods('...') # ... 断言,结果判断 def test_query_goods(): login('user', 'pwd') add_goods('...') query_goods('...') # ... 断言,结果判断 def test_del_goods(): login('user', 'pwd') add_goods('...') query_goods('...') del_goods('...') # ... 断言,结果判断
也可以写一个大的场景用例,包含4个测试点点验证:
这看起来有很多冗余,并且在一个用例中,如test_del_goods中,登录、添加商品、查询商品应该被视为是测试准备(setup),只保留核心的del_goods('...')作为测试步骤。
Copy
def test_login_add_query_del_goods(): login('user', 'pwd') # ... 断言,结果判断 add_goods('...') # ... 断言,结果判断 query_goods('...') # ... 断言,结果判断 del_goods('...') # ... 断言,结果判断
这样步骤永远是有序的,一个步骤失败,后续步骤将中断,不再执行。
另外,针对上面每个验证点分开的用例形式,我们可以使用Fixture模块化的特性,采用步骤渐进的方式来编写每一个带依赖的步骤,示例如下:
Copy
import pytest @pytest.fixture def login(): # fixture一般不使用普通参数,默认用户名密码需要确定并写在函数中 useranme, password = 'user', 'pwd' # ... 业务逻辑 @pytest.fixture def add_goods(login): # 依赖login步骤 pass @pytest.fixture def query_goods(add_goods): # 依赖add_goods步骤 pass def test_login(): # 作为参数引用login步骤 login('user', 'pwd') # ... 断言,结果判断 def test_add_goods(login): add_goods('...') # ... 断言,结果判断 def test_query_goods(add_goods): query_goods('...') # ... 断言,结果判断 def test_del_goods(query_goods): del_goods('...') # ... 断言,结果判断
这样做的好处是,任何一个用例都可以单独执行。缺点是一起执行时,登录、添加商品等会执行不止一遍。
不稳定用例处理
不稳定用例(flaky tests)是UI自动化测试过程中一个典型的问题。主要的策略有:
- 暂时跳过用例,等环境或用例稳定后再运行
- 为用例设置超时时间防止卡死
- 用例失败后自动重试
以下为3种策略的具体实现方式。
标记跳过用例
对于不稳定的用例,暂时跳过用例是最常用的方法之一。
在用例上使用@pytest.mark.skip()、@pytest.mark.skipIf()或在Fixture函数、测试用例中使用pytest.skip()方法即可跳过该用例。
使用超时时间
未避免用例卡死(长时间未结束),我们可以使用pytest-timeout为用例统一或分别添加超时时间。
安装方法:
Copy
pip install pytest-timeout
使用方法如下:
全局使用
Copy
pytest --timeout=300
配置方法:
Copy
[pytest] timeout = 300
单独使用:
Copy
@pytest.mark.timeout(60) def test_foo(): pass
用例失败重跑
对于不稳定用例,失败后立即重试可以应对一些环境或UI不稳定导致的一些用例失败的问题。我们可以很方便的借助pytest-rerunfailures这个插件来实现这个功能。
安装方法:
Copy
pip install pytest-rerunfailures
使用方法:
Copy
pytest -rerun 3 rerun-delay 1
即每次失败后,延迟1秒进行重试,最多重试3次,有一次成功,则视为成功。3次都失败则视为失败。
从面向过程到面向对象
按页面归类元素操作
Page Object模式即Page Object Module,页面对象模型模式,是一种基于模块的框架结构。以页面为对象来统一管理页面上元素的定位及操作,修改后示例如下:
代码test_baidu_search_v7内容
Copy
from time import sleep from selenium import webdriver import pytest class BaiduHomePage: url = 'https://www.baidu.com' search_ipt_loc = ('id', 'kw') # 百度搜索框 search_btn_loc = ('id', 'su') # 百度一下按钮 def __init__(self, driver): # 初始化传入driver self.driver = driver # 绑定页面对象 def open(self): print('打开百度页面') self.driver.get(self.url) def input_search_keyword(self, keyword): print(f'输入搜索关键词 {keyword}') self.driver.find_element(*self.search_ipt_loc).send_keys(keyword) def click_search_button(self): print('点击百度一下按钮') self.driver.find_element(*self.search_btn_loc).click() def search(self, keyword): # 页面常用组合操作 print(f'搜索关键字 {keyword}') self.open() self.input_search_keyword(keyword) self.click_search_button() sleep(0.5) @pytest.fixture def baidu_home(driver): # 自定义一个fixture方法方便多个用例共享 page_obj = BaiduHomePage(driver) return page_obj def test_baidu_search_01(driver, baidu_home): baidu_home.seach('北凡000') assert '北凡' in driver.title if __name__ == '__main__': # --html需要pip install pytest-html # --driver 需要pip install pytest-selenium pytest.main([__file__, '--driver=chrome', '--html=report.html','--self-contained-html'])
上例BaiduHomePage中除了封装了每个元素的单独操作外,还封装了组合的search操作,这样既可以灵活使用(如,只输入搜索词,不点击搜索按钮),也方便用例中快速使用组合操作。
上例中没有把页面对象baidu_home的实例化放到用例中,而是单独封装了一个Fixture方法,这样的好处是,所有需要用到此页面对象的用例都可以直接使用。
框架封装的一个设计方向就是让用户的使用尽可能简单。用例的编写便是用户的一个高频使用场景,我们通过设计要使的用例的编写尽可能简单。
封装常用方法
除了用例的编写外,页面模型也是需要用户进行编辑和新增的,如何使页面模型的编写更简单呢?比如每个页面模型都要编写初始化方法传入driver,比如常用的通过节点文本定位、鼠标悬浮、强制等待、主动等待、偶现元素处理等。我们可以编写一个页面基础类作为所有所有页面对象的父类,在页面基础类中实现这些操作。如下例:
代码test_baidu_search_v8.py内容
Copy
from time import sleep from selenium import webdriver from selenium.webdriver.common.action_chains import ActionChains from selenium.webdriver.support.wait import WebDriverWait from selenium.webdriver.support import expected_conditions as EC from selenium.common.exceptions import NoSuchElementException, NoAlertPresentException import pytest class BasePage: url = None def __init__(self, driver): # 初始化传入driver self.driver = driver # 绑定页面对象 @property def title(self): return self.driver.title @property def page_source(self): return self.driver.page_source def open(self, url=None): url = url or self.url # 如果没有指定url则打开页面url print(f'打开 {url}') if url: self.driver.get(self.url) return self # 返回self以支持链式操作如page.open('').click_element('') def wait(self, secs=1): print(f"等待 {secs}s") sleep(secs) return self def find_element(self, by, value, timeout=None, ignore_error=False): """元素定位方法增加显式等待和忽略异常选项(处理偶现元素)""" try: if timeout is None: return self.driver.find_element(by, value) else: return WebDriverWait(self.driver, timeout).until(EC.presence_of_element_located((by, value))) except NoSuchElementException: if ignore_error is False: # 不忽略错误则抛出异常 raise def click_element(self, by, value, timeout=None, ignore_error=False): print(f'点击元素 {by}={value} 超时 {timeout} 忽略异常 {ignore_error}') self.find_element(by, value, timeout, ignore_error).click() return self def input_text(self, by, value, text, timeout=None): print(f'向元素 {by}={value} 输入文本 {text} 超时 {timeout}') elm = self.find_element(by, value, timeout) elm.clear() elm.send_keys(text) return self def move_to_element(self, by, value): print('移动到元素 {by}={value}') elm = self.find_element(by, value) ActionChains(self.driver).move_to_element(elm).perform() return self def switch_to_frame(self, *frames): print(f'切换到框架 {" > ".join(frames)}') for frame in frames: self.driver.switch_to.frame(frame) def switch_to_window(self, index): print(f'切换到第{index+1}个窗口') window_list = self.driver.window_handles self.driver.switch_to.window(window_list[index]) return self def dismiss_alert(self, ignore_error=False): print("关闭警告弹框") try: self.driver.switch_to.alert().dissmiss() except NoAlertPresentException: if ignore_error is False: raise return self def remove_attr(self, by, value, attr): print(f'移除元素 {by}={value} {attr}属性') elm = self.find_element(by, value) js_script = f'arguments[0].removeAttribute("{attr}");' self.driver.execute_script(js_script, elm) return self
我们在BasePage页面基础类里,我们将页面标题driver.title,页面源码driver.page_source绑定给页面对象以方便获取。
我们定义了一个open方法拥有打开指定url或者子类配置的url。重新封装了find_element并扩展了显式等待和对偶现元素的支持(偶现元素定位不到视作未出现,不报错)。除了find_element方法返回元素对象外,其他操作方法都返回self对象本身,这样可以使页面对象支持链式操作,如:
Copy
... page = BasePage(driver) page.open('https://www.baidu.com/').click_element('id','su).input_text('北凡000').wait()
此外我们还封装了点击元素、输入文本、鼠标悬浮、切换窗口、框架、关闭警告框、移除元素属性等常用操作。我们在每种基本操作中增加了print信息,使得执行过程更透明易懂。
其他常用的操作读者可以根据需求自行补充其他封装方法,或者直接使用对象.driver来调用driver的原生方法,如定位一组元素:
Copy
... page = BasePage(driver) elm_list = page.driver.find_elements_by_xpath('//li')
有了页面基础类,每个页面对象类写起来遍稍微简略点,BaiduHomePage类修改后代码如下:
Copy
class BaiduHomePage(BasePage): url = 'https://www.baidu.com' search_ipt_loc = ('id', 'kw') # 百度搜索框 search_btn_loc = ('id', 'su') # 百度一下按钮 def input_search_keyword(self, keyword): self.input_text(*self.search_ipt_loc, keyword) def click_search_button(self): self.click_element(*self.search_btn_loc) def search(self, keyword): # 页面常用组合操作 print(f'搜索关键字 {keyword}') self.open().input_search_keyword(keyword).click_search_button().wait(0.5)
首先集成BasePage类,并无须再写__init__初始化方法,直接配置url和页面元素对象即可。这里对单个元素操作不再添加额外打印信息,使用基础方法click_element、input_text自带的打印信息。
在组合操作search方法中,我们使用了链式操作,写起来更简洁。
注:在页面对象类的元素操作中也可以每个操作都返回self,以使得上层测试用例再使用时支持链式操作。
提高运行效率
提高运行效率通常以下两种方式:
- 优化用例执行速度:如使用Headless无界面模式、使用Cookie绕过登录、使用页面URL直达内部页面(而不是通过页面一步步操作)及使用接口、数据库(而不是页面操作)进行测准备等。
- 并行执行:并行是开多个浏览器同时执行多条用例,这就要求我们的用例之间没有运行顺序的依赖(用例可以单独运行)。
使用Headless模式
Headless即无界面模式,可以在一定程度上提高用例的执行速度。pytest-selenium插件提供了chrome_options的Fixture函数,可以添加Chrome浏览器参数。我们只需要自定义一个--headless命令后选项,重写chrome_options参数,通过request这个内置的Fixture方法拿到配置对象config,判断命令行选项是否包含--headless来添加对应的浏览器参数即可。
实现方式如下:
文件conftest.py部分内容
Copy
import pytest def pytest_addoption(parser): parser.addoption('--headless', action='store_true', help='run chrome headless') @pytest.fixture def chrome_options(request, chrome_options): if request.config.getoption('--headless'): chrome_options.add_argument('--headless') return chrome_options 使用--headless运行测试用例 ... if __name__ == '__main__': # --html需要pip install pytest-html # --driver 需要pip install pytest-selenium # --base-url 需要pip install pytest-base-url # --variables 需要安装 pip install pytest-variables pytest.main([__file__, '--driver=chrome', '--headless', '--html=report.html','--self-contained-html', '--base-url=https://www.baidu.com', '--variables=test.json'])
多进程并行测试
使用pytest-xdist可以启动多个进程来平均分发多个用例,安装方法如下:
Copy
pip install pytest-xdist
使用方法非常简单,命令行中添加参数-n=<进程数>即可。
Copy
pytest -n=3
即启动3个进程来执行所有用例。
发送邮件
添加自定义选项和配置
假设我们要实现一个运行完发送Email的功能。 我们自定义一个命令行参数项--send-email,不需要参数值。当用户带上该参数运行时,我们就发送报告,不带则不发,运行格式如下:
Copy
pytest test_cases/ --html=report.html --send-email
这里,一般应配合--html先生成报告。 由于Pytest本身并没有--send-email这个参数,我们需要通过Hooks方法进行添加。
文件conftest.py部分内容
Copy
def pytest_addoption(parser): """Pytest初始化时添加选项的方法""" parser.addoption("--send-email", action="store_true", help="send email with test report")
另外,发送邮件我们还需要邮件主题、正文、收件人等配置信息。我们可以把这些信息配置到pytest.ini中,如:
文件pytest.ini部分内容
Copy
... email_subject = Test Report email_receivers = [email protected] email_body = Hi,all\n, Please check the attachment for the Test Report.
这里需要注意,自定义的配置选项需要先注册才能使用,注册方法如下:
**文件conftest.py部分内容
Copy
def pytest_addoption(parser): ... parser.addini('email_subject', help='test report email subject') parser.addini('email_receivers', help='test report email receivers') parser.addini('email_body', help='test report email body')
实现发送Email功能
前面我们只是添加了运行参数和Email配置,我们在某个生成报告时的Hook方法中,根据参数添加发送Email功能,示例如下:
**文件conftest.py部分内容
Copy
from utils.notify import Email def pytest_terminal_summary(config): """Pytest生成报告时的命令行报告运行总结方法""" send_email = config.getoption("--send-email") email_receivers = config.getini('email_receivers').split(',') if send_email is True and email_receivers: report_path = config.getoption('htmlpath') email_subject = config.getini('email_subject') or 'TestReport' email_body = config.getini('email_body') or 'Hi' if email_receivers: Email().send(email_subject, email_receivers, email_body, report_path)
框架整理
分类整理
一个好的框架需要清晰的结构,我们使用目录(或包)将不同的脚本进行归类,例如:
- testcases:存放测试用例,可以按模块建立子目录存放fixtures方法集中放在conftest.py中;
- pages:存放页面对象模型,可以按模块建立子目录存放;
- utils:存放常用的工具,方法的封装,如发邮件功能的封装;
另外我们对输入的测试数据(资源),输出的测试报告、日志文件等也需要建立指定的目录存放,如:
- data/:存放测试数据或资源;
- reports/:存放测试报告,运行日志等
再加上Pytest运行配置pytest.ini和一些说明文件,如:
- pytest.ini:Pytest配置文件;
- requirements.txt:运行依赖的三方包;
- README.md:框架说明文件。
整个框架结构如下:
Copy
WebAuto/ | -- data/ | -- test.json | -- prod.json | -- pages/ | -- baidu_page.py | -- base_page.py | -- reports/ | -- testcases/ | -- test_baidu_search.py | -- utils/ | -- send_email.py conftest.py pytest.ini requirements.txt README.md
敏感数据处理
在测试环境中经常会用到一些身份认证信息,如用户名、密码等,这些属于敏感数据,直接写在代码中,有可能会造成敏感信息泄露。最简单的做法是,将这些敏感信息配置到所运行机器(如本机)的环境变量中。如,我们在自己电脑上的环境变量中添加两个变量:
Copy
WEBAUTO_DEFAULT_USER=admin WEBAUTO_DEFAULT_PWD=123456
然后我们可以在代码中通过os.getenv()来获取指定的环境变量:
Copy
import os username = os.getenv('WEBAUTO_DEFAULT_USER') password = os.getenv('WEBAUTO_DEFAULT_PWD')
声明依赖文件
一般来说,框架不只是给自己一个人使用的,多数情况下需要大家协作完成用例的补充。这时候我们一般要在项目中新建一个requirements.txt的来列出所有需要安装的三方包,例如:
Copy
selenium pytest pytest-selenium pytest-html pytest-variables pytest-timeout pytest-level pytest-base-url pytest-ordering pytest-rerunfailures pytest-xdist
编写使用说明
一个框架最好能有一个使用说明一样的文件,简单阐述下框架的结构、有哪些特性、如何编写维护用例、如何运行等等。一般推荐使用Markdown语法编写。Markdown是一种标记语言,可以通过不同的标记写出层次分明的文档,示例如下:
Copy
# WebAuto **项目Web自动化测试框架 使用Pytest + Selenium基于POM模式搭建。 ## 特性 ## 安装方法 ## 使用方法
重点:学习资料学习当然离不开资料,这里当然也给你们准备了600G的学习资料
需要的先关注再私我关键字【000】免费获取哦 注意关键字是:000
疑惑:为什么要先关注呢? 回:因为没关注的话私信回了你看不到
项目实战
app项目,银行项目,医药项目,电商,金融
大型电商项目
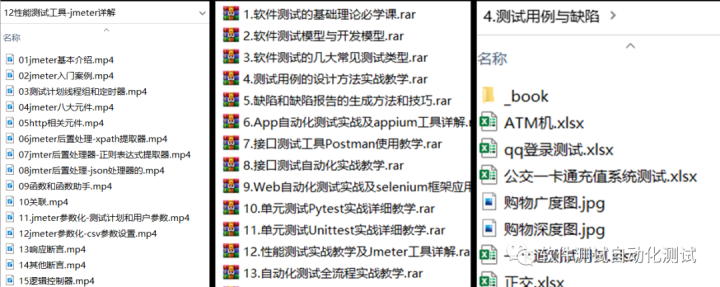
全套软件测试自动化测试教学视频

300G教程资料下载【视频教程+PPT+项目源码】
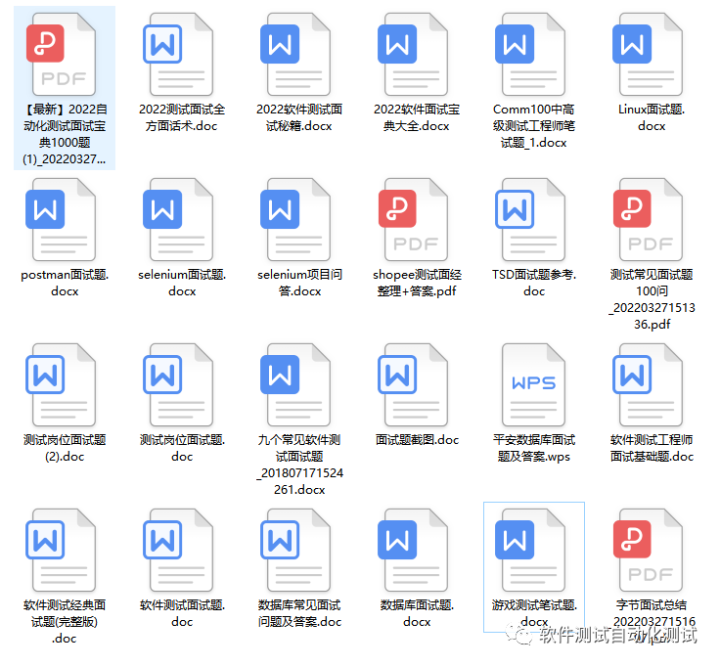
全套软件测试自动化测试大厂面经
python自动化测试++全套模板+性能测试


听说关注我并三连的铁汁都已经升职加薪暴富了哦!!!!