前言:在项目开发中我们经常会使用到文件上传与下载功能,比如传入图片或者在浏览器上下载文件到本地,下面将介绍怎么使用文件的上传与下载功能。
一:简介
文件上传,也称为upload,是指将本地图片、音频、视频等文件上传到服务器上,可以提供给其他用户浏览或者下载的过程。
文件下载,也称为download,是指将文件从服务器传输到本地计算机的过程,通过浏览器进行文件下载,通常有两种表现形式:
- 以附件形式下载,弹出保存对话框,将文件保存到指定磁盘目录
- 直接在浏览器中打开
通过浏览器进行文件下载,本质上就是服务端将文件以流的形式写回浏览器的过程。
二:实现
1.客户端上传功能
文件上传时,对页面的form表单有如下需求:
- method=“post” 采用post方式提交数据
- enctype=“multipart/form-data” 采用multipart格式上传文件
- type = “file” 使用input的file控件上传
当然在实际开发时候我们可以直接使用Element UI提供的现成组件简化开发。
对应的前端代码如下(包含下载部分前端代码):
<!DOCTYPE html>
<html lang="en">
<head>
    <meta charset="UTF-8">
    <meta http-equiv="X-UA-Compatible" content="IE=edge">
    <meta name="viewport" content="width=device-width, initial-scale=1.0">
    <title>文件上传</title>
    <!-- 引入样式 -->
    <link rel="stylesheet" href="../../plugins/element-ui/index.css"/>
    <link rel="stylesheet" href="../../styles/common.css"/>
    <link rel="stylesheet" href="../../styles/page.css"/>
    <link rel="shortcut icon" href="../../favicon.ico"/>
</head>
<body>
<div class="addBrand-container" id="food-add-app">
    <div class="container">
        <el-upload class="avatar-uploader"
                   action="/common/upload"
                   :show-file-list="false"
                   :on-success="handleAvatarSuccess"
                   :before-upload="beforeUpload"
                   ref="upload">
            <img v-if="imageUrl" :src="imageUrl" class="avatar"></img>
            <i v-else class="el-icon-plus avatar-uploader-icon"></i>
        </el-upload>
    </div>
</div>
<!-- 开发环境版本,包含了有帮助的命令行警告 -->
<script src="../../plugins/vue/vue.js"></script>
<!-- 引入组件库 -->
<script src="../../plugins/element-ui/index.js"></script>
<!-- 引入axios -->
<script src="../../plugins/axios/axios.min.js"></script>
<script src="../../js/index.js"></script>
<script>
    new Vue({


        el: '#food-add-app',
        data() {


            return {


                imageUrl: ''
            }
        },
        methods: {


            handleAvatarSuccess(response, file, fileList) {


                this.imageUrl = `/common/download?name=${
        response.data}`
            },
            beforeUpload(file) {


                if (file) {


                    const suffix = file.name.split('.')[1]
                    const size = file.size / 1024 / 1024 < 2
                    if (['png', 'jpeg', 'jpg'].indexOf(suffix) < 0) {


                        this.$message.error('上传图片只支持 png、jpeg、jpg 格式!')
                        this.$refs.upload.clearFiles()
                        return false
                    }
                    if (!size) {


                        this.$message.error('上传文件大小不能超过 2MB!')
                        return false
                    }
                    return file
                }
            }
        }
    })
</script>
</body>
</html>
2.服务端、客户端下载功能
服务端要接收客户端上传的文件,通常都会使用Apache的两个组件:
- commons-fileupload
- commons-io
Spring框架在Spring-web包中对文件上传进行了封装,大大简化了服务端代码,我们只需要在Controller的方法中声明一个MultipartFile类型的参数即可接收上传的文件,但是其底层实现还是基于上面提到的那两个组件。而客户端要实现下载功能,只需要向服务端发送请求,然后服务端进行响应并通过response对象获取输出流进行输出即可。下面是代码演示
首先可以在yml配置文件中自定义存储路径
mypath:
  path: D:\image\
然后可以编写对应的controller类:
package com.my.pro1.controller;

import com.my.reggie.common.R;
import lombok.extern.slf4j.Slf4j;
import org.springframework.beans.factory.annotation.Value;
import org.springframework.web.bind.annotation.GetMapping;
import org.springframework.web.bind.annotation.PostMapping;
import org.springframework.web.bind.annotation.RequestMapping;
import org.springframework.web.bind.annotation.RestController;
import org.springframework.web.multipart.MultipartFile;

import javax.servlet.ServletOutputStream;
import javax.servlet.http.HttpServletResponse;
import java.io.File;
import java.io.FileInputStream;
import java.io.IOException;
import java.net.http.HttpResponse;
import java.util.UUID;

@Slf4j
@RestController
@RequestMapping("/common")
public class CommonController {


    @Value("${mypath.path}")
    private String basePath;
    /**
     * 文件上传
     * @param file 上传的文件,注意参数名称要为file,因为在客户端的请求中name=file
     * @return
     */
    @PostMapping("/upload")
    public R<String> upload(MultipartFile file) {


        log.info("接收到文件{}",file);
        //file是一个临时文件,需要转存到指定位置,否则本次请求完成后临时文件会丢失
        //原始文件名
        String oriFilename = file.getOriginalFilename();
        //截取文件后缀名(.jpg)
        assert oriFilename != null;
        String suffix = oriFilename.substring(oriFilename.lastIndexOf("."));

        //使用UUID重新生成文件名,防止文件名称重复造成文件覆盖丢失
        String fileName = UUID.randomUUID().toString() + suffix;

        //创建一个目录对象
        File dir = new File(basePath);
        //判断当前目录是否存在
        if(!dir.exists()){


            //目录不存在,自动创建
            dir.mkdirs();
        }

        try {


            //将临时文件转存到指定位置
            file.transferTo(new File(basePath + fileName));
        } catch (IOException e) {


            throw new RuntimeException(e);
        }
        return R.success(fileName);
    }

    /**
     * 文件下载
     * @param name  传入的文件名
     * @param response 响应体
     */
    @GetMapping("/download")
    public void download(String name, HttpServletResponse response){


        try {


            //输入流,读取文件内容
            FileInputStream fileInputStream = new FileInputStream(new File(basePath + name));
            //输出流,将文件写回浏览器,并在浏览器显示
            ServletOutputStream outputStream = response.getOutputStream();
            //表示响应的是图片类型
            response.setContentType("image/jpeg");

            int len = 0;
            byte[] bytes = new byte[1024];
            while ((len = fileInputStream.read(bytes)) != -1){


                outputStream.write(bytes,0,len);
                outputStream.flush();
            }

            //关闭资源
            fileInputStream.close();
            outputStream.close();
        } catch (IOException e) {


            throw new RuntimeException(e);
        }
    }
}

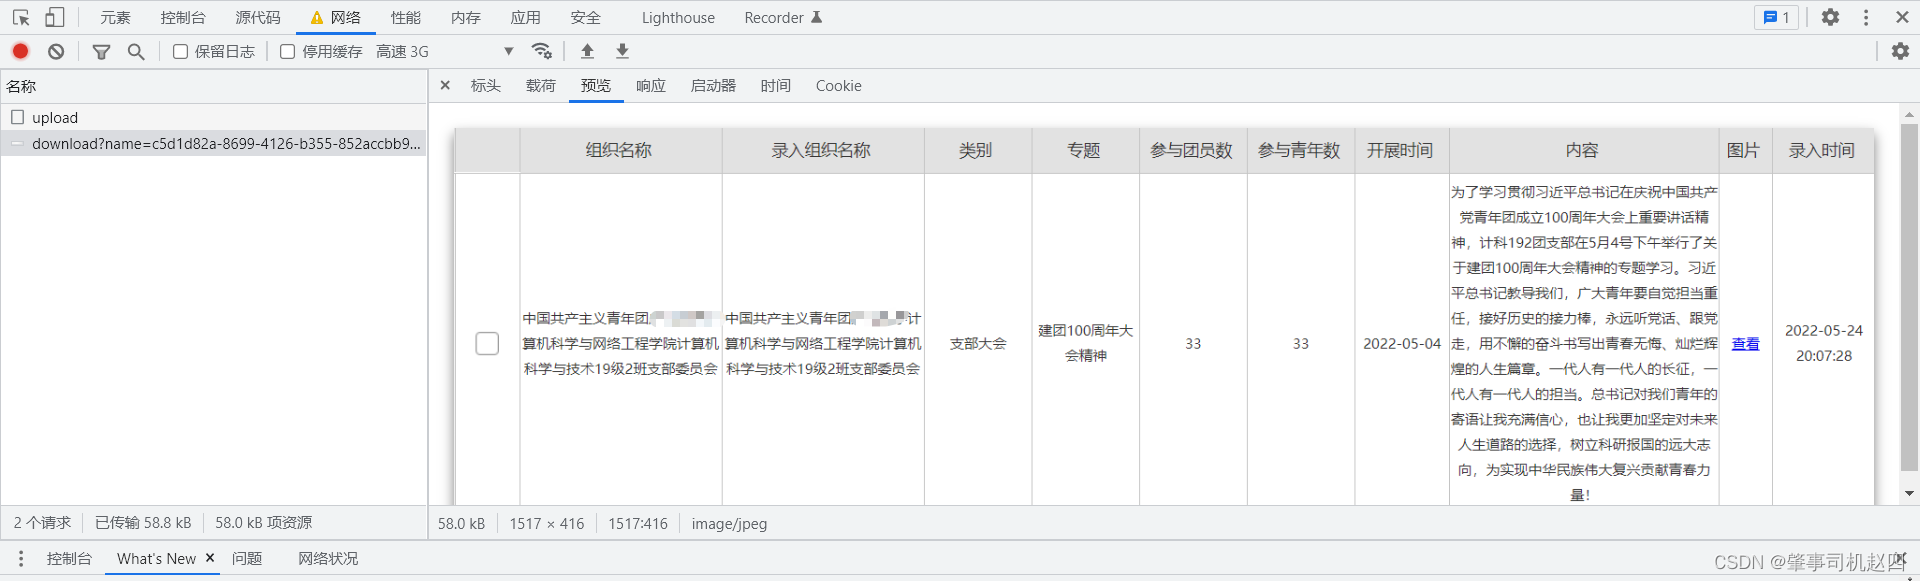
可以看到成功将上传的图片下载到本地中,同时浏览器中也获取到了数据,因为在上传完成后浏览器就发送了download请求。