系列文章目录
Vue基础篇一:编写第一个Vue程序
Vue基础篇二:Vue组件的核心概念
Vue基础篇三:Vue的计算属性与侦听器
Vue基础篇四:Vue的生命周期(秒杀案例实战)
Vue基础篇五:Vue的指令
Vue基础篇六:Vue使用JSX进行动态渲染
Vue提高篇一:使用Vuex进行状态管理
Vue提高篇二:使用vue-router实现静态路由
Vue提高篇三:使用vue-router实现动态路由
Vue提高篇四:使用Element UI组件库
Vue提高篇五:使用Jest进行单元测试
Vue提高篇六: 使用Vetur+ESLint+Prettier插件提升开发效率
Vue实战篇一: 使用Vue搭建注册登录界面
Vue实战篇二: 实现邮件验证码发送
Vue实战篇三:实现用户注册
Vue实战篇四:创建多步骤表单
Vue实战篇五:实现文件上传
Vue实战篇六:表格渲染动态数据
Vue实战篇七:表单校验
Vue实战篇八:实现弹出对话框进行交互
Vue实战篇九:使用省市区级联选择插件
Vue实战篇十:响应式布局
Vue实战篇十一:父组件获取子组件数据的常规方法
Vue实战篇十二:多项选择器的实际运用
Vue实战篇十三:实战分页组件
Vue实战篇十四:前端excel组件实现数据导入
Vue实战篇十五:表格数据多选在实际项目中的技巧
Vue实战篇十六:导航菜单
Vue实战篇十七:用树型组件实现一个知识目录
Vue实战篇十八:搭建一个知识库框架
Vue实战篇十九:使用printjs打印表单
Vue实战篇二十:自定义表格合计
Vue实战篇二十一:实战Prop的双向绑定
Vue实战篇二十二:生成二维码
Vue实战篇二十三:卡片风格与列表风格的切换
Vue实战篇二十四:分页显示
Vue实战篇二十五:使用ECharts绘制疫情折线图
Vue实战篇二十六:创建动态仪表盘
Vue实战篇二十七:实现走马灯效果的商品轮播图
Vue实战篇二十八:实现一个手机版的购物车
Vue实战篇二十九:模拟一个简易留言板
Vue项目实战篇一:实现一个完整的留言板(带前后端源码下载)
Vue实战篇三十:实现一个简易版的头条新闻
Vue实战篇三十一:实现一个改进版的头条新闻
Vue实战篇三十二:实现新闻的无限加载
文章目录
一、背景
- 在上一篇文章中,我们加入了新闻浏览的无限滚动功能,这次我们继续扩充功能,给webApp加入浏览历史的功能。
二、实现浏览历史功能
2.1 添加浏览历史的状态管理器
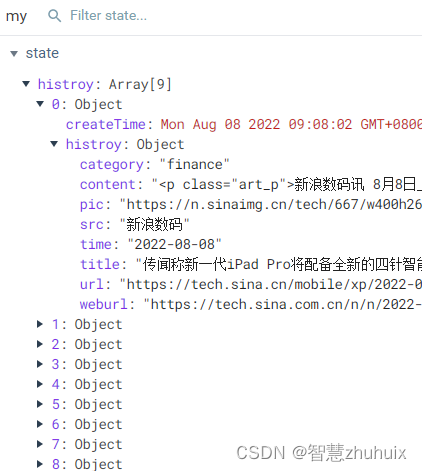
- 代码
const my = {


  state: {


    // 存储浏览历史
    histroy: [],
    // 存储我的收藏
    favourite: []
  },

  mutations: {


    SET_HISTROY: (state, histroy) => {


      state.histroy.unshift({

     createTime: new Date(), histroy: histroy })
    },
    SET_FAVOURITE: (state, favourite) => {


      state.favourite.unshift(favourite)
    }

  },

  actions: {


    setHistroy({

      commit }, histroy) {


      return new Promise(resolve => {


        commit('SET_HISTROY', histroy)
      })
    },

    setFavourite({

      commit }, favourite) {


      return new Promise(resolve => {


        commit('SET_FAVOURITE', favourite)
      })
    }
  }
}

export default my
2.2 浏览内容存储

- 代码改造
<template>
  <div>
    <!-- 标题栏 -->
    <div class="header">
      <span />
      <span>新闻</span>
      <span />
    </div>
    <channel />
    <div ref="container" class="nav-content">
      <!-- 在新闻列表中引入无限滚动加载功能 -->
      <div v-if="loading == false" ref="scroll" v-infinite-scroll="load" class="news-list">
        <div
          v-for="(item, index) in newData"
          :key="index"
          class="section"
          @click="toNews(index)"
        >
          <div class="news">
            <div class="news-left">
              <img :src="item.pic" alt="">
            </div>
            <div class="news-right">
              <div class="newsTitle">{

   { item.title }}</div>
              <div class="newsMessage">
                <span>{

   { item.time }}</span>
                <span>{

   { item.src }}</span>
              </div>
            </div>
          </div>
        </div>

      </div>

    </div>
  </div>
</template>

<script>

export default {


  ...
  methods: {


	...
    // 打开新闻阅读
    toNews(index) {


      // 存储浏览历史
      this.$store.commit('SET_HISTROY', this.newData[index])
      // 打开明细
      this.$store.commit('SET_NEWS_INDEX', index)
      this.$router.push('/news')
    }
  }

}
</script>
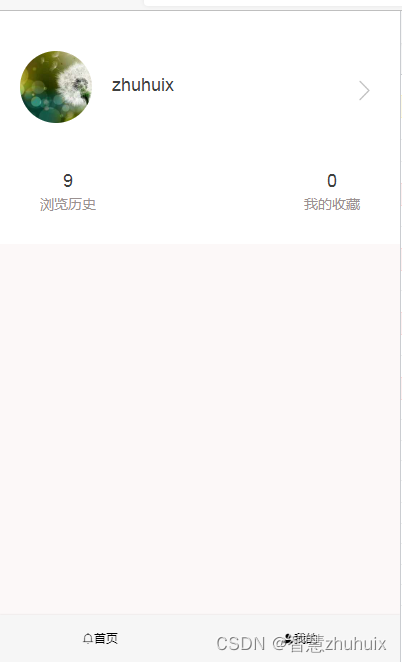
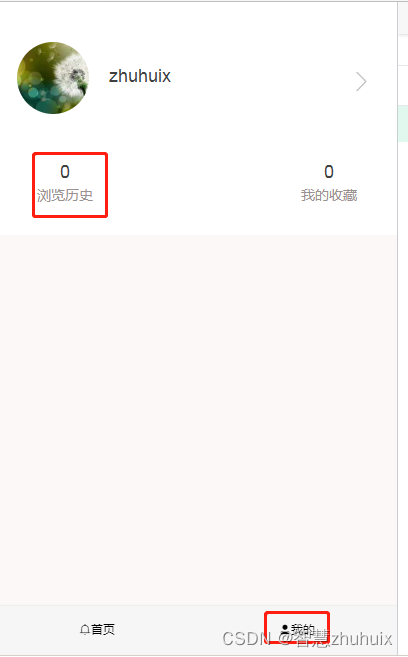
2.3 在我的页面中添加浏览历史
- 我们在我的页面中添加浏览历史,直接调取存储管理器的计数,进行显示。
<template>
  <div class="content">
    <div class="header">
      <div class="user">
        <img class="avatar" src="@/assets/images/avatar.png">
        <p class="user-name">{

   { 'zhuhuix' }}</p>
        <img class="right" src="@/assets/images/right.png">
      </div>
      <div class="info">
        <div class="histroy" @click="toHistroy()">
          <span class="histroy-count">{

   { histroryCount }}</span>
          <span class="histroy-text">{

   { '浏览历史' }}</span>
        </div>
        <div class="fav">
          <span class="fav-count">{

   { favCount }}</span>
          <span class="fav-text">{

   { '我的收藏' }}</span>
        </div>
      </div>
    </div>

  </div>
</template>

<script>

export default {


  computed: {


    // 调取浏览历史存储管理器中的计数
    histroryCount() {


      return this.$store.state.my.histroy.length
    },
    favCount() {


      return this.$store.state.my.favourite.length
    }
  },
  methods: {


    toHistroy() {


      if (this.histroryCount > 0) {


        this.$router.push('/list')
      }
    }
  }
}

</script>

<style lang="css"  scoped>
.content {


  width: 100%;
  height: 100%;
  background-color: rgb(252, 248, 248);
}
.header {


  width: 100%;
  height: 5.33rem;
  background-color: #fff;
}

.user {


  margin-top: 0.5rem;
  overflow: hidden;
  padding: 0.5rem;
  height: 2.5rem;
  width: 100%;
}

.avatar {


  float: left;
  width: 1.8rem;
  height: 1.8rem;
  border-radius: 50%;
}

.user-name {


  float: left;
  margin-top: 0.6rem;
  margin-left: 0.5rem;
  color: #404040;
  font-size: 18px;
}

.right {


  float: right;
  width: 0.8rem;
  height: 0.8rem;
  margin-top: 0.6rem;
}

.info {


  float: left;
  padding: 1rem;
  height: 2.5rem;
  width: 100%;

}
.histroy {


  display: flex;
  float: left;
  flex-direction: column;
  align-items: center;
  justify-content: center;
  cursor: pointer;
}

.histroy-count {


   color: #404040;
  font-size: 18px;

}

.histroy-text {


  margin-top: 0.1rem;
  color: #9b9191;
  font-size: 14px;

}

.fav {


  display: flex;
  float: right;
  flex-direction: column;
  align-items: center;
  justify-content: center;
  cursor: pointer;
}

.fav-count {


   color: #404040;
  font-size: 18px;
}

.fav-text {


  margin-top: 0.1rem;
   color: #9b9191;
  font-size: 14px;
}

</style>
2.4 动图演示

三、添加新的浏览历史页面
1、增加一个新的浏览历史页面,该页面类似于新闻列表页面。
2、该页面按浏览时间从新到旧显示列表内容。

- 完整的页面源码:
<template>
  <div>
    <!-- 标题栏 -->
    <div class="header">
      <img src="@/assets/images/back.png" @click="back">
      <span>浏览历史</span>
      <span />
    </div>
    <div ref="container" class="nav-content">
      <!-- 在新闻列表中引入无限滚动加载功能 -->
      <div ref="scroll" v-infinite-scroll="load" class="news-list">
        <div
          v-for="(item, index) in data"
          :key="index"
          class="section"
          @click="toNews(index)"
        >
          <div class="news">
            <div class="news-left">
              <img :src="item.histroy.pic" alt="">
            </div>
            <div class="news-right">
              <div class="newsTitle">{

   { item.histroy.title }}</div>
              <div class="newsMessage">
                <span>{

   { item.histroy.time }}</span>
                <span>{

   { item.histroy.src }}</span>
              </div>
            </div>
          </div>
        </div>
      </div>
    </div>
  </div>
</template>

<script>
export default {


  name: 'List',
  beforeRouteLeave(to, from, next) {


    this.scroll = this.$refs.scroll.scrollTop
    next()
  },
  data() {


    return {


      data: [],
      scrollTop: 0,
      currentPage: 0
    }
  },
  computed: {


    histroy() {


      return this.$store.state.my.histroy
    }
  },
  activated() {


    this.$refs.scroll.scrollTop = this.scroll
  },
  methods: {


    // 获取下一页历史
    load() {


      // 判断当前已加载多少页
      console.log('currentPage', this.currentPage)
      const totalPage = Math.floor(this.$store.state.my.histroy.length / this.$store.state.news.num)
      console.log('totalPage', totalPage)
      if (this.currentPage <= totalPage) {


        // 当前加载的起始位置
        const start = this.currentPage * this.$store.state.news.num
        // 结束位置
        let end = start + this.$store.state.news.num
        // 如果剩余未加载的条数小于固定加载条数,则取剩余条数
        const banlance = this.histroy.length - this.currentPage * this.$store.state.news.num
        if (banlance < this.$store.state.news.num) {


          end = start + banlance
        }
        console.log(start)
        console.log(end)
        for (let i = start; i < end; i++) {

       this.data.push(this.histroy[i]) }
        console.log(this.data)
        this.currentPage++
      }
    },
    // 打开新闻阅读
    toNews(index) {


      // 打开明细
      this.$store.commit('SET_NEWS_INDEX', index)
      this.$router.push('/news')
    },
    back() {


      this.$router.back()
    }
  }

}
</script>

<style lang="scss"  scoped>
.header {


  width: 100%;
  height: 1.33rem;
  background-color: #d43d3d;
  color: #fff;
  font-size: 20px;
  font-weight: 700;
  letter-spacing: 3px;
  display: flex;
  align-items: center;
  justify-content: space-between;
  position: fixed;
  top: 0;
}
.header img {


    width: 0.67rem;
    height: 0.67rem;
    cursor: pointer;
}

.nav-content {


  margin-top: 1.4rem;
}

.news-list {


  position: relative;
  height:calc(100vh - 1.4rem - 49px);
  overflow-y:auto;
  width: 100%;
}

.section {


  width: 100%;
  height: 2.5rem;
  border-bottom: 1px solid #ccc;
}

.news {


  height: 2.25rem;
  box-sizing: border-box;
  margin: 10px 10px;
  display: flex;
}
.news-left {


  height: 100%;
  width: 2.8rem;
  display: inline-block;
}
.news-left img {


  width: 100%;
  height: 100%;
}
.news-right {


  flex: 1;
  padding-left: 10px;
}
.newsTitle {


  width: 100%;
  height: 62%;
  color: #404040;
  font-size: 17px;
  overflow: hidden;
}
.newsMessage {


  width: 100%;
  height: 38%;
  display: flex;
  align-items: flex-end;
  color: #888;
  justify-content: space-between;
}
.load {


  width: 100%;
  height: 100%;
  overflow: hidden;
}
 .loading-more {


  margin-top: 5px;
  width: 100%;
  height: 20px;
  text-align: center;
 }
</style>
四、效果演示

五、源码地址
- 请关注文末的微信公众号,回复“新闻客户端”。