这里的项目工程是基于 SpringBoot 2.x 整合Redis_Wayfreem的博客-CSDN博客 这里搭建完成之后,继续实现的。下面就不去关注已经实现过的东西了,这里就直接开始修改之前的项目。文章分为两部分,第一部分是最传统的实现,第二部分是基于自定义注解实现。
传统的实现方式
项目结构如下

编码部分
新增配置监听配置类
新增一个 RedisMessageListener 类,用于注册监听类到 Redis 监听的容器中,下面是声明了两个监听类,用于接受 redis 发布的消息。
import com.wq.redis.recevier.ReceiverRedisMessage;
import org.springframework.context.annotation.Bean;
import org.springframework.context.annotation.Configuration;
import org.springframework.data.redis.connection.RedisConnectionFactory;
import org.springframework.data.redis.listener.PatternTopic;
import org.springframework.data.redis.listener.RedisMessageListenerContainer;
import org.springframework.data.redis.listener.adapter.MessageListenerAdapter;

/**
 * redis消息队列配置-订阅者
 */
@Configuration
public class RedisMessageListener {

    @Bean
    public RedisMessageListenerContainer container(RedisConnectionFactory connectionFactory,
                                                   MessageListenerAdapter onMsg,
                                                   MessageListenerAdapter onMessage){
        RedisMessageListenerContainer container = new RedisMessageListenerContainer();
        container.setConnectionFactory(connectionFactory);
        // 将回调的方法注册到 container 中去
        container.addMessageListener(onMsg,new PatternTopic("onMsg"));
        container.addMessageListener(onMessage,new PatternTopic("onMessage"));
        return container;
    }

    /**
     * 绑定消息监听者和接收监听的方法
     * @param receiver
     * @return
     */
    @Bean
    public MessageListenerAdapter onMsg(ReceiverRedisMessage receiver){
        // 这里的 onMsg 是在 ReceiverRedisMessage 中具体存在的方法,发布订阅之后,会回调这个方法
        return new MessageListenerAdapter(receiver,"onMsg");
    }

    /**
     * 绑定消息监听者和接收监听的方法
     * @param receiver
     * @return
     */
    @Bean
    public MessageListenerAdapter onMessage(ReceiverRedisMessage receiver){
        // 这里的 onMessage 是在 ReceiverRedisMessage 中具体存在的方法,发布订阅之后,会回调这个方法
        return new MessageListenerAdapter(receiver,"onMessage");
    }
}
新增监听处理类
import org.slf4j.Logger;
import org.slf4j.LoggerFactory;
import org.springframework.stereotype.Service;

@Service
public class ReceiverRedisMessage {
    private static final Logger log = LoggerFactory.getLogger(ReceiverRedisMessage.class);

    public void onMsg(String jsonMsg) {
        // 具体回调的方法
        log.info("onMsg ----->  {}", jsonMsg);
    }

    public void onMessage(String jsonMsg) {
        // 具体回调的方法
        log.info("onMessage ----->  {}", jsonMsg);
    }

}
新增 http 访问入口
在 Router 类中,增加一个访问的入口方法
@RequestMapping("send")
public ResultModel send(String msg){
    ResultModel resultModel = new ResultModel();
    System.out.println("msg:" +msg);
    try {
        redisOperator.sendMsg(msg);
        resultModel.setBody("");
        resultModel.setSuccess(true);
        resultModel.setMessage("请求成功!");
    } catch (Exception e) {
        resultModel.setSuccess(false);
        resultModel.setMessage(e.getMessage());
        resultModel.setBody(new HashMap<>());
    }
    return resultModel;
}
在 redisOperator 中增加一个发送消息的方法
public void sendMsg(String msg){
    redisTemplate.convertAndSend("onMessage", msg);
    redisTemplate.convertAndSend("onMsg", msg);
}
最后,浏览器访问:

自定义注解实现
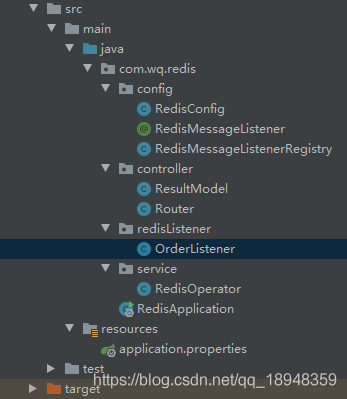
项目结构
为了好区分,这里的工程目录是上面的不一样的
说明
基于上面对于 redis 发布订阅的理解,我们可以通过自己定义一个注解来实现,这样子就可以不用手动去增加到 redis 的消息容器中,更加利于开发维护。
在上面的 RedisMessageListenerContainer 中,我们加入到 container 容器中的逻辑是:
- 我们先去定义一个处理 redis 发送消息的处理方法
- 然后将 1 中的方法注册成为 spring bean
- 将 2 中的 spring bean 注入到 RedisMessageListenerContainer 容器中
通过上面的 3 个步骤就完成了监听类的注册
编码部分
由于是通过注解实现,首先,我们自定义一个注解,用于标记出哪些方法是用来处理 redis 发布的消息。
import java.lang.annotation.*;

@Target({ElementType.METHOD})
@Retention(RetentionPolicy.RUNTIME)
@Documented
public @interface RedisMessageListener {

    String topic(); // 事件主题
}
接着,我们在增加一个 OrderListener 类,用刚刚定义的注解来标记出来,这个类也就是我们用于处理 redis 发布出来的消息,在注解里面的 topic 就是当前消息订阅的主题。
import com.wq.redis.config.RedisMessageListener;
import org.springframework.stereotype.Service;

/**
 * @Author wuq
 * @Date 2021-8-18
 */
@Service
public class OrderListener {

    @RedisMessageListener(topic = "order::getState")
    public void getState(String msg){
        System.out.println("OrderListener --->  getState ---->" + msg);
    }

    @RedisMessageListener(topic = "order::getState")
    public void onMessage(String msg){
        System.out.println("OrderListener --->  onMessage ---->" + msg);
    }
}
这里我们新增一个 Redis 监听的注册类,这个类才是关键的部分,通过上下文找到对应的方法,注册到 redis 发布订阅的容器中,为了方便注入到 container 中,就像将容器提取出来,作为一个 bean,然后通过 ReflectionUtils.doWithMethods() 查到对应的注解方法,并且注册;由于注册到容器中的时候,需要接收的类为 MesageListenerAdapter,所以就单独用 GenericApplicationContext 去注册生成一个 spring bean。
import org.springframework.beans.factory.annotation.Autowired;
import org.springframework.boot.ApplicationArguments;
import org.springframework.boot.ApplicationRunner;
import org.springframework.context.ApplicationContext;
import org.springframework.context.annotation.Bean;
import org.springframework.context.support.GenericApplicationContext;
import org.springframework.core.annotation.AnnotationUtils;
import org.springframework.data.redis.connection.RedisConnectionFactory;
import org.springframework.data.redis.listener.PatternTopic;
import org.springframework.data.redis.listener.RedisMessageListenerContainer;
import org.springframework.data.redis.listener.adapter.MessageListenerAdapter;
import org.springframework.stereotype.Component;
import org.springframework.util.ReflectionUtils;

import java.lang.reflect.Method;
import java.util.Objects;
import java.util.concurrent.atomic.AtomicLong;

/**
 * @Author wuq
 * @Date 2021-8-17
 */
@Component
public class RedisMessageListenerRegistry implements ApplicationRunner {
    // AtomicLong 可以理解为加了 synchronized 的 long 类型
    private AtomicLong counter = new AtomicLong(0);

    @Autowired
    private ApplicationContext context;

    @Bean
    public RedisMessageListenerContainer container(RedisConnectionFactory connectionFactory) {
        RedisMessageListenerContainer container = new RedisMessageListenerContainer();
        container.setConnectionFactory(connectionFactory);
        return container;
    }

    @Override
    public void run(ApplicationArguments args) {
        // 获取Redis的消息监听容器
        RedisMessageListenerContainer container = context.getBean(RedisMessageListenerContainer.class);

        // 扫描注册所有的 @RedisMessageListener 的方法,添加到容器中
        for (String beanName : context.getBeanNamesForType(Object.class)) {
            ReflectionUtils.doWithMethods(Objects.requireNonNull(context.getType(beanName)),
                    method -> {
                        ReflectionUtils.makeAccessible(method);
                        Object target = context.getBean(beanName);
                        RedisMessageListener annotation = AnnotationUtils.findAnnotation(method, RedisMessageListener.class);
                        MessageListenerAdapter adapter = registerBean((GenericApplicationContext) context, target, method);
                        container.addMessageListener(adapter, new PatternTopic(annotation.topic()));
                    },
                    method -> !method.isSynthetic() && method.getParameterTypes().length == 1
                            && AnnotationUtils.findAnnotation(method, RedisMessageListener.class) != null);
        }

    }

    private MessageListenerAdapter registerBean(GenericApplicationContext context, Object target, Method method) {
        String containerBeanName = String.format("%s_%s", MessageListenerAdapter.class.getName(), counter.incrementAndGet());
        context.registerBean(containerBeanName, MessageListenerAdapter.class, () -> new MessageListenerAdapter(target, method.getName()));
        return context.getBean(containerBeanName, MessageListenerAdapter.class);
    }
}
其次就是发布一个 http 接口,这里是和上面一样,
@RequestMapping("send")
public ResultModel send(String msg){
    ResultModel resultModel = new ResultModel();
    System.out.println("msg:" +msg);
    try {
        redisOperator.sendMsg(msg);
        resultModel.setBody("");
        resultModel.setSuccess(true);
        resultModel.setMessage("请求成功!");
    } catch (Exception e) {
        resultModel.setSuccess(false);
        resultModel.setMessage(e.getMessage());
        resultModel.setBody(new HashMap<>());
    }
    return resultModel;
}
发布消息服务类,在 RedisOperator 类中新增下面的方法:
public void sendMsg(String msg){
    redisTemplate.convertAndSend("order::getState", msg);
}
最后,浏览器访问:
