文章目录
4.1.1 Spring Boot 简介
Spring Boot是一套Spring的快速开发框架,基于Spring 4.0设计,使用Spring Boot开发可以避免一些繁琐的工程配置,同时它集成了大量的常用框架,快速导入依赖包,避免依赖包的冲突。基本上常用的开发框架都支持 SpringBoot开发,例如:MyBatis、Dubbo等,Spring 家族更是如此,例如:Spring Cloud、Spring mvc、Spring Security等,使用Spring Boot开发可以大大得高生产率,所以Spring Boo的使用率非常高。
本节讲解如何通过Spring Boot开发Spring Security应用,SpringBoot提供spring-boot-starter-security用于开发Spring Security应用。
4.1.2 创建maven工程
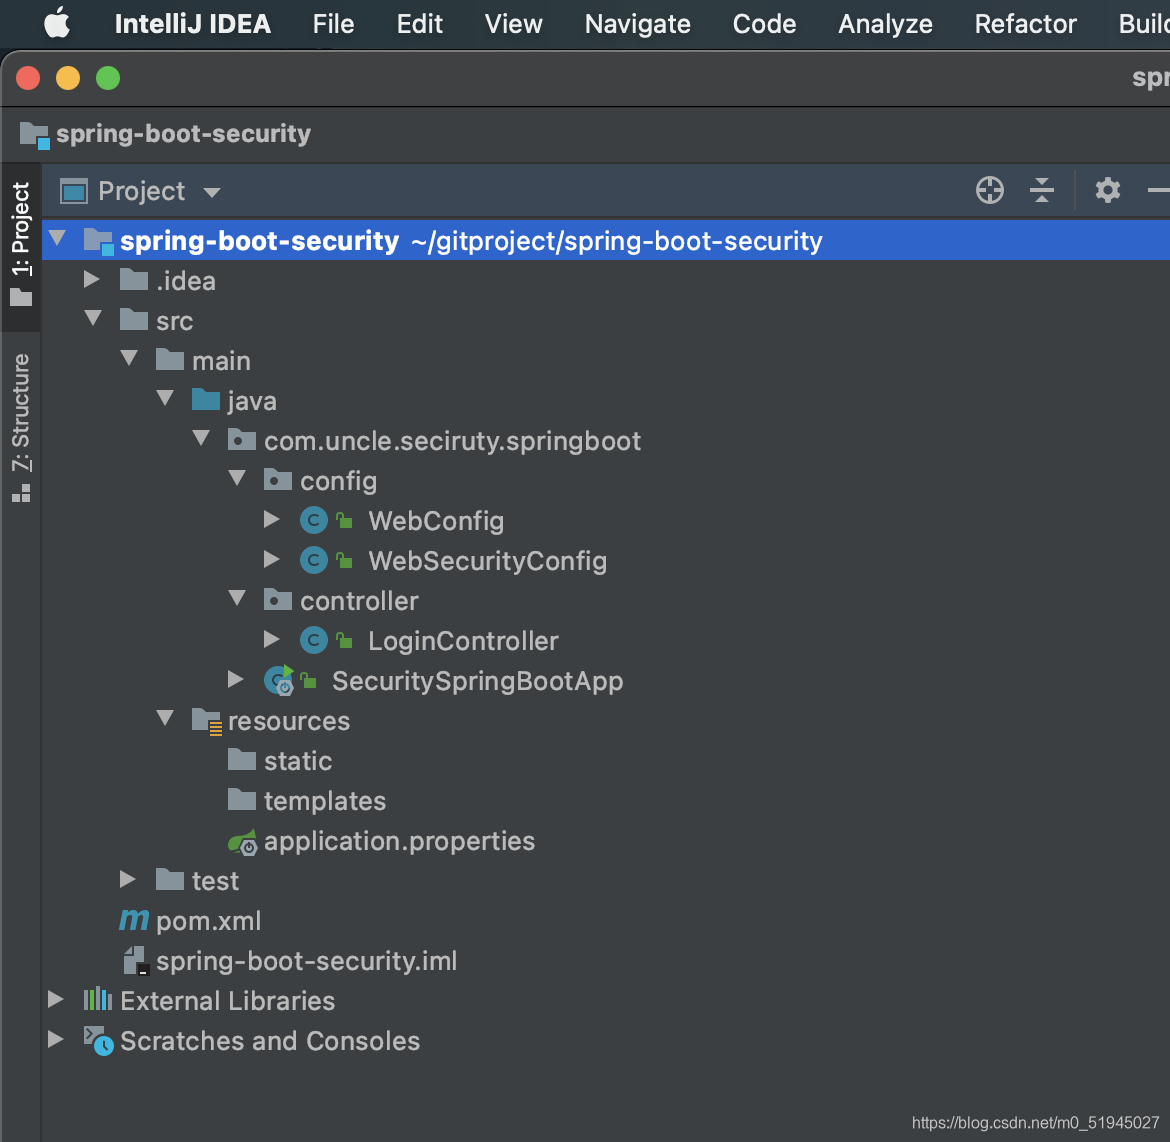
创建maven工程结构如下:
引入以下依赖
<?xml version="1.0" encoding="UTF-8"?>
<project xmlns="http://maven.apache.org/POM/4.0.0"
         xmlns:xsi="http://www.w3.org/2001/XMLSchema-instance"
         xsi:schemaLocation="http://maven.apache.org/POM/4.0.0 http://maven.apache.org/xsd/maven-4.0.0.xsd">
    <modelVersion>4.0.0</modelVersion>

    <groupId>com.uncle</groupId>
    <artifactId>spring-boot-security</artifactId>
    <version>1.0-SNAPSHOT</version>

    <parent>
        <groupId>org.springframework.boot</groupId>
        <artifactId>spring-boot-starter-parent</artifactId>
        <version>2.1.3.RELEASE</version>
    </parent>

    <properties>
        <project.build.sourceEncoding>UTF-8</project.build.sourceEncoding>
        <maven.compiler.source>1.8</maven.compiler.source>
        <maven.compiler.target>1.8</maven.compiler.target>
    </properties>
    <dependencies>
        <!-- 以下是>spring boot依赖-->
        <dependency>
            <groupId>org.springframework.boot</groupId>
            <artifactId>spring-boot-starter-web</artifactId>
        </dependency>

        <!-- 以下是>spring security依赖-->
        <dependency>
            <groupId>org.springframework.boot</groupId>
            <artifactId>spring-boot-starter-security</artifactId>
        </dependency>


        <!-- 以下是jsp依赖-->
        <dependency>
            <groupId>javax.servlet</groupId>
            <artifactId>javax.servlet-api</artifactId>
            <scope>provided</scope>
        </dependency>
        <!--jsp页面使用jstl标签 -->
        <dependency>
            <groupId>javax.servlet</groupId>
            <artifactId>jstl</artifactId>
        </dependency>

        <dependency>
            <groupId>org.springframework.boot</groupId>
            <artifactId>spring-boot-starter-tomcat</artifactId>
            <scope>provided</scope>
        </dependency>
        <!--用于编译jsp -->
        <dependency>
            <groupId>org.apache.tomcat.embed</groupId>
            <artifactId>tomcat-embed-jasper</artifactId>
            <scope>provided</scope>
        </dependency>
        <dependency>
            <groupId>org.projectlombok</groupId>
            <artifactId>lombok</artifactId>
            <version>1.18.0</version>
        </dependency>
        <dependency>
            <groupId>org.springframework.boot</groupId>
            <artifactId>spring-boot-starter-test</artifactId>
            <scope>test</scope>
        </dependency>

        <dependency>
            <groupId>org.springframework.boot</groupId>
            <artifactId>spring-boot-starter-jdbc</artifactId>
        </dependency>

        <dependency>
            <groupId>mysql</groupId>
            <artifactId>mysql-connector-java</artifactId>
            <version>5.1.47</version>
        </dependency>
    </dependencies>
    <build>
        <finalName>security-springboot</finalName>
        <pluginManagement>
            <plugins>
                <plugin>
                    <groupId>org.apache.tomcat.maven</groupId>
                    <artifactId>tomcat7-maven-plugin</artifactId>
                    <version>2.2</version>
                </plugin>
                <plugin>
                    <groupId>org.apache.maven.plugins</groupId>
                    <artifactId>maven-compiler-plugin</artifactId>
                    <configuration>
                        <source>1.8</source>
                        <target>1.8</target>
                    </configuration>
                </plugin>

                <plugin>
                    <artifactId>maven-resources-plugin</artifactId>
                    <configuration>
                        <encoding>utf-8</encoding>
                        <useDefaultDelimiters>true</useDefaultDelimiters>
                        <resources>
                            <resource>
                                <directory>src/main/resources</directory>
                                <filtering>true</filtering>
                                <includes>
                                    <include>**/*</include>
                                </includes>
                            </resource>
                            <resource>
                                <directory>src/main/java</directory>
                                <includes>
                                    <include>**/*.xml</include>
                                </includes>
                            </resource>
                        </resources>
                    </configuration>
                </plugin>
            </plugins>
        </pluginManagement>
    </build>


</project>
4.1.3 spring容器配置
SpringBoot工程启动会自动扫描启动类所在包下的所有Bean,加载到spring容器。
Spring Boot配置文件
在resources下添加application.yml,内容如下:
server:
  #端口
  port: 8080
  #应用的上下文路径,也可以称为项目路径,是构成url地址的一部分
  servlet:
    context-path: /spring-boot-security

#项目名
spring:
  application:
    name: spring-boot-security


#默认的配置为/templates/和.html
#这里笔者就不用jsp了,前面用jsp旨在让读者理解配置前缀和后缀
#spring.mvc.view.prefix=/WEB-INF/view/
#spring.mvc.view.suffix=.jsp
Spring Boot 启动类
package com.uncle.seciruty.springboot;

import org.springframework.boot.SpringApplication;
import org.springframework.boot.autoconfigure.SpringBootApplication;

/**
 * @program: spring-boot-security
 * @description:
 * @author: 步尔斯特
 * @create: 2021-07-23 19:35
 */
@SpringBootApplication
public class SecuritySpringBootApp {


    public static void main(String[] args) {


        SpringApplication.run(SecuritySpringBootApp.class,args);
    }
}
4.1.4 Servlet Context配置
由于Spring boot starter自动装配机制,这里无需使用@EnableWebMvc与@ComponentScan
WebConfig如下
package com.uncle.seciruty.springboot.config;

import org.springframework.context.annotation.Configuration;
import org.springframework.web.servlet.config.annotation.ViewControllerRegistry;
import org.springframework.web.servlet.config.annotation.WebMvcConfigurer;

/**
 * @program: spring-boot-security
 * @description:
 * @author: 步尔斯特
 * @create: 2021-07-23 19:38
 */
@Configuration//就相当于springmvc.xml文件
public class WebConfig implements WebMvcConfigurer {


    @Override
    public void addViewControllers(ViewControllerRegistry registry) {


        registry.addViewController("/").setViewName("redirect:/login");
    }

}
关于视图解析器
#默认的配置为/templates/和.html
#这里笔者就不用jsp了,前面用jsp旨在让读者理解视图解析器的配置
#spring.mvc.view.prefix=/WEB-INF/view/
#spring.mvc.view.suffix=.jsp
4.1.5 安全配置
由于Spring boot starter自动装配机制,这里无需使用@EnableWebSecurity
WebSecurityConfig内容如下
@Configuration
public class WebSecurityConfig extends WebSecurityConfigurerAdapter {


    //定义用户信息服务(查询用户信息)
    @Bean
    public UserDetailsService userDetailsService(){


        InMemoryUserDetailsManager manager = new InMemoryUserDetailsManager();
        manager.createUser(User.withUsername("zhangsan").password("123").authorities("p1").build());
        manager.createUser(User.withUsername("lisi").password("456").authorities("p2").build());
        return manager;
    }

    //密码编码器
    @Bean
    public PasswordEncoder passwordEncoder(){


        return NoOpPasswordEncoder.getInstance();
    }

    //安全拦截机制(最重要)
    @Override
    protected void configure(HttpSecurity http) throws Exception {


        http.authorizeRequests()
                .antMatchers("/r/r1").hasAuthority("p1")
                .antMatchers("/r/r2").hasAuthority("p2")
                .antMatchers("/r/**").authenticated()//所有/r/**的请求必须认证通过
                .anyRequest().permitAll()//除了/r/**,其它的请求可以访问
                .and()
                .formLogin()//允许表单登录
                .successForwardUrl("/login-success");//自定义登录成功的页面地址

    }
}
4.1.6 测试
Logincontroller的内容
package com.uncle.seciruty.springboot.controller;
import org.springframework.security.access.prepost.PreAuthorize;
import org.springframework.security.core.Authentication;
import org.springframework.security.core.context.SecurityContextHolder;
import org.springframework.security.core.userdetails.UserDetails;
import org.springframework.web.bind.annotation.GetMapping;
import org.springframework.web.bind.annotation.RequestMapping;
import org.springframework.web.bind.annotation.RestController;
/**
* @program: spring-boot-security
* @description:
* @author: 步尔斯特
* @create: 2021-07-23 19:41
*/
@RestController
public class LoginController {
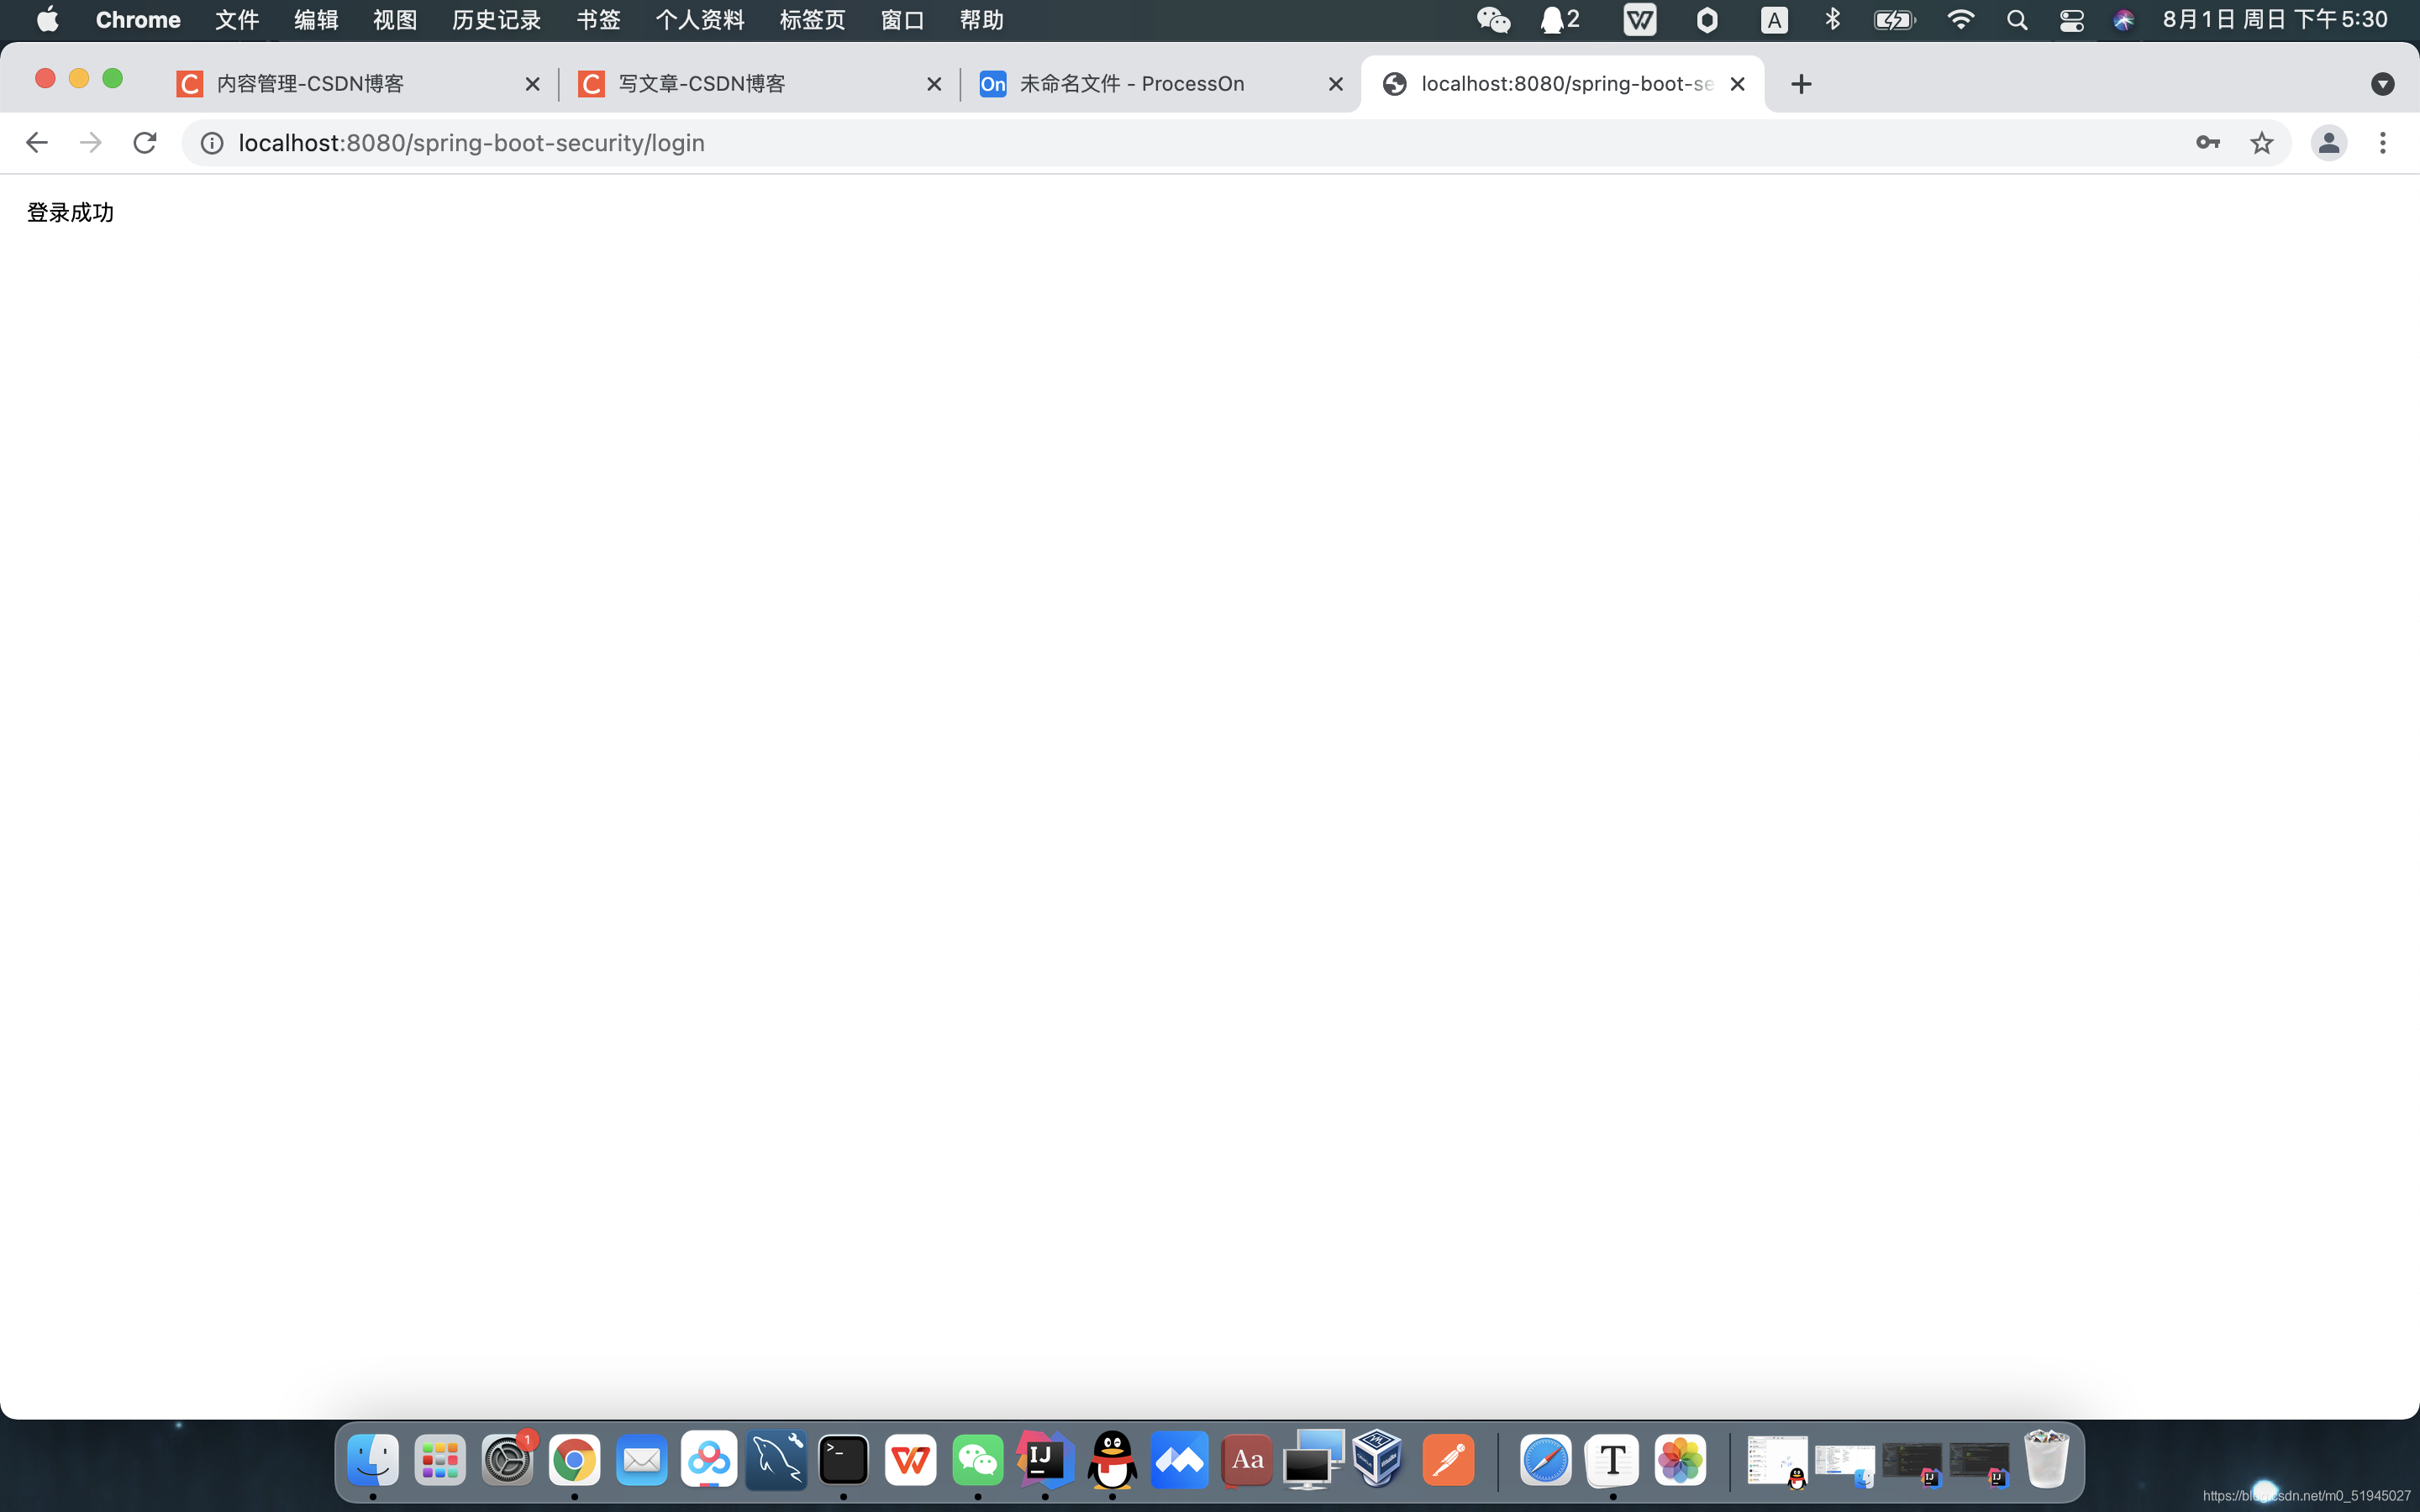
@RequestMapping(value = "/login-success",produces = {
"text/plain;charset=UTF-8"})
public String loginSuccess(){
//提示具体用户名称登录成功
return getUsername()+" 登录成功";
}
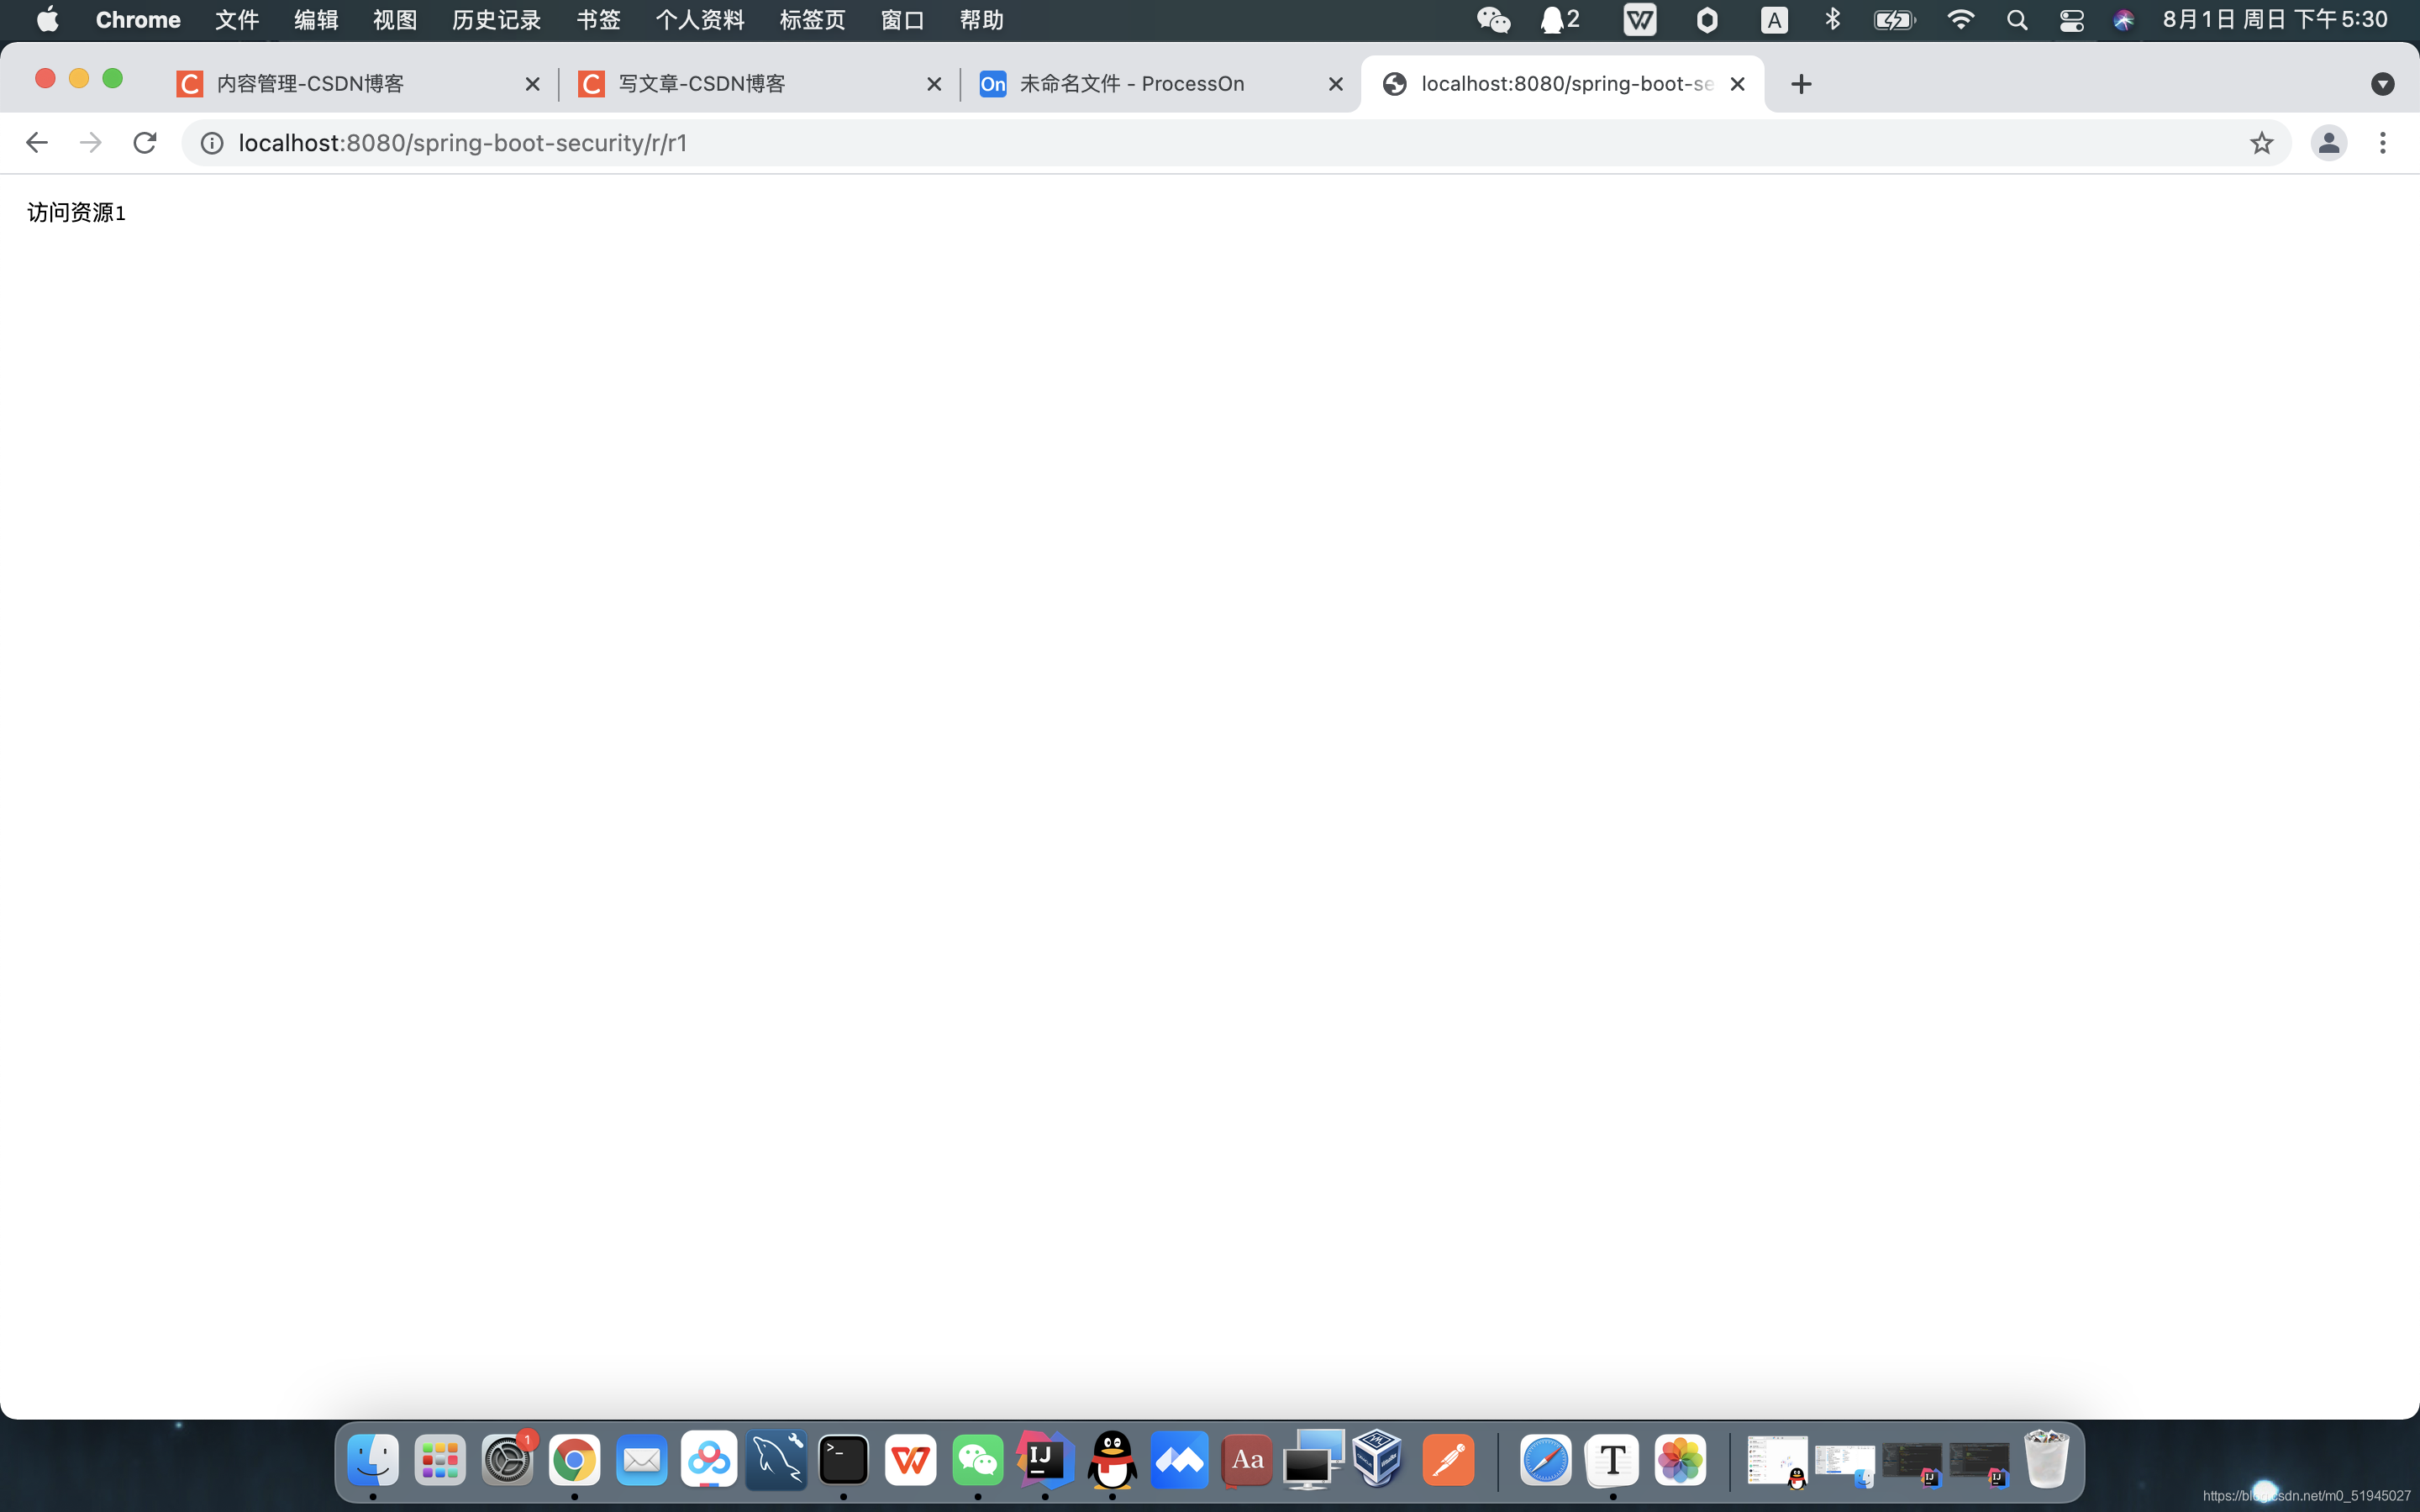
/**
* 测试资源1
* @return
*/
@GetMapping(value = "/r/r1",produces = {
"text/plain;charset=UTF-8"})
public String r1(){
return getUsername()+" 访问资源1";
}
/**
* 测试资源2
* @return
*/
@GetMapping(value = "/r/r2",produces = {
"text/plain;charset=UTF-8"})
public String r2(){
return getUsername()+" 访问资源2";
}
}
测试过程
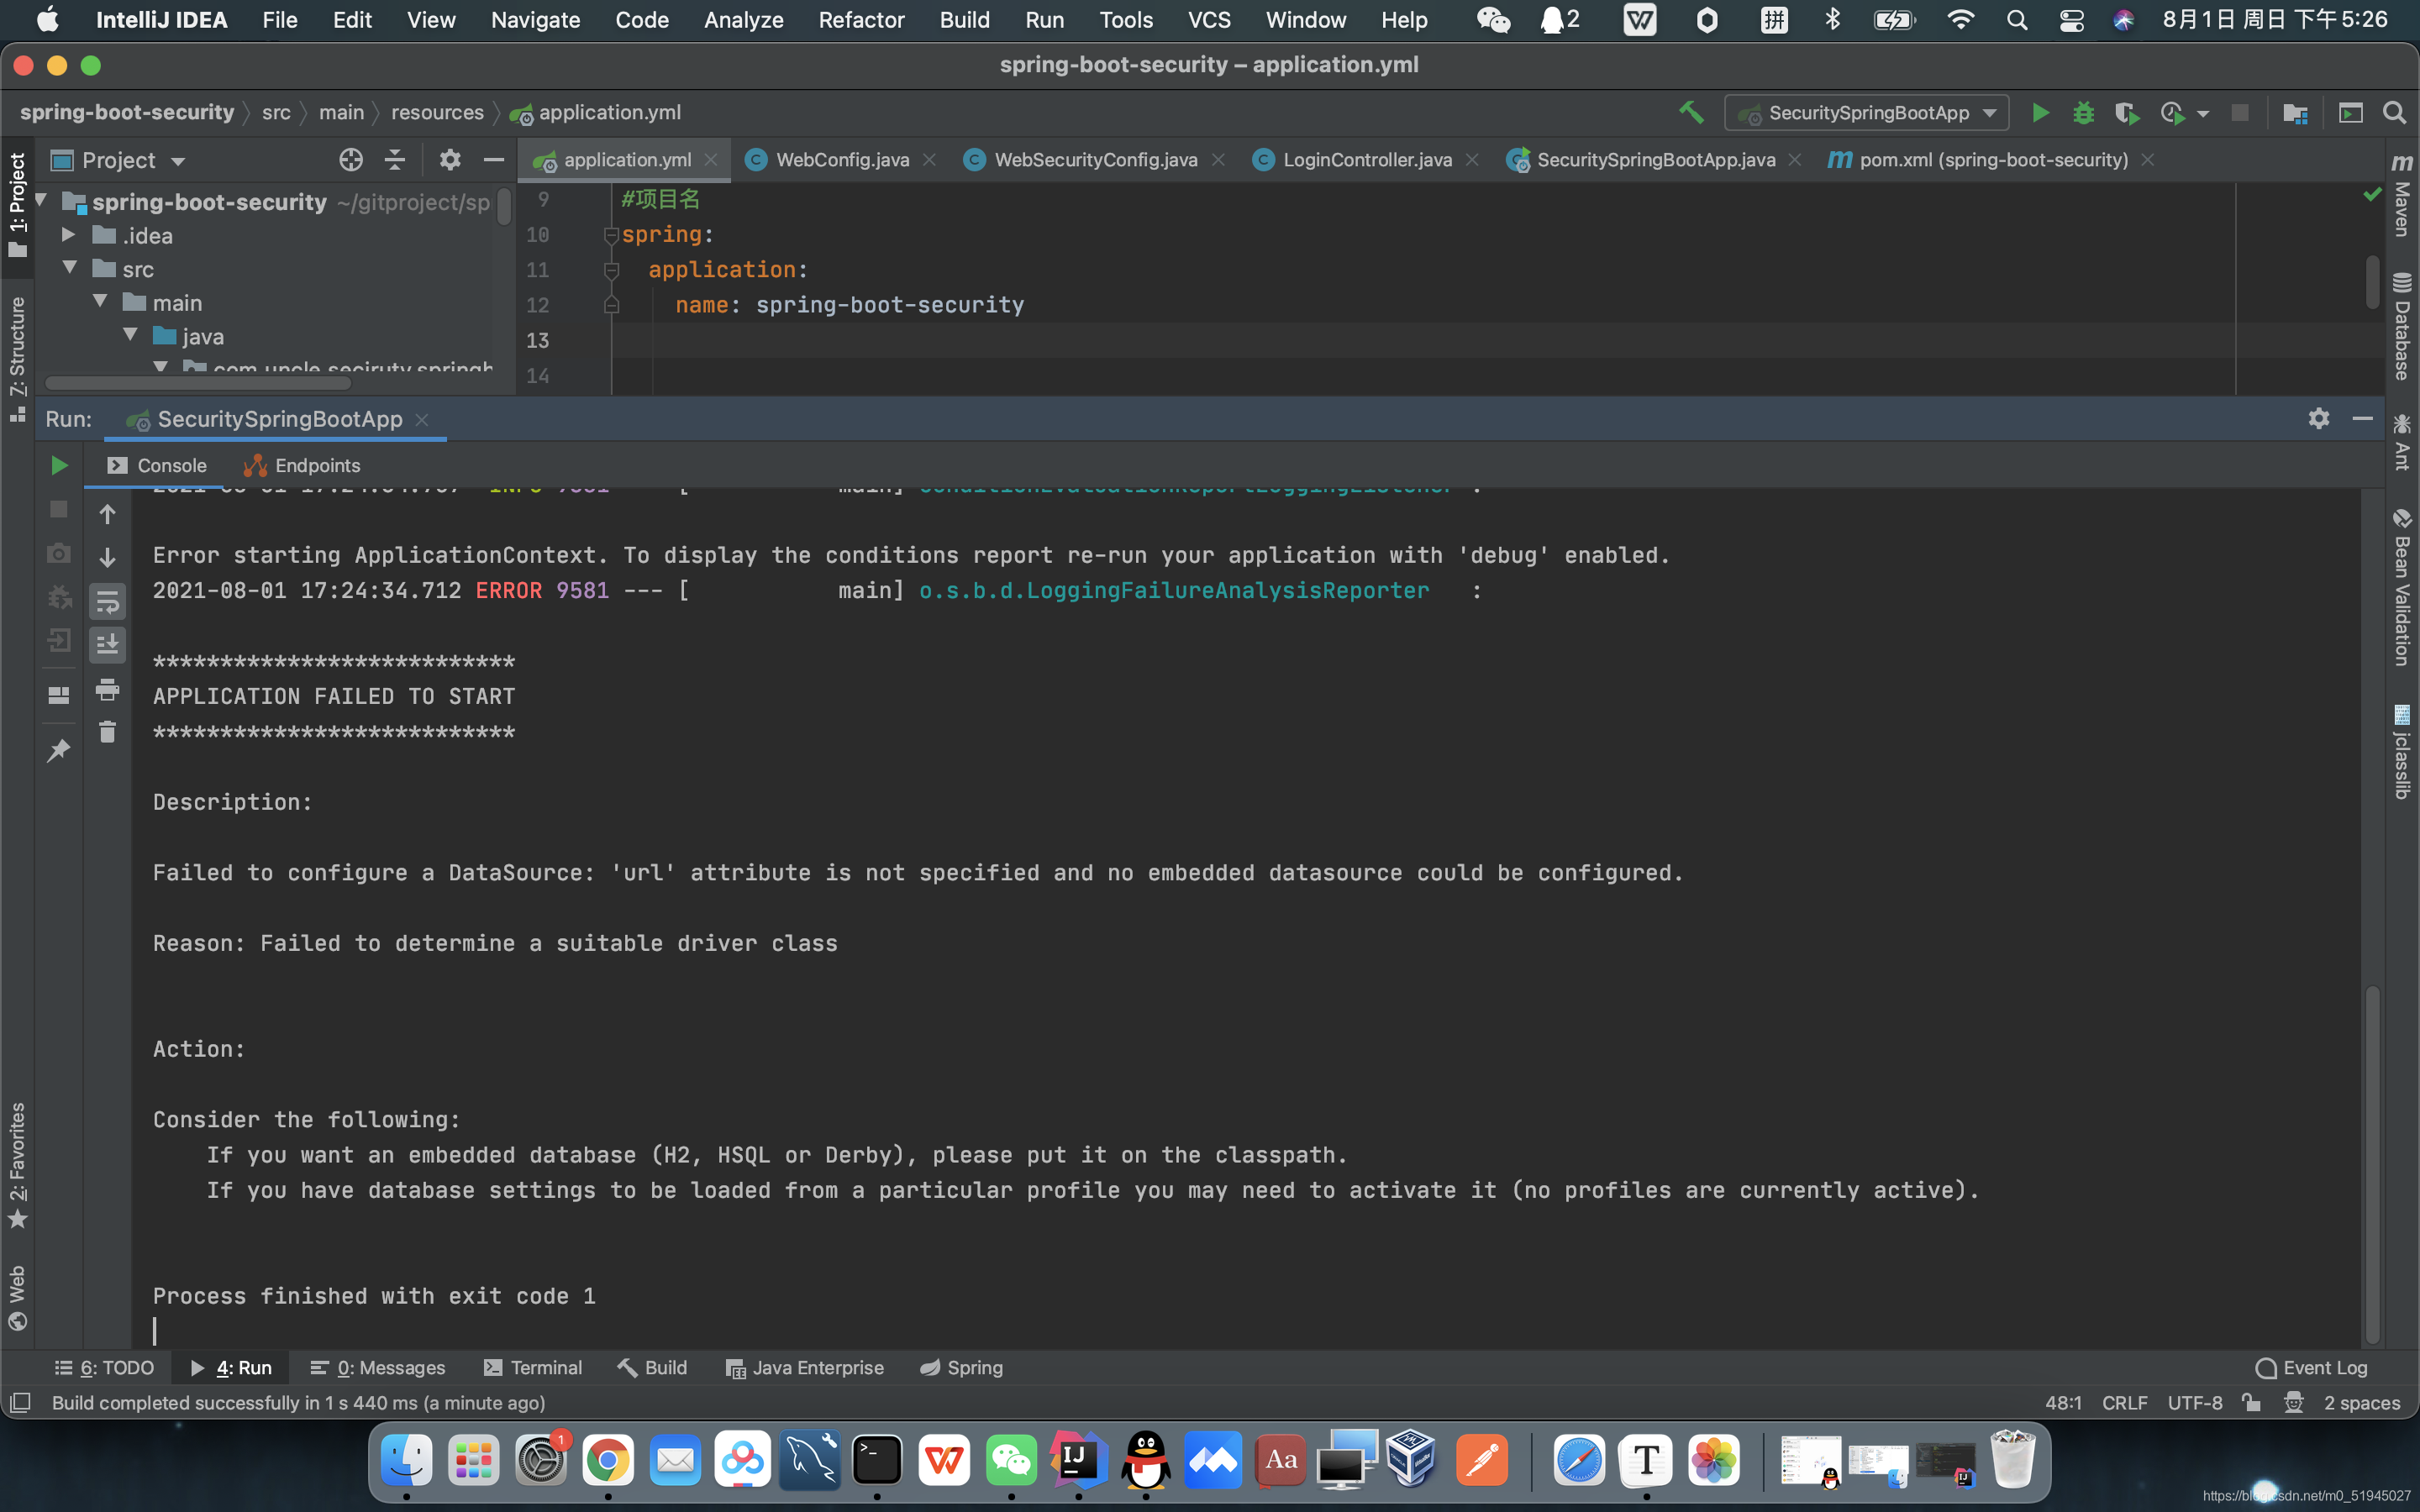
不出意外的话,此时应该是报错了
原因:
这是因为添加了数据库组件,所以autoconfig会去读取数据源配置,而新建的项目还没有配置数据源URL地址错误,所以会导致异常出现。
解决方案:
在启动类的@EnableAutoConfiguration或@SpringBootApplication中添加exclude ={DataSourceAutoConfiguration.class},排除此类的autoconfig,启动以后就可以正常运行。
package com.uncle.seciruty.springboot;

import org.springframework.boot.SpringApplication;
import org.springframework.boot.autoconfigure.SpringBootApplication;
import org.springframework.boot.autoconfigure.jdbc.DataSourceAutoConfiguration;

/**
 * @program: spring-boot-security
 * @description:
 * @author: 步尔斯特
 * @create: 2021-07-23 19:35
 */
@SpringBootApplication(exclude = {

    DataSourceAutoConfiguration.class})
public class SecuritySpringBootApp {


    public static void main(String[] args) {


        SpringApplication.run(SecuritySpringBootApp.class,args);
    }
}
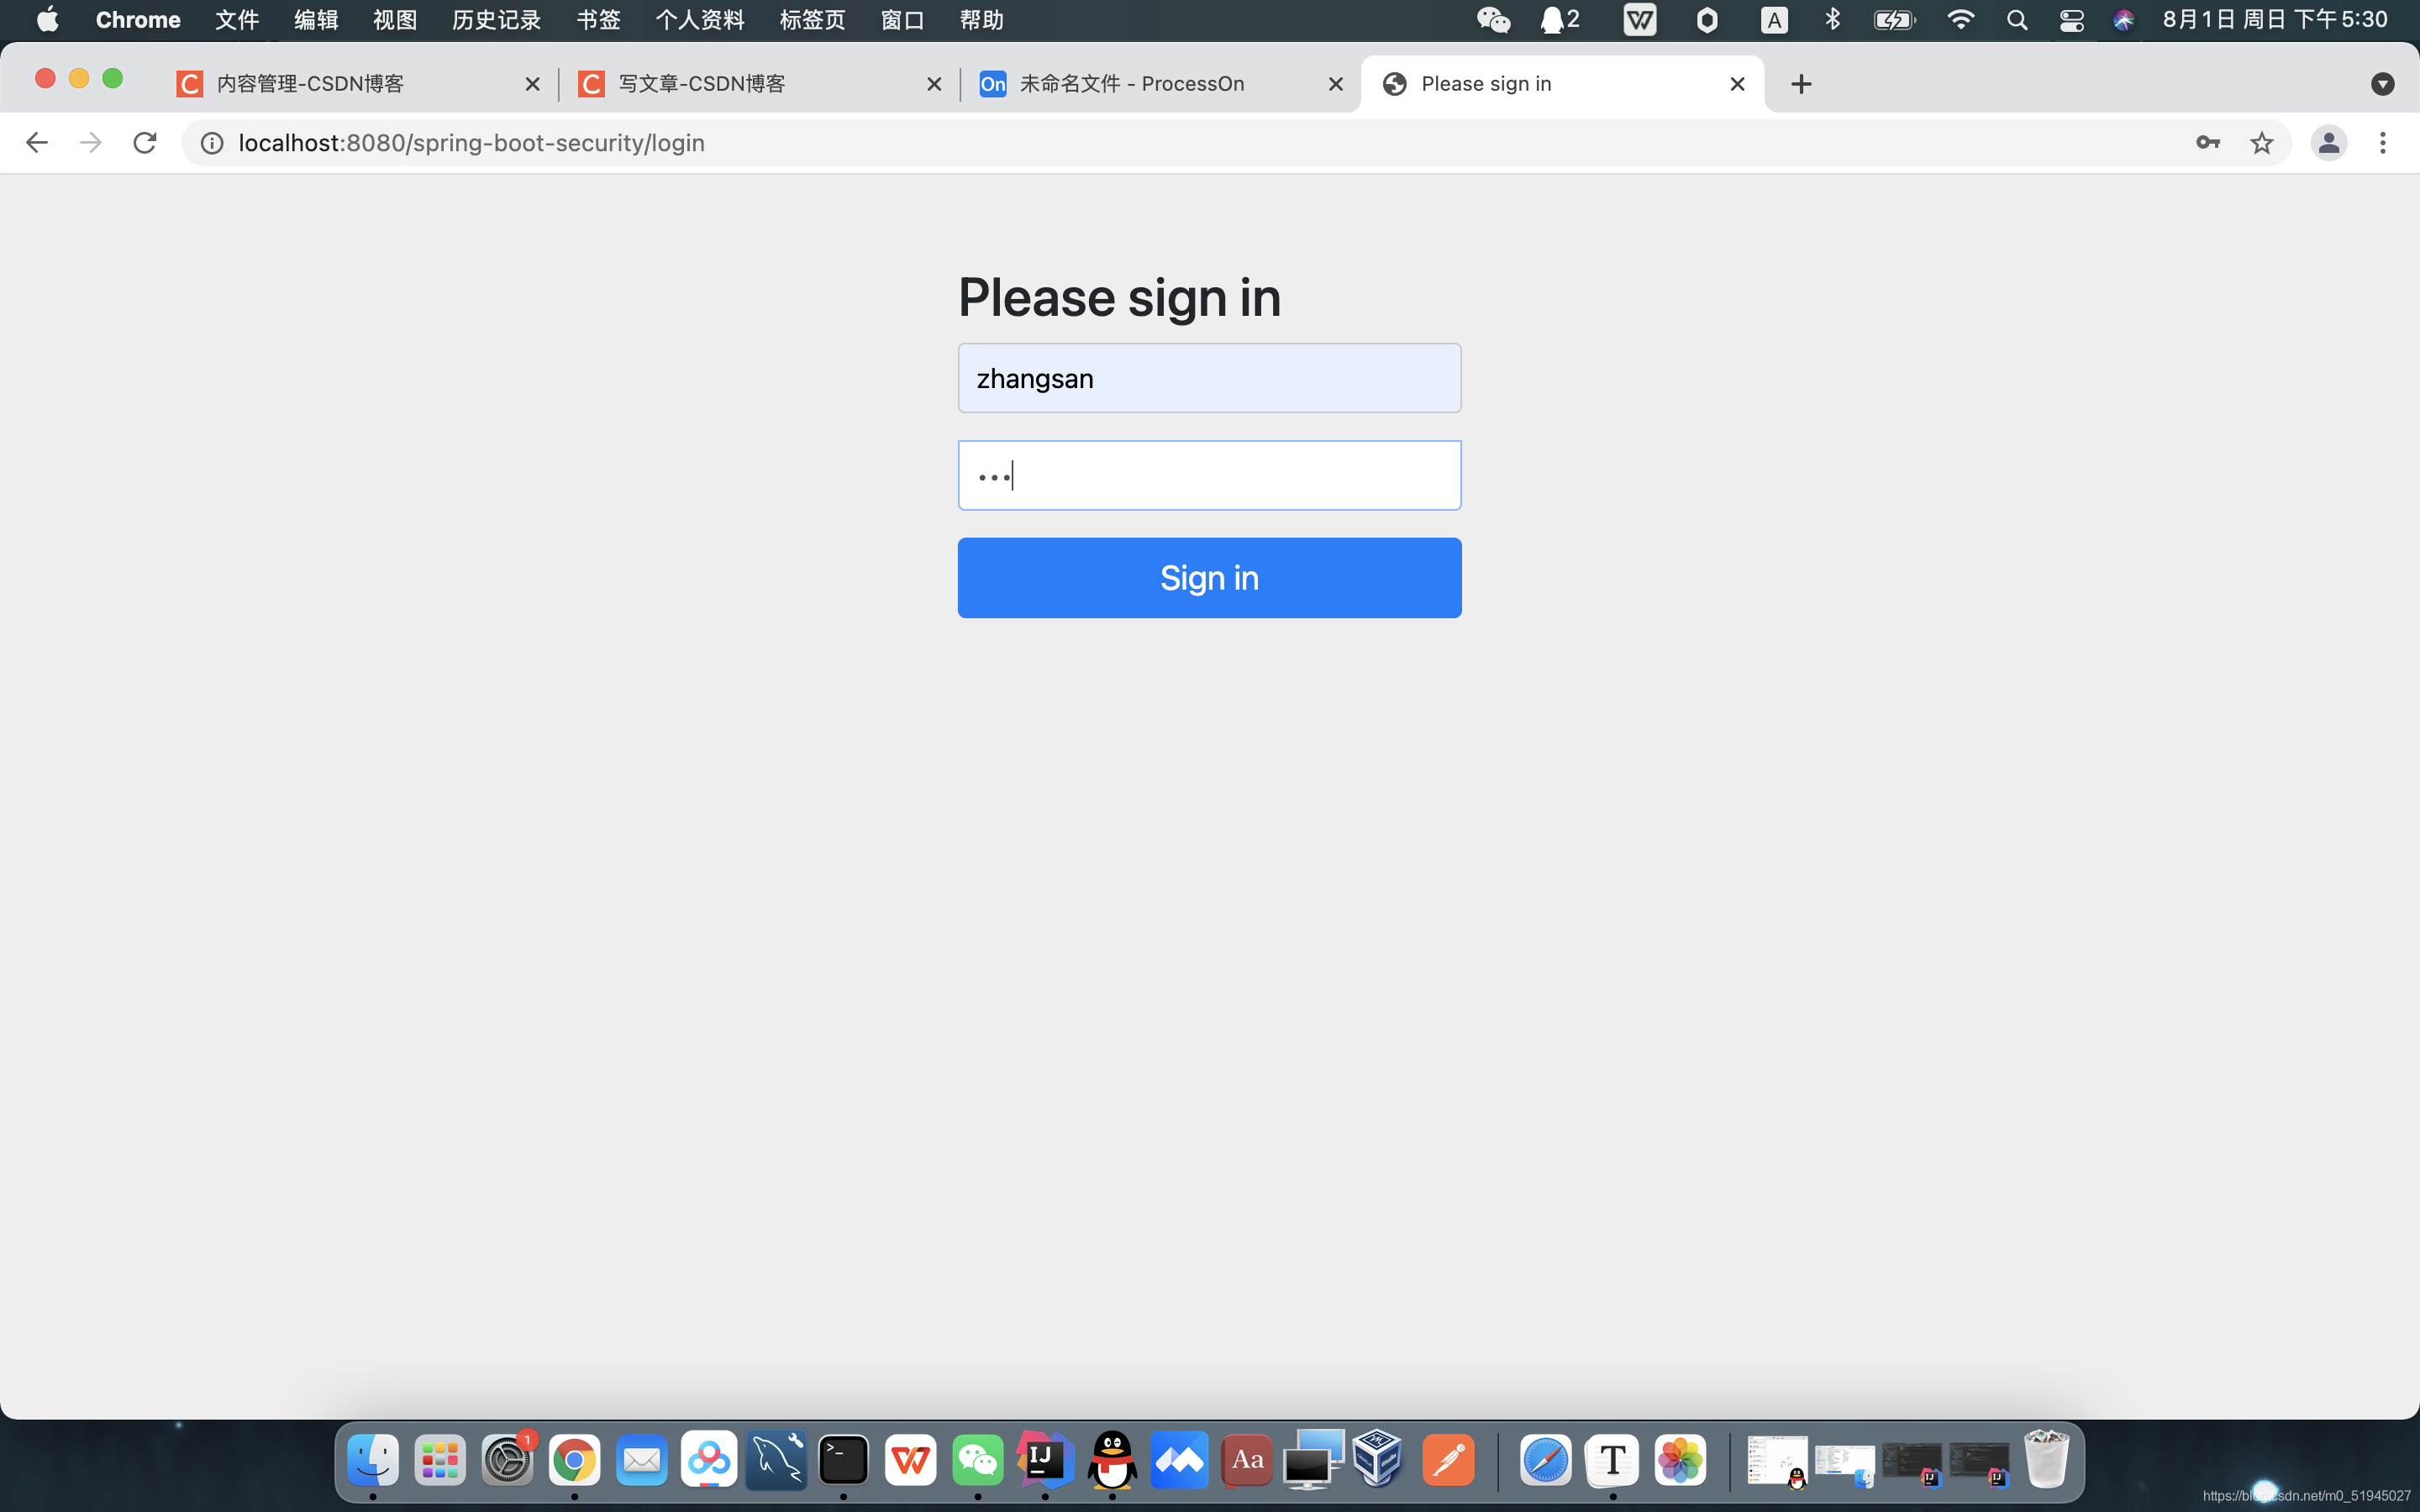
接下来,我们开始正式测试
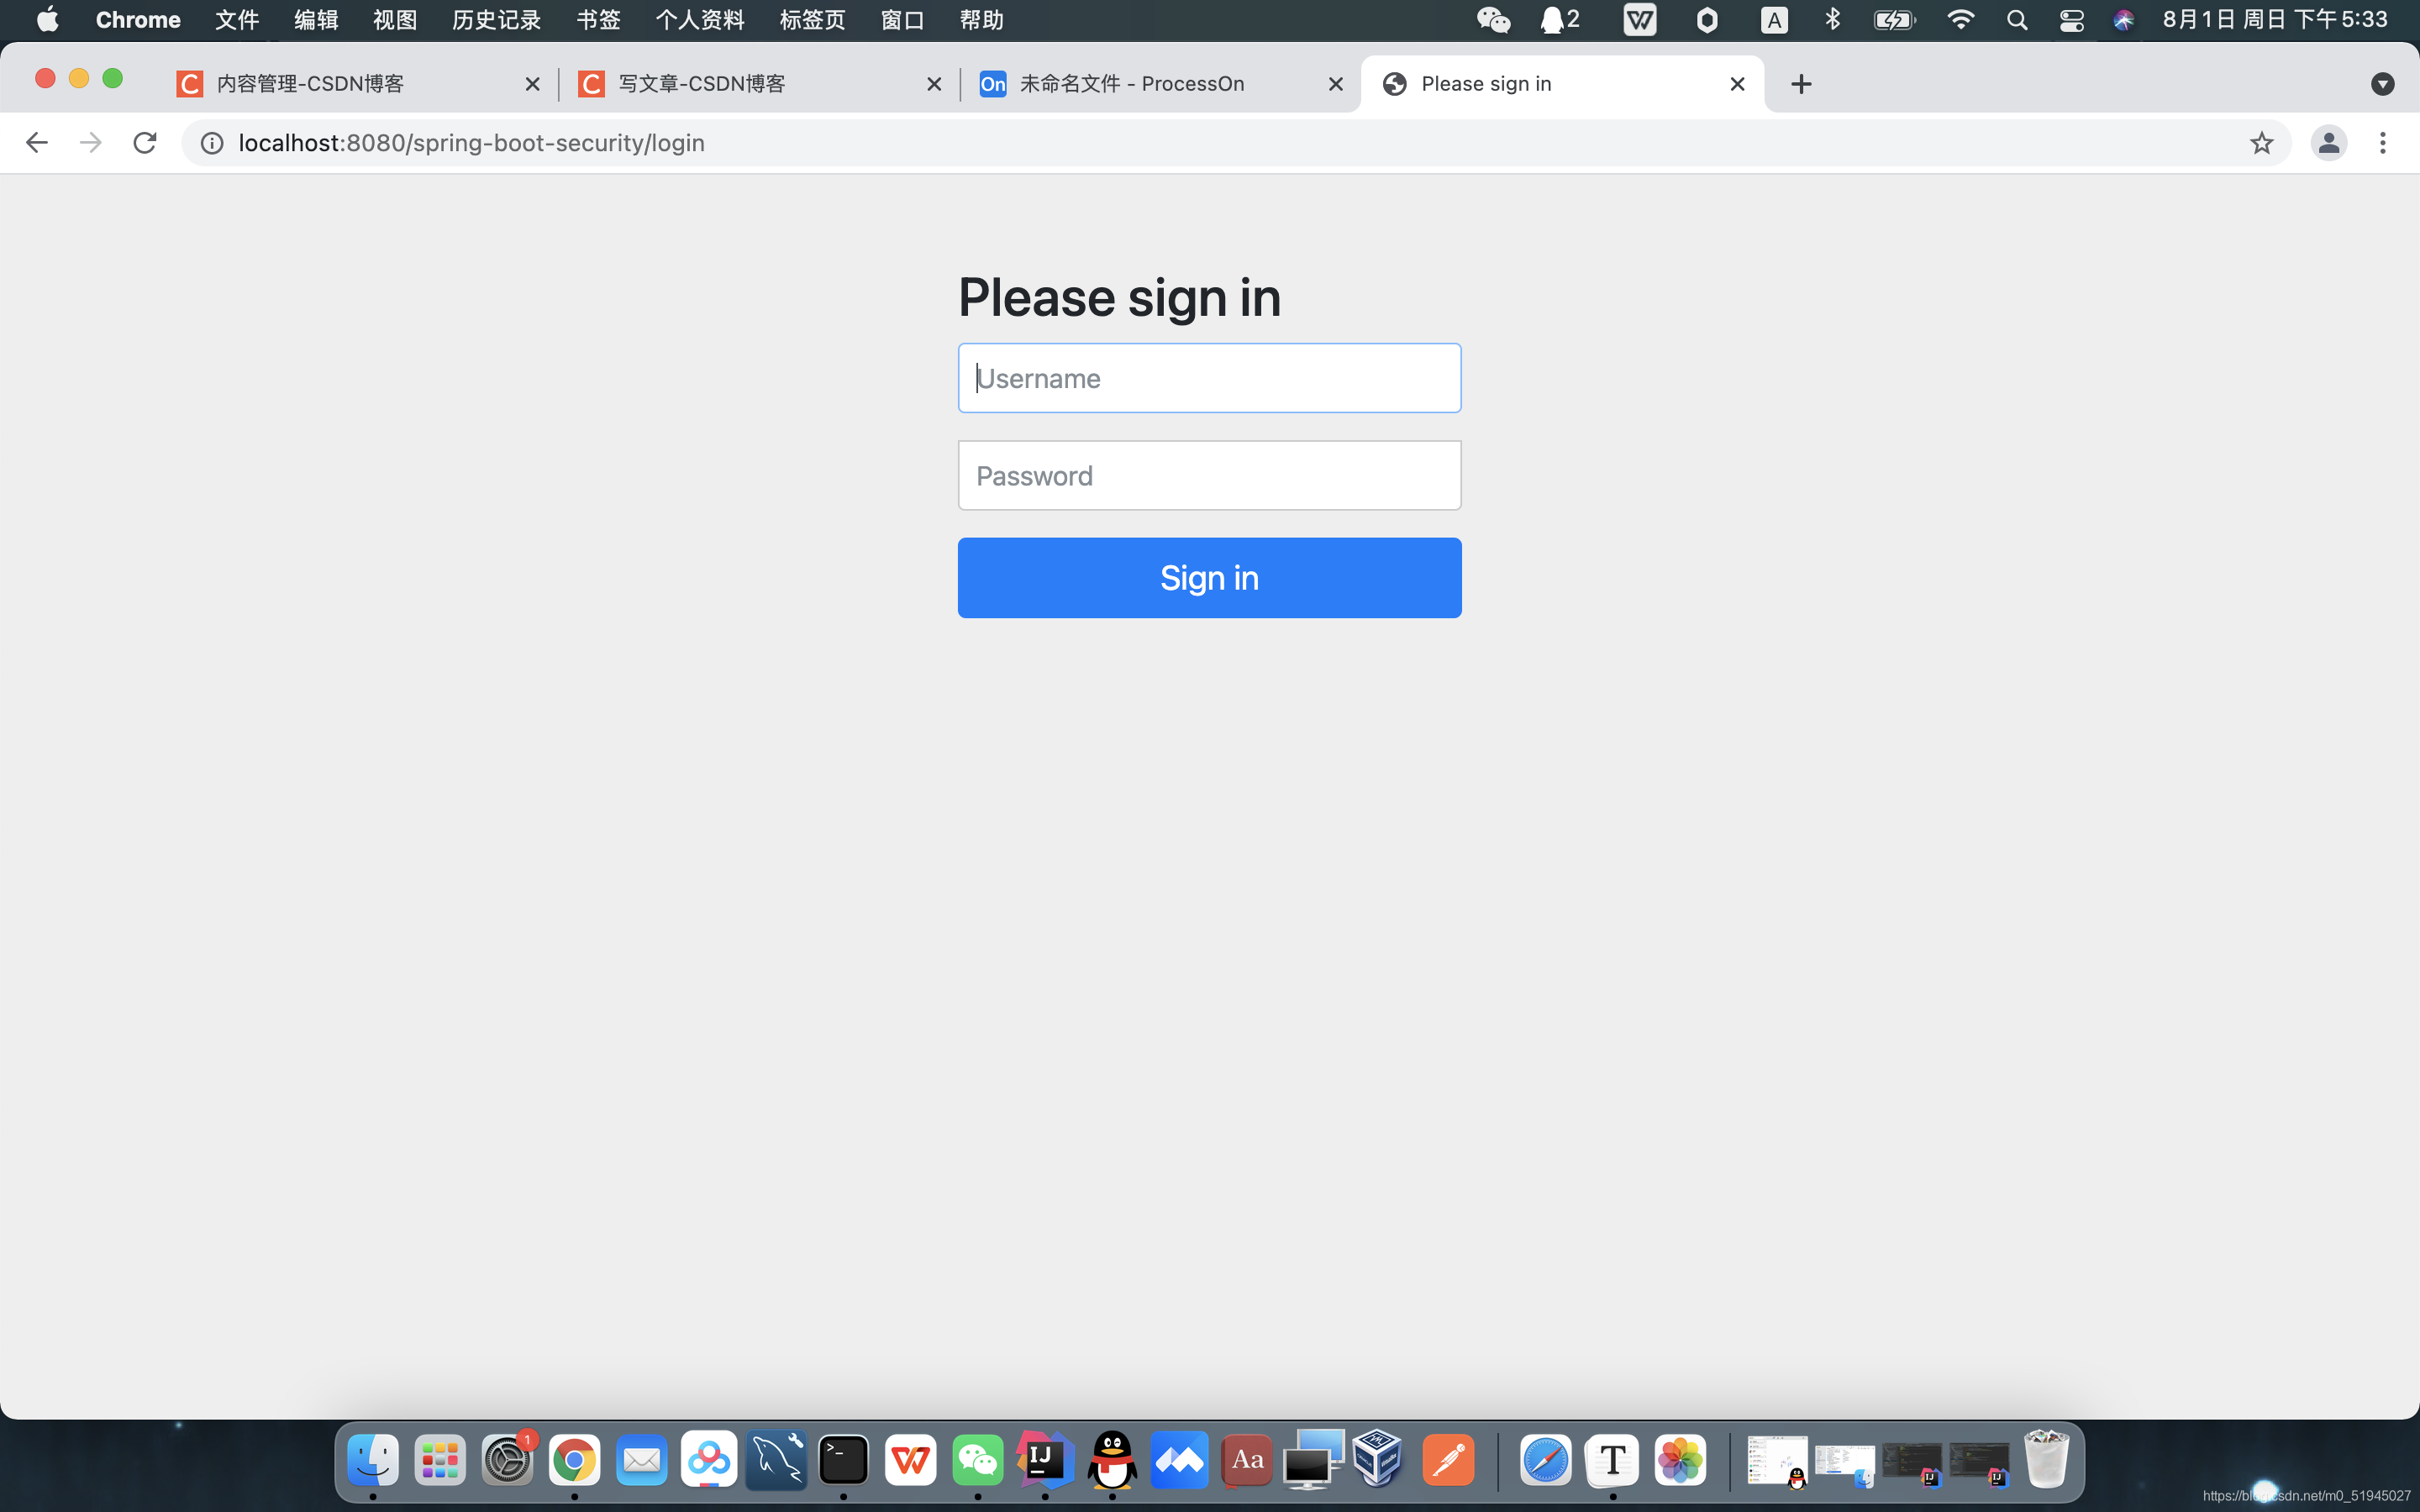
1、测试认证
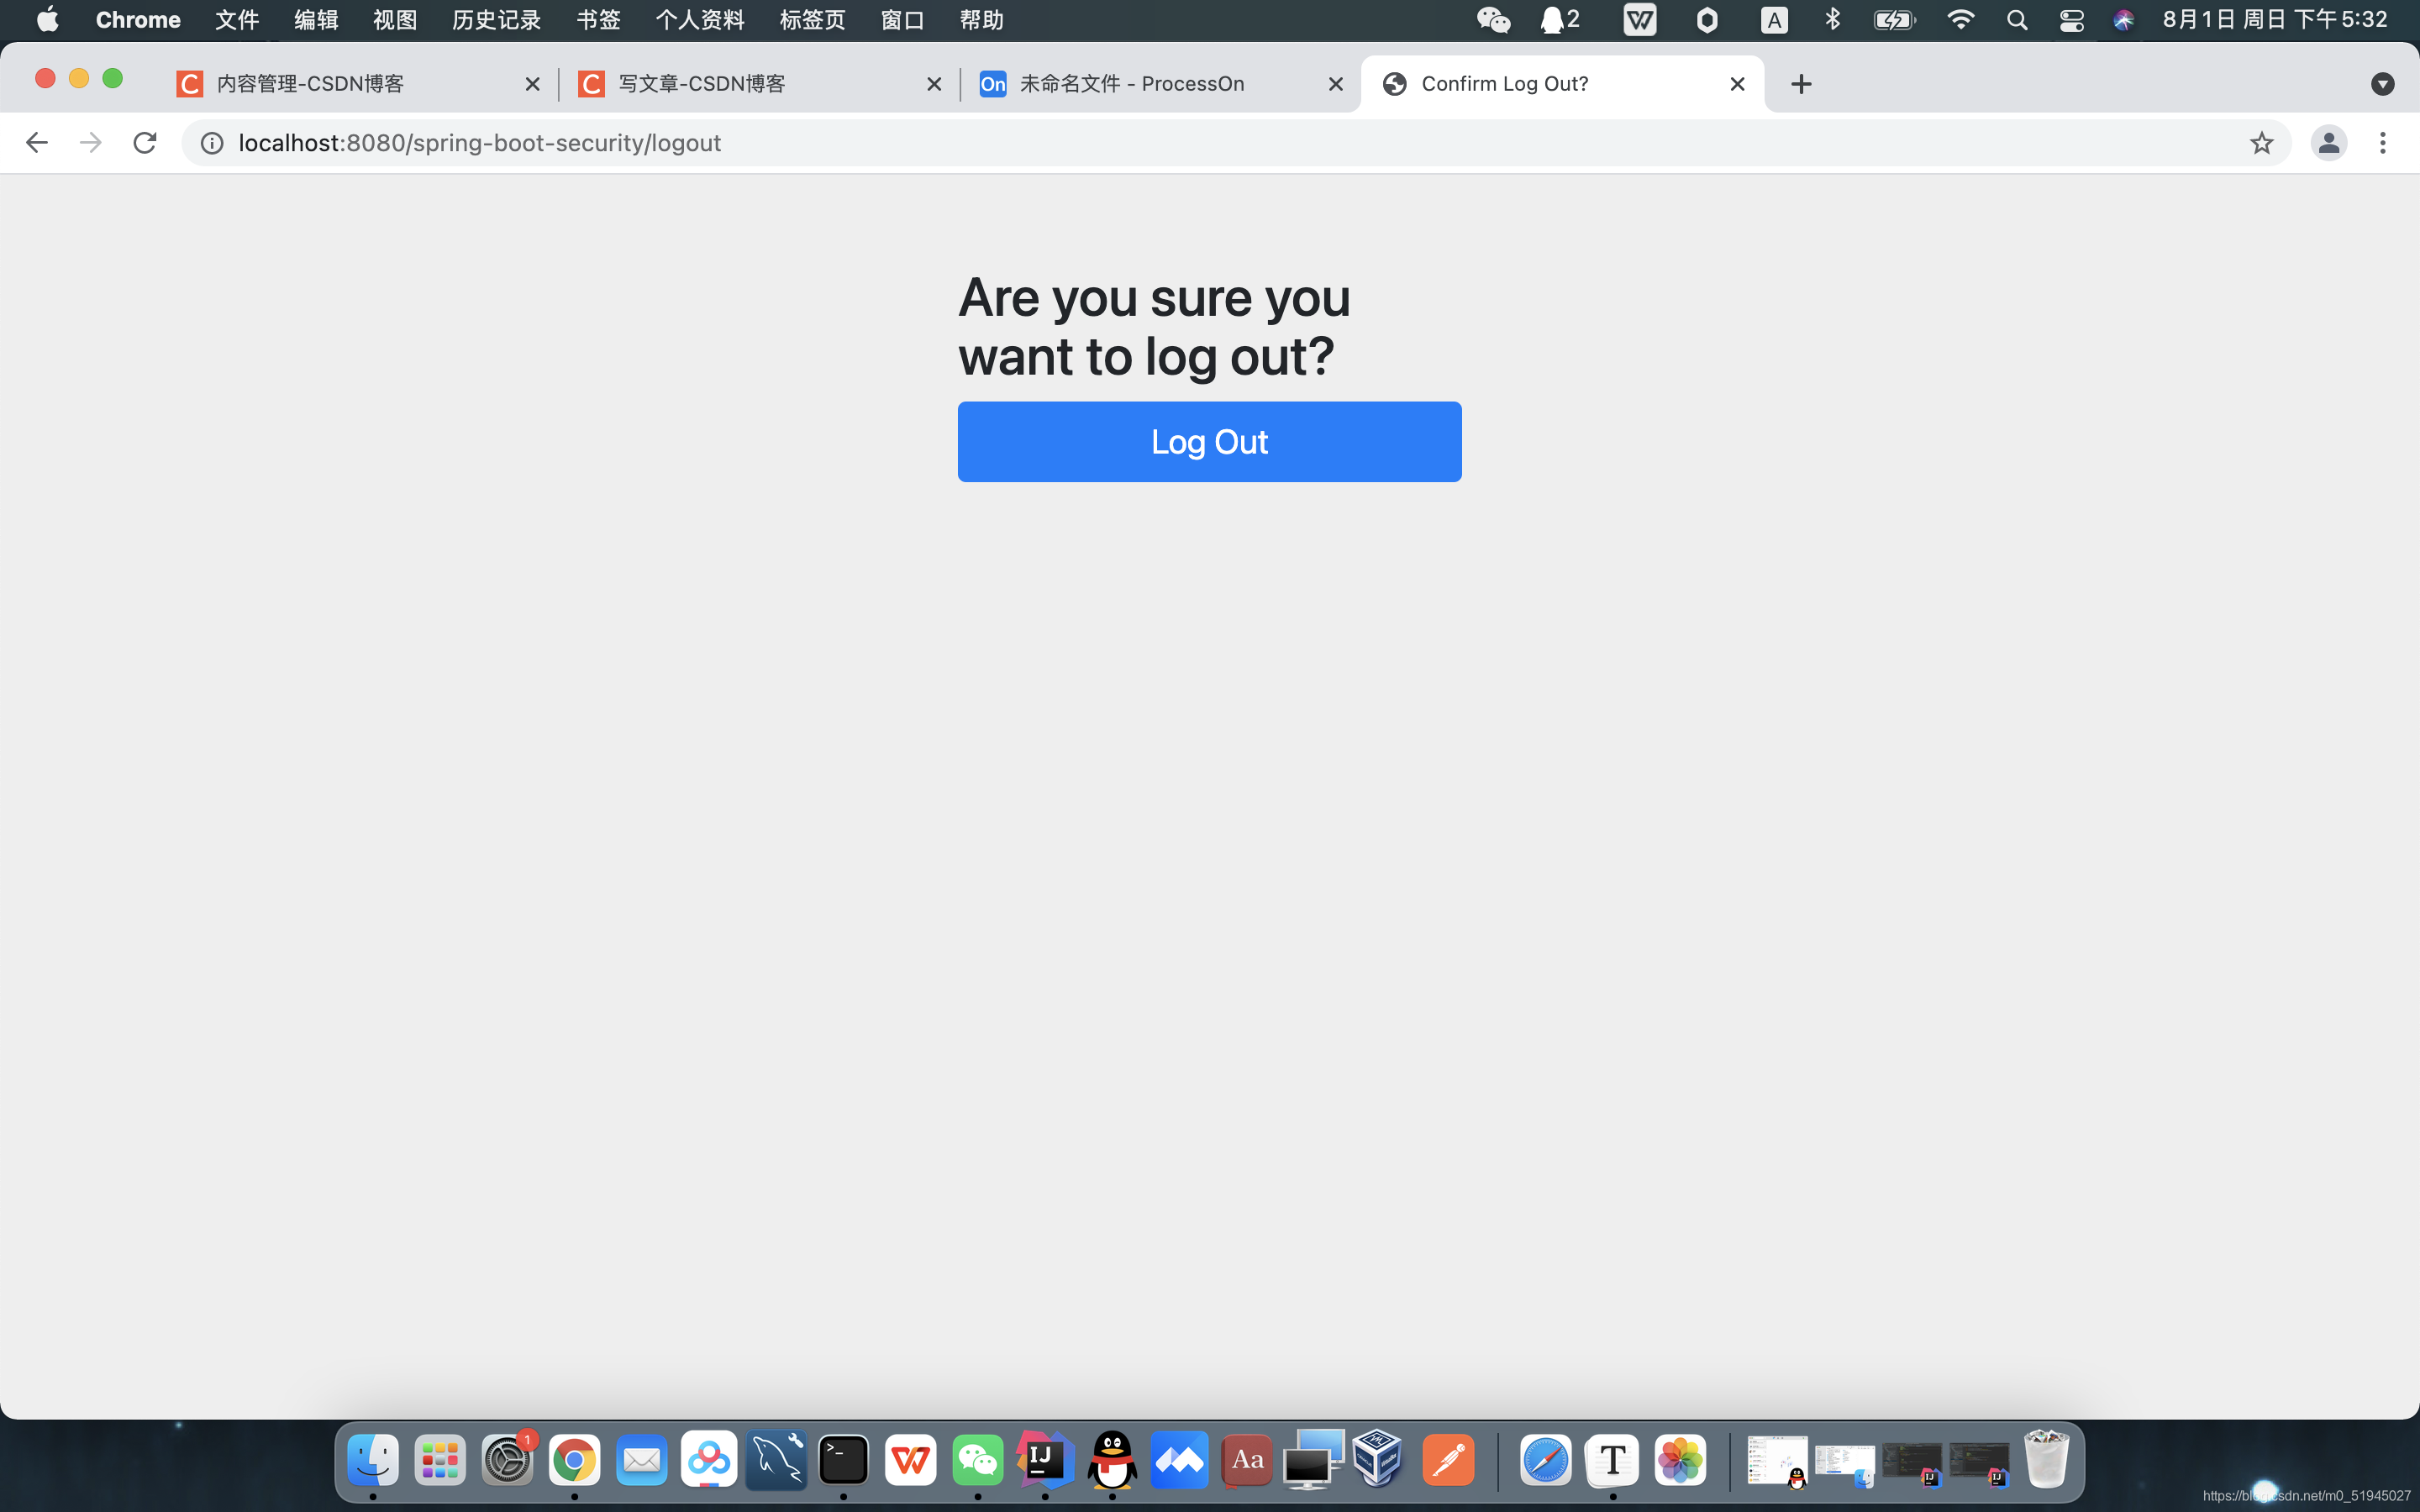
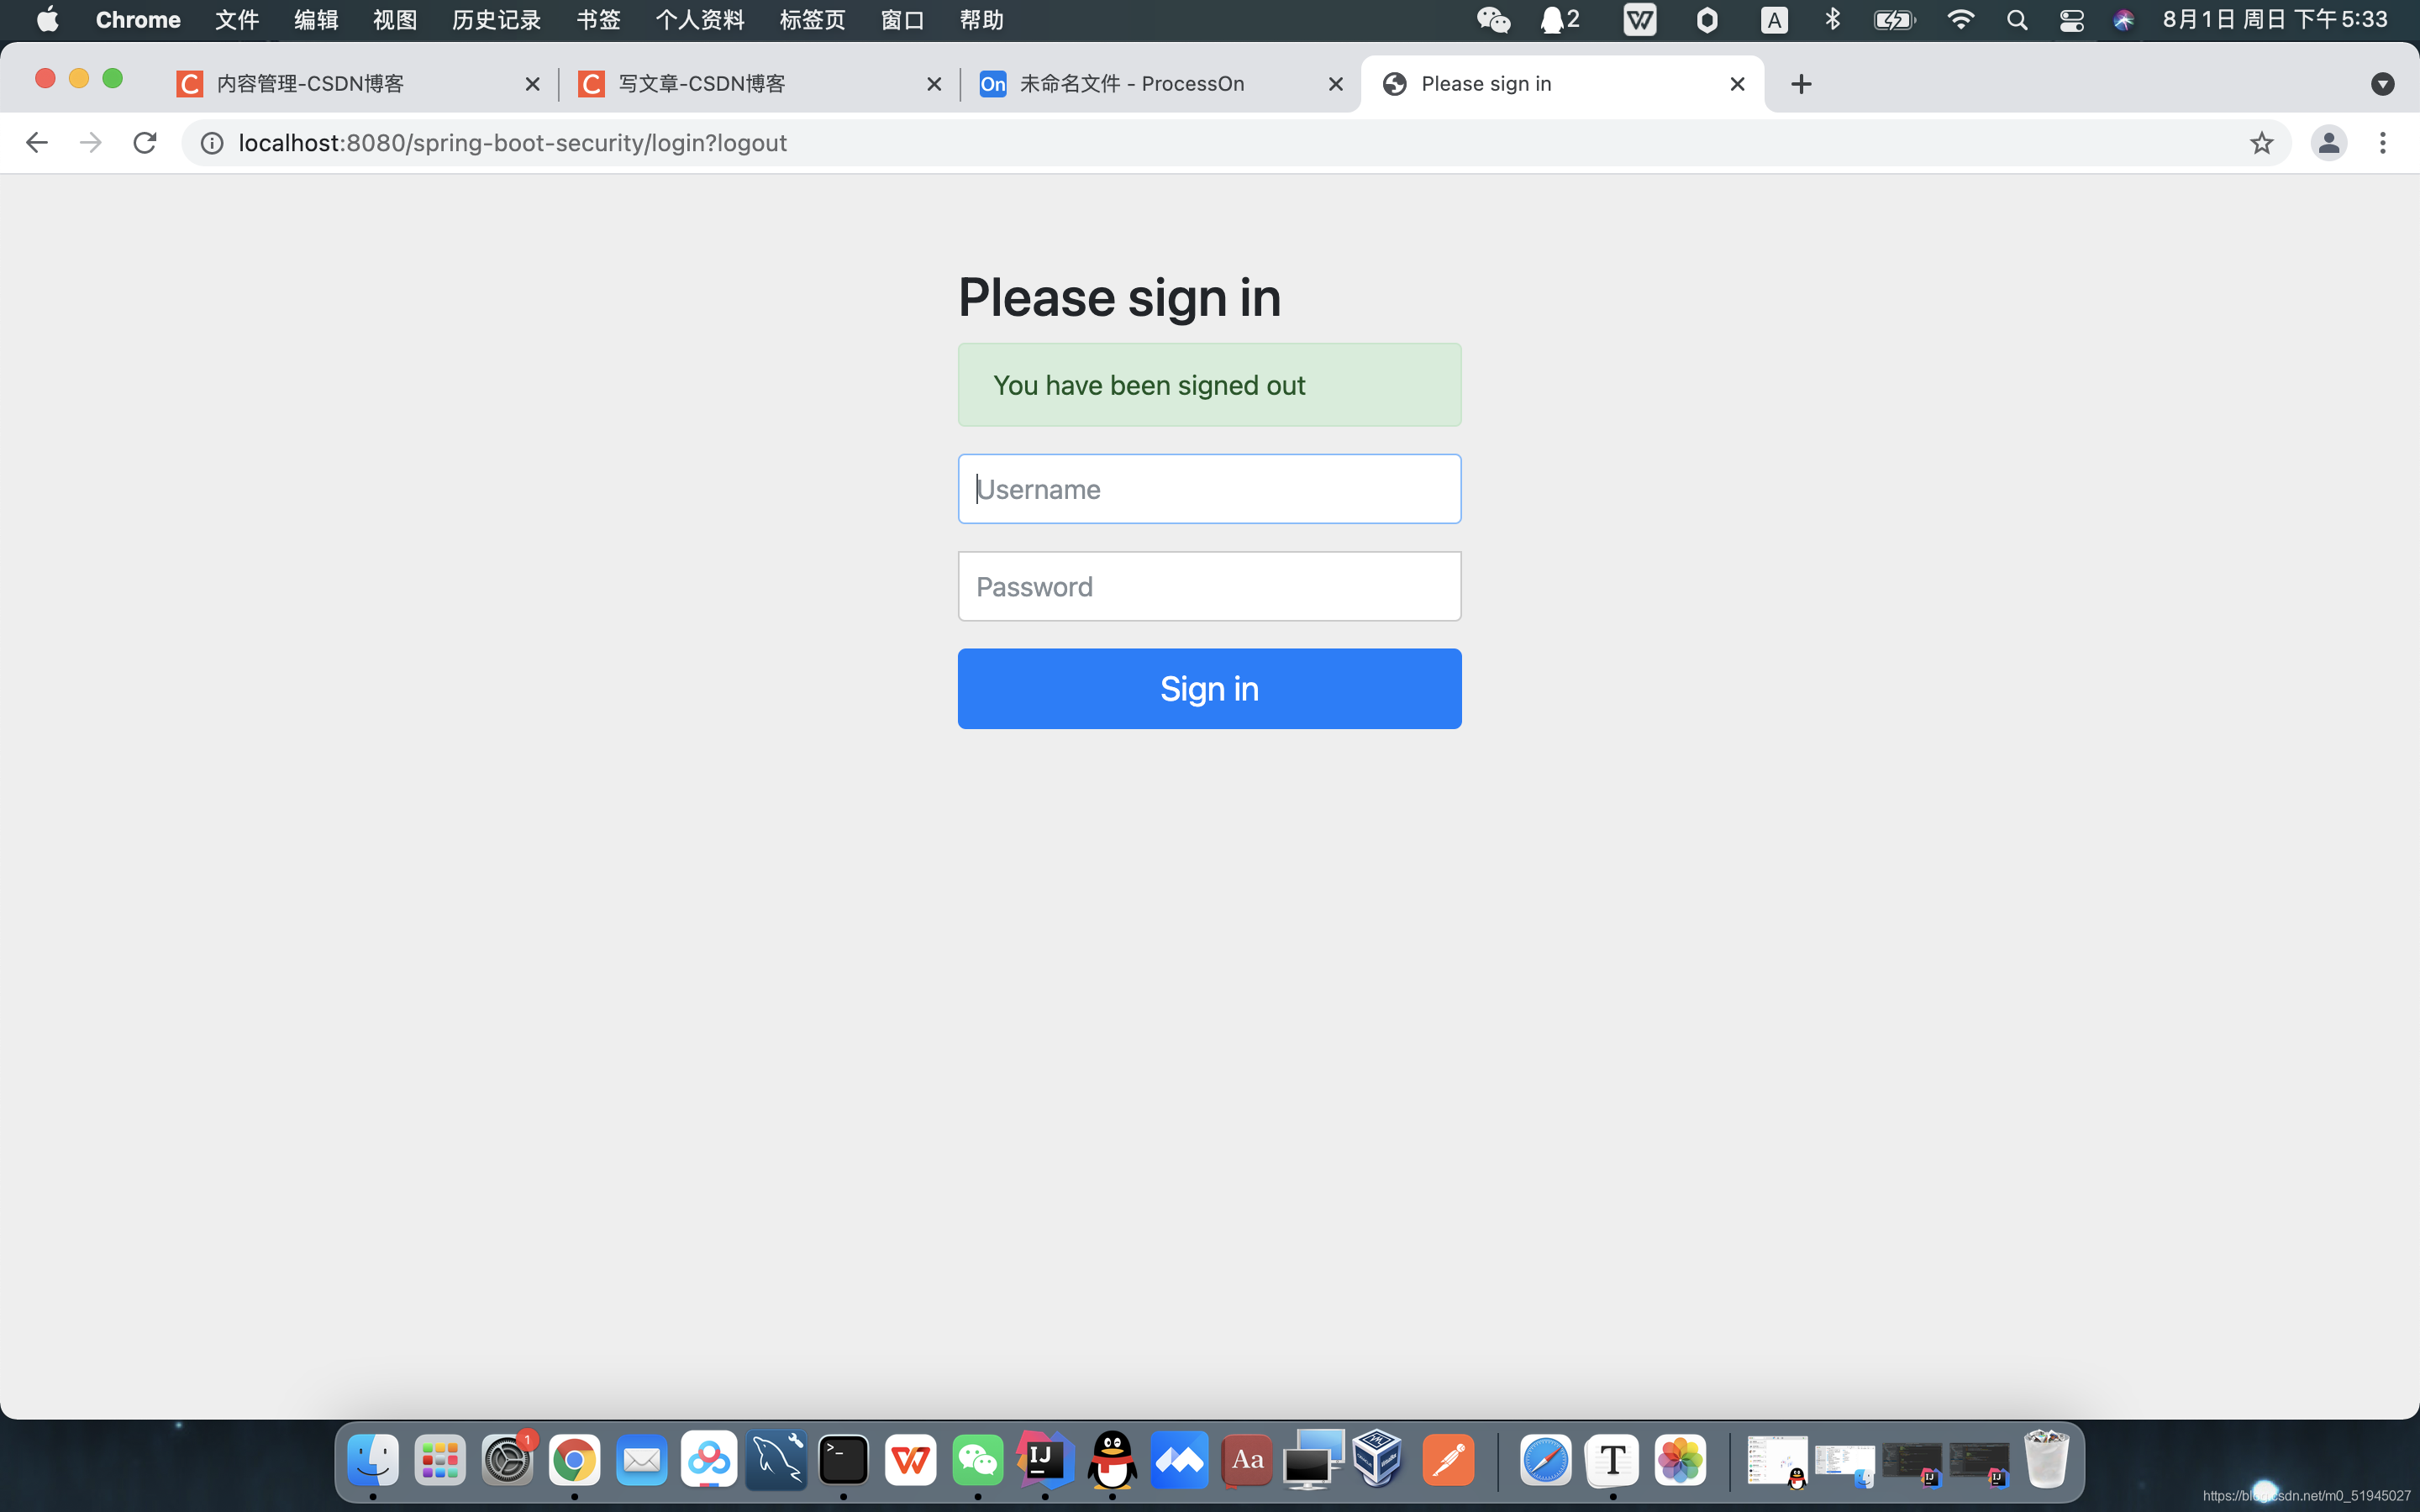
2、测试退出
3、测试授权