前言:
- 注解是代码特殊标记,格式:@注解名称(属性名称=属性值, 属性名称=属性值…)
- 使用注解,注解作用在类上面,方法上面,属性上面
- 使用注解目的:简化 xml 配置
一.Spring中针对Bean管理创建对象提供的注解
以下四个注解功能是一样的,都可以用来创建 bean 实例
- @Component
- @Service
- @Controller
- @Repository
步骤:
1.开启组件扫描
<?xml version="1.0" encoding="UTF-8"?>
<beans xmlns="http://www.springframework.org/schema/beans"
       xmlns:xsi="http://www.w3.org/2001/XMLSchema-instance"
       xmlns:context="http://www.springframework.org/schema/context"
       xsi:schemaLocation="http://www.springframework.org/schema/beans http://www.springframework.org/schema/beans/spring-beans.xsd http://www.springframework.org/schema/context https://www.springframework.org/schema/context/spring-context.xsd">

    <!--开启组件扫描
        1.扫描包上层目录
        2.如果扫描多个包,多个包使用逗号隔开
    -->
    <context:component-scan base-package="iocbean.byannotation"></context:component-scan>
</beans>
2.创建类,在类上面添加可以创建对象的注解
//在注解里面 value 属性值可以省略不写,
// 如果不写默认值是类名称的首字母小写 例如:Person --> person
@Component(value = "person") //相当于xml配置<bean id="person" class="iocbean.byannotation.Person"></bean>
public class Person {


    private String name;
    private String age;
    private String gender;

    @Override
    public String toString() {


        return "Person{" +
                "name='" + name + '\'' +
                ", age='" + age + '\'' +
                ", gender='" + gender + '\'' +
                '}';
    }
}
测试代码:
public class DemoTest {


    @Test
    public void test1(){


        ApplicationContext context = new ClassPathXmlApplicationContext("iocbean/byannotation/bean.xml");

        Person person = context.getBean("person", Person.class);

        System.out.println(person);
    }
}
输出结果:
Person{name='null', age='null', gender='null'}

Process finished with exit code 0
二.组件扫描细节配置
- use-default-filters=“false” 表示现在不使用默认 filter,自己配置 filter ;context:include-filter ,设置扫描哪些内容
- context:exclude-filter: 设置哪些内容不进行扫描
其中type有annotation,aspectj,assignable,custom,regex几种类型。
其意义如下:
- annotation:注解类型
- assignable_type:annotation:指定的类型
- aspectj:按照Aspectj的表达式,基本上不会用到
- regex:按照正则表达式
- custom:自定义规则
配置文件示例:
<?xml version="1.0" encoding="UTF-8"?>
<beans xmlns="http://www.springframework.org/schema/beans"
       xmlns:xsi="http://www.w3.org/2001/XMLSchema-instance"
       xmlns:context="http://www.springframework.org/schema/context"
       xsi:schemaLocation="http://www.springframework.org/schema/beans http://www.springframework.org/schema/beans/spring-beans.xsd http://www.springframework.org/schema/context https://www.springframework.org/schema/context/spring-context.xsd">

    <!--开启组件扫描
        1.扫描包上层目录
        2.如果扫描多个包,多个包使用逗号隔开
    -->
    <context:component-scan base-package="iocbean.byannotation"></context:component-scan>


    <!--示例 1
        use-default-filters="false" 表示现在不使用默认 filter,
        自己配置 filter context:include-filter ,设置扫描哪些内容
    -->
    <context:component-scan base-package="iocbean.byannotation" use-default-filters="false">
        <context:include-filter type="annotation" expression="org.springframework.stereotype.Service"></context:include-filter>
    </context:component-scan>

    <!--示例 2
        下面配置扫描包所有内容 context:exclude-filter: 设置哪些内容不进行扫描
    -->
    <context:component-scan base-package="iocbean.byannotation">
        <context:exclude-filter type="annotation" expression="org.springframework.stereotype.Controller"></context:exclude-filter>
    </context:component-scan>
</beans>
三.注解方式实现属性注入
1. @Autowired:根据属性类型进行自动装配
@Component
public class Student {


    // 添加注入属性注解
    @Autowired
    //定义 Person 类型属性
    // 不需要添加 set 方法
    private Person person;

    @Override
    public String toString() {


        return "Student{" +
                "person=" + person +
                '}';
    }
}
2.@Qualifier:根据名称进行注入
@Qualifier 注解的使用需和上面@Autowired 一起使用
    //添加注入属性注解
    @Autowired //根据类型进行注入
    @Qualifier(value = "person")//根据名称进行注入
    //定义 Person 类型属性
    // 不需要添加 set 方法
    private Person person1;
3.@Resource:可以根据类型注入,可以根据名称注入
其实@Resource并不是Spring的注解,它的包是javax.annotation.Resource,需要导入,但是Spring支持该注解的注入。
@Resource这个注解属于J2EE的,默认按照名称进行装配,名称可以通过name属性进行指定。
- 如果没有指定name属性,当注解写在字段上时,默认取字段名进行名称查找。
- 如果没有指定name属性,当注解写在setter方法上时,默认取属性名进行装配。
- 如果没有指定name属性,当找不到与名称匹配的bean时才按照类型进行装配。
- 需要注意的是,如果name属性一旦指定,就只会按照名称进行装配。
推荐使用:@Resource注解在字段上,且这个注解是属于J2EE的,减少了与spring的耦合。最重要的这样代码看起就比较优雅。
要注意的是高版本JDK在使用@Resource注解时装配失败,改用@Autowired() 和@Qualifier("")后bean装配成功。在使用Spring注解开发中,使用@Resource报空指针异常时有两个解决方案:
- 使用jdk8
- 导入一个新的javax.annotation的jar包
例如本人JDK12版本中javax.annotation.*包内容如下:
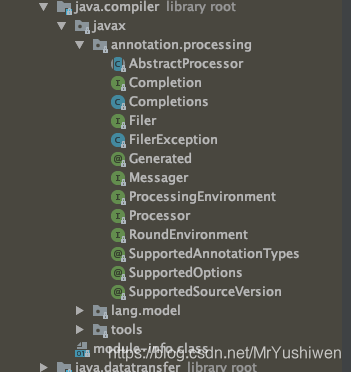
可以看到没有Resource注解类,然后本人重新导入javax.annotation-api-1.3.2.jar,完成后如下:

这样我们就可以使用@Resource注解了
代码示例:
    @Resource//根据类型进行注入
    private Person person;

    @Resource(name = "person1") //根据名称进行注入
    private Person person3;
4.@Value:注入普通类型属性
    @Value(value = "19")
    private String age;
5.@Autowired(required=false)
默认情况下必须要求依赖对象必须存在,如果要允许null 值,可以设置它的required属性为false,
即有些时候依赖对象不存在,会注入失败,当我们没有加上required=false时会出现异常,当我们加上参数(required=false)时,如果注入失败,此时会自动注入null值,不会发生报错当情况。
代码示例:
    @Autowired(required = false)
    private Person person;


    @Autowired(required = false) //根据类型进行注入
    @Qualifier(value = "person1")//根据名称进行注入
    private Person person1;
四.配置类
创建配置类,替代 xml 配置文件
//作为配置类,替代xml配置文件
@Configuration
//定义扫描的路径,从中找出标识了需要装配的类自动装配到spring的bean容器中
@ComponentScan("iocbean.byannotation/complete_annotation")
public class SpringIocConfig {


}
Person类:
@Component
public class Person {


    @Value("Mr.Yu")
    private String name;
    @Value("21")
    private String age;
    @Value("男")
    private String gender;

    public Person() {


        System.out.println("Person类构造器");
    }

    @Override
    public String toString() {


        return "Person{" +
                "name='" + name + '\'' +
                ", age='" + age + '\'' +
                ", gender='" + gender + '\'' +
                '}';
    }
}
Student类:
@Component
public class Student {


    @Autowired(required = false)
    private Person person;

    @Autowired(required = false)
    @Qualifier("person")
    private Person person1;

    @Resource
    private Person person2;

    public Student() {


        System.out.println("Student类构造器");
    }

    @Override
    public String toString() {


        return "Student{" +
                "person=" + person +
                ", person1=" + person1 +
                ", person2=" + person2 +
                '}';
    }
}
测试代码:
public class DemoTest {


    @Test
    public void test1(){


        ApplicationContext context = new AnnotationConfigApplicationContext(SpringIocConfig.class);

        Student student = context.getBean("student", Student.class);

        System.out.println(student);
    }
}
输出结果:
Person类构造器
Student类构造器
Student{person=Person{name='Mr.Yu', age='21', gender='男'}, person1=Person{name='Mr.Yu', age='21', gender='男'}, person2=Person{name='Mr.Yu', age='21', gender='男'}}

Process finished with exit code 0