本专栏将从基础开始,循序渐进,以实战为线索,逐步深入SpringBoot相关知识相关知识,打造完整的SpringBoot学习步骤,提升工程化编码能力和思维能力,写出高质量代码。希望大家都能够从中有所收获,也请大家多多支持。
专栏地址:SpringBoot专栏
本文涉及的代码都已放在gitee上:gitee地址
如果文章知识点有错误的地方,请指正!大家一起学习,一起进步。
专栏汇总:专栏汇总
文章目录
相应MQ下载链接:下载链接
SpringBoot整合Kafka
安装
windows版安装包下载地址:https://kafka.apache.org/downloads
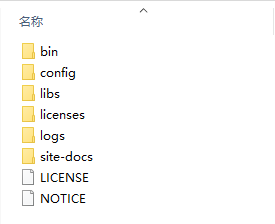
下载完毕后得到tgz压缩文件,使用解压缩软件解压缩即可使用,解压后得到如下文件
建议使用windows版2.8.1版本。
启动服务器
kafka服务器的功能相当于RocketMQ中的broker,kafka运行还需要一个类似于命名服务器的服务。在kafka安装目录中自带一个类似于命名服务器的工具,叫做zookeeper,它的作用是注册中心。
zookeeper-server-start.bat ..\..\config\zookeeper.properties		# 启动zookeeper
kafka-server-start.bat ..\..\config\server.properties				# 启动kafka
运行bin目录下的windows目录下的zookeeper-server-start命令即可启动注册中心,默认对外服务端口2181。
运行bin目录下的windows目录下的kafka-server-start命令即可启动kafka服务器,默认对外服务端口9092。
创建主题
和之前操作其他MQ产品相似,kakfa也是基于主题操作,操作之前需要先初始化topic。
# 创建topic
kafka-topics.bat --create --zookeeper localhost:2181 --replication-factor 1 --partitions 1 --topic itheima
# 查询topic
kafka-topics.bat --zookeeper 127.0.0.1:2181 --list
# 删除topic
kafka-topics.bat --delete --zookeeper localhost:2181 --topic itheima
测试服务器启动状态
Kafka提供有一套测试服务器功能的测试程序,运行bin目录下的windows目录下的命令即可使用。
kafka-console-producer.bat --broker-list localhost:9092 --topic itheima							# 测试生产消息
kafka-console-consumer.bat --bootstrap-server localhost:9092 --topic itheima --from-beginning	# 测试消息消费
整合
步骤①:导入springboot整合Kafka的starter,此坐标由springboot维护版本
<dependency>
    <groupId>org.springframework.kafka</groupId>
    <artifactId>spring-kafka</artifactId>
</dependency>
步骤②:配置Kafka的服务器地址
spring:
  kafka:
    bootstrap-servers: localhost:9092
    consumer:
      group-id: order
设置默认的生产者消费者所属组id。
步骤③:使用KafkaTemplate操作Kafka
@Service
public class MessageServiceKafkaImpl implements MessageService {


    @Autowired
    private KafkaTemplate<String,String> kafkaTemplate;

    @Override
    public void sendMessage(String id) {


        System.out.println("待发送短信的订单已纳入处理队列(kafka),id:"+id);
        kafkaTemplate.send("itheima2022",id);
    }
}
使用send方法发送消息,需要传入topic名称。
步骤④:使用消息监听器在服务器启动后,监听指定位置,当消息出现后,立即消费消息
@Component
public class MessageListener {


    @KafkaListener(topics = "itheima2022")
    public void onMessage(ConsumerRecord<String,String> record){


        System.out.println("已完成短信发送业务(kafka),id:"+record.value());
    }
}
使用注解@KafkaListener定义当前方法监听Kafka中指定topic的消息,接收到的消息封装在对象ConsumerRecord中,获取数据从ConsumerRecord对象中获取即可。
总结
-
springboot整合Kafka使用KafkaTemplate对象作为客户端操作消息队列
-
操作Kafka需要配置Kafka服务器地址,默认端口9092
-
企业开发时通常使用监听器来处理消息队列中的消息,设置监听器使用注解@KafkaListener。接收消息保存在形参ConsumerRecord对象中