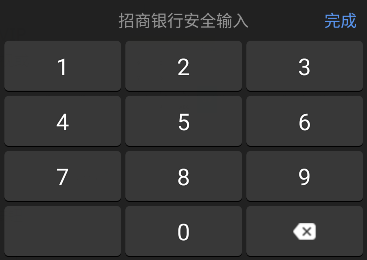
在当今的中国,移动端金融服务已经成为一种潮流,支付宝、微信、银行等机构都推出了他们各自的金融理财类App。钱是好东西,所以总会有人惦记着。手机上的钱看不见摸不着,但是一个个大额数字还是诱惑一些好事的人想干点事情,头一个可以想到的事情就是在输入法上面做文章,把用户输入的账户密码记录下来偷偷上传。面对这种情况,各家App对招都一致,就是自己开发一个键盘,让用户用这个安全键盘进行密码输入,让好事者的输入法失效
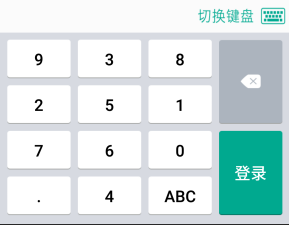
招商银行的相对简单,只是数字键盘而已,农业银行的稍微复杂点,还提供字母键盘。那我们今天模仿一下农业银行,试着撸一个数字加字母键盘吧
相关代码在github上,欢迎大家star、fork
预备知识
自定义键盘其实也很简单,至少比我之前想象的要简单太多太多了。我们只需要用到系统提供的两个类:Keyboard和KeyboardView。通过类名我们可以猜想到只要把写好键盘布局文件送到键盘类中,就可以实现相应的自定义功能。事实是不是如此简单?一点都没错!咱们就此开始吧
键盘绘制
先来看一个简单的按键布局文件吧
<?xml version="1.0" encoding="utf-8"?>
<Keyboard xmlns:android="http://schemas.android.com/apk/res/android"
    android:horizontalGap="0px"
    android:verticalGap="0px"
    android:keyHeight="7.5%p"
    android:keyWidth="30%p">
    <Row android:verticalGap="1%p">
        <Key
            android:codes="49"
            android:keyLabel="1"
            android:horizontalGap="2%p">

        </Key>
        <Key
            android:codes="50"
            android:keyLabel="2"
            android:horizontalGap="2%p">

        </Key>
        <Key
            android:codes="51"
            android:keyLabel="3"
            android:horizontalGap="2%p">

        </Key>
    </Row>
    <Row>
        <Key
            android:codes="-2"
            android:keyLabel="abc"
            android:horizontalGap="2%p">

        </Key>
        <Key
            android:codes="48"
            android:keyLabel="0"
            android:horizontalGap="2%p">

        </Key>
        <Key
            android:codes="-5"
            android:isRepeatable="true"
            android:keyIcon="@mipmap/ic_delete"
            android:horizontalGap="2%p">

        </Key>
    </Row>
</Keyboard>
只看看按键布局,其他不管,我们来分析一下这个按键布局是怎么搭建出来的。
键盘的宽高不用我们去烦神,我们就管理每一个按键的宽高,这个宽高对应的属性是android:keyWidth、android:keyHeight,行与行之间的间隙(下方间隙)可以用android:vertical,列与列之间的*(左方间隙)是Gapandroid:horizontalGap。
按键的换行用Row来处理,每一个按键Key都在其中,其中android:keyLabel是按键上的文字,android:codes是在EditText上输出的文字。注意一下这个codes值不能随便填字符串,它一般是unicode值,像我上面48对应的是十进制的0,这些你对照ASCII表就行,如果你想输出真正的字符串,则需要用属性keyOutputText。你想按键不要文字而放置图片,可以使用android:keyIcon属性。要想实现删除键那种长按连续删除可以使用android:isRepeatable属性
这里宽高、间距的单位既可以是像素,英寸等,也可以是相对于基础取值的百分比,以%p结尾。我建议开发过程中使用百分比单位比较好,毕竟屏幕适配还是百分比布局最稳妥,计算方法我们稍后再说
其他的一些属性就不多做介绍了,可以看看文末的参考文章中的一些资料
这里将整个数字键盘的按键贴全了来说明一下百分比的计算步骤,顺带提醒一下,按键的布局放置在res/xml文件夹下
<?xml version="1.0" encoding="utf-8"?>
<Keyboard xmlns:android="http://schemas.android.com/apk/res/android"
    android:horizontalGap="0px"
    android:verticalGap="0px"
    android:keyHeight="7.5%p"
    android:keyWidth="30%p">
    <Row android:verticalGap="1%p">
        <Key
            android:codes="49"
            android:keyLabel="1"
            android:horizontalGap="2%p">

        </Key>
        <Key
            android:codes="50"
            android:keyLabel="2"
            android:horizontalGap="2%p">

        </Key>
        <Key
            android:codes="51"
            android:keyLabel="3"
            android:horizontalGap="2%p">

        </Key>
    </Row>
    <Row android:verticalGap="1%p">
        <Key
            android:codes="52"
            android:keyLabel="4"
            android:horizontalGap="2%p">

        </Key>
        <Key
            android:codes="53"
            android:keyLabel="5"
            android:horizontalGap="2%p">

        </Key>
        <Key
            android:codes="54"
            android:keyLabel="6"
            android:horizontalGap="2%p">

        </Key>
    </Row>
    <Row android:verticalGap="1%p">
        <Key
            android:codes="55"
            android:keyLabel="7"
            android:horizontalGap="2%p">

        </Key>
        <Key
            android:codes="56"
            android:keyLabel="8"
            android:horizontalGap="2%p">

        </Key>
        <Key
            android:codes="57"
            android:keyLabel="9"
            android:horizontalGap="2%p">

        </Key>
    </Row>
    <Row>
        <Key
            android:codes="-2"
            android:keyLabel="abc"
            android:horizontalGap="2%p">

        </Key>
        <Key
            android:codes="48"
            android:keyLabel="0"
            android:horizontalGap="2%p">

        </Key>
        <Key
            android:codes="-5"
            android:isRepeatable="true"
            android:keyIcon="@mipmap/ic_delete"
            android:horizontalGap="2%p">

        </Key>
    </Row>
</Keyboard>
我全局定义了按键高度为7.5%p,这说明我相对这个屏幕高度的7.5%;同时宽度是屏幕宽度的30%。这样我的按键每一个横向间隙就是(100-30*3)/4=2.5,随便写了就是2%了哈哈,就是这么简单
按键绘制结束了就把他放到键盘上了,来看看键盘的布局文件
<?xml version="1.0" encoding="utf-8"?>
<android.inputmethodservice.KeyboardView xmlns:android="http://schemas.android.com/apk/res/android"
    android:layout_width="match_parent" android:layout_height="wrap_content"
    android:id="@+id/view_keyboard"
    android:background="#999999"
    android:focusable="true"
    android:focusableInTouchMode="true"
    android:keyBackground="@drawable/selector_keyboard_key"
    android:keyPreviewHeight="64dip"
    android:keyPreviewLayout="@layout/view_keyboard_preview"
    android:keyTextColor="@android:color/black"
    android:keyTextSize="24sp"
    android:labelTextSize="18sp"
    android:paddingTop="8dip"
    android:paddingBottom="8dip"
    android:shadowColor="#FFFFFF"
    android:shadowRadius="0.0"
    android:visibility="gone">

</android.inputmethodservice.KeyboardView>
简单解释一下没见过的属性android:keyBackground:键盘背景图android:keyPreviewLayout:键盘点击时候预览图的布局,我这里是一个TextView。预览图就是点击按键后短暂弹出的提示布局文件
<?xml version="1.0" encoding="utf-8"?>
<TextView xmlns:android="http://schemas.android.com/apk/res/android"
    android:layout_width="wrap_content" android:layout_height="wrap_content"
    android:background="@android:color/holo_red_light"
    android:textColor="@android:color/white"
    android:gravity="center"
    android:textSize="24sp">

</TextView>
android:keyPreviewHeight:键盘点击时候预览图的高度android:keyTextColor:按键文字的颜色android:keyTextSize:按键文字大小android:labelTextSize:如果同时设置了文字+图片的按键,用这个属性进行设置。这边我比较纳闷,明明文字加图表不能同时在按键上显示,这个属性意义应该不能这么理解了吧android:shadowColor android:shadowRadius:你别问我,反正没有这两个属性,按键上文字会发虚模糊
最后来看看键盘摆放位置,在相对布局的最底下,默认隐藏
<?xml version="1.0" encoding="utf-8"?>
<RelativeLayout xmlns:android="http://schemas.android.com/apk/res/android"
    xmlns:tools="http://schemas.android.com/tools"
    android:layout_width="match_parent"
    android:layout_height="match_parent"
    tools:context="com.renyu.keyboarddemo.MainActivity">
    <LinearLayout
        android:id="@+id/layout_root"
        android:layout_width="match_parent"
        android:layout_height="wrap_content"
        android:orientation="vertical">
        <View
            android:layout_width="match_parent"
            android:layout_height="400dip"></View>
        <com.renyu.keyboarddemo.KeyBoardEditText
            android:id="@+id/ed_main"
            android:layout_width="match_parent"
            android:layout_height="50dip"
            android:background="@android:color/holo_orange_dark"/>
    </LinearLayout>
    <LinearLayout
        android:id="@+id/layout_main"
        android:layout_width="match_parent"
        android:layout_height="wrap_content"
        android:orientation="vertical"
        android:layout_alignParentBottom="true"
        android:background="#999999"
        android:visibility="gone">
        <include layout="@layout/content_keyboard"></include>
    </LinearLayout>
</RelativeLayout>
键盘功能
键盘按键输出处理功能我们放置到一个EditText上,一般流程是初始化好一个Keyboard类,然后将该类赋值到keyboardView上,同时设置KeyboardView.OnKeyboardActionListener来处理相应的按键回调事件
初始化键盘,这里得到字母键盘与数字键盘
private fun initEditView() {
    keyboradNumber = Keyboard(context_, R.xml.keyboard_number)
    keyboradLetter = Keyboard(context_, R.xml.keyboard_letter)
}
随后你可以通过
keyboardView.isPreviewEnabled = true
进行键盘预览功能的开关
完成以上步骤你可以添加按键回调事件了
    public interface OnKeyboardActionListener {
        // 当用户按下一个键时调用。在调用onKey之前调用。如果之前定义的codes有问题,primaryCode为0
        void onPress(int primaryCode);
        // 当用户释放键时调用
        void onRelease(int primaryCode);
        // 之前codes字段定义的值
        void onKey(int primaryCode, int[] keyCodes);
        // 如果之前在keyOutputText定义过数值,则按键之后会在此回调中进行响应
        void onText(CharSequence text);
        // 下面都是在键盘上进行手势操作
        void swipeLeft();
        void swipeRight();
        void swipeDown();
        void swipeUp();
    }
我们重点看一下onKey方法。
不知道你之前有没有注意到我在按键布局中有几个负数值,其实这些负数值是有意义的,我这里使用了系统定义好的几个参数
    public static final int KEYCODE_SHIFT = -1;
    public static final int KEYCODE_MODE_CHANGE = -2;
    public static final int KEYCODE_CANCEL = -3;
    public static final int KEYCODE_DONE = -4;
    public static final int KEYCODE_DELETE = -5;
    public static final int KEYCODE_ALT = -6;
看名称就能明白意思。这里我切换键盘类型用了-2,切换大小写用了-1,删除-5,完成-4。基本上你自定义的code值最好都用负数,为什么呢?因为系统的都是正数呗
我就拷贝我使用到的2个回调方法,通过判断primaryCode值判断按键上的code值是什么,如果不是功能键,则将unicode值转换成字符并输入到文本框中
keyboardView.setOnKeyboardActionListener(object : KeyboardView.OnKeyboardActionListener {
    override fun onPress(primaryCode: Int) {
        canShowPreview(primaryCode)
    }

    override fun onKey(primaryCode: Int, keyCodes: IntArray?) {
        val editable = text
        val start = selectionStart
        // 删除功能
        if (primaryCode == Keyboard.KEYCODE_DELETE) {
            if (editable.isNotEmpty() && start>0) {
                editable.delete(start-1, start)
            }
        }
        // 字母键盘与数字键盘切换
        else if (primaryCode == Keyboard.KEYCODE_MODE_CHANGE) {
            changeKeyBoard(!changeLetter)
        }
        // 完成
        else if (primaryCode == Keyboard.KEYCODE_DONE) {
            keyboardView.visibility = View.GONE
            viewGroup.visibility = View.GONE
            listener?.hide()
        }
        // 切换大小写
        else if (primaryCode == Keyboard.KEYCODE_SHIFT) {
            changeCapital(!isCapital)
            keyboardView.keyboard = keyboradLetter
        }
        else {
            editable.insert(start, Character.toString(primaryCode.toChar()))
        }
    }
})
我们来看看数字键盘与字母键盘相互切换时候的代码,不同的键盘重新设置到键盘视图上,只要调用keyboardView?.keyboard即可
fun changeKeyBoard(letter: Boolean) {
    changeLetter = letter
    if (changeLetter) {
        keyboardView?.keyboard = keyboradLetter
    }
    else {
        keyboardView?.keyboard = keyboradNumber
    }
}
一般通过触摸文本框显示键盘,点击返回键键盘收起。注意需要将系统输入法给隐藏,不然就乱七八糟的了
override fun onTouchEvent(event: MotionEvent?): Boolean {
    KeyboardUtils.hideSoftInput(this)
    if (event?.action == MotionEvent.ACTION_UP) {
        if (keyboardView?.visibility != View.VISIBLE) {
            keyboardView?.visibility = View.VISIBLE
            viewGroup?.visibility = View.VISIBLE
        }
    }
    return true
}

override fun onKeyDown(keyCode: Int, event: KeyEvent?): Boolean {
    if (keyCode == KeyEvent.KEYCODE_BACK && keyboardView?.visibility != View.GONE
            && viewGroup?.visibility != View.GONE) {
        keyboardView?.visibility = View.GONE
        viewGroup?.visibility = View.GONE
        return true
    }
    return super.onKeyDown(keyCode, event)
}

override fun onAttachedToWindow() {
    super.onAttachedToWindow()
    KeyboardUtils.hideSoftInput(this)
}

override fun onDetachedFromWindow() {
    super.onDetachedFromWindow()
    KeyboardUtils.hideSoftInput(this)
}
如果你对键盘按键的UI定制需求强烈的话,你可以通过重写KeyboardView的onDraw()方法,遍历keyboard.getKeys()进行自定义
大结局
没有什么大结局,直接用吧