1. 前言
在上一篇博客中已经讲解了Tkinter的基础知识,为了设计自己的程序界面就需要进一步了解相关控件的使用。在本文中将主力介绍以下控件及其使用,Label、Frame、Entry、Text、Button、Listbox、Scrollbar。
2. 控件使用及介绍
在Tkinter中控件的使用都是基于如下的形式的:控件类型(根对象, [属性列表]),在控件定义好之后就需要将其添加到主界面上去。通常使用的布局方法便是pack()函数,没有调用pack()函数控件是不能在界面上显示的。
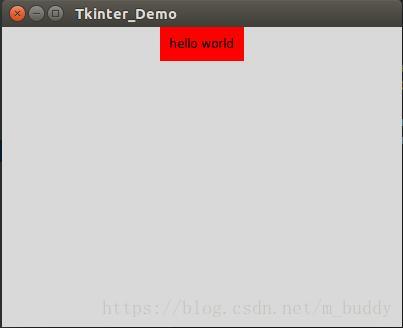
2.1 Label
Label控件是最为常见的Tkinter控件,主要是用于标签文本的显示。使用方法:(parent可以理解成父窗口,下同)
w = tk.Label(parent, option, ...)- 1
option:
| 属性 | 解释 |
|---|---|
| bg | 背景颜色,可设置’white’, ‘black’, ‘red’,’green’, ‘blue’, ‘cyan’, ‘yellow’, ‘magenta’ |
| text | 这个就是你要在标签控件上现实的文本 |
| font | 需要显示的文字字体属性(颜色, 大小) |
| width | 设置控件宽度 |
| height | 设置控件高度 |
| bitmap | 设置Label控件中显示图像 |
| anchor | 控制Lable中文本的显示位置,当控件大小大于了文本需要的大小时,默认为tk.CENTER |
| padx | 指定文本左右两个方向的留白大小,默认为1 |
| pady | 指定文本上下两个方向的留白大小,默认为1 |
| …… | …… |
示例:
# -*- coding=utf-8 -*-

import Tkinter

root_window = Tkinter.Tk()
root_window.title('Tkinter_Demo')
root_window.geometry('400x300')

hello_label = Tkinter.Label(root_window, text='hello world', bg='red', width=10, height=2)
hello_label.pack(side=Tkinter.TOP)  # 这里的side可以赋值为LEFT  RTGHT TOP  BOTTOM

root_window.mainloop()- 1
- 2
- 3
- 4
- 5
- 6
- 7
- 8
- 9
- 10
- 11
- 12
效果:
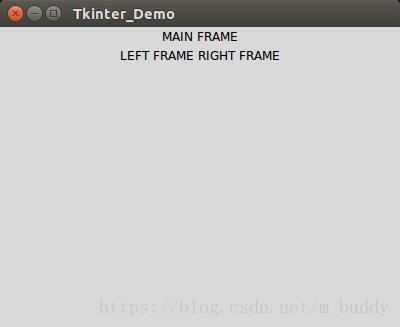
2.2 Frame
Frame控件是Tkinter控件中用作其它控件的容器。使用方法:
w = Frame(parent, option, ...)- 1
option:
| 属性 | 解释 |
|---|---|
| bg or background | Frame控件的背景颜色 |
| cursor | 当鼠标在Frame控件区域时需要显示的样式 |
| height | Frame控件的高度 |
| width | Frame控件的宽度 |
| …… | …… |
示例:
# -*- coding=utf-8 -*-

import Tkinter

root_window = Tkinter.Tk()
root_window.title('Tkinter_Demo')
root_window.geometry('400x300')

# main frame
main_frame = Tkinter.Frame(root_window)
main_label = Tkinter.Label(main_frame, text='MAIN FRAME')
main_label.pack()

# left frame
left_frame = Tkinter.Frame(main_frame)
left_label = Tkinter.Label(left_frame, text='LEFT FRAME')
left_label.pack()
left_frame.pack(side=Tkinter.LEFT)

# right frame
right_frame = Tkinter.Frame(main_frame)
right_label = Tkinter.Label(right_frame, text='RIGHT FRAME')
right_label.pack()
right_frame.pack(side=Tkinter.RIGHT)

main_frame.pack()

root_window.mainloop()- 1
- 2
- 3
- 4
- 5
- 6
- 7
- 8
- 9
- 10
- 11
- 12
- 13
- 14
- 15
- 16
- 17
- 18
- 19
- 20
- 21
- 22
- 23
- 24
- 25
- 26
- 27
- 28
效果:
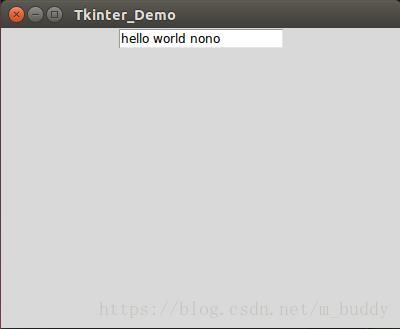
2.3 Entry
Entry控件是Tkinter控件中用作文本输入用的。使用方法:
w = tk.Entry(parent, option, ...)- 1
option:
| 属性 | 解释 |
|---|---|
| justify | 当输入的文本小于了文本框的大小,可以指定其位置LEFT (默认), CENTER,RIGHT |
| show | 在作为输入密码框的时候可以设置非明文为:show=’*’ |
| textvariable | 关联一个StringVar类,可以用set()和get()函数去设置和获取控件中的值 |
| xscrollcommand | 指定控件滑动条事件 |
| …… | …… |
示例:
# -*- coding=utf-8 -*-

import Tkinter

root_window = Tkinter.Tk()
root_window.title('Tkinter_Demo')
root_window.geometry('400x300')

m_str_var = Tkinter.StringVar()
m_entry = Tkinter.Entry(root_window, textvariable=m_str_var)
m_str_var.set('hello world')
m_entry.insert(Tkinter.END, ' nono')
m_entry.pack()

root_window.mainloop()- 1
- 2
- 3
- 4
- 5
- 6
- 7
- 8
- 9
- 10
- 11
- 12
- 13
- 14
- 15
效果:
2.4 Text
Text控件是Tkinter控件中用作显示文本的。使用方法:
w = tk.Text(parent, option, ...)- 1
option:
| 属性 | 解释 |
|---|---|
| undo | 是否使能撤销功能,使用False和True设置 |
| maxundo | 撤销的最大次数 |
| …… | …… |
插入操作:t.insert(mark, 内容)
删除操作:t.delete(mark1, mark2)
其中,mark可以是行号,或者特殊标识,例如
Tkinter.INSERT,Tkinter.CURRENT:鼠标的当前位置所对应的字符位置
Tkinter.END:这个Textbuffer的最后一个字符
Tkinter.SEL_FIRST:选中文本域的第一个字符,如果没有选中区域则会引发异常
Tkinter.SEL_LAST:选中文本域的最后一个字符,如果没有选中区域则会引发 异常
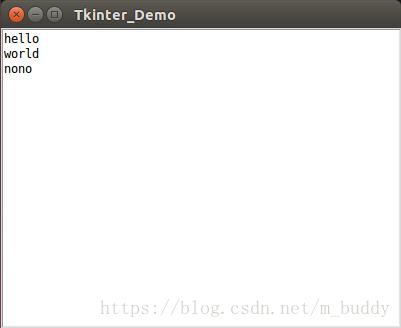
示例:
# -*- coding=utf-8 -*-

import Tkinter

root_window = Tkinter.Tk()
root_window.title('Tkinter_Demo')
root_window.geometry('400x300')

m_text = Tkinter.Text(root_window)
m_text.insert(Tkinter.CURRENT, 'hello \n')
m_text.insert(Tkinter.END, 'world \n')
m_text.insert(Tkinter.END, 'nono')
m_text.pack()

root_window.mainloop()- 1
- 2
- 3
- 4
- 5
- 6
- 7
- 8
- 9
- 10
- 11
- 12
- 13
- 14
- 15
效果:
2.5 Button
Button控件是Tkinter控件中用作按钮的。使用方法:
w = tk.Button(parent, option=value, ...)- 1
option:
| 属性 | 解释 |
|---|---|
| image | 按钮控件上显示的图片 |
| text | 按钮空间上显示的文本 |
| command | 指定其回调函数 |
| …… | …… |
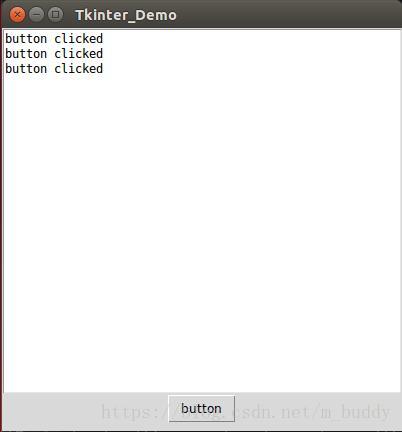
示例:
# -*- coding=utf-8 -*-

import Tkinter

def button_clicked():
    m_text.insert(Tkinter.END, 'button clicked\n')


root_window = Tkinter.Tk()
root_window.title('Tkinter_Demo')
root_window.geometry('400x300')

m_text = Tkinter.Text(root_window)
m_text.pack()

m_button = Tkinter.Button(root_window, text='button', command=button_clicked)
m_button.pack()

root_window.mainloop()- 1
- 2
- 3
- 4
- 5
- 6
- 7
- 8
- 9
- 10
- 11
- 12
- 13
- 14
- 15
- 16
- 17
- 18
- 19
效果:
2.6 Listbox
Listbox控件是Tkinter控件中用作列表内容显示的。使用方法:
w = tk.Listbox(parent, option, ...)- 1
option:
| 属性 | 解释 |
|---|---|
| listvariable | 用于设置列表框中的值,或是获取列表框的值,通过set()与get()函数实现 |
| selectbackground | 选中选项的背景色 |
| selectmode | • tk.BROWSE: 缺省的;• tk.SINGLE:只能选中一项,不能拖动鼠标;• tk.MULTIPLE:选中多行;• tk.EXTENDED:选中当前位置到最后 |
| …… | …… |
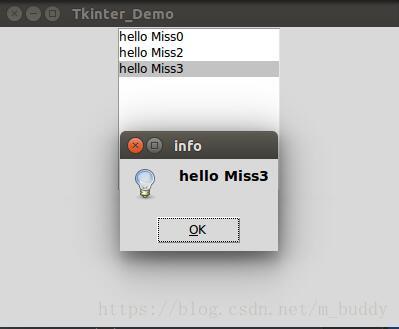
示例:
# -*- coding=utf-8 -*-

import Tkinter
import tkMessageBox

# 列表框项选中响应函数
def listbox_selected(event):
    info = m_list.get(m_list.curselection())
    tkMessageBox.showinfo('info', info)

root_window = Tkinter.Tk()
root_window.title('Tkinter_Demo')
root_window.geometry('400x300')

m_listbox_var = Tkinter.StringVar()
m_list = Tkinter.Listbox(root_window, listvariable=m_listbox_var)
temp_list = ['hello Miss1', 'hello Miss2', 'hello Miss3']
for item in temp_list:  # 插入元素
    m_list.insert(Tkinter.END, item)

m_list.delete(0, 1)  # 删除第一个元素
m_listbox_var.set(('hello Miss0', 'hello Miss2', 'hello Miss3'))  # 为列表框设置新值
m_list.bind('<ButtonRelease-1>', listbox_selected)  # 设置选中响应函数
m_list.pack()

root_window.mainloop()- 1
- 2
- 3
- 4
- 5
- 6
- 7
- 8
- 9
- 10
- 11
- 12
- 13
- 14
- 15
- 16
- 17
- 18
- 19
- 20
- 21
- 22
- 23
- 24
- 25
- 26
效果:
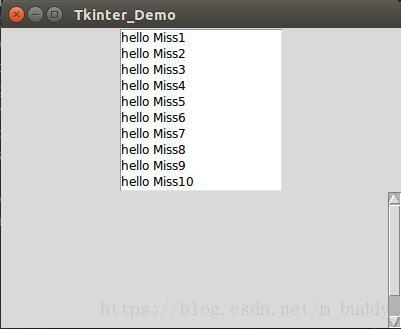
2.7 Scrollbar
Scrollbar控件是Tkinter控件中用作滚动条的。使用方法:
w = tk.Scrollbar(parent, option, ...)- 1
option:
| 属性 | 解释 |
|---|---|
| command | Scrollbar移动的响应函数 |
| orient | 控制Scrollbar的位置,可以为Tkinter.HORIZONTAL水平的scrollbar,Tkinter.VERTICAL垂直的 |
| …… | …… |
示例:
# -*- coding=utf-8 -*-

import Tkinter
import tkMessageBox

def listbox_selected(event):
    info = m_list.get(m_list.curselection())
    tkMessageBox.showinfo('info', info)

root_window = Tkinter.Tk()
root_window.title('Tkinter_Demo')
root_window.geometry('400x300')

m_listbox_var = Tkinter.StringVar()
m_list = Tkinter.Listbox(root_window, listvariable=m_listbox_var, selectbackground='red', selectmode=Tkinter.SINGLE)
temp_list = ['hello Miss1', 'hello Miss2', 'hello Miss3', 'hello Miss4', 'hello Miss5', 'hello Miss6',
             'hello Miss7', 'hello Miss8', 'hello Miss9', 'hello Miss10', 'hello Miss11', 'hello Miss12']
for item in temp_list:
    m_list.insert(Tkinter.END, item)

m_list.bind('<ButtonRelease-1>', listbox_selected)
m_list.pack()

m_scrl = Tkinter.Scrollbar(root_window)
m_scrl.pack(side=Tkinter.RIGHT, fill=Tkinter.Y)
m_list.configure(yscrollcommand=m_scrl.set)
m_list.pack()
m_scrl['command'] = m_list.yview

root_window.mainloop()- 1
- 2
- 3
- 4
- 5
- 6
- 7
- 8
- 9
- 10
- 11
- 12
- 13
- 14
- 15
- 16
- 17
- 18
- 19
- 20
- 21
- 22
- 23
- 24
- 25
- 26
- 27
- 28
- 29
- 30
效果: