MyBatis-plus个人学习总结 之 删除操作汇总
一、前期工作
准备工作完全可以参考上一篇笔记MyBatis-plus快速入门https://blog.csdn.net/junR_980218/article/details/124816265
参考上面链接mybatis-plus快速入门笔记一直到测试前面部分,然后开始参考下面的操作进行今天的内容部分。
二、删除操作
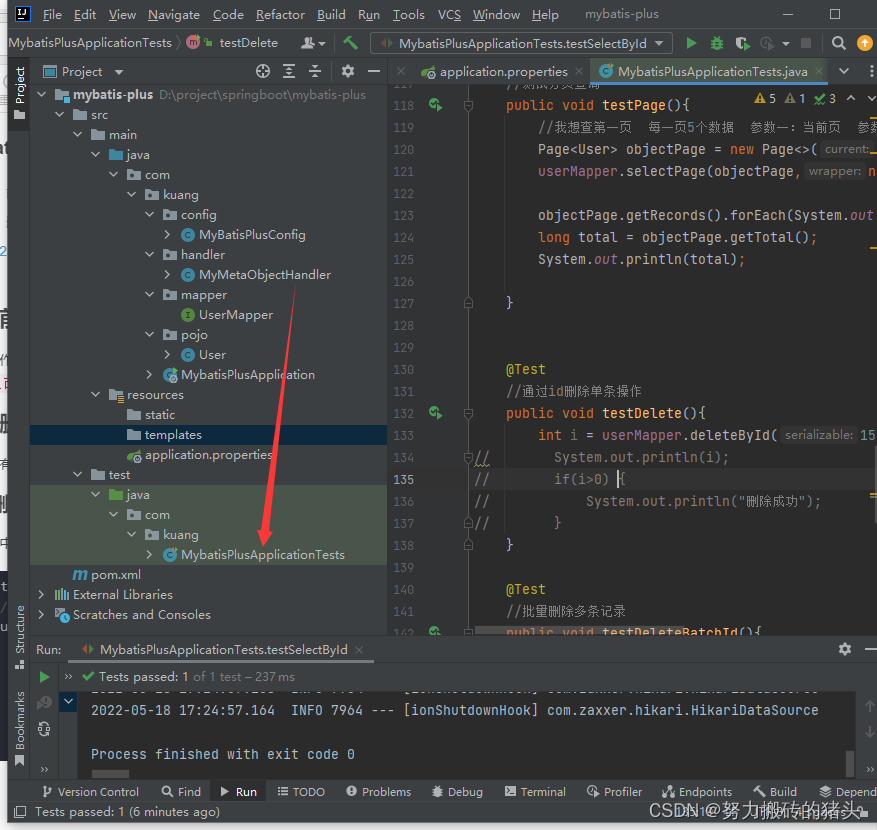
下面所有操作的测试了位置如下图所示
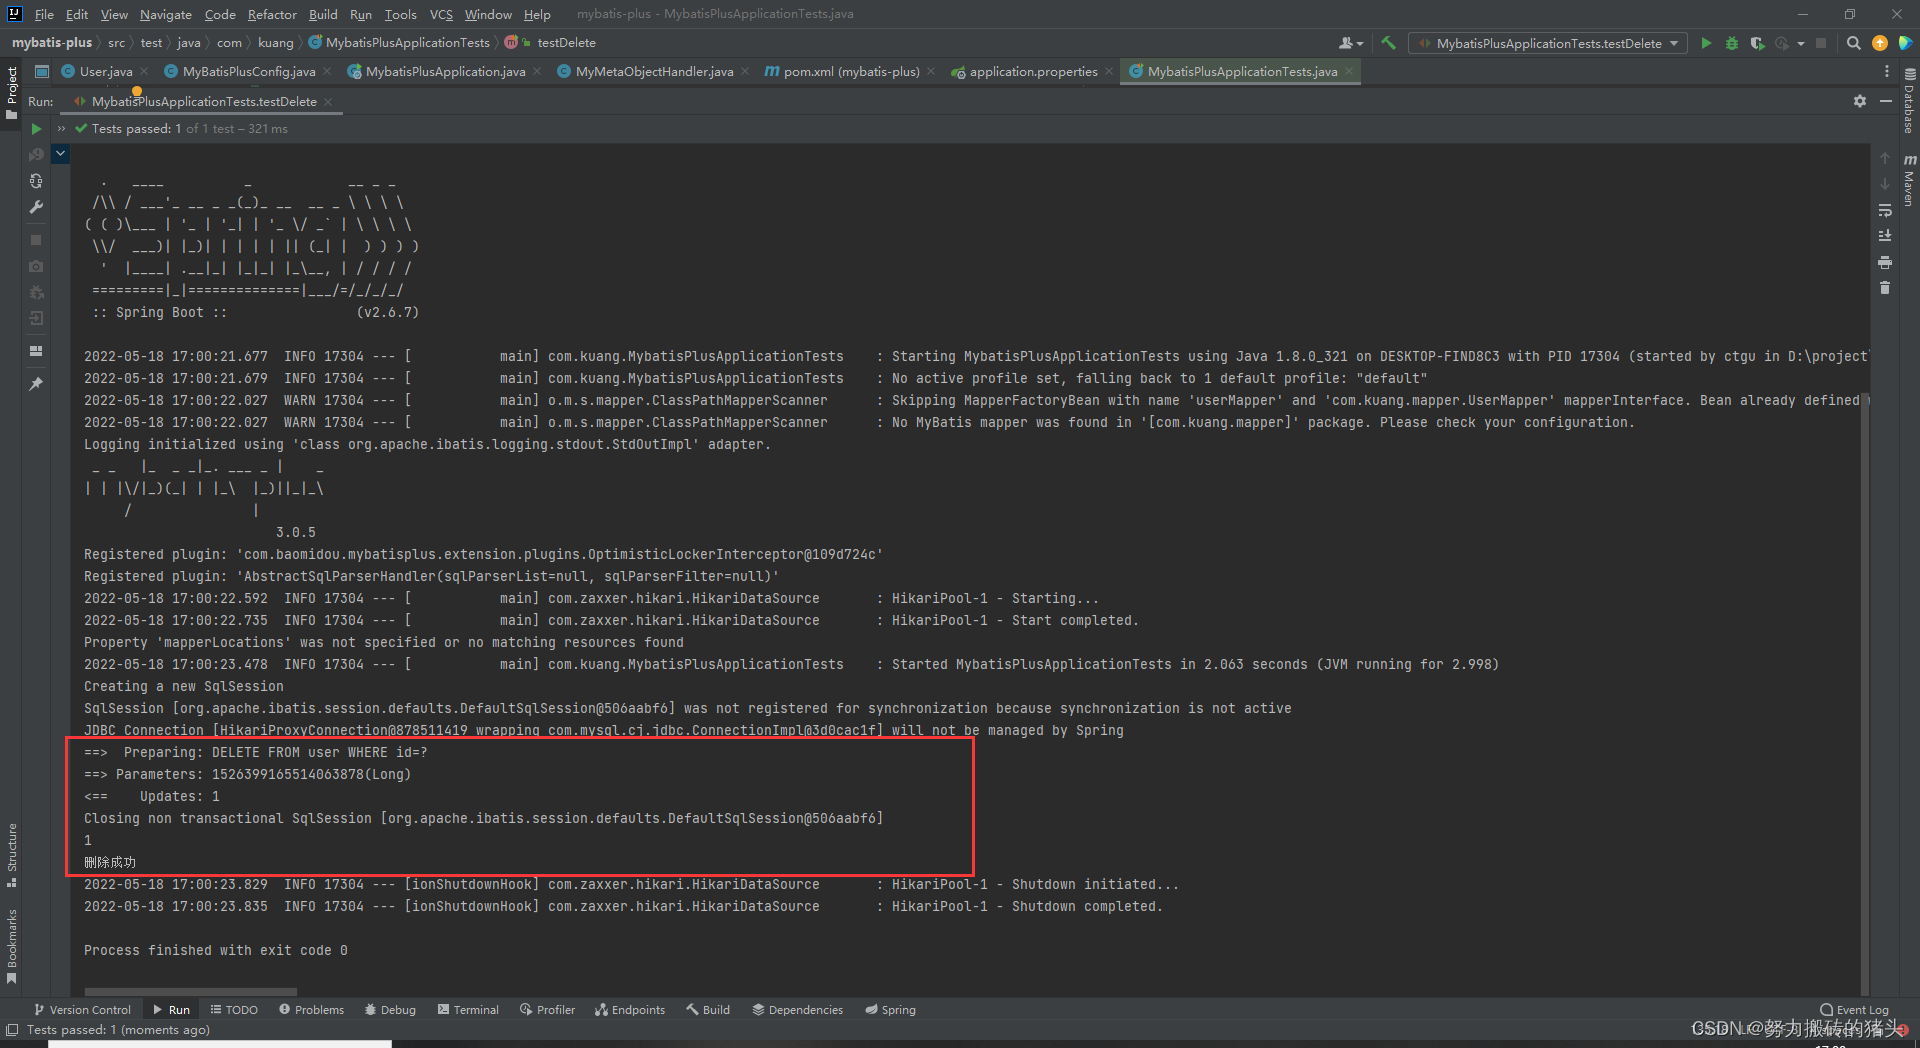
2.1 删除单条记录
测试类中直接添加下面内容
 @Test
    //通过id删除单条操作
    public void testDelete(){


        int i = userMapper.deleteById(1526399165514063877L);
//        System.out.println(i);
//        if(i>0) {


//            System.out.println("删除成功");
//        }
    }
测试结果
2.2 删除多条记录——批量删除
测试类中直接添加下面内容
   @Test
    //批量删除多条记录
    public void testDeleteBatchId(){


        int i = userMapper.deleteBatchIds(Arrays.asList(1L, 81L));
        System.out.println(i);
        if(i>0){


            System.out.println("删除成功");
        }
    }
测试结果

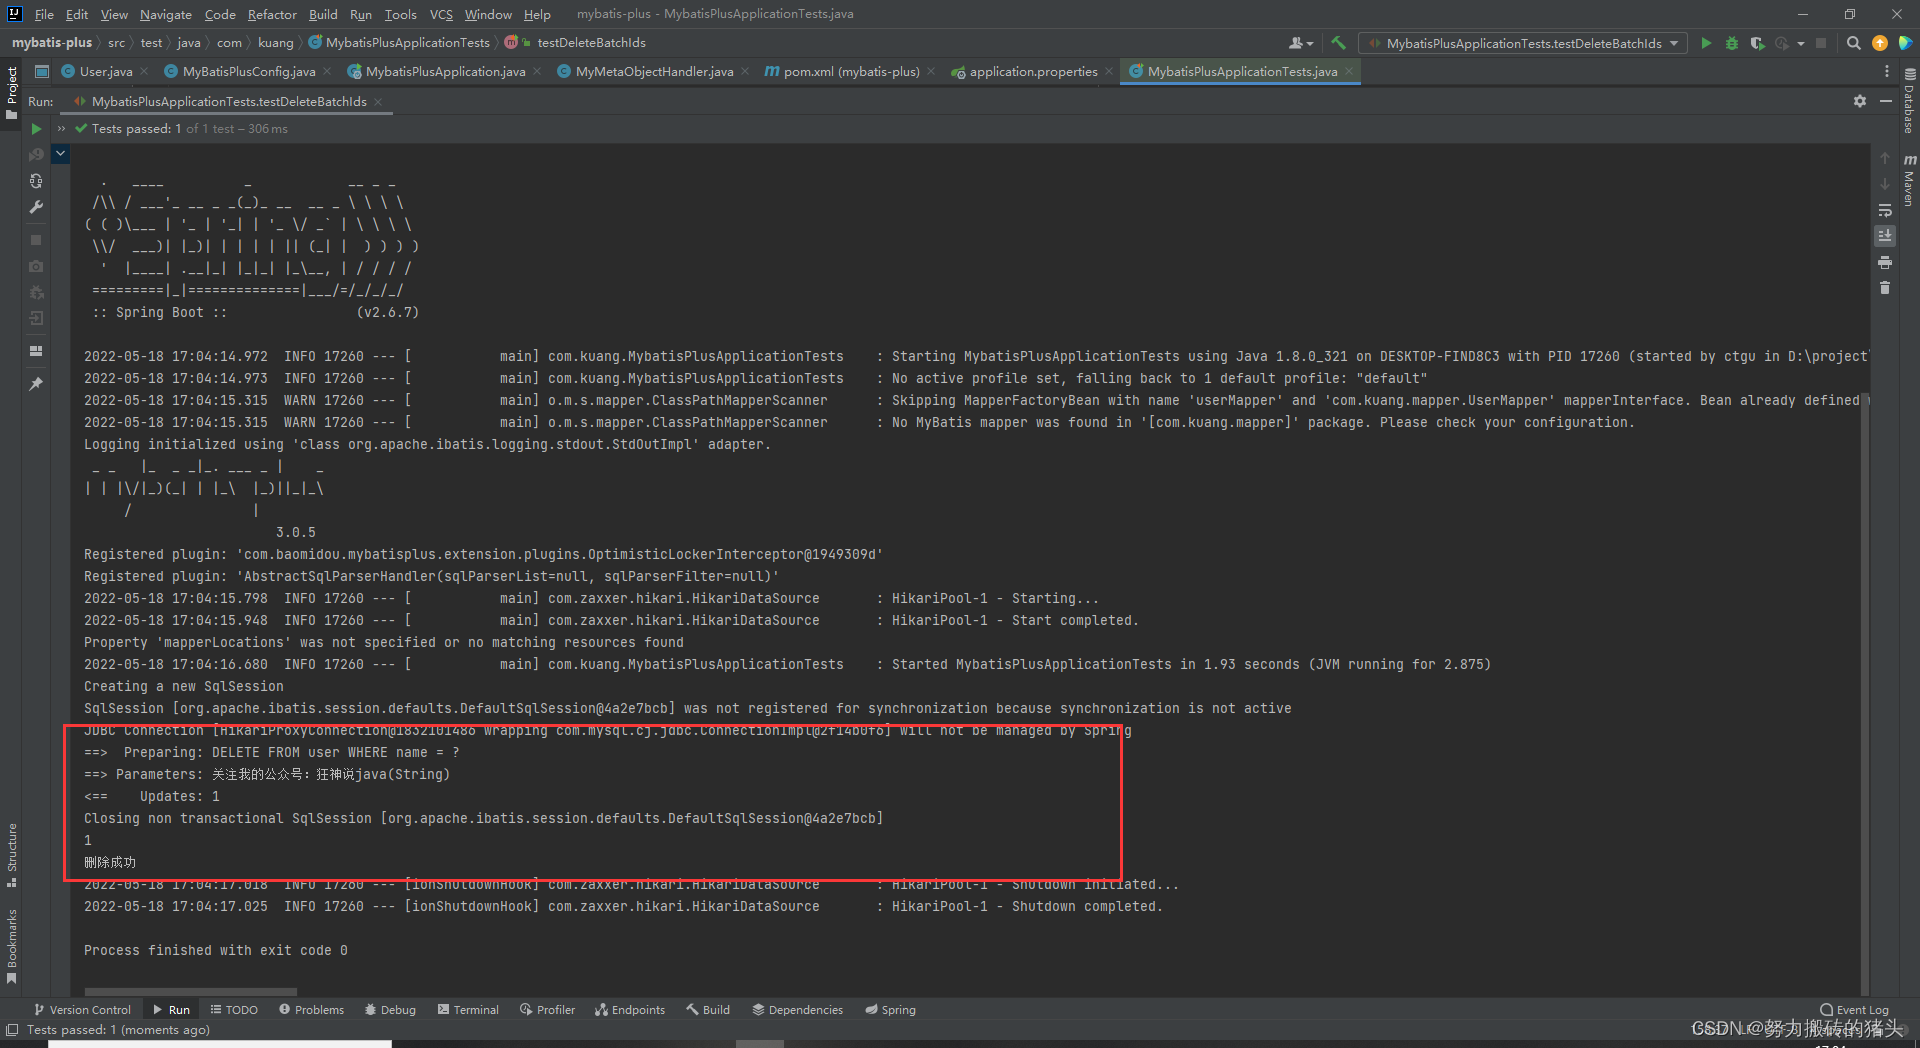
2.3 条件删除
测试类中直接添加下面内容
@Test
//条件删除
public void testDeleteBatchIds(){


    HashMap<String, Object> objectObjectHashMap = new HashMap<>();
    objectObjectHashMap.put("name","关注我的公众号:狂神说java");
    int i = userMapper.deleteByMap(objectObjectHashMap);
    System.out.println(i);
    if(i>0){


        System.out.println("删除成功");
    }
测试结果
2.4 逻辑删除
1、数据表中增加deleted字段

2、实体类中增加属性 我这里的实体类是User,并添加其set/get方法,修改有参构造 并且在添加的deleted属性上`添加注解@TableLogic 逻辑删除
User
package com.kuang.pojo;


import com.baomidou.mybatisplus.annotation.*;

import java.util.Date;

public class User {


    @TableId(type = IdType.AUTO)
    private Long id;
    private String name;


    private Integer age;

    private String email;

    /**
     * 字段添加填充内容
     */
    @TableField(fill= FieldFill.INSERT)
    private Date createTime;
    @TableField(fill=FieldFill.INSERT_UPDATE)
    private Date updateTime;
    /**
     * @TableLogic 逻辑删除
     */
    @TableLogic
    private Integer deleted;


    /**
     * @Version 乐观锁 注解
     */
    @Version
    private Integer version;

    public Long getId() {


        return id;
    }

    public void setId(Long id) {


        this.id = id;
    }

    public String getName() {


        return name;
    }

    public void setName(String name) {


        this.name = name;
    }

    public Integer getAge() {


        return age;
    }

    public void setAge(Integer age) {


        this.age = age;
    }

    public String getEmail() {


        return email;
    }

    public void setEmail(String email) {


        this.email = email;
    }

    public Date getCreateTime() {


        return createTime;
    }

    public void setCreateTime(Date createTime) {


        this.createTime = createTime;
    }

    public Date getUpdateTime() {


        return updateTime;
    }

    public void setUpdateTime(Date updateTime) {


        this.updateTime = updateTime;
    }

    public Integer getDeleted() {


        return deleted;
    }

    public void setDeleted(Integer deleted) {


        this.deleted = deleted;
    }

    public Integer getVersion() {


        return version;
    }

    public void setVersion(Integer version) {


        this.version = version;
    }


    public User(Long id, String name, Integer age, String email, Date createTime, Date updateTime, Integer deleted, Integer version) {


        this.id = id;
        this.name = name;
        this.age = age;
        this.email = email;
        this.createTime = createTime;
        this.updateTime = updateTime;
        this.deleted = deleted;
        this.version = version;
    }
    public User() {


    }

    @Override
    public String toString() {


        return "User{" +
                "id=" + id +
                ", name='" + name + '\'' +
                ", age=" + age +
                ", email='" + email + '\'' +
                ", createTime=" + createTime +
                ", updateTime=" + updateTime +
                ", deleted=" + deleted +
                ", version=" + version +
                '}';
    }
}
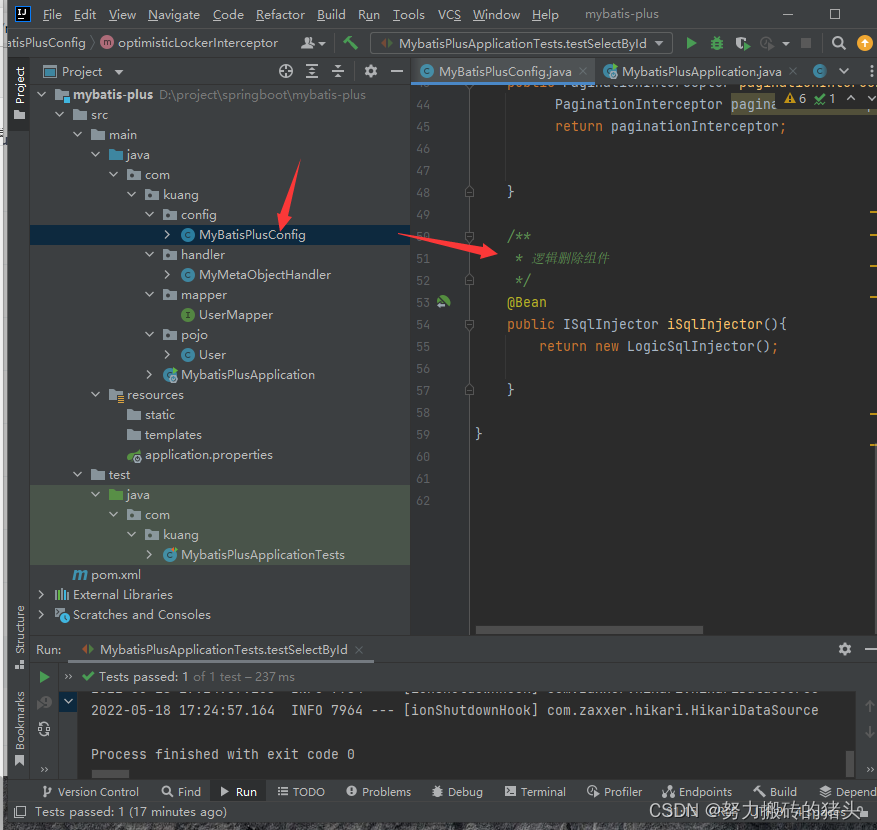
3、创建config包,编写MyBatisPlusConfig类,并在类中添加逻辑删除的组件
package com.kuang.config;

import com.baomidou.mybatisplus.core.injector.ISqlInjector;
import com.baomidou.mybatisplus.extension.injector.LogicSqlInjector;
import com.baomidou.mybatisplus.extension.plugins.OptimisticLockerInterceptor;
import com.baomidou.mybatisplus.extension.plugins.PaginationInterceptor;
import org.mybatis.spring.annotation.MapperScan;
import org.springframework.context.annotation.Bean;
import org.springframework.context.annotation.Configuration;
import org.springframework.transaction.annotation.EnableTransactionManagement;

/**
 * 加上@Configuration这个注解之后 使得他变成 能被识别到的配置类
 * @Configuration代表是一个配置类
 */
@Configuration
/**
 * 这个注解的意思是 管理事务的  m默认情况下是开启的
 */
@EnableTransactionManagement
/**
 * 可以把主启动类中的扫描包 放到这里面来
 */
@MapperScan("com.kuang.mapper")

public class MyBatisPlusConfig {


    /**
     * 逻辑删除组件
     */
    @Bean
    public ISqlInjector iSqlInjector(){


        return new LogicSqlInjector();

    }

}
4、在application.properties中添加逻辑删除的配置
#配置逻辑删除组件 没有删除的值为0 删除的值为1
mybatis-plus.global-config.db-config.logic-delete-value=1
mybatis-plus.global-config.db-config.logic-not-delete-value=0
5、测试
    @Test
    //通过id删除单条操作
    public void testDelete(){


        int i = userMapper.deleteById(1526399165514063877L);
//        System.out.println(i);
//        if(i>0) {


//            System.out.println("删除成功");
//        }
    }
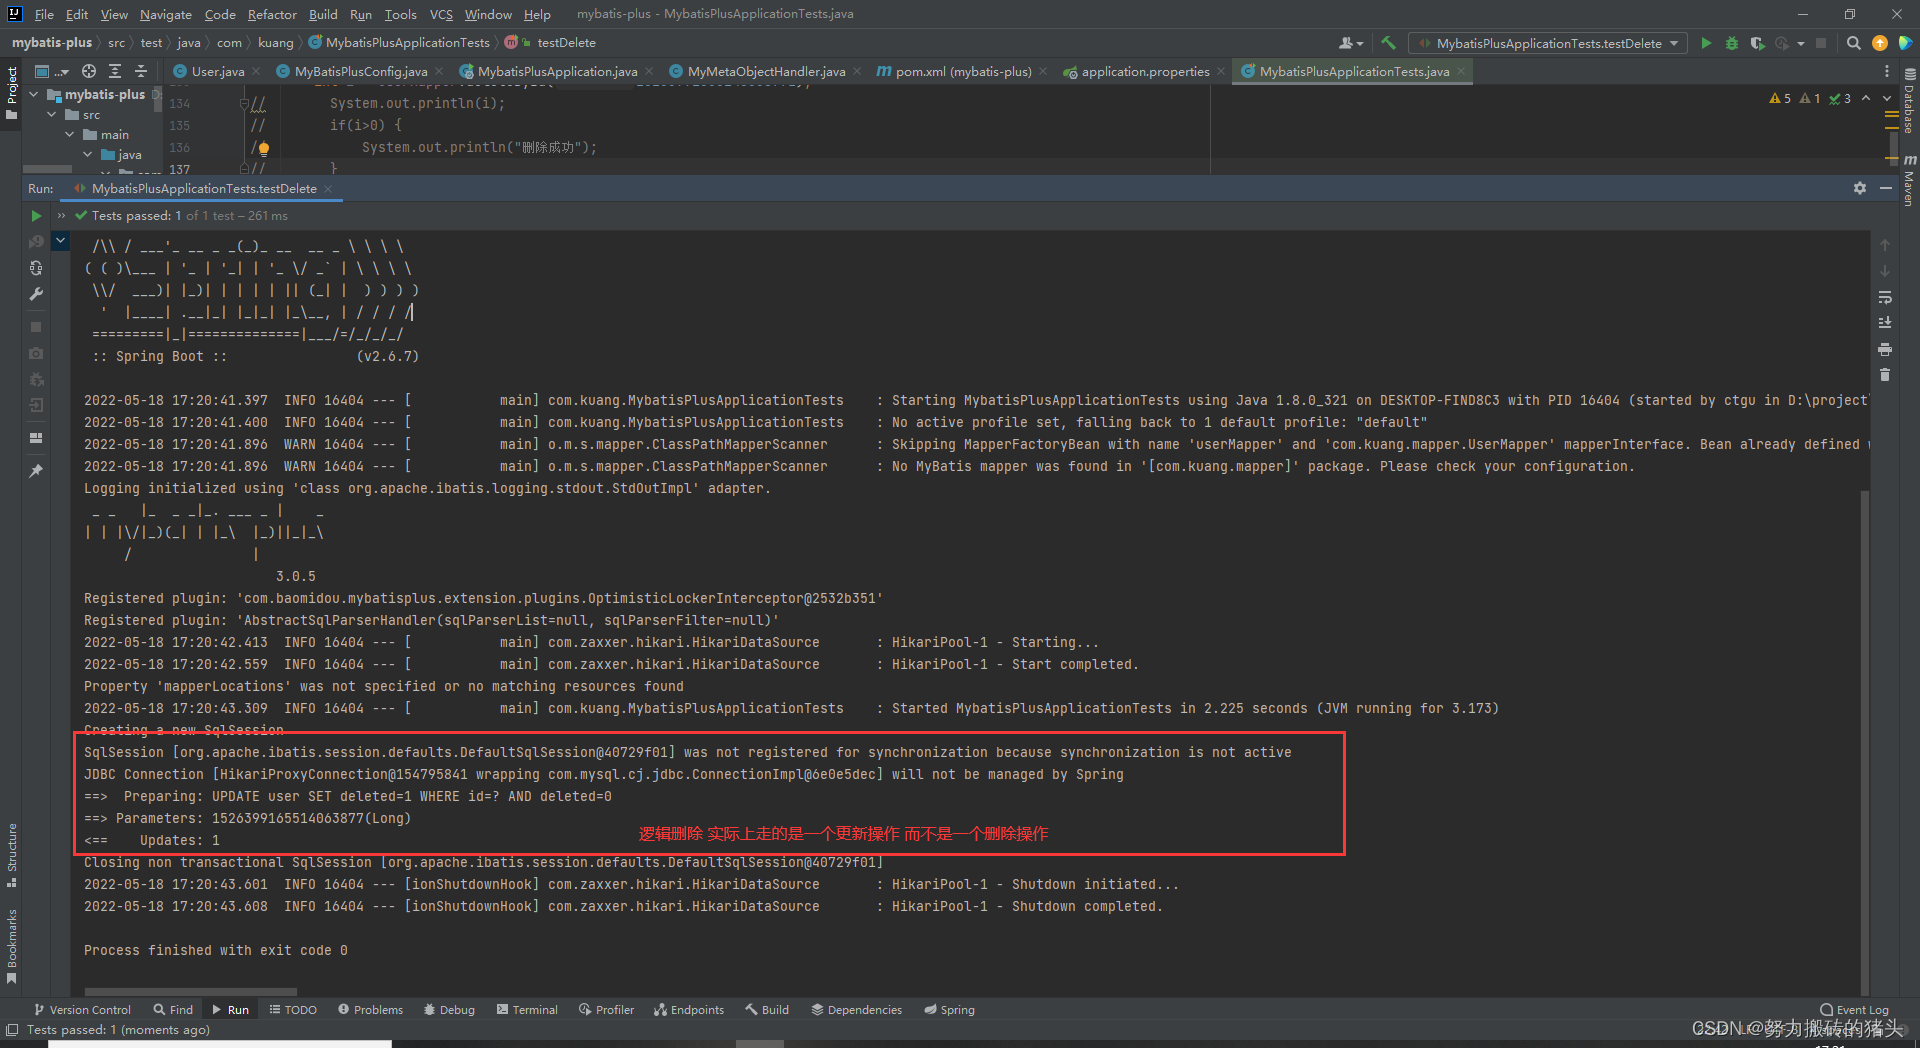
再次进行查询刚才删除掉的那个记录
查询语句
@Test
//测试单条查询
public void testSelectById(){


    User user = userMapper.selectById(1526399165514063877L);
    System.out.println(user);


}
查询结果
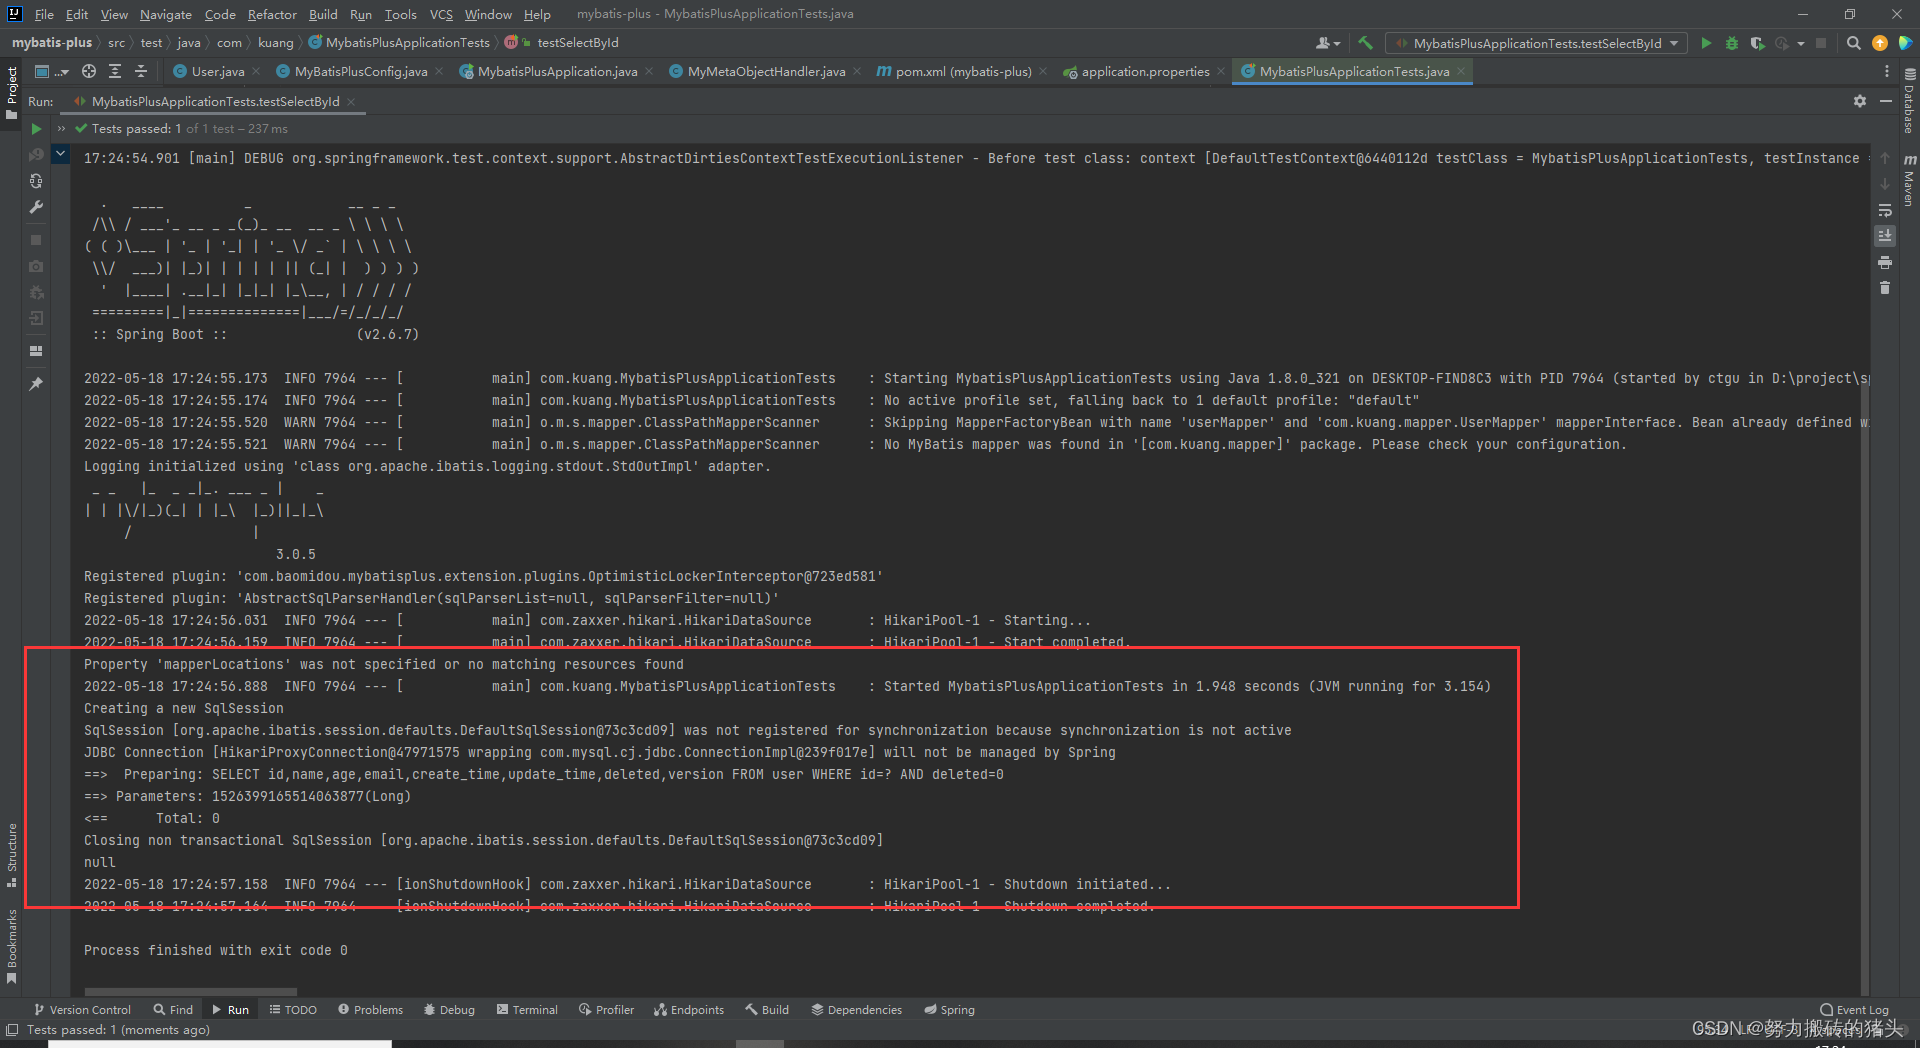
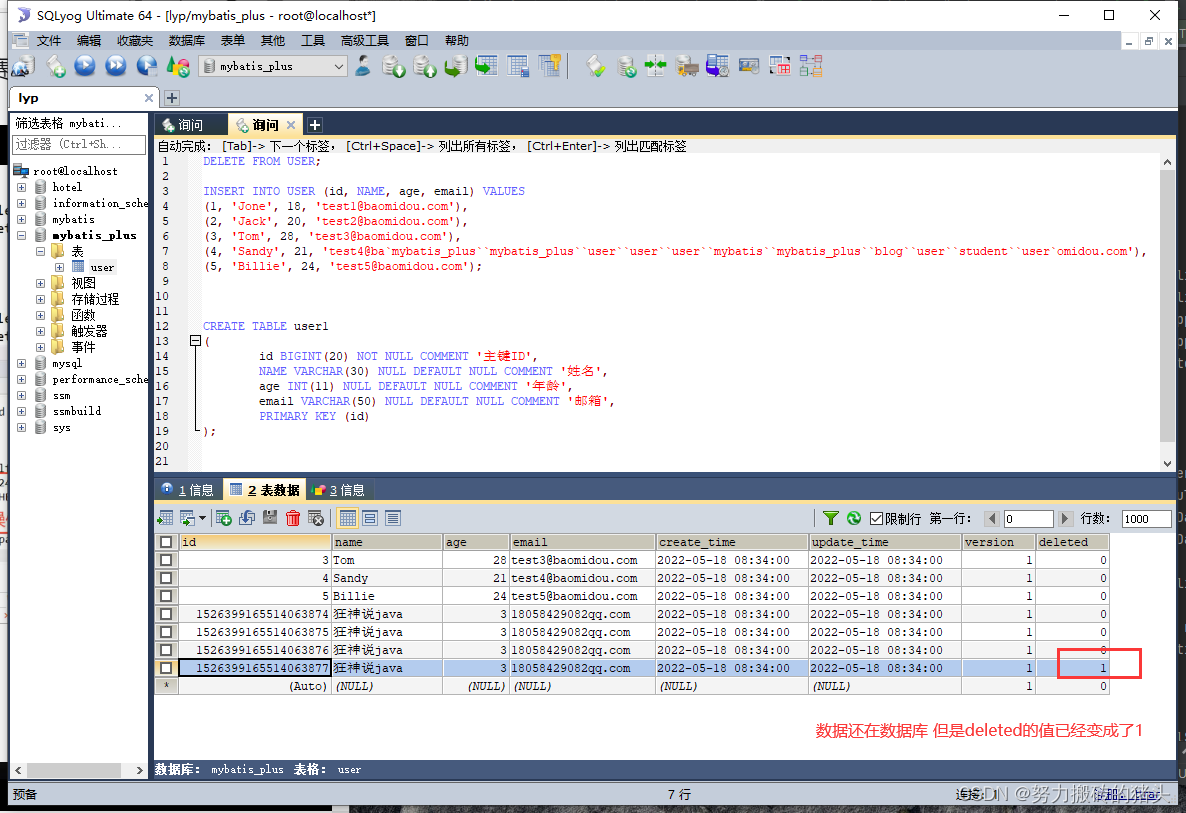
发现 查询语句自动拼接deleted=0 但是因为刚才的那条记录的deleted已经变为1也就是已经从逻辑上被删除掉了
所以是查询不到的。
至此,MyBatis-plus中全部删除操作总结完毕。