背景:
亚马逊云科技提供了100余种产品免费套餐。其中,计算资源Amazon EC2首年12个月免费,750小时/月;存储资源 Amazon S3 首年12个月免费,5GB标准存储容量。
大家好,我是坚果,由于最近一直疫情居家,所以想到外边转转,但是确实出不去,那么作为程序员的我们肯定也不能闲着,于是想做一个很简单的旅行应用,具有基础的增删改查的功能。以及身份验证!这个时候考虑到Amazon 具有高响应,高可用等特点,这个时候你只要Amazon 结合一定的Android基础,就可以很方便快捷的拥有自己的应用程序。而且由于Amazon 具有全球优势的特点,以及Amazon Amplify 是一组位于云端的工具和无服务器服务都让他拥有了一定的优势,这样一来技术选型接确定了,那么说了这么多,如何结合Amazon 很快的创建属于自己的Android 应用程序呢?只需要简单的五个步骤就可以。接下来开始正文
开始之前看一下具体你要具备哪些条件:
先决条件
-
Android Studio 4.x 或更高版本
-
Node.js 10 或更高版本
-
Amazon 命令行界面 Amazon CLI 2.0.x 或更高版本。
检查noidejs版本,node -v,发现版本是16.13.0,符合条件
android studio 版本查看方式
点击help-about,如图所示:版本符合要求


概览
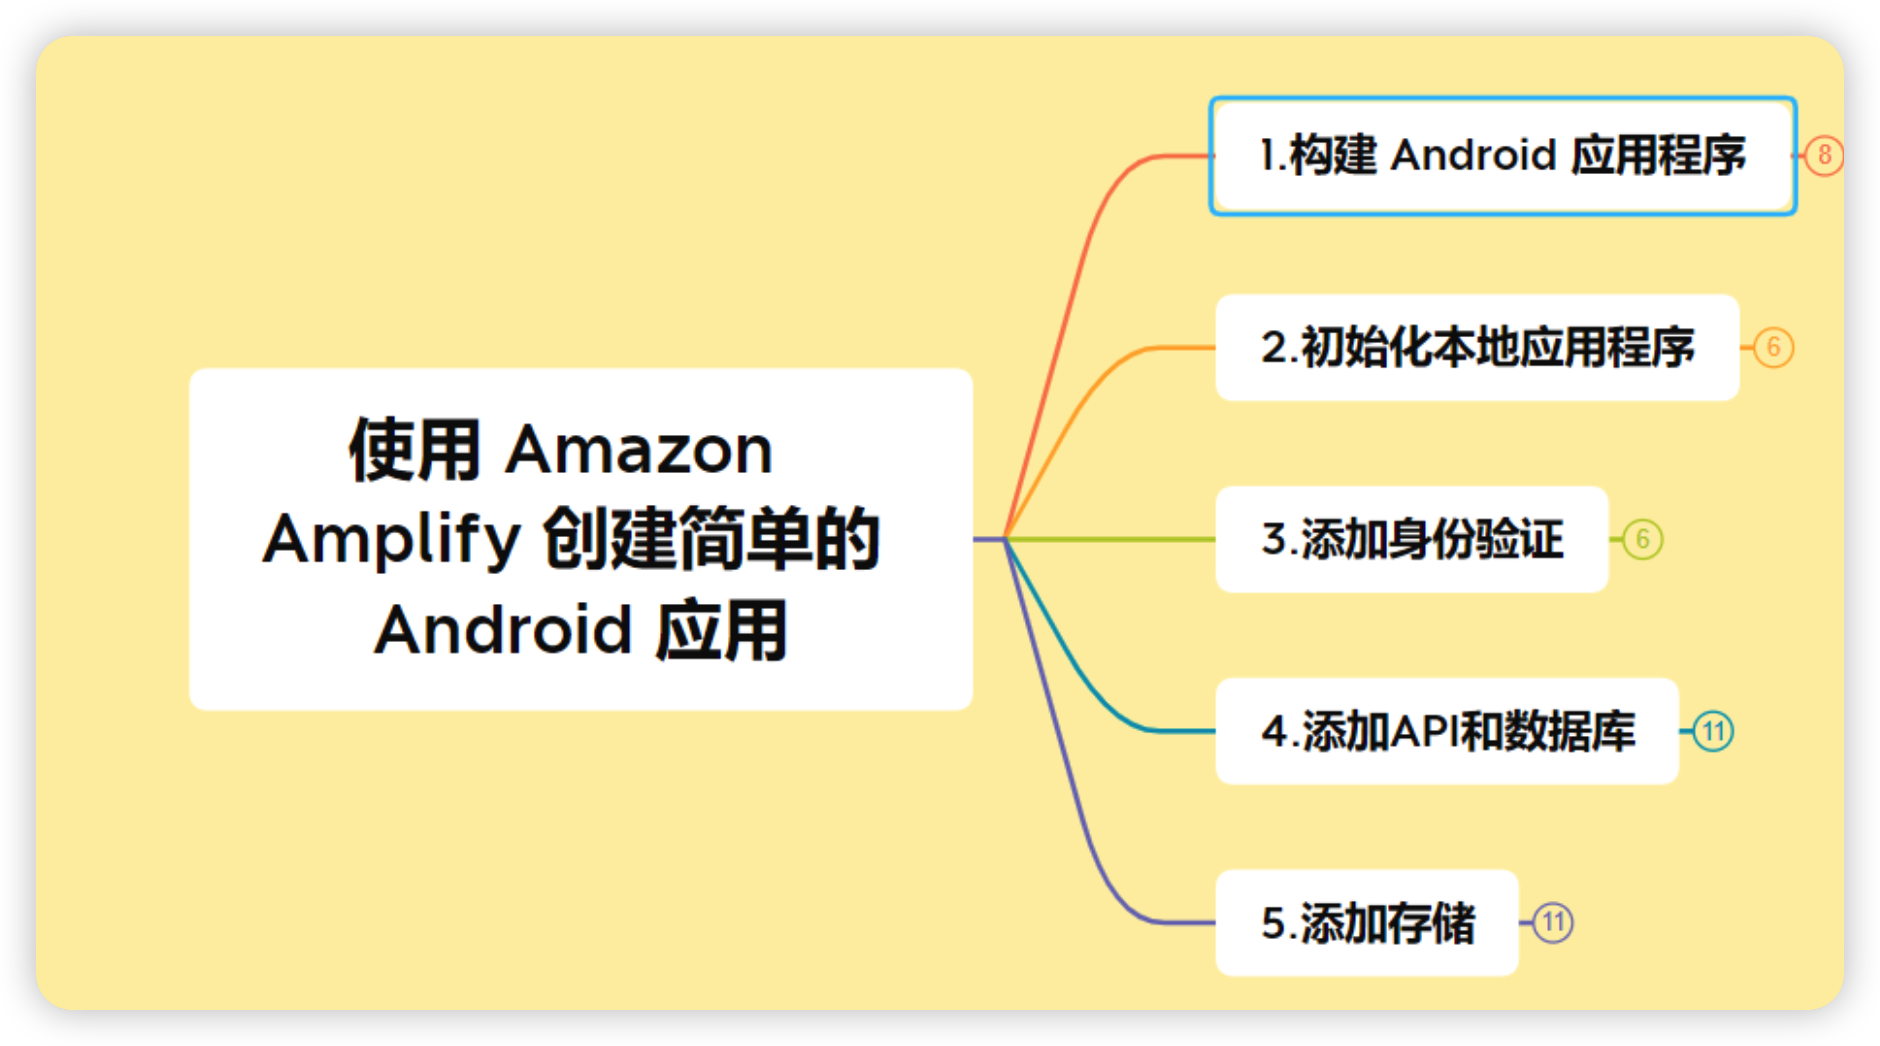
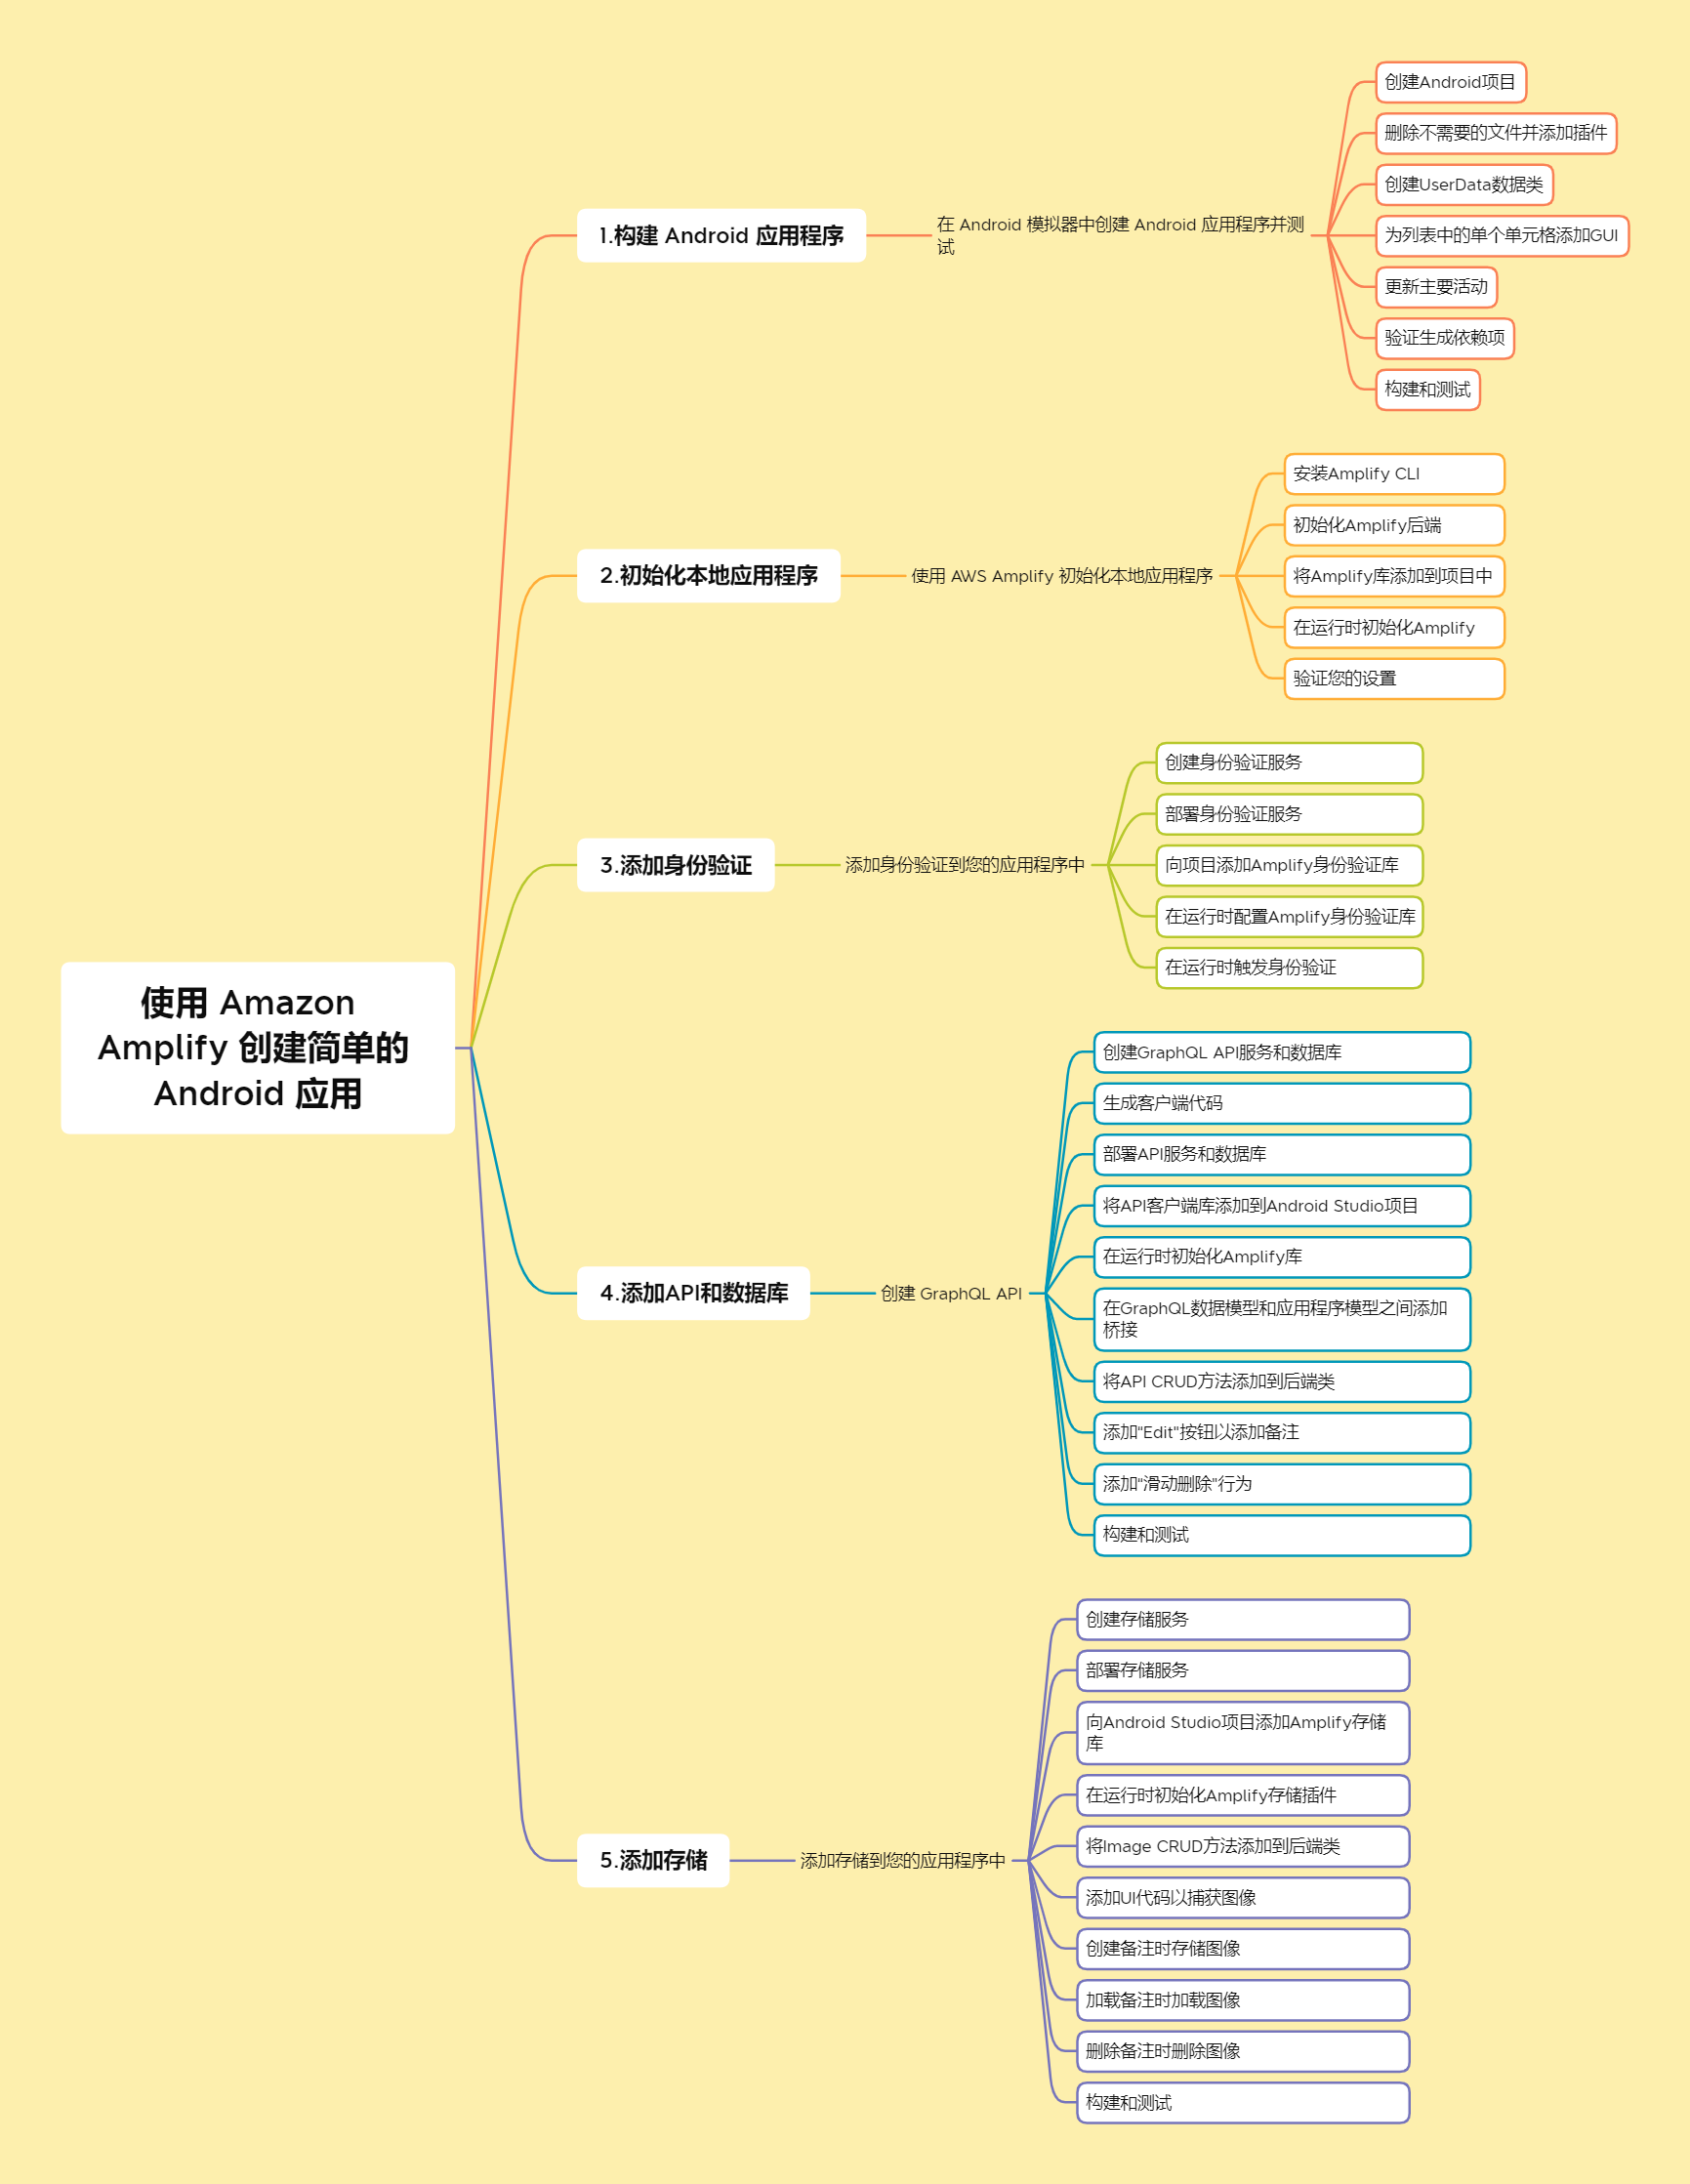
在本文中,您将使用 Amazon Amplify 创建一个简单的 Android 应用程序,Amazon Amplify 是一组位于云端的工具和无服务器服务。在第一个单元中,您将构建一个简单的 Android 应用程序。在其余单元中,您将使用 Amplify 命令行接口 (Amplify CLI) 初始化一个本地应用程序、添加用户身份验证、添加一个 GraphQL API 和一个数据库以存储您的数据,并更新您的应用程序以存储图像。
本文将引导您完成创建上面讨论的简单 Android 应用程序。
本文分为五个简短单元。您必须按顺序完成每个单元才能进入下一单元。

使用 Amazon Amplify 创建简单的 Android 应用qq
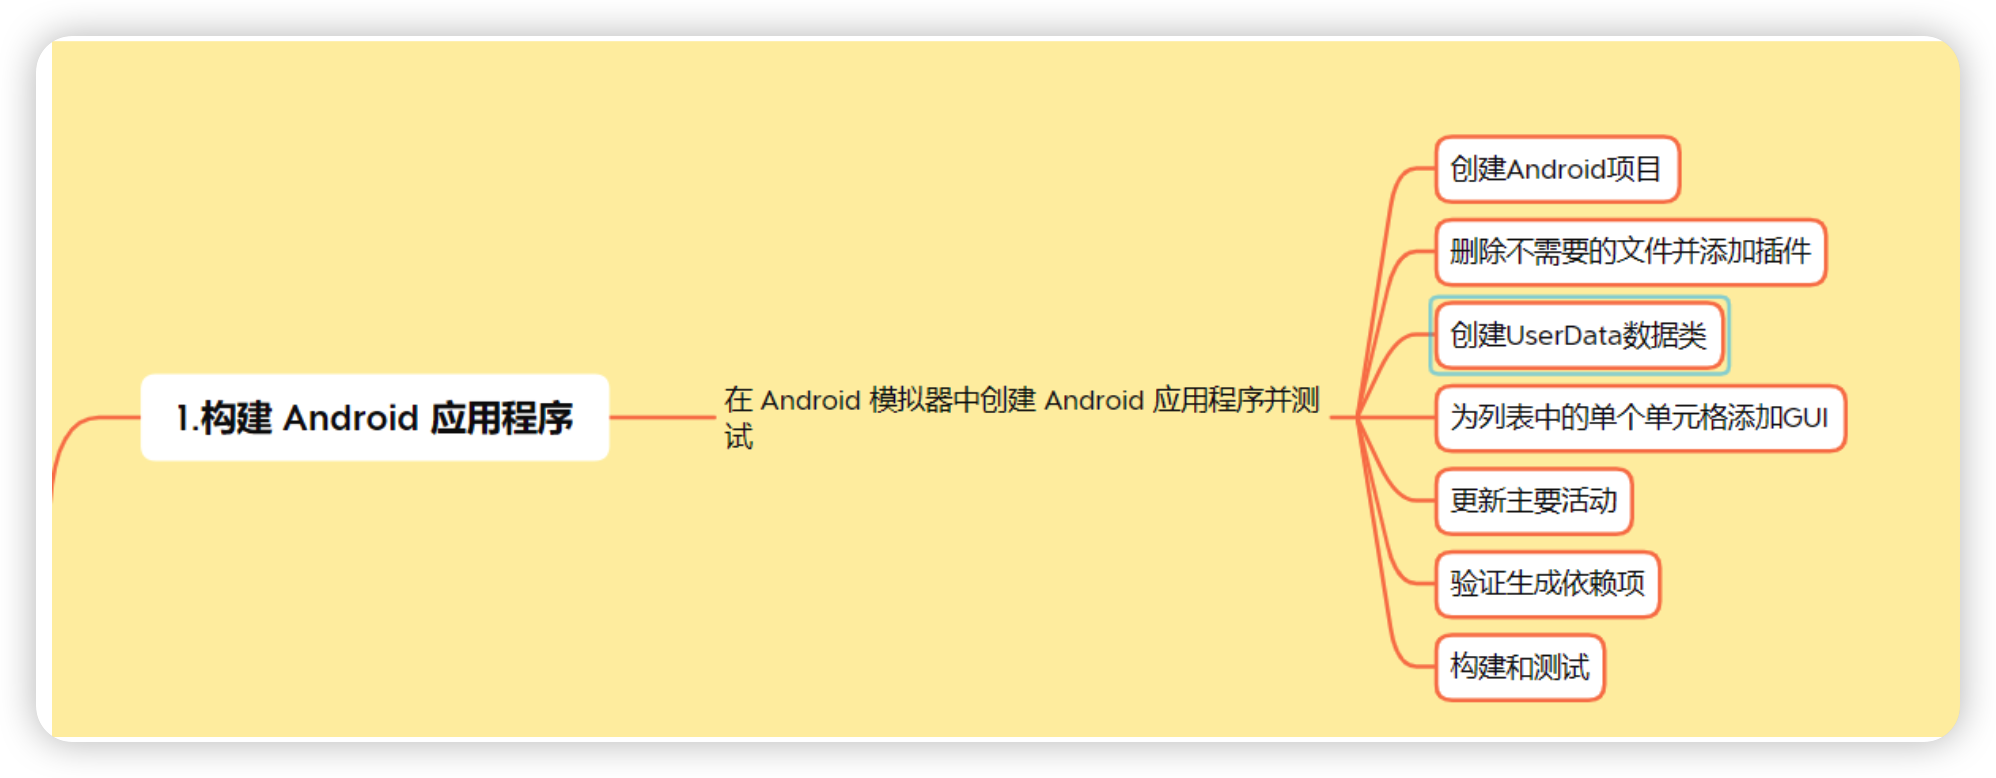
1.构建 Android 应用程序
在 Android 模拟器中创建 Android 应用程序并测试
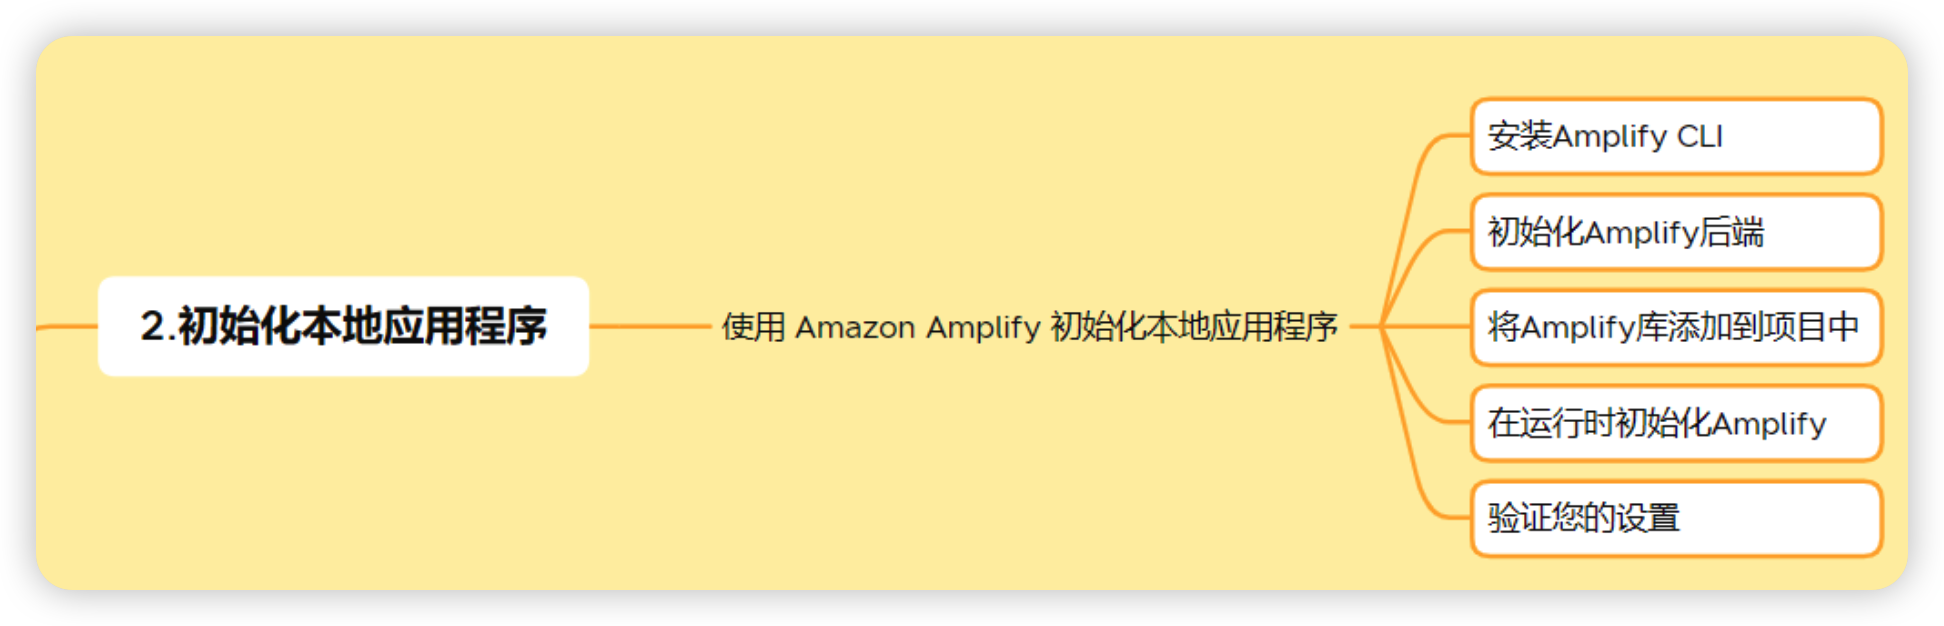
2.初始化本地应用程序
使用 Amazon Amplify 初始化本地应用程序
3.添加身份验证
添加身份验证到您的应用程序中
4.添加API和数据库
创建 GraphQL API
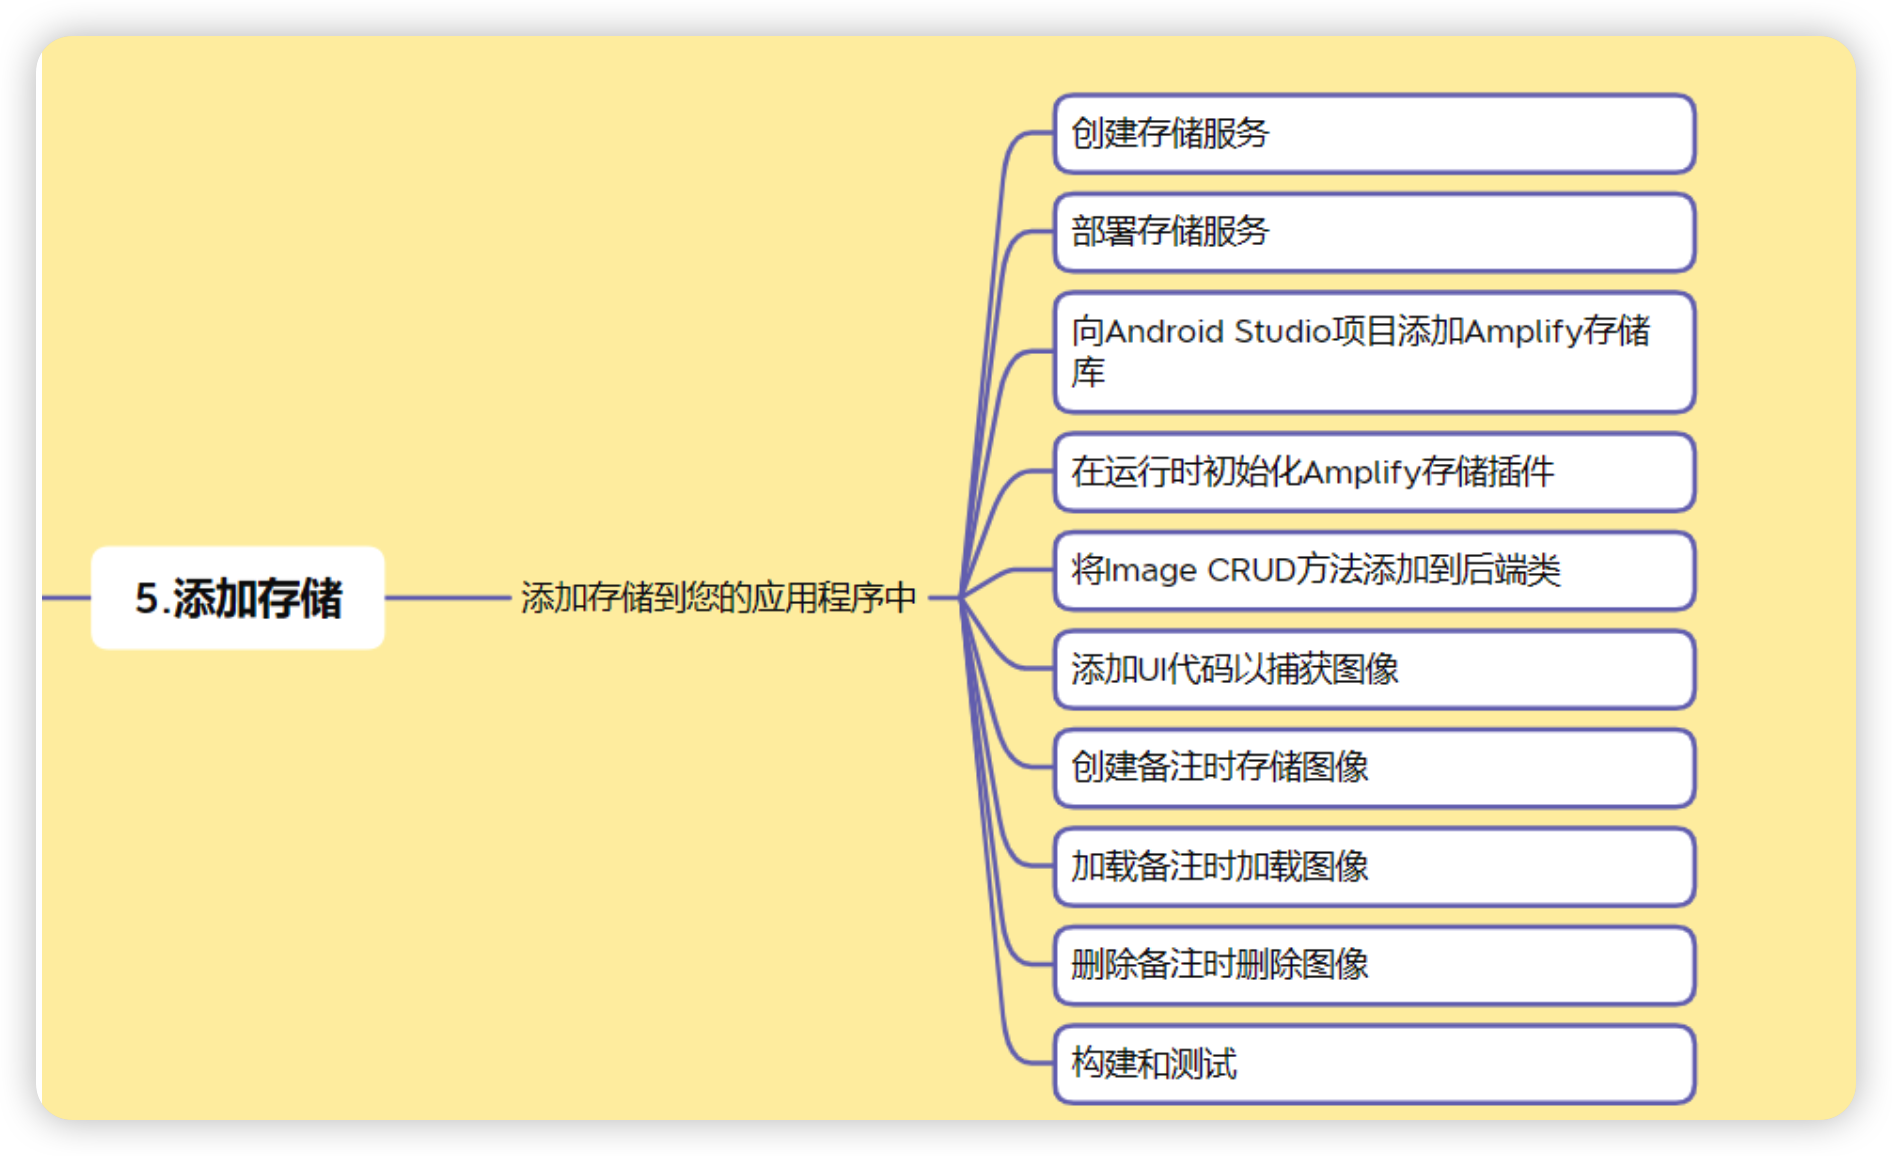
5.添加存储
添加存储到您的应用程序中
您将使用终端和 Google 的 Android Studio IDE 来构建此 Android 应用程序。
1.创建和部署 Android 应用程序
在这,您将创建 Android 应用程序并使用 Amazon Amplify 的 Web 托管服务将其部署到云中。
1.1简介
Amazon Amplify 提供基于 Git 的工作流,用于创建、管理、集成和部署 Web 和移动应用程序的无服务器后端。Amplify CLI 提供了一个简单的基于文本的用户界面,用于预置和管理后端服务,如用于您的应用程序的用户身份验证或 REST 或 GraphQL API。使用 Amplify 库可以轻松地将这些后端服务与应用程序中的几行代码集成。
1.2实施
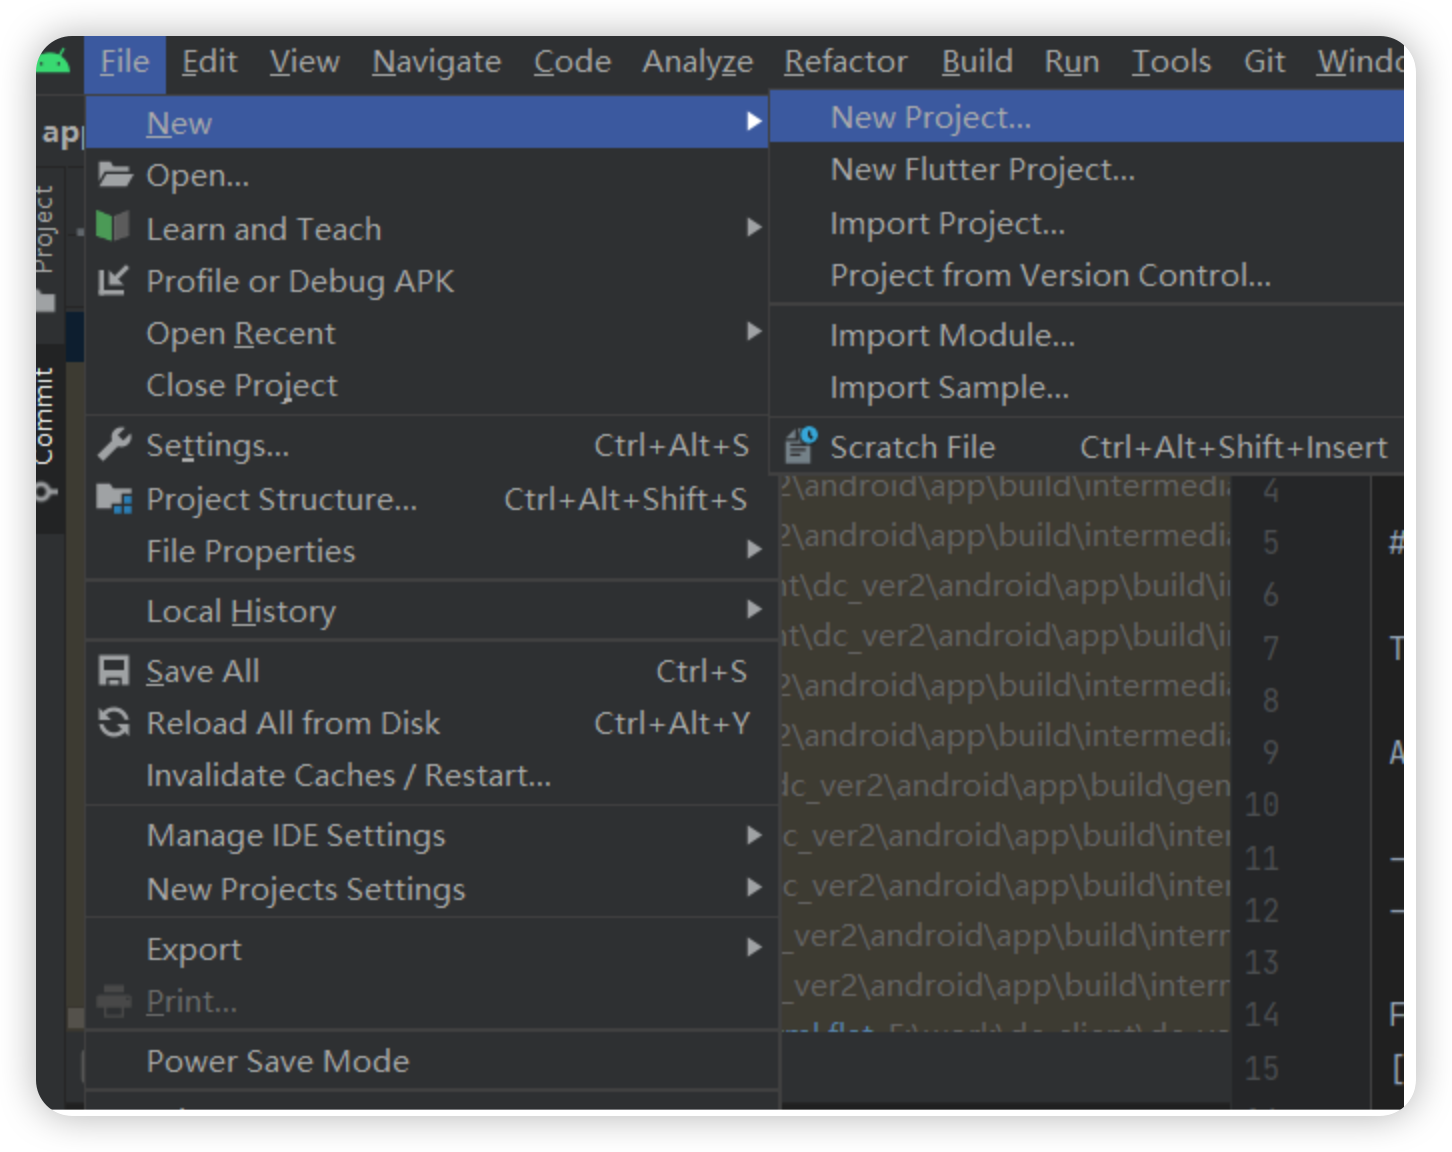
1.2.1.创建 Android 项目
启动 Android Studio,然后选择New Project
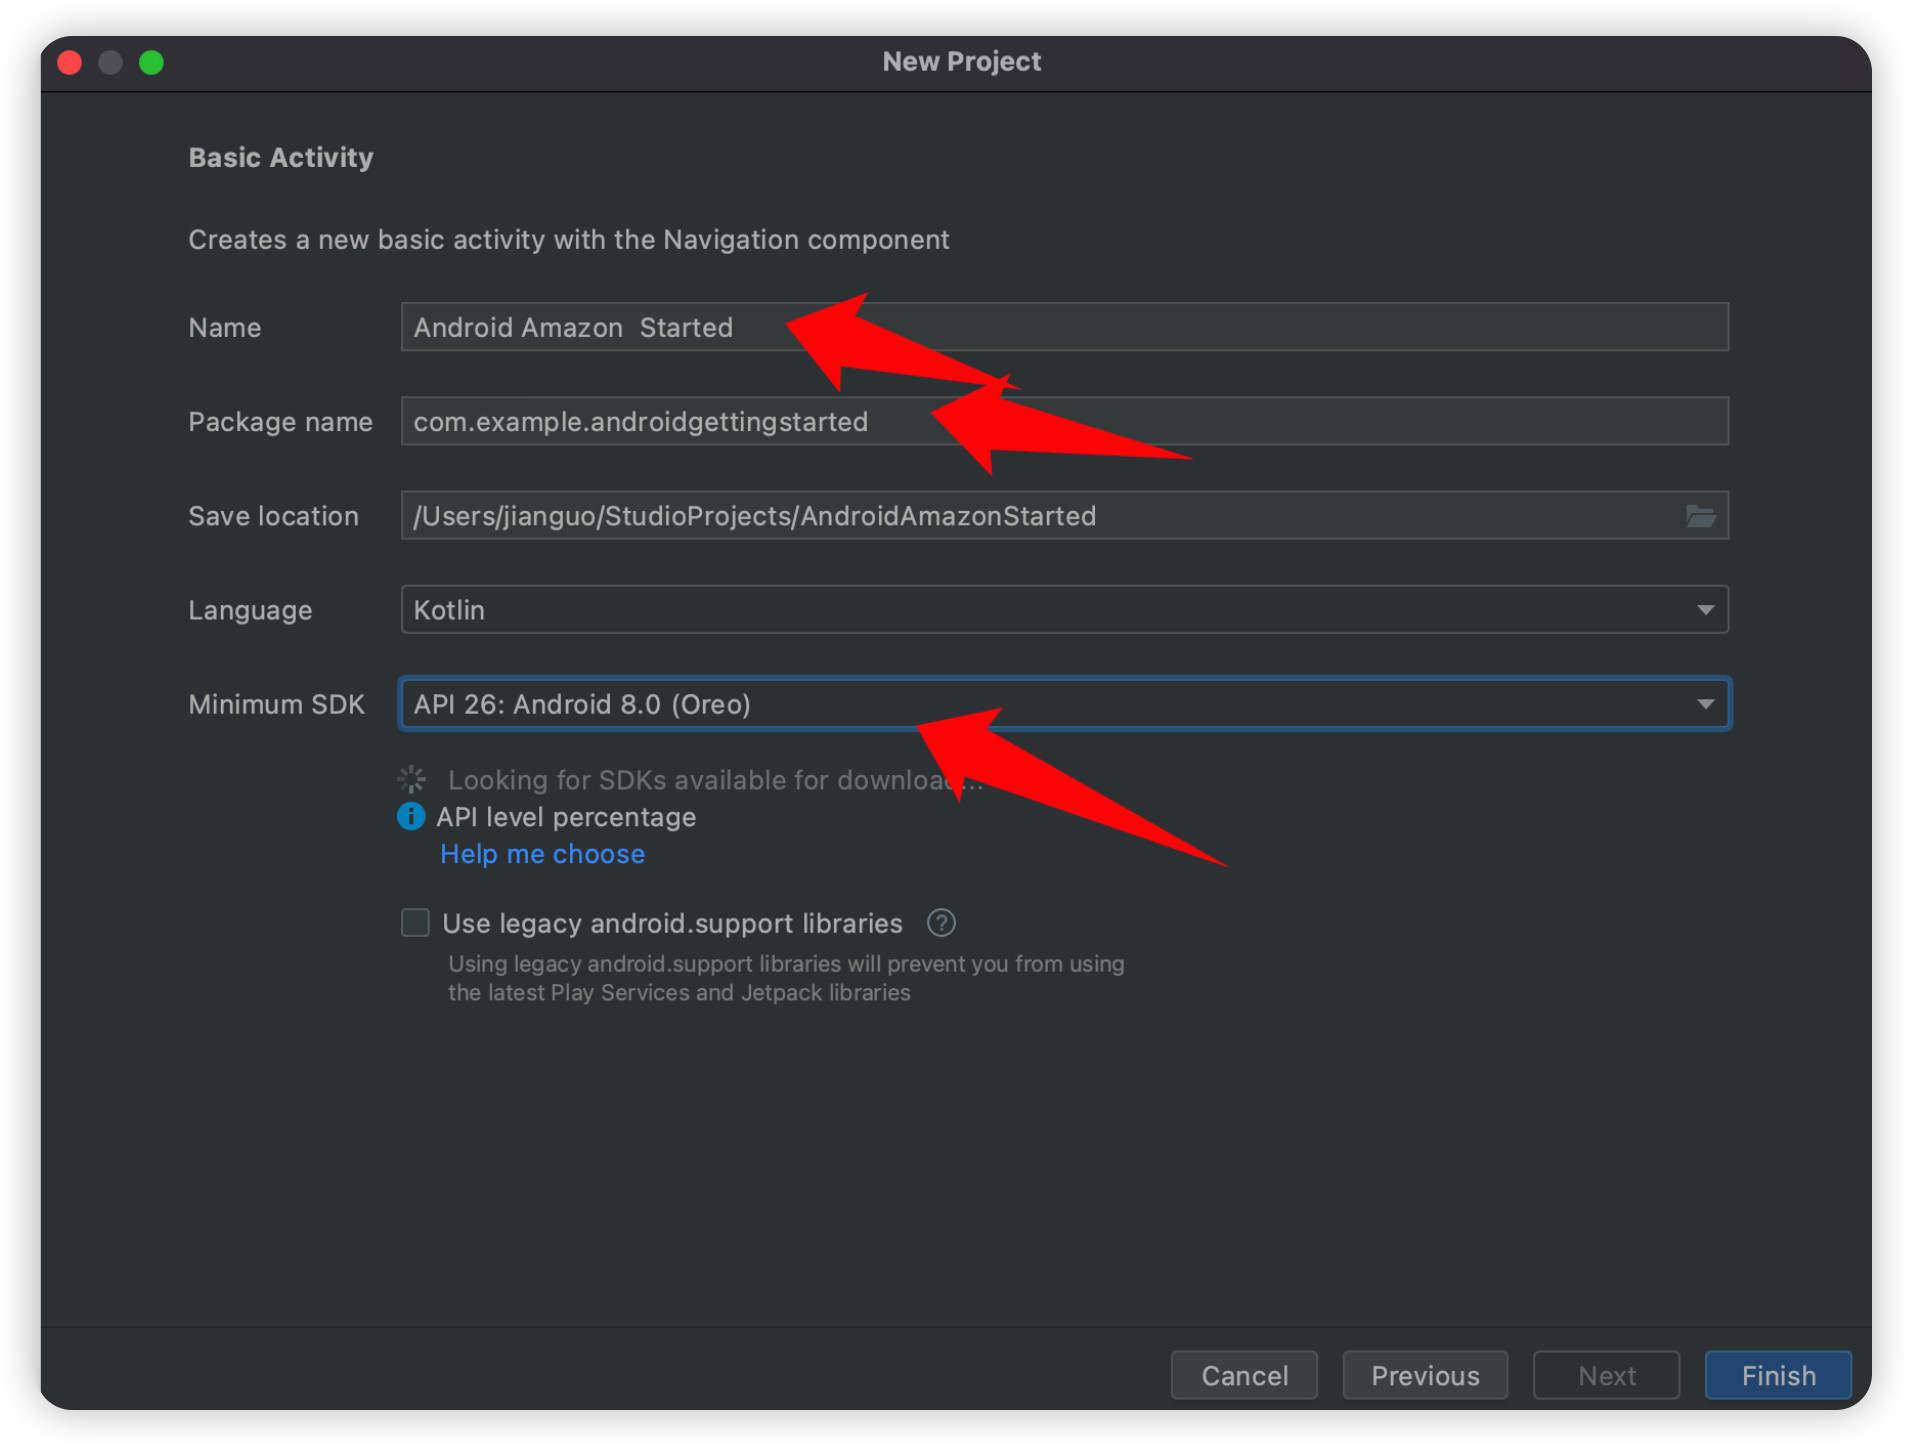
在 Phone and Tablet 下,选择 Basic Activity,然后单击 Next:
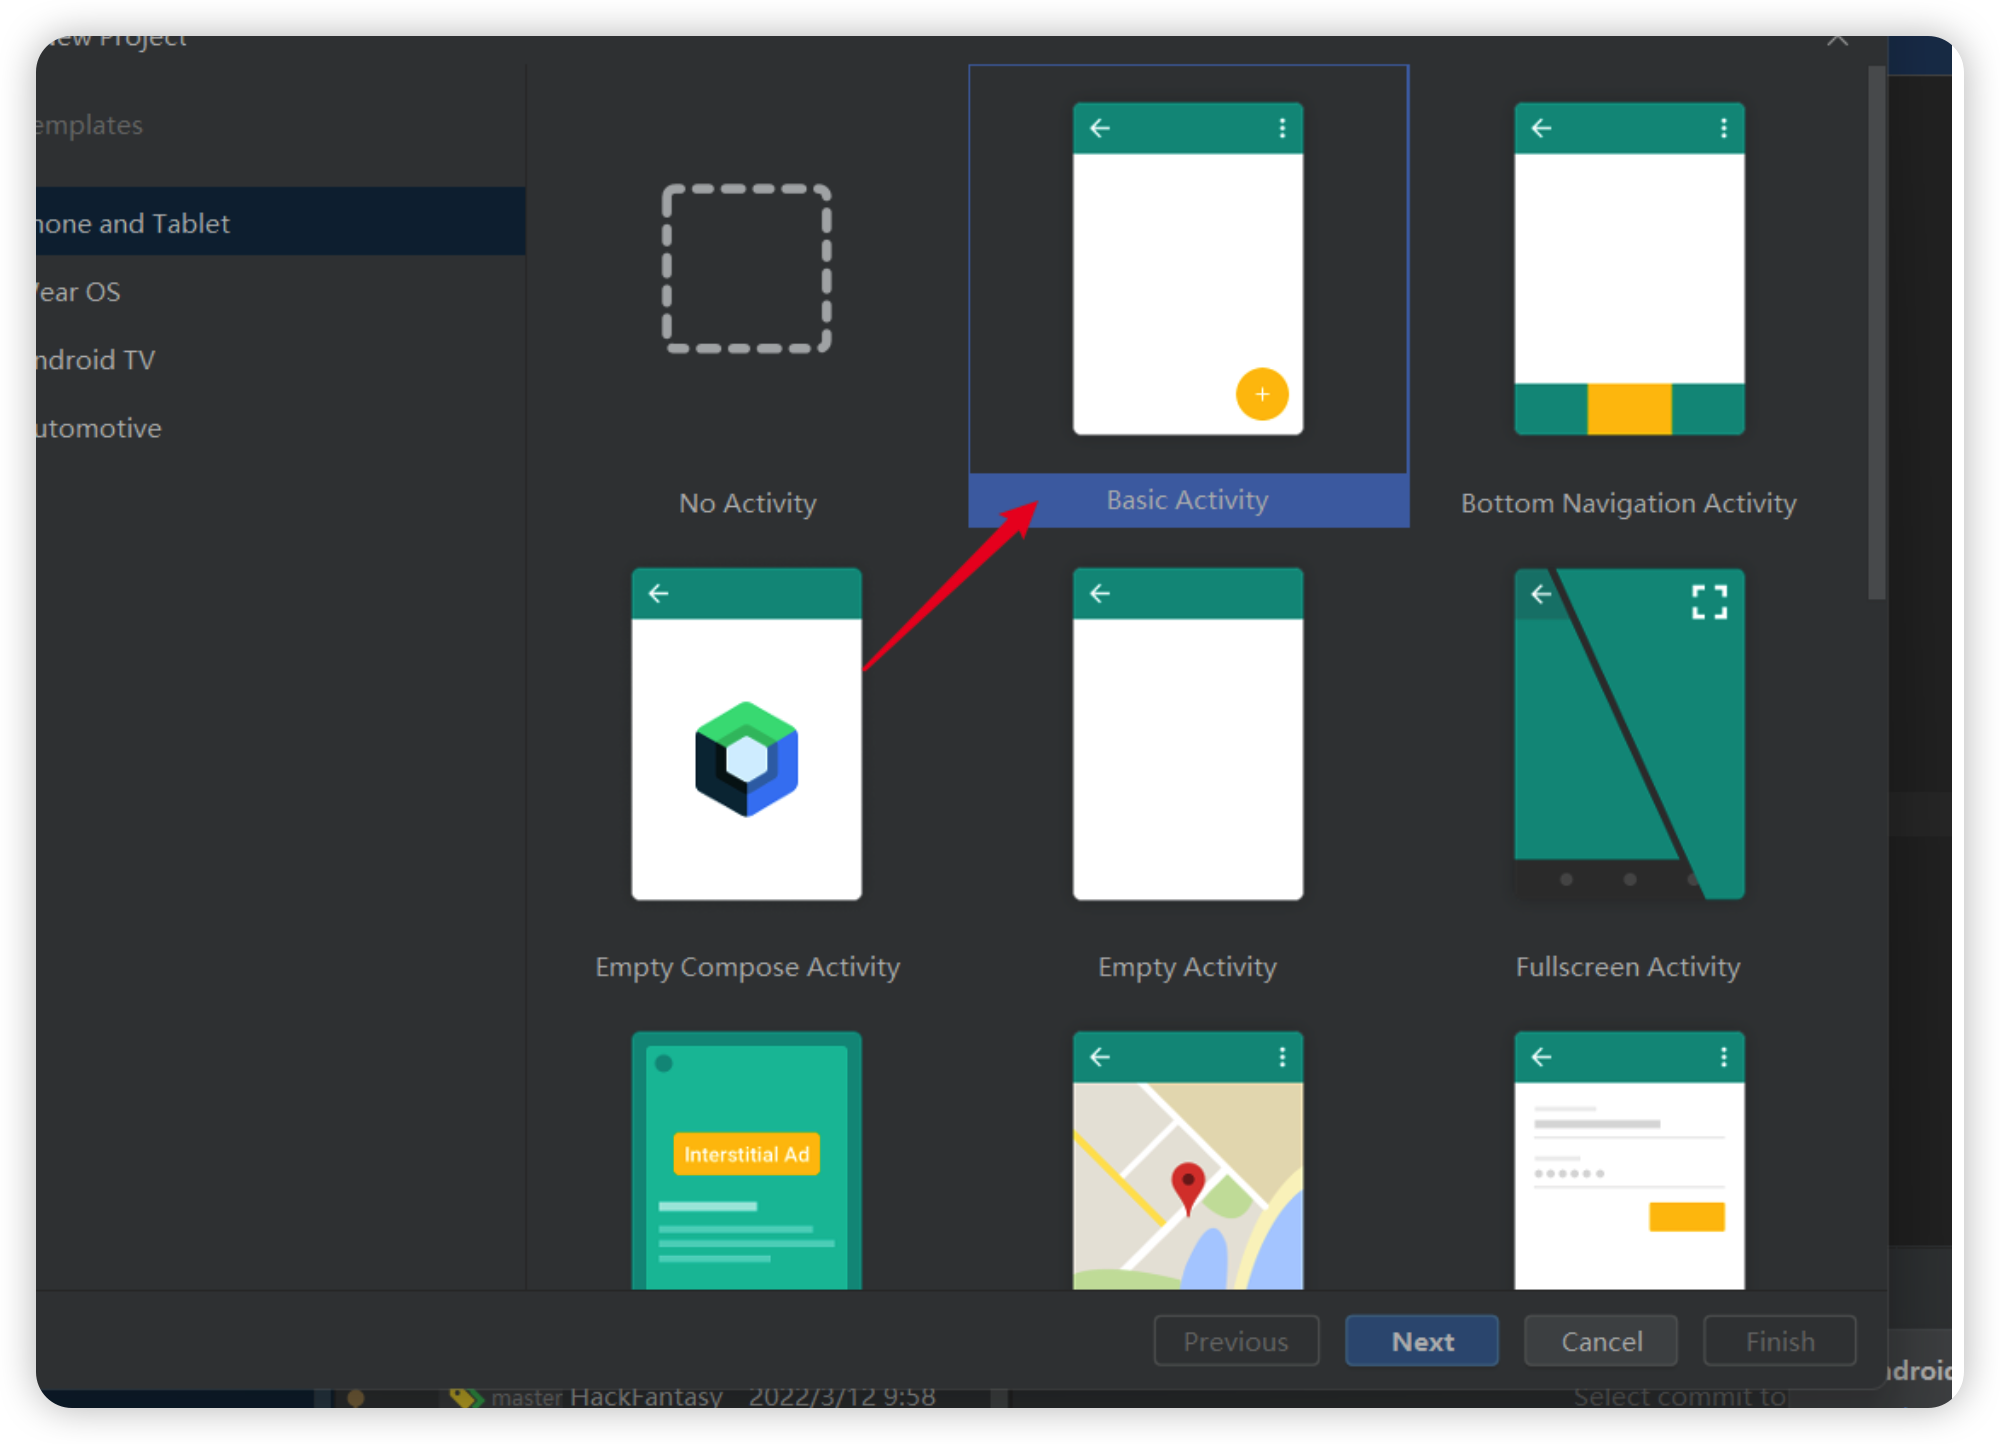
为您的项目键入名称,例如 Android Amazon Started。确保语言为 Kotlin,开发工具包最低为 API 26: Android 8.0 (oreo),然后单击 Finish:
现在,项目的框架已经存在,我们需要完成 4 个步骤来让我们的基本应用程序运行:
- 删除不需要的类和文件,并添加插件
- 创建类以保留数据结构
- 创建视图以在列表中保留单个备注
- 修改 MainActivity 以显示备注列表
1.2.2.删除不需要的类和文件,并添加插件
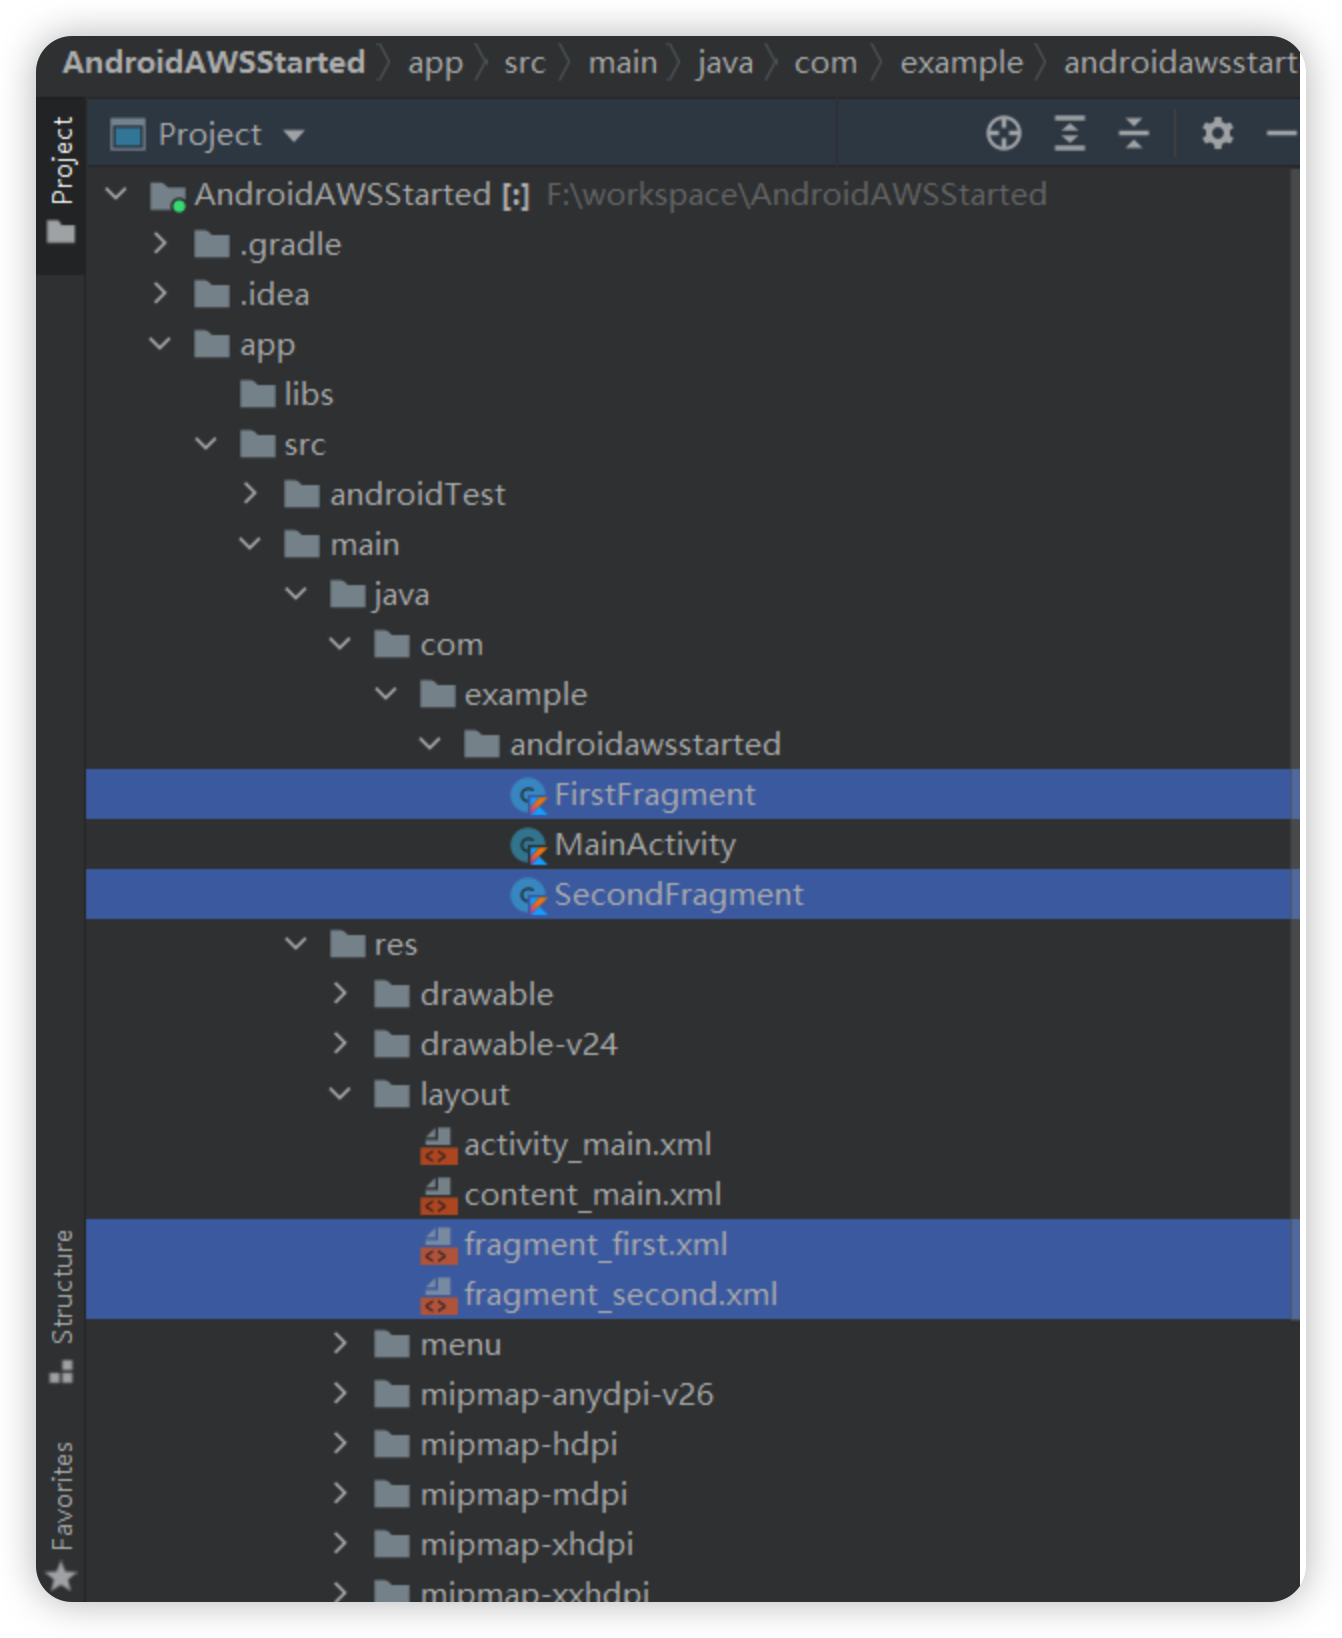
在“res/layout”和 java/com.example.androidgettingstarted 下,删除四个片段文件(选择这 4 个文件,右键单击,然后从上下文菜单中选择 Delete ):
在 Gradle Scripts下,打开 build.gradle (Module:app),并添加 Kotlin 扩展插件。
plugins {


    id 'com.android.application'


    id 'kotlin-android'


    id 'kotlin-android-extensions' //  <== add this line


}

1.2.3.创建类以保留数据结构
UserData 类可保留用户状态:一个 isSignedIn 标记和一个备注值列表。
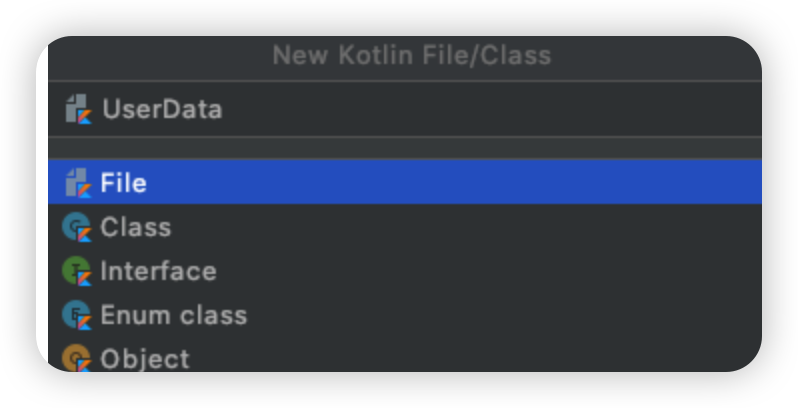
要创建新类,请右键单击 java/com.example/androidgettingstarted,然后选择 New -> Kotlin file/class。键入 UserData 作为名称。
将以下代码粘贴到新创建的文件 (UserData.kt) 中
package com.example.androidgettingstarted


import android.graphics.Bitmap


import android.util.Log


import androidx.lifecycle.LiveData


import androidx.lifecycle.MutableLiveData


// a singleton to hold user data (this is a ViewModel pattern, without inheriting from ViewModel)


object UserData {


    private const val TAG = "UserData"


    //


    // observable properties


    //


    // signed in status


    private val _isSignedIn = MutableLiveData<Boolean>(false)


    var isSignedIn: LiveData<Boolean> = _isSignedIn


    fun setSignedIn(newValue : Boolean) {


        // use postvalue() to make the assignation on the main (UI) thread


        _isSignedIn.postValue(newValue)


    }


    // the notes


    private val _notes = MutableLiveData<MutableList<Note>>(mutableListOf())


    // please check https://stackoverflow.com/questions/47941537/notify-observer-when-item-is-added-to-list-of-livedata


    private fun <T> MutableLiveData<T>.notifyObserver() {


        this.postValue(this.value)


    }


    fun notifyObserver() {


        this._notes.notifyObserver()


    }


    fun notes() : LiveData<MutableList<Note>>  = _notes


    fun addNote(n : Note) {


        val notes = _notes.value


        if (notes != null) {


            notes.add(n)


            _notes.notifyObserver()


        } else {


            Log.e(TAG, "addNote : note collection is null !!")


        }


    }


    fun deleteNote(at: Int) : Note?  {


        val note = _notes.value?.removeAt(at)


        _notes.notifyObserver()


        return note


    }


    fun resetNotes() {


        this._notes.value?.clear()  //used when signing out


        _notes.notifyObserver()


    }


    data class Note(val id: String, val name: String, val description: String, var imageName: String? = null) {


        override fun toString(): String = name


        // bitmap image


        var image : Bitmap? = null

    }


}
我们刚刚添加了哪些内容?
-
UserData 类负责保留用户数据,即一个 isSignedIn 标记用于跟踪当前的身份验证状态和备注对象列表。
-
这两个属性是根据 LiveData 发布/订阅框架来实现的。它允许图形用户界面 (GUI) 订阅更改并做出相应反应。
-
我们还添加了一个备注数据类,仅用于保留单个备注的数据。针对 ImageName 和 Image 使用了两个不同的属性。我们将在后续单元中介绍 Image。
-
为 UserData 对象实施了单态设计模式,因为此模式允许只使用 UserData 即可从应用程序的任何位置引用此对象。
1.2.4.为列表中的但各单元格添加GUI
滚动列表中的单个单元格称为 RecyclerView,因为当用户上下滚动屏幕,屏幕上再也看不到视图时,可以回收视图。
与常规视图一样,我们也创建了布局 XML 文件和 Kotlin 类。单个单元格类似以下内容:
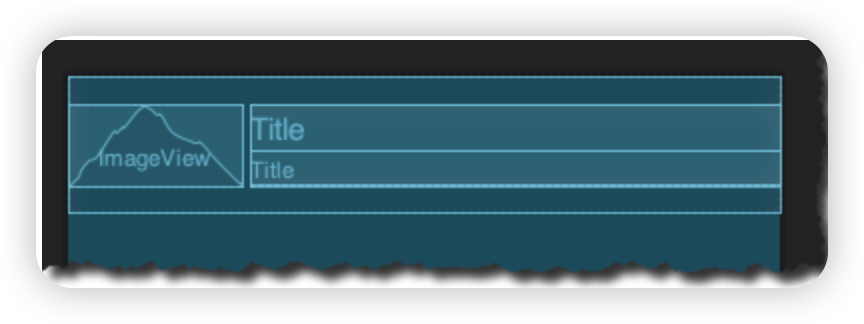
要创建布局文件,请右键单击“res/layout”,然后选择 New -> Layout Resource File。键入 content_note 作为名称,并保留所有其他值,因为我们将直接编辑 XML 文件。
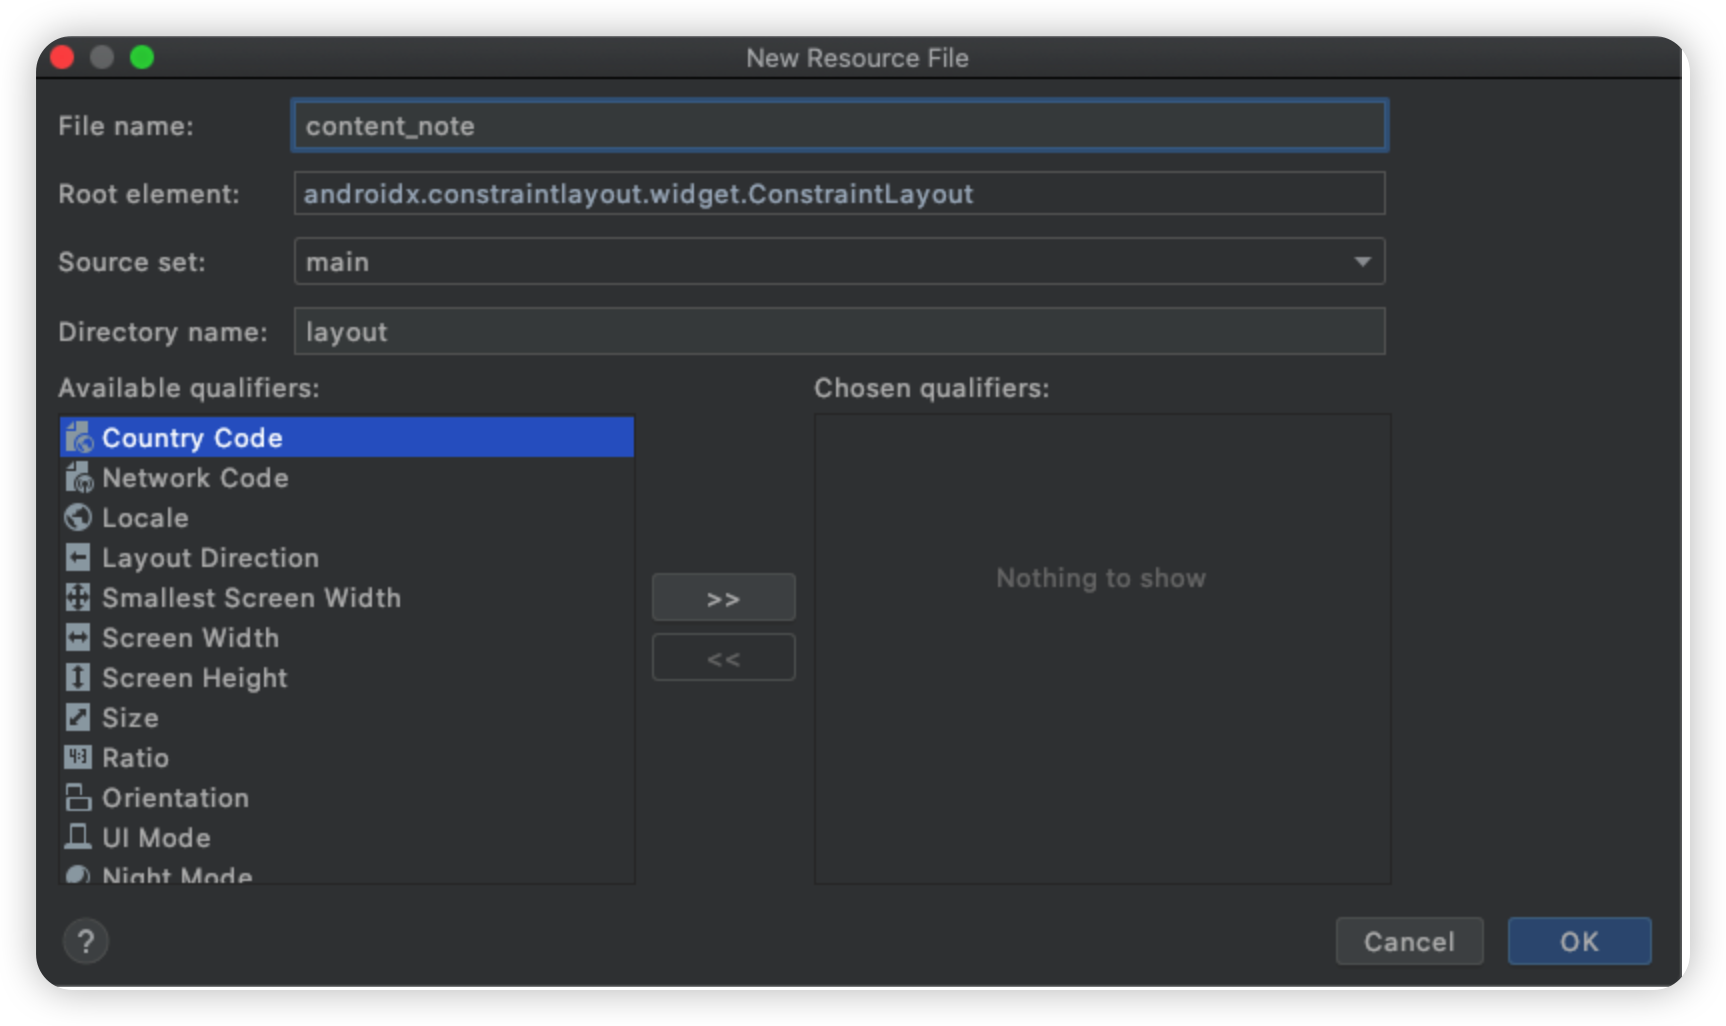
打开新创建的文件的 Code 视图。

在新创建的文件 (content_note.xml) 的“Code”视图中,通过粘贴以下代码来替代所生成的代码:
<?xml version="1.0" encoding="utf-8"?>


<LinearLayout xmlns:android="http://schemas.android.com/apk/res/android"


    android:layout_width="match_parent"


    android:layout_height="wrap_content"


    android:orientation="horizontal"


    android:paddingVertical="16dp">


    <ImageView


        android:id="@+id/image"


        android:layout_width="100dp"


        android:layout_height="match_parent"


        android:padding="8dp"


        android:scaleType="centerCrop"


        android:src="@drawable/ic_launcher_background" />


    <LinearLayout


        android:layout_width="match_parent"


        android:layout_height="wrap_content"


        android:layout_gravity="center"


        android:layout_marginLeft="5dp"


        android:orientation="vertical">


        <TextView


            android:id="@+id/name"


            android:layout_width="match_parent"


            android:layout_height="wrap_content"


            android:text="Title"


            android:textSize="20sp"


            android:textStyle="bold" />


        <TextView


            android:id="@+id/description"


            android:layout_width="match_parent"


            android:layout_height="wrap_content"


            android:text="Title"


            android:textSize="15sp" />


    </LinearLayout>


</LinearLayout>
最后,创建 Kotlin 类:右键单击 java/com.example/androidgettingstarted,然后选择 New -> Kotlin file/class。键入 NoteRecyclerViewAdapter 作为名称。
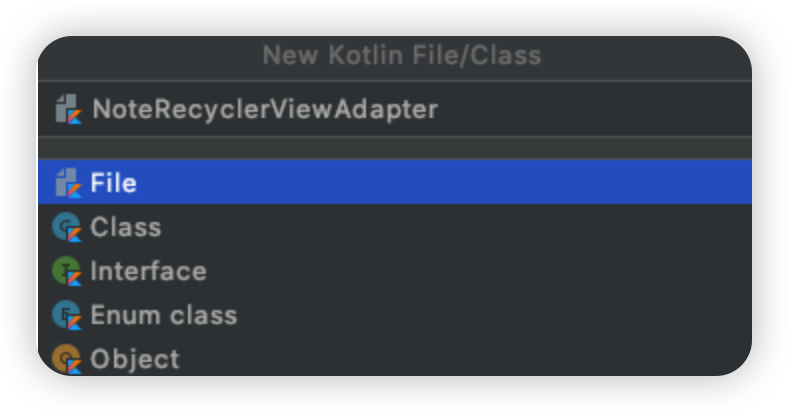
将以下代码粘贴到新创建的文件 (NoteRecyclerViewAdapter.kt) 中
package com.example.androidgettingstarted


import android.view.LayoutInflater


import android.view.View


import android.view.ViewGroup


import android.widget.ImageView


import android.widget.TextView


import androidx.recyclerview.widget.RecyclerView


// this is a single cell (row) in the list of Notes


class NoteRecyclerViewAdapter(


    private val values: MutableList<UserData.Note>?) :


    RecyclerView.Adapter<NoteRecyclerViewAdapter.ViewHolder>() {


    override fun onCreateViewHolder(parent: ViewGroup, viewType: Int): ViewHolder {


        val view = LayoutInflater.from(parent.context)


            .inflate(R.layout.content_note, parent, false)


        return ViewHolder(view)


    }


    override fun onBindViewHolder(holder: ViewHolder, position: Int) {


        val item = values?.get(position)


        holder.nameView.text = item?.name


        holder.descriptionView.text = item?.description


        if (item?.image != null) {


            holder.imageView.setImageBitmap(item.image)


        }


    }


    override fun getItemCount() = values?.size ?: 0


    inner class ViewHolder(view: View) : RecyclerView.ViewHolder(view) {


        val imageView: ImageView = view.findViewById(R.id.image)


        val nameView: TextView = view.findViewById(R.id.name)


        val descriptionView: TextView = view.findViewById(R.id.description)


    }


}
我们刚刚添加了哪些内容?
上述代码包含
-
一个布局 xml 文件,该文件说明表示备注的单元格上的组件布局。它显示图像、备注标题和备注说明。
-
一个支持 Kotlin 类。它在创建时接收备注数据对象,并将单个值分配给其相对应的视图(图像、标题和说明)
1.2.5.更新主要活动
现在,我们已经有了数据类(UserData 和备注)和单个备注的视图 (NoteRecyclerViewAdapter),让我们在主要活动上创建备注列表。
从 Android Studio 左侧的文件列表,打开 res/layout/content_main.xml,并将代码替换为以下内容:
<?xml version="1.0" encoding="utf-8"?>


<FrameLayout xmlns:android="http://schemas.android.com/apk/res/android"


    xmlns:app="http://schemas.android.com/apk/res-auto"


    xmlns:tools="http://schemas.android.com/tools"


    android:id="@+id/frameLayout"


    android:layout_width="match_parent"


    android:layout_height="match_parent"


    >


    <androidx.recyclerview.widget.RecyclerView


        android:id="@+id/item_list"


        android:name="com.example.myapplication.ItemListFragment"


        android:layout_width="match_parent"


        android:layout_height="match_parent"


        android:layout_marginTop="60dp"


        android:paddingHorizontal="8dp"


        android:paddingVertical="8dp"


        app:layoutManager="LinearLayoutManager"


        tools:context=".MainActivity"


        tools:listitem="@layout/content_note" />


</FrameLayout>
从 Android Studio 左侧的文件列表,打开 java/com.example/androidgettingstarted/MainActivity.kt,并将代码替换为以下内容:
package com.example.androidgettingstarted


import android.os.Bundle


import android.util.Log


import androidx.appcompat.app.AppCompatActivity


import androidx.lifecycle.Observer


import androidx.recyclerview.widget.ItemTouchHelper


import androidx.recyclerview.widget.RecyclerView


import kotlinx.android.synthetic.main.activity_main.*


import kotlinx.android.synthetic.main.content_main.*


class MainActivity : AppCompatActivity() {


    override fun onCreate(savedInstanceState: Bundle?) {


        super.onCreate(savedInstanceState)


        setContentView(R.layout.activity_main)


        setSupportActionBar(toolbar)


        // prepare our List view and RecyclerView (cells)


        setupRecyclerView(item_list)


    }


    // recycler view is the list of cells


    private fun setupRecyclerView(recyclerView: RecyclerView) {


        // update individual cell when the Note data are modified


        UserData.notes().observe(this, Observer<MutableList<UserData.Note>> { notes ->


            Log.d(TAG, "Note observer received ${notes.size} notes")


            // let's create a RecyclerViewAdapter that manages the individual cells


            recyclerView.adapter = NoteRecyclerViewAdapter(notes)


        })


    }


    companion object {


        private const val TAG = "MainActivity"


    }


}
我们刚刚添加了哪些内容?
-
主要布局是一个 RecyclerView,用于管理我们之前创建的单个单元格列表
-
主要活动类可观察备注列表的变化,并创建一个 NoteRecyclerViewAdapter 以创建单个单元格。
1.2.6.验证生成依赖项
- 在 Gradle Scripts下,打开 build.gradle (Module:app),并验证所生成的依赖关系是否正确。需要选中
**libraries versions**。
```gradle


dependencies {


    implementation "org.jetbrains.kotlin:kotlin-stdlib:$kotlin_version"


    implementation 'androidx.core:core-ktx:1.3.2'


    implementation 'androidx.appcompat:appcompat:1.2.0'


    implementation 'com.google.android.material:material:1.2.1'


    implementation 'androidx.constraintlayout:constraintlayout:2.0.2'


    implementation 'androidx.navigation:navigation-fragment-ktx:2.3.1'


    implementation 'androidx.navigation:navigation-ui-ktx:2.3.1'


    testImplementation 'junit:junit:4.+'


    androidTestImplementation 'androidx.test.ext:junit:1.1.2'


    androidTestImplementation 'androidx.test.espresso:espresso-core:3.2.0'


}
1.2.7.构建和测试
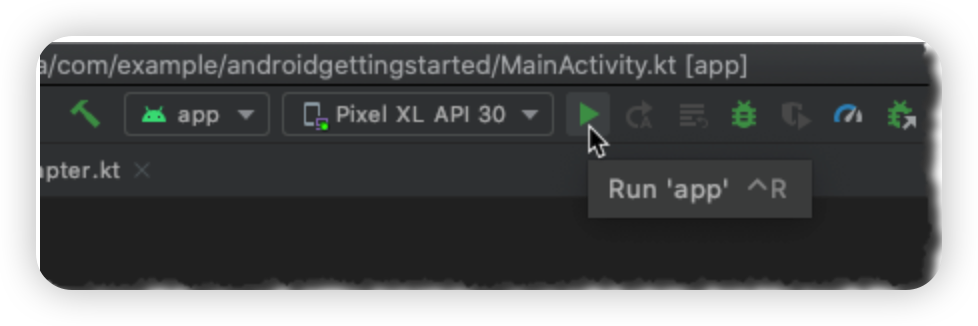
- 现在,请在模拟器中构建并启动应用程序。单击工具栏中的运行图标 ▶️ 或按 ^ R。
片刻之后,应用程序会在 Android 模拟器中启动,初始屏幕为空。
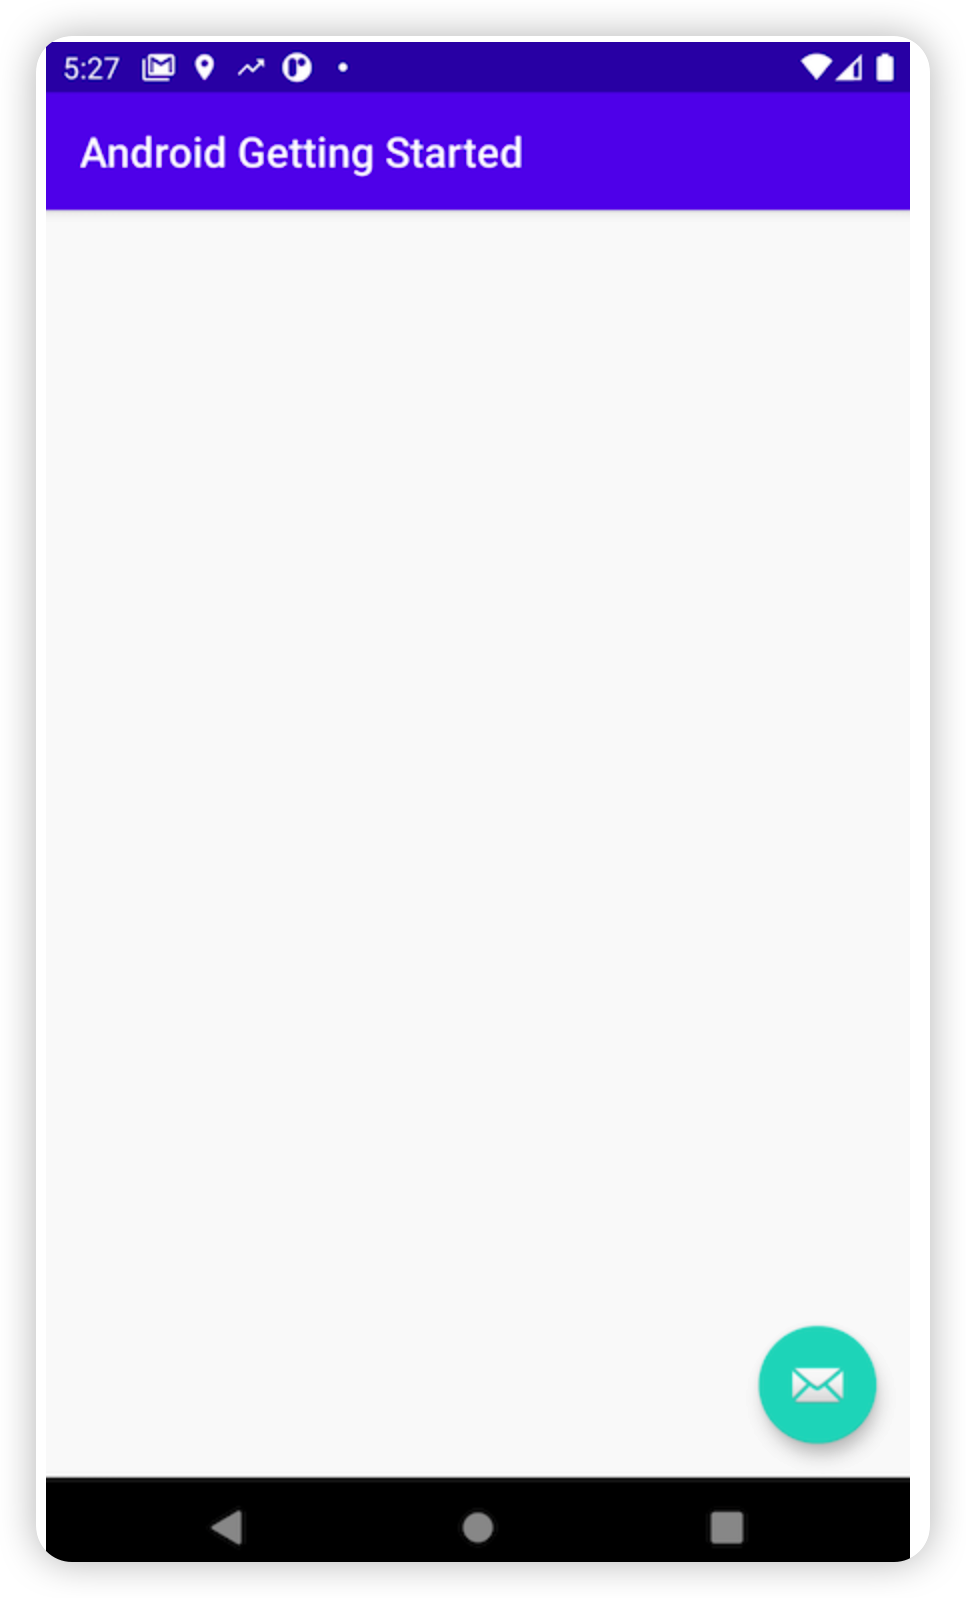
在此阶段,没有要在运行时呈现的数据。到此您已成功创建 Android 应用程序。接下来开始使用 Amplify 进行构建!
2.初始化 Amplify
在此单元中,您将安装并配置 Amplify CLI。
2.1简介
现在我们已创建一个 Android 应用程序,我们想要继续开发并添加新功能。
要开始在应用程序中使用 Amazon Amplify,必须安装 Amplify 命令行,初始化 Amplify 项目目录,将项目配置为使用 Amplify 库,并在运行时初始化 Amplify 库。
2.2实施
2.2.1安装Amplify CLI
Amazon Amplify CLI 取决于 Node.js,没有安装的化,请安装。
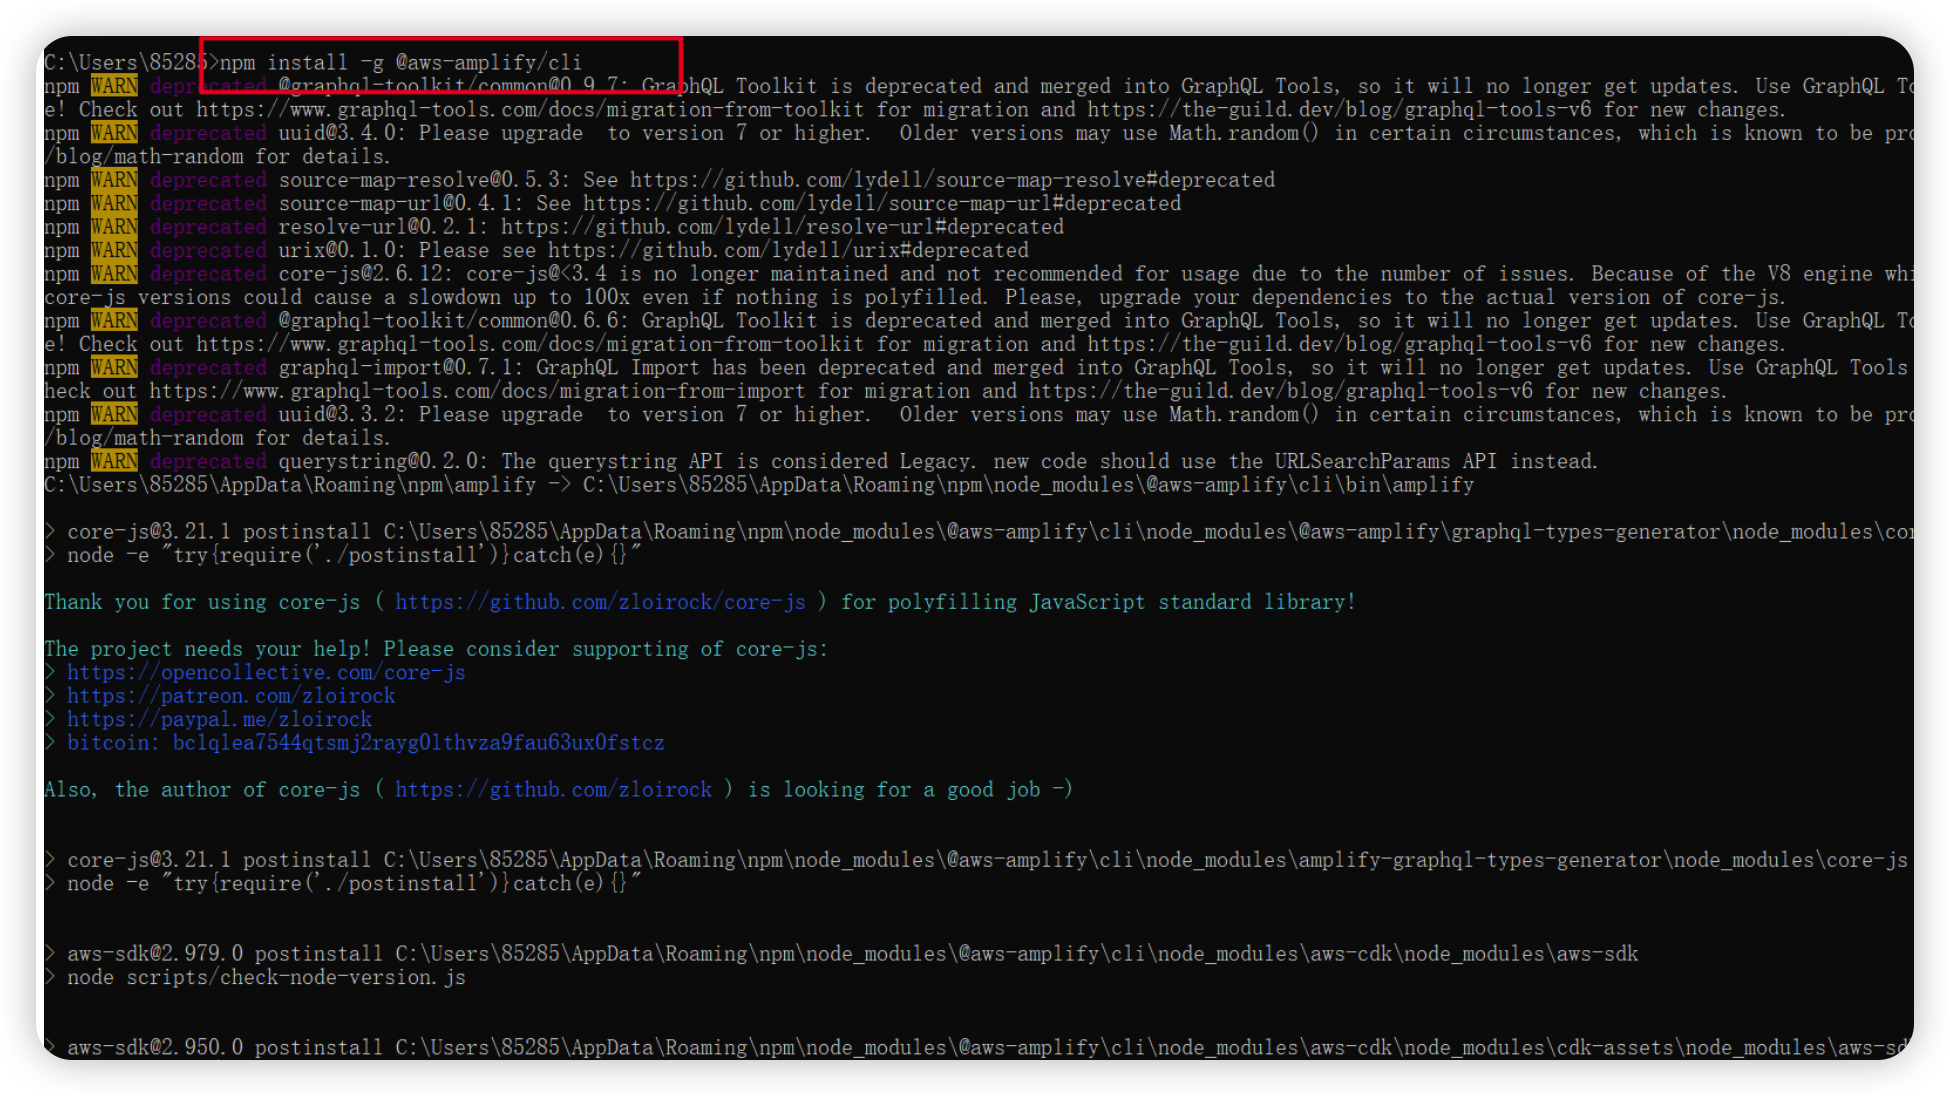
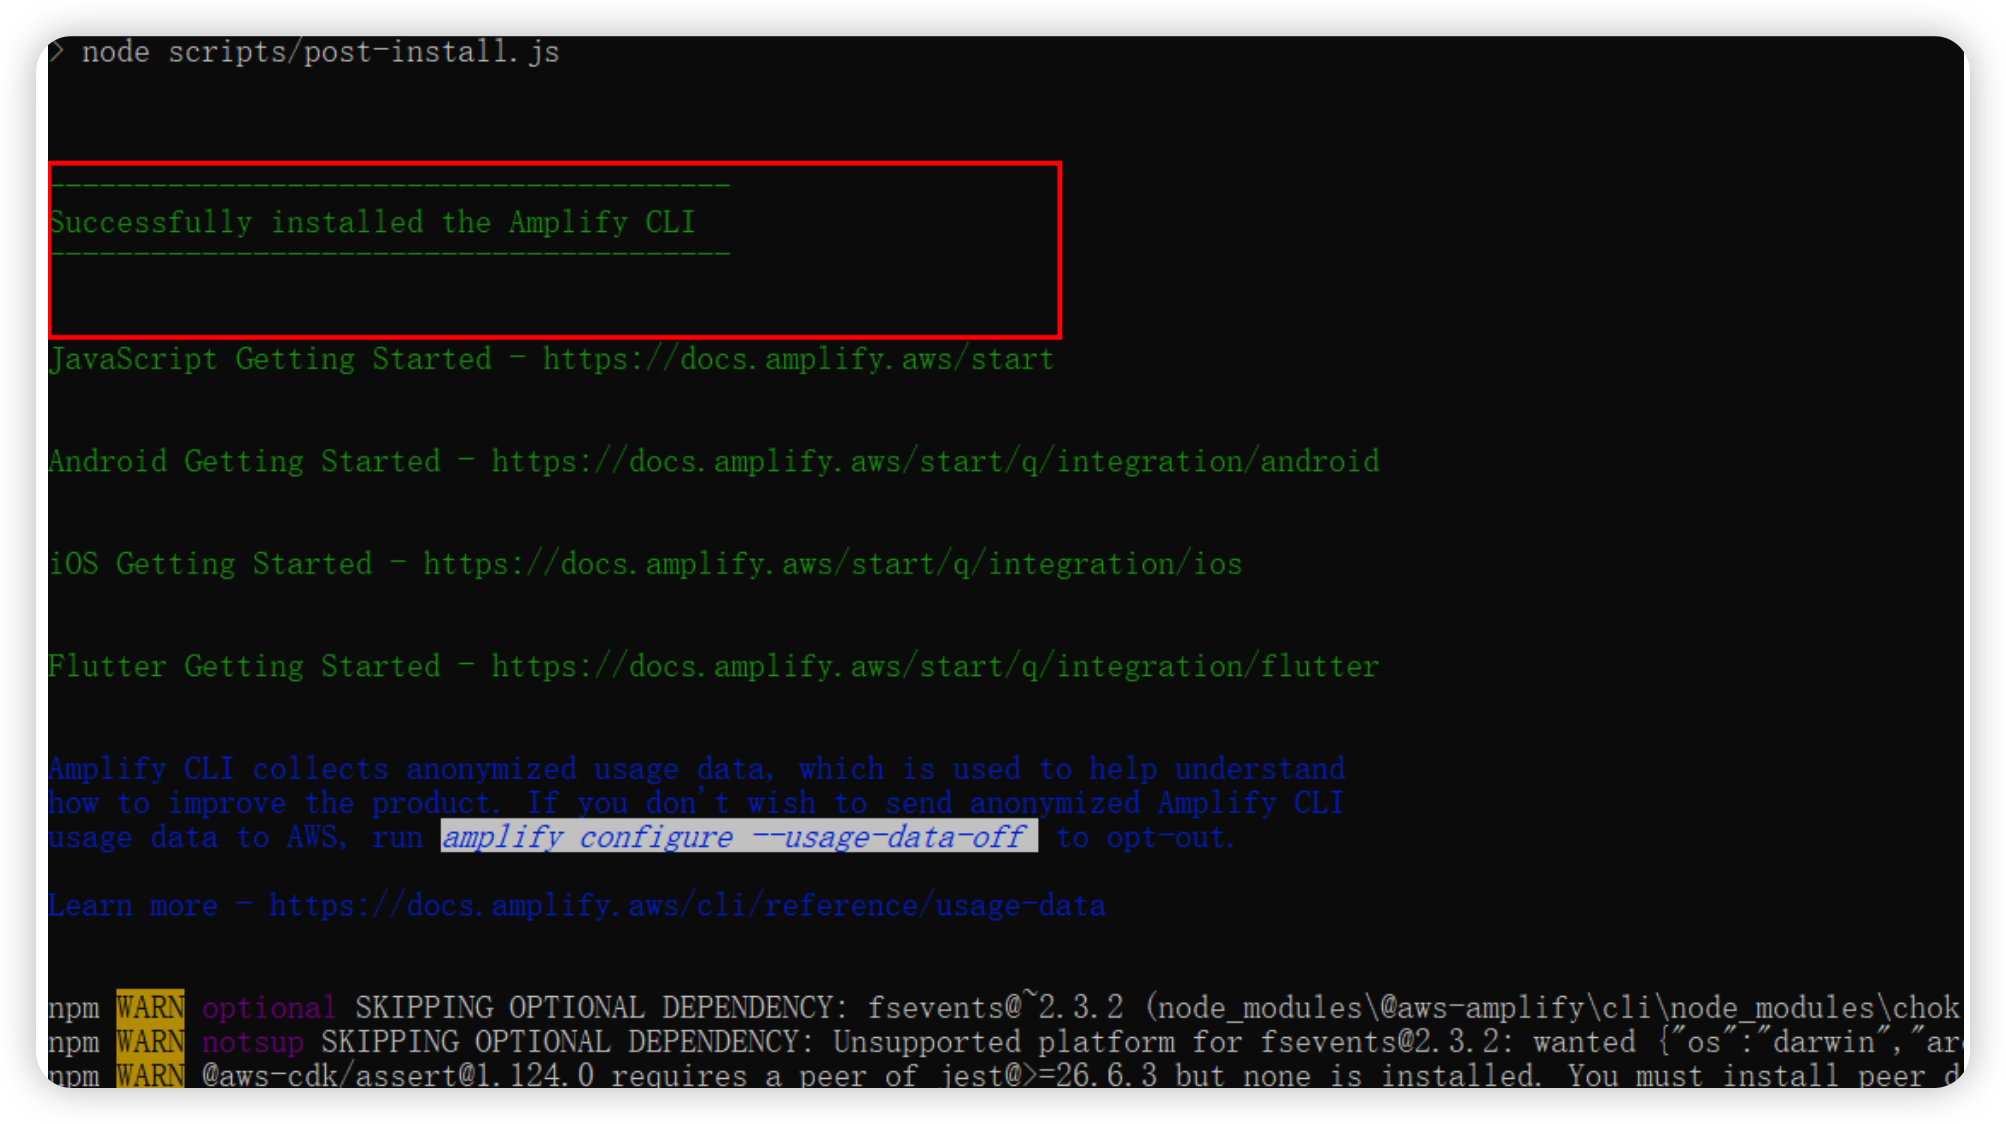
要安装 Amazon Amplify CLI,请打开一个终端,然后输入以下命令:
## Install Amplify CLI


npm install -g @aws-amplify/cli
查看版本:
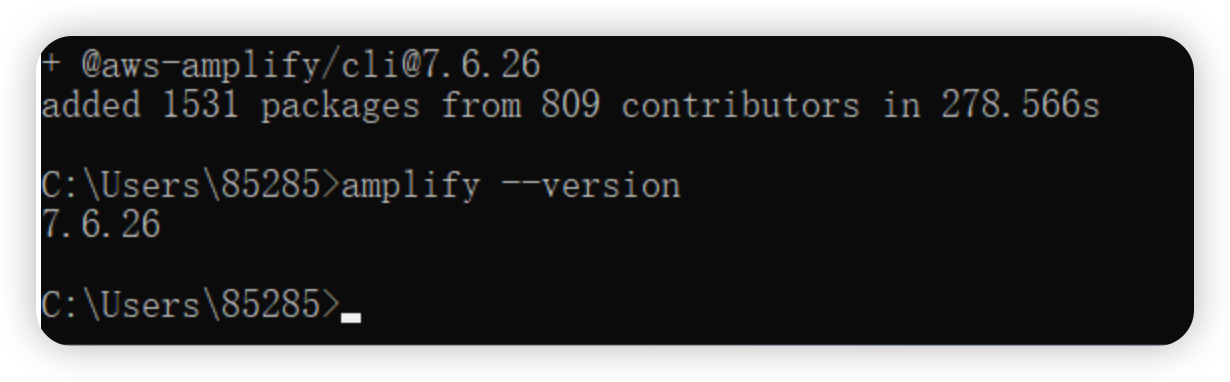
## Verify installation and version


amplify --version


 7.6.26
2.2.2初始化Amplify后端
要创建后端基本结构,首先需要初始化 Amplify 项目目录并创建云后端。
打开项目所在目录,输入cmd,即可打开终端
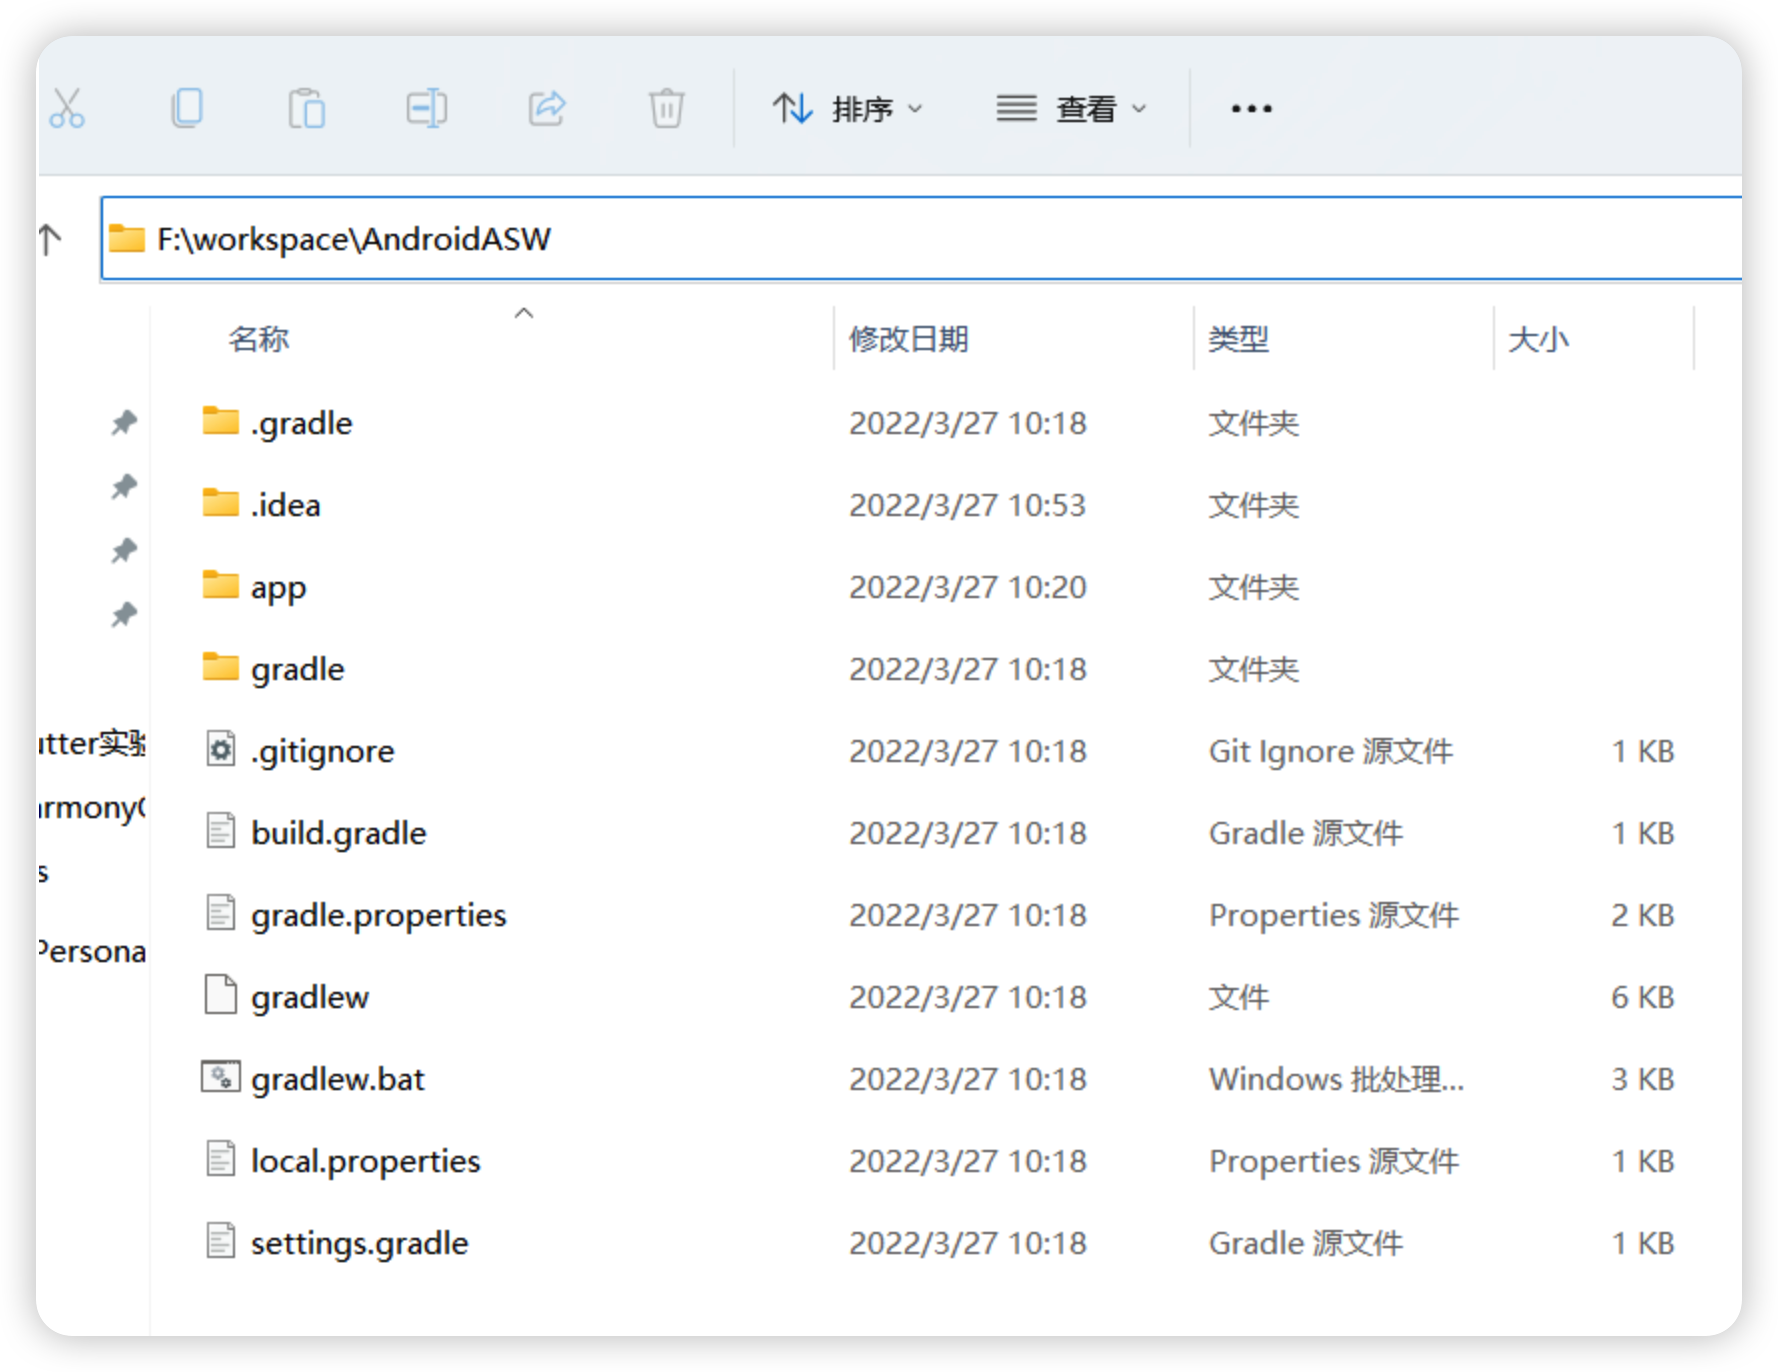
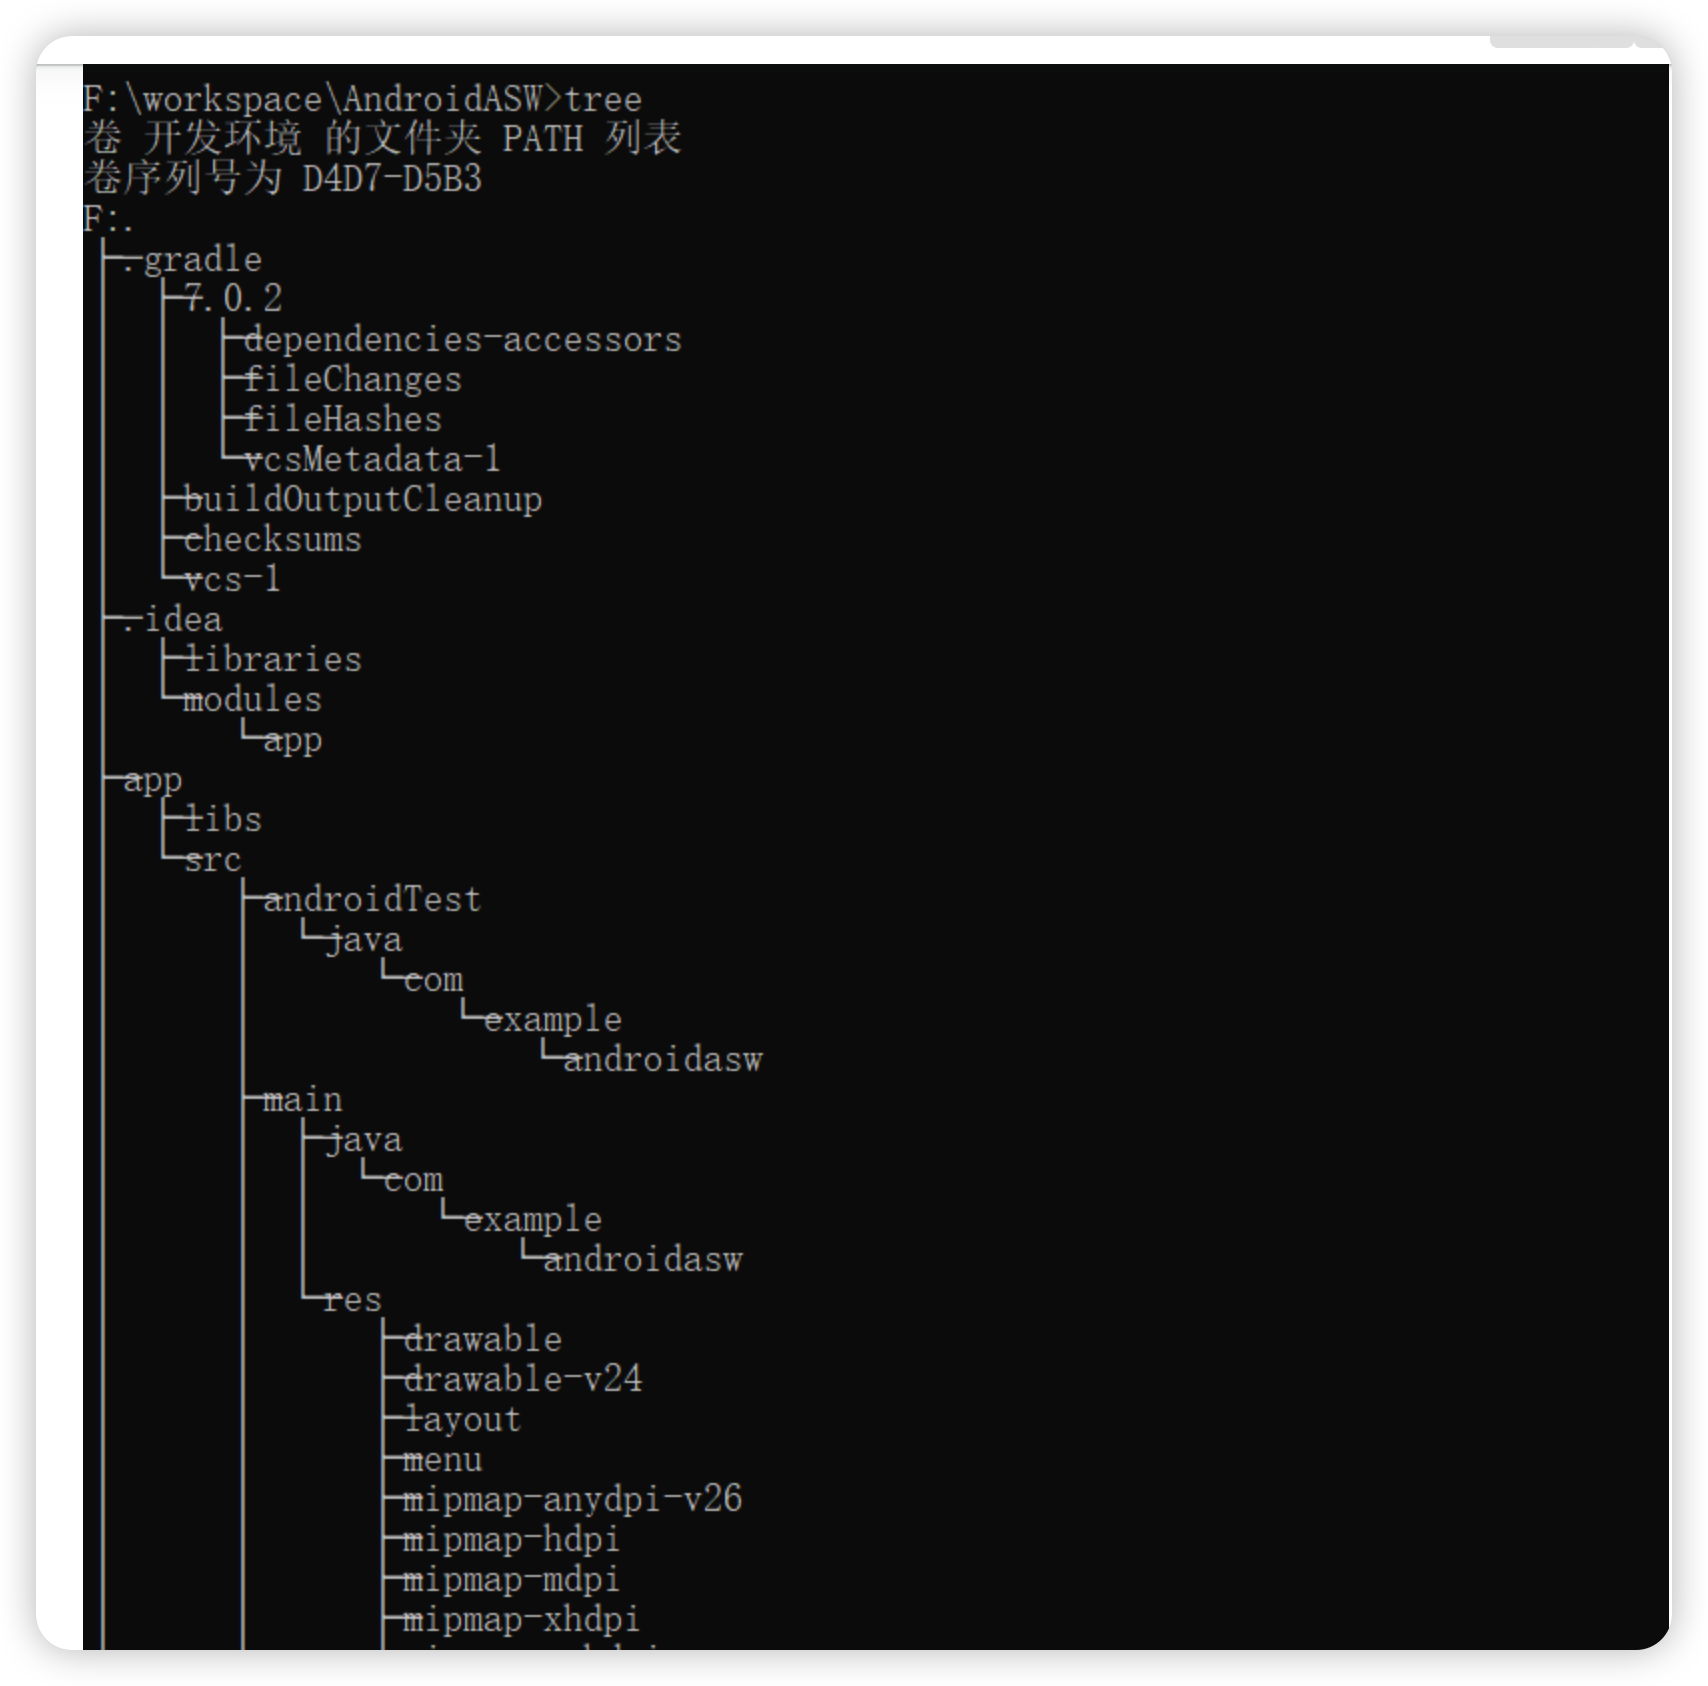
验证您是否在正确的目录中,它应该如下所示:
F:\workspace\AndroidASW>tree


卷 开发环境 的文件夹 PATH 列表


卷序列号为 D4D7-D5B3


F:.


├─.gradle


│  ├─7.0.2


│  │  ├─dependencies-accessors


│  │  ├─fileChanges


│  │  ├─fileHashes


│  │  └─vcsMetadata-1


│  ├─buildOutputCleanup


│  ├─checksums


│  └─vcs-1


├─.idea


│  ├─libraries


│  └─modules


│      └─app


├─app


│  ├─libs


│  └─src


│      ├─androidTest


│      │  └─java


│      │      └─com


│      │          └─example


│      │              └─androidasw


│      ├─main


│      │  ├─java


│      │  │  └─com


│      │  │      └─example


│      │  │          └─androidasw


│      │  └─res


│      │      ├─drawable


│      │      ├─drawable-v24


│      │      ├─layout


│      │      ├─menu


│      │      ├─mipmap-anydpi-v26


│      │      ├─mipmap-hdpi


│      │      ├─mipmap-mdpi


│      │      ├─mipmap-xhdpi


│      │      ├─mipmap-xxhdpi


│      │      ├─mipmap-xxxhdpi


│      │      ├─navigation


│      │      ├─values


│      │      ├─values-land


│      │      ├─values-night


│      │      ├─values-w1240dp


│      │      └─values-w600dp


│      └─test


│          └─java


│              └─com


│                  └─example


│                      └─androidasw


└─gradle


    └─wrapper


F:\workspace\AndroidASW>
接下来,在亚马逊服务管理后台创建对应的用户,并添加权限类型,具体如下图所示:
2.2.3控制台相关操作
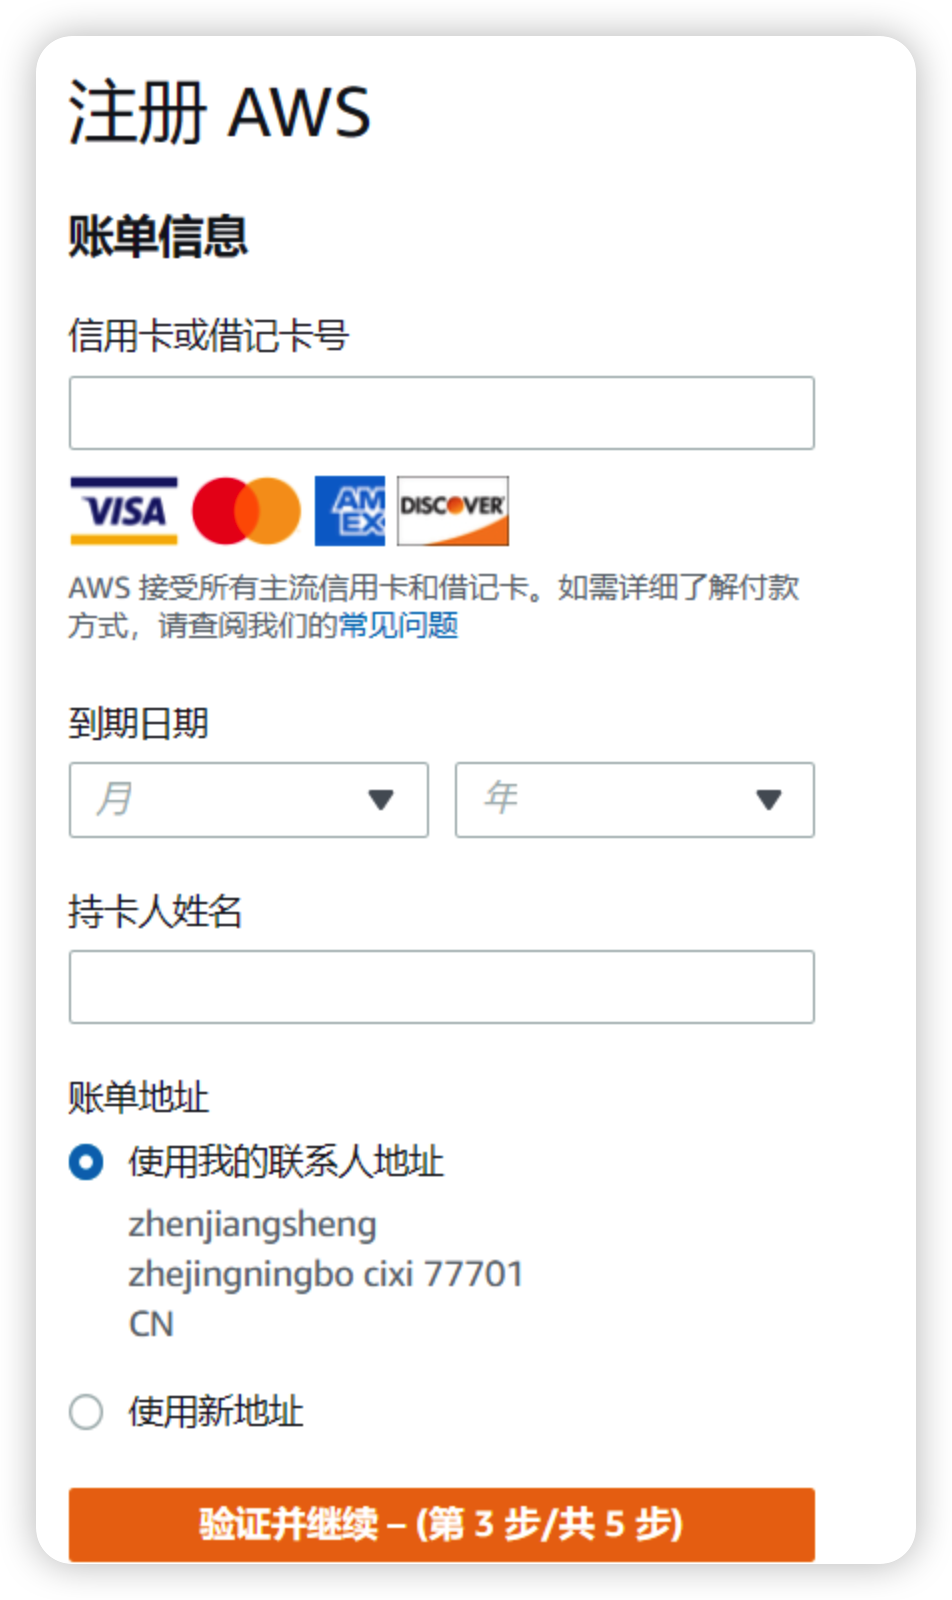
[https://aws.amazon.com/cn/free/?trk=95502bdb-28e0-4dc1-895c-2e975a171d36&sc_channel=ba&all-free-tier.sort-by=item.additionalFields.SortRank&all-free-tier.sort-order=asc&awsf.Free%20Tier%20Types=](https://aws.amazon.com/cn/free/?trk=95502bdb-28e0-4dc1-895c-2e975a171d36&sc_channel=ba&all-free-tier.sort-by=item.additionalFields.SortRank&all-free-tier.sort-order=asc&awsf.Free Tier Types=)*all&awsf.Free%20Tier%20Categories=*all
登录控制台

添加权限
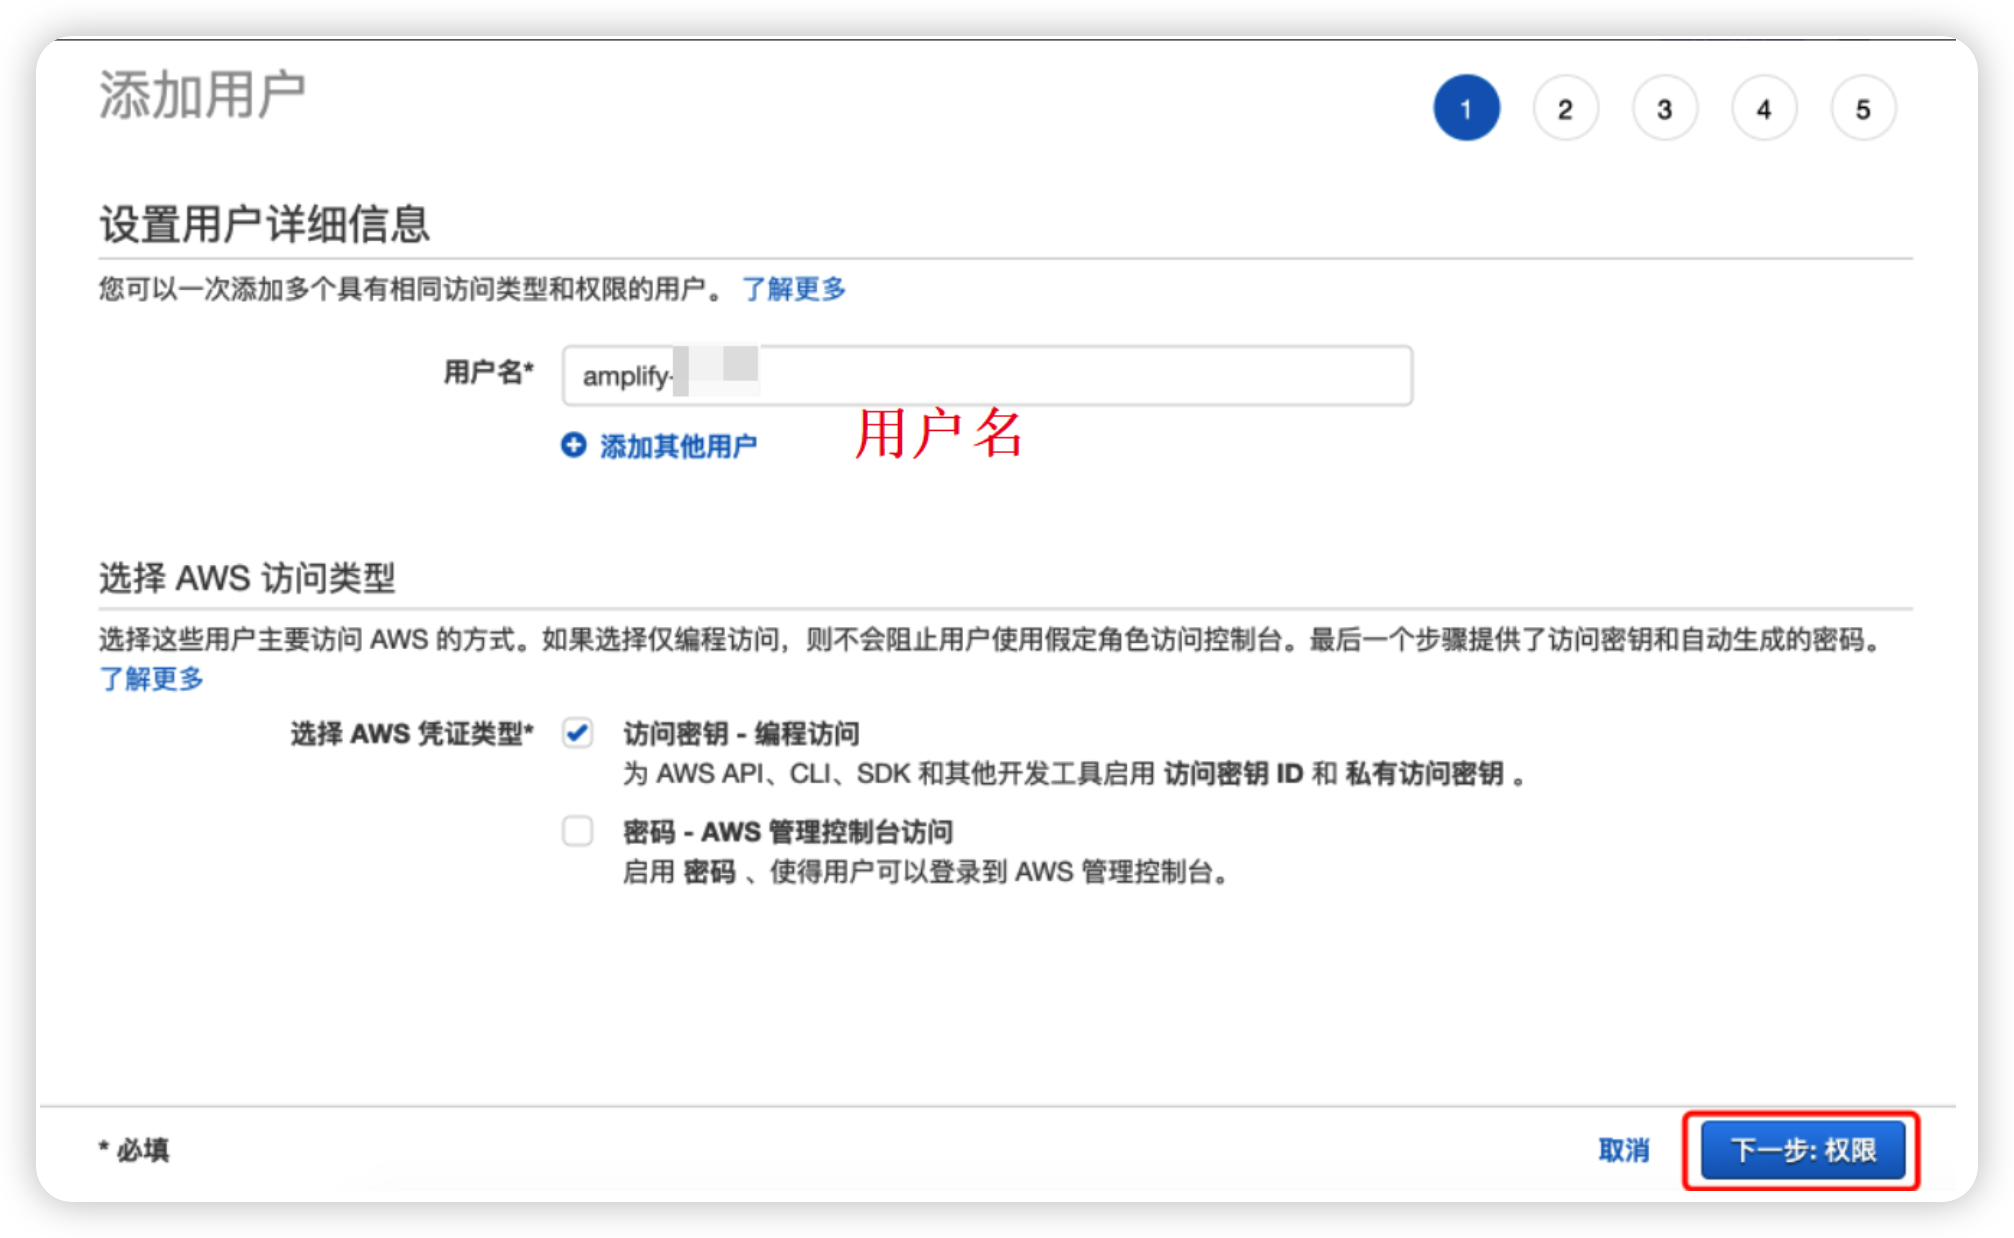
点击“下一步”,选择“直接附加现有策略”,一直“下一步",后会提示创建用户成功。
添加用户
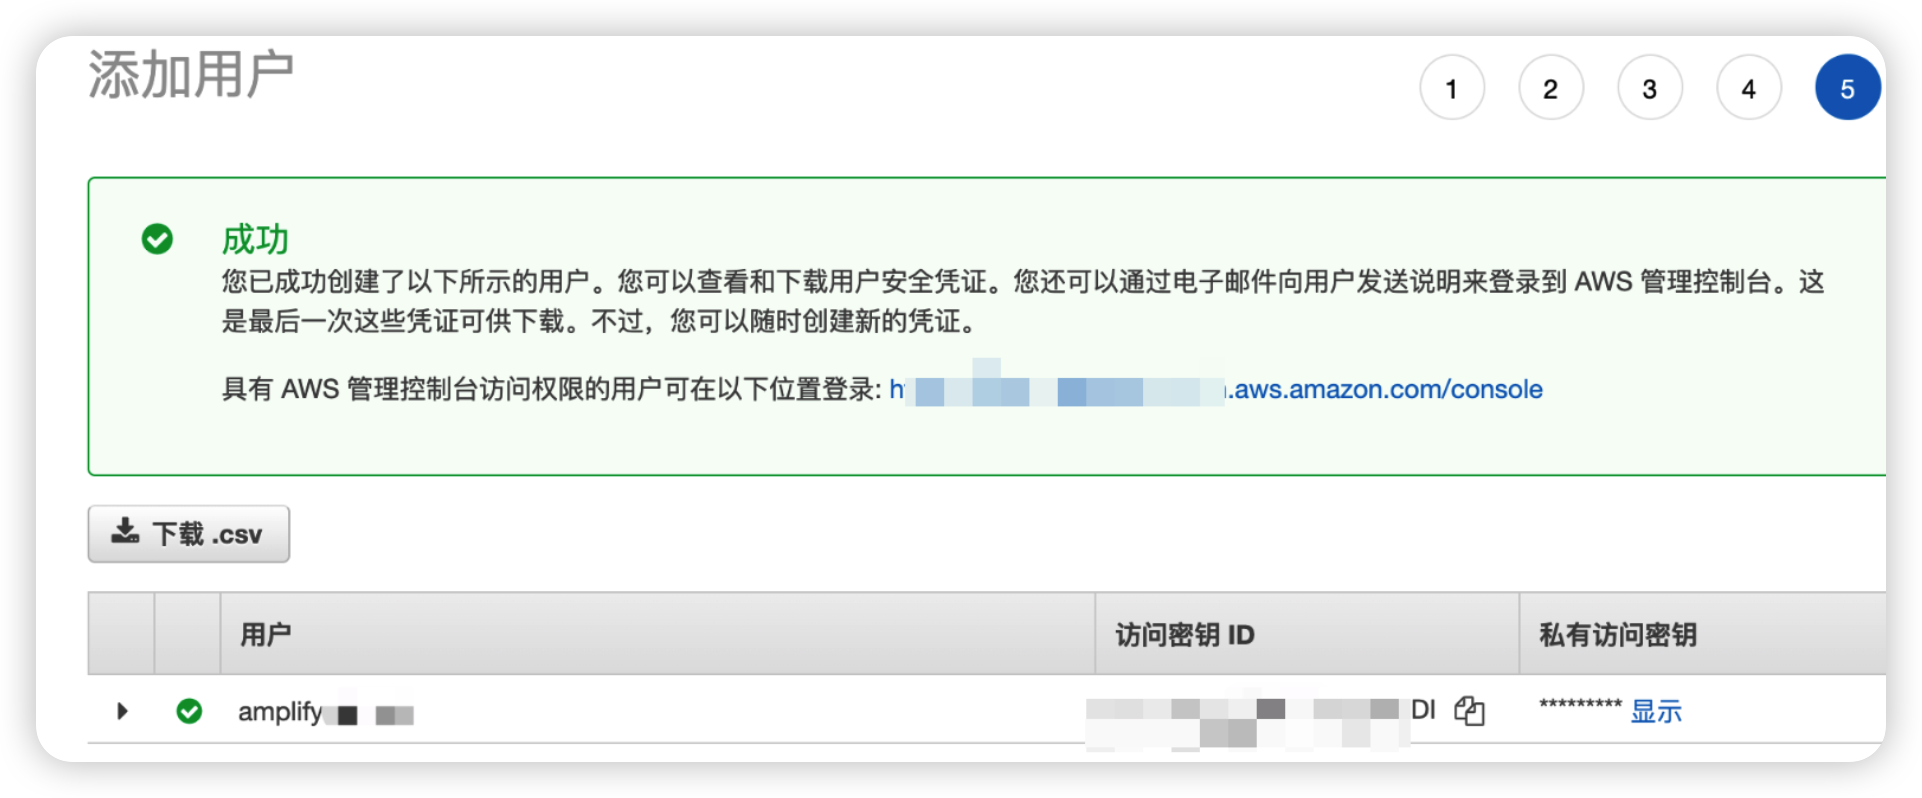
到此,我们也就创建完成。接下来继续下面的步骤。
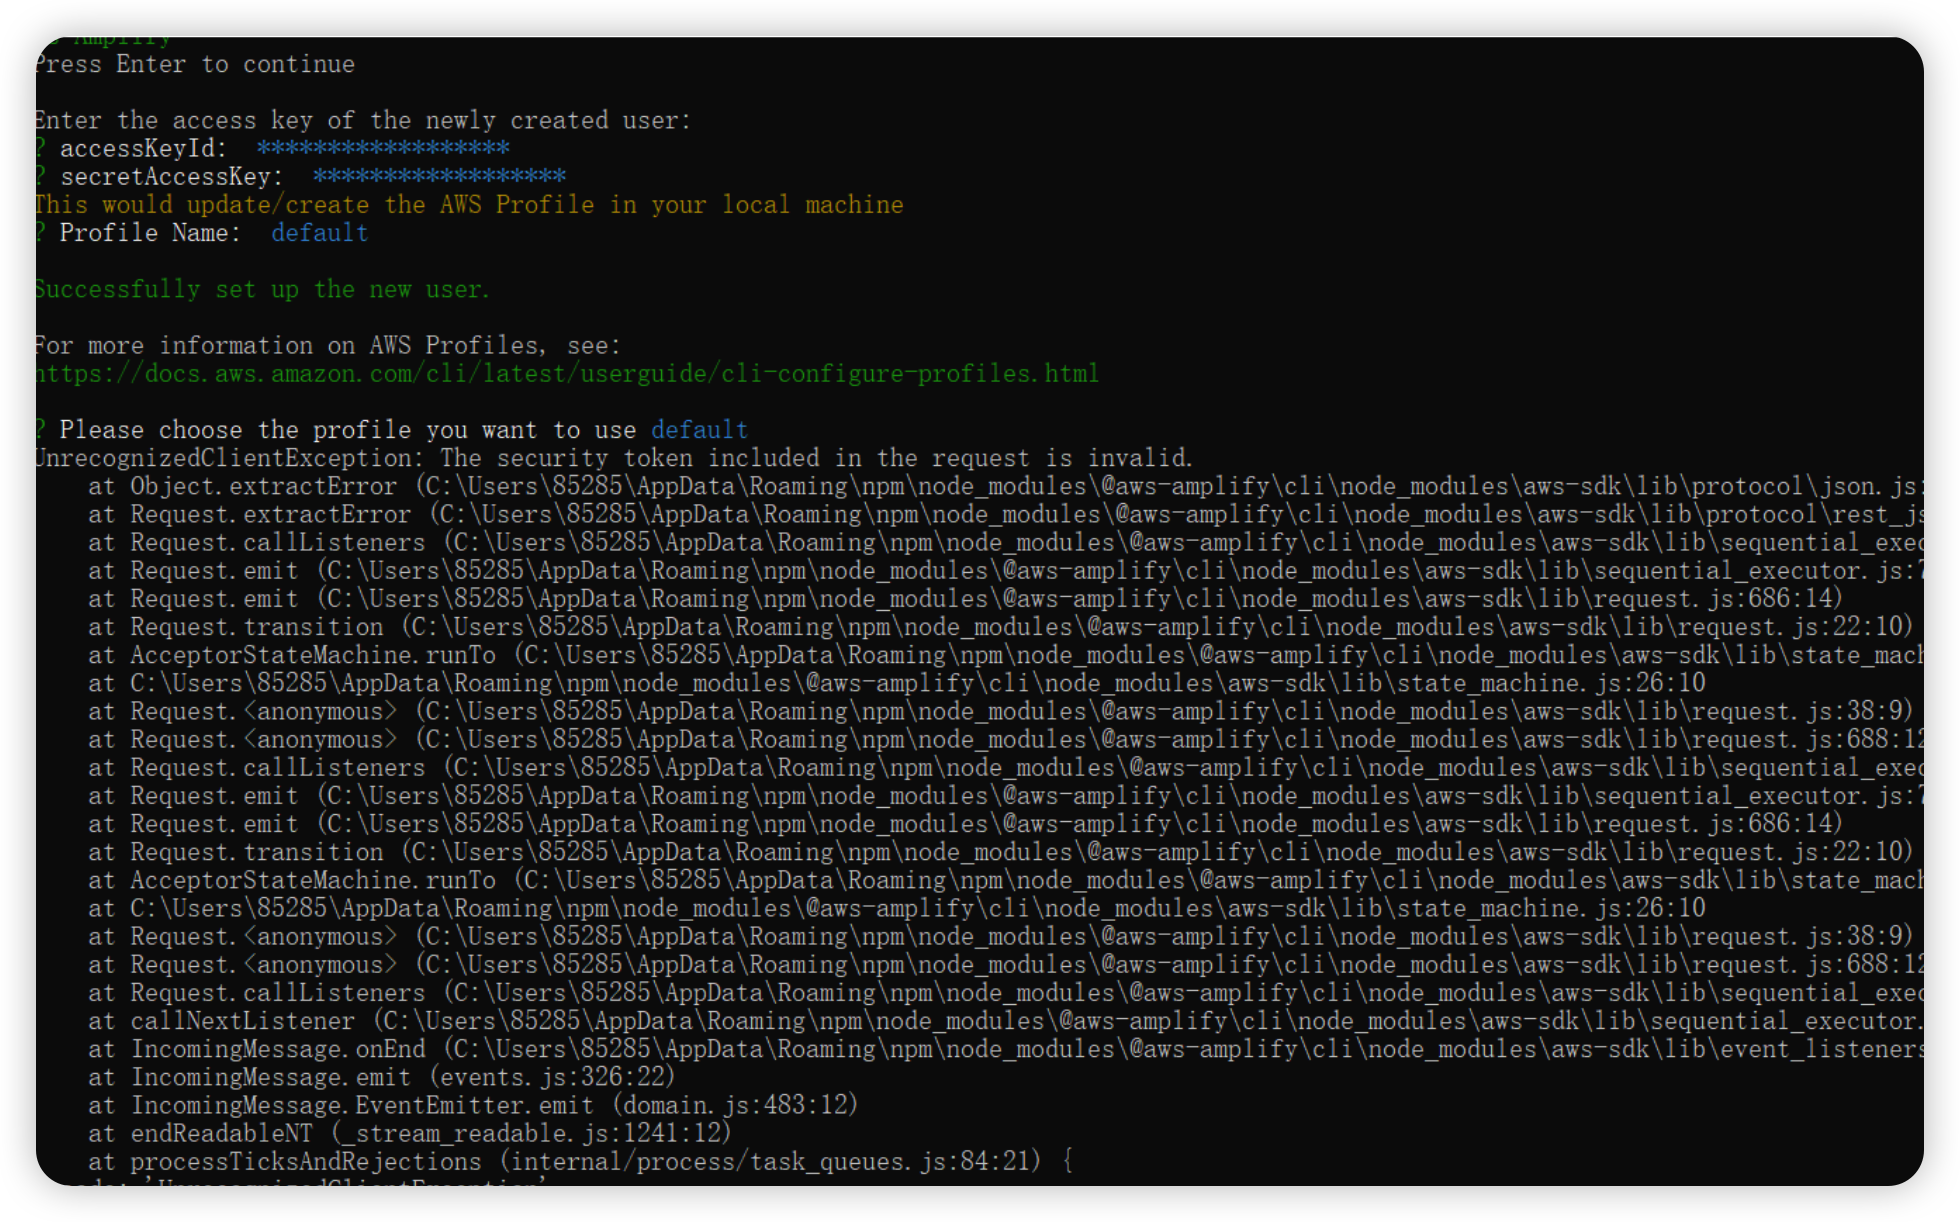
初始化 Amplify 项目结构和配置文件。运行以下命令:
amplify init
? Enter a name for your project (androidgettingstarted): accept the default, press enter


? Enter a name for the environment (dev): accept the default, press enter


? Choose your default editor: use the arrow key to select your favorite text editor an press enter


? Choose the type of app that you're building: android is already selected, press enter


? Where is your Res directory: accept the default, press enter


? Do you want to use an AWS profile?, Y, press enter


? Please choose the profile you want to use: use the arrow keys to select your profile and press enter.
如果没有配置文件,可使用 Amazon CLI 键入命令 aws configure --profile 创建一个。
Amplify 在云中初始化您的项目,可能需要几分钟。几分钟后,您应该会看到如下消息:
2.2.4将Amplify库添加到项目中
Amplify for Android 是作为 Apache Maven 软件包分发的。在本部分中,您会将软件包和其他必需的指令添加到构建配置中。
返回 Android Studio,展开 Gradle Scripts 并打开 build.gradle (Project: Android_Getting_Started)。在 buildscript 和 allprojects 数据块的 repositories 数据块内添加行 mavenCentral()。
buildscript {


    ext.kotlin_version = "1.4.10"


    repositories {


        google()


        jcenter()


        // Add this line into `repositories` in `buildscript`


        mavenCentral()


    }


    dependencies {


        classpath "com.android.tools.build:gradle:4.0.1"


        classpath "org.jetbrains.kotlin:kotlin-gradle-plugin:$kotlin_version"


        // NOTE: Do not place your application dependencies here; they belong


        // in the individual module build.gradle files


    }


}


allprojects {


    repositories {


        google()


        jcenter()


        // Add this line into `repositories` in `buildscript`


        mavenCentral()


    }


}
在 Gradle Scripts 下,打开 build.gradle (Module:app),并在 implementations 数据块中添加 Amplify 框架核心依赖项。
dependencies {


    implementation fileTree(dir: "libs", include: ["*.jar"])


    implementation "org.jetbrains.kotlin:kotlin-stdlib:$kotlin_version"


    implementation 'androidx.core:core-ktx:1.3.2'


    implementation 'androidx.appcompat:appcompat:1.2.0'


    implementation 'com.google.android.material:material:1.2.1'


    implementation 'androidx.constraintlayout:constraintlayout:2.0.1'


    implementation 'androidx.navigation:navigation-fragment-ktx:2.3.0'


    implementation 'androidx.navigation:navigation-ui-ktx:2.3.0'


    testImplementation 'junit:junit:4.13'


    androidTestImplementation 'androidx.test.ext:junit:1.1.2'


    androidTestImplementation 'androidx.test.espresso:espresso-core:3.2.0'


    // Amplify core dependency


    implementation 'com.amplifyframework:core:1.4.0'


}
如果您使用 Java 或目标 Android SDK 21 或更早版本进行开发,请查看文档了解其他配置更改。
现在,运行 Gradle Sync。
过一会儿您将看到
BUILD SUCCESSFUL in 1s

2.2.5在运行时初始化Amplify
我们来创建一个后端类对代码进行分组,以便与后端交互。我使用单例设计模式,使其通过应用程序轻松可用,并确保 Amplify 库仅初始化一次。
类初始化程序负责初始化 Amplify 库。
在 java/com.example.androidgettingstarted 下创建一个新的 Kotlin 文件 Backend.kt,打开它并添加以下代码:
package com.example.androidgettingstarted


import android.content.Context


import android.util.Log


import com.amplifyframework.AmplifyException


import com.amplifyframework.core.Amplify


object Backend {


    private const val TAG = "Backend"


    fun initialize(applicationContext: Context) : Backend {


        try {


            Amplify.configure(applicationContext)


            Log.i(TAG, "Initialized Amplify")


        } catch (e: AmplifyException) {


            Log.e(TAG, "Could not initialize Amplify", e)


        }


        return this


    }


}
应用程序启动时,初始化单例 Backend 对象。
在 java/com.example.androidgettingstarted 下创建一个新的 Kotlin 文件 Application.kt,打开它并添加以下代码:
package com.example.androidgettingstarted


import android.app.Application


class AndroidGettingStartedApplication : Application() {


    override fun onCreate() {


        super.onCreate()


        // initialize Amplify when application is starting


        Backend.initialize(applicationContext)


    }


}
在“manifests”下,打开 AndroidManifest.xml,并将应用程序类的名称添加到 元素。
    <!-- add the android:name attribute to the application node  -->


    <application


        android:name="AndroidGettingStartedApplication"


        android:allowBackup="true"


        android:icon="@mipmap/ic_launcher"


        android:label="@string/app_name"


        android:roundIcon="@mipmap/ic_launcher_round"


        android:supportsRtl="true"


        android:theme="@style/Theme.GettingStartedAndroid">


...
打开此文件后,请添加一些在本教程的后续步骤中应用程序需要的权限:
    <!-- add these nodes between manifest and application  -->


    <uses-permission android:name="android.permission.INTERNET"/>


    <uses-permission android:name="android.permission.ACCESS_NETWORK_STATE"/>


    <uses-permission android:name="android.permission.READ_EXTERNAL_STORAGE"/>
2.2.6验证您的设置
要验证一切是否都按预期运行,请构建并运行项目。单击工具栏中的运行图标 ▶️,或按 ^ R。
要验证一切是否都按预期运行,请构建并运行项目。单击工具栏中的 运行 图标 ▶️ 或按 ^ R。

应该不会出现错误。
BUILD SUCCESSFUL in 6s
23 actionable tasks: 8 executed, 15 up-to-date
3.添加身份验证
在此单元中,您将使用 Amplify CLI 和库配置和添加身份验证到您的应用程序中。

3.1简介
您将添加的下一个功能是用户身份验证。在此单元中,您将了解如何使用 Amplify CLI 和库对用户进行身份验证,以利用托管用户身份提供商 Amazon Cognito。
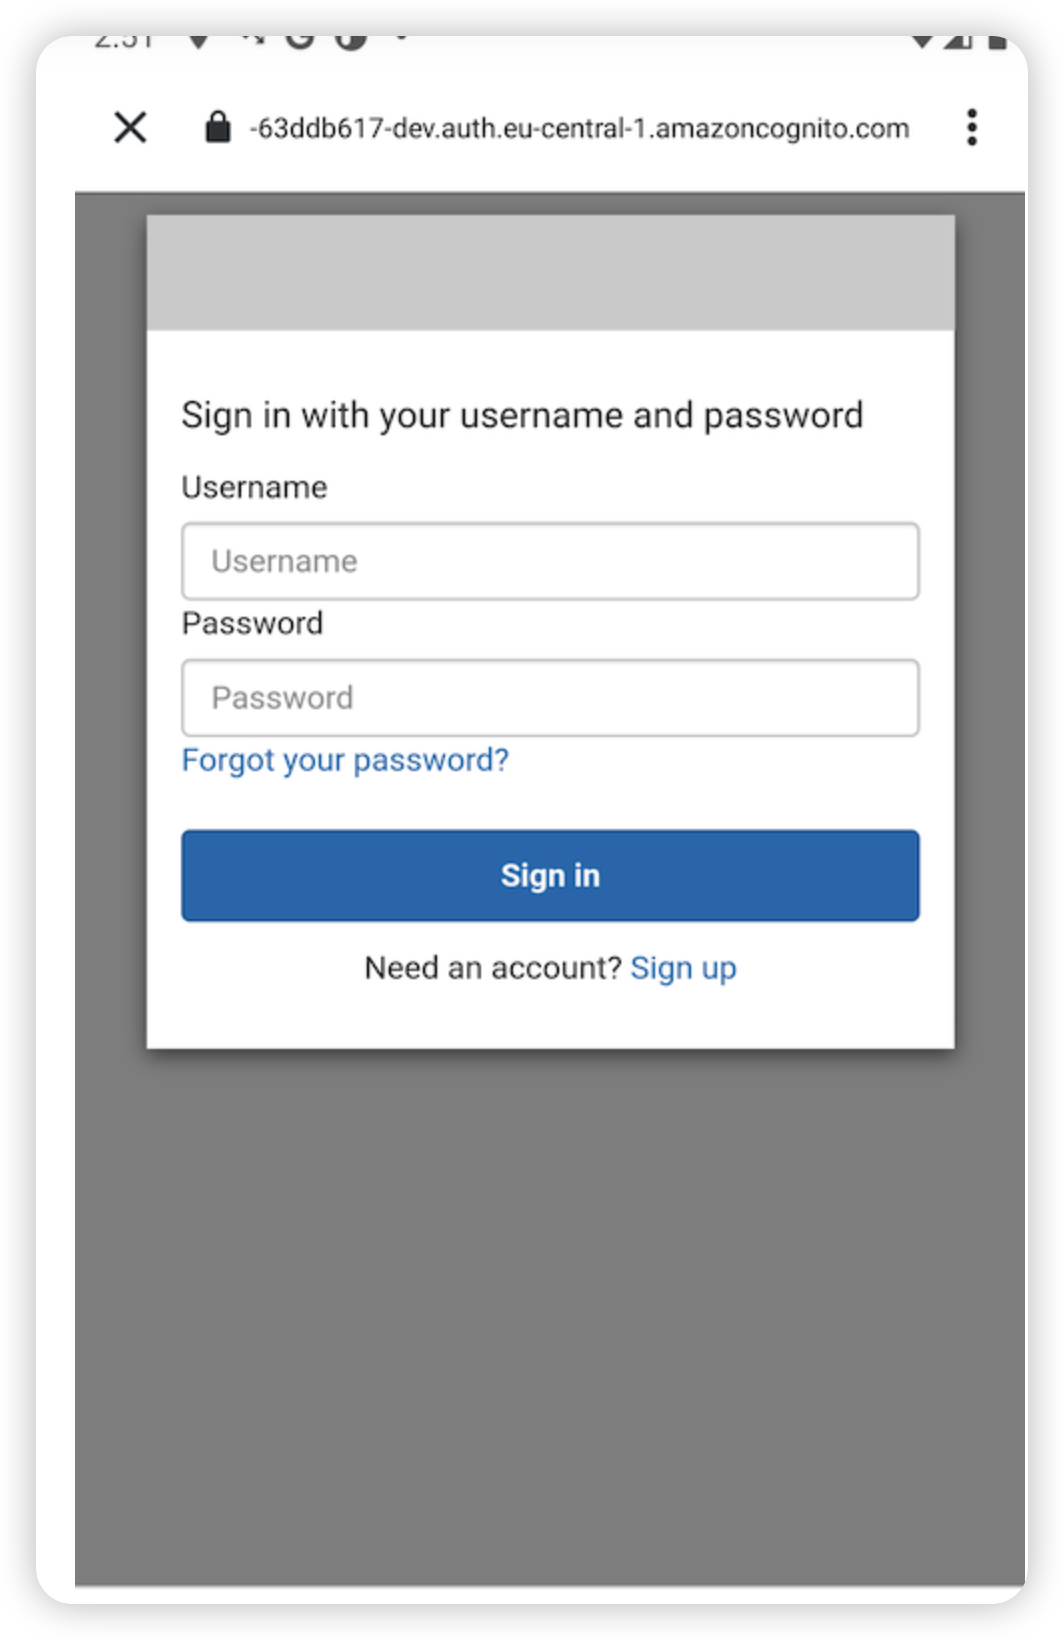
您还将了解如何使用 Cognito 托管用户界面展示整个用户身份验证流,从而使用户只需几行代码即可注册、登录和重置密码。
使用“托管用户界面”意味着应用程序利用 Cognito 网页登录和注册用户界面流。应用程序的用户将重定向到 Cognito 托管的网页,并在登录后重定向回应用程序。当然,Cognito 和 Amplify 也支持本机 UI。
3.2实施
3.2.1创建身份验证服务
要创建身份验证服务,请打开一个终端,然后执行以下命令:
amplify add auth
当您看到此消息时,即表示配置成功(资源的确切名称将有所不同):
Successfully added resource androidgettingstartedfc5a4717 locally
3.2.2部署身份验证服务
现在,已在本地配置身份验证服务,我们可以将它部署到云:在终端中,请在项目目录中执行以下命令:
amplify push
# press Y when asked to continue
片刻之后,您应看到以下消息:
✔ All resources are updated in the cloud


Hosted UI Endpoint: https://androidgettingstarted-dev.auth.eu-central-1.amazoncognito.com/


Test Your Hosted UI Endpoint: https://androidgettingstarted-dev.auth.eu-central-1.amazoncognito.com/login?respons
3.2.3向项目添加Amplify身份验证库
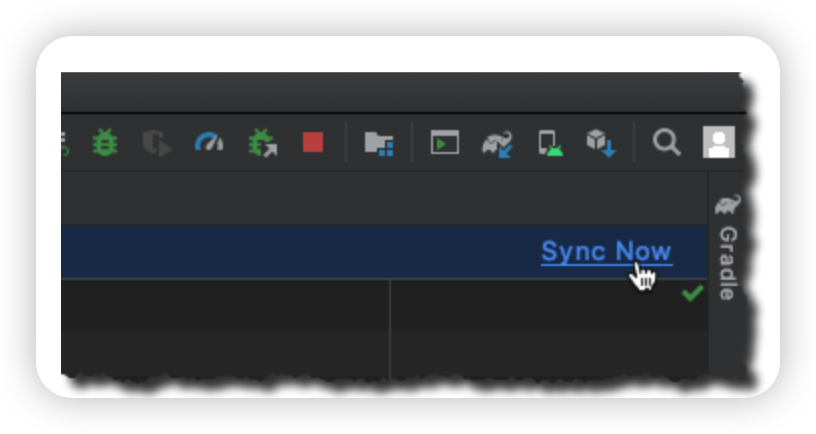
在转到代码之前,请先返回 Android Studio,将以下依赖项连同您之前添加的其他
amplifyframework 实现一起,添加到您的单元的
build.gradle,然后在看到提示时,单击 Sync Now:
dependencies {


    ...


    // Amplify core dependency


    implementation 'com.amplifyframework:core:1.4.0'


    implementation 'com.amplifyframework:aws-auth-cognito:1.4.0'


}
3.2.4在运行时配置Amplify身份验证库
返回 Android Studio,打开 Backend.kt 文件。在后端类中,向我们在上一部分(在 initialize() 方法中)添加的 Amplify 初始化代码添加一行。
完整代码块应如下所示:
// inside Backend class


fun initialize(applicationContext: Context) : Backend {


    try {


        Amplify.addPlugin(AWSCognitoAuthPlugin())


        Amplify.configure(applicationContext)


        Log.i(TAG, "Initialized Amplify")


    } catch (e: AmplifyException) {


        Log.e(TAG, "Could not initialize Amplify", e)


    }


    return this


}
请不要忘记添加导入语句,Android Studio 会自动为您完成此操作(在 Mac 上,在代码编辑器检测到的每个错误上,同时按 Alt 和 Enter 键)。
像在上一步骤中那样,为每个缺少的类定义添加所需的导入语句(在红色单词上同时按 Alt 和 Enter 键)。
要验证一切是否都按预期运行,请构建项目。单击 Build 菜单,并选择 Make Project,或者,在 Mac 上按 ⌘F9。应该不会出现错误。
3.2.5在运行时触发身份验证
其余代码更改会跟踪用户的状态(他们是否已登录?)并在用户单击锁定图标时触发“SignIn/SignUp”用户界面。
a.添加 signIn 和 signOut 方法
在后端类中的任意位置,添加以下四种方法:
private fun updateUserData(withSignedInStatus : Boolean) {


    UserData.setSignedIn(withSignedInStatus)


}


fun signOut() {


    Log.i(TAG, "Initiate Signout Sequence")


    Amplify.Auth.signOut(


        { Log.i(TAG, "Signed out!") },


        { error -> Log.e(TAG, error.toString()) }


    )


}


fun signIn(callingActivity: Activity) {


    Log.i(TAG, "Initiate Signin Sequence")


    Amplify.Auth.signInWithWebUI(


        callingActivity,


        { result: AuthSignInResult ->  Log.i(TAG, result.toString()) },


        { error: AuthException -> Log.e(TAG, error.toString()) }


    )


}
然后为每个缺少的类定义添加所需的导入语句(在红色单词上按 Alt 和 Enter 键)。当您可以在多个类之间进行选择时,请务必从 Amplify 包中选择一个,如下面的屏幕截图所示。
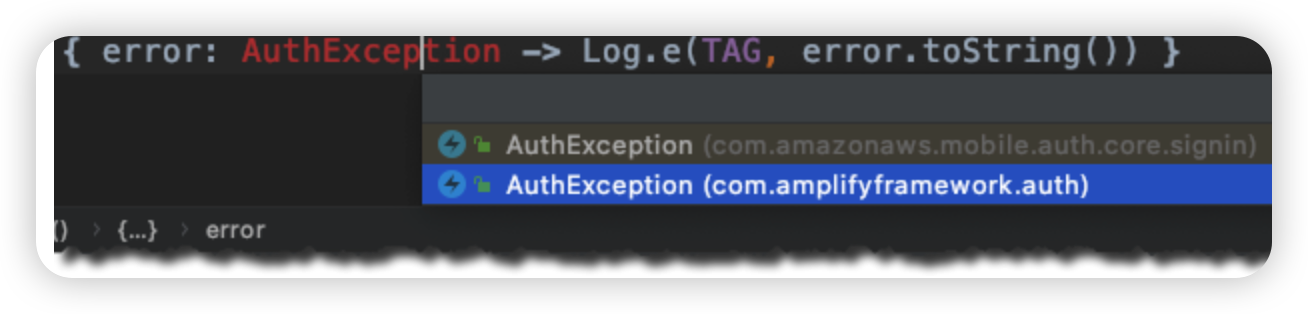
请注意,我们没有在这些方法中更新 UserData.isSignedIn 标记,该操作将在下一节中完成。
b.添加身份验证中心侦听器
为了跟踪身份验证状态的变化,我们添加了代码以订阅由 Amplify 发送的身份验证事件。我们在 Backend.initialize() 方法中初始化该中心。
在收到身份验证事件时,我们将调用 updateUserData() 方法。此方法可使 UserData 对象保持同步。UserData.isSignedIn 属性是 LiveData,这意味着当值更改时,订阅此属性的观察者将收到通知。我们使用此机制来自动刷新用户界面。
我们还添加了代码以在应用程序启动时检查以前的身份验证状态。当应用程序启动时,它会检查 Cognito 会话是否已存在,并相应地更新 UserData。
在 Backend.initialize() 中,在 try/catch 块之后和 return 语句之前添加以下代码。
// in Backend.initialize() function, after the try/catch block but before the return statement


Log.i(TAG, "registering hub event")


// listen to auth event


Amplify.Hub.subscribe(HubChannel.AUTH) { hubEvent: HubEvent<*> ->


    when (hubEvent.name) {


        InitializationStatus.SUCCEEDED.toString() -> {


            Log.i(TAG, "Amplify successfully initialized")


        }


        InitializationStatus.FAILED.toString() -> {


            Log.i(TAG, "Amplify initialization failed")


        }


        else -> {


            when (AuthChannelEventName.valueOf(hubEvent.name)) {


                AuthChannelEventName.SIGNED_IN -> {


                    updateUserData(true)


                    Log.i(TAG, "HUB : SIGNED_IN")


                }


                AuthChannelEventName.SIGNED_OUT -> {


                    updateUserData(false)


                    Log.i(TAG, "HUB : SIGNED_OUT")


                }


                else -> Log.i(TAG, """HUB EVENT:${hubEvent.name}""")


            }


        }


    }


}


Log.i(TAG, "retrieving session status")


// is user already authenticated (from a previous execution) ?


Amplify.Auth.fetchAuthSession(


    { result ->


        Log.i(TAG, result.toString())


        val cognitoAuthSession = result as AWSCognitoAuthSession


        // update UI


        this.updateUserData(cognitoAuthSession.isSignedIn)


        when (cognitoAuthSession.identityId.type) {


            AuthSessionResult.Type.SUCCESS ->  Log.i(TAG, "IdentityId: " + cognitoAuthSession.identityId.value)


            AuthSessionResult.Type.FAILURE -> Log.i(TAG, "IdentityId not present because: " + cognitoAuthSession.identityId.error.toString())


        }


    },


    { error -> Log.i(TAG, error.toString()) }


)
要验证一切是否都按预期运行,请构建项目。单击 Build菜单,并选择 Make Project,或者,在 Mac 上按 ⌘F9。应该不会出现错误。
c.更新用户界面代码
代码中的最后一个更改与用户界面相关,我们将 FloatingActionButton 添加到主要活动中。
在“res/layout”下,打开 activity_main.xml,并将现有的 FloatingActionButton 替换为以下内容:
<com.google.android.material.floatingactionbutton.FloatingActionButton


    android:id="@+id/fabAuth"


    android:layout_width="wrap_content"


    android:layout_height="wrap_content"


    android:layout_alignParentRight="true"


    android:layout_gravity="bottom|end"


    android:layout_margin="@dimen/fab_margin"


    android:src="@drawable/ic_baseline_lock"


    app:fabCustomSize="60dp"


    app:fabSize="auto"


    />
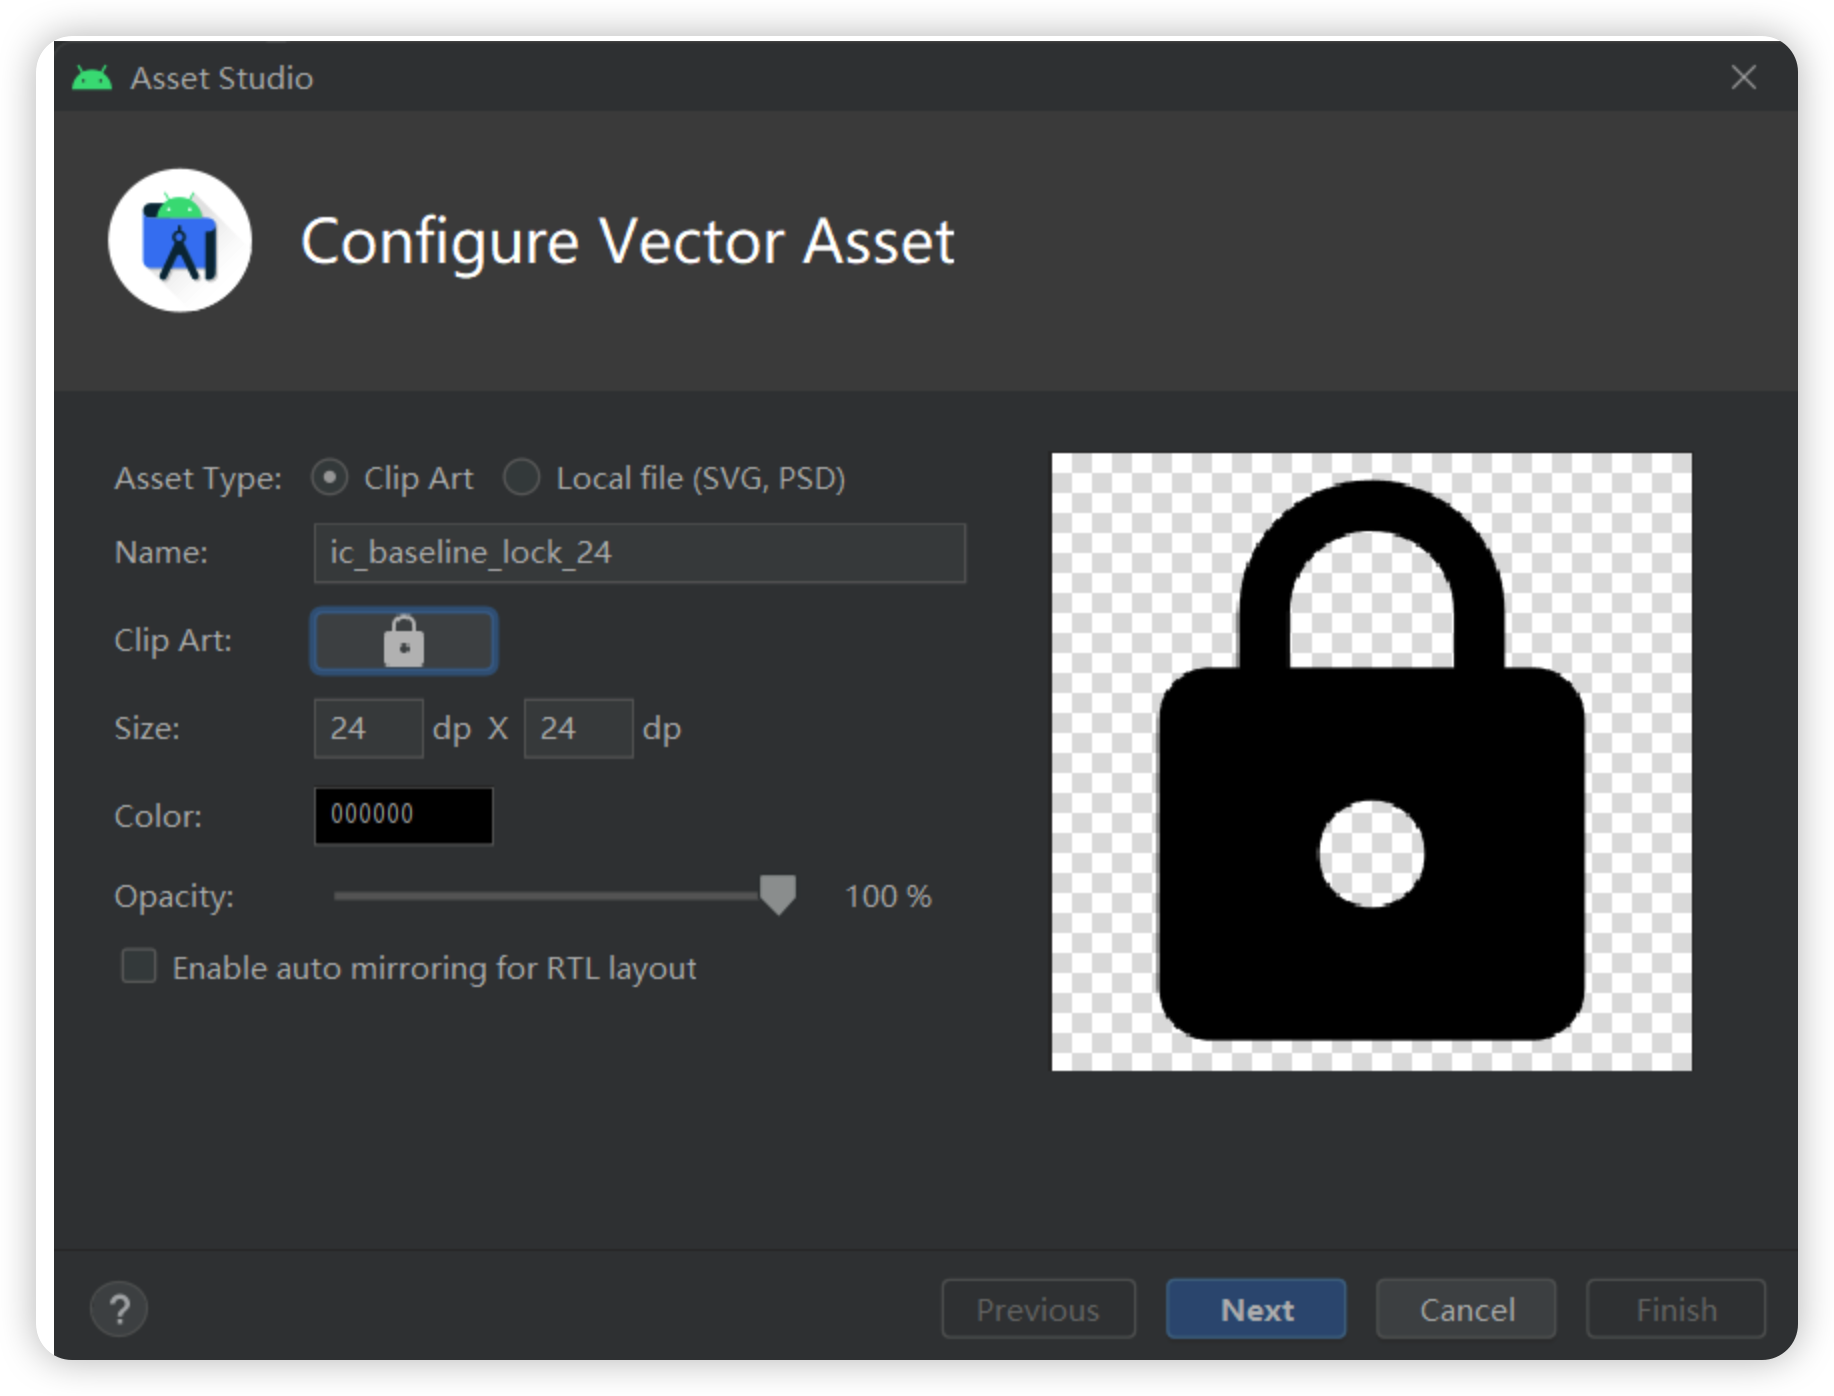
在“res/drawable”下添加一个锁状图标。右键单击“drawable”,选择 New,然后选择 Vector Asset。从 Clilp Art 中选择锁状图标,然后输入 ic_baseline_lock(不含 _24)作为名称,并从 Clip Art 中选择闭合的锁状图标。单击 Next,然后单击 Finish。
对打开的锁状图标重复相同的操作。
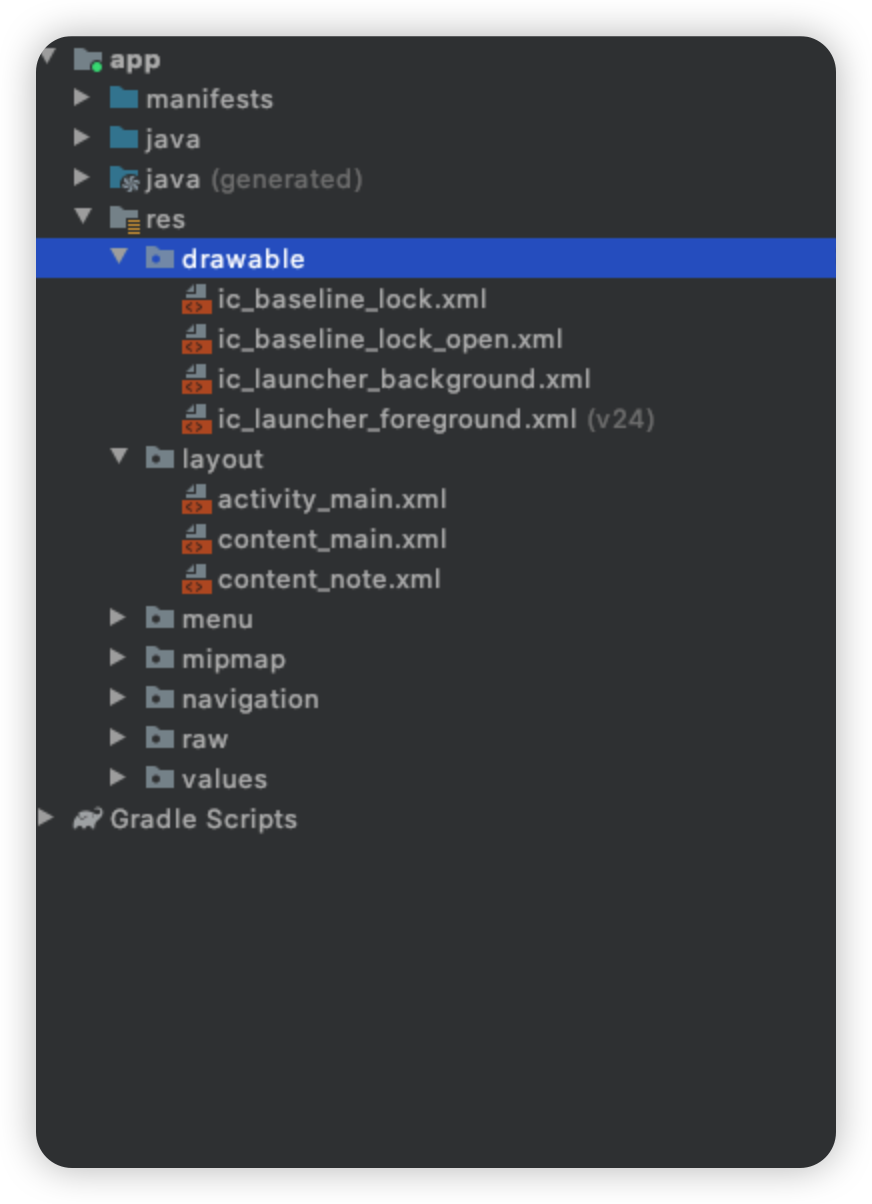
执行完以上操作后,您的“drawable”目录下应具有以下文件:
现在,在代码中链接新创建的按钮。在 java/com.example.androidgettingstarted/ 下,打开 MainActivity.kt 并添加以下代码。
// anywhere in the MainActivity class


private fun setupAuthButton(userData: UserData) {


    // register a click listener


    fabAuth.setOnClickListener { view ->


        val authButton = view as FloatingActionButton


        if (userData.isSignedIn.value!!) {


            authButton.setImageResource(R.drawable.ic_baseline_lock_open)


            Backend.signOut()


        } else {


            authButton.setImageResource(R.drawable.ic_baseline_lock_open)


            Backend.signIn(this)


        }


    }


}
还是在 MainActivity 中,在 onCreate() 方法的末尾添加以下代码:
setupAuthButton(UserData)


UserData.isSignedIn.observe(this, Observer<Boolean> { isSignedUp ->


    // update UI


    Log.i(TAG, "isSignedIn changed : $isSignedUp")


    if (isSignedUp) {


        fabAuth.setImageResource(R.drawable.ic_baseline_lock_open)


    } else {


        fabAuth.setImageResource(R.drawable.ic_baseline_lock)


    }


})
以上代码会针对 Userdata.isSignedIn 值注册观察者。当 isSignedIn 值更改时调用闭包。现在,我们只是更改锁状图标:当用户通过身份验证时为打开的锁,当用户没有会话时为闭合的锁。
要验证一切是否都按预期运行,请构建项目。单击 Build 菜单,并选择 Make Project,或者,在 Mac 上按 ⌘F9。应该不会出现错误。
d.更新 AndroidManifest.xml 和 MainActivity
最后,我们必须确保在 Cognito 托管用户界面提供的 Web 身份验证序列结束时启动我们的应用程序。我们在清单文件中添加一个新的活动。当接收到 gettingstarted URI 方案时,将调用该活动。
在 Android Studio 中的“manifests”下,打开 AndroidManifest.xml,并在应用程序元素中添加以下活动。
    <activity


android:name="com.amazonaws.mobileconnectors.cognitoauth.activities.CustomTabsRedirectActivity">


        <intent-filter>


            <action android:name="android.intent.action.VIEW" />


            <category android:name="android.intent.category.DEFAULT" />


            <category android:name="android.intent.category.BROWSABLE" />


            <data android:scheme="gettingstarted" />


        </intent-filter>


    </activity>
在 java/com.example.androidgettingstarted/ 下,打开 MainActivity.kt 并在类中的任意位置添加以下代码。
// MainActivity.kt


// receive the web redirect after authentication


override fun onActivityResult(requestCode: Int, resultCode: Int, data: Intent?) {


    super.onActivityResult(requestCode, resultCode, data)


    Backend.handleWebUISignInResponse(requestCode, resultCode, data)


}

在 java/com.example.androidgettingstarted/ 下,打开 Backend.kt 并在类中的任意位置添加以下代码。


// Backend.kt


// pass the data from web redirect to Amplify libs


fun handleWebUISignInResponse(requestCode: Int, resultCode: Int, data: Intent?) {


    Log.d(TAG, "received requestCode : $requestCode and resultCode : $resultCode")


    if (requestCode == AWSCognitoAuthPlugin.WEB_UI_SIGN_IN_ACTIVITY_CODE) {


        Amplify.Auth.handleWebUISignInResponse(data)


    }


}
e.构建和测试
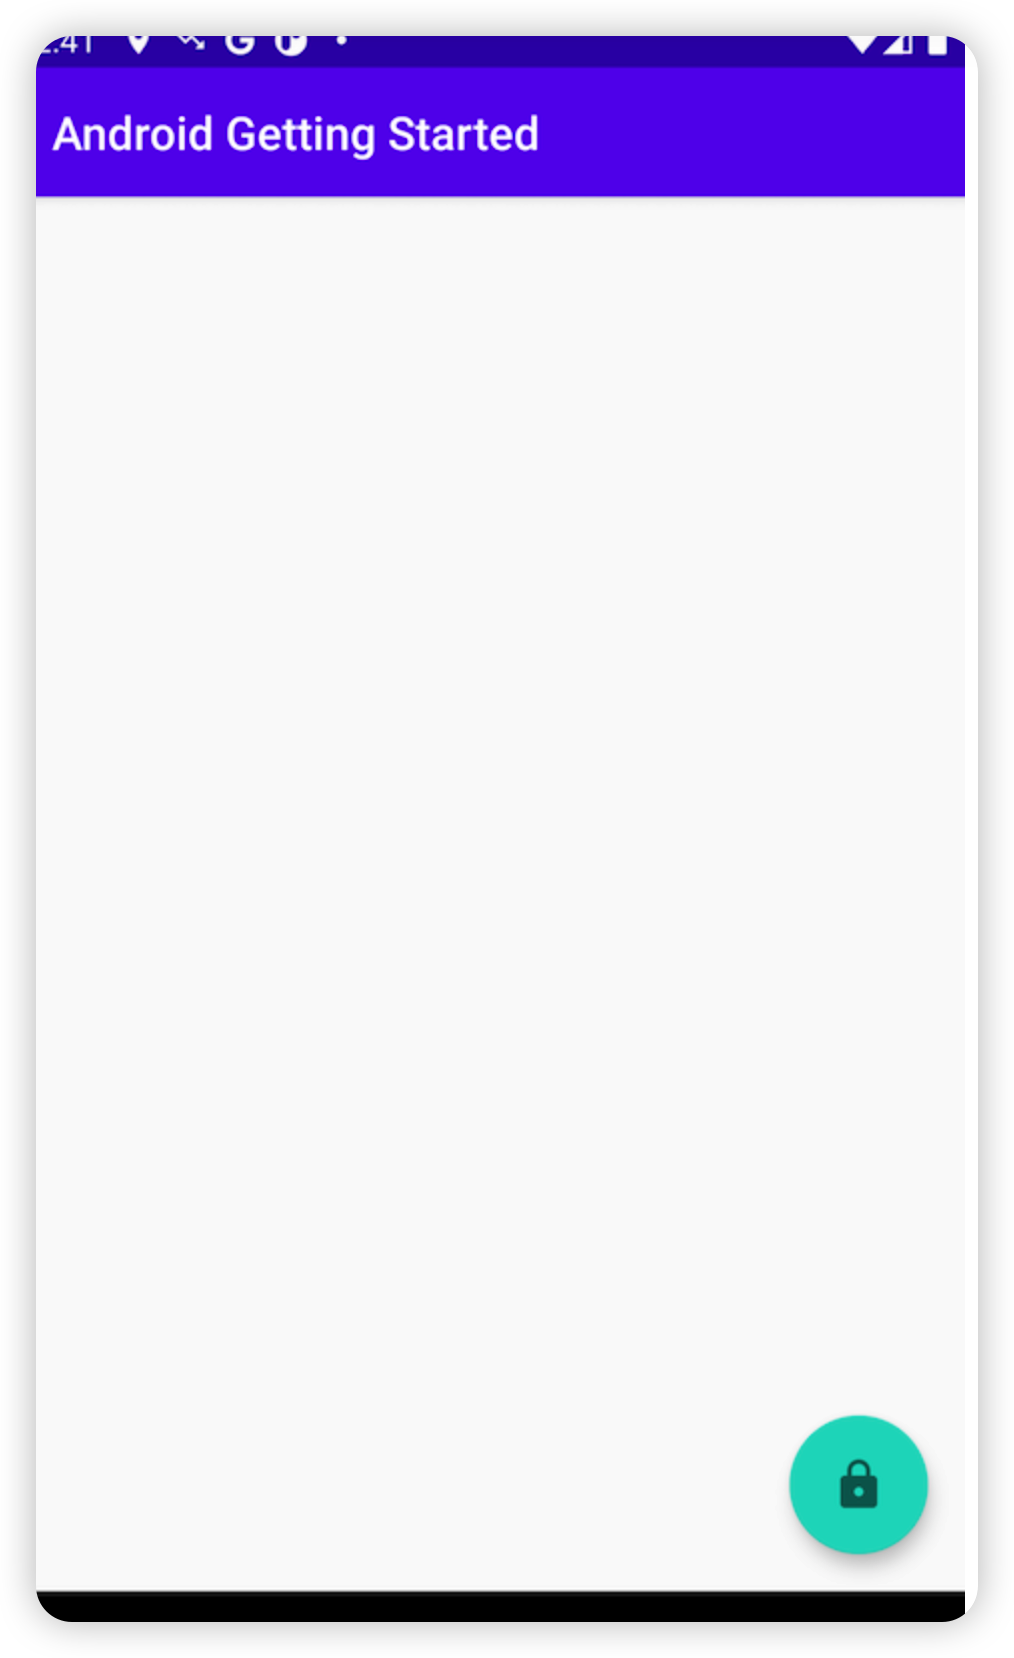
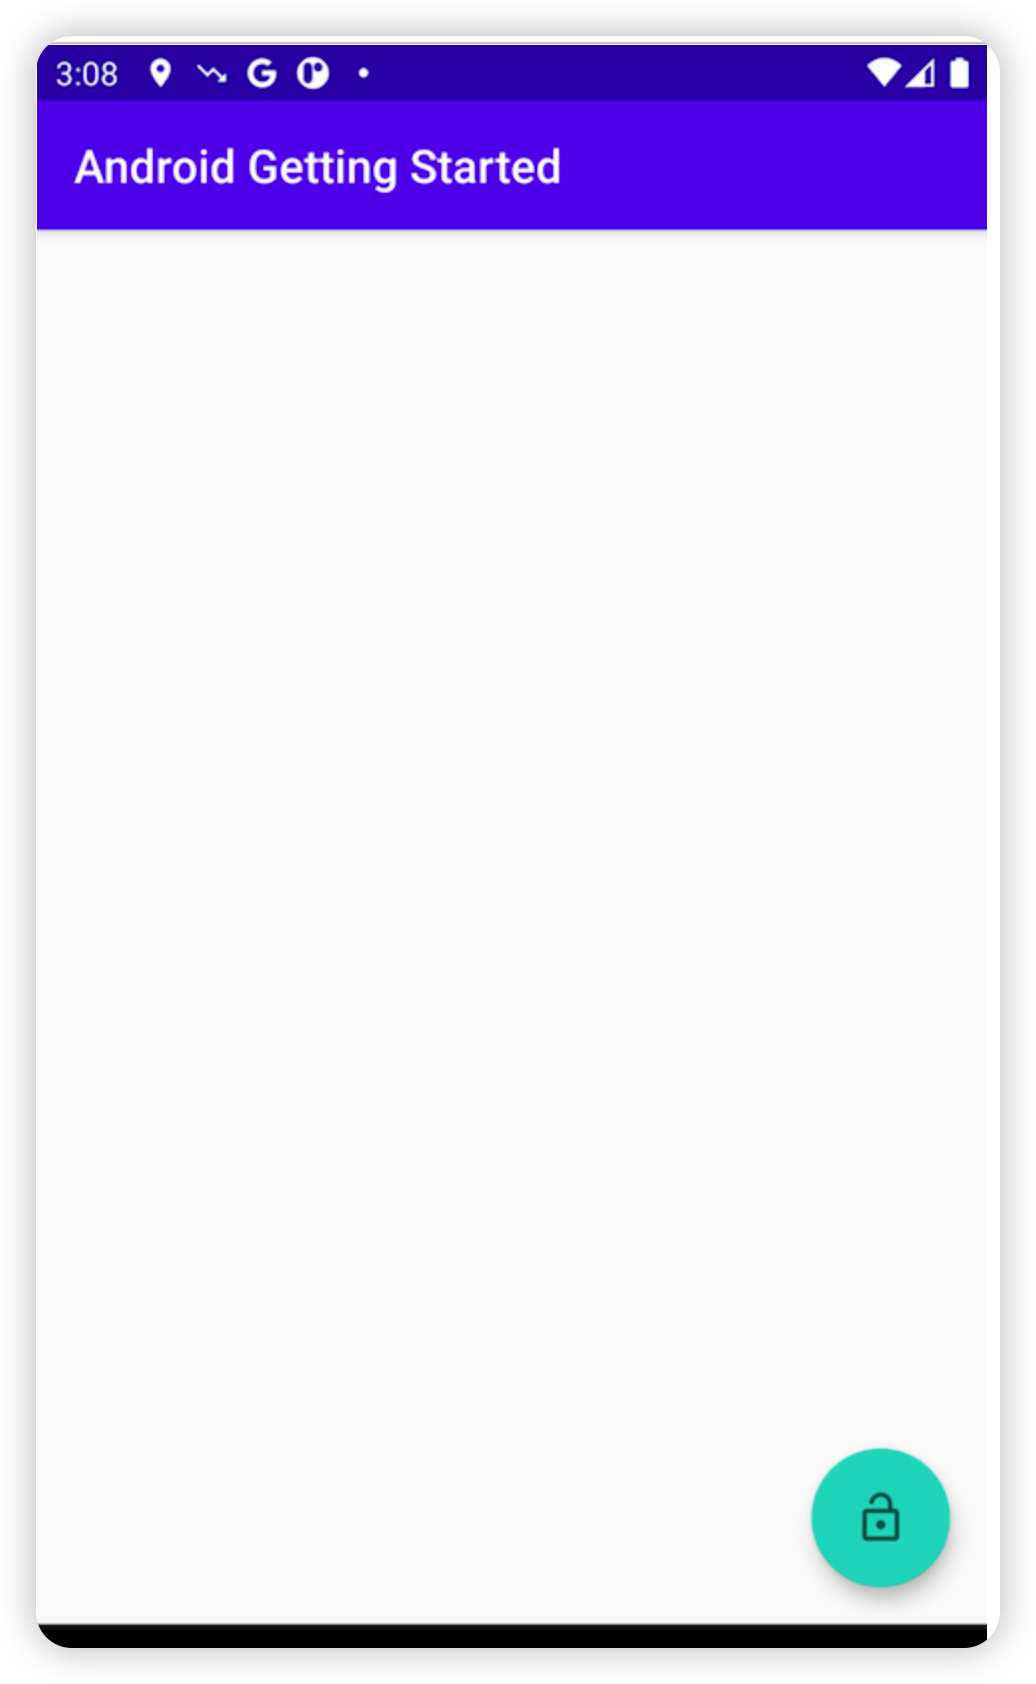
要验证一切是否都按预期运行,请构建并运行项目。单击工具栏中的运行图标 ▶️,或按 ^ R。应该不会出现错误。应用程序将启动,且屏幕右下角会显示一个闭合的锁状浮动按钮。
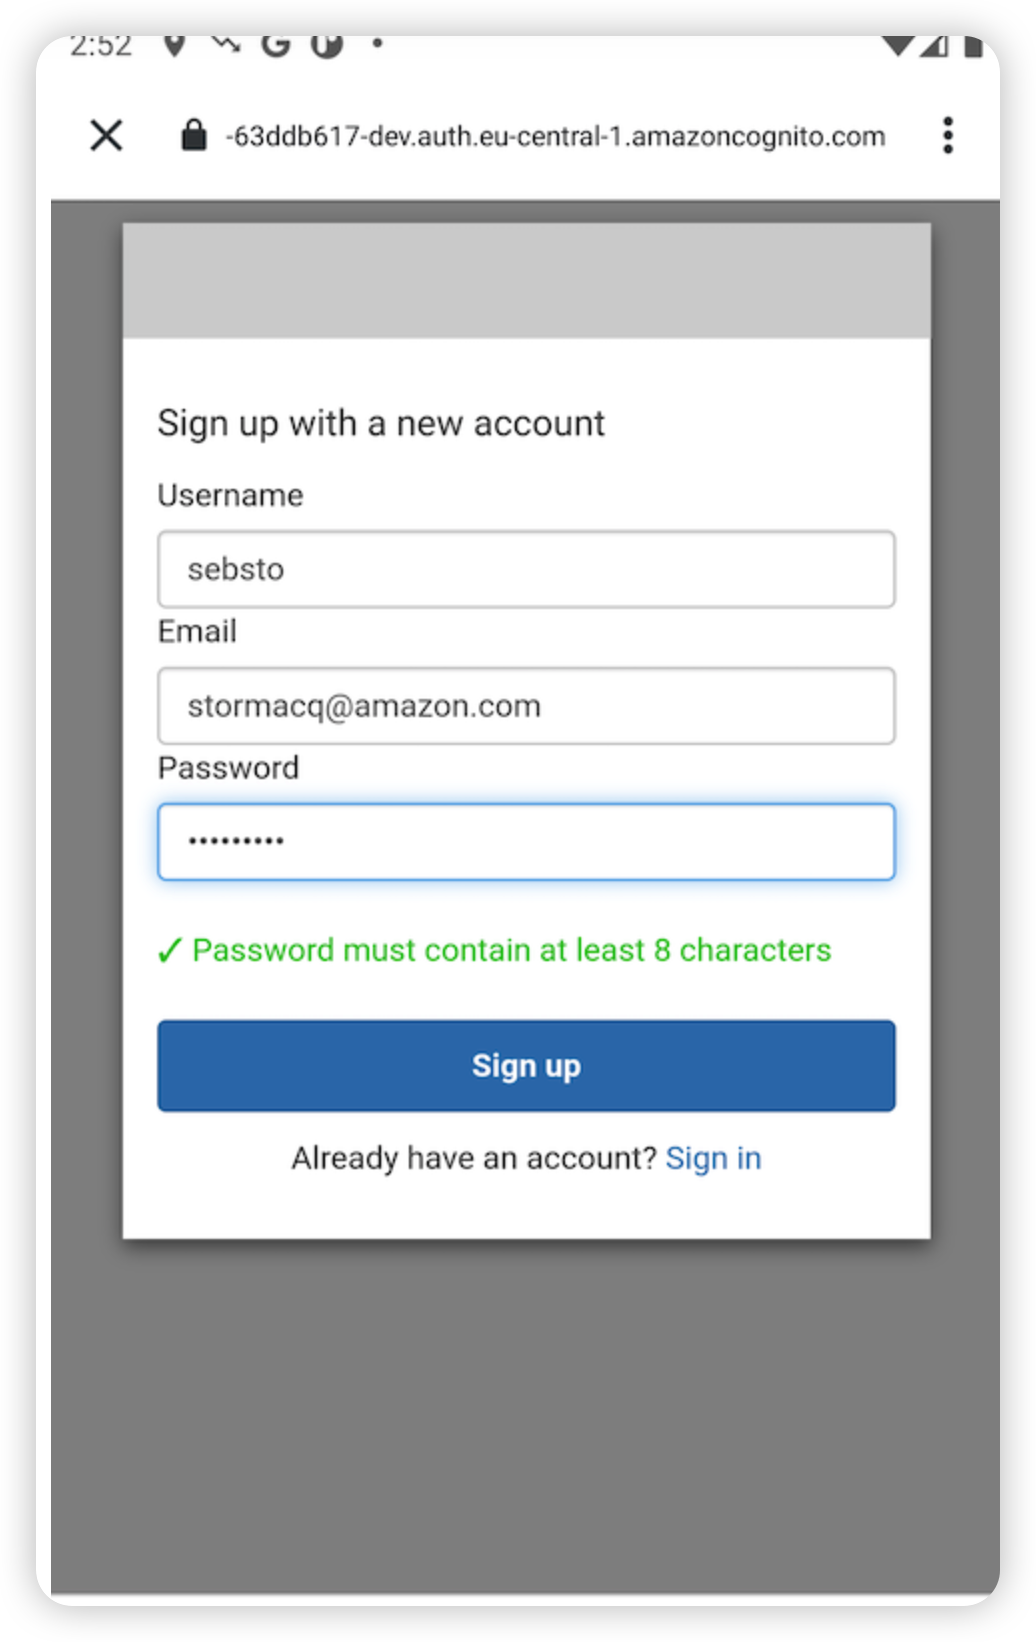
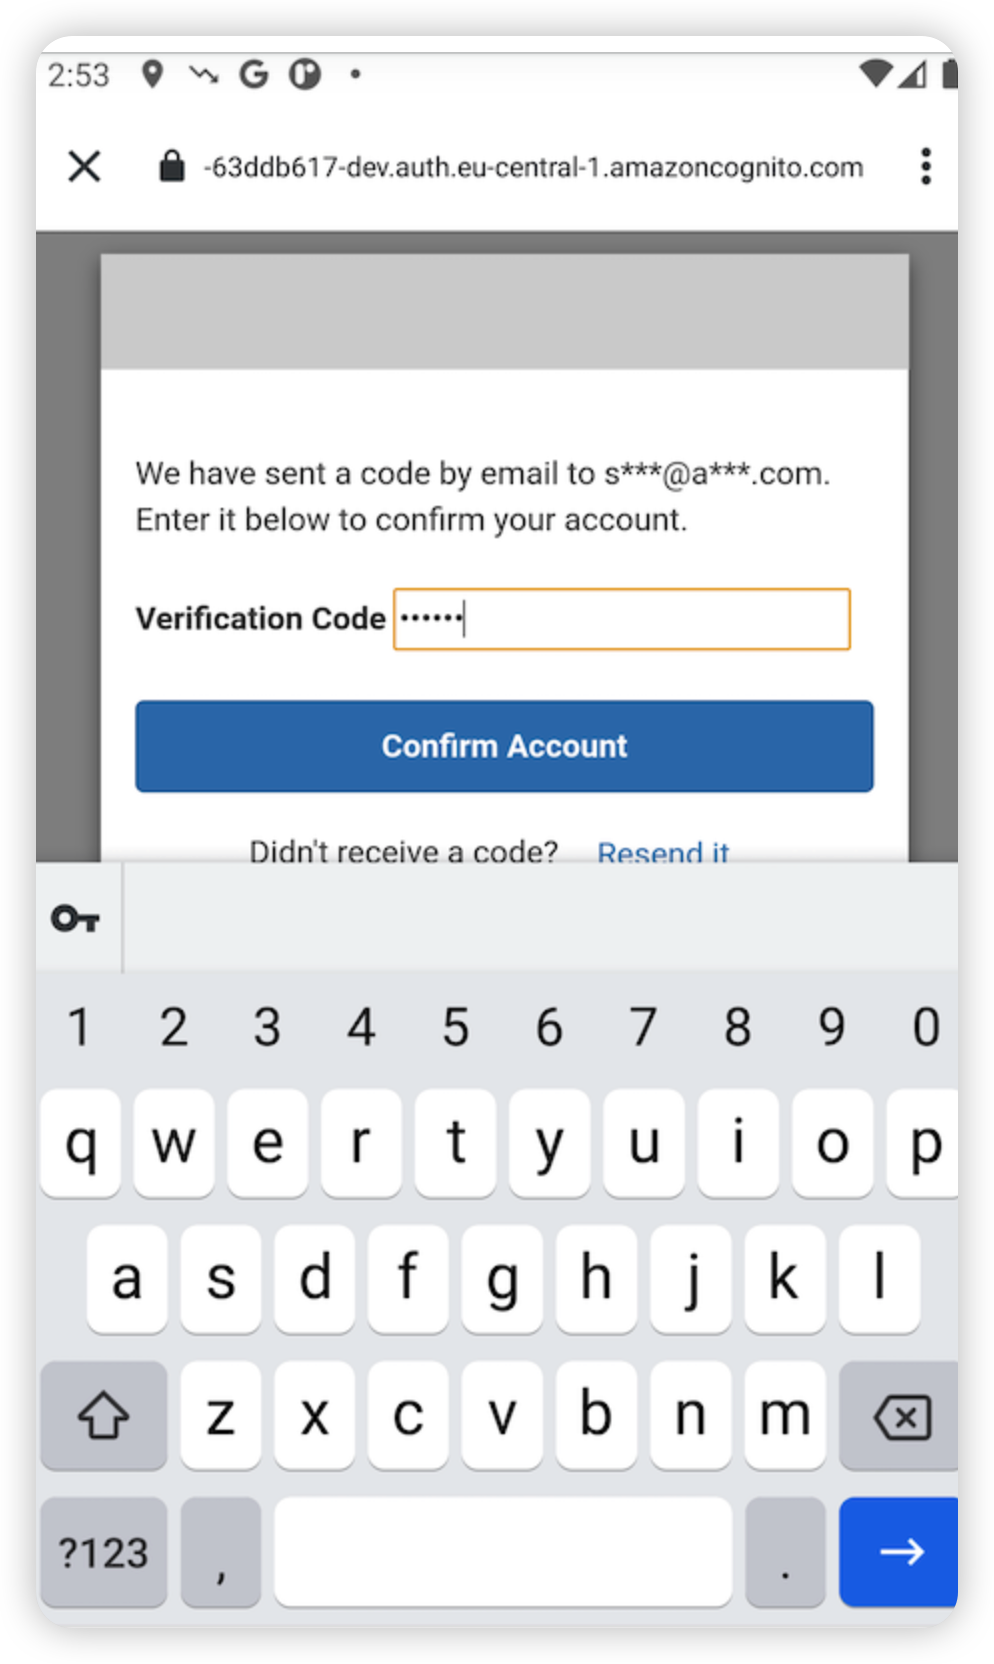
以下是完整的注册流程。
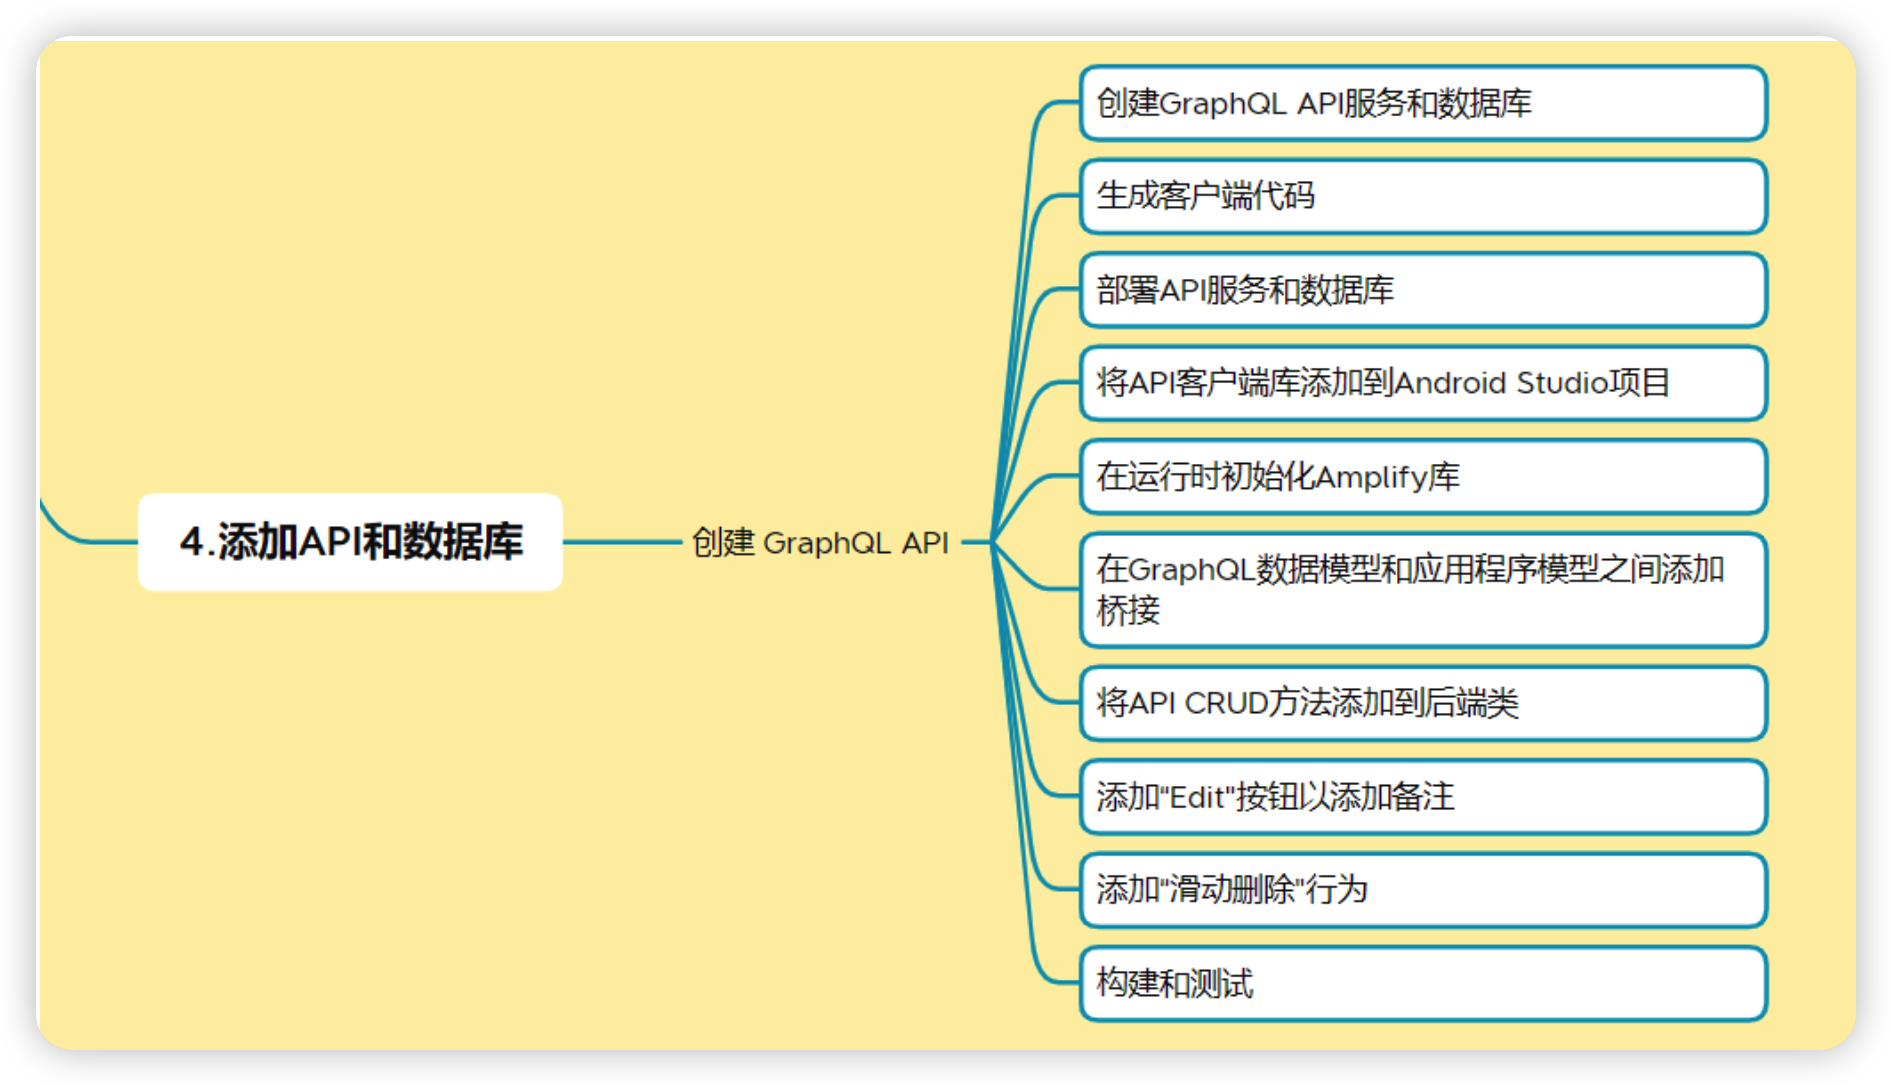
4.添加 GraphQL API 和数据库
在此单元中,您将使用 Amplify CLI 和库配置和添加 GraphQL API 到您的应用程序中。
4.1简介
现在,我们已经创建并配置了带用户身份验证功能的应用程序。接下来,我们要在数据库中添加 API 以及“创建”、“读取”、“更新”、“删除”(CRUD) 操作。
在此单元中,您将使用 Amplify CLI 和库将 API 添加到您的应用程序中。您将创建的 API 是 GraphQL API,它利用 Amazon DynamoDB(NoSQL 数据库)支持的 Amazon AppSync(托管 GraphQL 服务)。有关 GraphQL 的介绍,请访问此页面。
您将构建的应用程序是备注记录应用程序,用户可使用它创建、删除和列出备注。本示例将让您了解如何构建很多常见类型的 CRUD+L(创建、读取、更新、删除和列出)应用程序。
4.2实施
4.2.1创建GraphQL API服务和数据库
要创建 GraphQL API 及其后备数据库,请打开一个终端,然后从项目目录中执行此命令:
amplify add api
初始化项目时选择的默认文本编辑器 (amplify init) 将使用预构建数据 schema 打开。
删除此 schema,并使用我们的应用程序 GraphQL schema 替换:
type NoteData


@model


@auth (rules: [ { allow: owner } ]) {


    id: ID!


    name: String!


    description: String


    image: String


}
数据模型由一个类 NoteData 和 4 个属性组成:ID 和名称是必填项,描述和图像是选填字符串。
@model 转换器指示我们需要创建数据库来存储数据。
@auth 转换器添加了身份验证规则,以允许访问此数据。对于此项目,我们希望仅 NoteData 的拥有者有访问它们的权限。
完成后,请不要忘记保存,然后返回您的终端以告知 Amplify CLI 您已完成。
? Press enter to continue, press enter.
几秒钟后,您应该会看到一条成功消息:
GraphQL schema compiled successfully.
4.2.2生成客户端代码
根据我们刚刚创建的 GraphQL 数据模型定义,Amplify 会生成客户端代码(即 Swift 代码)以代表我们应用程序中的数据。
要生成代码,请在终端执行以下命令:
amplify codegen models
这将在 java/com/amplifyframework.datastore.generated.model 目录中创建 Java 文件,如以下情况所示:
➜  Android Getting Started git:(master) ✗ ls -al app/src/main/java/com/amplifyframework/datastore/generated/model


total 24


drwxr-xr-x  4 stormacq  admin   128 Oct  7 15:27 .


drwxr-xr-x  3 stormacq  admin    96 Oct  7 15:27 ..


-rw-r--r--  1 stormacq  admin  1412 Oct  7 15:27 AmplifyModelProvider.java


-rw-r--r--  1 stormacq  admin  7153 Oct  7 15:27 NoteData.java
这些文件会自动导入到您的项目中。
4.2.2部署API服务和数据库
要部署我们刚刚创建的后端 API 和数据库,请转至您的终端,然后执行命令:
amplify push


# press Y when asked to continue


? Are you sure you want to continue? accept the default Y and press enter


? Do you want to generate code for your newly created GraphQL API type N and press enter
几分钟后,您应该会看到一条成功消息:
✔ All resources are updated in the cloud
GraphQL endpoint: https://yourid.appsync-api.eu-central-1.amazonaws.com/graphql
4.2.4将API客户端库添加到Android Studio项目
在转到此代码之前,请先返回 Android Studio,将以下依赖关系连同您之前添加的其他“amplifyframework”实现一起添加到您的单元的 build.gradle,然后在看到提示时单击 Sync Now。
dependencies {


    implementation 'com.amplifyframework:aws-api:1.4.0'


    implementation 'com.amplifyframework:aws-auth-cognito:1.4.0'


}
4.2.5在运行时初始化Amplify库
打开 Backend.kt,然后在 initialize() 方法的 Amplify 初始化序列中添加一行。完整的尝试/捕获代码块应如下所示:
try {


    Amplify.addPlugin(AWSCognitoAuthPlugin())


    Amplify.addPlugin(AWSApiPlugin())


    Amplify.configure(applicationContext)


    Log.i(TAG, "Initialized Amplify")


} catch (e: AmplifyException) {


    Log.e(TAG, "Could not initialize Amplify", e)


}
4.2.6在GraphQL数据模型和应用程序模型之间添加桥接
我们的项目已经有一个数据模型来表示备注。在此教程中,我们将继续使用该模型,并提供一种将 NoteData 转换为备注的简单方法。打开 UserData.kt 并添加两个组件:一个动态属性,从 UserData.Note 返回 NoteData 对象;一个相反静态方法,接收 API NoteData 并返回 Userdata.Note。
在数据类 Note 中,添加以下内容:
// return an API NoteData from this Note object


val data : NoteData


    get() = NoteData.builder()


            .name(this.name)


            .description(this.description)


            .image(this.imageName)


            .id(this.id)


            .build()


// static function to create a Note from a NoteData API object


companion object {


    fun from(noteData : NoteData) : Note {


        val result = Note(noteData.id, noteData.name, noteData.description, noteData.image)


        // some additional code will come here later


        return result


    }


}
确保通过生成的代码导入 NoteData 类。
4.2.7将API CRUD方法添加到后端类
我们添加 3 种方法来调用 API:一种查询 Note 的方法,一种创建新 Note 的方法,以及一种删除 Note 的方法。请注意,这些方法适用于应用程序数据模型 (Note),以便通过用户界面轻松交互。这些方法可以透明地将 Note 转换为 GraphQL 的 NoteData 对象。
打开 Backend.kt 文件,然后在后端类末尾添加以下代码段:
fun queryNotes() {


    Log.i(TAG, "Querying notes")


    Amplify.API.query(


        ModelQuery.list(NoteData::class.java),


        { response ->


            Log.i(TAG, "Queried")


            for (noteData in response.data) {


                Log.i(TAG, noteData.name)


                // TODO should add all the notes at once instead of one by one (each add triggers a UI refresh)


                UserData.addNote(UserData.Note.from(noteData))


            }


        },


        { error -> Log.e(TAG, "Query failure", error) }


    )


}


fun createNote(note : UserData.Note) {


    Log.i(TAG, "Creating notes")


    Amplify.API.mutate(


        ModelMutation.create(note.data),


        { response ->


            Log.i(TAG, "Created")


            if (response.hasErrors()) {


                Log.e(TAG, response.errors.first().message)


            } else {


                Log.i(TAG, "Created Note with id: " + response.data.id)


            }


        },


        { error -> Log.e(TAG, "Create failed", error) }


    )


}


fun deleteNote(note : UserData.Note?) {


    if (note == null) return


    Log.i(TAG, "Deleting note $note")


    Amplify.API.mutate(


        ModelMutation.delete(note.data),


        { response ->


            Log.i(TAG, "Deleted")


            if (response.hasErrors()) {


                Log.e(TAG, response.errors.first().message)


            } else {


                Log.i(TAG, "Deleted Note $response")


            }


        },


        { error -> Log.e(TAG, "Delete failed", error) }


    )


}

确保通过生成的代码导入 ModelQuery、ModelMutation 和 NoteData 类。

最后,我们必须在应用程序启动时调用此 API,以查询当前登录用户的 Note 列表。

在 Backend.kt 文件中,更新 updateUserData(withSignInStatus: Boolean) 方法,使其看起来类似以下内容:


// change our internal state and query list of notes


private fun updateUserData(withSignedInStatus : Boolean) {


    UserData.setSignedIn(withSignedInStatus)


    val notes = UserData.notes().value


    val isEmpty = notes?.isEmpty() ?: false


    // query notes when signed in and we do not have Notes yet


    if (withSignedInStatus && isEmpty ) {


        this.queryNotes()


    } else {


        UserData.resetNotes()


    }


}
现在,只需创建一个用户界面即可创建新 Note 和从列表中删除 Note。
4.2.8添加“Edit"按钮以添加备注
现在,后端和数据模型已到位,本节的最后一步是让用户创建新的 Note 然后将其删除。
a.在 Android Studio 中的 res/layout 下,创建一个新布局:
右键单击 layout,选择“New”,然后选择 Layout Resource File。将此文件命名为 activity_add_note 并接受所有其他默认值。单击 OK。
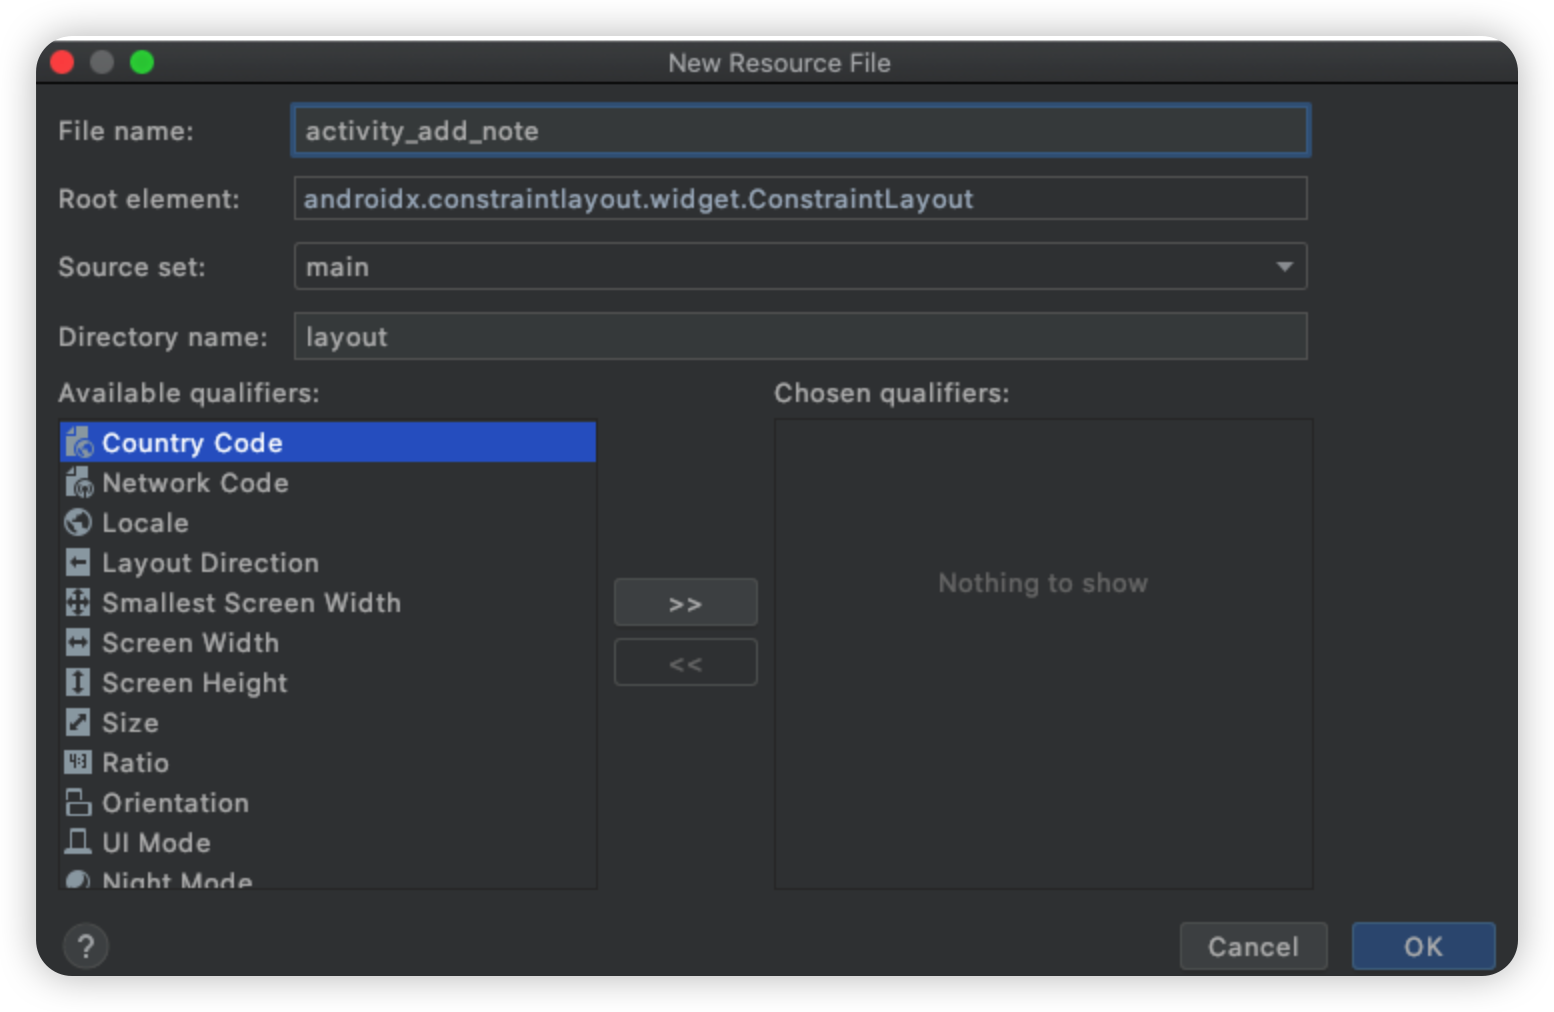
打开刚刚创建的文件 activity_add_note,然后通过粘贴以下内容替换所生成的代码:
<?xml version="1.0" encoding="utf-8"?>


<ScrollView xmlns:android="http://schemas.android.com/apk/res/android"


    xmlns:app="http://schemas.android.com/apk/res-auto"


    android:layout_width="match_parent"


    android:layout_height="match_parent"


    android:fitsSystemWindows="true"


    android:fillViewport="true">


    <LinearLayout


        android:layout_width="match_parent"


        android:layout_height="wrap_content"


        android:orientation="vertical"


        android:padding="8dp">


        <TextView


            android:id="@+id/title"


            android:layout_width="wrap_content"


            android:layout_height="wrap_content"


            android:layout_marginTop="8dp"


            android:text="Create a New Note"


            android:textSize="10pt" />


        <EditText


            android:id="@+id/name"


            android:layout_width="fill_parent"


            android:layout_height="wrap_content"


            android:layout_marginTop="8dp"


            android:hint="name"


            android:inputType="text"


            android:lines="5" />


        <EditText


            android:id="@+id/description"


            android:layout_width="fill_parent"


            android:layout_height="wrap_content"


            android:layout_marginBottom="8dp"


            android:hint="description"


            android:inputType="textMultiLine"


            android:lines="3" />


        <Space


            android:layout_width="match_parent"


            android:layout_height="0dp"


            android:layout_weight="1" />


        <Button


            android:id="@+id/addNote"


            style="?android:attr/buttonStyleSmall"


            android:layout_width="fill_parent"


            android:layout_height="wrap_content"


            android:layout_gravity="center_horizontal"


            android:backgroundTint="#009688"


            android:text="Add Note" />


        <Button


            android:id="@+id/cancel"


            style="?android:attr/buttonStyleSmall"


            android:layout_width="fill_parent"


            android:layout_height="wrap_content"


            android:layout_gravity="center_horizontal"


            android:backgroundTint="#FFC107"


            android:text="Cancel" />


    </LinearLayout>


</ScrollView>
这是一个非常简单的布局,可以只输入 Note 标题和描述。
b.添加 AddNoteActivity 类。
在 java/com.example.androidgettingstarted 下,创建一个新的 Kotlin 文件 AddActivityNote.kt,然后打开此文件并添加以下代码:
package com.example.androidgettingstarted


import android.os.Bundle


import androidx.appcompat.app.AppCompatActivity


import kotlinx.android.synthetic.main.activity_add_note.*


import java.util.*


class AddNoteActivity : AppCompatActivity()  {


    override fun onCreate(savedInstanceState: Bundle?) {


        super.onCreate(savedInstanceState)


        setContentView(R.layout.activity_add_note)


        cancel.setOnClickListener {


            this.finish()


        }


        addNote.setOnClickListener {


            // create a note object


            val note = UserData.Note(


                UUID.randomUUID().toString(),


                name?.text.toString(),


                description?.text.toString()


            )


            // store it in the backend


            Backend.createNote(note)


            // add it to UserData, this will trigger a UI refresh


            UserData.addNote(note)


            // close activity


            this.finish()


        }


    }


    companion object {


        private const val TAG = "AddNoteActivity"


    }


}
最后,在清单下打开 AndroidManifest.xml,并在应用程序节点的任何位置添加以下活动元素。
<activity


    android:name=".AddNoteActivity"


    android:label="Add Note"


    android:theme="@style/Theme.GettingStartedAndroid.NoActionBar">


    <meta-data


        android:name="android.support.PARENT_ACTIVITY"


        android:value="com.example.androidgettingstarted.MainActivity" />


</activity>
c.在“Main Activity”中添加一个“Add Note”FloatingActionButton。
在 res/layout 下,打开 activity_main.xml 并将以下内容添加到现有“Floating Action Button”上方。
<com.google.android.material.floatingactionbutton.FloatingActionButton


    android:id="@+id/fabAdd"


    android:layout_width="wrap_content"


    android:layout_height="wrap_content"


    android:layout_alignParentRight="true"


    android:layout_gravity="bottom|end"


    android:layout_margin="@dimen/fab_margin"


    android:visibility="invisible"


    android:src="@drawable/ic_baseline_post_add"


    app:fabCustomSize="60dp"


    app:fabSize="auto"/>
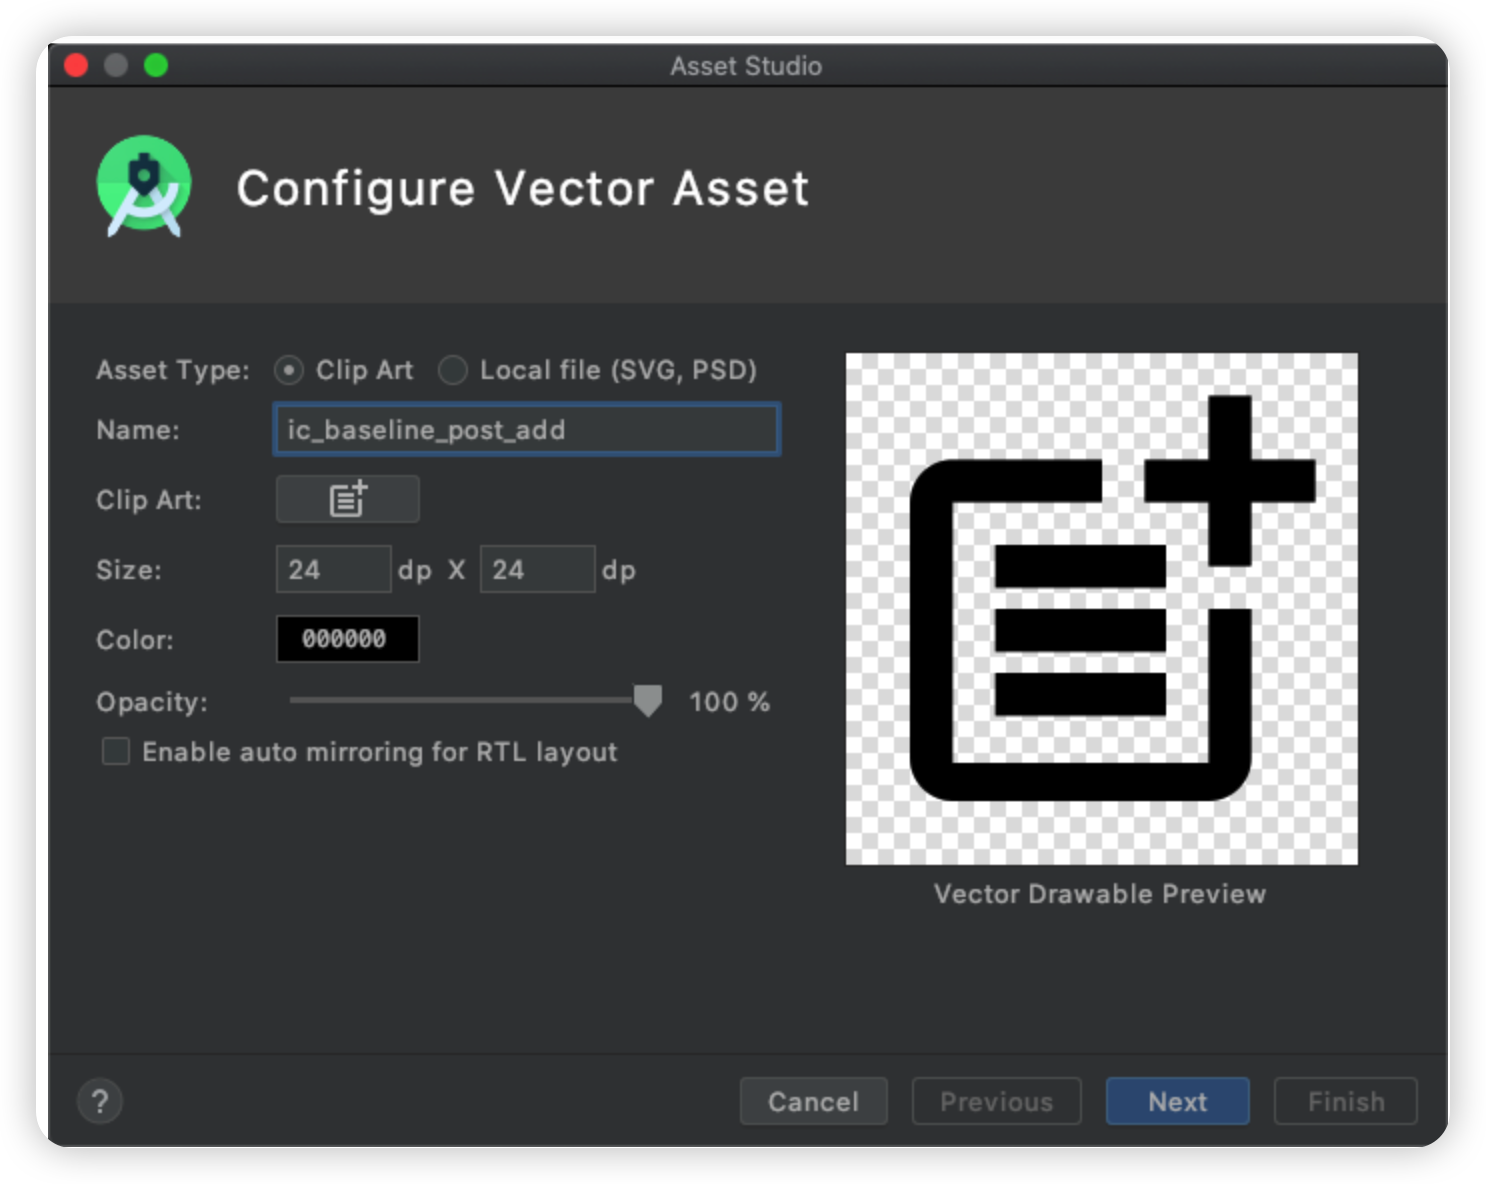
在 res/drawable 中添加一个“Add Note”图标。右键单击“drawable”,选择 New,然后选择 Vector Asset。输入 ic_baseline_add 作为名称,并从“Clip Art”中选择添加图标。单击 Next,然后单击 Finish。
d.添加代码以处理“Add Note”按钮。
要拥有功能完全的“Add Button”,还需要完成的最后两项工作是让按钮根据 isSignedIn 值显示或消失,显然,需要添加代码来处理按钮点击操作。
打开 mainActivity.kt,并将以下内容添加到 onCreate() 方法的末尾:
// register a click listener


fabAdd.setOnClickListener {


    startActivity(Intent(this, AddNoteActivity::class.java))


}

然后,仍然在 onCreate() 方法中,将 UserData.isSignedIn.observe 替换为以下内容:


UserData.isSignedIn.observe(this, Observer<Boolean> { isSignedUp ->


    // update UI


    Log.i(TAG, "isSignedIn changed : $isSignedUp")


    //animation inspired by https://www.11zon.com/zon/android/multiple-floating-action-button-android.php


    if (isSignedUp) {


        fabAuth.setImageResource(R.drawable.ic_baseline_lock_open)


        Log.d(TAG, "Showing fabADD")


        fabAdd.show()


        fabAdd.animate().translationY(0.0F - 1.1F * fabAuth.customSize)


    } else {


        fabAuth.setImageResource(R.drawable.ic_baseline_lock)


        Log.d(TAG, "Hiding fabADD")


        fabAdd.hide()


        fabAdd.animate().translationY(0.0F)


    }


})
要验证一切是否都按预期运行,请构建项目。单击 Build 菜单,并选择 Make Project,或者,在 Mac 上按 ⌘F9。应该不会出现错误。
运行应用程序时,您将看到“Add Note”按钮会在用户登录时显示,在用户注销时消失。您现在可以添加备注了。
4.2.9添加“滑动删除”行为
可以通过在 Note 列表中添加触摸处理程序来添加“滑动删除”行为。触摸处理程序负责绘制红色背景、删除图标,并在释放触摸时调用 Backend.delete() 方法。
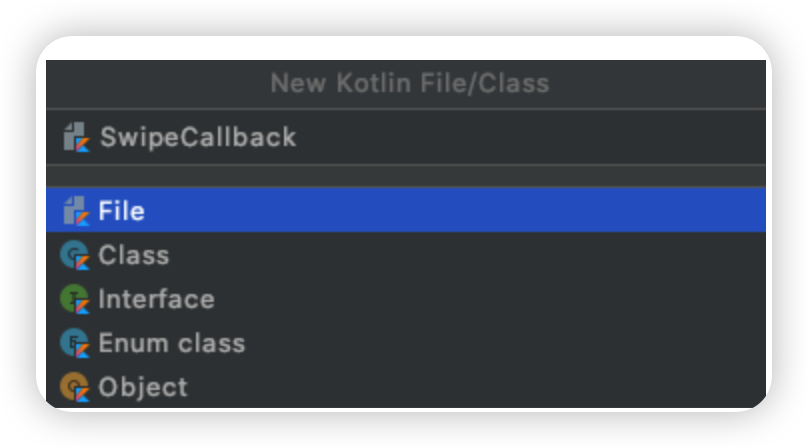
a.创建一个新类 SimpleTouchCallback。
在 java/com 下,右键单击 example.androidgettingstarted,依次选择 New、Kotlin File,然后输入 SwipeCallback 作为名称。
将以下代码粘贴到新文件中:
package com.example.androidgettingstarted


import android.graphics.Canvas


import android.graphics.Color


import android.graphics.drawable.ColorDrawable


import android.graphics.drawable.Drawable


import android.util.Log


import android.widget.Toast


import androidx.appcompat.app.AppCompatActivity


import androidx.core.content.ContextCompat


import androidx.recyclerview.widget.ItemTouchHelper


import androidx.recyclerview.widget.RecyclerView


// https://stackoverflow.com/questions/33985719/android-swipe-to-delete-recyclerview


class SwipeCallback(private val activity: AppCompatActivity): ItemTouchHelper.SimpleCallback(


    0,


    ItemTouchHelper.LEFT


) {


    private val TAG: String = "SimpleItemTouchCallback"


    private val icon: Drawable? = ContextCompat.getDrawable(


        activity,


        R.drawable.ic_baseline_delete_sweep


    )


    private val background: ColorDrawable = ColorDrawable(Color.RED)


    override fun onChildDraw(


        c: Canvas,


        recyclerView: RecyclerView,


        viewHolder: RecyclerView.ViewHolder,


        dX: Float,


        dY: Float,


        actionState: Int,


        isCurrentlyActive: Boolean


    ) {


        super.onChildDraw(


            c,


            recyclerView,


            viewHolder,


            dX,


            dY,


            actionState,


            isCurrentlyActive


        )


        val itemView = viewHolder.itemView


        val backgroundCornerOffset = 20


        val iconMargin = (itemView.height - icon!!.intrinsicHeight) / 2


        val iconTop = itemView.top + (itemView.height - icon.intrinsicHeight) / 2


        val iconBottom = iconTop + icon.intrinsicHeight


        val iconRight: Int = itemView.right - iconMargin


        if (dX < 0) {


            val iconLeft: Int = itemView.right - iconMargin - icon.intrinsicWidth


            icon.setBounds(iconLeft, iconTop, iconRight, iconBottom)


            background.setBounds(


                itemView.right + dX.toInt() - backgroundCornerOffset,


                itemView.top, itemView.right, itemView.bottom


            )


            background.draw(c)


            icon.draw(c)


        } else {


            background.setBounds(0, 0, 0, 0)


            background.draw(c)


        }


    }


    override fun onMove(


        recyclerView: RecyclerView,


        viewHolder: RecyclerView.ViewHolder,


        target: RecyclerView.ViewHolder


    ): Boolean {


        Toast.makeText(activity, "Moved", Toast.LENGTH_SHORT).show()


        return false


    }


    override fun onSwiped(viewHolder: RecyclerView.ViewHolder, swipeDir: Int) {


        Toast.makeText(activity, "deleted", Toast.LENGTH_SHORT).show()


        //Remove swiped item from list and notify the RecyclerView


        Log.d(TAG, "Going to remove ${viewHolder.adapterPosition}")


        // get the position of the swiped item in the list


        val position = viewHolder.adapterPosition


        // remove to note from the userdata will refresh the UI


        val note = UserData.deleteNote(position)


        // async remove from backend


        Backend.deleteNote(note)


    }


}
重要的代码行位于 onSwiped() 方法中。当滑动手势完成时,将调用此方法。我们将收集列表中滑动项的位置,并会将相应备注从 UserData 结构(这将更新用户界面)和云后端中删除。
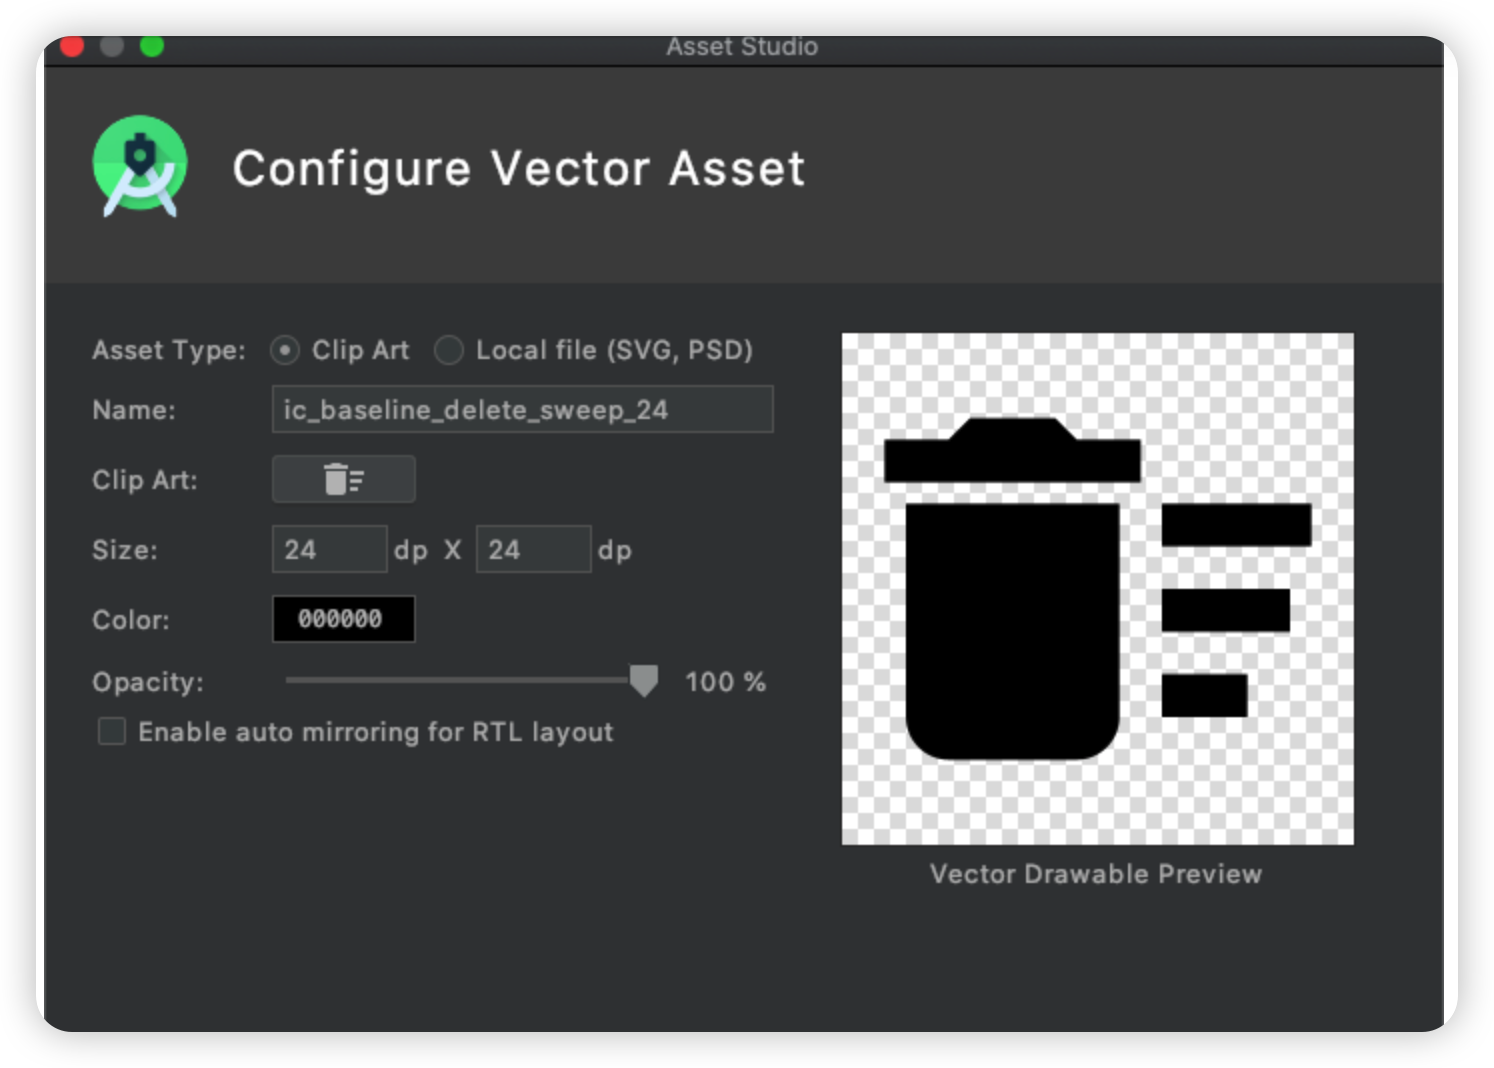
b.现在,我们已经有了类,让我们在 res/drawable 中添加“删除”图标。
右键单击“drawable”,选择 New,然后选择 Vector Asset。输入 ic_baseline_delete_sweep 作为名称,并从“Clip Art”中选择“删除滑动”图标。单击 Next,然后单击 Finish。
c.将以下代码粘贴到新文件中:为 RecyclerView 添加“滑动删除”手势处理程序。
在 java/com/example.androidgettingstarted 下,打开 MainActivity.kt,并将下面两行代码添加到 setupRecyclerView 中:
// add a touch gesture handler to manager the swipe to delete gesture


val itemTouchHelper = ItemTouchHelper(SwipeCallback(this))


itemTouchHelper.attachToRecyclerView(recyclerView)
4.2.10构建和测试
要验证一切是否都按预期运行,请构建并运行项目。单击工具栏中的运行图标 ▶️,或按 ^ R。应该不会出现错误。
假设您仍处于登录状态,应用程序会在一个空列表上启动。它现在具有一个用于添加 Note 的“Add Note”按钮。**单击“Add Note”符号、输入标题和描述、单击“Add Note”**按钮,随后备注应显示在列表中。
您可以通过向左滑动一行来删除 Note。
5.添加图像存储功能
在本单元中,您将添加存储以及将图像与您的应用程序中的备注关联的功能。
5.1简介
现在,我们的备注应用程序已在运行,接下来添加将图像与每个备注关联的功能。在本单元中,您将使用 Amplify CLI 和库来创建利用 Amazon S3 的存储服务。最后,您将更新 Android 应用程序以启用图像上传、获取和渲染。
5.2实施
5.2.1创建存储服务
要添加图像存储功能,我们将使用 Amplify 存储类别:
amplify add storage
一段时间后,您将看到:
Successfully added resource image locally
5.2.2部署存储服务
要部署我们刚刚创建的存储服务,请转至您的终端,然后执行以下命令:
amplify push
按 Y 确认,一段时间后,您将看到:
✔ Successfully pulled backend environment amplify from the cloud.
5.2.2向Android Studio项目添加Amplify存储库
在转到此代码之前,请先返回 Android Studio,将以下依赖关系连同您之前添加的其他
amplifyframework 实现一起添加到您的单元的
build.gradle,然后在看到提示时单击 Sync Now:
dependencies {


 ...


    // Amplify core dependency


    implementation 'com.amplifyframework:core:1.4.0'


    implementation 'com.amplifyframework:aws-auth-cognito:1.4.0'


    implementation 'com.amplifyframework:aws-api:1.4.0'


    implementation 'com.amplifyframework:aws-storage-s3:1.4.0'


}
5.2.4在运行时初始化Amplify存储插件
返回 Android Studio,在 java/example.androidgettingstarted 下,打开 Backend.kit,并在 initialize() 方法中的 Amplify 初始化序列中添加一行。完整代码块应如下所示:
try {


    Amplify.addPlugin(AWSCognitoAuthPlugin())


    Amplify.addPlugin(AWSApiPlugin())


    Amplify.addPlugin(AWSS3StoragePlugin())


    Amplify.configure(applicationContext)


    Log.i(TAG, "Initialized Amplify")


} catch (e: AmplifyException) {


    Log.e(TAG, "Could not initialize Amplify", e)


}
5.2.5将Image CRUD方法添加到后端类
依然在 Backend.kt 中。在后端类的任何位置,添加以下三个方法,用于从存储中上传、下载和删除图像:
fun storeImage(filePath: String, key: String) {


    val file = File(filePath)


    val options = StorageUploadFileOptions.builder()


        .accessLevel(StorageAccessLevel.PRIVATE)


        .build()


    Amplify.Storage.uploadFile(


        key,


        file,


        options,


        { progress -> Log.i(TAG, "Fraction completed: ${progress.fractionCompleted}") },


        { result -> Log.i(TAG, "Successfully uploaded: " + result.key) },


        { error -> Log.e(TAG, "Upload failed", error) }


    )


}


fun deleteImage(key : String) {


    val options = StorageRemoveOptions.builder()


        .accessLevel(StorageAccessLevel.PRIVATE)


        .build()


    Amplify.Storage.remove(


        key,


        options,


        { result -> Log.i(TAG, "Successfully removed: " + result.key) },


        { error -> Log.e(TAG, "Remove failure", error) }


    )


}


fun retrieveImage(key: String, completed : (image: Bitmap) -> Unit) {


    val options = StorageDownloadFileOptions.builder()


        .accessLevel(StorageAccessLevel.PRIVATE)


        .build()


    val file = File.createTempFile("image", ".image")


    Amplify.Storage.downloadFile(


        key,


        file,


        options,


        { progress -> Log.i(TAG, "Fraction completed: ${progress.fractionCompleted}") },


        { result ->


            Log.i(TAG, "Successfully downloaded: ${result.file.name}")


            val imageStream = FileInputStream(file)


            val image = BitmapFactory.decodeStream(imageStream)


            completed(image)


        },


        { error -> Log.e(TAG, "Download Failure", error) }


    )


}
这三种方法仅调用其 Amplify 对应项。Amplify 存储有三个文件保护级别:
-
公有:所有用户均可访问
-
受保护:所有用户均可读取,但只有创建用户可写入
-
私有:只有创建用户可读可写
对于此应用程序,我们希望仅备注拥有者可使用图像,我们将使用 StorageAccessLevel.PRIVATE 属性。
5.2.6添加UI代码以捕获图像
下一步是修改 UI,以允许用户在单击 AddNoteACtivity 上的“Add image”按钮时从手机库中选择图像。
必须执行两个更改:更改“Add Note”活动布局以添加“Add image”按钮和图像视图,以及在活动类中添加处理程序代码。
在 Android Studio 中的“res/layout”下,打开 activity_add_note.xml 文件,然后将以下 Button 元素添加到 addNote 按钮的正上方:
<!-- after the description EditText -->


<com.google.android.material.imageview.ShapeableImageView


    android:id="@+id/image"


    android:layout_width="match_parent"


    android:layout_height="280dp"


    android:layout_margin="16dp"


    android:scaleType="centerCrop" />


<!-- after the Space -->


<Button


    android:id="@+id/captureImage"


    style="?android:attr/buttonStyleSmall"


    android:layout_width="fill_parent"


    android:layout_height="wrap_content"


    android:layout_gravity="center_horizontal"


    android:backgroundTint="#009688"


    android:text="Add image" />
在 Android Studio 中的 java/example.androidgettingstarted 下,打开 AddNoteACtivity.kt 文件,然后在 onCreate() 方法中添加以下代码:
// inside onCreate()


// Set up the listener for add Image button


captureImage.setOnClickListener {


    val i = Intent(


        Intent.ACTION_GET_CONTENT,


        MediaStore.Images.Media.EXTERNAL_CONTENT_URI


    )


    startActivityForResult(i, SELECT_PHOTO)


}


// create rounded corners for the image


image.shapeAppearanceModel = image.shapeAppearanceModel


    .toBuilder()


    .setAllCorners(CornerFamily.ROUNDED, 150.0f)


    .build()
在 Intent、MediaStore 和 CornerFamily 上添加所需导入。
同时在伴生对象中添加以下常量值:
// add this to the companion object
private const val SELECT_PHOTO = 100
最后,添加收到的代码并将所选图像存储到临时文件。
将以下代码添加到 AddNoteACtivity 类的任何位置:
//anywhere in the AddNoteActivity class


private var noteImagePath : String? = null


private var noteImage : Bitmap? = null


override fun onActivityResult(requestCode: Int, resultCode: Int, imageReturnedIntent: Intent?) {


    super.onActivityResult(requestCode, resultCode, imageReturnedIntent)


    Log.d(TAG, "Select photo activity result : $imageReturnedIntent")


    when (requestCode) {


        SELECT_PHOTO -> if (resultCode == RESULT_OK) {


            val selectedImageUri : Uri? = imageReturnedIntent!!.data


            // read the stream to fill in the preview


            var imageStream: InputStream? = contentResolver.openInputStream(selectedImageUri!!)


            val selectedImage = BitmapFactory.decodeStream(imageStream)


            val ivPreview: ImageView = findViewById<View>(R.id.image) as ImageView


            ivPreview.setImageBitmap(selectedImage)


            // store the image to not recreate the Bitmap every time


            this.noteImage = selectedImage


            // read the stream to store to a file


            imageStream = contentResolver.openInputStream(selectedImageUri)


            val tempFile = File.createTempFile("image", ".image")


            copyStreamToFile(imageStream!!, tempFile)


            // store the path to create a note


            this.noteImagePath = tempFile.absolutePath


            Log.d(TAG, "Selected image : ${tempFile.absolutePath}")


        }


    }


}


private fun copyStreamToFile(inputStream: InputStream, outputFile: File) {


    inputStream.use { input ->


        val outputStream = FileOutputStream(outputFile)


        outputStream.use { output ->


            val buffer = ByteArray(4 * 1024) // buffer size


            while (true) {


                val byteCount = input.read(buffer)


                if (byteCount < 0) break


                output.write(buffer, 0, byteCount)


            }


            output.flush()


            output.close()


        }


    }


}
以上代码将所选图像作为 InputStream 使用两次。第一次,InputStream 会创建一个位图图像以显示在用户界面中,第二次,InputStream 会保存一个临时文件以发送到后端。
本单元将浏览一个临时文件,因为 Amplify API 使用 Fileobjects。尽管不是最高效的设计,但此代码十分简单。
要验证一切是否都按预期运行,请构建项目。单击 Build 菜单,并选择 Make Project,或者,在 Mac 上按 ⌘F9。应该不会出现错误。
5.2.7创建备注时存储图像
创建备注时,我们从后端调用存储方法。打开 AddNoteActivity.kt 并修改 addNote.setOnClickListener() 方法,以便在创建备注对象后添加以下代码。
// add this in AddNoteACtivity.kt, inside the addNote.setOnClickListener() method and after the Note() object is created.


if (this.noteImagePath != null) {


    note.imageName = UUID.randomUUID().toString()


    //note.setImage(this.noteImage)


    note.image = this.noteImage


    // asynchronously store the image (and assume it will work)


    Backend.storeImage(this.noteImagePath!!, note.imageName!!)


}
5.2.8加载备注时加载图像
要加载图像,我们需要修改备注数据类上的静态方法。这样,每当 API 返回的 NoteData 对象转换为 Note 对象时,将同时加载图像。加载图像时,我们会通知 LiveData 的 UserData,以便观察者知晓进行的更改。这将触发用户界面刷新。
打开 UserData.kt,然后修改备注数据类的伴生对象,如下所示:
// static function to create a Note from a NoteData API object


companion object {


    fun from(noteData : NoteData) : Note {


        val result = Note(noteData.id, noteData.name, noteData.description, noteData.image)


        if (noteData.image != null) {


            Backend.retrieveImage(noteData.image!!) {


                result.image = it


                // force a UI update


                with(UserData) { notifyObserver() }


            }


        }


        return result


    }


}
5.2.9删除备注时删除图像
最后一步是自己清理,即,当用户删除备注时,从云存储中删除图像。如果清理不是为了节省存储空间,可以出于节省 AWS 费用的目的进行清理,因为 Amazon S3 对存储的数据按 Gb/月收费(前 5Gb 免费,运行本教程不收费)。
打开 SwipeCallback.kt,然后在 onSwipe() 方法末尾添加以下代码:
if (note?.imageName != null) {
//asynchronously delete the image (and assume it will work)
Backend.deleteImage(note.imageName!!)
}
5.2.10构建和测试
要验证一切是否都按预期运行,请构建并运行项目。单击工具栏中的运行图标 ▶️,或按 ^ R。应该不会出现错误。
假设您仍在登录中,应用程序将从未从上一部分删除的备注列表开始。再次使用“Add Note”按钮创建备注。这一次,添加从本地图像存储中选择的图片。
退出应用程序并重新启动,以验证图像是否正确加载。
总结
到这里,你已经使用 Amazon Amplify 构建了 Android 应用程序! 并且在应用程序中添加了身份验证,使用户可以注册、登录和管理其账户。该应用程序还使用 Amazon DynamoDB 数据库配置了一个可扩展的 GraphQL API,使用户可以创建和删除备注。您还使用 Amazon S3 添加了文件存储,从而使用户可以上传图像并在其应用程序中查看它们。
通过本文相信你对从零使用 Amazon Amplify 创建简单的 Android 应用程序有了一个完整的认识,并且完成了入门。
最后想说的是
最后想要说的是,一门新技术,新框架,新的解决方案来临的时候努力去学习它,并从中发现机会。本次使用该技术也算是一个新的体验,总体来说,优势很明显,开发速度很快,只要你具有一定的Android基础,那么你就可以很快的利用该产品制作属于自己的一个应用程序。总之,不断的把自己的舒适圈扩大,扩大,再扩大,主动学习和挑战新的东西 。
最后,很感谢能够阅读到这里的读者。如果看完觉得好的话,还请轻轻点一下赞或者分享给更多的人,你们的鼓励就是作者继续行文的动力。
最后也给大家带来了专属福利
【专属福利】
福利一:100余种产品免费套餐。其中,计算资源Amazon EC2首年12个月免费,750小时/月;存储资源 Amazon S3 首年12个月免费,5GB标准存储容量。
福利二:最新优惠大礼包,200 数 据 与 分 析 抵 扣 券 , 200 数据与分析抵扣券,200 数据与分析抵扣券,200机器学习抵扣券,200$微服务与应用开发抵扣券。
❤️❤️❤️如果你喜欢的话,就不要吝惜你的一键三连了。