在之前的文章《编写 Nginx 模块进行 RSA 加解密》中,我提到了如何编写 Nginx 模块,并借助 Nginx 实现相对高性能的加解密。正巧 Nginx 新版本发布,初步具备了原生“RSA加解密”能力。
那么,就来换一种更轻量的方式进行实现之前提到的功能吧。
写在前面
随着 Nginx 版本来到了 1.21.4 ,NJS 也升级到了 0.7 版本。这个版本可以说是具有突破意义的版本,因为这个版本的 NJS 添加了符合 W3C 的标准的 WebCrypto API。
这意味着,以往需要单独起一套服务来说接口加密鉴权的时代或许可以过去了。
官方实现这个功能主要是通过添加 njs_webcrypto.c 加解密模块,引入 OpenSSL 了部分 OpenSSL 的能力。如果你的需求包含了针对指定的 RSA 密钥(带密码)的加解密,那么目前 NJS 还做不到。不过,你可以修改上面的代码,添加我在《编写 Nginx 模块进行 RSA 加解密》一文中,提到的“计算部分”的代码实现:将 PEM_read_bio_RSAPrivateKey 携带密码的部分添加进去,并对 NJS 做一些函数绑定,最后记得清理干净 RSA 相关引用就好了。
好在在多数情况下,考虑到调用性能,针对业务接口进行加解密,不太倾向使用添加密码的密钥。
接下来,我将介绍如何使用 Nginx NJS 的这个新能力,一步步的实现一个能够根据业务接口内容,进行 RSA 自动加解密的接口服务。
使用浏览器生成 RSA 证书
你没有看错小标题,这次我们要使用浏览器而不是“传统命令行中OpenSSL”来生成我们的证书。
这里主要会用到两个 API:
- SubtleCrypto.generateKey()
- SubtleCrypto.exportKey()
文档枯燥,这里直接划出重点。在生成算法中,本文采用 WEB Crypto API 唯一支持的非对称加密算法 RSA-OAEP,在导出生成证书时,需要根据密钥类型,针对性的选择对应的导出格式。
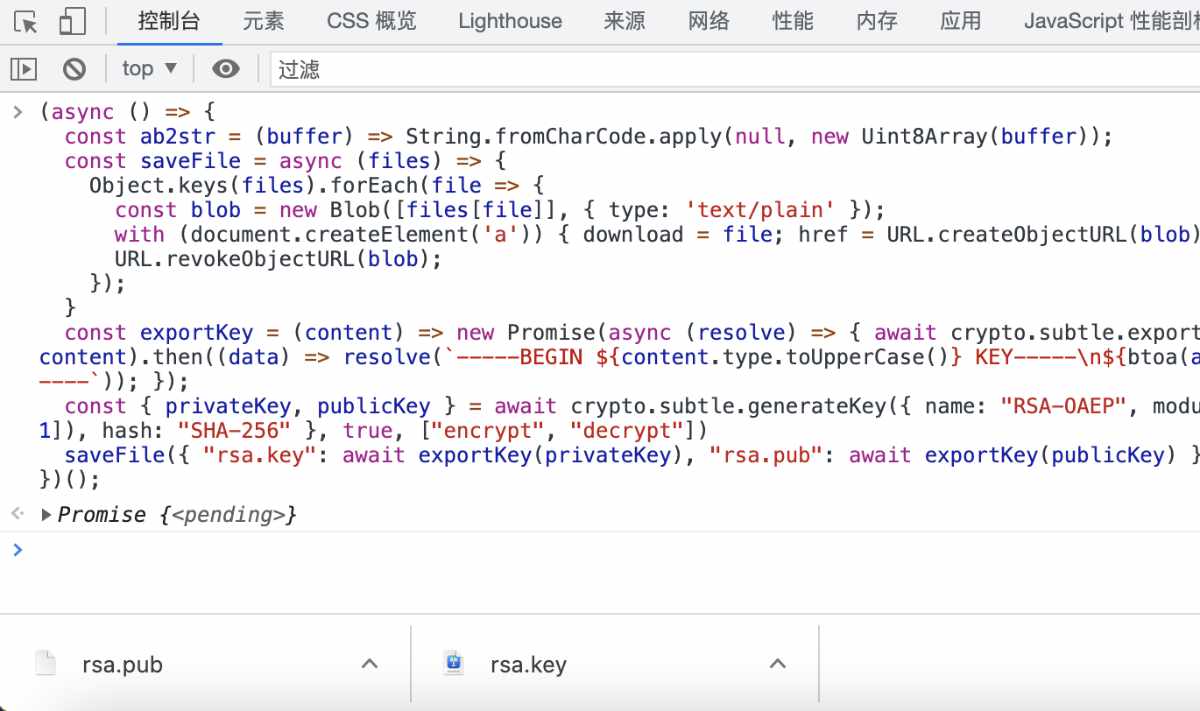
为了方便我的读者玩耍,我写了一段简单的 JavaScript 脚本,将内容复制粘贴到你的浏览器控制台里(推荐 Chrome ),然后执行即可。不出意外,你的浏览器将会自动下载到两个名为 “rsa.pub”和“rsa.key”文件,我们稍后会使用。
(async () => {


  const ab2str = (buffer) => String.fromCharCode.apply(null, new Uint8Array(buffer));
  const saveFile = async (files) => {


    Object.keys(files).forEach(file => {


      const blob = new Blob([files[file]], {

     type: 'text/plain' });
      with (document.createElement('a')) {

     download = file; href = URL.createObjectURL(blob); click(); }
      URL.revokeObjectURL(blob);
    });
  }
  const exportKey = (content) => new Promise(async (resolve) => {

     await crypto.subtle.exportKey(content.type === "private" ? "pkcs8" : "spki", content).then((data) => resolve(`-----BEGIN ${

      content.type.toUpperCase()} KEY-----\n${

      btoa(ab2str(data))}\n-----END ${

      content.type.toUpperCase()} KEY-----`)); });
  const {

     privateKey, publicKey } = await crypto.subtle.generateKey({

     name: "RSA-OAEP", modulusLength: 4096, publicExponent: new Uint8Array([1, 0, 1]), hash: "SHA-256" }, true, ["encrypt", "decrypt"])
  saveFile({

     "rsa.key": await exportKey(privateKey), "rsa.pub": await exportKey(publicKey) });
})();
使用 NJS 进行 RSA 加解密
虽然 Nginx 和 NJS 官方文档中,还未提及新添加的 WEB Crypto API 如何使用,但是我们可以从代码仓库中最新的测试用例中看到接口的用法。
我们参考之前的文章《使用 Docker 和 Nginx NJS 实现 API 聚合服务(前篇)》中“使用 NJS 编写 Nginx 基础接口”的代码为基础,先写一个“糙一些”的版本出来,体验下使用 NJS 进行 Nginx 原生 RSA 加解密:
const fs = require('fs');
if (typeof crypto == 'undefined') {


  crypto = require('crypto').webcrypto;
}

function pem_to_der(pem, type) {


  const pemJoined = pem.toString().split('\n').join('');
  const pemHeader = `-----BEGIN ${

      type} KEY-----`;
  const pemFooter = `-----END ${

      type} KEY-----`;
  const pemContents = pemJoined.substring(pemHeader.length, pemJoined.length - pemFooter.length);
  return Buffer.from(pemContents, 'base64');
}

const rsaKeys = {


  public: fs.readFileSync(`/etc/nginx/script/rsa.pub`),
  private: fs.readFileSync(`/etc/nginx/script/rsa.key`)
}

async function simple(req) {


  const spki = await crypto.subtle.importKey("spki", pem_to_der(rsaKeys.public, "PUBLIC"), {

     name: "RSA-OAEP", hash: "SHA-256" }, false, ["encrypt"]);
  const pkcs8 = await crypto.subtle.importKey("pkcs8", pem_to_der(rsaKeys.private, "PRIVATE"), {

     name: "RSA-OAEP", hash: "SHA-256" }, false, ["decrypt"]);

  let originText = "假设这是需要加密的内容,by soulteary";

  let enc = await crypto.subtle.encrypt({

     name: "RSA-OAEP" }, spki, originText);
  let decode = await crypto.subtle.decrypt({

     name: "RSA-OAEP" }, pkcs8, enc);

  req.headersOut["Content-Type"] = "text/html;charset=UTF-8";
  req.return(200, [
    '<h2>原始内容</h2>',
    `<code>${

      originText}</code>`,
    '<h2>加密后的内容</h2>',
    `<code>${

      Buffer.from(enc)}</code>`,
    '<h2>解密后的内容</h2>',
    `<code>${

      Buffer.from(decode)}</code>`,
  ].join(''));
}

export default {

     simple };
上面的代码定义了一个简单的接口“simple”,用于加载我们刚刚生成的 RSA Keys,然后对一段指定的内容(originText)进行加密再解密。将上面的内容保存为 app.js,我们继续编写一段简单的 Nginx 配置(nginx.conf):
load_module modules/ngx_http_js_module.so;

user nginx;
worker_processes auto;
error_log /var/log/nginx/error.log notice;
pid /var/run/nginx.pid;

events {

     worker_connections 1024; }

http {


    include /etc/nginx/mime.types;
    default_type application/octet-stream;

    js_import app from script/app.js;

    log_format main '$remote_addr - $remote_user [$time_local] "$request" '
    '$status $body_bytes_sent "$http_referer" '
    '"$http_user_agent" "$http_x_forwarded_for"';

    access_log /var/log/nginx/access.log main;

    keepalive_timeout 65;
    gzip on;

    server {


        listen 80;
        server_name localhost;

        charset utf-8;
        gzip on;

        location / {


            js_content app.simple;
        }
    }
}
为了使用简单,这里同样给出一份容器配置(docker-compose.yml):
version: '3'

services:

  nginx-rsa-demo:
    image: nginx:1.21.4-alpine
    ports:
      - 8080:80
    volumes:
      - ./nginx.conf:/etc/nginx/nginx.conf
      - ./scripts:/etc/nginx/script
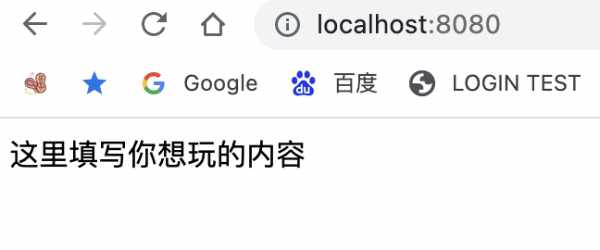
使用 docker-compose up 启动容器,然后在浏览器中访问 localhost:8080,可以看到下面的内容。

顺便看一下响应时间,在笔记本的容器里大概十来ms,如果放到生产环境,加上一些优化,控制在个位数里问题不大。

好了,能力验证到此就结束了。我们来稍加改造和优化,实现网关产品中的全自动的 RSA 加解密功能。
构建具备 RSA 加解密能力的网关
下面具体实战一下,如何使用 Nginx 的 NJS 针对请求进行加解密。先来编写 Nginx 配置部分。
调整 Nginx 配置使用的 NJS 导出函数
考虑到调试方便,我们将“入口点”(接口)拆分为三个,你可以根据实际使用场景进行调整,比如在入口处添加 IP 访问限制、额外的身份验证功能,或者取消“统一的入口”,直接使用两个主要的加解密接口为程序“入口点”:
server {


    listen 80;
    server_name localhost;

    charset utf-8;
    gzip on;

    location / {


        js_content app.entrypoint;
    }

    location /api/encrypt {


        js_content app.encrypt;
    }

    location /api/decrypt {


        js_content app.decrypt;
    }
}
完成了 Nginx 配置的编写后,就可以开始正餐了:编写 NJS 程序。
调整 NJS 程序:调整导出函数
Nginx 配置修改之后,同样的, NJS 中的导出函数也需要进行调整:
export default {

     encrypt, decrypt, entrypoint };
修改完毕导出函数后,我们依次来实现三个接口函数的功能。
实现 NJS 程序:默认入口函数
因为目前 NJS 的开发调试还处于非常不方便的状态,所以我们先来编写入口函数,以方便调试过程(app.js):
function debug(req) {


  req.headersOut["Content-Type"] = "text/html;charset=UTF-8";
  req.return(200, JSON.stringify(req, null, 4));
}

function encrypt(req) {


  debug(req)
}

function decrypt(req) {


  debug(req)
}

function entrypoint(r) {


  r.headersOut["Content-Type"] = "text/html;charset=UTF-8";
  switch (r.method) {


    case 'GET':
      return r.return(200, [
        '<form action="/" method="post">',
        '<input name="data" value=""/>',
        '<input type="radio" name="action" id="encrypt" value="encrypt" checked="checked"/><label for="encrypt">Encrypt</label>',
        '<input type="radio" name="action" id="decrypt" value="decrypt"/><label for="decrypt">Decrypt</label>',
        '<button type="submit">Submit</button>',
        '</form>'
      ].join('<br>'));
    case 'POST':
      var body = r.requestBody;
      if (r.headersIn['Content-Type'] != 'application/x-www-form-urlencoded' || !body.length) {


        r.return(401, "Unsupported method\n");
      }

      var params = body.trim().split('&').reduce(function (prev, item) {


        var tmp = item.split('=');
        var key = decodeURIComponent(tmp[0]).trim();
        var val = decodeURIComponent(tmp[1]).trim();
        if (key === 'data' || key === 'action') {


          if (val) {


            prev[key] = val;
          }
        }
        return prev;
      }, {

    });

      if (!params.action || (params.action != 'encrypt' && params.action != 'decrypt')) {


        return r.return(400, 'Invalid Params: `action`.');
      }

      if (!params.data) {


        return r.return(400, 'Invalid Params: `data`.');
      }

      function response_cb(res) {


        r.return(res.status, res.responseBody);
      }

      return r.subrequest(`/api/${

     params.action}`, {

     method: 'POST' }, response_cb)
    default:
      return r.return(400, "Unsupported method\n");
  }
}

export default {

     encrypt, decrypt, entrypoint };
上面60来行代码中,我们实现了哪些功能呢?
- 一个简单的 Web 表单界面,用于接收我们调试开发过程中的“加解密动作”、“需要加解密的数据”。
- 根据我们选择的动作,自动进行“加解密”操作,并返回具体加解密接口的处理结果。
- 简单 Mock 了加解密接口,目前实际调用一个名为
debug的函数打印我们的提交内容。
使用浏览器访问界面,能够看到这个简单的提交界面:
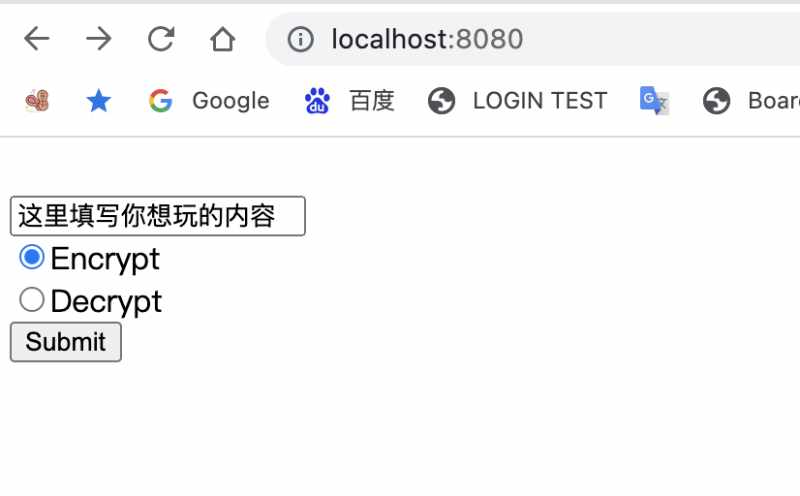
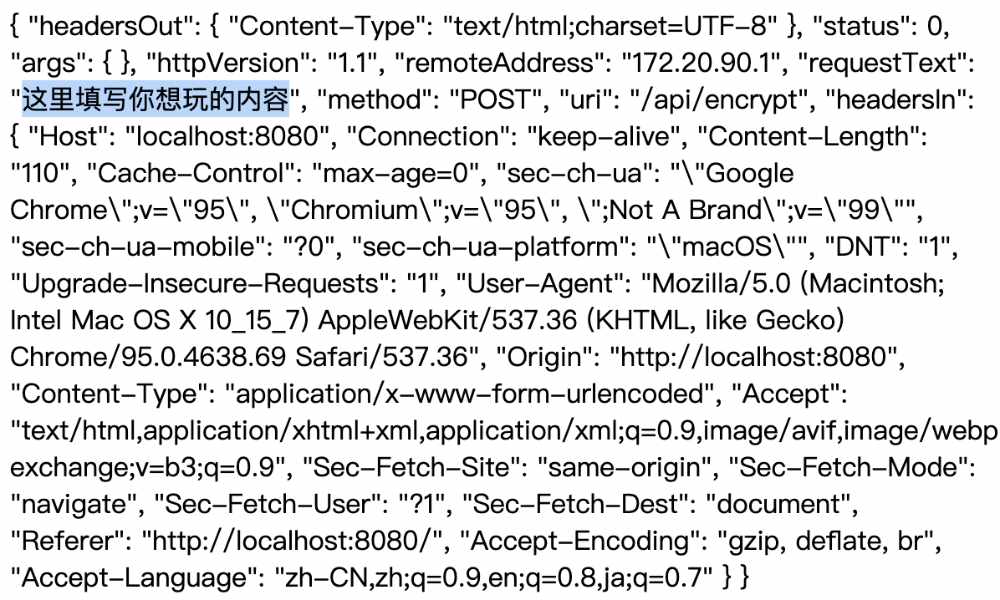
在调试表单里的文本框中随便写一点内容,进行提交,可以看到函数运行符合预期,提交内容被正确的打印了出来:
接着,我们来实现 NJS 的 RSA 加密函数。
实现 NJS 程序:RSA 加密函数
参考前文,稍作调整,不难实现这个加密函数,大概五行左右就够了。
async function encrypt(req) {


  const spki = await crypto.subtle.importKey("spki", pem_to_der(rsaKeys.public, "PUBLIC"), {

     name: "RSA-OAEP", hash: "SHA-256" }, false, ["encrypt"]);
  const result = await crypto.subtle.encrypt({

     name: "RSA-OAEP" }, spki, req.requestText);
  req.return(200, Buffer.from(result));
}
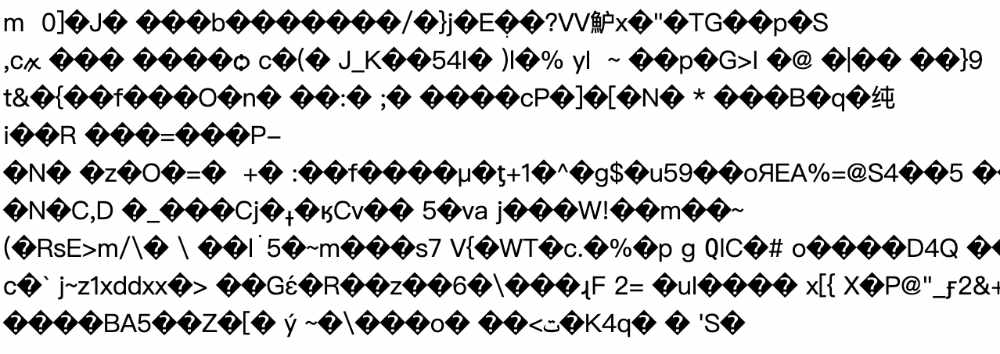
再次运行 Nginx ,提交内容,可以看到数据已经被顺利的进行了 RSA 加密。
因为 RSA 默认加密后的内容不具备可读性,所以一般情况下,如果明文传输,我们会套一层 Base64 来展示。所以,我们需要对这个函数以及上一步中的函数进行一些调整,先拿入口函数“开刀”。
function entrypoint(r) {


  r.headersOut["Content-Type"] = "text/html;charset=UTF-8";

  switch (r.method) {


    case 'GET':
      return r.return(200, [
        '<form action="/" method="post">',
        '<input name="data" value=""/>',
        '<input type="radio" name="action" id="encrypt" value="encrypt" checked="checked"/><label for="encrypt">Encrypt</label>',
        '<input type="radio" name="action" id="decrypt" value="decrypt"/><label for="decrypt">Decrypt</label>',
        '<input type="radio" name="base64" id="base64-on" value="on" checked="checked"/><label for="base64-on">Base64 On</label>',
        '<input type="radio" name="base64" id="base64-off" value="off" /><label for="base64-off">Base64 Off</label>',
        '<button type="submit">Submit</button>',
        '</form>'
      ].join('<br>'));
    case 'POST':
      var body = r.requestBody;
      if (r.headersIn['Content-Type'] != 'application/x-www-form-urlencoded' || !body.length) {


        r.return(401, "Unsupported method\n");
      }

      var params = body.trim().split('&').reduce(function (prev, item) {


        var tmp = item.split('=');
        var key = decodeURIComponent(tmp[0]).trim();
        var val = decodeURIComponent(tmp[1]).trim();
        if (key === 'data' || key === 'action' || key === 'base64') {


          if (val) {


            prev[key] = val;
          }
        }
        return prev;
      }, {

    });

      if (!params.action || (params.action != 'encrypt' && params.action != 'decrypt')) {


        return r.return(400, 'Invalid Params: `action`.');
      }

      if (!params.base64 || (params.base64 != 'on' && params.base64 != 'off')) {


        return r.return(400, 'Invalid Params: `base64`.');
      }

      if (!params.data) {


        return r.return(400, 'Invalid Params: `data`.');
      }

      function response_cb(res) {


        r.return(res.status, res.responseBody);
      }

      return r.subrequest(`/api/${

      params.action}${

      params.base64 === 'on' ? '?base64=1' : ''}`, {

     method: 'POST', body: params.data }, response_cb)
    default:
      return r.return(400, "Unsupported method\n");
  }
}
我们在调试入口添加了一个是否开启 Base64 编码的选项,并在开启 Base64 编码的情况下,调用加解密接口的时候,额外添加了一个 ?base64=1 的请求参数。
加密函数的改造也很简单,差不多十行就行了:
async function encrypt(req) {


  const needBase64 = req.uri.indexOf('base64=1') > -1;
  const spki = await crypto.subtle.importKey("spki", pem_to_der(rsaKeys.public, "PUBLIC"), {

     name: "RSA-OAEP", hash: "SHA-256" }, false, ["encrypt"]);
  const result = await crypto.subtle.encrypt({

     name: "RSA-OAEP" }, spki, req.requestText);
  if (needBase64) {


    req.return(200, Buffer.from(result).toString("base64"));
  } else {


    req.headersOut["Content-Type"] = "application/octet-stream";
    req.return(200, Buffer.from(result));
  }
}
重启 Nginx 服务,选择使用 Base64 编码,可以看到输出结果已经符合预期了。
将内容复制保存,稍后使用。我们来接着实现 RSA 解密功能。
实现 NJS 程序:RSA 解密函数
有了 RSA 加密函数,写出解密函数就更简单了,这里就不和加密函数一样,拆解步骤了,直接照顾到“是否启用 Base64”这个选项类型就好。
async function decrypt(req) {


  const needBase64 = req.uri.indexOf('base64=1') > -1;
  const pkcs8 = await crypto.subtle.importKey("pkcs8", pem_to_der(rsaKeys.private, "PRIVATE"), {

     name: "RSA-OAEP", hash: "SHA-256" }, false, ["decrypt"]);
  const encrypted = needBase64 ? Buffer.from(req.requestText, 'base64') : Buffer.from(req.requestText);
  const result = await crypto.subtle.decrypt({

     name: "RSA-OAEP" }, pkcs8, encrypted);
  req.return(200, Buffer.from(result));
}
使用上一步里的 Base64 后的 RSA 加密结果进行提交,可以看到我们前文中加密的内容就能被正确解密了。
有了上面的基础,接下来我们来折腾自动化加解密。
构建具备自动加解密能力的网关
为了模拟真实业务场景,我们得分别调整 Nginx 配置、容器配置。
调整 Nginx 配置:模拟业务接口
还是先进行 Nginx 配置的调整。
先模拟两个新的服务,并设定它们输出的内容,分别为原始数据和已被 RSA 加密过的数据。为了保持简单,我们还是使用 NJS 来模拟服务端接口响应内容:
server {


    listen 8081;
    server_name localhost;

    charset utf-8;
    gzip on;

    location / {


        js_content mock.mockEncData;
    }
}

server {


    listen 8082;
    server_name localhost;

    charset utf-8;
    gzip on;

    location / {


        js_content mock.mockRawData;
    }
}
为了在模拟服务中使用 NJS,记得在 Nginx 全局配置中添加额外的 NJS 脚本引用声明:
js_import mock from script/mock.js;
为了方便本地调试,我们还可以调整容器编排配置,将上面两个服务的接口公开出来:
version: '3'

services:

  nginx-api-demo:
    image: nginx:1.21.4-alpine
    restart: always
    ports:
      - 8080:80
      - 8081:8081
      - 8082:8082
    volumes:
      - ./nginx.conf:/etc/nginx/nginx.conf
      - ./scripts:/etc/nginx/script
实现 NJS 程序:编写业务模拟接口
这里参考上文,可以迅速写出两个业务接口,它们分别会输出后续需要加密原始数据,以及RSA加密后的数据。为了模拟真实场景,这里使用随机函数,随机的针对三个不同的内容进行具体计算。
function randomPick() {


    const powerWords = ['苏洋博客', '专注硬核', '分享有趣'];
    return powerWords[Math.floor(Math.random() * powerWords.length)];
}

function mockRawData(r) {


    r.headersOut["Content-Type"] = "text/html;charset=UTF-8";
    r.return(200, randomPick());
}

const fs = require('fs');
if (typeof crypto == 'undefined') {


    crypto = require('crypto').webcrypto;
}

function pem_to_der(pem, type) {


    const pemJoined = pem.toString().split('\n').join('');
    const pemHeader = `-----BEGIN ${

      type} KEY-----`;
    const pemFooter = `-----END ${

      type} KEY-----`;
    const pemContents = pemJoined.substring(pemHeader.length, pemJoined.length - pemFooter.length);
    return Buffer.from(pemContents, 'base64');
}

const publicKey = fs.readFileSync(`/etc/nginx/script/rsa.pub`);

async function mockEncData(r) {


    const spki = await crypto.subtle.importKey("spki", pem_to_der(publicKey, "PUBLIC"), {

     name: "RSA-OAEP", hash: "SHA-256" }, false, ["encrypt"]);
    const result = await crypto.subtle.encrypt({

     name: "RSA-OAEP" }, spki, randomPick());

    r.headersOut["Content-Type"] = "text/html;charset=UTF-8";
    r.headersOut["Encode-State"] = "ON";
    r.return(200, Buffer.from(result).toString("base64"));
}

export default {

     mockEncData, mockRawData };
一切就绪之后,我们访问不同的端口,可以看到“业务接口”已经就绪啦。这里通过对已加密的数据添加 Encode-State 请求头,来做数据类型区别。如果你不希望添加额外字段,也可以在 Content-Type 中进行响应数据类型标识。

调整网关 Nginx 配置:聚合业务接口
业务实际使用方法有两种,一种是业务接口调用我们前文中的网关加解密功能,进行数据加解密,然后进行响应。而另外一种,则是网关聚合业务接口,根据数据响应类型调整对应的输出结果。
本文选择后一种方案,搭配 Traefik 可以实现快速的水平扩容,以提高服务响应能力。
因为 NJS 的子请求有请求来源限制,为了能够和业务数据进行交互,需要在网关的 Nginx 配置中添加两个接口,代理远端的需要加密或解密的业务数据。
location /remote/need-encrypt {


    proxy_pass http://localhost:8082/;
}

location /remote/need-decrypt {


    proxy_pass http://localhost:8081/;
}
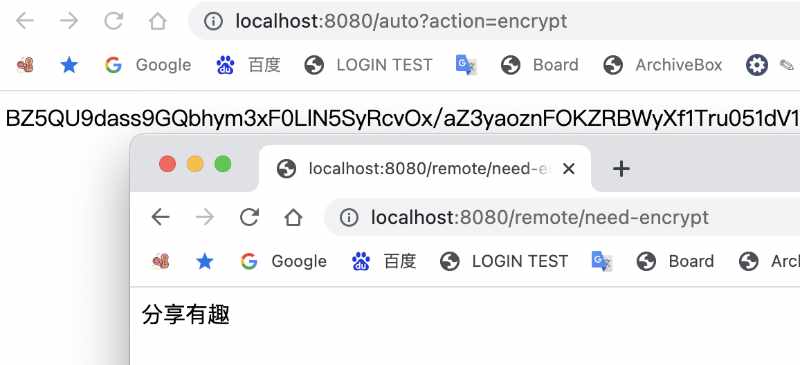
配置完毕,你就可以通过 http://localhost:8080/remote/need-encrypt 和 http://localhost:8080/remote/need-encrypt 访问上一小节中的内容了。
同时,为了我们能够访问自动加解密的接口,还需要再添加一个接口,用于调用 NJS 函数进行数据的自动加解密。(实际业务使用,追求极致性能,可以考虑拆分成两个)
location /auto{


    js_content app.auto;
}
实现 NJS 程序:自动加解密业务数据
我们先来实现一个能够根据我们指定的数据源(加密过的数据、未解密的数据),进行数据的自动处理。
async function auto(req) {


  req.headersOut["Content-Type"] = "text/html;charset=UTF-8";

  let remoteAPI = "";
  switch (req.args.action) {


    case "encrypt":
      remoteAPI = "/remote/need-encrypt";
      break;
    case "decrypt":
    default:
      remoteAPI = "/remote/need-decrypt";
      break;
  }

  async function autoCalc(res) {


    const isEncoded = res.headersOut['Encode-State'] == "ON";
    const remoteRaw = res.responseText;
    if (isEncoded) {


      const pkcs8 = await crypto.subtle.importKey("pkcs8", pem_to_der(rsaKeys.private, "PRIVATE"), {

     name: "RSA-OAEP", hash: "SHA-256" }, false, ["decrypt"]);
      const encrypted = Buffer.from(remoteRaw, 'base64');
      const result = await crypto.subtle.decrypt({

     name: "RSA-OAEP" }, pkcs8, encrypted);
      req.return(200, Buffer.from(result));
    } else {


      const spki = await crypto.subtle.importKey("spki", pem_to_der(rsaKeys.public, "PUBLIC"), {

     name: "RSA-OAEP", hash: "SHA-256" }, false, ["encrypt"]);
      const dataEncrypted = await crypto.subtle.encrypt({

     name: "RSA-OAEP" }, spki, remoteRaw);
      req.return(200, Buffer.from(dataEncrypted).toString("base64"));
    }
  }

  req.subrequest(remoteAPI, {

     method: "GET" }, autoCalc)
}


export default {

     encrypt, decrypt, entrypoint, auto };
重启 Nginx ,分别访问代理远端数据接口 /remote/need-encrypt 和自动加密的网关接口,可以看到程序已经能够符合预期的运行了。
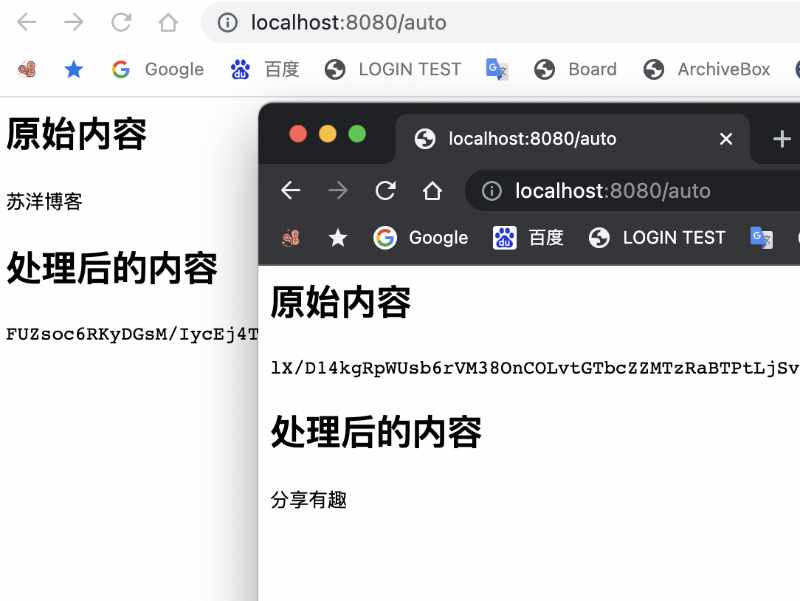
为了让程序更智能一些,达到数据加解密的完全自动化,可以再进行一个简单调整,让程序不是根据我们指定的参数去访问原始数据,而是随机访问原始数据。(为了能够直观验证行为,这里我们将输出内容也进行调整)
async function auto(req) {


  req.headersOut["Content-Type"] = "text/html;charset=UTF-8";

  function randomSource() {


    const sources = ["/remote/need-encrypt", "/remote/need-decrypt"];
    return sources[Math.floor(Math.random() * sources.length)];
  }

  async function autoCalc(res) {


    const isEncoded = res.headersOut['Encode-State'] == "ON";
    const remoteRaw = res.responseText;
    if (isEncoded) {


      const pkcs8 = await crypto.subtle.importKey("pkcs8", pem_to_der(rsaKeys.private, "PRIVATE"), {

     name: "RSA-OAEP", hash: "SHA-256" }, false, ["decrypt"]);
      const encrypted = Buffer.from(remoteRaw, 'base64');
      const result = await crypto.subtle.decrypt({

     name: "RSA-OAEP" }, pkcs8, encrypted);
      req.return(200, [
        "<h2>原始内容</h2>",
        `<code>${

      remoteRaw}</code>`,
        "<h2>处理后的内容</h2>",
        `<code>${

      Buffer.from(result)}</code>`
      ].join(""));
    } else {


      const spki = await crypto.subtle.importKey("spki", pem_to_der(rsaKeys.public, "PUBLIC"), {

     name: "RSA-OAEP", hash: "SHA-256" }, false, ["encrypt"]);
      const dataEncrypted = await crypto.subtle.encrypt({

     name: "RSA-OAEP" }, spki, remoteRaw);
      req.return(200, [
        "<h2>原始内容</h2>",
        `<code>${

      remoteRaw}</code>`,
        "<h2>处理后的内容</h2>",
        `<code>${

      Buffer.from(dataEncrypted).toString("base64")}</code>`
      ].join(""));
    }
  }

  req.subrequest(randomSource(), {

     method: "GET" }, autoCalc)
}
再次重启 Nginx ,多刷新几次,就能看到根据内容自动进行 RSA 加解密的结果啦。
其他:接口安全考虑
实际使用过程中,除了推荐在业务前添加额外的鉴权验证、频率限制外,同样建议根据实际情况使用 internal 限制 Nginx 接口的“作用域”,让数据源和基础计算接口仅允许被 NJS 程序内部访问。
location /remote/need-encrypt {


    internal;
    proxy_pass http://localhost:8082/;
}

location /remote/need-decrypt {


    internal;
    proxy_pass http://localhost:8081/;
}

location /api/encrypt {


    internal;
    js_content app.encrypt;
}

location /api/decrypt {


    internal;
    js_content app.decrypt;
}
其他:如果你追求更高效的计算
上面为了演示,我们将计算结果都进行了 Base64 编码,考虑实际生产环境中超高压力,我们一般对函数计算复杂度锱铢必较,所以可以考虑将证书硬编码到代码中,以及尽可能的去掉不必要的 Base64(只在调试模式中打开)。
最后
网络上关于 NJS 的参考资料目前还是比较少的,希望本文会成为连接你和 NJS 的纽带。
上述内容,我存放在了 GitHub 上,感兴趣的同学可以自取。
–EOF
我们有一个小小的折腾群,里面聚集了几百位喜欢折腾的小伙伴。
在不发广告的情况下,我们在里面会一起聊聊软硬件、HomeLab、编程上的一些问题,也会在群里不定期的分享一些技术沙龙的资料。
喜欢折腾的小伙伴欢迎扫码添加好友。(添加好友,请备注实名,注明来源和目的,否则不会通过审核)
如果你觉得内容还算实用,欢迎点赞分享给你的朋友,在此谢过。
本文使用「署名 4.0 国际 (CC BY 4.0)」许可协议,欢迎转载、或重新修改使用,但需要注明来源。 署名 4.0 国际 (CC BY 4.0)
本文作者: 苏洋
创建时间: 2021年11月14日
统计字数: 16413字
阅读时间: 33分钟阅读
本文链接: https://soulteary.com/2021/11/14/use-nginx-njs-to-implement-high-performance-rsa-encryption-and-decryption-services.html